1. Introduction
In this codelab, you will learn about Gemini CLI, an open-source AI agent that brings the power of Gemini directly into your terminal.
What you'll learn
- Installing and configuring Gemini CLI
- Exploring tools, built-in commands and configuring MCP Servers in Gemini CLI
- Customizing Gemini CLI via the
GEMINI.mdfile - Exploring a few use cases with Gemini CLI
What you'll need
This codelab can be run entirely within Google Cloud Shell, which comes pre-installed with Gemini CLI.
Alternatively, if you prefer to work on your own machine, there is a section to install Gemini CLI locally.
You would need the following:
- Chrome web browser
- A Gmail account
This codelab, designed for users and developers of all levels (including beginners). The use cases in the codelab have been categorized into developer and non-developer tasks. The developer use cases demonstrate how to vibe code with Gemini CLI and working with a GitHub repository to perform common development tasks like code explanation/understanding, generating documentation, fixing issues and more. It is recommended that you complete these use cases in the codelab. There is an optional section at the end that covers several every day tasks that are non-developer focused.
2. Before you begin
Create a project
- In the Google Cloud Console, on the project selector page, select or create a Google Cloud project.
- Make sure that billing is enabled for your Cloud project. Learn how to check if billing is enabled on a project.
- You'll use Cloud Shell, a command-line environment running in Google Cloud that comes preloaded with bq. Click Activate Cloud Shell at the top of the Google Cloud console.

- Once connected to Cloud Shell, you check that you're already authenticated and that the project is set to your project ID using the following command:
gcloud auth list
- Run the following command in Cloud Shell to confirm that the gcloud command knows about your project.
gcloud config list project
- If your project is not set, use the following command to set it:
gcloud config set project <YOUR_PROJECT_ID>
3. Installation
Before you do the setup and run Gemini CLI, let us create a folder that we will be using as our home folder for all the projects that we create inside of it. This is a starting point for the Gemini CLI to work with, though it will also reference some other folders on your system and which you will come to later, as needed.
Go ahead and create a sample folder (gemini-cli-projects) and navigate to that via the commands shown below. If you prefer to use some other folder name, please do so.
mkdir gemini-cli-projects
Let's navigate to that folder:
cd gemini-cli-projects
You can directly launch Gemini CLI via the gemini command.
Please navigate directly to the next section (Gemini CLI configuration via settings.json).
If you want to install Gemini CLI locally, follow the instructions given below.
The first step is to install Node 20+ on your machine. Once this is complete, you can install and run Gemini CLI via any one of the following methods:
- You can install Gemini CLI globally on your system first. You may need Administrator access to perform this step.
# option 1: install Gemini CLI

npm install -g @google/gemini-cli

# .. and then run
gemini
- Run it with the following command:
# option 2: run without installing Gemini CLI

npx https://github.com/google-gemini/gemini-cli
You can confirm the CLI is installed by running:
gemini --version
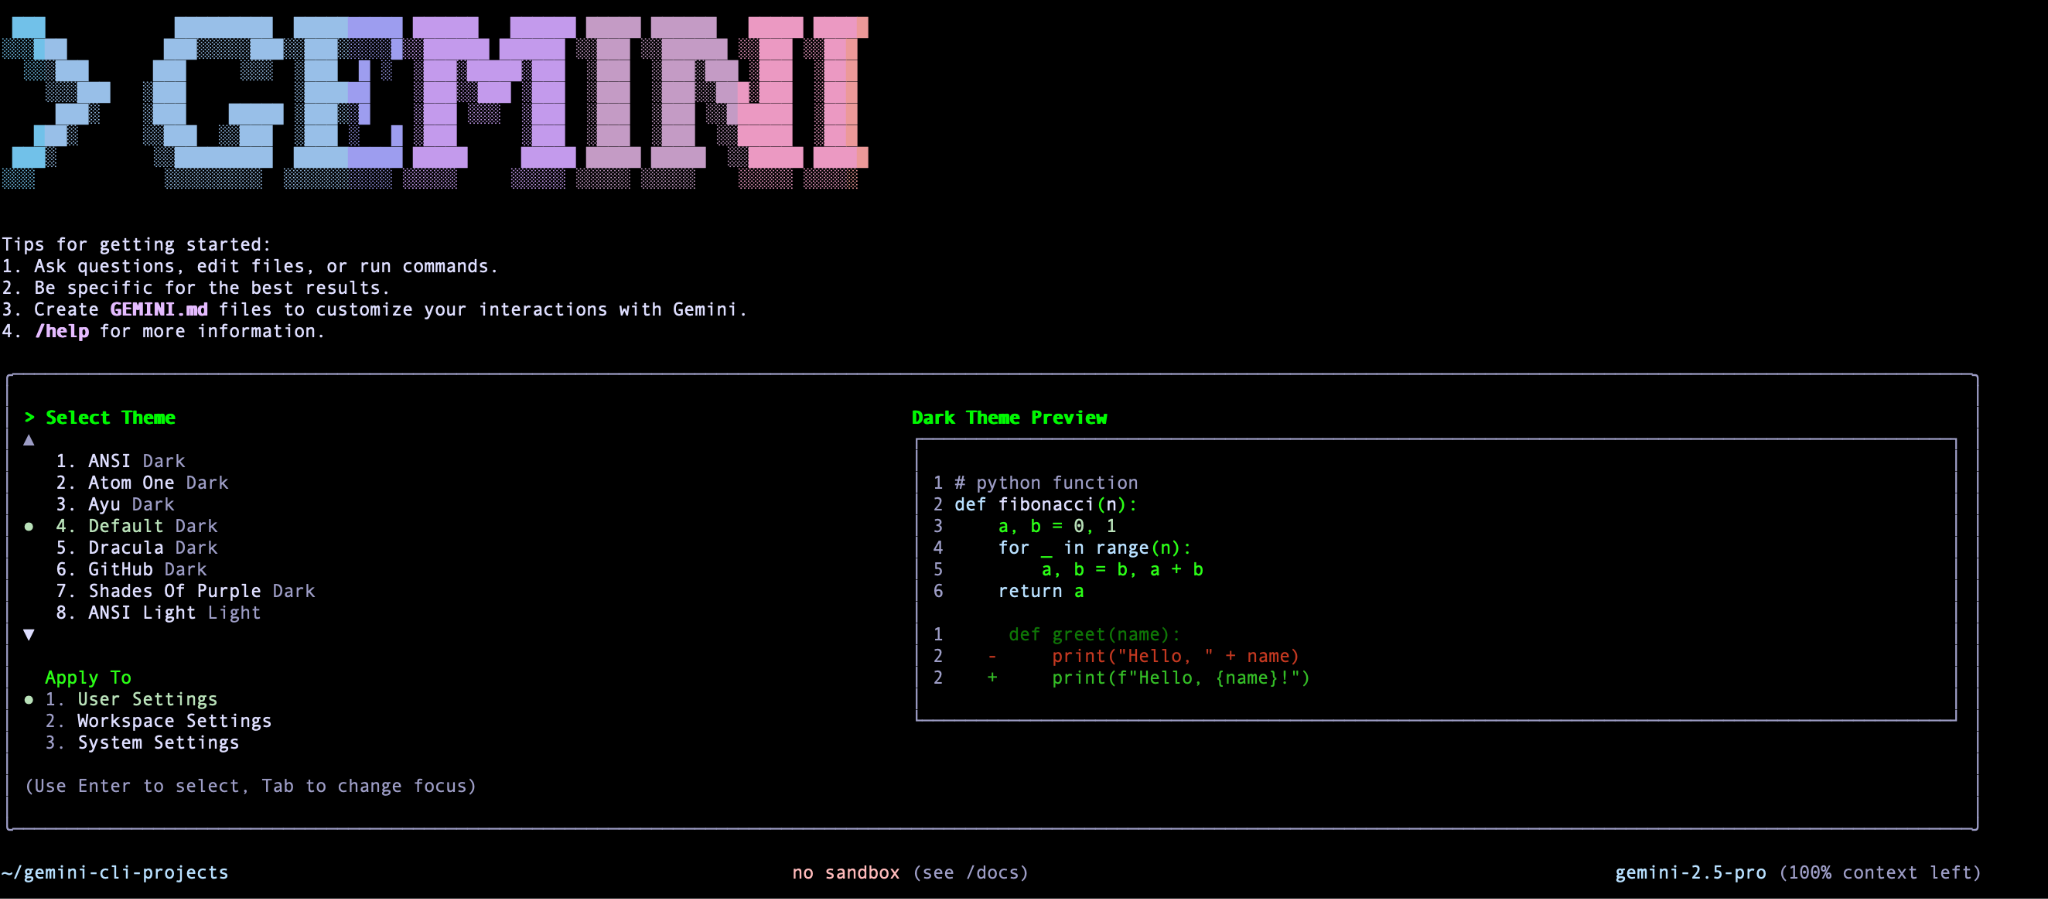
Assuming that you have launched Gemini CLI via any of the methods above, you should see the following screen that asks you about choosing a theme. Go ahead and select one that you like:
Once you select that, it will ask for the Authentication method. It is recommended that you use your personal Google Account and not non-Google or Google Workspace related accounts in this lab. That free license gets you access to Gemini 2.5 Pro and its 1 million token context window. The free tier allows for 60 model requests per minute and 1,000 requests per day at no charge.
If you hit limits with the current free quota given to Google Accounts, you can opt to use the Gemini API Key or even Google Cloud Vertex AI, where you will need to have a Project Id and the location name for that project. Do refer to the Authentication section of the documentation, if you plan to use other methods of authentication.
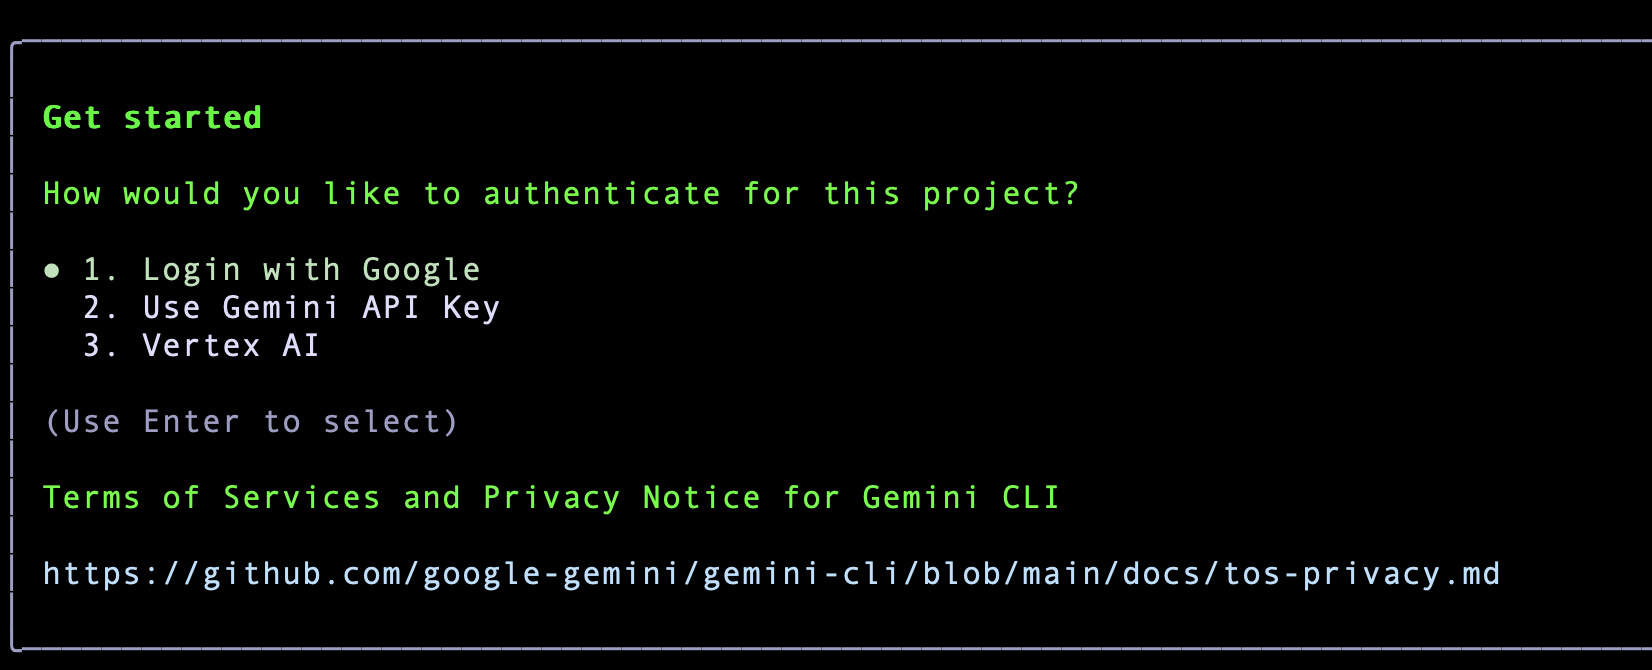
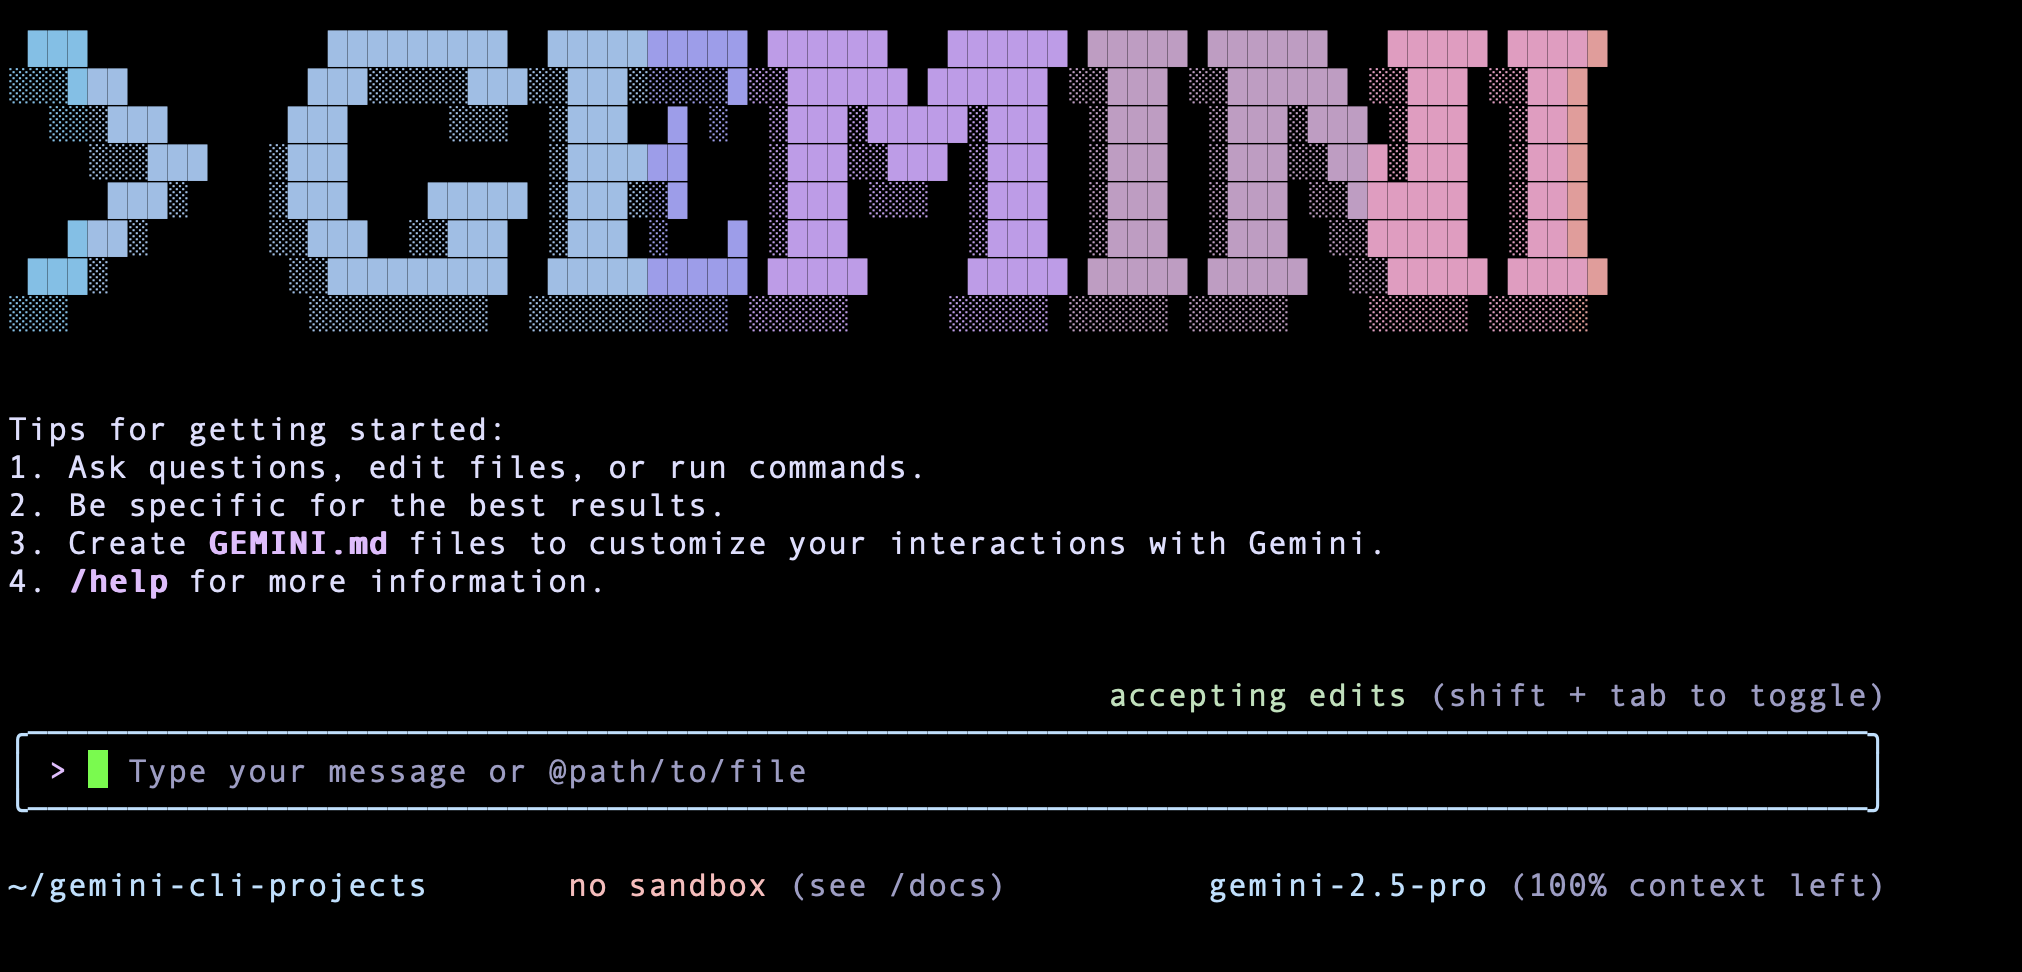
Go ahead and click on Enter. This will open up a Google Authentication page in the browser. Go ahead with the authentication with your Google Account, accept the terms and once you are successfully authenticated, you will notice that the Gemini CLI is ready and waiting for your command. A sample screenshot is given below:
4. Gemini CLI configuration via settings.json
If you choose Cloud Shell to run Gemini, a default theme for Gemini CLI and the authentication method is already selected and configured for you.
If you installed Gemini CLI on your machine and launched it for the first time, you selected a theme and then an authentication method.
Now, on subsequent runs of Gemini CLI, you will not be asked to select a theme and authentication method again. This means that it is getting persisted somewhere and the file that it uses is called settings.json and it is the way to customize Gemini CLI.
Settings are applied with the following precedence (Cloud Shell only makes User settings available):
- System:
/etc/gemini-cli/settings.json(applies to all users, overrides user and workspace settings). - Workspace:
.gemini/settings.json(overrides user settings). - User:
~/.gemini/settings.json.
Windows User: %USERPROFILE%.gemini\settings.json (which typically expands to C:\Users<YourUsername>.gemini\settings.json)
System: %ProgramData%\gemini-cli\settings.json (which typically expands to C:\ProgramData\gemini-cli\settings.json)
Mac User: ~/.gemini/settings.json (which expands to /Users/<YourUsername>/.gemini/settings.json)
System: /etc/gemini-cli/settings.json
If you recollect, at the time of selecting the theme, you selected for the settings to be saved in the User Settings. So visit the ~/.gemini folder and you will notice the settings.json file.
My settings.json file is shown below. If you had selected another theme, you would see the name there.
{
  "theme": "Default",
  "selectedAuthType": "oauth-personal" or "cloud-shell"
}
5. Our first interaction with Gemini CLI
Let's get started with Gemini CLI and type your first query as shown below:
Give me a famous quote on Artificial Intelligence and who said that?
The expected response is shown below:
GoogleSearch Searching the web for: "famous quote on Artificial Intelligence and who said it"                                                                                                                 ...
Search results for "famous quote on Artificial Intelligence and who said it" returned.

✦ "The development of full artificial intelligence could spell the end of the human race." - Stephen Hawking.
You will notice that our query resulted in a GoogleSearch tool (an in-built tool in Gemini CLI) that got invoked. In other words, you have already exercised one of Gemini CLIs powerful in-built tools namely GoogleSearch that grounds its responses based on information that it gets from the web. You will learn more about Tools in the next section.
A quick way to understand Gemini CLI and the various commands that it supports is to type /help (forward slash) and you will see a variety of commands and keyboard shortcuts.
Let's quit Gemini CLI for now. You can do that either via the /quit command or you can do Ctrl-C twice in the interactive Gemini CLI terminal session.
6. Gemini CLI - Command Parameters
There are a few command line parameters that one can provide when you start Gemini CLI. To get a full list of options, you can use the --help as shown below.
gemini --help
This should show the full range of options available. You are encouraged to go through the documentation here.
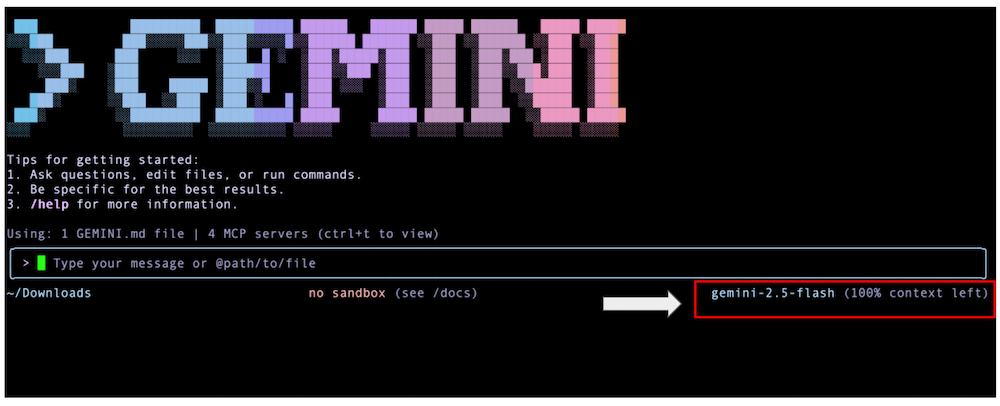
Let us take a look at a few of them. The first one is to configure Gemini CLI to use either the Pro or the Flash model. Currently, at the time of writing this lab, these are the only two models supported. By default the Gemini 2.5 Pro model is used, but if you would like to use the Flash Model, you can do that at the time of starting Gemini CLI via the -m parameter as shown below:
gemini -m "gemini-2.5-flash"
You will notice that if you start in the above manner, you can check the model at the bottom right of the Gemini CLI terminal as shown below:
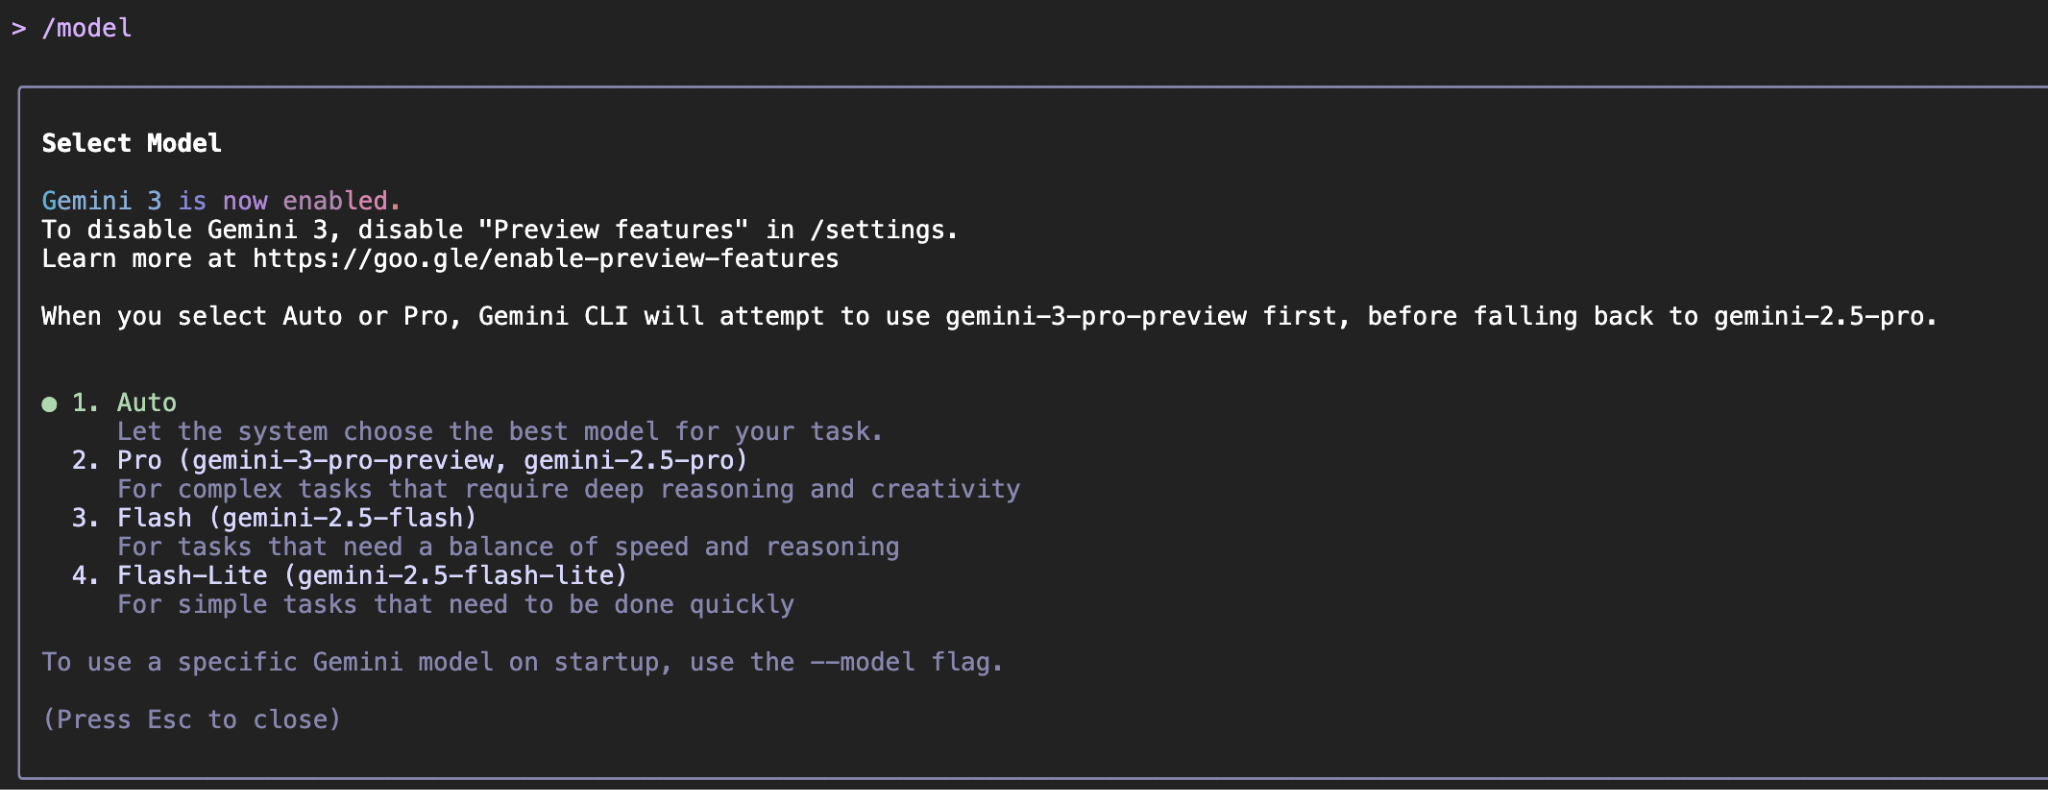
Once you are in the Gemini CLI application, you can use the /model command to open a dialog that allows you to choose a model. A sample run is shown below and depending on your requirements and guidance given, you can keep switching the model to choose the right one for the task depending on complexity and the need to control costs.
Non-interactive mode
An interesting option is to run Gemini CLI in a non-interactive mode. This means that you directly provide it the prompt and it will go ahead and respond to it, without the Gemini CLI interactive terminal opening up. This is very useful if you plan to use Gemini CLI in an automated fashion as part of the script or any other automation process. You use the -p parameter to provide the prompt to Gemini CLI as shown below or just use the positional argument to give the prompt.
gemini "What is the gcloud command to deploy to Cloud Run"
Do keep in mind that there is no scope to continue the conversation with follow up questions. This mode also does not allow you to authorise tools (including WriteFile) or to run shell commands.
7. Gemini CLI - built-in Tools
Gemini CLI comes with a set of built-in tools and the tools documentation states "Gemini model uses these tools to interact with your local environment, access information, and perform actions. These tools enhance the CLI's capabilities, enabling it to go beyond text generation and assist with a wide range of tasks."
To get a list of current Built-in Tools, invoke the /tools command as shown below:
Available Gemini CLI tools:

  - Codebase Investigator Agent (codebase_investigator)
  - Edit (replace)
  - FindFiles (glob)
  - GoogleSearch (google_web_search)
  - ReadFile (read_file)
  - ReadFolder (list_directory)
  - SaveMemory (save_memory)
  - SearchText (search_file_content)
  - Shell (run_shell_command)
  - WebFetch (web_fetch)
  - WriteFile (write_file)
  - WriteTodos (write_todos)
One of the things that should strike you immediately is to ask yourself if Gemini CLI can simply call these tools, when it wants to? The default answer is no, when it comes to sensitive operations that might involve writing to the local system, reading from an external system, going to the external network and so on.
While there is a --yolo available when you start the CLI (not typically recommended), you will find that Gemini CLI will prompt you for permission to run the tool that it has chosen. You can refuse permission, or let it run once or give it blanket permission to always run. You are and should be in full control of things.
Let's use a prompt that will make Gemini CLI choose one of the inbuilt tools to execute and that will give you a good understanding of how it all works.
Imagine a scenario where you would like to get information on latest financial news across the world and save that into a file in the local working directory from where you launched Gemini CLI. Use the following prompt:
Search for the latest headlines today in the world of finance and save them in a file named finance-news-today.txt
Imagine for a moment what it should do. Ideally it needs to go out to do a GoogleSearch to get news from some relevant sources of information that can provide it financial news. It then needs to create a file named finance-news-today.txt (a write operation on your local system that will require your permission) with its content.
Let's see what happens (you should proceed doing the same on your machine).
The first thing it does is that it invokes the GoogleSearch tool to search the web and retrieve the results, as shown below:
GoogleSearch Searching the web for: "latest finance headlines today"

Search results for "latest finance headlines today" returned.
Once that is done, it is ready to write this to the file and it will use the WriteFile tool, but since that is a sensitive operation (write), it will ask for your permission. You can decide the permission type i.e. allow once , allow always, etc. Go ahead and select allow once for now.
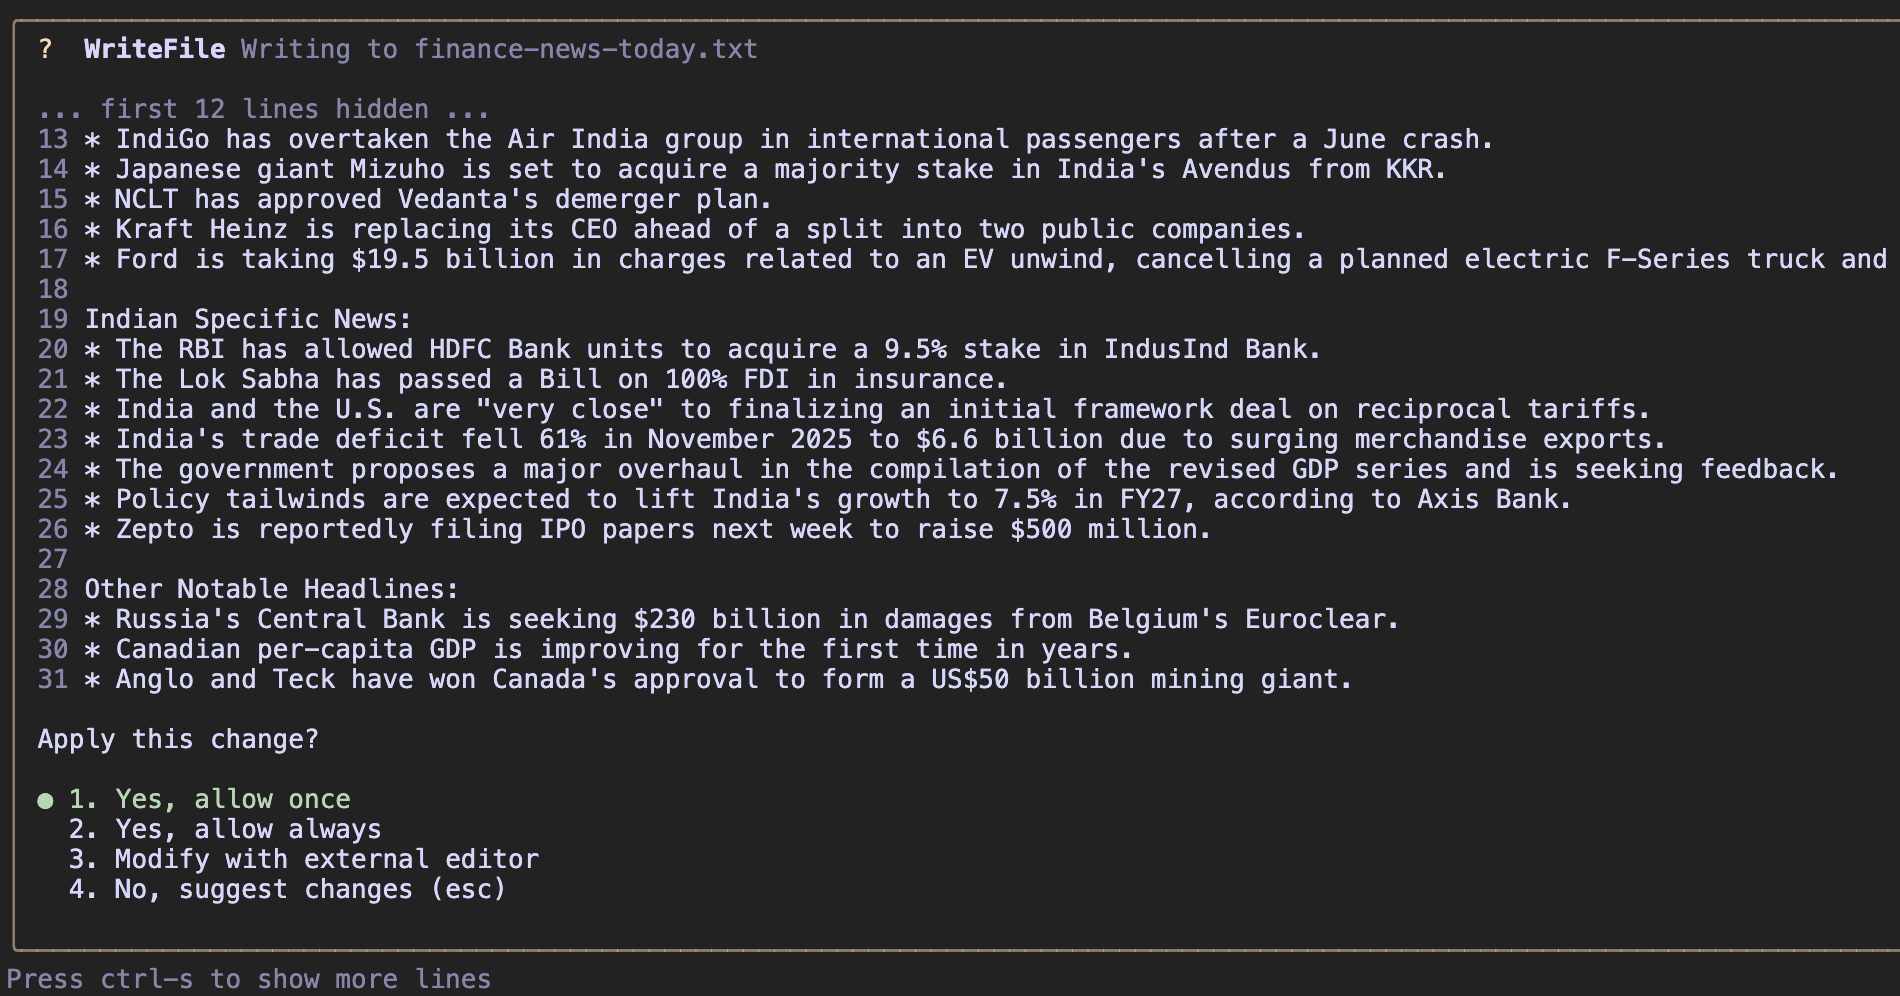
This will then write the information to the file and a success message is shown below:
✦ I have successfully saved the latest finance headlines into the file finance-news-today.txt.
How do you check if the file is written or not? You can use the @file to ask it to read the content. As you type @, it displays a list of files in the current folder and it has shown the file that it has just created. Select that and submit the prompt. My prompt is shown below:
read the contents of @finance-news-today.txt
This results in the required tools (ReadManyFiles, ReadFile) being invoked and the contents are displayed as shown below:

8. Gemini CLI - Shell mode
This is a good time to learn how to directly work with the Shell from within Gemini CLI. You can go into shell mode by pressing ! in the message box. This will toggle to a Shell mode. You can get back by pressing ! again or by hitting the ESC key.
When in shell mode, you will see the ! at the start of the prompt as shown below:

You can directly check using standard commands like pwd and ls as shown below. Please note that the commands assume a Linux type OS. If you are on another operating system (Windows), please use equivalent commands like (cd, dir and type). Do note that the output of these calls is included in the model's context window.
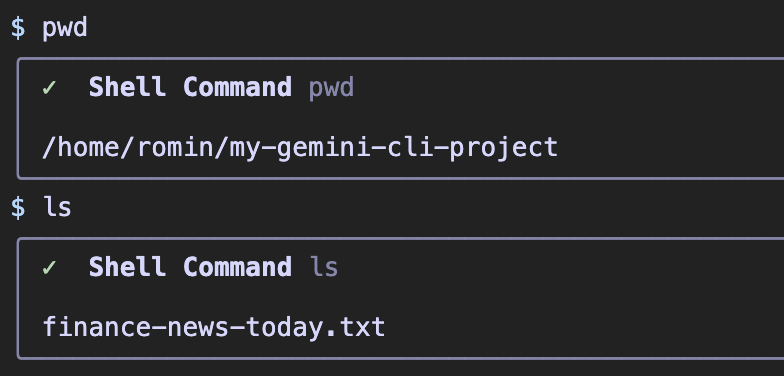
You can print the contents of the file via the cat command today.

Exercise: Here is a short exercise to try out. Choose an RSS feed of your choice. Give a prompt to Gemini CLI to fetch the contents of the RSS feed and format the results for you in a specific way. This is a good way to automate something at the start of the day. You might even ask Gemini CLI to figure out if there is RSS Feed for a specific area for e.g. Google Cloud Platform Release Notes.
A sample prompt is shown below:
Get the latest release notes for Google Cloud from its RSS Feed and display the key points in a well-formatted list.
This prompt should ideally first invoke the GoogleSearch tool to find the Google Cloud Platform RSS feed and then it will use the WebFetch tool to get the contents of the RSS Feed and display them.
9. Gemini CLI Extensions
As the documentation states, Gemini CLI extensions package prompts, MCP servers, and custom commands into a familiar and user-friendly format. With extensions, you can expand the capabilities of Gemini CLI and share those capabilities with others. It is the primary mechanism to extend the functionality of Gemini CLI beyond its in-built tools.
An extension is a self-contained, versionable, and easily distributable package. Think of it as the "shipping container" for your Gemini CLI customizations, bundling everything needed for a specific workflow into a single, neat package.
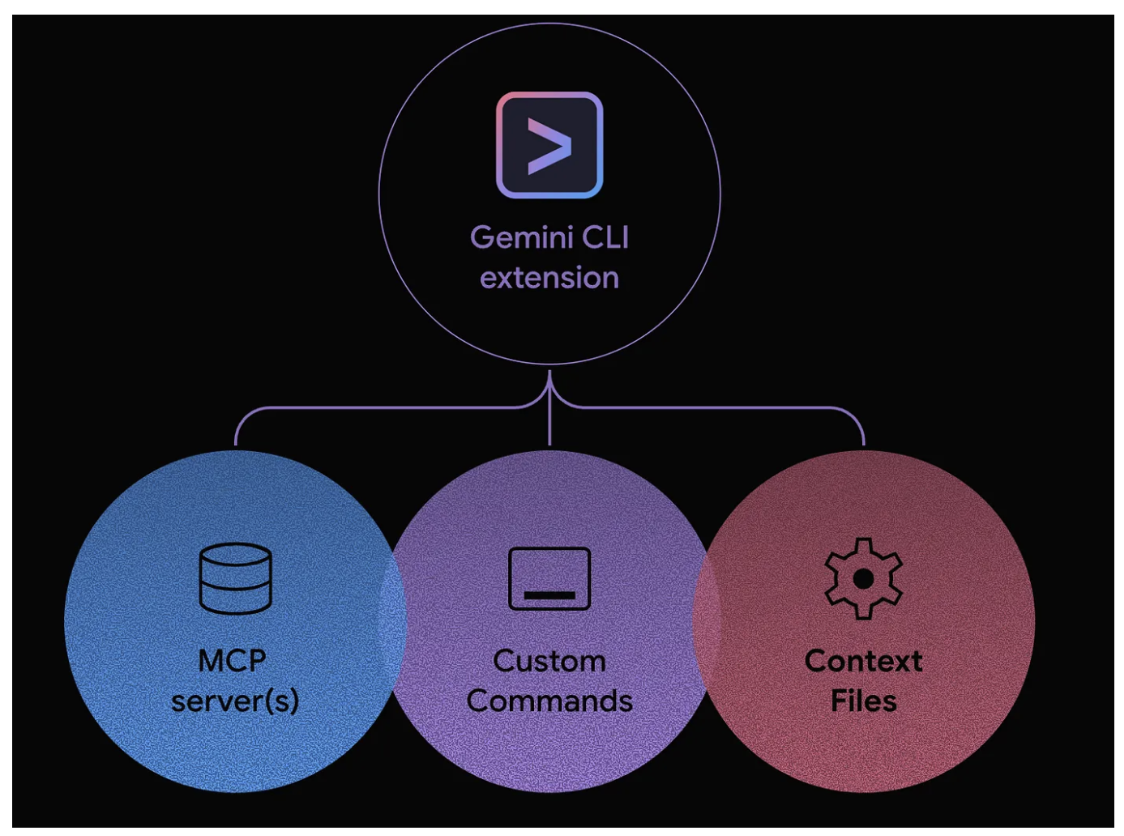
An extension can bundle any combination of:
- Custom slash commands (your .toml files).
- MCP server configurations (which previously lived in settings.json).
- Context files (GEMINI.md) to provide specific instructions and guidelines to the model.
- Tool restrictions (excludeTools) to create a safer, more focused environment.
Explore the Extensions Gallery
The Extensions Gallery is the central marketplace for discovering all official Google-built and third-party extensions:
- Open the following URL in your browser:
https://geminicli.com/extensions/browse/. - This gallery is the discoverability engine for the ecosystem. You can see Extensions from companies like GitHub, Redis, and DynaTrace, showing the breadth of available tools.
- Scroll down and find the extension card for Cloud Run.
- Notice that the card provides a description, the author (Google), and a one-click
Copycommand button. This is the simplest way to get the installation command for an extension.
Gemini CLI Extensions - Management Commands
The gemini extensions command is your entry point for managing your local Extensions.
Run it in your terminal to see the list of available commands.
gemini extensions <command>

Manage Gemini CLI extensions.

Commands:
  gemini extensions install <source> [--auto-update] [--pre-release]
      Installs an extension from a git repository URL or a local path.
  gemini extensions uninstall <names..>
      Uninstalls one or more extensions.
  gemini extensions list
      Lists installed extensions.
  gemini extensions update [<name>] [--all]
      Updates all extensions or a named extension to the latest version.
  gemini extensions disable [--scope] <name>
      Disables an extension.
  gemini extensions enable [--scope] <name>
      Enables an extension.
  gemini extensions link <path>
     Links an extension from a local path. Updates made to the local path
     will always be reflected.
  gemini extensions new <path> [template]
     Create a new extension from a boilerplate example.
  gemini extensions validate <path>
     Validates an extension from a local path.
The commands are straightforward (install/uninstall, list, update, enable/disable, etc) and we will be using some of these commands in this codelab.
Check your current list of extensions
Before we install anything, let's check our "clean slate."
- Run the
gemini extensions listcommand: - You should see the following output, confirming that no Extensions are installed yet.
No extensions installed.
Configuring GitHub MCP Server
One of the Gemini CLI Extension types is an MCP Server. An MCP server is an application that exposes tools and resources to the Gemini CLI through the Model Context Protocol, allowing it to interact with external systems and data sources. MCP servers act as a bridge between the Gemini model and your local environment or other services like APIs.
We have the GitHub MCP Server available as in the Gemini Extensions Gallery. Click on that and it will open up the Extensions card, where you will also see the command to install the extension:
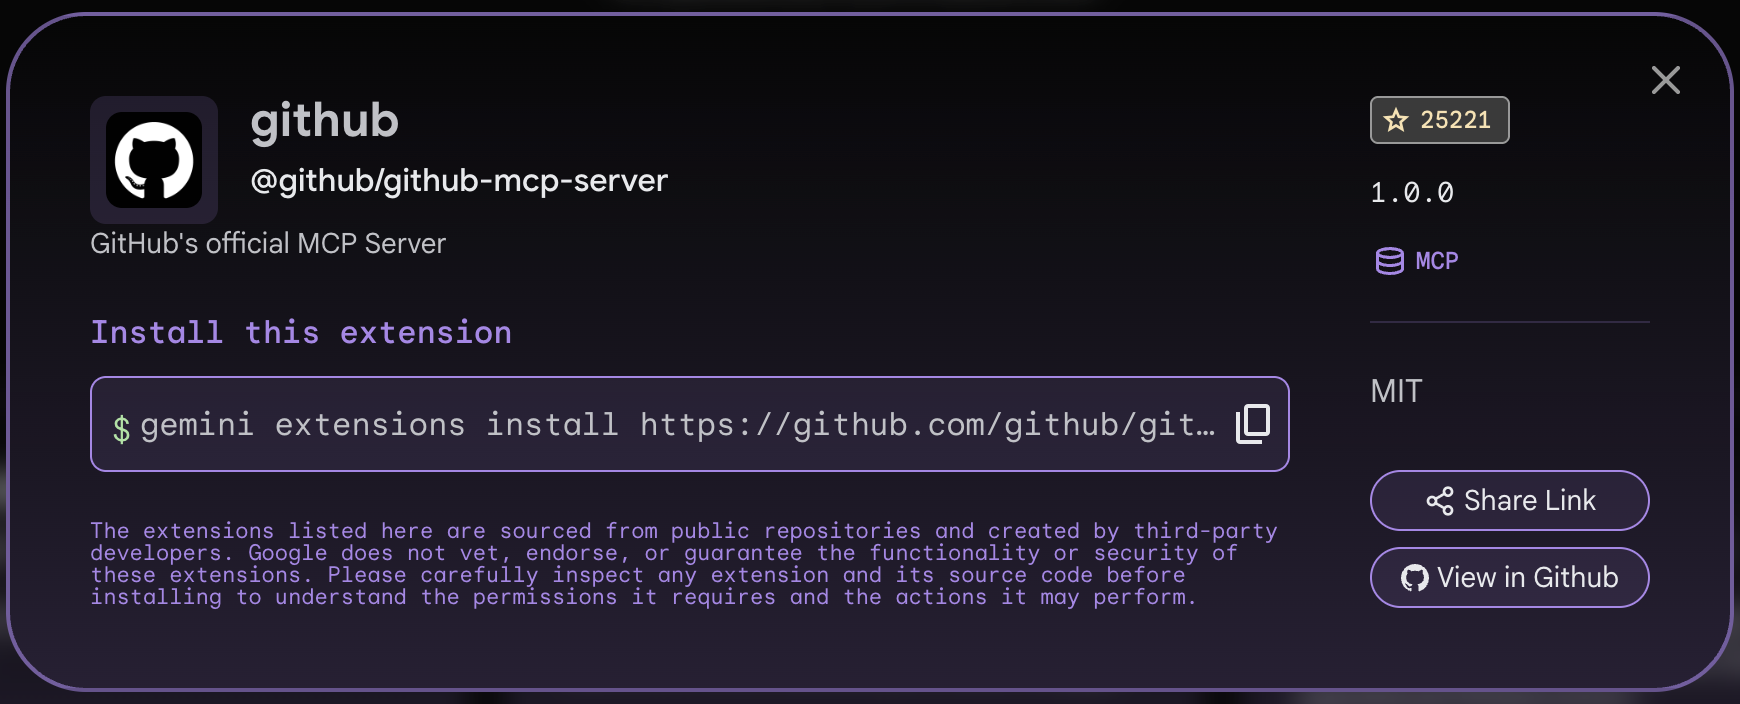
Simply copy that or use the command below:
gemini extensions install https://github.com/github/github-mcp-server
Go ahead with the necessary permissions. Once installed, you should be able to see this extension available in the list of extensions, when you give the gemini extensions list command.
✓ github (1.0.0)
 ID: faa318861b48de8d83c95eb8cd5e82c02393493978d198a0e7bf67fcb1bd22cb
 name: c0b0109d9439de57fe3cf03abeccbc52f4c98170c732d3b69af5e6395ace574e
 Path: /home/romin/.gemini/extensions/github
 Source: https://github.com/github/github-mcp-server (Type: git)
 Enabled (User): true
 Enabled (Workspace): true
 MCP servers:
  github
You can see the path of the extension and in that folder, you will have a file named gemini-extension.json, whose contents are shown below:
{
  "name": "github",
  "version": "1.0.0",
  "mcpServers": {
    "github": {
      "description": "--description–",
      "httpUrl": "https://api.githubcopilot.com/mcp/",
      "headers": {
            "Authorization": "Bearer $GITHUB_MCP_PAT"
      }
     }
  }
}
You will notice that it has the Personal Access Token (PAT) being read via an environment variable. You will need to have a Personal Access Token (PAT) from GitHub first. Once you have that, ensure that you have entire created a .env file and placed this value there or created an environment variable as follows (replace the PAT_VALUE with the actual value):
export GITHUB_MCP_PAT=PAT_VALUE
You should restart Gemini CLI. Once it is launched, you can use the /mcp list command to see the list of MCP Servers and their respective tools available. You should be able to see the GitHub MCP Server shown in green along with its tools (30+ of them). A partial listing is shown below:
🟢 github (from github) - Ready (40 tools)
Tools:
- add_comment_to_pending_review
- add_issue_comment
- assign_copilot_to_issue
- create_branch
- create_or_update_file
- create_pull_request
- create_repository
- delete_file
- fork_repository
- get_commit
- get_file_contents
- get_label
- get_latest_release
- get_me
- get_release_by_tag
- get_tag
- get_team_members
- get_teams
- issue_read
Let's start with a prompt that will invoke one of the tools from the GitHub MCP Server. Give the following prompt (who am I on GitHub?). This will result in Gemini CLI selecting the correct tool and asking for your permission.
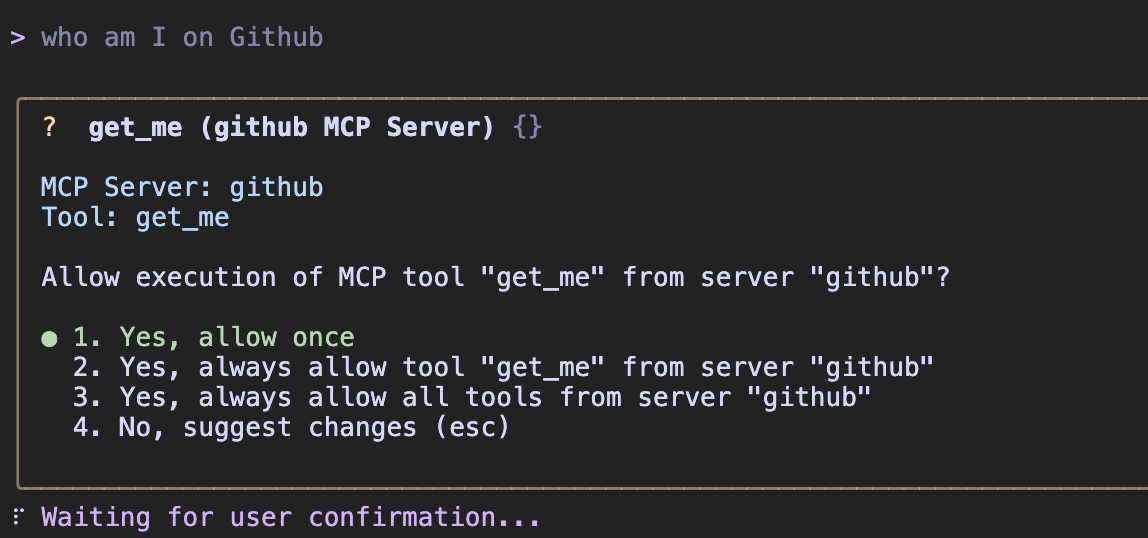
Once you give the go ahead, it will retrieve the result as shown below:
✦ You are rominirani, a Developer Advocate at Google Cloud, located in Mumbai. You have 125 public repositories and 256 followers.
You should now work with one of your GitHub projects. Give your queries in natural language like:
- Describe the <repo-name> to me?
- Clone the <repo-name> on my local machine.
- Describe @<file-name> or @<directory-name>/
- What are the different components of this repository?
- I have made necessary changes. Can you push the changes to GitHub and use the GitHub MCP Server tools to do that.
You will find an exercise for working with the GitHub MCP Server in detail later in the lab.
Configuring Cloud Run MCP Server
The Cloud Run extension available in the Gemini CLI Extensions gallery is a MCP Server that allows us to deploy our applications to Cloud Run.
The Cloud Run Extension card from the Extensions gallery is shown below:

Let's first install the Cloud Run Extension by clicking on the Copy install command as shown above. Then paste that command in the Cloud Shell terminal (it should be similar to the following):
gemini extensions install https://github.com/GoogleCloudPlatform/cloud-run-mcp
On running the above command, you would see a confirmation required from you. Go ahead and give it your approval. The Cloud Run Extension should then install successfully.
If you now execute the gemini extensions list command, you should see the Cloud Run extension installed as shown below:
✓ cloud-run (1.0.0)
 ID: 3c1a38909b6d7d90b6acc8ca1e80d97b4a867253a3cd12d841b2aab4e556a58f
 name: 0b1820c1f0c043bbb3b54f496d862c02172424c930eb965d61f468be52e6f127
 Path: /home/romin/.gemini/extensions/cloud-run
 Source: https://github.com/GoogleCloudPlatform/cloud-run-mcp (Type: git)
 Enabled (User): true
 Enabled (Workspace): true
 Context files:
  /home/romin/.gemini/extensions/cloud-run/gemini-extension/GEMINI.md
 MCP servers:
  cloud-run
If you launch Gemini CLI now and execute the /mcp list command, you will see the following:
🟢 cloud-run (from cloud-run) - Ready (8 tools, 2 prompts)
  Tools:
  - create_project
  - deploy_container_image
  - deploy_file_contents
  - deploy_local_folder
  - get_service
  - get_service_log
  - list_projects
  - list_services
  Prompts:
  - deploy
  - logs
The above are just a couple of Gemini CLI Extensions that we have shown how to configure. You can look at the Extensions Gallery to discover more of them or even do a codelab " Getting Started with Gemini CLI Extensions".
10. Use cases to try out
Gemini CLI can be applied to a wide range of use cases that apply to both developers and non-developers alike. Presented here are a few scenarios and depending on your area of interest, you can try any or all of them out.
In each of these cases, the prompt is provided. You are free to try this out in the Gemini CLI interactive mode or non-interactive mode via the -p parameter at the time of launching the Gemini CLI.
Vibe coding with Gemini CLI
Let's use Gemini CLI to vibe code an application. In this task, you will ask Gemini CLI to generate an application and then push the initial version to a GitHub repository.
Prerequisite
To perform the tasks in this section, there are a few prerequisites:
- Git
- Gemini CLI with GitHub Gemini CLI Extension (we did that earlier) or if you have set up
gh( GitHub CLI tool) that would work too. - Familiarity with Git basics and a bit of programming knowledge
We will assume that you have launched Gemini CLI in a specific folder of your choice.
Start with an initial prompt. Feel free to modify it as you see fit. Keep in mind that throughout the session with Gemini CLI, it will ask you for permissions to create the files, etc. Do give the required permissions.
In this task, we are not looking for Gemini CLI to run the application or test it out for us since we would like a little more control. But it is completely up to you if you would like to do that.
Generate a website for a 1-day event filled with technical talks. There are going to be 6 talks in a single track of 1 hour each. Each talk has the following information: title, 1 or maximum of 2 speakers, category (1 or maximum of 3 keywords), duration and a description. The website has a single page where users can see the schedule for the entire day with the timings. There will be one lunch break of an hour and the event starts at 10:00 AM. Keep a 10 minute transition between talks. I would like to use Node.js on the server side and standard HTML, JavaScript and CSS on the front-end. The users should be able to search the talks based on category.

I would like you to proceed in the following way:
1. Plan out how you would design and code this application.
2. Ask me for any clarifications along the way.
3. Once I am fine with it, do generate the code and provide me instructions to run and test locally.
The next few prompts and responses are a sample flow that was observed. Gemini CLI will come up with a plan and ask you for any confirmations / clarifications or go ahead. Please follow the instructions. As a sample, this is my sample conversational thread:
   1. Backend (Node.js/Express):
       * Set up an Express server to serve the static frontend files.
       * Create an /api/schedule endpoint that will:
           * Generate the event schedule dynamically, including talk timings and the lunch break, based on your requirements.
           * Store mock talk data (title, speakers, category, description).
           * Filter the schedule based on a category query parameter.

   2. Frontend (HTML, CSS, JavaScript):
       * Create an index.html file for the main structure.
       * Develop style.css for a clean and responsive design.
       * Write script.js to:
           * Fetch the schedule data from the backend.
           * Dynamically render the talks and lunch break on the page.
           * Implement a search input that filters talks by category, updating the displayed schedule without a full page reload.

   3. Schedule Logic:
       * The backend will handle calculating the precise start and end times for each 1-hour talk, factoring in the 10:00 AM start, 10-minute transitions, and the 1-hour lunch break.

  Before I proceed with the code, could you please clarify the following:

   * Example Talk Data: Could you provide some example talk titles, speakers, categories (keywords), and descriptions? This will help me create realistic dummy data for the schedule.
   * Lunch Break Placement: Where should the 1-hour lunch break be placed in the schedule? (e.g., after the 3rd talk, at 1 PM, etc.)
   * Styling Preferences: Do you have any specific styling preferences (e.g., color scheme, modern/minimalist, etc.)? If not, I will go with a clean, simple design.

✦ I will create a single-page website for your event. Here's my plan:

✓  WriteTodos Set 7 todo(s)

✦ I am waiting for your clarifications regarding the example talk data, lunch break placement, and styling preferences before I proceed with generating the code.
Finally, it gave me the following summary:
✦ Instructions to Run and Test Locally:

   1. Start the server:
      Open your terminal in the project directory (/home/romin/gemini-cli-projects/event-website/) and run:
   1     node server.js
      You should see a message in the terminal indicating: Server running on http://localhost:3000.

   2. Open in your browser:
      Open your web browser and navigate to:
      http://localhost:3000

   3. Test functionality:
       * You should see the event schedule displayed on the page, with talks and a lunch break.
       * Search by category: In the "Search by category..." input box, type a category keyword (e.g., "AI", "Web Development", "Python", "Security").
       * Click the "Search" button. The schedule displayed should filter to only show talks matching that category.
       * Click the "Reset" button to clear the search filter and view the full schedule again.

  Let me know if you encounter any issues or if you'd like to make any modifications or additions to the website!
On following the instructions to start the server and navigate to the home page, we got a sample site as shown below (you should see a variant of a similar site if you used the same prompt):
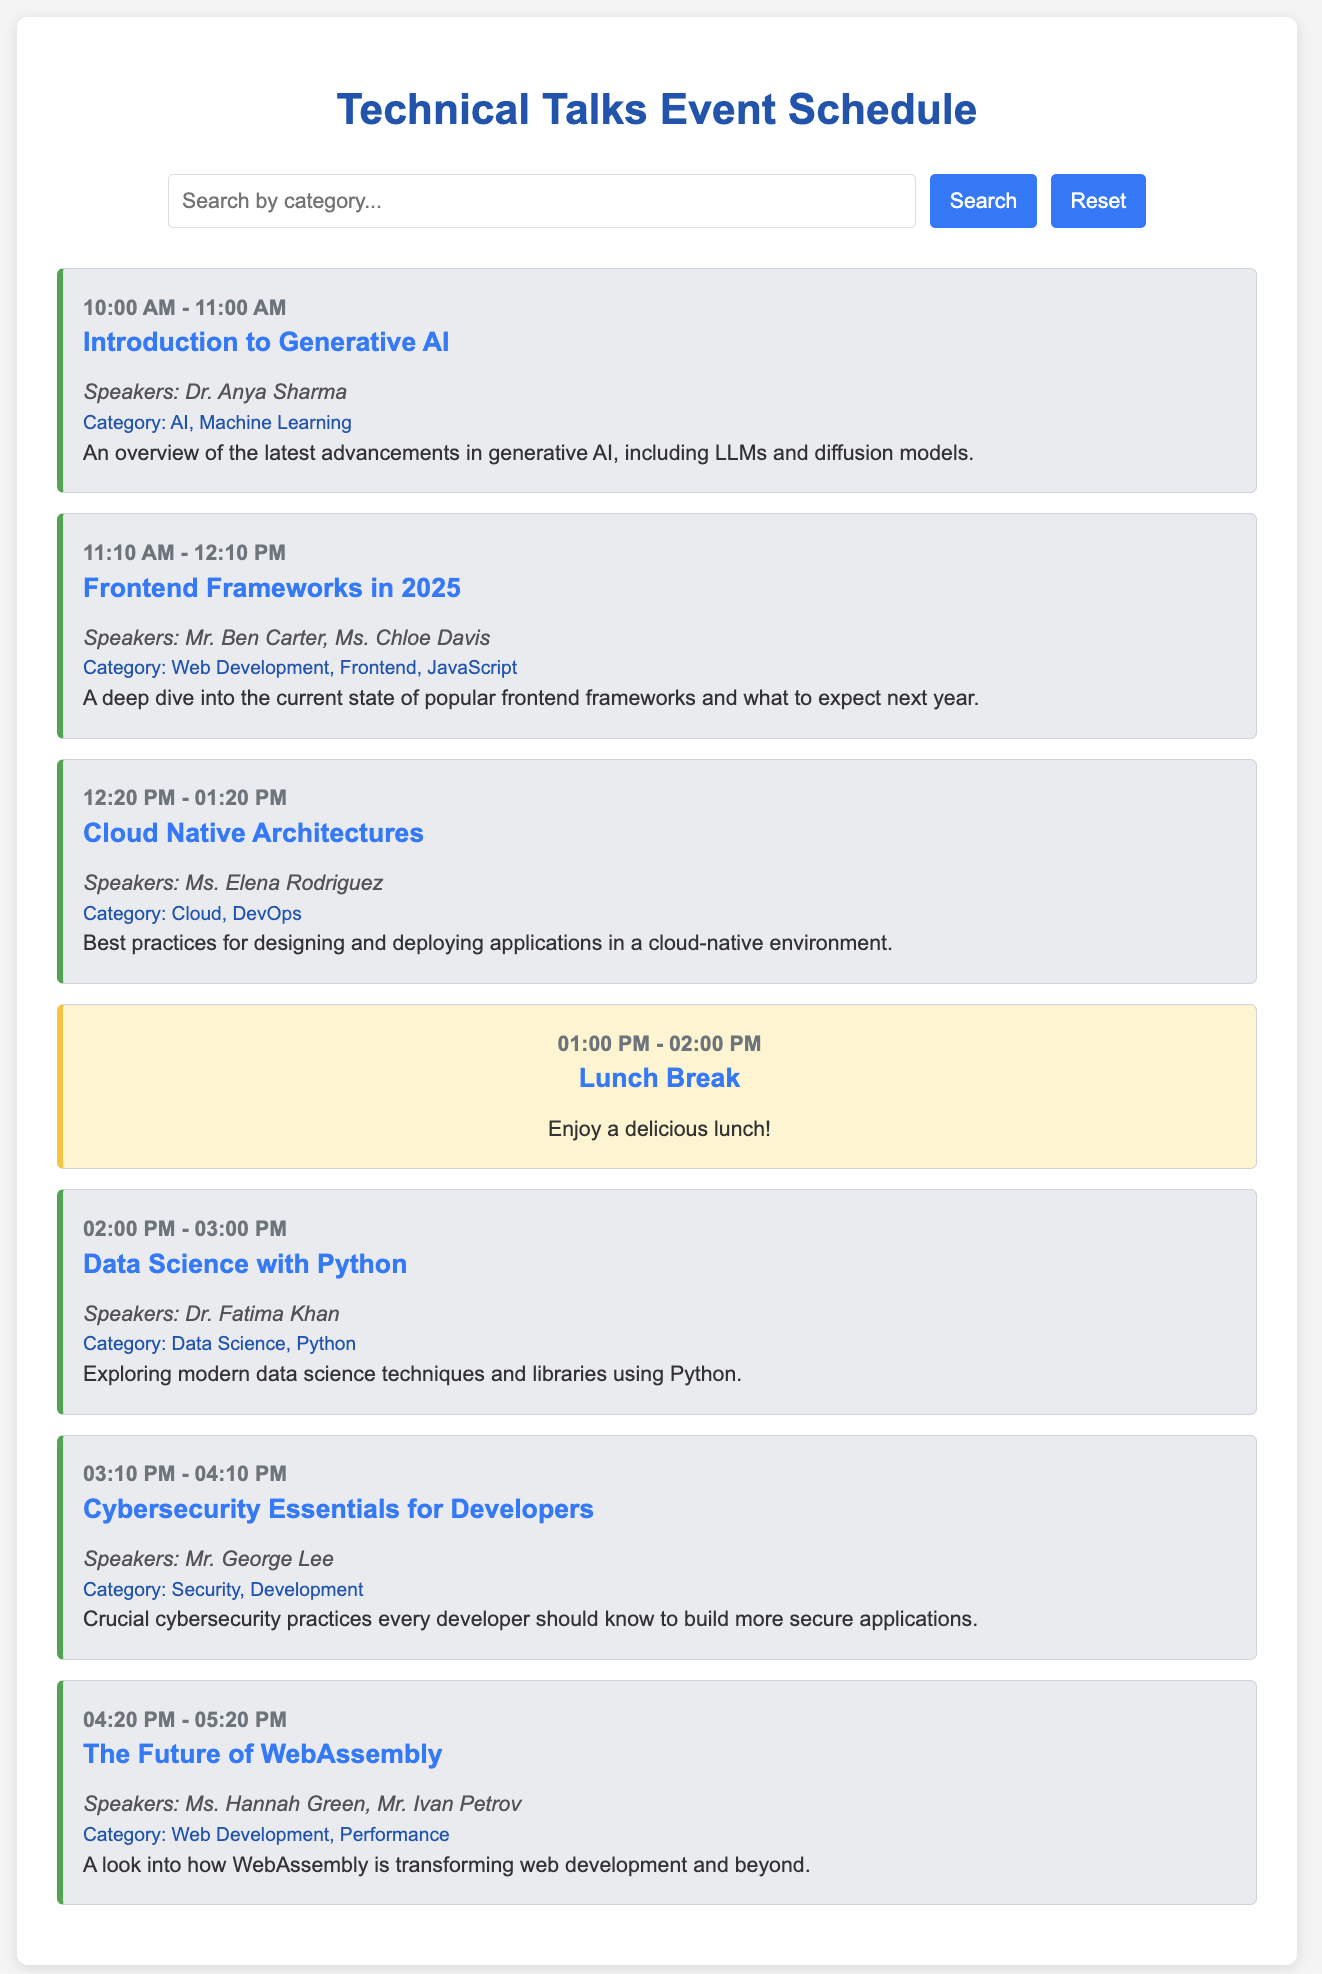
You are free to keep making more changes with the help of Gemini CLI. Once you are satisfied with the changes, you can push this to a GitHub repository.
First up, let's create a .gitignore file and you can take the help of Gemini CLI.
Create a .gitignore file for this project.
The next step for you is to give instructions to Gemini CLI to push this repository under our GitHub account and this should exercise the GitHub MCP Server tools in the background.
Give a prompt similar to the one below:
Great! I would now like to push all of this to a new repository in my GitHub account. I would like to name this repository <Your-Name>-event-talks-app
It will go through a number of commands here:
- Create the repository.
- It will use multiple Git commands : init, add, commit to manage the local Git repository.
- It will then setup the Git remote and do a push
Note: There are instances where Gemini CLI might timeout or use an incorrect username, etc. Do interact with it and suggest the fixes.
If all goes well, you should have a GitHub repository in place. A sample screenshot is shown below:
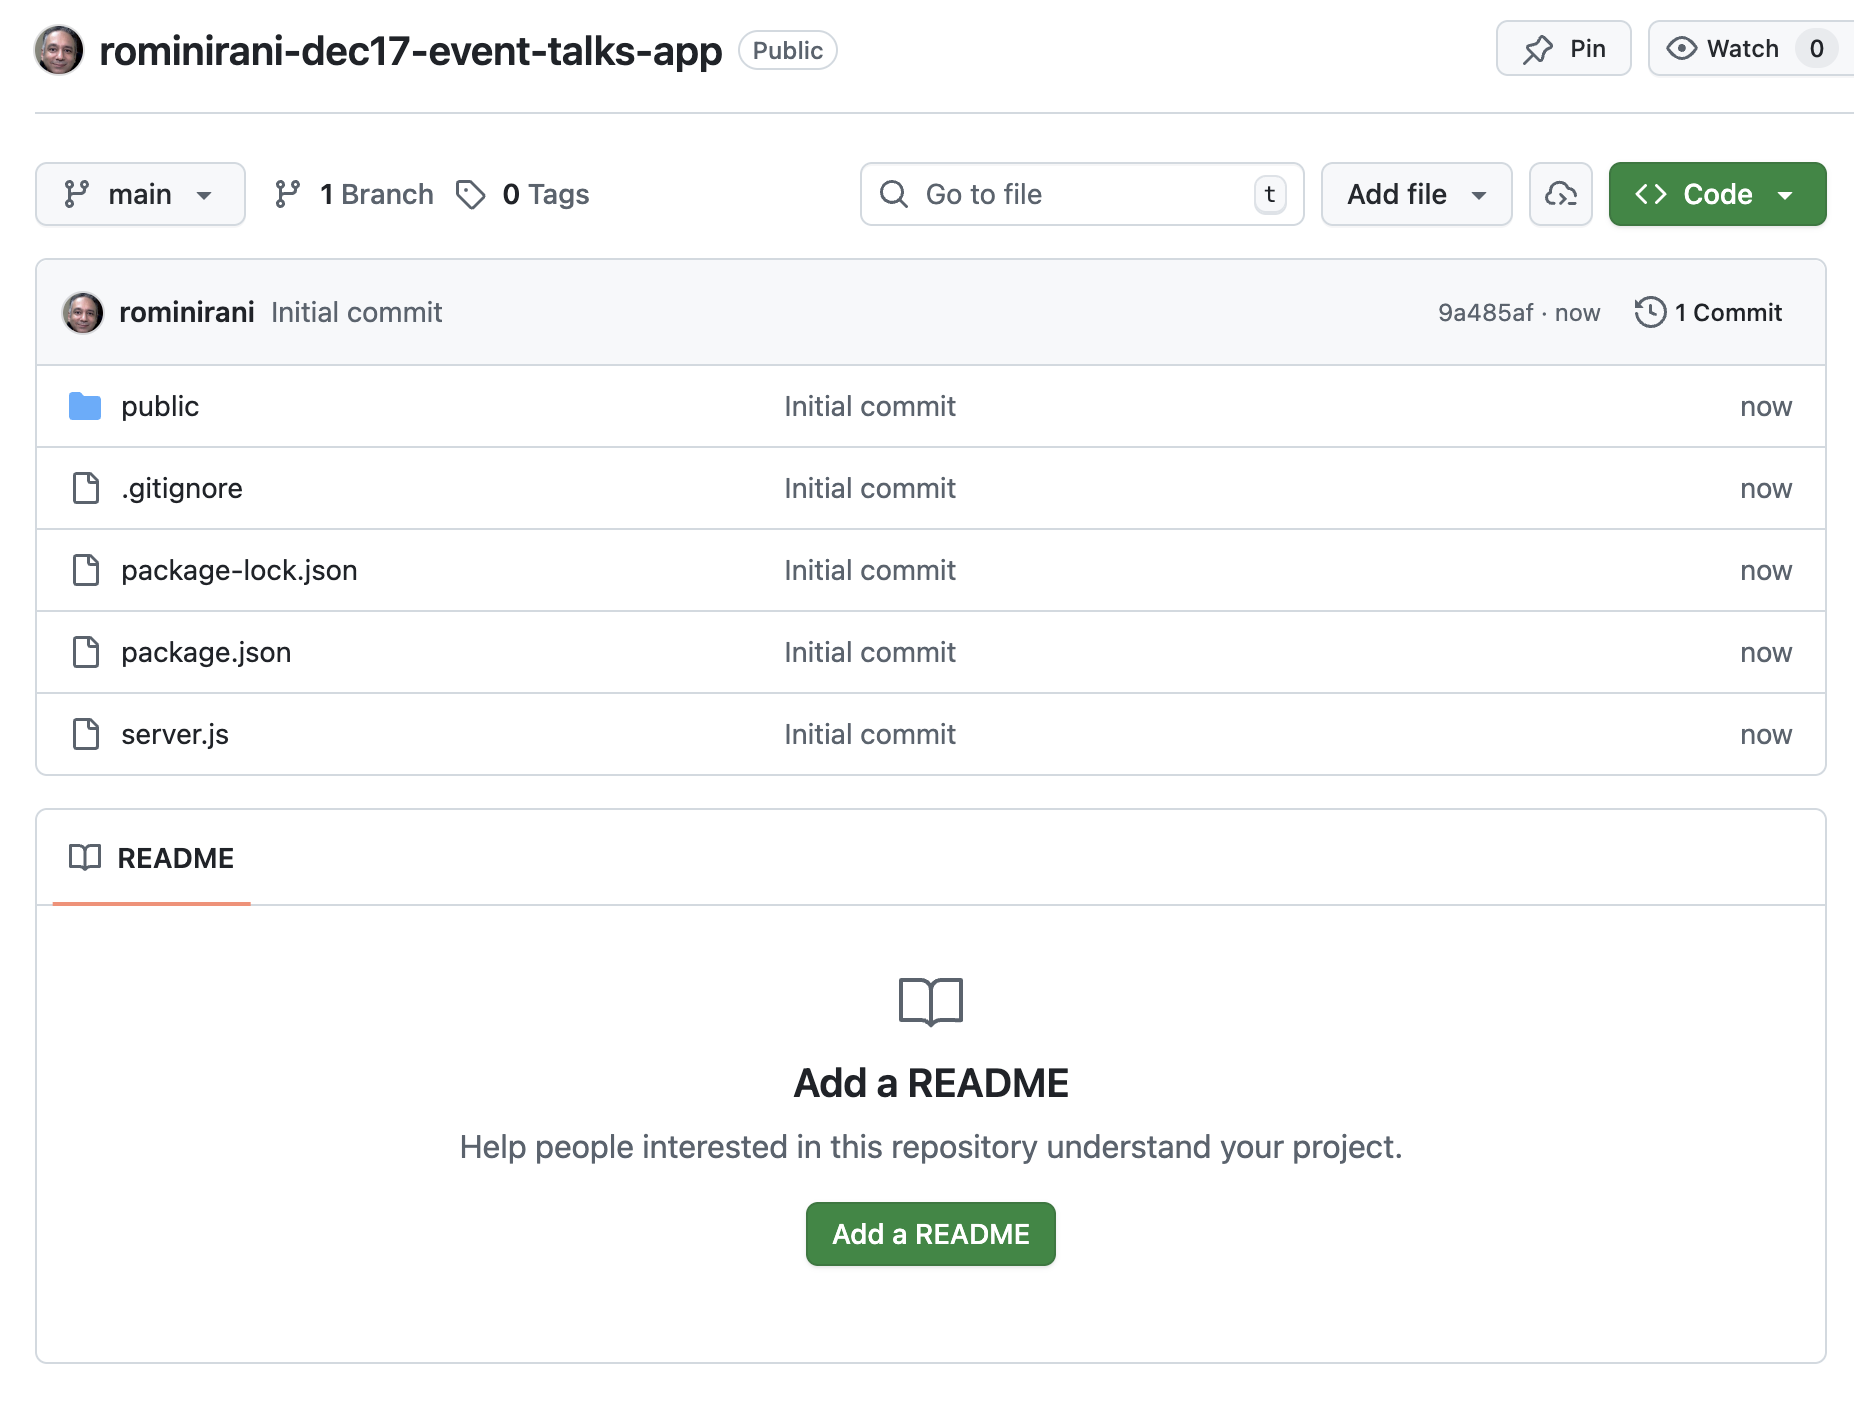
Note that you have not generated a README.md for this project and that is a good exercise for the next section, where we shall now work with this repository that you just created.
Using Gemini CLI to work on a GitHub Repository
In this use case, you shall use Gemini CLI to work with a GitHub repository. You will perform multiple tasks that include:
- Understanding the code base
- Generating documentation
- Implementing a new feature
- Commit and push the changes back to the repository
- Work on a GitHub Issue and implement the proposed changes
This should give you a good foundation to then work with your repositories and use Gemini CLI as an assistant vis-a-vis these developer specific tasks.
Prerequisite
To perform the tasks in this section, you will need to the following:
- Git
- Gemini CLI with GitHub MCP Gemini CLI Extension (we did that earlier) or if you have set up
gh( GitHub CLI tool) that would work too. - Familiarity with Git basics and a bit of programming knowledge (we will use Node.js in this example since you might already have the environment ready on your machine due to the fact that you have installed Gemini CLI). But feel free later on to pick a repository of your choice with a different programming language and framework.
- You should have completed the previous section and have the repository handy, where we created an Event Talks website.
Let's continue to use Gemini CLI from the folder/directory that you used to generate the Event Talks application or if needed, you can clone the repository to your local machine and then start Gemini CLI from that directory. Try out the following scenarios as listed below:
Understanding the code base
- I would like to understand this project in detail. Help me understand the main features and then break it down into Server and Client side. Take a sample flow and show me how the request and response works.
Explain @server.js
Generating a README file
- Generate a
READMEfile for this project.
Implementing a new feature
- I would like to implement a new feature where the user is allowed to search by a specific Speaker too. First show me a plan of how you would implement this change and then we can generate the code.
It should provide you with a plan, which you can approve. On approval, Gemini CLI will go ahead and make those changes. Do test out your changes and if there are bugs (likely), do ask Gemini CLI to fix it.
Once the changes look good, you can follow the same steps to commit and push them to the remote repository.
Generate Issues based on suggested features
Let's try something interesting here. You are going to ask Gemini CLI about how it can improve the user experience of this application and based on its assessment, it can create those suggestions as issues in the same GitHub repository. It will use the "create_issue" tool from the GitHub MCP Server.
Try the following prompt:
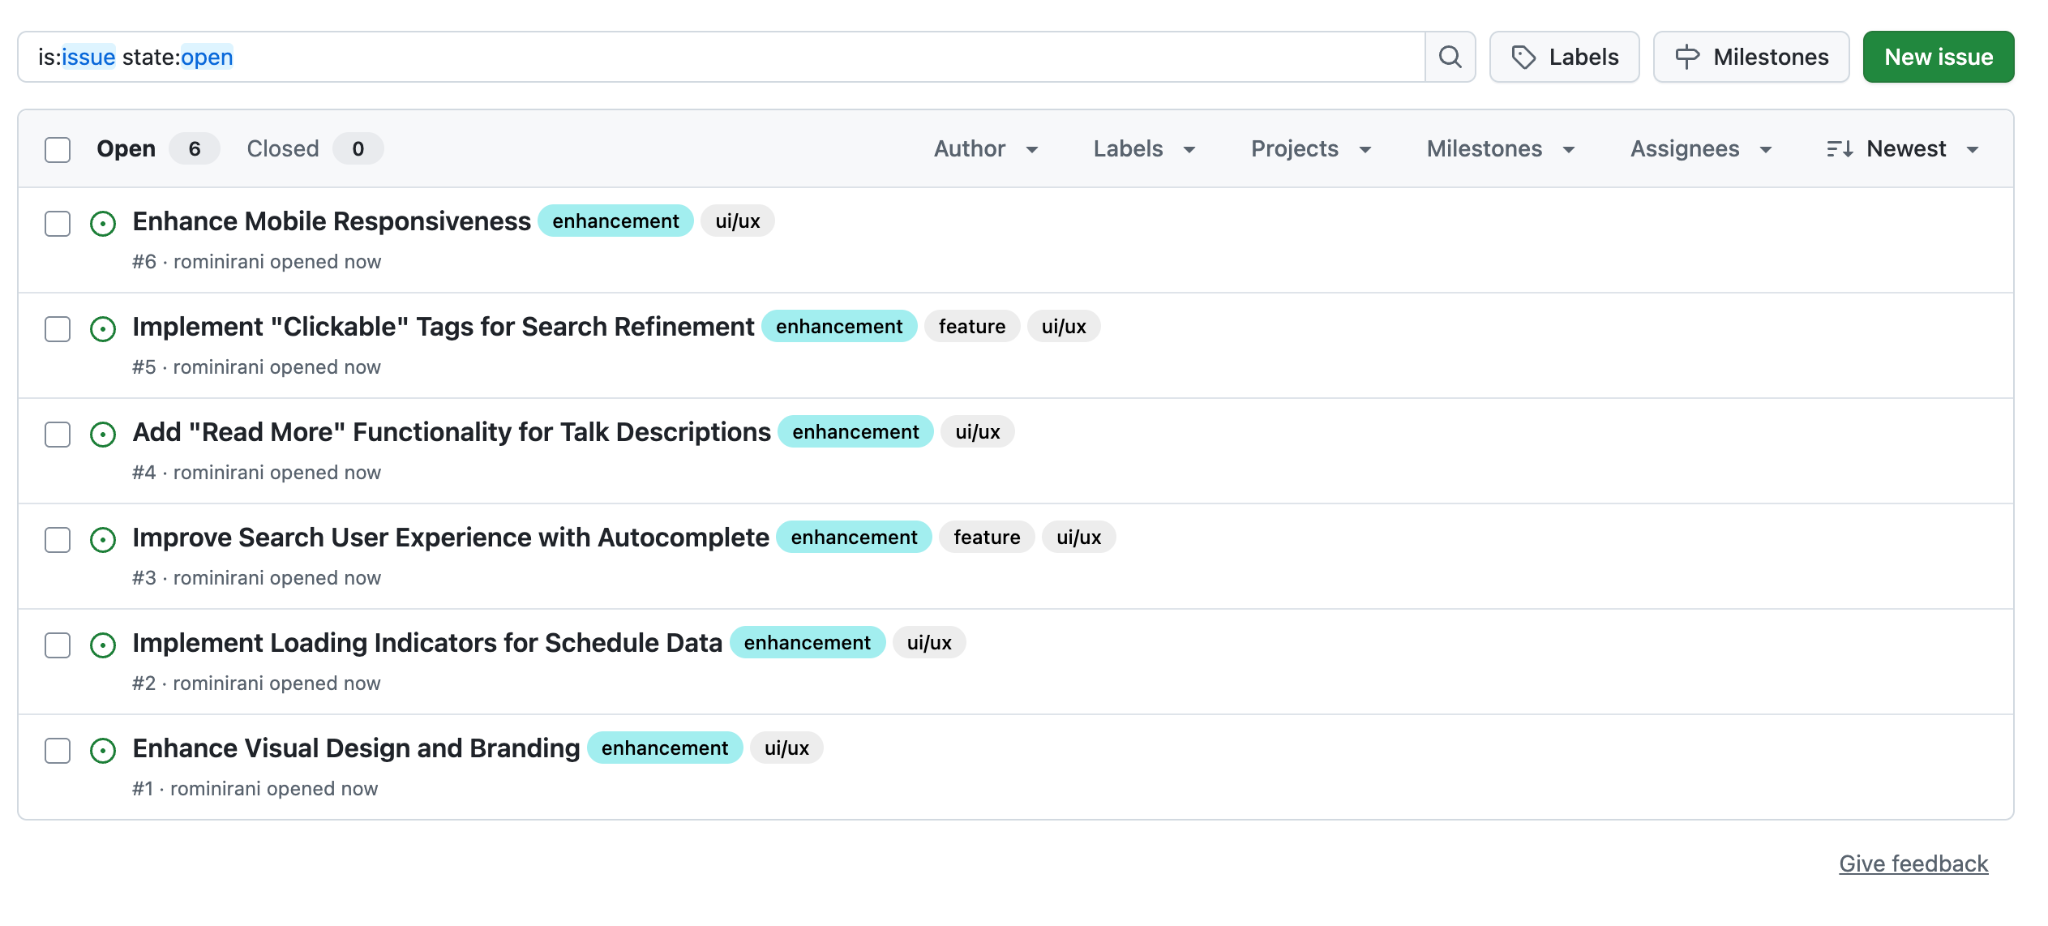
- I would like you to assess the application from a user experience point of view. Ease of use, responsiveness, helpful messages and more. Please come up with a list of improvements and I would like you to then create them as Issues in the GitHub repository.
Ideally it will share the improvements first with you and then proceed with your permission to create the issues in the GitHub repository. Here is a sample screenshot from our run:
Work on a GitHub Issue and implement the proposed changes
You can now take one of the issues that was generated earlier and ask Gemini CLI to work and implement it.
A sample issue that it generated is shown below:
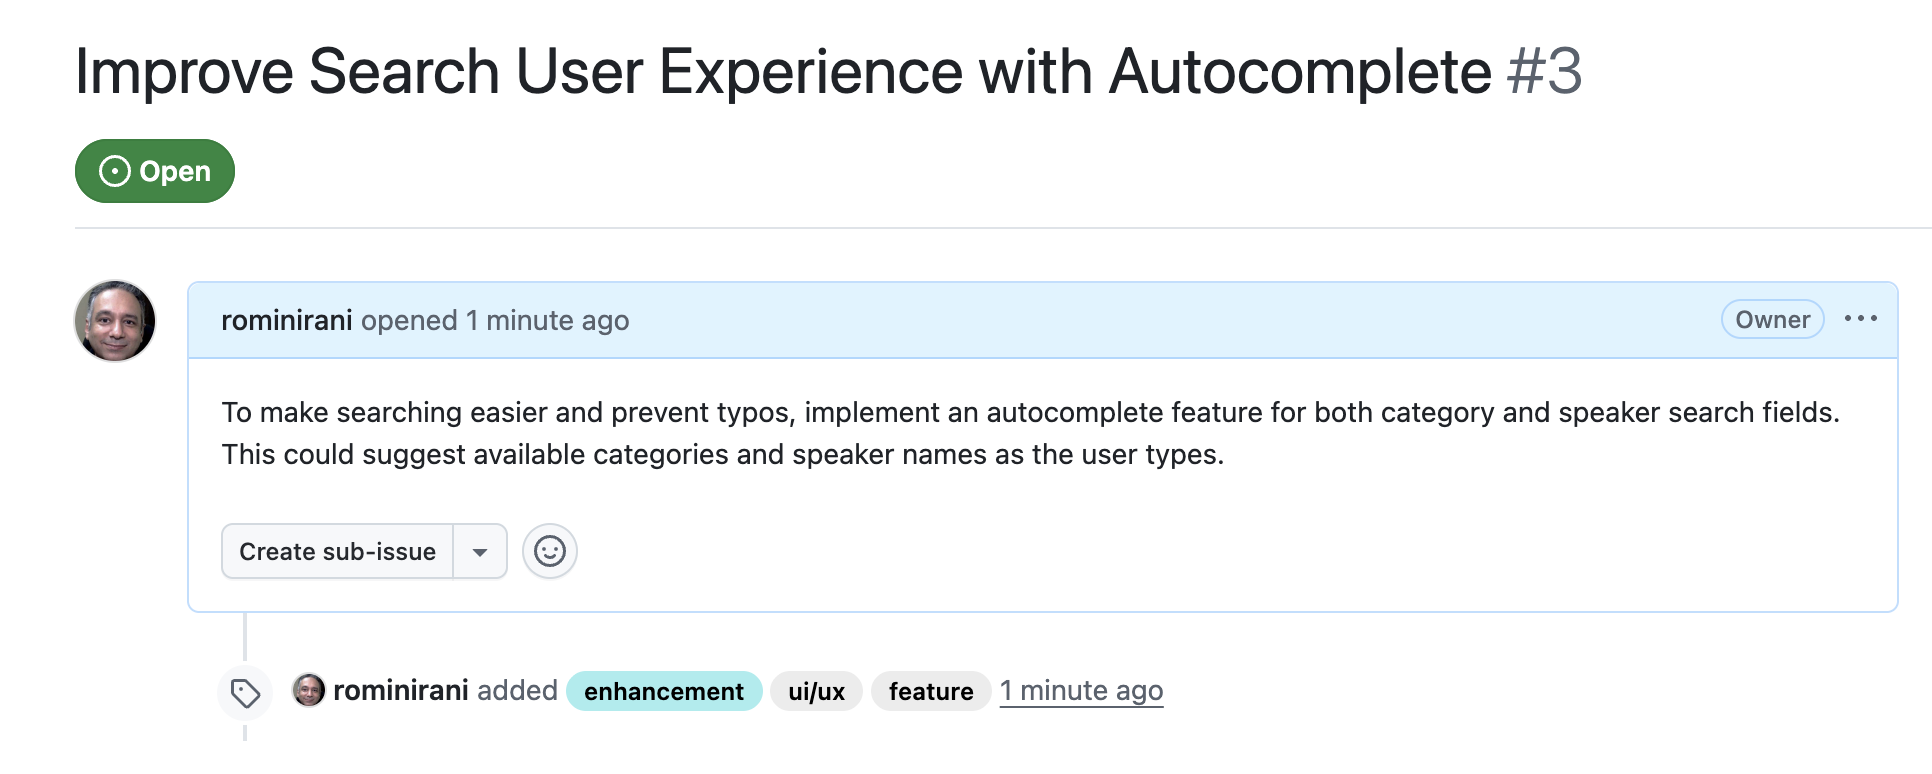
Take the entire Issue URL and provide a prompt like this:
- Please go through the Issue:
<YOUR_ISSUE_URL>and understand what changes need to be made. First discuss the plan and then show the proposed changes in code.
Feel free to approve the changes and push them to the repository. You can even ask it to close the issue.
(Optional) Everyday Tasks
The use cases given below are tasks that you might end up doing regularly. These include arranging files into folders, fetching and summarizing content from the web, processing image files and extracting content from them, working with databases and more.
Feel free to explore any of the use cases that you like.
Organizing Files/Folders
You can use Gemini CLI to organize the files depending on types in various folders as needed. Go to a folder on your machine that has several files .txt, .png, .jpg, .pdf, .mp4 and others. This is likely to be your Desktop or your Downloads folder.
Here is a sample folder and the contents of the folder are shown below (you may have other files):
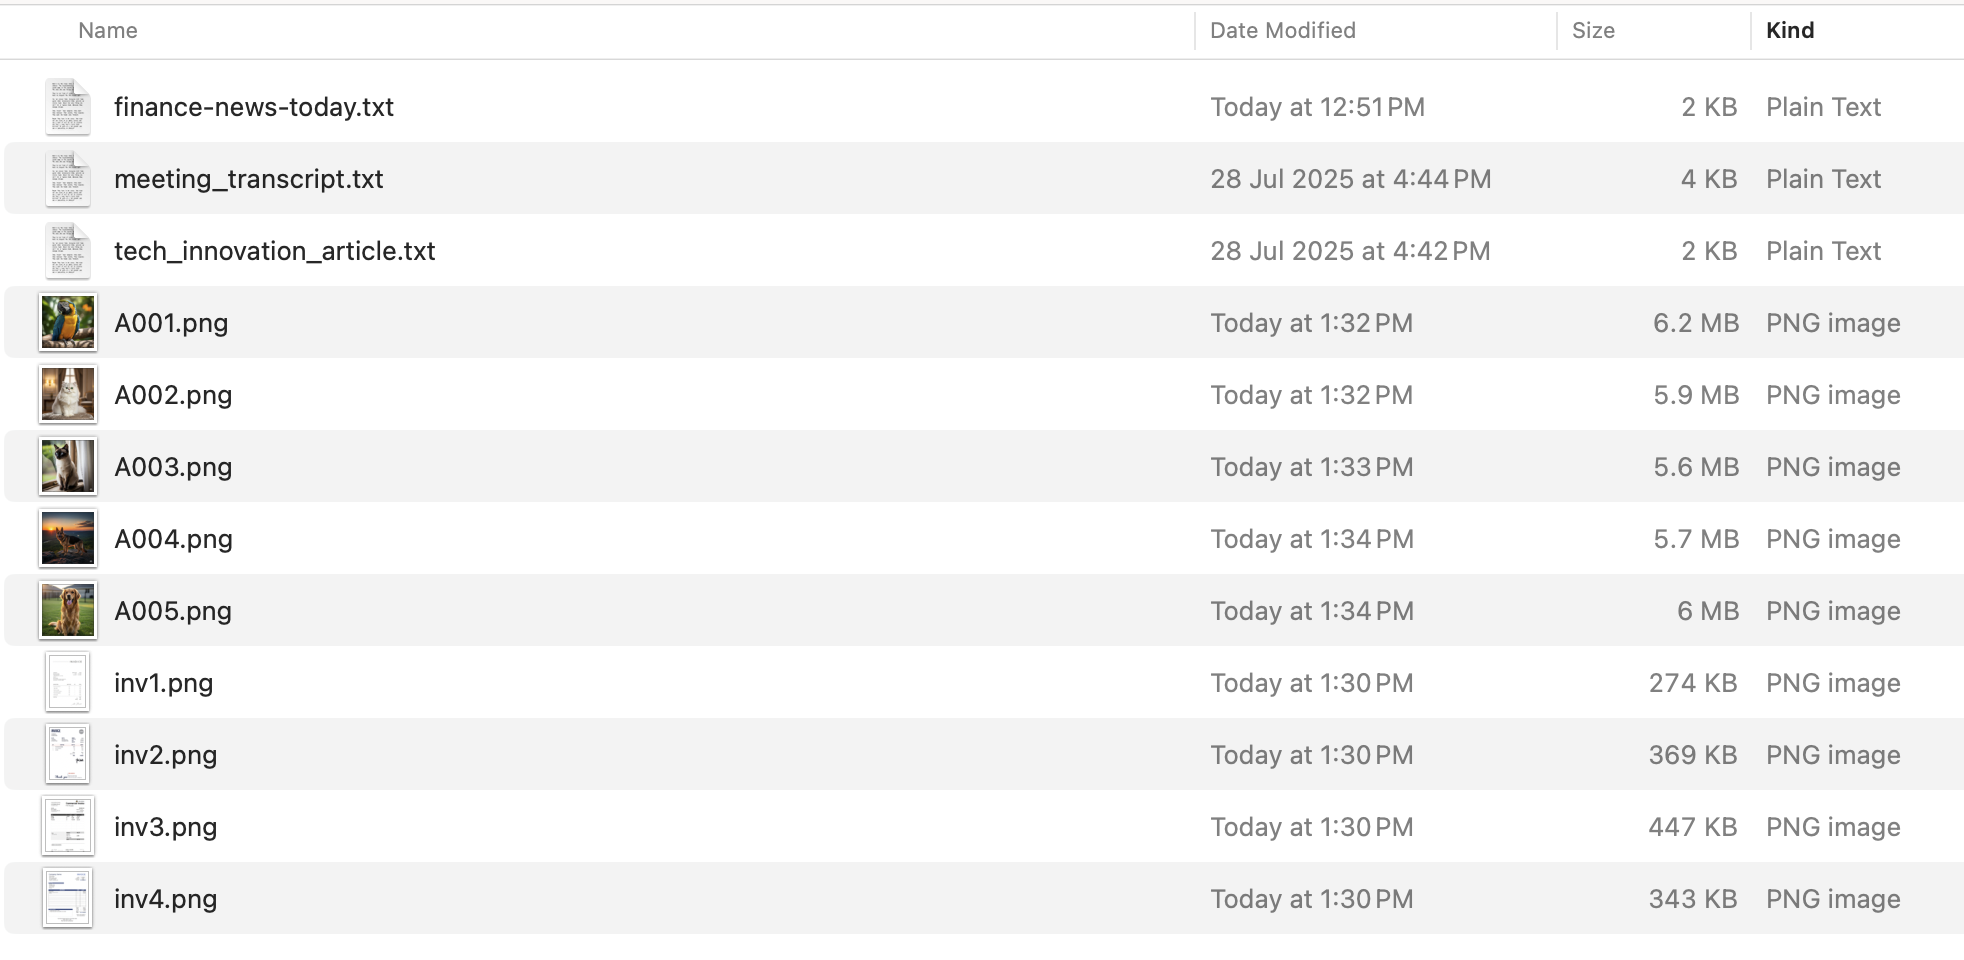
Navigate to that folder and start Gemini CLI. You are going to ask Gemini CLI to create some folders first: Images, Documents, Videos and then you will ask Gemini CLI to organize the files in the folders.
The Gemini CLI will often prompt you for permission before executing commands, especially those that modify your file system (like writing, moving, or deleting files). Always review these prompts carefully before granting permission. This is your safety net.
Create the following folders "Images","Documents","Videos"
Then give the following prompt:
Go through all the files in this folder and then organize them by moving all the files ending with .jpg, .jpeg, .gif into the "Images" folder. Move all ".txt" files into the "Documents" folder. Move all the ".mp4" files in the "Videos" folder.
An example of what the final state of the folder should be, is shown below. You should see new sub-folders created and the files moved into the respective sub-folders depending on their type.
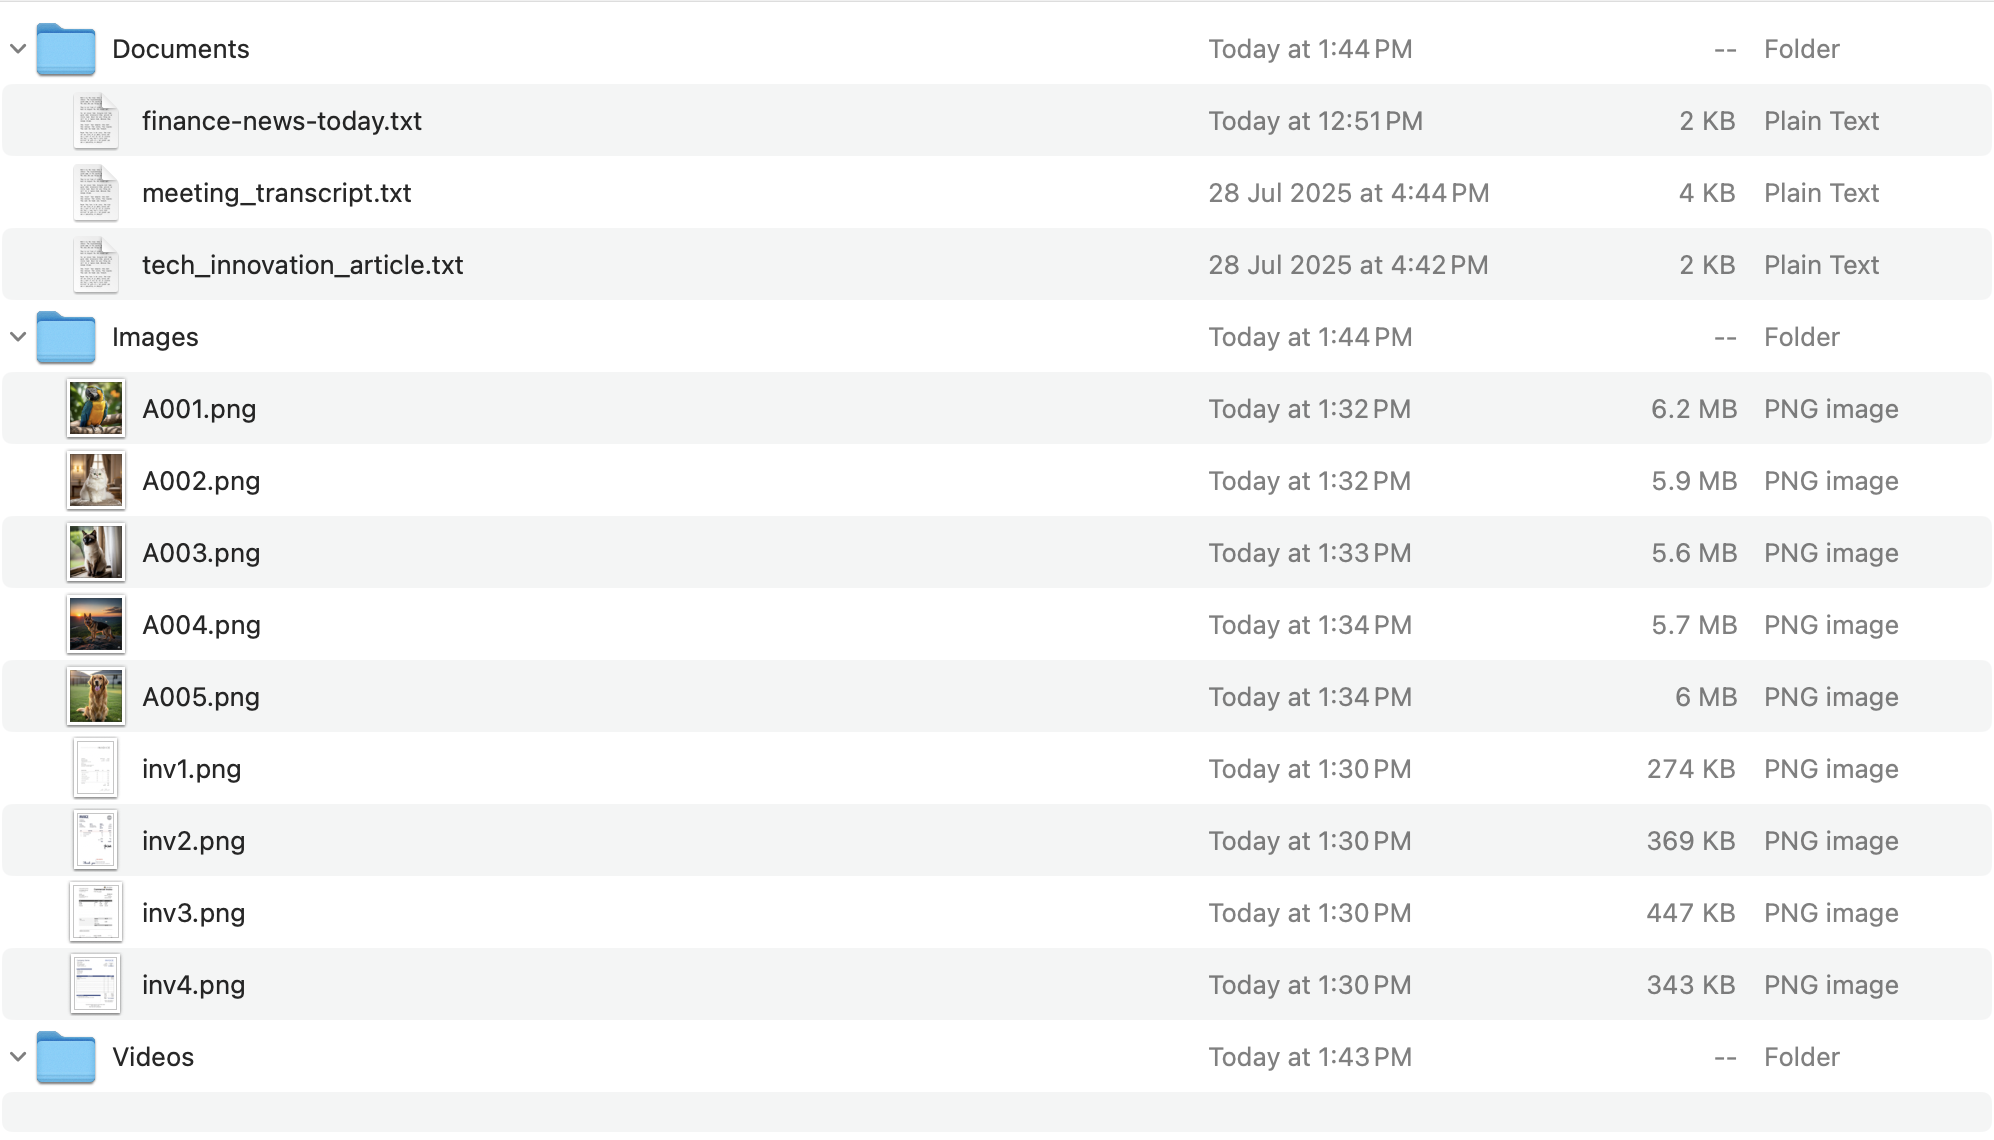
A few other organizing scenarios (the prompts are given next to each scenario):
- Summarization: For each document in the ‘Documents' folder, create a txt file in the same folder named ‘summary_ORIGINAL_FILENAME.txt' that contains a 3-sentence summary of the document's main points.
- Categorizing by Type: Scan all PDF and DOCX files in this directory. Move all files with "invoice" in their name or content into the ‘Financial/Invoices' folder. Move files with "receipt" into ‘Financial/Receipts'. Any other .docx files go into ‘Reports'.
- Extracting Key Information (and "tagging"): For each PDF file in the ‘Financial/Invoices' folder, read its content. If you find a date, rename the file to include that date in YYYY-MM-DD format, e.g., ‘invoice_2025-07-26_original_name.pdf'.
Organizing Images
Let's see how you can organize image content in your machine.
To try this out:
- You will need to have a directory/folder with various image files (.jpg, .png, etc.). Include some with EXIF data (most photos from cameras/phones have this).
- Navigate into this directory.
- Launch Gemini CLI.
Try out any of the following scenarios (the prompts are given next to each scenario):
- Rename by Date (EXIF Data): Rename all .jpg and .png files in this directory to include their creation date from EXIF data in ‘YYYYMMDD_HHMMSS_original_name.jpg' format. If no EXIF date is found, use the file's last modified date.
- Create Image Descriptions: For each image in this folder, describe what is in the image and save that description in a text file named ‘description_ORIGINAL_FILENAME.txt' in the same directory.
- Identify Duplicates (Conceptual, requires more advanced logic): Find any duplicate images in this folder based on their visual content, and list their filenames. Do not delete them yet.
Summarizing Articles (Local Files or Web)
For each of the scenarios below, feel free to change the url, topic of interest and the local file names as applicable. The filenames provided are sample file names, you can replace them with filenames of files that you have on your system.
Try out any of the following scenarios (the prompts are given next to each scenario):
- Summarize a web article (single URL): Go to https://medium.com/google-cloud/getting-started-with-gemini-cli-8cc4674a1371 and summarize the top 3 key takeaways from this news article.
- Summarize multiple web articles (e.g., from a search): Find the latest news articles about "Gemini CLI" using Google Search. For the top 5 relevant articles, summarize each in 2-3 sentences and list their URLs.
- Summarize a local text file: Summarize the main points of the article in ‘my_research_paper.txt'. Focus on the methodology and conclusions.
- Summarize a local PDF: Read ‘financial_report_Q2_2025.pdf'. Provide a summary of the financial performance and key challenges mentioned.
Extracting Specific Information (Local Files or Web)
For each of the scenarios below, feel free to change the url, topic of interest and the local file names as applicable. The filenames provided are sample file names, you can replace them with filenames of files that you have on your system.
Try out any of the following scenarios (the prompts are given next to each scenario):
- Extract entities from a local article: From ‘biography.txt', list all named individuals and the significant dates associated with them.
- Extract data from a table in a PDF: In ‘quarterly_sales.pdf', extract the data from the table on page 3 that shows "Product Sales by Region" and present it in a Markdown table format.
- Extract news headlines and sources from a news website: Go to ‘https://news.google.com/' (or a similar news site). Extract the main headlines from the front page and their corresponding news sources. Present them as a bulleted list.
- Find product specifications from an e-commerce page: Browse to ‘https://www.amazon.in/Google-Cloud-Certified-Associate-Engineer/dp/1119871441' (example for a book). Extract the book title, author and other details. Present this in a structured JSON format.
- Extract duration from a video, in a certain format (eg "2h37m42s").
Answering Questions based on Content (RAG-like behavior)
For each of the scenarios below, feel free to change the url, topic of interest and the local file names as applicable. The filenames provided are sample file names, you can replace them with filenames of files that you have on your system.
Try out any of the following scenarios (the prompts are given next to each scenario):
- Q&A on a local document: I'm attaching ‘user_manual.pdf'. What are the steps to troubleshoot network connectivity issues?
- Q&A on a web page: Using the content from ‘https://www.who.int/news-room/fact-sheets/detail/climate-change-and-health', what are the primary health risks associated with climate change according to WHO?
- Compare information across multiple sources: I have two news articles: ‘article1.txt' and ‘article2.txt', both discussing the recent economic policy changes. Compare and contrast their views on the potential impact on small businesses.
Content Generation based on Extracted Information
For each of the scenarios below, feel free to change the url, topic of interest and the local file names as applicable.
Try out any of the following scenarios (the prompts are given next to each scenario):
- Generate a news brief from an article: Read @tech_innovation_article.txt. Write a short, engaging news brief (around 150 words) suitable for a company newsletter, highlighting the new technology and its potential.
- Draft an email summarizing a meeting transcript: Here is a meeting transcript file: @meeting_transcript.txt. Draft an email to the team summarizing the key decisions made and action items assigned, including who is responsible for each.
Gemini CLI multi-modal support
Gemini CLI has multi-model support via Gemini and you can ask it to process files of different content formats as per your requirements.
You are going to process a bunch of invoice images with Gemini CLI and extract key information from them. Follow the steps given below:
- Create a folder on your machine and download some invoices from the following GitHub repository.
- Launch Gemini CLI from that folder
Give the following prompt to extract out information from the invoices in the form of a table.
The current folder contains a list of invoice files in Image format. Go through all the files in this folder and extract the following invoice information in the form of a table: Invoice No, Invoice Date, Invoice Sent By, Due Date, Due Amount.
You should ideally get an output that looks like this:

Here is another scenario, where you can ask for additional derived columns. Let's say that you want to show a red cross emoji for all the invoice due dates that are in the past. You can give a prompt as follows:
list all files with .png extension in this folder. Extract the invoice information from it by reading them locally and display it in a table format containing the following column headers: : Invoice No, Invoice Date, Invoice Sent By, Due Date, Due Amount. Add a column at the end of the table that shows a red cross emoji in case the due date is in the past.
This produces the following output:

Apply this to any of your own files that are in formats other than text.
Using Gemini CLI to work with databases
You can use Gemini CLI to more efficiently work with various databases. You can use it for multiple scenarios: querying with natural language, exporting data, designing database schemas, generating realistic test data and more.
You shall be using SQLite3 to do this task. You will need to install SQLite3 and have the sample Chinook database.
Here are brief instructions for setting up SQLite3:
- macOS: SQLite3 comes pre-installed. Verify with
sqlite3 --version. If needed, install with Homebrew:brew install sqlite3. - Windows: Download the precompiled binaries from the SQLite website. Extract the files to a directory (e.g.,
C:\sqlite). Add that directory to your system's PATH environment variable. - Linux: Debian/Ubuntu:
sudo apt update && sudo apt install sqlite3
Download the sample Chinook database (here is a direct link to download it).
To run these prompts, it is suggested that you create a folder (database-tasks) in the gemini-cli-projects directory. Copy the Chinook database file to that folder. Ensure that the sqlite3 tool is set up on your system and available in the path, so that Gemini CLI can use that. Launch Gemini CLI.
The database schema diagram is shown below:
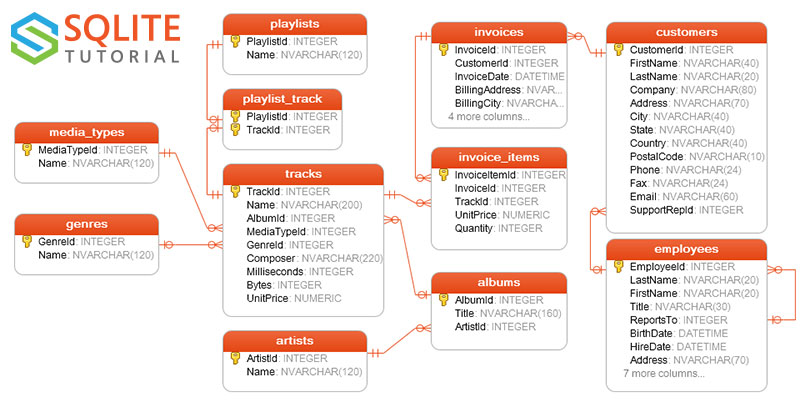
Let's assume that you are in a folder named database-tasks and the Chinook database file is named chinook.db.
Several prompts are given below that can help you work with databases. Let's cover the first one in brief to demonstrate the permission that will be requested.
Start off with the prompt to list down the tables that are present in the database, give the following prompt:
What tables are present in the file: chinook.db
This uses the tool to read the file and then wants to use sqlite3 utility present on your system to do the needful:
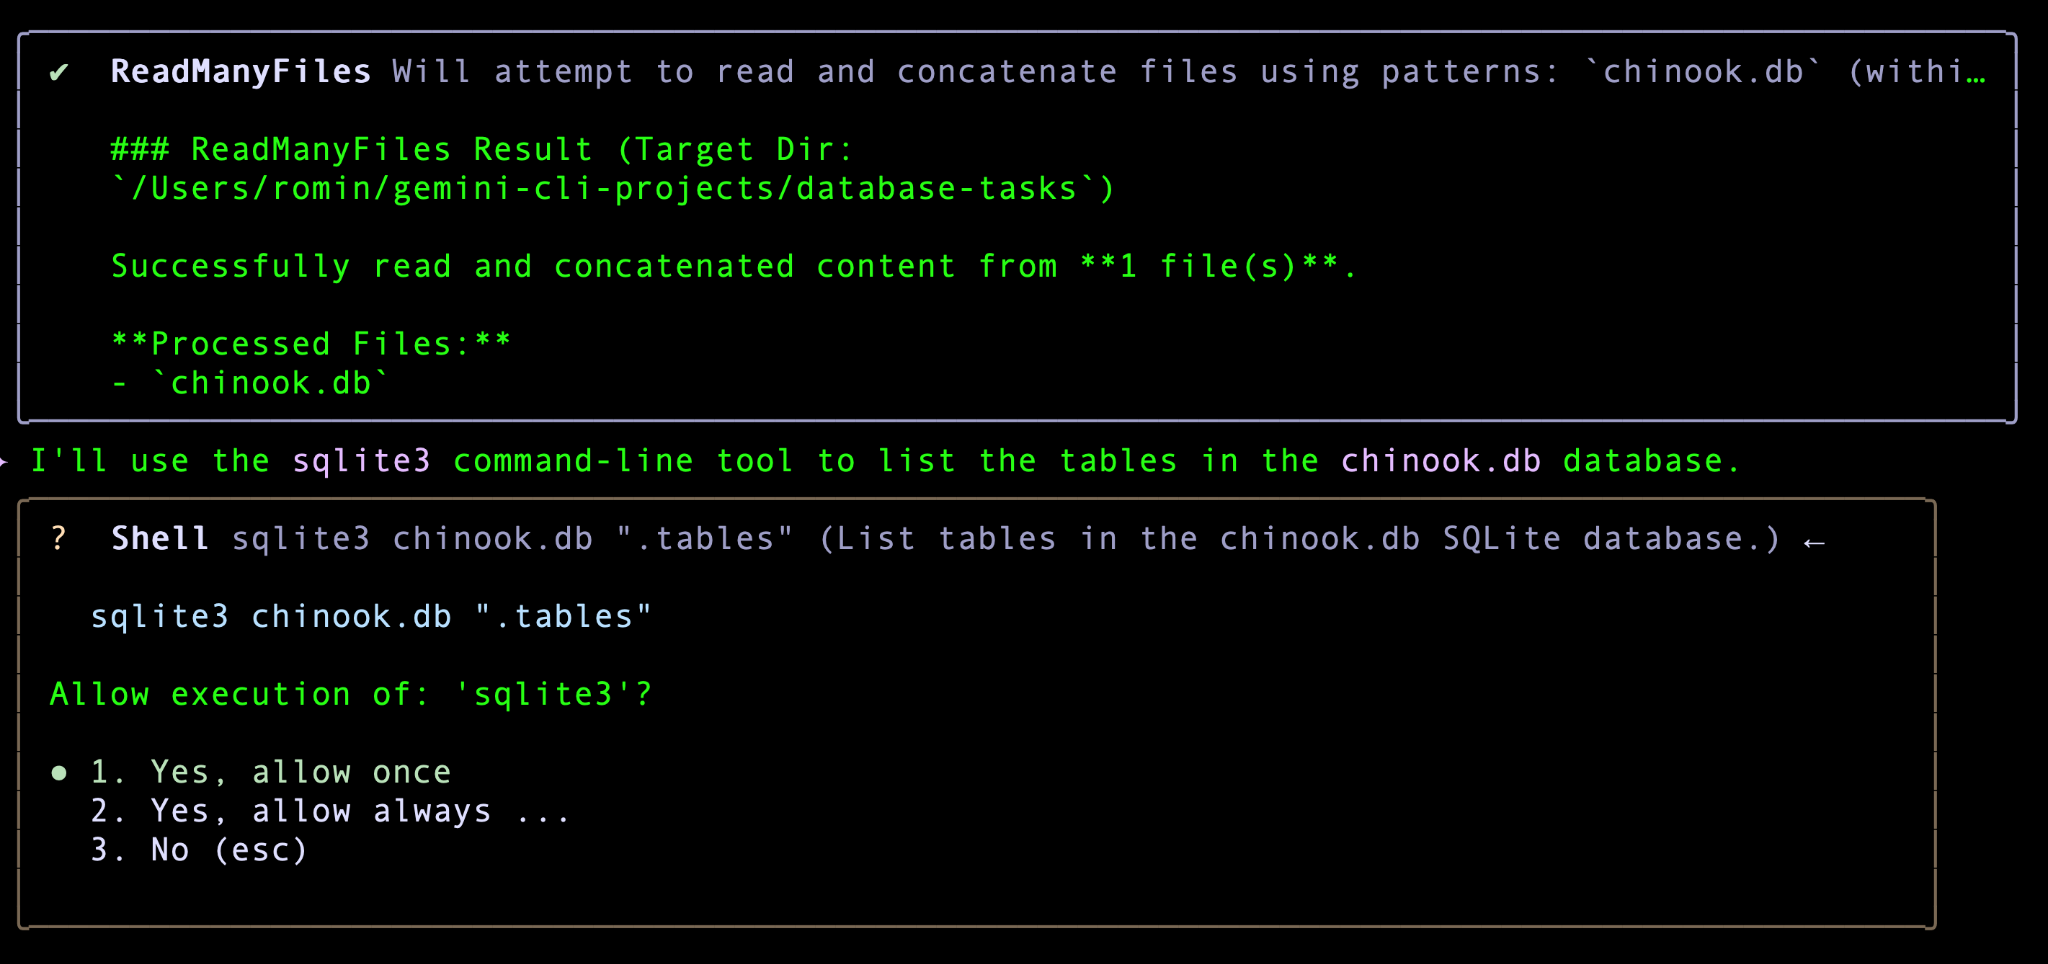
Provide the permission to run it once to get the expected output:
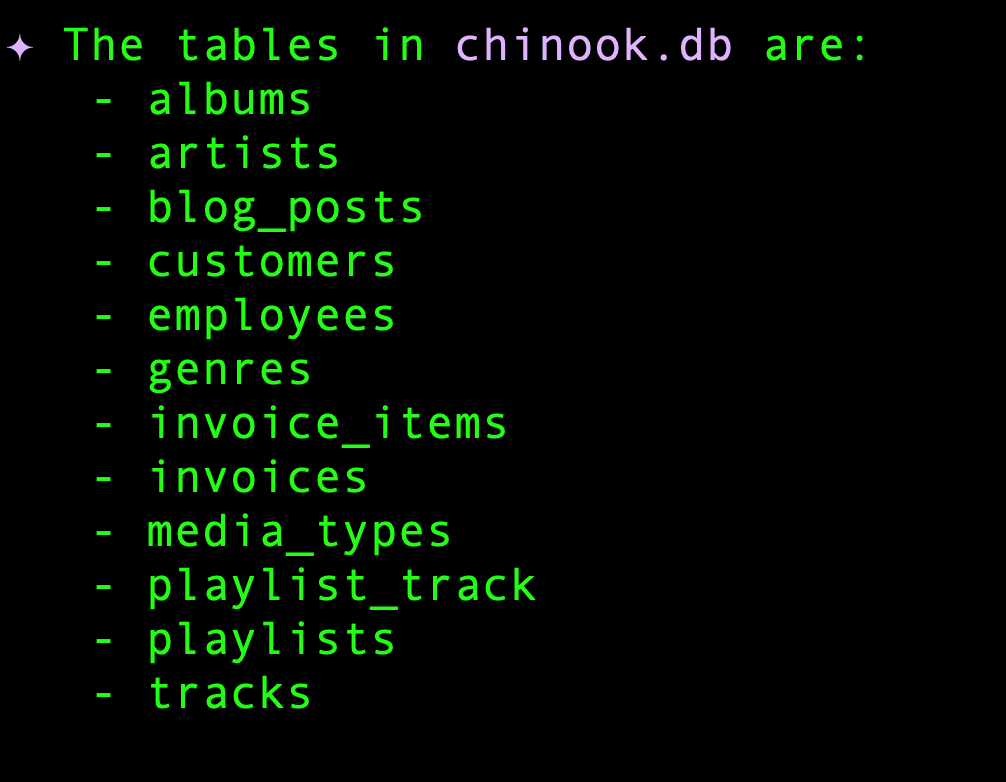
Try out the following prompts or any other prompt of your choice:
- How many employees are there?
- What is the schema of the invoices table?
- Which are the top 3 invoices by total and which customers have placed those invoices?
You will notice that Gemini CLI takes care of two things: Generating the correct SQL statement to meet your requirement and giving the correct sqlite3 command.
Using Gemini CLI to generate data
You can prompt Gemini CLI to produce data in various data formats. This could range from content pieces to JSON data, that you might need to mock. Let's focus here on scenarios applicable to developers/testers.
Here are some prompts to try out:
Generate JSON data of sample customer reviews
Generate a JSON array of 3 synthetic customer reviews for a new smartphone. Each review should have 'reviewId' (string, UUID-like), 'productId' (string, e.g., 'SMARTPHONE_X'), 'rating' (integer, 1-5), 'reviewText' (string, 20-50 words), and 'reviewDate' (string, YYYY-MM-DD format).
Generating Mock API Responses (JSON)
Generate a JSON array representing 7 daily sales records for a mock API endpoint. Each record should include 'date' (YYYY-MM-DD, chronologically increasing), 'revenue' (float, between 5000.00 and 20000.00), 'unitsSold' (integer, between 100 and 500), and 'region' (string, either 'North', 'South', 'East', 'West').
Generating Sample Database Insert Statements (SQL)
Generate 5 SQL INSERT statements for a table named 'users' with columns: 'id' (INTEGER, primary key), 'username' (VARCHAR(50), unique), 'email' (VARCHAR(100)), 'password_hash' (VARCHAR(255)), 'created_at' (DATETIME, current timestamp). Ensure the password_hash is a placeholder string like 'hashed_password_X'.
Generating CSV Data for Data Loading/Analysis
Generate 10 lines of CSV data, including a header row, for customer transactions. Columns should be: 'TransactionID' (unique string), 'CustomerID' (integer), 'ItemPurchased' (string, e.g., 'Laptop', 'Monitor', 'Keyboard'), 'Quantity' (integer, 1-3), 'UnitPrice' (float, between 100.00 and 1500.00), 'TransactionDate' (YYYY-MM-DD).
Generate a Configuration file (YAML)
Generate a sample YAML configuration for a 'user_service'. Include sections for 'database' with 'host', 'port', 'username', 'password', 'database_name'. Also include a 'api_keys' section with 'payment_gateway' and 'email_service' placeholders. Use realistic default values.
Generating Test Data for Edge Cases/Validation
Generate a JSON array of 8 email addresses for testing purposes. Include a mix of: 2 valid standard emails, 2 with missing '@', 2 with invalid domains (e.g., '.com1'), and 2 with special characters in the local part that are usually invalid (e.g., spaces or multiple dots).
11. Congratulations
Congratulations, you've successfully explored Gemini CLI, its capabilities and applied it to a few use cases.
