
1. Overview
In this lab, you will learn to build a prompt-based generation pipeline for your image library.
You will complete the following steps:
- 1️⃣ Start with an archive image
- 2️⃣ Extract a character to create a brand-new reference image
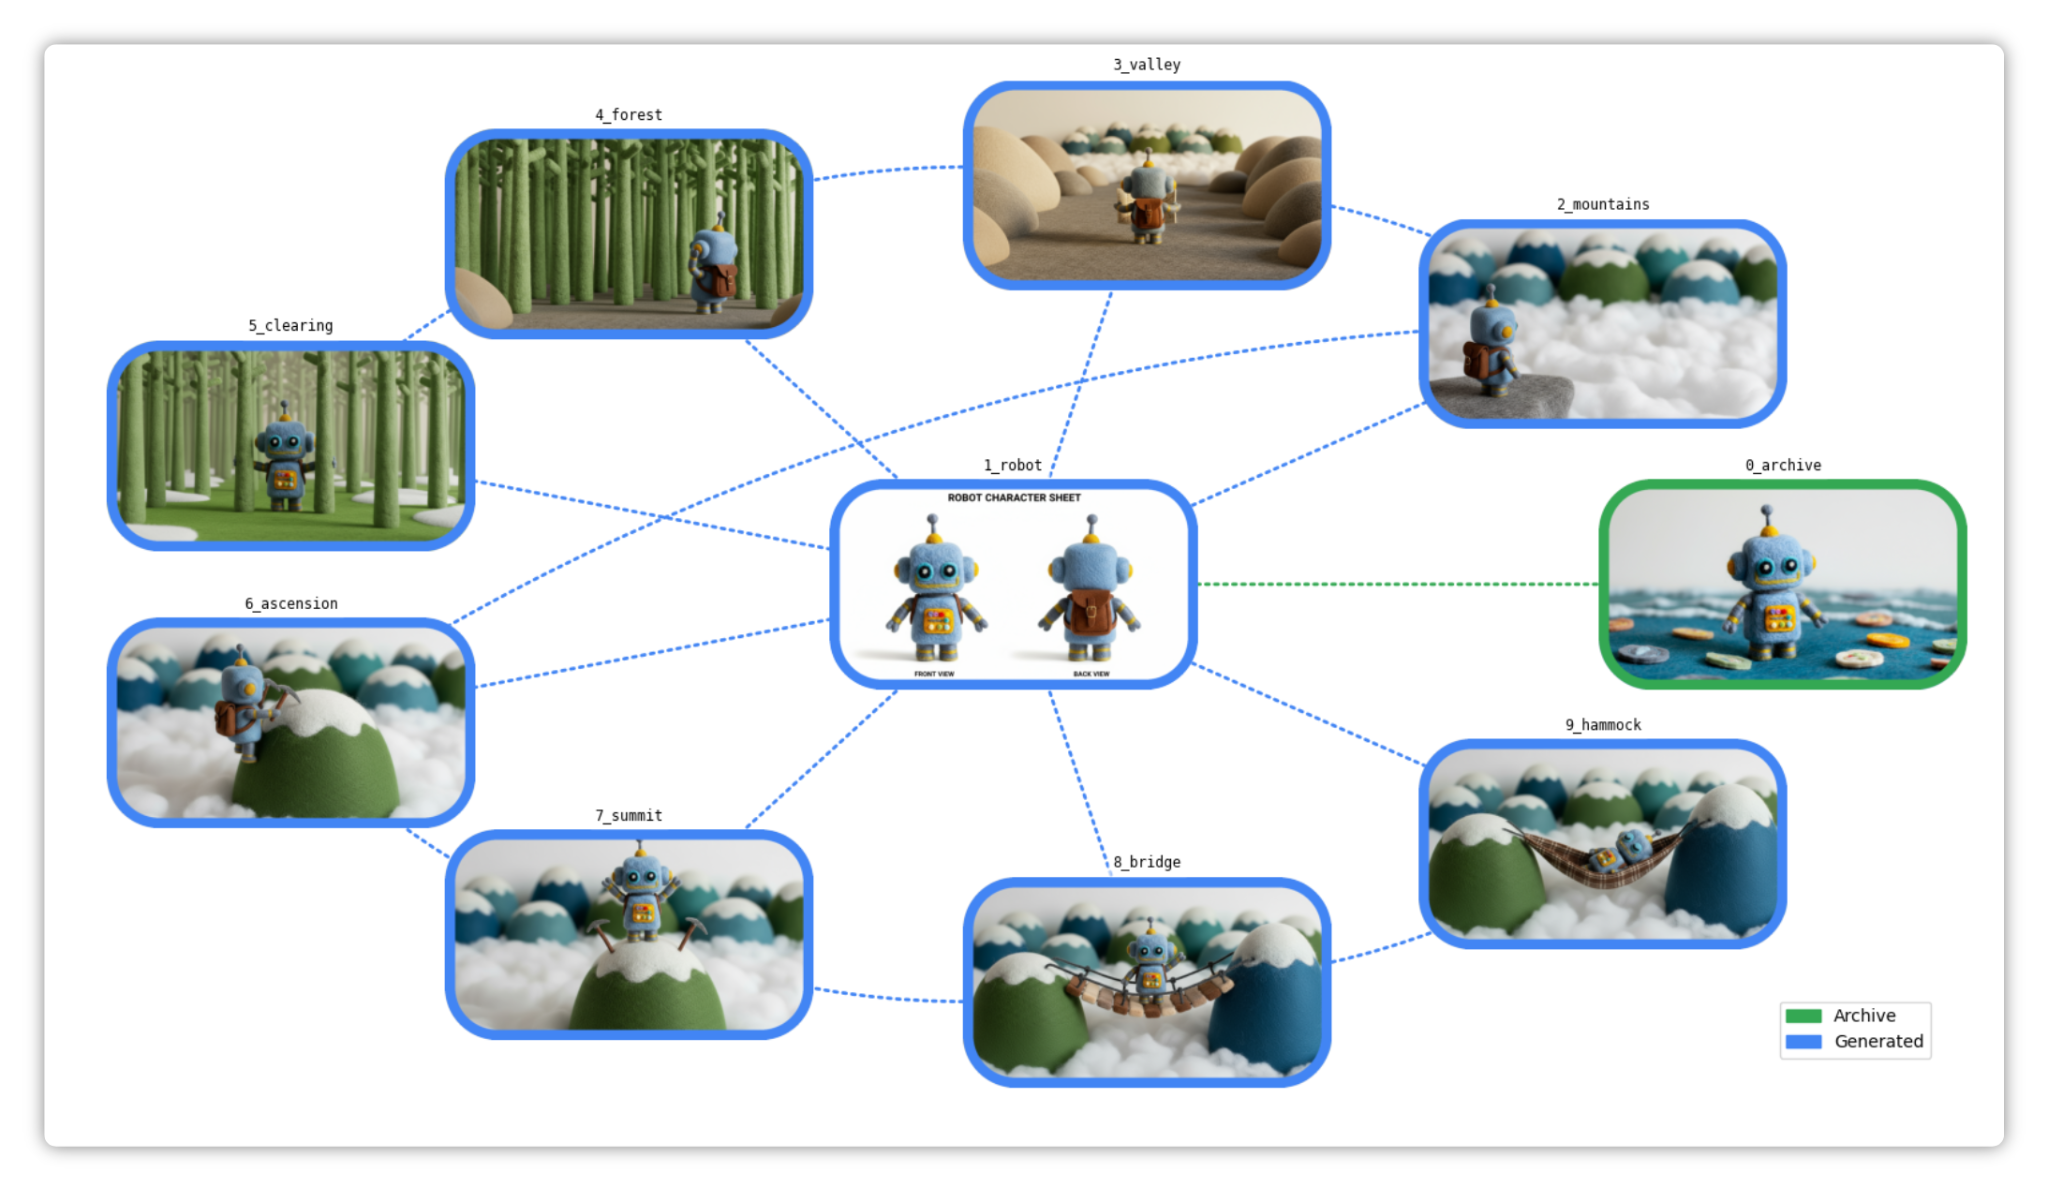
- 3️⃣ Generate a series of illustrations using only prompts and the new assets
Here is a summary of what you'll achieve:
What you'll learn
- How to generate new consistent images from images and prompts
- How to create a character sheet
- How to use descriptive or imperative prompts
- How to benefit from Gemini's spatial understanding
- How to build an asset graph
What you'll need
- Familiarity running Python in a notebook (in Colab or any other Jupyter environment)
- A Google Cloud project (Vertex AI) or a Gemini API key (Google AI Studio) with billing enabled
ℹ️ The total cost to run this lab on Google Cloud is less than 1 USD.


Let's get started...
2. Before you begin
To use the Gemini API, you have two main options:
- Via Vertex AI with a Google Cloud project
- Via Google AI Studio with a Gemini API key
🛠️ Option 1 - Gemini API via Vertex AI
Requirements:
- A Google Cloud project
- The Vertex AI API must be enabled for this project
🛠️ Option 2 - Gemini API via Google AI Studio
Requirement:
- A Gemini API key
Learn more about getting a Gemini API key from Google AI Studio.
3. Run the notebook
Choose your preferred tool to open the notebook:
🧰 Tool A - Open the notebook in Colab
🧰 Tool B - Open the notebook in Colab Enterprise or Vertex AI Workbench
💡 This might be preferred if you already have a Google Cloud project configured with a Colab Enterprise or Vertex AI Workbench instance.
🧰 Tool C - Get the notebook from GitHub and run it in your own environment
⚠️ You will need to get the notebook from GitHub (or clone the repository) and run it in your own Jupyter environment.
🗺️ Notebook table of contents
For easier navigation, make sure to expand and use the table of contents. Example:

🏁 Run the notebook
You are ready. You can now follow and run the notebook. Have fun!...
4. Congratulations!

Congratulations for completing the codelab!
Learn more
- Check out the Nano Banana recipes notebook for more practical examples.
- Explore additional use cases in the Vertex AI Prompt Gallery.
- Stay updated by following the Vertex AI Release Notes.