
۱. خوش آمدید، توسعهدهندهی جمینی!
در این آزمایشگاه کد، شما یاد خواهید گرفت که چگونه با استفاده از کیت توسعه نرمافزار سفارشی Gemini Interactions، برنامههای هوش مصنوعی نسل بعدی را در جاوا بسازید.
رابط برنامهنویسی کاربردی (API) تعاملات جمینی چیست؟
APIهای سنتی LLM بدون وضعیت و مبتنی بر درخواست-پاسخ هستند. برای ساخت یک دستیار چت چند نوبتی یا یک حلقه عامل پیچیده، توسعهدهندگان از نظر تاریخی مجبور بودهاند وضعیت مکالمه، کوتاهسازی تاریخچه، تنظیم فراخوانی ابزار و حلقههای اجرا را بهطور کامل در کد برنامه سمت کلاینت مدیریت کنند.
رابط برنامهنویسی Gemini Interactions این پیچیدگی را به سرور منتقل میکند. این یک رابط برنامهنویسی کاربردی مبتنی بر session و stateful است که در آن زیرساخت گوگل، گراف مکالمه را میزبانی و مدیریت میکند. یک Interaction واحد، یک session stateful را نشان میدهد. هنگامی که با آن تعامل میکنید، API یک جدول زمانی غنی و ساختاریافته متشکل از مراحل چندریختی را برمیگرداند - مانند:
-
ThoughtStep: فرآیند استدلال درونی مدل. -
ModelOutputStep: محتوای متنی، صوتی یا تصویری تولید شده توسط مدل. -
ToolCallStepوToolResultStep: فراخوانیهای ابزار آغاز شده توسط سیستم یا مدل. -
UserInteractionStep): نقاطی که سیستم برای درخواست ورودی یا تأیید انسان مکث میکند.
نمایندگان مدیریتشده چه هستند؟
هماهنگسازی عاملهای خودمختار - مدیریت حلقهها، منطق تلاش مجدد، محیطهای اجرای ابزار و مدیریت وضعیت - به طور چشمگیری دشوار است.
عاملهای مدیریتشده یک راهکار در سطح پلتفرم هستند که توسط رابط برنامهنویسی کاربردی Gemini Interactions ارائه میشوند. به جای اجرای حلقههای عامل به صورت محلی، میتوانید عاملهای تخصصی را مستقیماً در زیرساخت گوگل فراهم کنید:
- عاملهای داخلی : عاملهای تخصصی آماده برای استفاده، مانند عامل Deep Research که تحقیقات وب چند مرحلهای را انجام میدهد، یافتهها را جمعآوری میکند و گزارشهای جامعی تولید میکند.
- عاملهای مدیریتشده سفارشی : موجودیتهای خودمختاری که شما تعریف میکنید. شما دستورالعملهای سیستمی را ارائه میدهید، ابزارهایی (مانند جستجوی گوگل یا محیط اجرای Bash) را پیوست میکنید و یک Cloud Sandbox را پیکربندی میکنید - یک محیط زمان اجرای امن، ایزوله و کانتینری با قوانین خروجی شبکه قابل تنظیم (مثلاً اجازه دسترسی فقط به دامنههای خاص مانند GitHub).
با استفاده از کیت توسعه نرمافزار جاوا Gemini Interactions، میتوانید به راحتی با این عاملهای مدیریتشده در برنامههای استاندارد جاوا، بوتاسترپ، هماهنگی و همکاری کنید.
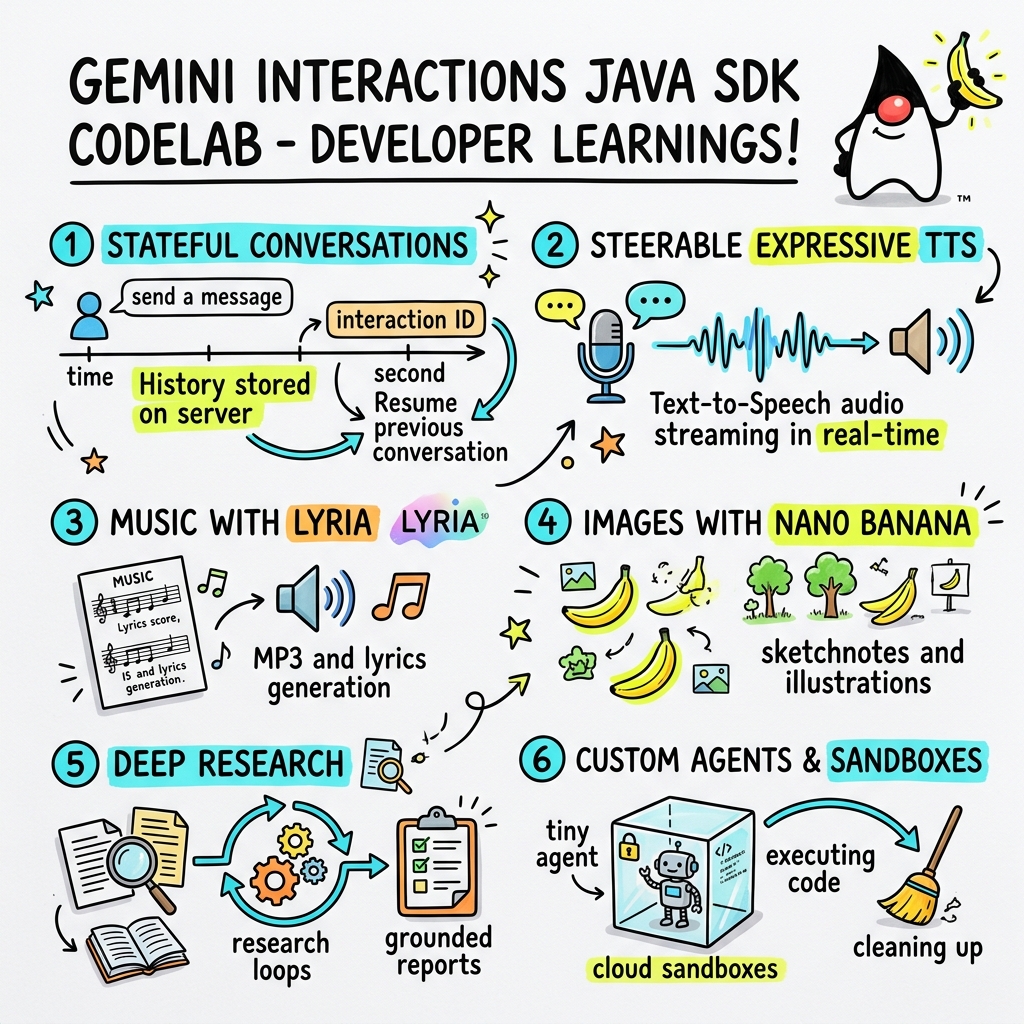
آنچه یاد خواهید گرفت
- چگونه در معماری جدید چندریختی مبتنی
Stepپیمایش کنیم. - چگونه صدای TTS رسا را مستقیماً به بلندگوها پخش کنیم.
- نحوه تولید موسیقی (MP3 + متن آهنگ) با Lyria.
- نحوه تولید یادداشتهای تصویری با Gemini 3 Pro Image.
- نحوه هدایت عامل تحقیقات عمیق با استفاده از برنامهریزی مشارکتی.
- نحوه تجهیز یک عامل سفارشی با قوانین و ابزارهای خروجی شبکه.
آنچه نیاز دارید
- جاوا ۲۱ یا بالاتر
- آپاچی ماون.
- یک ویرایشگر متن یا IDE (مثل IntelliJ IDEA، VS Code و غیره).
- یک کلید API از Gemini (از Google AI Studio).
۲. راهاندازی: پروژه و کلید API
ایجاد پروژه Maven
با استفاده از دستور زیر، یک پروژه Maven جدید را از ترمینال خود بوتاسترپ کنید:
mvn archetype:generate \
    -DgroupId=com.example \
    -DartifactId=gemini-interactions-demo \
    -DarchetypeGroupId=org.apache.maven.archetypes \
    -DarchetypeArtifactId=maven-archetype-quickstart \
    -DarchetypeVersion=1.5 \
    -DinteractiveMode=false
به دایرکتوری پروژه تازه ایجاد شده خود بروید:
cd gemini-interactions-demo
فایل pom.xml خود را باز کنید و آن را پیکربندی کنید:
- ویژگیهای نسخه جاوا را برای هدف قرار دادن جاوا ۲۱ بهروزرسانی کنید:
<properties> <maven.compiler.source>21</maven.compiler.source> <maven.compiler.target>21</maven.compiler.target> </properties> - وابستگی SDK را درون آن اضافه کنید
<dependency>
    <groupId>io.github.glaforge</groupId>
    <artifactId>gemini-interactions-api-sdk</artifactId>
    <version>0.10.1</version>
</dependency>
پیکربندی کلید API
یک کلید API مربوط به Gemini را از Google AI Studio دریافت کنید.
کلید را به عنوان یک متغیر محیطی در ترمینال خود تنظیم کنید:
مکاواس / لینوکس:
export GEMINI_API_KEY="your_actual_api_key"
ویندوز (خط فرمان):
set GEMINI_API_KEY="your_actual_api_key"
۳. سلام دنیا: پیمایش معماری مرحلهای
API تعاملات، یک معماری جدول زمانی چندریختی و مبتنی بر مرحله را معرفی کرد. این API به جای بازگرداندن یک لیست مسطح از خروجیها، دنبالهای از اشیاء Step تایپشده (مثلاً ModelOutputStep ، ThoughtStep ، FunctionCallStep ) را برمیگرداند.
در این مرحله، شما یک تعامل ساده خواهید نوشت تا نحوه استخراج خروجی مدل نهایی از این ساختار را درک کنید.
ایجاد HelloInteractions.java
فایل src/main/java/com/example/HelloInteractions.java را با محتوای زیر ایجاد کنید:
package com.example;

import io.github.glaforge.gemini.interactions.GeminiInteractionsClient;
import io.github.glaforge.gemini.interactions.model.*;
import io.github.glaforge.gemini.interactions.model.InteractionParams.ModelInteractionParams;

public class HelloInteractions {
    public static void main(String[] args) {
        // 1. Initialize the client
        GeminiInteractionsClient client = GeminiInteractionsClient.builder()
            .apiKey(System.getenv("GEMINI_API_KEY"))
            .build();

        // 2. Build the request
        ModelInteractionParams request = ModelInteractionParams.builder()
            .model("gemini-3.5-flash")
            .input("Explain the difference between a library and a framework in one sentence.")
            .build();

        // 3. Send request
        Interaction response = client.create(request);

        // 4. Navigate the step-based architecture to get the output
        response.steps().stream()
            .filter(step -> step instanceof Step.ModelOutputStep)
            .map(step -> (Step.ModelOutputStep) step)
            .findFirst()
            .ifPresent(step -> System.out.println(step.content().get(0)));
    }
}
کد را اجرا کنید
کلاس را کامپایل و اجرا کنید:
mvn compile exec:java -Dexec.mainClass=com.example.HelloInteractions
۴. صدای قابل هدایت: پخش TTS رسا
Gemini 3.1 Flash قابلیت تبدیل متن به گفتار (TTS) قابل هدایت را معرفی میکند. میتوانید با استفاده از دستورات، سرعت، لحن و محیط صدا را کنترل کنید و از برچسبهای احساسی (مانند [excitedly] یا [whispers] ) در اواسط جمله استفاده کنید.
در این مرحله، شما صدای رسا تولید میکنید و آن را مستقیماً به بلندگوهای خود پخش میکنید.
ایجاد StreamingDJ.java
فایل src/main/java/com/example/StreamingDJ.java را با محتوای زیر ایجاد کنید:
package com.example;

import io.github.glaforge.gemini.interactions.GeminiInteractionsClient;
import io.github.glaforge.gemini.interactions.model.*;
import io.github.glaforge.gemini.interactions.model.Config.SpeechConfig;
import io.github.glaforge.gemini.interactions.model.InteractionParams.ModelInteractionParams;
import javax.sound.sampled.*;
import java.util.Base64;
import java.util.stream.Stream;

public class StreamingDJ {
    public static void main(String[] args) throws Exception {
        GeminiInteractionsClient client = GeminiInteractionsClient.builder()
            .apiKey(System.getenv("GEMINI_API_KEY"))
            .build();

        // Prompt defining the voice profile and emotional tags
        String prompt = """
            # AUDIO PROFILE: Jaz R.
            ## THE SCENE: London Studio
            ### DIRECTOR'S NOTES
            Accent: Jaz is a DJ from Brixton, London.
            Style: Bouncy, energetic, high-speed delivery.

            #### TRANSCRIPT
            [excitedly] Yes, massive vibes in the studio!
            [whispers] But keep it down, the boss is coming...
            [shouting] Turn this up! Let's go!
            """;

        ModelInteractionParams request = ModelInteractionParams.builder()
            .model("gemini-3.1-flash-tts-preview")
            .input(prompt)
            .responseModalities(Interaction.Modality.AUDIO)
            .speechConfig(new SpeechConfig("Algenib", "en-GB"))
            .stream(true) // Enable streaming
            .build();

        System.out.println("Streaming audio from Gemini...");

        try (Stream<Events> eventStream = client.stream(request)) {
            // Configure the Java Audio System for 24kHz Mono 16-bit PCM
            AudioFormat format = new AudioFormat(24000, 16, 1, true, false);
            DataLine.Info info = new DataLine.Info(SourceDataLine.class, format);

            try (SourceDataLine line = (SourceDataLine) AudioSystem.getLine(info)) {
                line.open(format);
                line.start();

                // Process the stream and play audio chunks as they arrive
                eventStream.forEach(event -> {
                    if (event instanceof Events.StepDelta cd && cd.delta() instanceof Events.AudioDelta audioDelta) {
                        byte[] audioData = Base64.getDecoder().decode(audioDelta.data());
                        line.write(audioData, 0, audioData.length);
                    }
                });
                line.drain();
            }
        }
    }
}
کد را اجرا کنید
mvn compile exec:java -Dexec.mainClass=com.example.StreamingDJ
به خروجی گوش دهید
در اینجا یک مثال صوتی از آنچه هنگام اجرای کد خواهید شنید (با استفاده از صدای Algenib با برچسبهای احساسی) آورده شده است:
۵. تولید موسیقی با Lyria 3
با استفاده از مدل DeepMind Lyria 3، میتوانید موسیقی و زنگوله تولید کنید. با درخواست روشهای پاسخ دوگانه ( AUDIO و TEXT )، میتوانید هم صدای تولید شده (MP3) و هم متن آهنگ را بازیابی کنید.
ایجاد MusicGenerator.java
فایل src/main/java/com/example/MusicGenerator.java را با محتوای زیر ایجاد کنید:
package com.example;

import io.github.glaforge.gemini.interactions.GeminiInteractionsClient;
import io.github.glaforge.gemini.interactions.model.*;
import io.github.glaforge.gemini.interactions.model.InteractionParams.ModelInteractionParams;
import io.github.glaforge.gemini.interactions.model.Content.AudioContent;
import java.nio.file.Files;
import java.nio.file.Paths;

public class MusicGenerator {
    public static void main(String[] args) throws Exception {
        GeminiInteractionsClient client = GeminiInteractionsClient.builder()
            .apiKey(System.getenv("GEMINI_API_KEY"))
            .build();

        ModelInteractionParams request = ModelInteractionParams.builder()
            .model("models/lyria-3-clip-preview") // 30-second clip
            .input("An uplifting rock song with acoustic guitars about coding in Java.")
            .responseModalities(
                Interaction.Modality.AUDIO,
                Interaction.Modality.TEXT) // Request both MP3 and Lyrics
            .build();

        System.out.println("Generating music (this might take a moment)...");
        Interaction response = client.create(request);

        // 1. Print the lyrics (TEXT output)
        System.out.println("\n--- Generated Lyrics ---");
        response.steps().stream()
            .filter(step -> step instanceof Step.ModelOutputStep)
            .flatMap(step -> ((Step.ModelOutputStep) step).content().stream())
            .filter(content -> content instanceof Content.TextContent)
            .forEach(content -> System.out.println(((Content.TextContent) content).text()));

        // 2. Save the MP3 (AUDIO output)
        response.steps().stream()
            .filter(step -> step instanceof Step.ModelOutputStep)
            .flatMap(step -> ((Step.ModelOutputStep) step).content().stream())
            .filter(content -> content instanceof AudioContent)
            .map(content -> (AudioContent) content)
            .findFirst()
            .ifPresent(audio -> {
                try {
                    Files.write(Paths.get("coding_song.mp3"), audio.data());
                    System.out.println("\nSuccess: Song saved to coding_song.mp3");
                } catch (Exception e) {
                    e.printStackTrace();
                }
            });
    }
}
کد را اجرا کنید
mvn compile exec:java -Dexec.mainClass=com.example.MusicGenerator
به آهنگ ساخته شده گوش دهید
فایل MP3 تولید شده ( coding_song.mp3 ) حاوی موسیقی و متن آهنگ به صورت زیر است:
۶. تجسم با Sketchnotes (Nano Banana Pro)
نرمافزار Gemini 3 Pro Image (که با نام Nano Banana Pro نیز شناخته میشود) میتواند تصاویر تولید کند. با درخواست حالت IMAGE ، میتوانید بر اساس ورودی متن، اینفوگرافیک، نمودار یا یادداشتهای طراحی تولید کنید.
در این مرحله، خلاصهای از مقالهای درباره Managed Agents (عاملهای مدیریتشده) را به صورت یک فایل PNG ذخیره خواهید کرد.
ایجاد ImageGenerator.java
فایل src/main/java/com/example/ImageGenerator.java را با محتوای زیر ایجاد کنید:
package com.example;

import io.github.glaforge.gemini.interactions.GeminiInteractionsClient;
import io.github.glaforge.gemini.interactions.model.*;
import io.github.glaforge.gemini.interactions.model.InteractionParams.ModelInteractionParams;
import io.github.glaforge.gemini.interactions.model.Content.ImageContent;
import java.nio.file.Files;
import java.nio.file.Paths;

public class ImageGenerator {
    public static void main(String[] args) throws Exception {
        GeminiInteractionsClient client = GeminiInteractionsClient.builder()
            .apiKey(System.getenv("GEMINI_API_KEY"))
            .build();

        String articleSummary = """
            Managed Agents in the Gemini API allow developers to run autonomous agents
            that reason, plan, use tools, and execute code inside isolated cloud sandboxes.
            The Gemini API handles the infrastructure (containers, network, runtime).
            It is powered by the Antigravity agent running on Gemini 3.5 Flash.
            The Java Interactions SDK supports these capabilities, utilizing a Step-based
            architecture to model the execution timeline.
            """;

        ModelInteractionParams request = ModelInteractionParams.builder()
            .model("gemini-3-pro-image-preview")
            .input(String.format("""
                Create a hand-drawn and hand-written sketchnote
                style summary infographic, with a pure white background,
                about the following information:

                %s
                """, articleSummary))
            .responseModalities(Interaction.Modality.IMAGE) // Request IMAGE modality
            .build();

        System.out.println("Generating sketchnote (this might take a moment)...");
        Interaction response = client.create(request);

        // Save the generated image
        response.steps().stream()
            .filter(step -> step instanceof Step.ModelOutputStep)
            .flatMap(step -> ((Step.ModelOutputStep) step).content().stream())
            .filter(content -> content instanceof ImageContent)
            .map(content -> (ImageContent) content)
            .findFirst()
            .ifPresent(image -> {
                try {
                    Files.write(Paths.get("sketchnote.png"), image.data());
                    System.out.println("Success: Sketchnote saved to sketchnote.png");
                } catch (Exception e) {
                    e.printStackTrace();
                }
            });
    }
}
کد را اجرا کنید
mvn compile exec:java -Dexec.mainClass=com.example.ImageGenerator
Sketchnote تولید شده
در اینجا sketchnote تولید شده ( sketchnote.png ) که توسط مدل ایجاد شده است را مشاهده میکنید:

۷. عوامل هدایتکننده: تحقیقات عمیق مشارکتی
Deep Research یک عامل قدرتمند است که میتواند وظایف تحقیقاتی چند مرحلهای را اجرا کند. با این حال، به جای اجرای فوری، میتوانید از Collaborative Planning برای بررسی، اصلاح و هدایت طرح تحقیقاتی قبل از شروع جمعآوری دادهها توسط عامل استفاده کنید.
شما یک مکالمه چند نوبتی پیادهسازی خواهید کرد که از همان وضعیت سمت سرور ( previousInteractionId ) برای اصلاح یک طرح استفاده میکند.
ایجاد فایل CollaborativeResearch.java
فایل src/main/java/com/example/CollaborativeResearch.java را با محتوای زیر ایجاد کنید:
package com.example;

import io.github.glaforge.gemini.interactions.GeminiInteractionsClient;
import io.github.glaforge.gemini.interactions.model.*;
import io.github.glaforge.gemini.interactions.model.InteractionParams.AgentInteractionParams;
import io.github.glaforge.gemini.interactions.model.Config.DeepResearchAgentConfig;
import io.github.glaforge.gemini.interactions.model.Config.ThinkingSummaries;
import io.github.glaforge.gemini.interactions.model.Config.Visualization;

public class CollaborativeResearch {
    public static void main(String[] args) throws Exception {
        GeminiInteractionsClient client = GeminiInteractionsClient.builder()
            .apiKey(System.getenv("GEMINI_API_KEY"))
            .build();

        String agentModel = "deep-research-preview-04-2026";

        // --- Phase 1: Request a Plan ---
        System.out.println("Phase 1: Requesting research plan...");
        AgentInteractionParams planParams = AgentInteractionParams.builder()
            .agent(agentModel)
            .input("Research the latest generations of Google Cloud TPUs (TPU7x and the 8th generation TPU 8t and TPU 8i).")
            .agentConfig(new DeepResearchAgentConfig(
                "deep-research",
                ThinkingSummaries.AUTO,
                Visualization.AUTO,
                true // TRUE enables collaborative planning
            ))
            .background(true)
            .store(true)
            .build();

        Interaction planInteraction = client.create(planParams);
        planInteraction = waitForCompletion(client, planInteraction.id());

        System.out.println("\n--- Proposed Plan ---");
        printOutputText(planInteraction);

        // --- Phase 2: Refine the Plan ---
        System.out.println("\nPhase 2: Refining research plan...");
        AgentInteractionParams refineParams = AgentInteractionParams.builder()
            .agent(agentModel)
            .input("Focus on comparing the architectural, performance, and scaling differences between the TPU7x generation and the two flavors of the eighth generation: TPU 8t (optimized for training at scale) and TPU 8i (optimized for low-latency reasoning and inference).")
            .agentConfig(new DeepResearchAgentConfig(
                "deep-research",
                ThinkingSummaries.AUTO,
                Visualization.AUTO,
                true // Keep collaborative planning TRUE to iterate
            ))
            .previousInteractionId(planInteraction.id()) // Resume session
            .background(true)
            .store(true)
            .build();

        Interaction refinedInteraction = client.create(refineParams);
        refinedInteraction = waitForCompletion(client, refinedInteraction.id());

        System.out.println("\n--- Refined Plan ---");
        printOutputText(refinedInteraction);

        // --- Phase 3: Approve and Execute ---
        System.out.println("\nPhase 3: Approving plan and starting deep research (this will take a few minutes)...");
        AgentInteractionParams executeParams = AgentInteractionParams.builder()
            .agent(agentModel)
            .input("Plan looks good, execute!")
            .agentConfig(new DeepResearchAgentConfig(
                "deep-research",
                ThinkingSummaries.AUTO,
                Visualization.AUTO,
                false // FALSE approves the plan and executes the research
            ))
            .previousInteractionId(refinedInteraction.id()) // Resume session
            .background(true)
            .store(true)
            .build();

        Interaction finalReport = client.create(executeParams);
        finalReport = waitForCompletion(client, finalReport.id());

        System.out.println("\n--- Final Research Report ---");
        printOutputText(finalReport);
    }

    private static Interaction waitForCompletion(GeminiInteractionsClient client, String id) throws Exception {
        Interaction interaction = client.get(id);
        while (interaction.status() != Interaction.Status.COMPLETED && interaction.status() != Interaction.Status.FAILED) {
            Thread.sleep(5000);
            interaction = client.get(id);
        }
        if (interaction.status() == Interaction.Status.FAILED) {
            throw new RuntimeException("Interaction failed. Status: " + interaction.status());
        }
        return interaction;
    }

    private static void printOutputText(Interaction interaction) {
        interaction.steps().stream()
            .filter(step -> step instanceof Step.ModelOutputStep)
            .flatMap(step -> ((Step.ModelOutputStep) step).content().stream())
            .filter(content -> content instanceof Content.TextContent)
            .forEach(content -> System.out.println(((Content.TextContent) content).text()));
    }
}
کد را اجرا کنید
mvn compile exec:java -Dexec.mainClass=com.example.CollaborativeResearch
خروجی گزارش تولید شده
عامل Deep Research یک گزارش جامع و ساختاریافته تولید خواهد کرد. میتوانید گزارش کامل تولید شده توسط مثال اجرا شده را اینجا مشاهده کنید:
۸. عاملهای سفارشی و سندباکسهای ابری
برای وظایف پیچیده توسعهدهندگان، میتوانید نمایندگان سفارشی (Custom Agents ) را فراهم کنید. شما دستورالعملهای سیستمی آنها را تعریف میکنید، آنها را به ابزارهایی (مانند اجرای کد/Bash) مجهز میکنید و محیط از راه دور آنها (مانند قوانین خروجی شبکه) را پیکربندی میکنید.
در این مرحله، شما یک عامل (agent) که دسترسی اینترنتی امن به github.com دارد، فراهم میکنید و به آن دستور میدهید که یک مخزن را کلون کند و فایلهای پیکربندی آن را در داخل جعبه شنی ابری خود تجزیه و تحلیل کند.
ایجاد GitHubAnalyzer.java
فایل src/main/java/com/example/GitHubAnalyzer.java را با محتوای زیر ایجاد کنید:
package com.example;

import io.github.glaforge.gemini.interactions.GeminiInteractionsClient;
import io.github.glaforge.gemini.interactions.model.*;
import io.github.glaforge.gemini.interactions.model.InteractionParams.AgentInteractionParams;
import java.util.List;

public class GitHubAnalyzer {
    public static void main(String[] args) throws Exception {
        GeminiInteractionsClient client = GeminiInteractionsClient.builder()
            .apiKey(System.getenv("GEMINI_API_KEY"))
            .build();

        String agentId = "github-analyzer-codelab";

        // 1. Define the Custom Agent with Network Egress and Tools
        Agent customAgent = Agent.builder()
            .id(agentId)
            .description("Clones and analyzes GitHub repos.")
            .baseAgent("antigravity-preview-05-2026")
            .baseEnvironment(new EnvironmentConfig(
                new EnvironmentNetworkEgressAllowlist(List.of(
                    new AllowlistEntry("github.com") // Allow git clone over HTTPS
                )),
                List.of()
            ))
            .systemInstruction("You are an architect. Clone the repo, inspect files, and write a summary.")
            .tools(List.of(
                new AgentTool.CodeExecution(), // Enables terminal bash execution in sandbox
                new AgentTool.GoogleSearch()
            ))
            .build();

        // 2. Provision the Agent
        System.out.println("Provisioning custom agent in the cloud...");
        client.createAgent(customAgent);

        try {
            // 3. Start the Interaction
            AgentInteractionParams params = AgentInteractionParams.builder()
                .agent(agentId)
                .input("Clone https://github.com/glaforge/gemini-interactions-api-sdk and explain its pom.xml structure.")
                .environment("remote") // Crucial: Run in cloud sandbox
                .build();

            System.out.println("Starting clone and analysis (polling status)...");
            Interaction interaction = client.create(params);

            // 4. Poll for completion
            while (interaction.status() != Interaction.Status.COMPLETED) {
                System.out.println("Agent working... Status: " + interaction.status());
                Thread.sleep(5000);
                interaction = client.get(interaction.id());
            }

            // 5. Output the results
            System.out.println("\n--- Architectural Analysis ---");
            interaction.steps().stream()
                .filter(step -> step instanceof Step.ModelOutputStep)
                .flatMap(step -> ((Step.ModelOutputStep) step).content().stream())
                .filter(content -> content instanceof Content.TextContent)
                .forEach(content -> System.out.println(((Content.TextContent) content).text()));

        } finally {
            // 6. Clean up resources
            client.deleteAgent(agentId);
            System.out.println("\nCustom agent resource deleted from cloud.");
        }
    }
}
کد را اجرا کنید
mvn compile exec:java -Dexec.mainClass=com.example.GitHubAnalyzer
خروجی تحلیل تولید شده
شما میتوانید گزارش کامل تحلیل معماری تولید شده توسط عامل سفارشی پس از کلون کردن مخزن را در اینجا مشاهده کنید:
۹. تبریک میگویم!
شما آزمایشگاه کد را به پایان رساندهاید و یاد گرفتهاید که چگونه با استفاده از کیت توسعه نرمافزار Gemini Interactions، گردشهای کاری پیچیده، چندوجهی و عاملمحور را در جاوا بسازید.
آنچه شما به انجام رساندهاید:
- پیمایش معماری مرحلهای : از معماری مرحلهای چندریختی جدید برای پرسوجو از مدلهای استاندارد استفاده شد.
- TTS رسا و گویا : از یادداشتهای کارگردان و تگهای احساسی درونخطی برای پخش صدا در زمان واقعی استفاده میشود.
- موسیقی تولید شده : آهنگها و اشعار MP3 با Lyria 3 تولید شدهاند.
- یادداشتهای طراحی تولید شده : خلاصههای بصری با استفاده از Gemini 3 Pro Image (Nano Banana Pro) ایجاد شد.
- هدایت تحقیقات عمیق : استفاده از برنامهریزی مشارکتی برای اصلاح برنامههای تحقیقاتی.
- عوامل سفارشی ارائه شده : محیطهای سندباکس شده با کنترل خروجی شبکه سفارشی ایجاد شده تا کد به صورت ایمن اجرا شود.
بیشتر بدانید:
- کد منبع SDK و موارد آزمایشی بیشتر را در GitHub بررسی کنید: glaforge/gemini-interactions-api-sdk
- برای اطلاعات بیشتر در مورد الگوهای طراحی عاملمحور، به وبلاگ Guillaume مراجعه کنید: glaforge.dev