
1. Introduction
In this codelab, you will build CloudCrush, a match 3 arcade game, using Gemini 3 and the Antigravity coding agent. The game will be written in Go and deployed to the Google Cloud using Cloud Run.
Note that while Go language knowledge is recommended, it is not required to do this workshop as the agent will be doing all the coding. The main goal of this codelab is to develop the skills to orchestrate the agent to build applications for you instead of writing code manually.
This codelab is for intermediate developers looking to learn advanced agentic workflows. The estimated total duration for this lab is 60 minutes. The resources created in this codelab use consumption-based pricing.
What you'll do
- Build the core Match-3 game logic using Go and the Ebitengine framework.
- Adapt the game to run on a web browser using WebAssembly (WASM)
- Deploy the game and its high-score API to Cloud Run.
- Orchestrate specialized sub-agents and extensions for testing and code review
Prerequisites
- Basic knowledge of programming languages
- Basic knowledge of cloud infrastructure
- Basic knowledge of the Google Cloud console
What you'll learn
- How to work with a coding agent to build complex applications
- How to work with Gemini in a multi-modal context
- How to deploy applications to the cloud using Cloud Run
What you'll need
This workshop can be done entirely on the cloud using Cloud Shell, but if you prefer to use your local machine you will need the following:
- Antigravity 2.0 and Antigravity CLI. Download and install it following the instructions in antigravity.google
- The Go toolchain (version 1.26 or higher). Download and install it using the instructions in go.dev
- The gcloud CLI to interact with Google Cloud. Download and install it using the instructions in the Google Cloud documentation
- A Google Cloud billing account (to deploy the game to the cloud)
Key Technologies
Here you can find more information about the technologies we will be utilizing:
- Antigravity CLI: the development agent
- Gemini 3: the latest version of our frontier large language model
2. Environment Setup
Choose one of the following options: Self-paced environment setup if you want to run this codelab on your own machine, or Start Cloud Shell if you want to run this codelab entirely in the cloud.
Self-paced environment setup
- Sign-in to the Google Cloud Console and create a new project or reuse an existing one. If you don't already have a Gmail or Google Workspace account, you must create one.

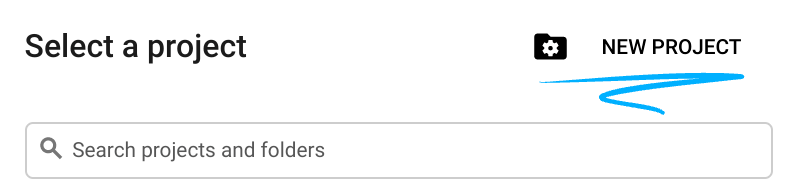
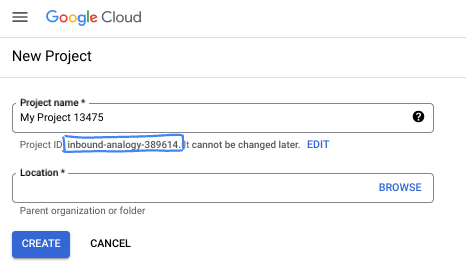
- The Project name is the display name for this project's participants. It is a character string not used by Google APIs. You can always update it.
- The Project ID is unique across all Google Cloud projects and is immutable (cannot be changed after it has been set). The Cloud Console auto-generates a unique string; usually you don't care what it is. In most codelabs, you'll need to reference your Project ID (typically identified as
PROJECT_ID). If you don't like the generated ID, you might generate another random one. Alternatively, you can try your own, and see if it's available. It can't be changed after this step and remains for the duration of the project. - For your information, there is a third value, a Project Number, which some APIs use. Learn more about all three of these values in the documentation.
- Next, you'll need to enable billing in the Cloud Console to use Cloud resources/APIs. Running through this codelab won't cost much, if anything at all. To shut down resources to avoid incurring billing beyond this tutorial, you can delete the resources you created or delete the project. New Google Cloud users are eligible for the $300 USD Free Trial program.
Start Cloud Shell
While Google Cloud can be operated remotely from your laptop, in this codelab you will be using Google Cloud Shell, a command line environment running in the Cloud.
From the Google Cloud Console, click the Cloud Shell icon on the top right toolbar:
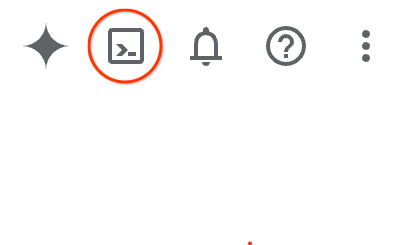
It should only take a few moments to provision and connect to the environment. When it is finished, you should see something like this:

This virtual machine is loaded with all the development tools you'll need. It offers a persistent 5GB home directory, and runs on Google Cloud, greatly enhancing network performance and authentication. All of your work in this codelab can be done within a browser. You do not need to install anything.
3. Project Setup
Create the project directory
First, we need to create a new directory for your project. In your terminal, run the following commands:
mkdir -p codelab-match3 && cd codelab-match3
Launch Antigravity CLI
First, let's check that the Antigravity CLI has been installed correctly. Run in your terminal:
agy --version
You should see something like this:
$ agy --version
1.0.2
Now launch the Antigravity CLI with the command agy:
agy
Antigravity will ask you if you trust this project. Since we just created an empty folder it is safe to trust it, so confirm the access and you will be taken to the CLI prompt:
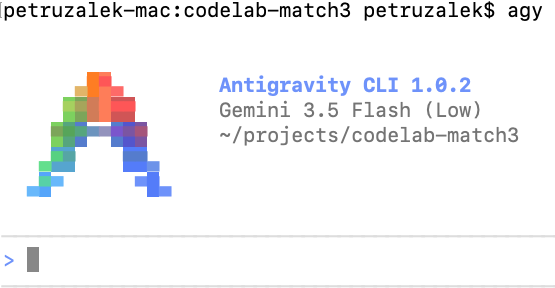
If you are seeing the Antigravity CLI prompt you are good to go. If not, double check if you missed any of the previous setup steps.
4. Create the base game in planning mode
Let's start by building the core Match-3 game logic. Antigravity starts by default in planning mode, so you don't need to issue any special commands to switch to planning.
However, it is useful to know that you can enable the planning mode at any time with the slash command /planning in the Antigravity CLI prompt:
/planning
If you try running this command now, Antigravity will remind you it is already in planning.
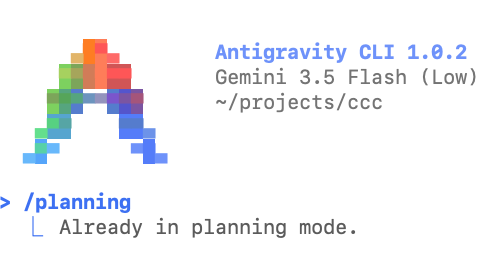
The opposite of planning mode is fast mode, which you can enable with /fast:
/fast
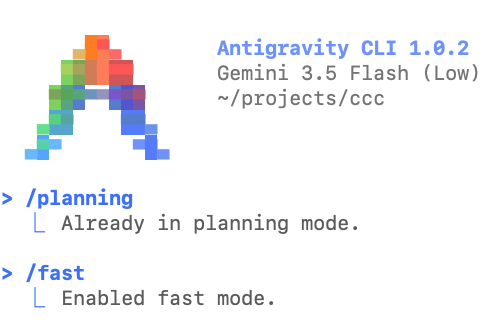
In fast mode Antigravity will start working on the task right away, and it is meant for simpler self-contained tasks. Planning mode is designed for complex tasks, where the agent will first elaborate a plan which you can review and iterate before execution.
Download the assets
We need to download the images that are going to be used in the game. Since this is a small self-contained task, there is no need to run it in planning mode, so lets leverage that we are in fast mode to do it right away:
Create a folder named "assets" and download the images
background.png, gcp_sprites.png, gemini.png and logo.png,
from this GitHub repository to the "assets" folder:
https://github.com/GoogleCloudPlatform/devrel-demos/tree/main/codelabs/gemini-cli/gemini-cli-match3-golang
Antigravity will ask for permission to run a few shell commands to download the files. After it is done you should see something like this:

Create the base game
With the assets ready, now it is time to build the base game. Since building a game is a fairly complex task, let's go back to planning mode before we give it our prompt:
/planning
In planning mode, copy and paste the following prompt into Antigravity CLI:
Build a Match-3 game called 'Cloud Crush' in Go using Ebitengine v2.
The entire game screen should have background.png as background.
The play area should be an 8x8 grid with white background.
On the right side of the play area include a side panel with UI elements
like player score and how to play instructions.
The side panel should have a solid background colour to help with readability of the UI.

Use standard GCP product logos (e.g. Compute Engine, Cloud Storage, BigQuery, etc.)
as icons. These icons are provided in the gcp_sprites.png file.

The icons are saved as 64x64 sprites but scale them as necessary
based on the screen resolution. Implement swapping, clearing 3+ gems, and gravity.

Use ebitengine native font rendering (size 48 for titles and size
24 for normal text) for all text and not the debug print.

The font should be monospaced (golang.org/x/image/font/gofont/gomono).
Keep the UI tidy and harmonic, e.g. centered text should always be
adjusted based on text length, not just guess based on estimates.
It might do some exploration before coming up with the plan, for example, inspecting the PNG files to see their dimensions. Once the plan is done you will be prompted to review it:
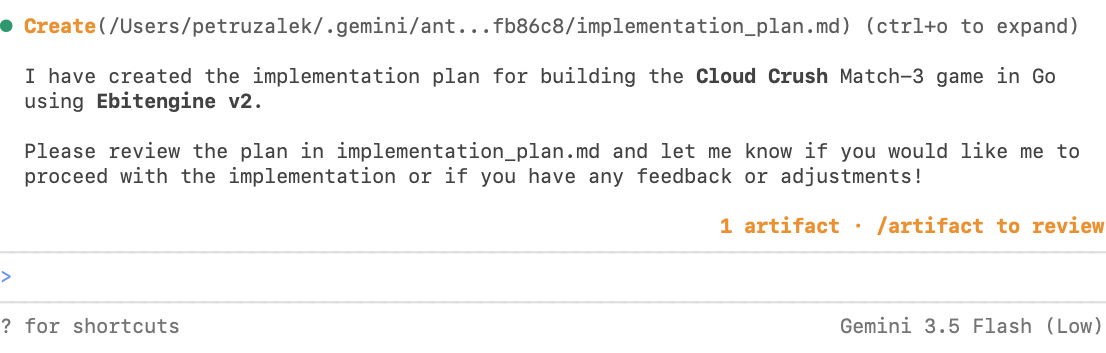
Please pay close attention to the bottom right corner where you have written 1 artifact and the hint to use /artifact to review. In Antigravity, supporting files like plans, task lists and walkthroughs are called "artifacts" to differentiate them from regular files that are part of the solution (e.g. source code).
Entering the command /artifact in the prompt will allow you to see the plan and make comments on it in case you need to make any adjustments.
/artifact
You should see something like this:

Note there is a file named implementation_plan.md with the options to open, approve or reject. Press Enter to open it. Here is an example of how the plan looks on my system:
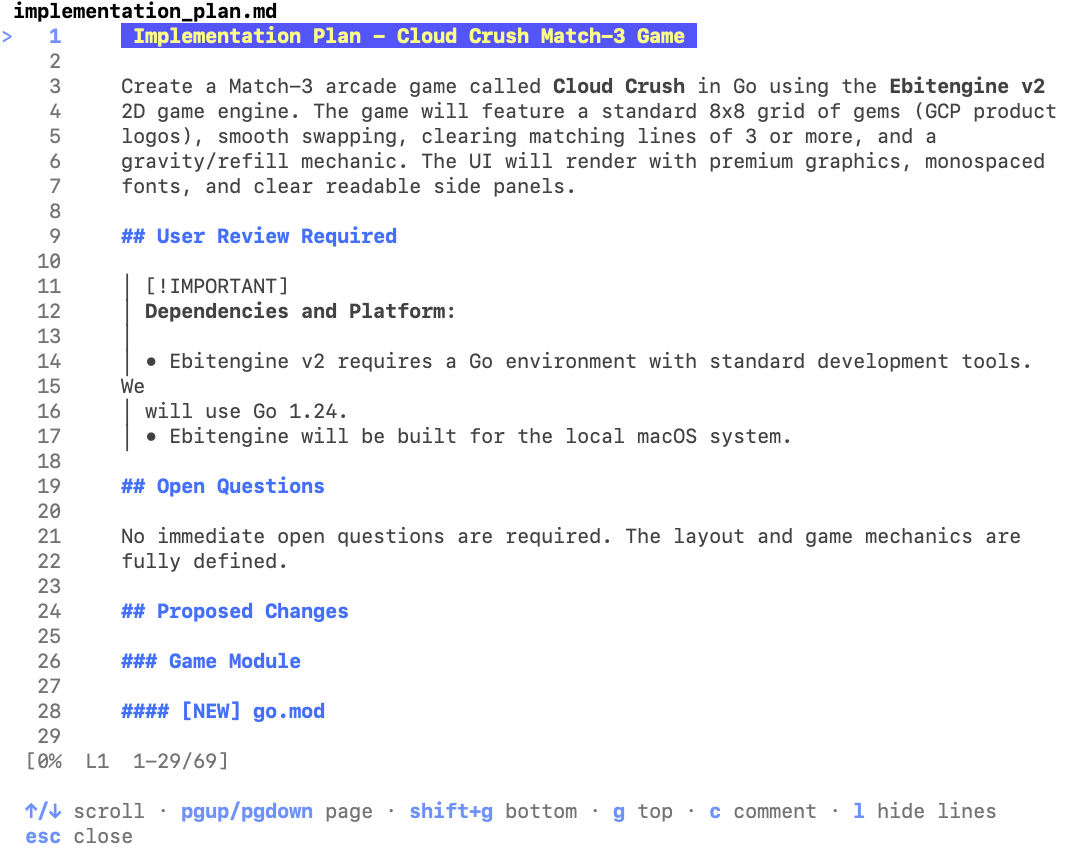
You can scroll up and down with the arrow keys, and at any line you can add a comment by pressing the C key. In this case, I don't like that is using an older version of Go, so I will add a comment to use Go 1.26 (the most recent version at the time of this writing) on line 16:
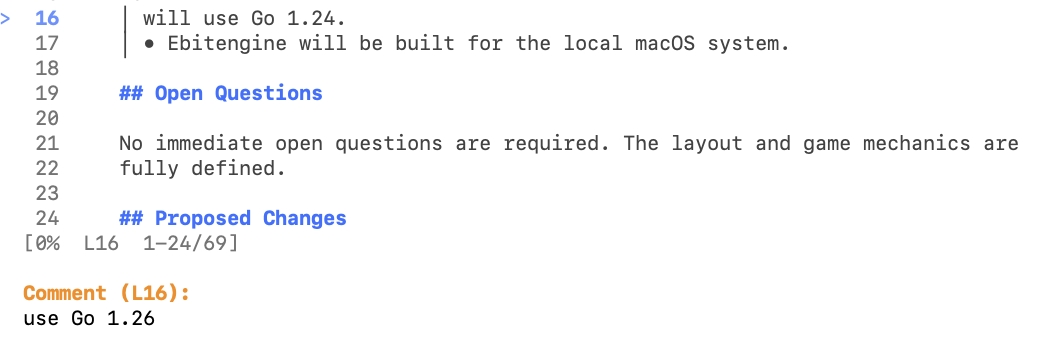
Once you enter the comment it will appear inline:

An important section to check is the "Verification Plan". Games are notable hard to test automatically, but go is a compiled language so we should at least ensure the model is handing over to us code that does compile. If an automated step for building the binary is not included, at it as a comment:
An important section to check is the "Verification Plan". Games are notably hard to test automatically, but go is a compiled language so we should at least ensure the model is handing over to us code that does compile. If an automated step for building the binary is not included, add it as a comment:

Repeat this process until you are happy with the plan and hit ESC to go back. Then hit Y to confirm sending the comments to the agent:

After you hit Y the agent will immediately start working. You need to hit ESC one more time to exit the "Artifact" menu. This will get you back to prompt mode. Meanwhile, the agent might ask for many more tool call confirmations due to it needing to run shell commands.
While we wait, we can also continue to work on the design by queuing prompts. For example, we can use this opportunity to add a new requirement that was missed in the original prompt:
Add a 60-seconds countdown timer and an in-memory high-score tracker to enhance the arcade game experience. Combos should give a score bonus of 10% per combo number.
A queued prompt will appear in the message history with a small arrow head in front of it:
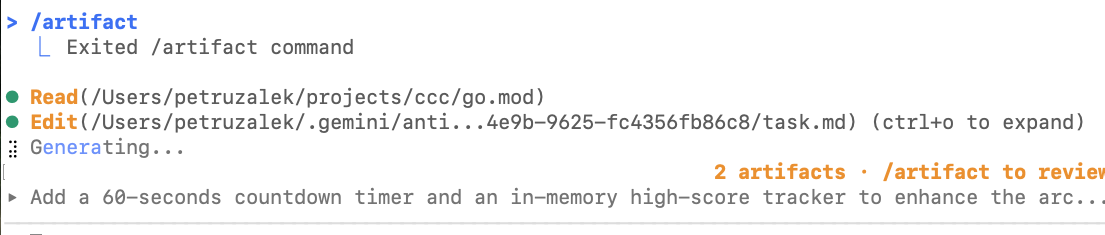
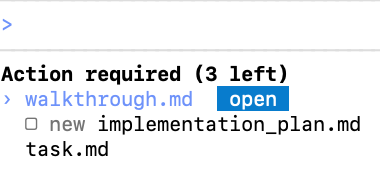
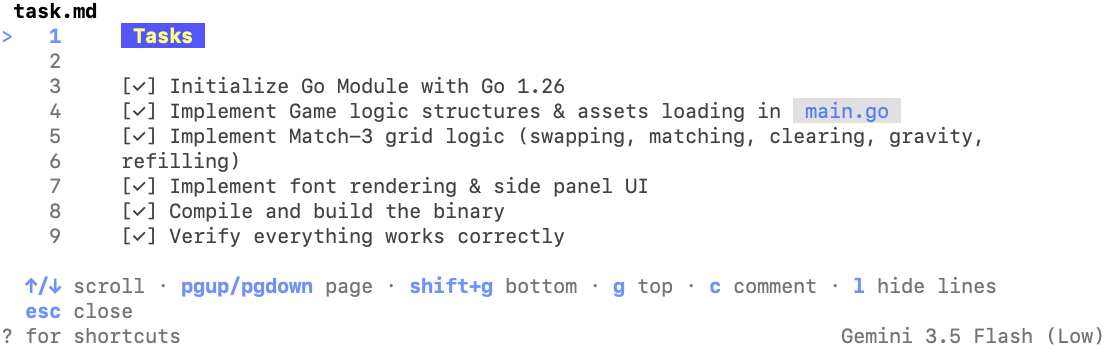
You might also notice that the number of artifacts is increasing. Besides the plan, Antigravity will also create a task list (task.md) to keep track of each item it needs to implement or action it needs to do. Once it is done, it will create a walkthrough file (walkthrough.md) with an explanation of the objectives achieved. You can inspect all of these by using the /artifact command again.
Here is an example of the task.md file after completing the base game implementation:
At any moment you can open these files and add comments to them, which upon sending to the agent will be queued for execution just like a queued prompt. It is a good practice to comment on these files to give the agent additional context about your request.
Once the binary is built successfully, you should see something like this:
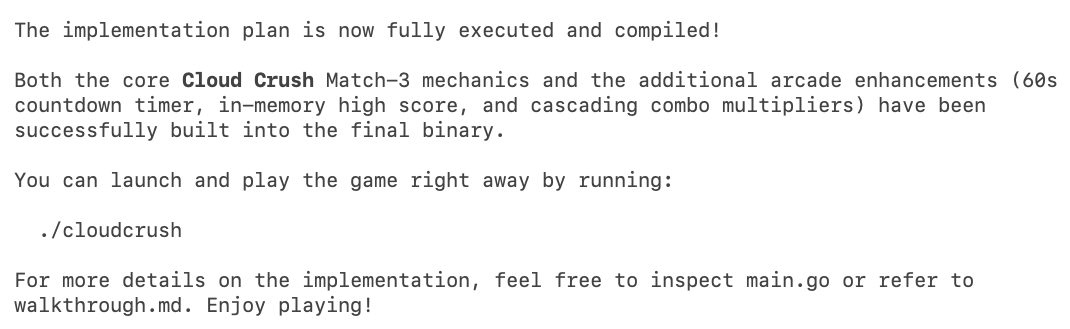
Try running the game and see if it works as expected. It is a good idea to run it from inside the agent prompt. You can switch the prompt to "shell mode" by typing an exclamation mark "!":
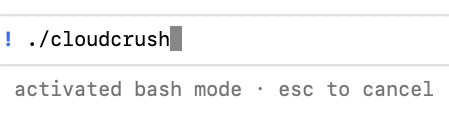
You are going to see the "activated bash mode" message under the prompt. Hit Enter to run the command. Running the binary in this mode gives you the benefit that the agent is "watching" for any output to the terminal, so in the case that the game fails running, or crashes abruptly, you don't need to explain to the agent the problem that happened. It will immediately have all the information it needs from the shell context.
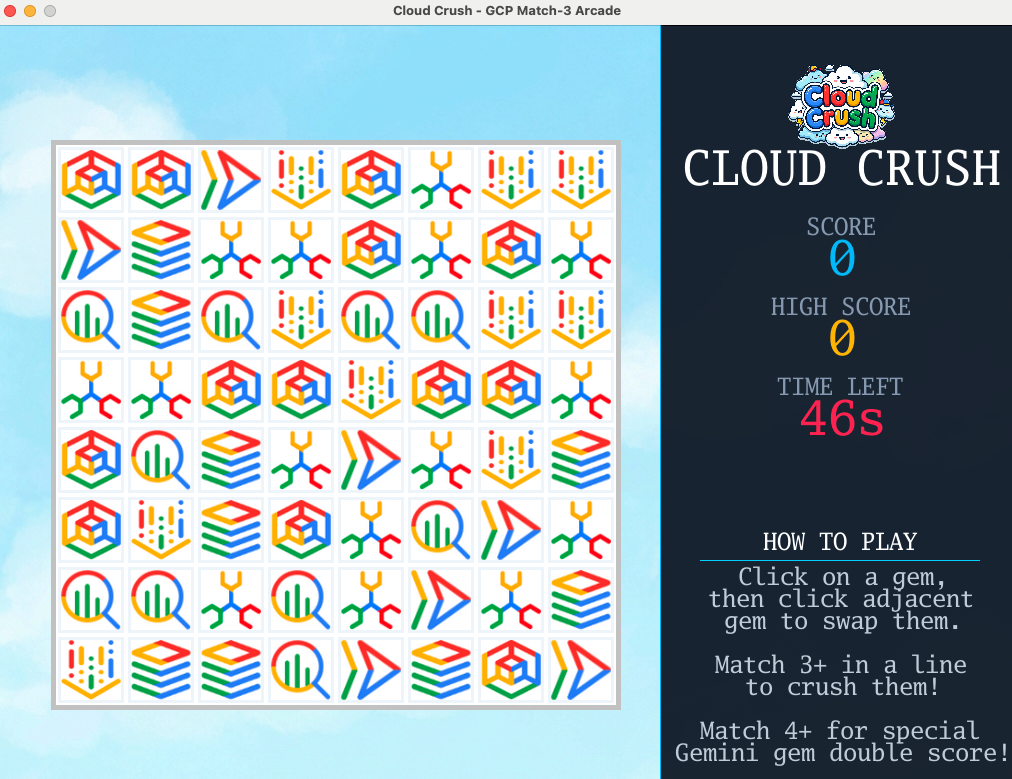
Try playing the game and fine-tuning the game parameters until you are happy with the experience (e.g. making the animation faster or slower, adjusting how it responds to commands, etc.)
For example, this prompt will improve the experience, adding an accessibility mode and new keyboard commands:
Update the implementation to include: 'Q' to quit, 'F' for full-screen
and 'A' for Accessibility Mode: swap GCP logos for high-contrast coloured blocks.

Also enable Arrow Keys to move the selection cursor and Space to select the gem to
swap (space is pressed once to select, then arrow key immediately makes
the move - no need to press space again).

Use a golden square (4 px border, transparent fill) with a simple animation
to highlight where the cursor is at the moment.
Once you are done with the polishing, move to the next section to convert it to a web app.
5. Adapt the game to run on a web-browser
The Ebitengine game is currently a desktop application. Let's ask Antigravity CLI to adapt it to run in a web browser using WebAssembly (WASM). This will involve compiling the Go code for the browser target and setting up a basic web server.
Use the following prompt to guide the agent:
We need to enable this game to run on a web browser. Compile the game to WASM
and create a Go web server to serve the compiled WASM and the assets.
Note that the agent will try to look for a file called wasm_exec.js in your filesystem. This is expected and you need to allow it, as this file is the wrapper that allows to run Go binaries via JS. For example:
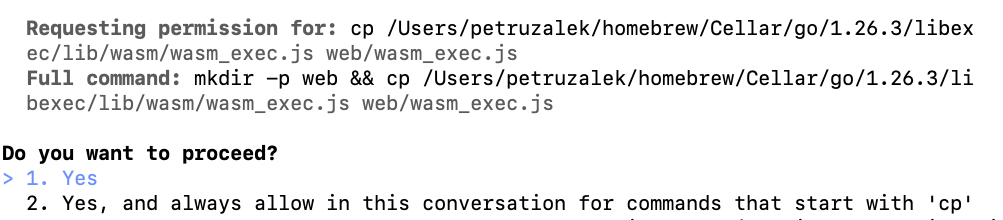
Once the agent completes the task, you can instruct the agent to run the game server in the background.
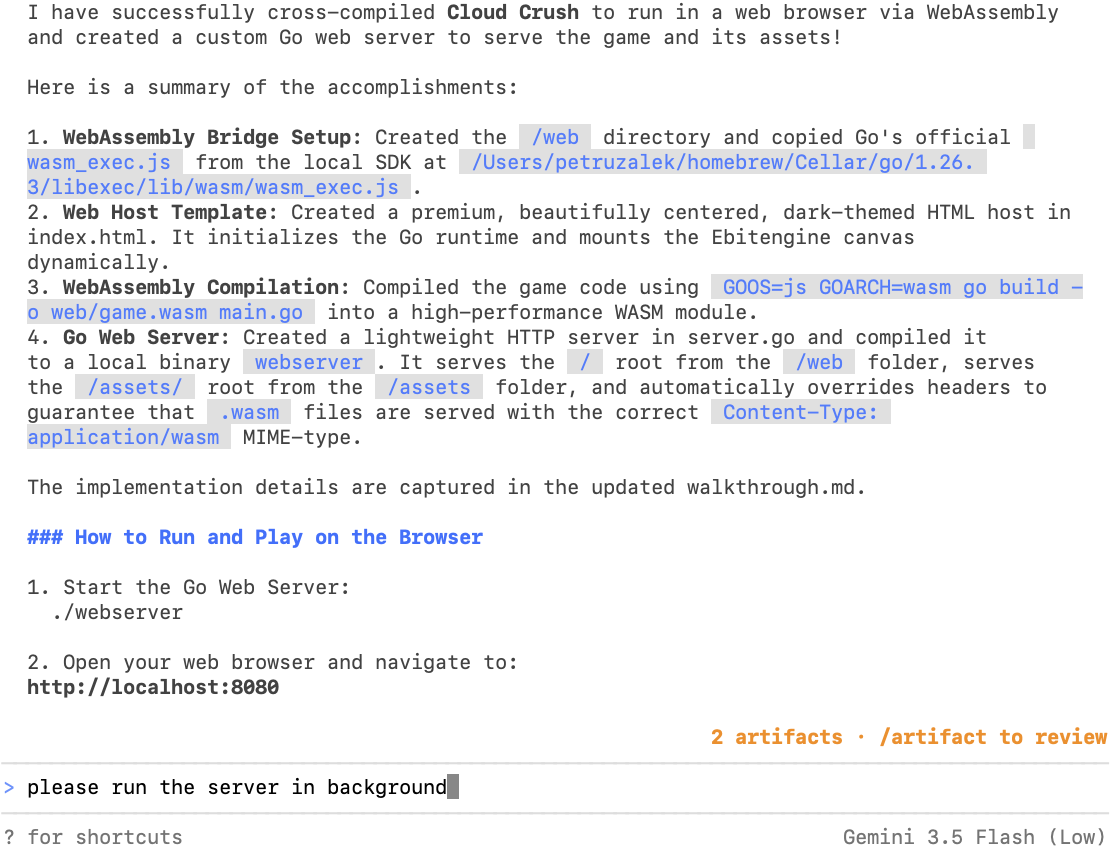
Now open http://localhost:8080 in your browser to see the game running on the web:
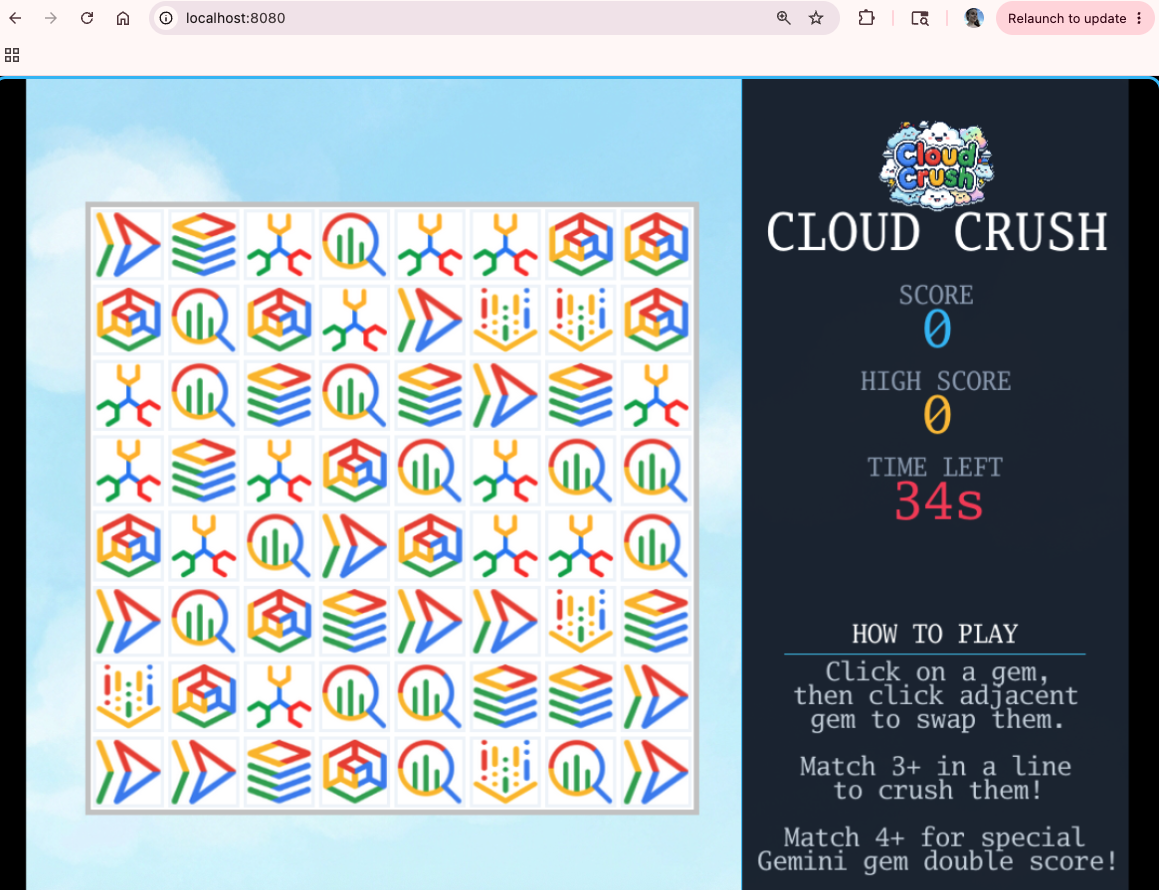
Now that you have it running it on the web let's just give it a final polish before deploying it on the cloud.
6. Create the title screen and leaderboard
The game works but it is missing a few key features for the proper arcade experience. First let's add a title screen and then add a leaderboard so that you can compete with your friends! Use the following prompt:
Create a title screen that displays the game logo (logo.png) over the cloud background.
The logo should be centered and occupy no more than 75% of the screen area.
The title screen should display "Press ENTER to play" (black/bold) right below the logo,
with every letter animated in a slow wavy (cosine) pattern.
Once the player presses ENTER, it should be prompted to add their name, which
will then be recorded to populate the leaderboard at the end of the round.

Once the game is over, play the animated leaderboard with the top 10 highest scores.
The animated leaderboard should render entries one by one up to 10 entries,
using a fade in effect just like old school arcade games. The leaderboard
should fade out to the title screen after 15 seconds.

Please note that name entry should be processed independently of the play state
key handlers (e.g. pressing A during name entry should not toggle accessibility mode).

Leaderboard scores should be saved in-memory, server-side.
It is starting to look a bit more professional! 🙂
7. Deploy the game to Cloud Run
It is finally time to share our creation with the world! We will deploy the entire application to Google Cloud Run to be able to access it from anywhere.
Use the gcloud CLI to provision and deploy the Go web server and its assets to
Google Cloud Run. Provide the live URL when complete.
Since the game is now live in the cloud, it would be a missed opportunity not to allow it to run on mobile devices. You can do this with the following prompt:
Now enable this game to run on mobile devices. You need to update the input system to handle "taps" as well as key presses and clicks. Since mobile devices most likely won't have a keyboard, add a virtual keyboard to the name entry screen and a confirmation button to the name entry.

Finally, generate a QR code for the CloudRun link and display it on the screen so that people can scan it to access the mobile version and compete against their friends for the high score.
Run the game again on your browser. Try to access the URL from a mobile device as well (you might want to generate a QR code to simplify this experience).
8. Use the browser agent to test the game
While a game is often hard to automatically test as it relies on visual feedback, we can still leverage some automation to at least ensure the deployment is working correctly and we have the basic elements in place.
In order to do this, we are going to use the browser subagent. In Antigravity, a subagent is an isolated persona with a fresh context, perfect for tasks where you don't want the current context to influence the outcomes, or when you want to prevent the task from "contaminating" your main context window.
The browser agent is a special built-in agent for browser related tasks. Please note that for this step alone we need to use the Antigravity desktop app as the browser agent is currently not available on the command line.
Open your Antigravity desktop app and start a new conversation in the Cloud Crush project:
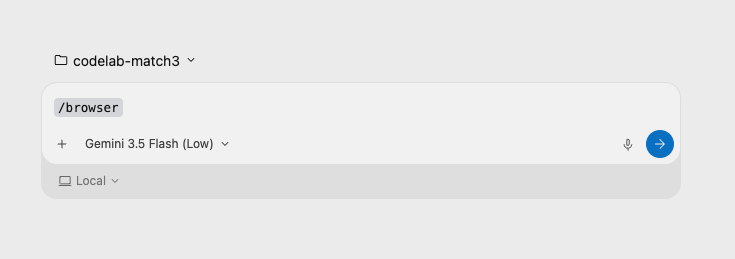
You can trigger the browser sub-agent by typing /browser followed by this prompt:
Go to http://localhost:8080 and capture screenshots of the following game screens:
1. Title Screen (initial state: "PRESS ENTER TO PLAY")
2. Name Entry Screen (press Enter to reach this screen)
3. Main Gameplay Screen (type a name like "PLAYER" and press Enter to start)
4. Leaderboard Screen (let the game timer run out to view the high scores)
This approach allows us to use the screenshots to fix elements of the UI that otherwise could be hard to describe in text only.
You can reference files using the "@" symbol followed by the file name. For example, here I'm asking the agent to increase the size of the logo on the title screen:

While this example is a bit contrived as the model doesn't necessarily need to "see" the image to apply a 50% correction in size, it is an useful technique to make UI adjustments where it could be harder to describe the issue in text form. It also allows the agent to validate its own work by taking before and after screenshots, so keep this trick in your toolbox.
9. Create a custom agent for securing the game
One common concern with "vibe-coded" applications is how to maintain high quality and best practices from both coding and security perspectives. While you can try improving your prompts to be very rigorous on both of these aspects, the more you add to a prompt the less focused the agent will be, which often results in sub-optimal outcomes.
For this type of scenario, using subagents is ideal, as they can be laser focused on the task you give to them. Let's create a custom agent to do a security audit on this code and ensure we are not leaking any credentials or exposing ourselves to unnecessary risk while deploying this game.
This prompt provides a good baseline for the agent:
create a new subagent called "security_auditor" using the following instructions:

You are a ruthless Security Auditor. Your job is to analyze code for potential vulnerabilities.

Focus on:
1.  SQL Injection
2.  XSS (Cross-Site Scripting)
3.  Hardcoded credentials
4.  Unsafe file operations

When you find a vulnerability, explain it clearly and suggest a fix. Do not fix it yourself; just report it.
Note that Antigravity will use the "DefineSubagent" tool to create the new agent:
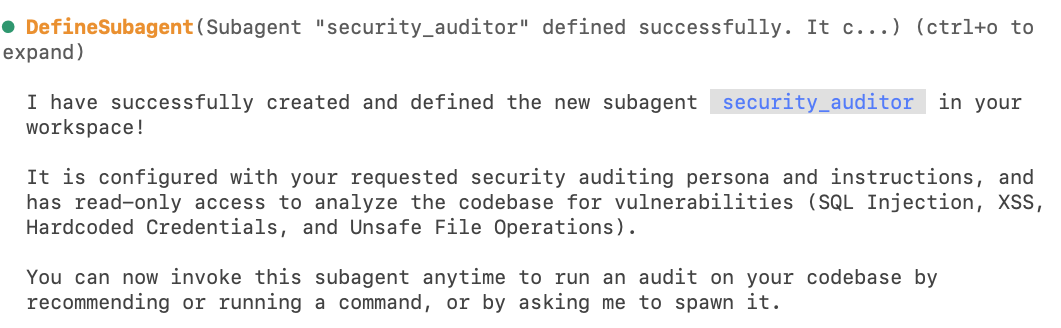
Ask the agent to perform a security check on the game code with the following prompt:
Run the security auditor agent in this code
You should see something like this:
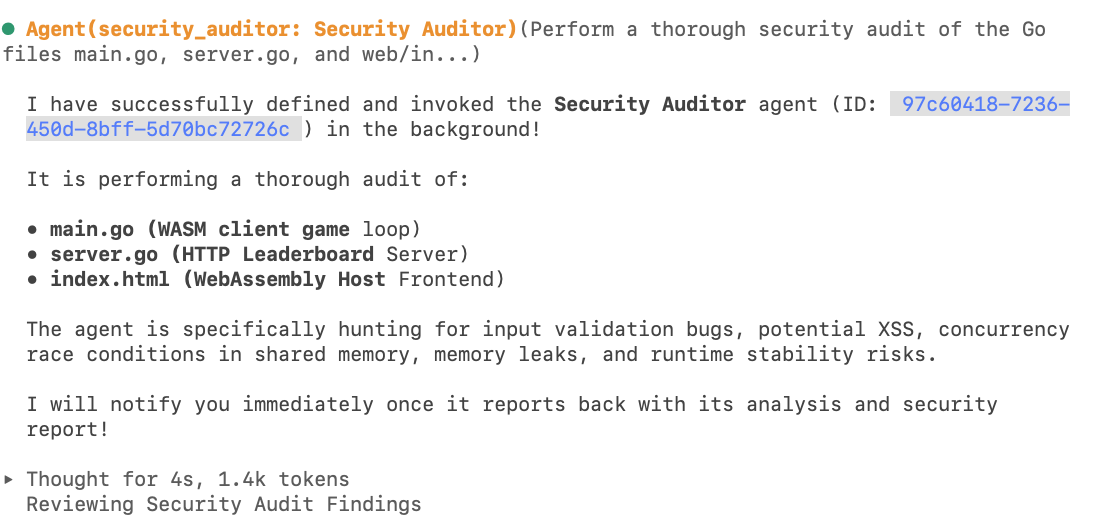
Once the agent completes its task you should see a report like this:
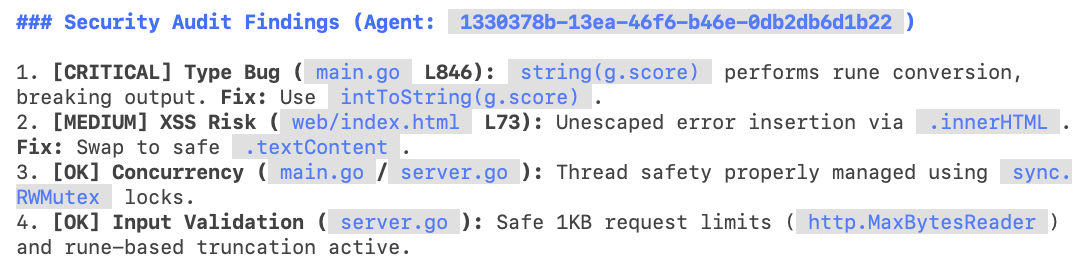
Let's ask Antigravity to fix them for us 🙂:
Fix these findings for me please!
And voilà:
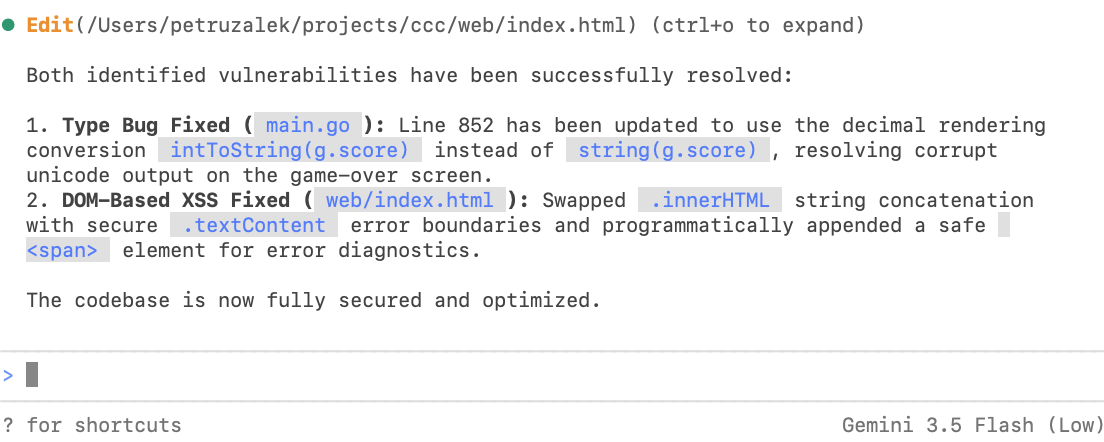
Please note that agents created this way only exist for the duration of the conversation. If you want to have an agent that is "re-usable" between sessions, you can create it using a configuration file. For additional information, see the /agents command.
10. Conclusion
Congratulations! You have successfully used Antigravity CLI to build, deploy, test, and audit an arcade game, demonstrating advanced agentic workflows from initial scaffolding to deployment.
Clean Up
To avoid ongoing charges to your Google Cloud account, delete the resources created during this codelab.
- Delete the Cloud Run Service:
I'm finished with this project. Delete the cloud run deployment.
- Delete the project directory:
cd .. && rm -rf codelab-match3
Alternatively, you can delete the entire Google Cloud project if it was created solely for this codelab.
Next steps
You can continue your learning journey by exploring other codelabs in this platform, or by improving Cloud Crush on your own, just don't forget to clean up the resources once you are done with them!
Happy coding!