
1. Introduction
In this hands-on lab you will practice modern development skills by orchestrating Antigravity to build a complete cloud-based application. and learn how to use the Developer Knowledge MCP and agent skills to improve the agent knowledge and output quality.
We are building the "Cat Delivery System", an application that generates cat images using Gemini 3.1 Flash Image, also known as Nano Banana 2. The application backend will be developed using the Antigravity SDK and deployed to Cloud Run. We are also going to create a modern frontend using lit and vite. All of this without writing a single line of code manually.
What you'll learn
- How to work with Antigravity CLI in fast and planning mode
- How to give Antigravity access to Google developer documentation using the Developer Knowledge MCP server
- How to install custom skills into Antigravity CLI
- How to use Antigravity to deploy and audit applications
Prerequisites
- Experience with using a terminal
- Reading and understanding code
- Basic knowledge of AI coding agents
- Basic understanding of cloud concepts
2. Setup
Follow the instructions below to initialize the Google Cloud Project needed for this codelab. After initializing the project, it is recommended that you run this codelab on Cloud Shell, as it comes with all the tools needed to run it out of the box.
If you prefer to run this codelab in your local environment you will need to install python, uv and a code editor before proceeding. All the instructions in this codelab assume you are running it in Cloud Shell unless mentioned otherwise.
Self-paced environment setup
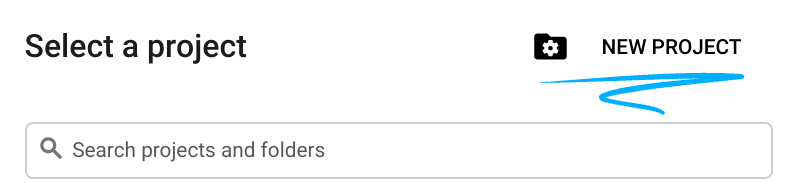
- Sign-in to the Google Cloud Console and create a new project or reuse an existing one. If you don't already have a Gmail or Google Workspace account, you must create one.

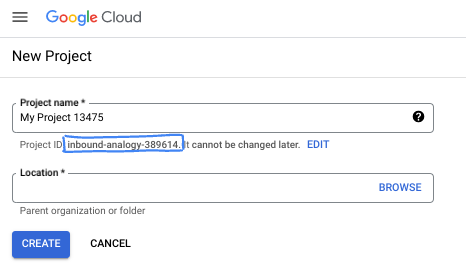
- The Project name is the display name for this project's participants. It is a character string not used by Google APIs. You can always update it.
- The Project ID is unique across all Google Cloud projects and is immutable (cannot be changed after it has been set). The Cloud Console auto-generates a unique string; usually you don't care what it is. In most codelabs, you'll need to reference your Project ID (typically identified as
PROJECT_ID). If you don't like the generated ID, you might generate another random one. Alternatively, you can try your own, and see if it's available. It can't be changed after this step and remains for the duration of the project. - For your information, there is a third value, a Project Number, which some APIs use. Learn more about all three of these values in the documentation.
- Next, you'll need to enable billing in the Cloud Console to use Cloud resources/APIs. Running through this codelab won't cost much, if anything at all. To shut down resources to avoid incurring billing beyond this tutorial, you can delete the resources you created or delete the project. New Google Cloud users are eligible for the $300 USD Free Trial program.
Start Cloud Shell
While Google Cloud can be operated remotely from your laptop, in this codelab you will be using Google Cloud Shell, a command line environment running in the Cloud.
From the Google Cloud Console, click the Cloud Shell icon on the top right toolbar:
It should only take a few moments to provision and connect to the environment. When it is finished, you should see something like this:

This virtual machine is loaded with all the development tools you'll need. It offers a persistent 5GB home directory, and runs on Google Cloud, greatly enhancing network performance and authentication. All of your work in this codelab can be done within a browser. You do not need to install anything.
3. Setting up and authenticating Antigravity CLI
In this lab you'll work with Antigravity (AGY). Google's coding agent that uses Google's Gemini models to help you build software. There's an AGY desktop application, a command line interface (AGY CLI), and an integrated development environment (IDE) that allows you to view and edit code together with the agent. In this lab, you'll be using the AGY CLI.
Additionally, there's also an SDK for building your own general purpose agents using the Antigravity agent harness (think of the harness as the engine of Antigravity).
Launching and authenticating AGY
Press the Open editor button to open the Cloud Shell Editor.

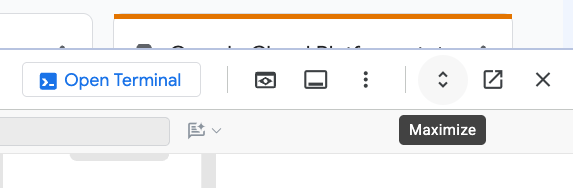
Once the editor is open, you can maximize the window using the maxime button in the menu bar:
Open the terminal panel using the menu Terminal > New Terminal or using the hotkey Ctrl+` (control plus backtick):
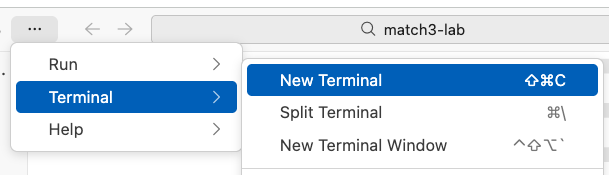
A new terminal window should open at the bottom of the screen showing the bash prompt:

Then, in the terminal, create a working directory for your first exercise and change into it:
mkdir -p ~/hello-agy && cd ~/hello-agy
In this terminal, type agy to launch Antigravity CLI:
agy
Once agy launches it will ask you to authenticate. Choose Use a Google Cloud project:
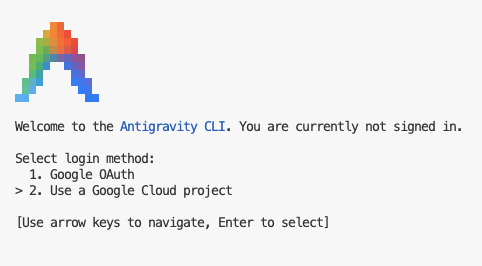
The screen now shows a link. Copy the provided link and paste it into another tab in your incognito browser.
Use the same student credentials provided for this lab to log in.
Copy the authorization code and paste it back into agy:
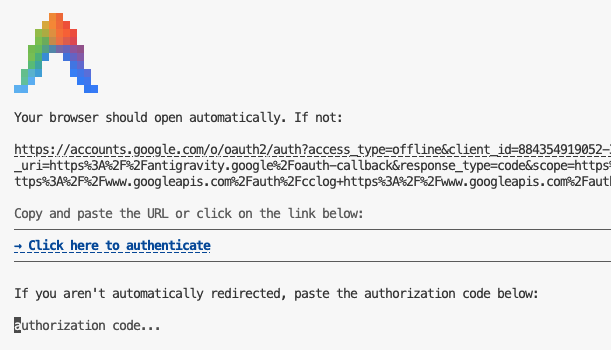
When asked for a Project ID you should use the Project ID displayed on the side panel of this page.
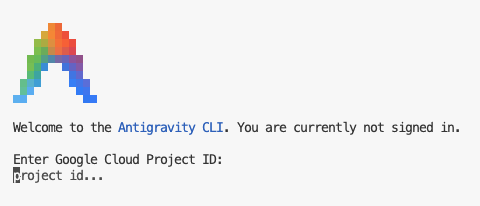
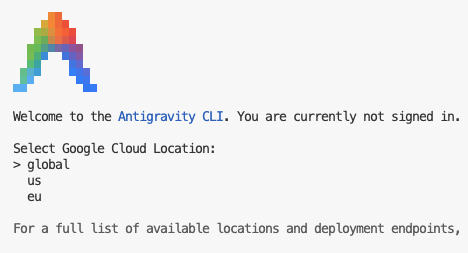
Finally, select Google Cloud Location global:
Generate a quick script to return cat trivia
Now, let's generate a quick script to get a feeling for how AGY CLI works.
Ask AGY to write a short script that returns cat facts, and run it for you:
Write a simple node script that returns cat trivia and run it for me
AGY will think for a while and write the script for you.
When AGY requests permission to run the node script, choose Yes and hit Enter.
This is how the permission request looked like for me:
Requesting permission for: node cat-trivia.js

Do you want to proceed?
> 1. Yes
  2. Yes, and always allow in this conversation for commands that start with 'node cat-trivia\.js'
  3. Yes, and always allow for commands that start with 'node cat-trivia\.js' (Persist to settings.json)
  4. No
After it runs the script, AGY gives you a summary of what it did. Here's what it told me:
I have created and executed a simple Node.js script that returns cat trivia.

### Created File

• cat-trivia.js: A standalone Node.js script that fetches random cat facts from a public API ( https://catfact.ninja/fact ) with built-in fallbacks and ASCII art.

### Execution Output

Running the script using  node cat-trivia.js  produced the following output:

     _._     _,-'""`-._
    (,-.`._,'(       |\`-/|
        `-.-' \ )-`( , o o)
              `-    \`_`"'-

    🐱 Here is your Cat Trivia:
    ----------------------------------------
    "In 1987 cats overtook dogs as the number one pet in America."
    ----------------------------------------
I like that it even added an ASCII drawing of a cat for me.
Now, you might want to learn more about what it created for you. While you can open the editor and inspect the source code (I would certainly encourage you to do so), you can also ask AGY to annotate and explain the code to you:
Explain the code you generated please
Read the explanation and ask follow up questions if you want to know more.
Finally, to finish this task, close agy by pressing Ctrl+D twice.
4. Connect and query Google Developer documentation
While agents and models are getting smarter every day, the response quality is highly dependent on the accuracy and how up to date their knowledge is. This is why it is important to give the agent tools to retrieve up-to-date developer documentation from an authoritative source, so it can avoid making incorrect decisions based on internal knowledge or guesswork.
The Google Developer Knowledge MCP server gives coding agents the ability to search Google's official developer documentation for Firebase, Google Cloud, Android, Maps, and many more Google products.
By connecting your agent directly to Google's official library of documentation, you make sure the code and guidance it uses is up-to-date and based on authoritative context.
To get started, enable the Developer Knowledge API:
gcloud services enable developerknowledge.googleapis.com
Setup and configure the Developer Knowledge MCP server
Follow the steps below to create the workspace for this project and configure the Developer Knowledge MCP server for Antigravity:
The Antigravity configuration files for your user are stored in the .gemini folder in your home directory. The diagram below shows a simplified version of it with the main elements you will find:
~/.gemini
├── antigravity/
├── antigravity-cli/
│   ├── brain/            # Conversations and artifacts
│   └── settings.json     # CLI settings
├── config/
│   ├── plugins/          # Global / shared plugins
│   └── mcp_config.json   # Global / shared MCP config
├── skills/               # Global / shared skills
│   └── {skill_name}/
│       ├── SKILL.md      # Skill definition
│       └── ...           # [optional] support files, scripts, etc.
└── GEMINI.md             # Global rules
To add the Developer Knowledge MCP Server to AGY CLI, edit the mcp_config.json file in the ~/.gemini/config folder.
First, make sure the config folder exists and create an empty mcp_config.json file:
mkdir -p ~/.gemini/config && touch mcp_config.json
Then open this file on the Cloud Shell editor using the command below:
cloudshell edit ~/.gemini/config/mcp_config.json
Finally, add the following configuration to mcp_config.json. Please note that you need to replace [[PROJECT_ID]] with your actual project ID. You can find your project ID in the side panel of these instructions.
~/.gemini/config/mcp_config.json
{
  "mcpServers": {
    "google-developer-knowledge": {
      "url": "https://developerknowledge.googleapis.com/mcp",
      "authProviderType": "google_credentials",
      "oauth": {
        "scopes": [
          "https://www.googleapis.com/auth/cloud-platform"
        ]
      },
      "timeout": 30000,
      "headers": {
        "X-goog-user-project": "[[PROJECT_ID]]"
      }
    }
  }
}
Now you can check if the MCP server has been loaded correctly with the /mcp slash command. You should see something like this:
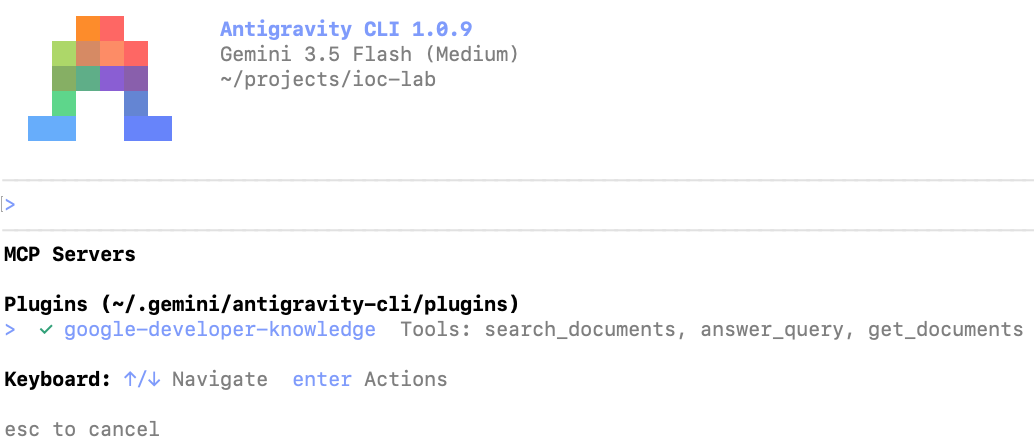
The Developer Knowledge MCP is configured, now let's see it in action!
Generate a script to create cat pictures using Nano Banana 2
Let's create a simple script that generates cat pictures using Nano Banana 2 to show the Developer Knowledge MCP capabilities.
You will need to run the following commands on the terminal. You can close agy by pressing Ctrl+D twice to go back to the shell.
First, enable the AI Platform API. This is the API that allows your project to make Gemini API calls:
gcloud services enable aiplatform.googleapis.com
Create a workspace for the kitten generator:
mkdir -p ~/nano-banana-kitten && cd ~/nano-banana-kitten
Initialize the dependency manager:
uv init
Now launch Antigravity and give it the following prompt:
Write a script that uses Nano Banana 2 through Vertex AI to generate a picture of a cute kitten, and run the script for me. Use the google-developer-knowledge MCP when researching.
Press Ctrl+O to expand the intermediate thinking steps and read along. You should see AGY use the google-developer-knowledge service to make queries, write a script, run it for you, and fix any errors it finds.
View the cat image =^_^=

5. Building the cat delivery agent
The Google Developer Knowledge MCP is useful to answer questions via the official documentation, but sometimes the information we need is very specialized and cannot be found in the docs. For those circumstances, we can use another open standard: Agent Skills.
Agent Skills are a lightweight, open format for extending AI agent capabilities with specialized knowledge and workflows. The defining characteristic of a skill is what is called progressive disclosure: instead of loading all the skill contents from the start, the agent will only activate the skill when necessary, loading the required information on demand and saving precious tokens.
To complete the cat delivery agent, we will employ the Antigravity SDK as our agent harness. To minimize friction and streamline implementation for the coding agent, we will also leverage the official Antigravity SDK skill.
Create workspace and install dependencies
First, create a folder for the final project:
mkdir -p ~/cat-delivery && cd ~/cat-delivery
Then, use the uv package manager to initialize this folder and install a few dependencies:
uv init && uv add fastapi uvicorn
Install the AGY SDK Python skill
To install skills from source code and open marketplaces, you can use Vercel's Skill CLI. Run the following command in the terminal to install the google-antigravity-sdk skill. Make sure you are running it from the lab workspace folder (~/cdslab)
npx skills add Google-Antigravity/antigravity-sdk-python --skill google-antigravity-sdk --agent antigravity-cli --yes
The output of this command should look like this:
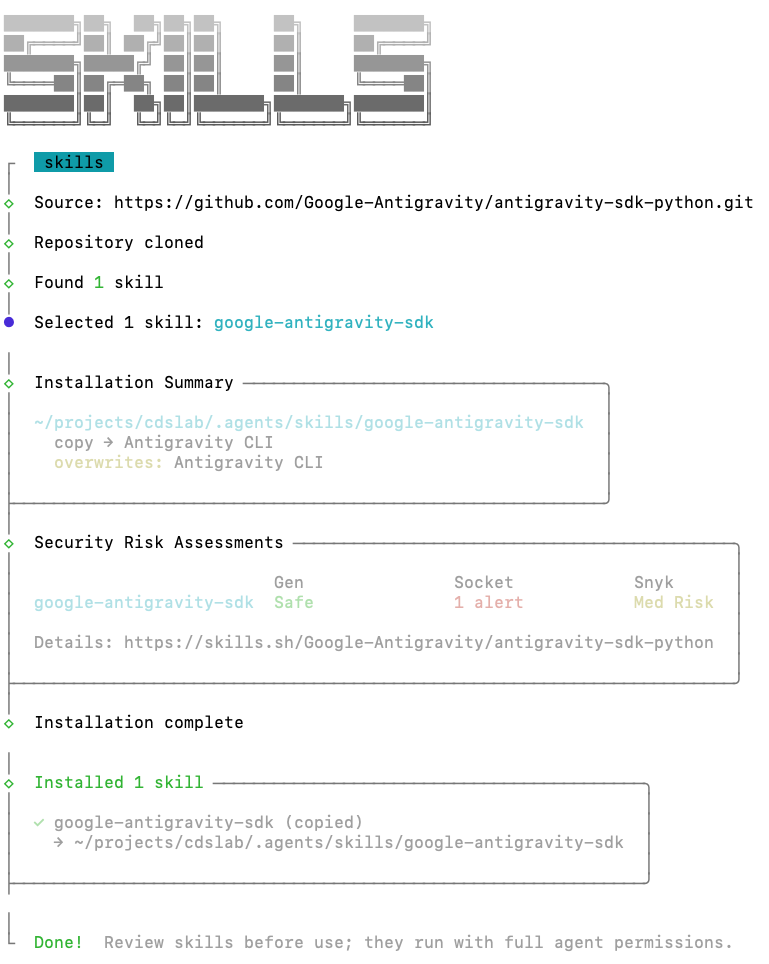
Note that the command npx skills add Google-Antigravity/antigravity-sdk-python automatically cloned the repository antigravity-sdk-python from GitHub. This command can be used to install skills from any Github repository, as long as they have a skills folder.
Installing skills from plugins
Another way of installing skills is via the plugin system. Plugins in Antigravity allow you to include not only skills, but also MCP servers, rules and hooks in the same package. They are useful for creating cohesive extensions in a single deployment bundle.
Since we are building a web application, install the modern-web-guidance plugin using the command below:
agy plugin install https://github.com/GoogleChrome/modern-web-guidance
This plugin includes a skill that contains best practices for web development written by the Google Chrome team.
Launch agy again so we can see those skills in action. In agy's prompt, type /skills to open the skills menu:
/skills
You are going to see something like this:
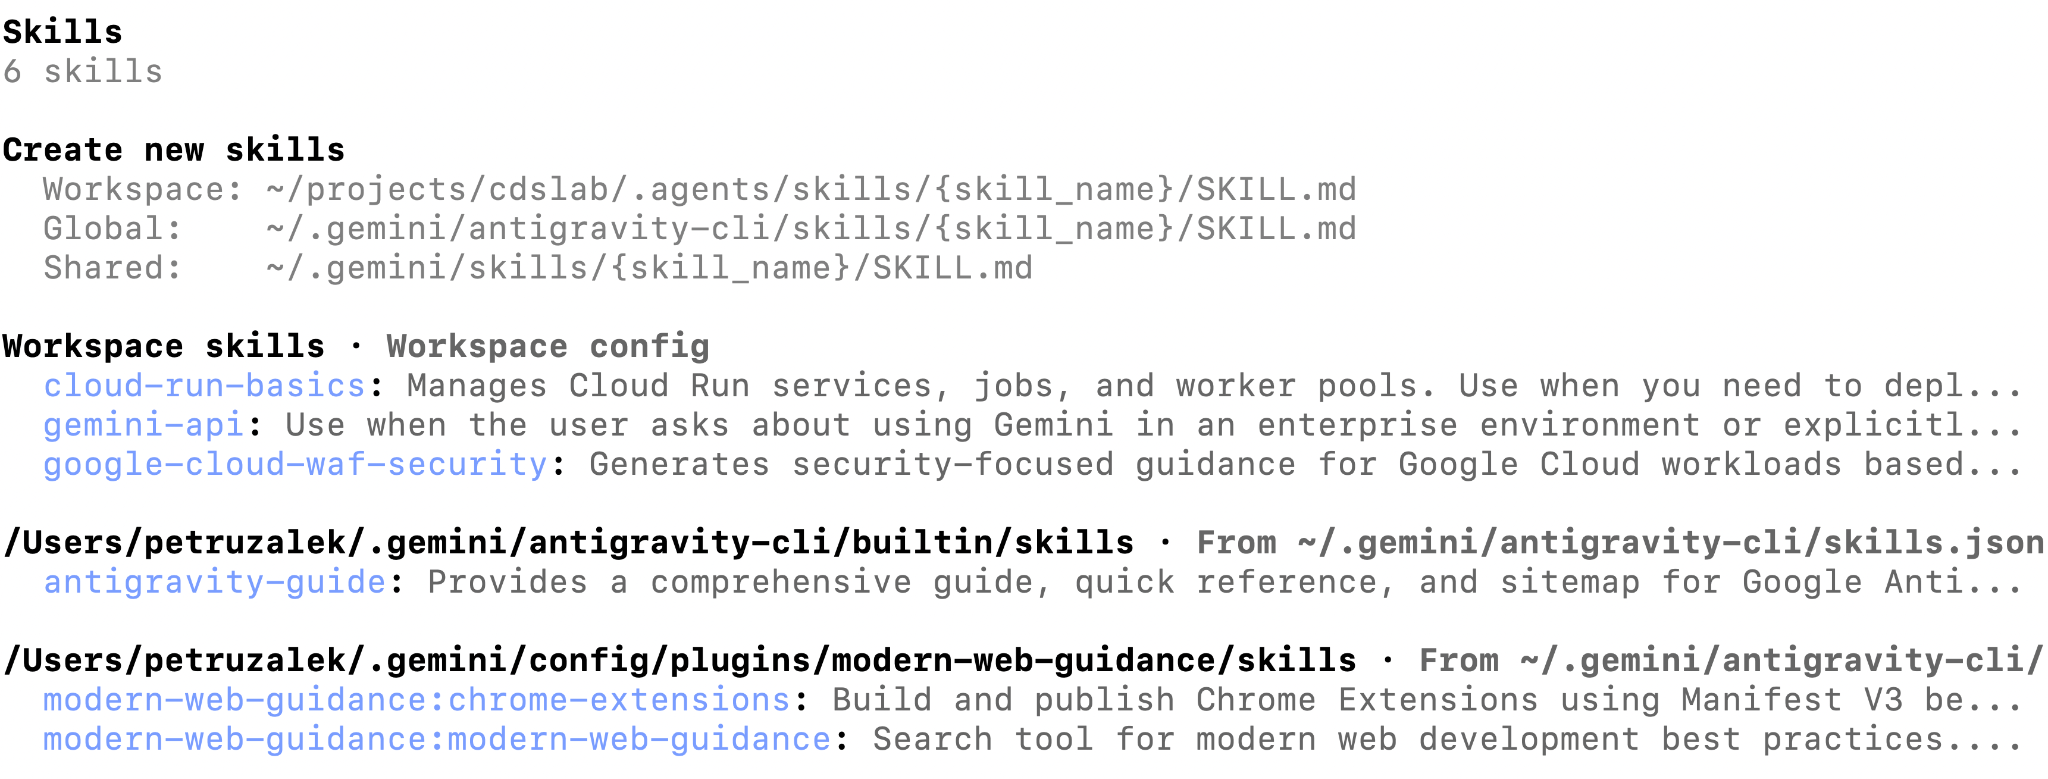
Now that we have both MCP and agent skills configured, Antigravity is ready to work on our project with all the information it needs to succeed.
Planning the app
Antigravity has two modes of operation: fast and planning. In fast mode Antigravity will start working on the task right away, and it is meant for simpler self-contained tasks. Planning mode is designed for complex tasks, where the agent will first elaborate a plan which you can review and amend before starting implementation.
To enable planning mode you can use the slash command /planning:
/planning
You can switch back to fast mode with /fast:
/fast
When toggling between planning and fast mode, it can also be useful to switch models. You can do this using the /model command:
/model
The list of available models might be slightly different depending on your environment and authentication mode:
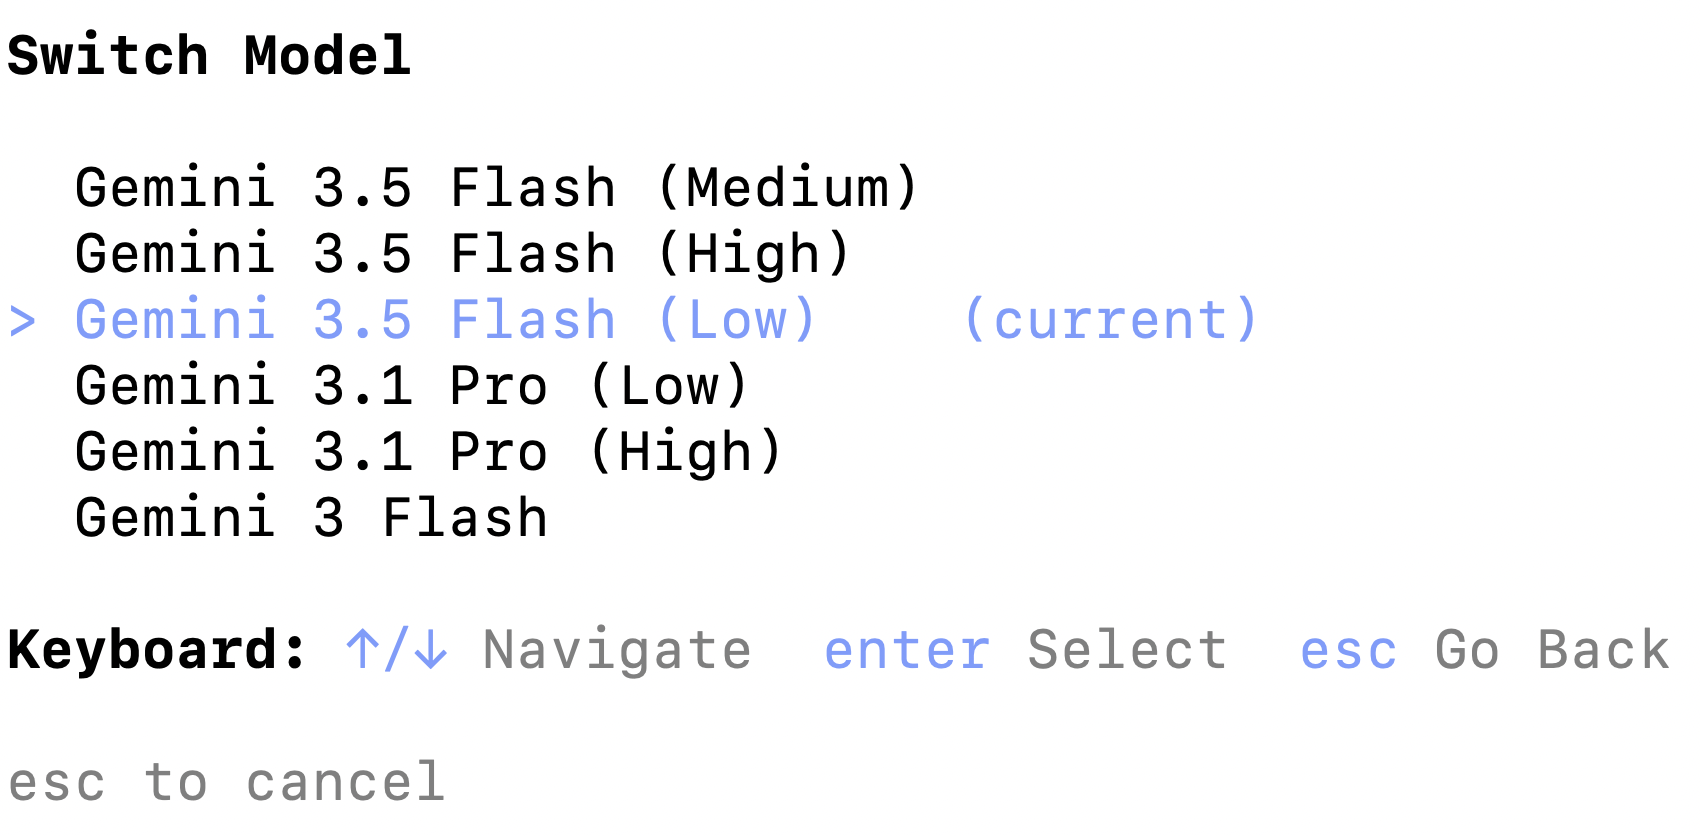
For the scope of this tutorial choose Gemini 3.5 Flash (Low). The word "low" in parenthesis means the thinking level of the model. Gemini 3.5 Flash with Low thinking is a very fast and effective model with good token economics. Choosing Medium or High as thinking level will spend more tokens and time into reasoning before the model comes back with a response.
For example, in real world scenarios you could use the most capable model in High thinking level for planning and a faster model for implementation. But for our project Gemini 3.5 Flash (Low) is sufficient.
Generating the plan
Switch Antigravity back to planning mode:
/planning
Then send the following prompt to create the implementation plan:
Create an application named "Cat Delivery System". This application will be an agent that generates cat pictures using Gemini 3.1 Flash Image (aka Nano Banana 2). The user will interact with the agent whenever it feels the need for a cat picture in their life, whether it be to make them smile, laugh or just brighten their day. Cat pictures can take any form the user desires: anime, cartoon, photorealistic, 3D render, etc. The only rule is ABSOLUTELY NO DOGS - steer the user towards cats if necessary. P.S.: capybaras are allowed.

The tech stack should be as follows:
- uv package manager
- Backend: agent using Antigravity SDK
- Frontend: simple chat window, light mode, lit / vite
- Model: Gemini 3.5 Flash for the root agent, Gemini 3.1 Flash Image for image generation

TODO:
- backend should serve a static frontend
- define the contract between frontend and backend before starting implementation
- use Google Cloud Project auth
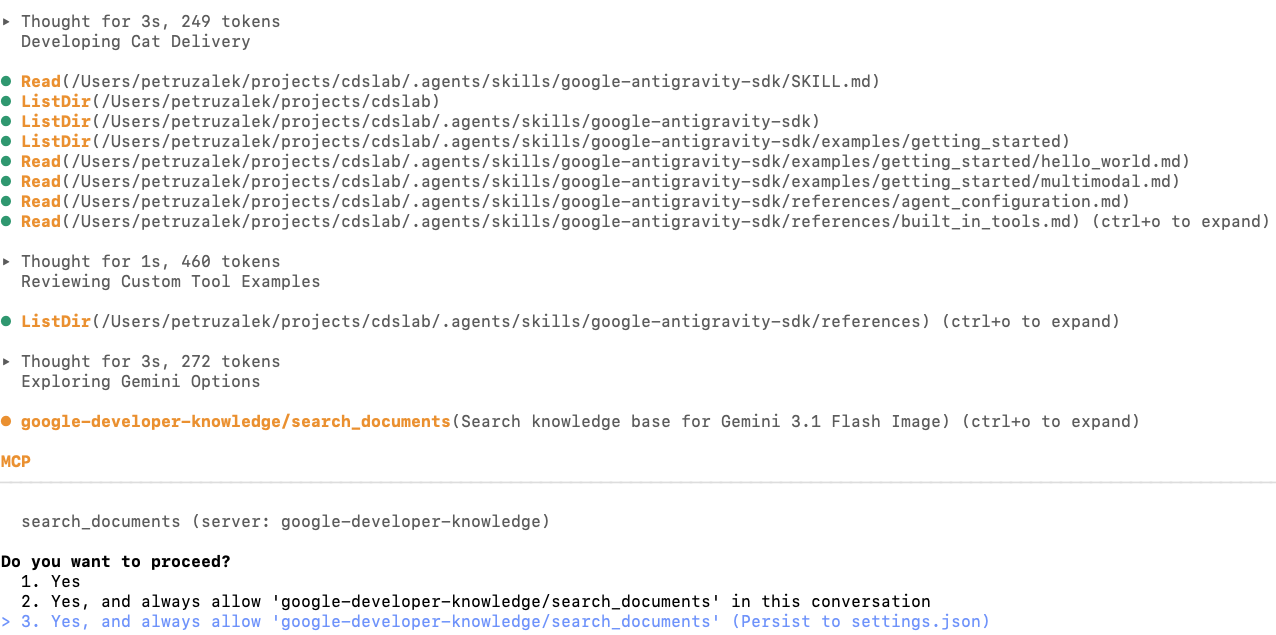
You are going to see that in research phase Antigravity might invoke both the Developer Knowledge MCP and one or more skills:
Once the plan is done you will be prompted to review it:
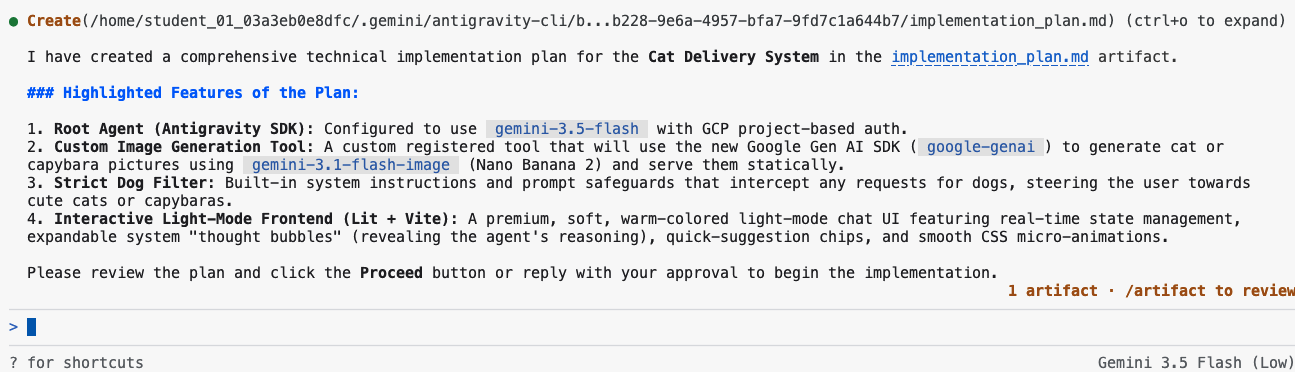
Please pay close attention to the bottom right corner of the screen: there is a message saying 1 artifact and the hint to use /artifact to review. In Antigravity, supporting files like plans, task lists and walkthroughs are called "artifacts" to differentiate them from regular files that are part of the solution (e.g. source code).
Entering the command /artifact in the prompt will allow you to see the plan and make comments on it in case you need to make any adjustments.
/artifact
You should see something like this:

Note there is a file named implementation_plan.md with the options to open, approve or reject. Press Enter to open it. Here is an example of how the plan looks on my system:
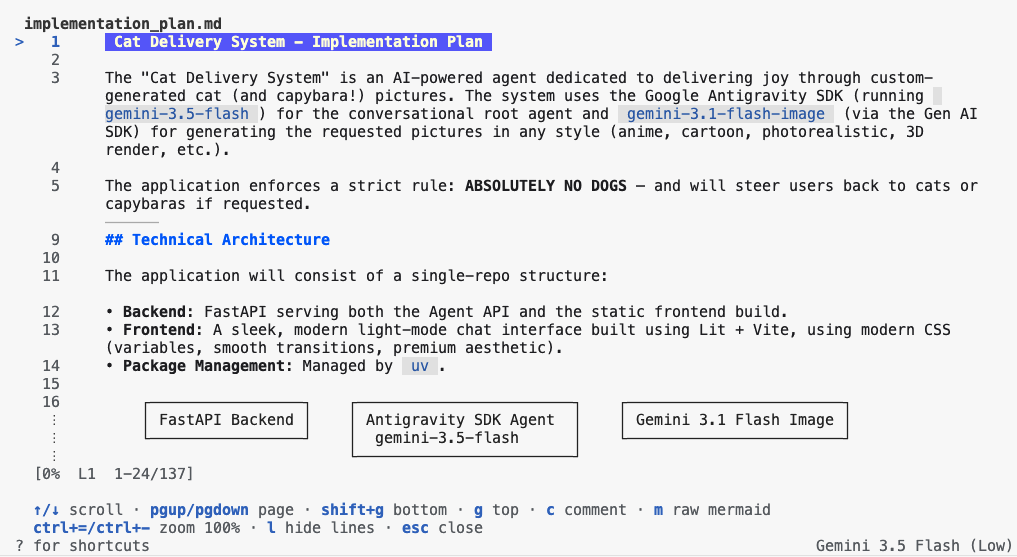
You can scroll up and down with the arrow keys, and at any line you can add a comment by pressing the C key.
An important section to check is the "Verification Plan". This is where you can verify and add validation steps so that the model knows it is finished with the task.
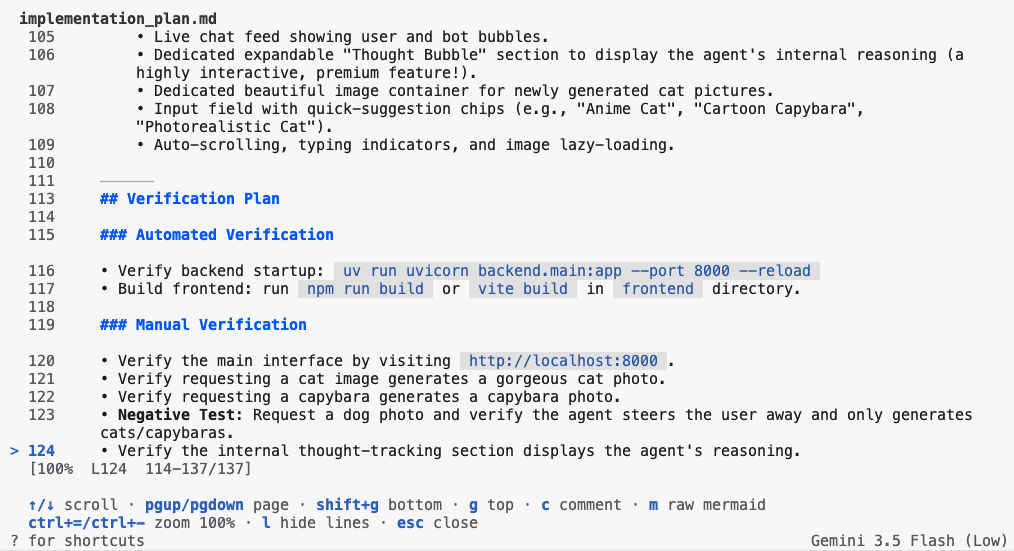
Add comments to the plan until you are happy with it and hit ESC to go back. Then press Y to confirm sending the comments to the agent:

After you hit Y the agent will immediately start working. The agent might ask for more tool call confirmations as it makes progress with the implementation.
You might notice that the number of artifacts will increase with time. Besides the plan, Antigravity will also create a task list (task.md) to keep track of each item it needs to implement or action it needs to do. Once it is done, it will create a walkthrough file (walkthrough.md) with an explanation of the objectives achieved. You can inspect all of these by using the /artifact command again.
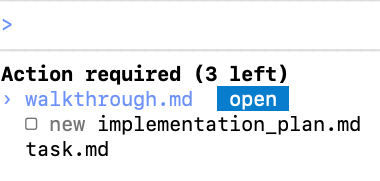
At any moment you can open these files and add comments to them, which upon sending to the agent they will be queued for execution just like a queued prompt. It is a good practice to comment on these files to give the agent additional context about your request.
6. Deploy the agent to the cloud
Now you are ready to deploy it to the cloud using Cloud Run. Since this task doesn't require an elaborate plan we can use fast mode.
Switch Antigravity to fast mode with /fast:
/fast
Use the following prompt to instruct Antigravity to deploy the CDS agent to Cloud Run:
Deploy the agent and frontend to Cloud Run.

TODO:
- backend should serve a static frontend
- frontend and backend are deployed in the same container

Acceptance Criteria
- Agent is deployed to cloud run
- Frontend is live and renders with no errors
- Backend is live and responds to requests with no errors
7. Congratulations!
In this workshop you have practiced modern development with Antigravity, including how to extend its capabilities with MCP servers and agent skills. You also have built a full application leveraging the Antigravity SDK and Gemini 3.1 Flash Image. Your learning journey doesn't need to stop here: check out other codelabs in this platform and continue developing your agentic coding skills!