
1. Overview
In this quickstart codelab, you set up your Google Cloud environment and start building with Antigravity on Google Cloud:
- Claim Google Cloud credits through the Google Developer Program, or use an existing Cloud Billing account.
- Create a Google Cloud project and set up your Google Cloud Shell and Cloud Code Editor environments.
- Launch Antigravity CLI in Cloud Code Editor using built-in Application Default Credentials (ADC), select your preferred model, and run sample prompts.
- (Optional) Link the same Google Cloud project in the local Antigravity desktop app using Pay As You Go billing.
What you'll learn
- How to claim Google Cloud credits from the Google Developer Program or connect your own Cloud Billing account
- How to create a Google Cloud project, enable the Agent Platform API, and save your workspace configuration in Google Cloud Shell
- How to authenticate Antigravity CLI with Application Default Credentials, select Gemini 4 Argon (High), and run agentic coding prompts
- How to link your Google Cloud project in the Antigravity desktop app using Pay As You Go billing on Agent Platform
What you'll need
- A Google account (use a personal
@gmail.comaccount if you are claiming workshop event credits) - Either a workshop credit claim link provided by your instructor (plus a mobile phone with a camera to scan the verification QR code) or an active Cloud Billing account
- A web browser, such as Google Chrome (opening an Incognito window is recommended so you do not mix personal and work accounts)
2. Claim Google Cloud credits (Optional)
Every Google Cloud project requires an active billing account. If you are attending a workshop with an event credit link, claiming credits from the Google Developer Program automatically provisions a Google Cloud billing account on your personal Gmail account without requiring a credit card.
Claim your event credit
- Open the credit claim link provided by your workshop instructor (in an Incognito browser window).
- Sign in with your personal Gmail account (
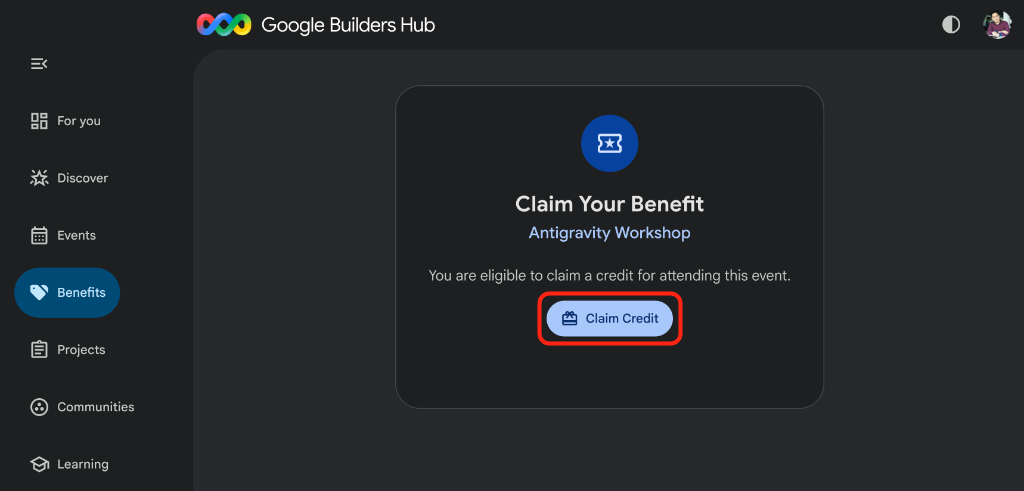
@gmail.com) if you are not signed in yet. - On the Claim Your Benefit page in Google Builders Hub, click the Claim Credit button:
- If prompted to create a Google Developer Program profile, complete the profile creation form to continue.
- A Scan to Verify You're Human QR code dialog appears on screen. If the QR code does not appear automatically after creating your profile, refresh the page and click the Claim Credit button again:
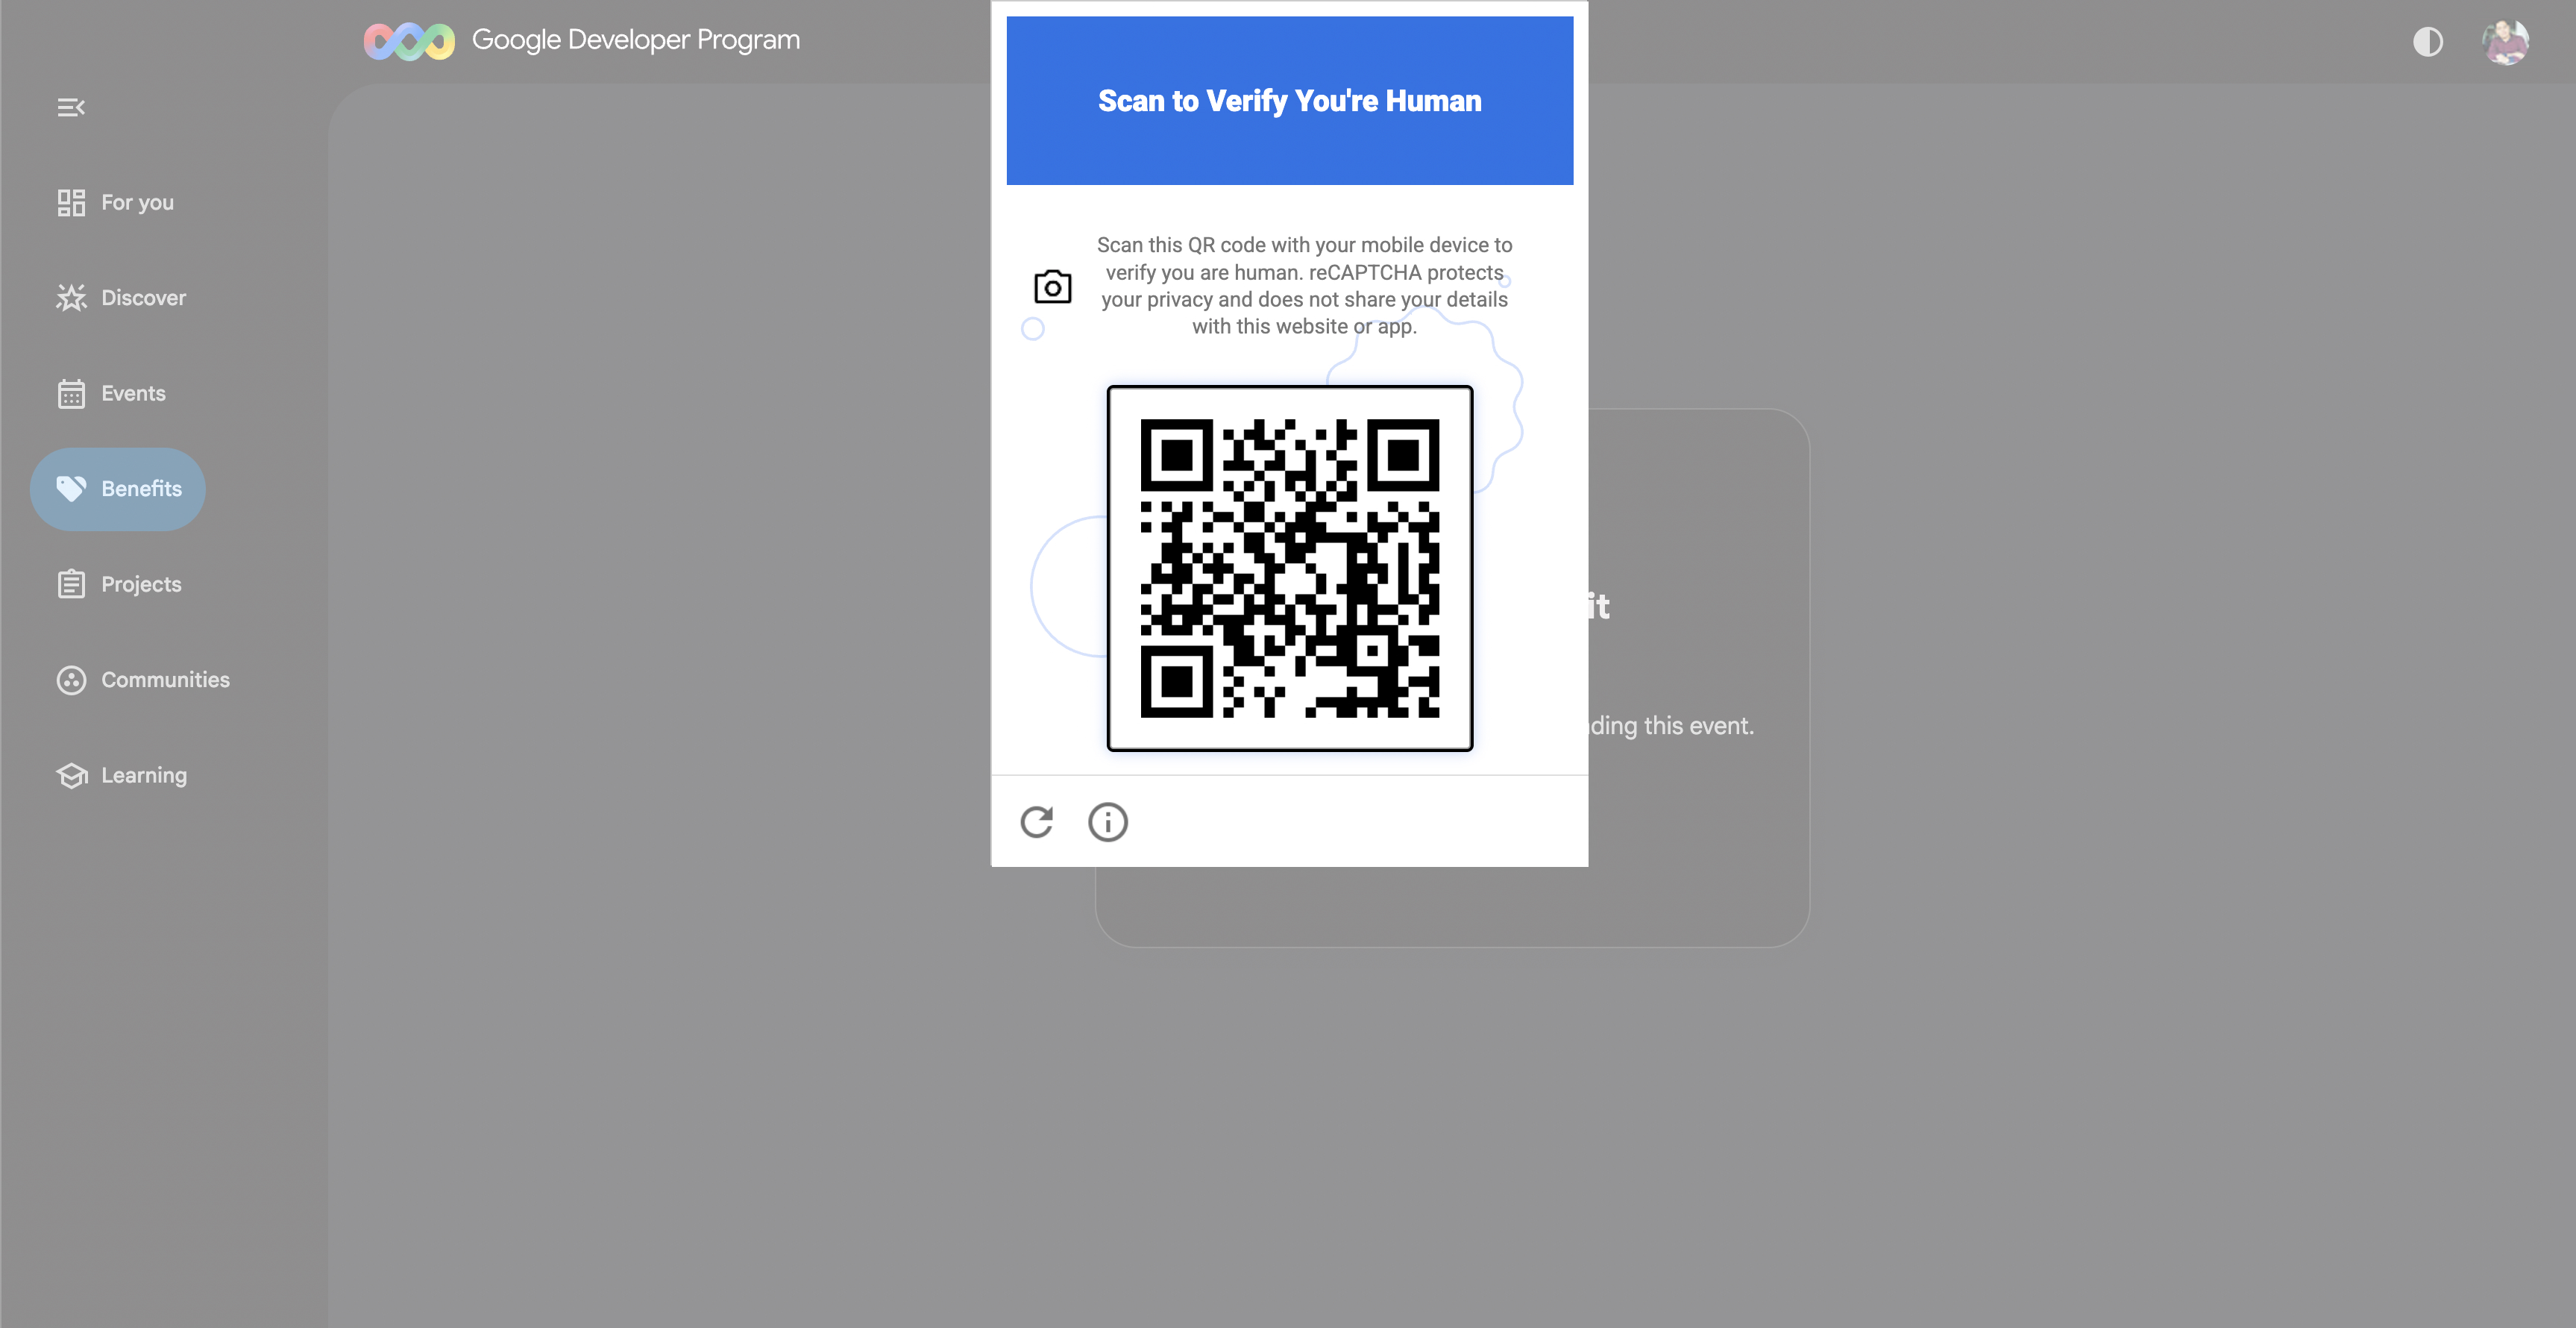
- Scan the QR code displayed on your screen using your phone and complete the verification prompt on your mobile device.
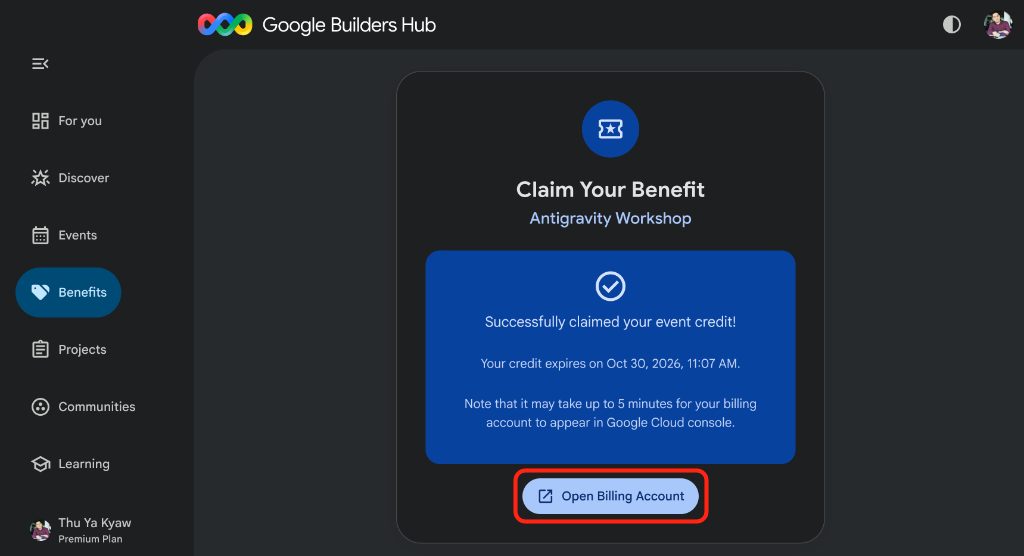
- Once verified, you see a Successfully claimed your event credit! confirmation banner and an Open Billing Account button:
🔍 Check your work
Provisioning your new Google Cloud billing account takes about 3 minutes:
- Click Open Billing Account to open Billing account management in the Google Cloud Billing console.
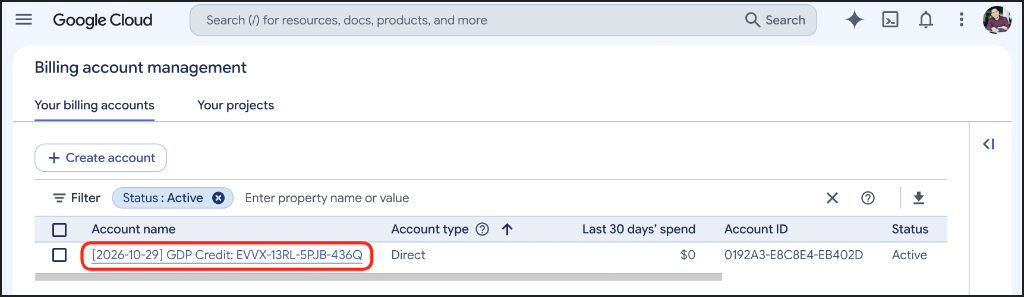
- Monitor Your billing accounts (refreshing after a minute or two if needed) until your
GDP Creditbilling account appears with status Active:
Once your billing account is visible, proceed to the next step to create your Google Cloud project.
3. Create and set up a Google Cloud project
Now that you have an active Cloud Billing account (from your claimed workshop credits or your own billing setup), create a Google Cloud project and use Google Cloud Shell to enable the required API and save your workspace configuration.
Create a Google Cloud project
- In the same browser window, go to https://console.cloud.google.com/projectcreate.
- Enter your project details:
- Project name: Enter a descriptive name (for example,
antigravity-workshop). - Billing account (if shown): Accounts with a single billing account link it automatically without displaying a dropdown. If you do see a Billing account dropdown, select your
GDP Creditbilling account (or your own active Cloud Billing account). - Parent resource: Leave as No organization (or select your organization if required).
- Project name: Enter a descriptive name (for example,
- Take note of the generated Project ID displayed below the project name field. You will need it later:
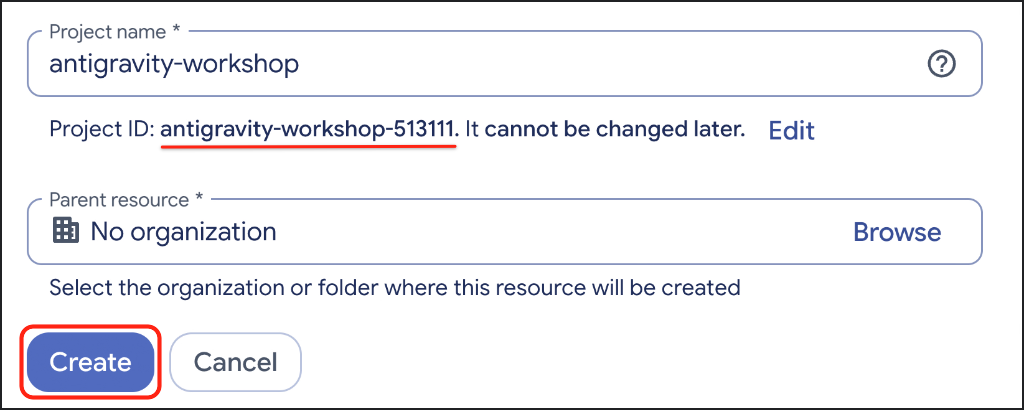
- Click Create and wait a few seconds for Google Cloud to provision your new project.
- Once the project is created, click the Notifications icon in the top-right toolbar and click Select Project:
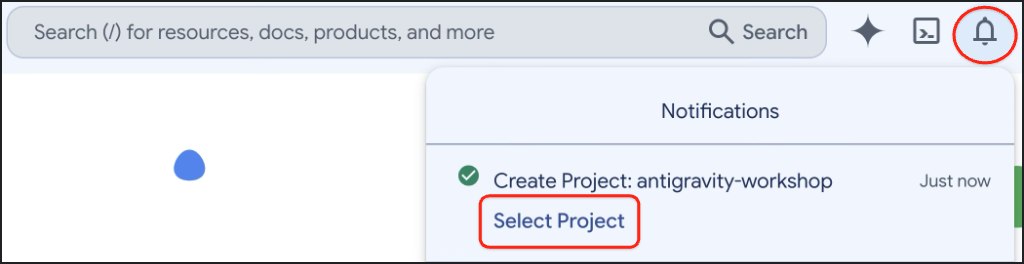
Configure your project in Google Cloud Shell
- In the top-right toolbar of the Google Cloud console, click Activate Cloud Shell (
>_icon) to open the Cloud Shell terminal pane at the bottom of your browser window:

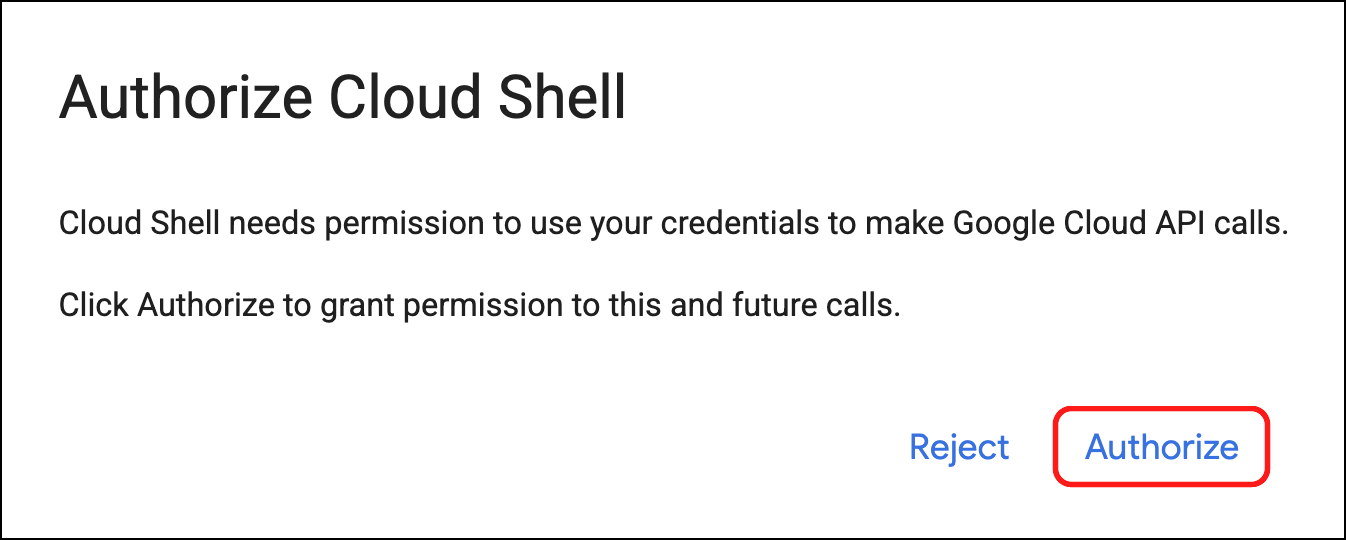
- Click Authorize if an Authorize Cloud Shell dialog appears:
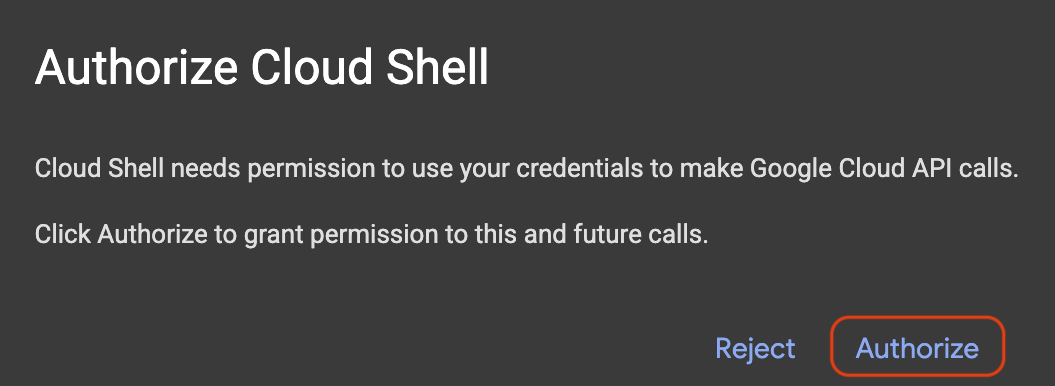
- Confirm your selected Project ID appears highlighted in yellow in the Cloud Shell terminal prompt:
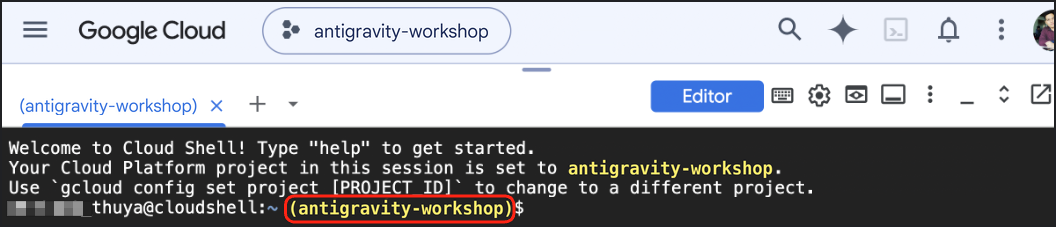
- If your new project is not yet shown in yellow in your Cloud Shell prompt, copy and paste the following snippet into Cloud Shell and type the number next to your project (for example,
1), and press Enter:
unset CLOUDSDK_CORE_PROJECT
PS3="Select your project (e.g. 1): "
select PROJECT_ID in $(gcloud projects list --format="value(projectId)"); do
  [ -n "$PROJECT_ID" ] && gcloud config set project "$PROJECT_ID" && break
done
Enable the Agent Platform API
Execute the following command in Cloud Shell to enable the Agent Platform API for your project, allowing Antigravity CLI and the Antigravity app to access Gemini models:
gcloud services enable aiplatform.googleapis.com
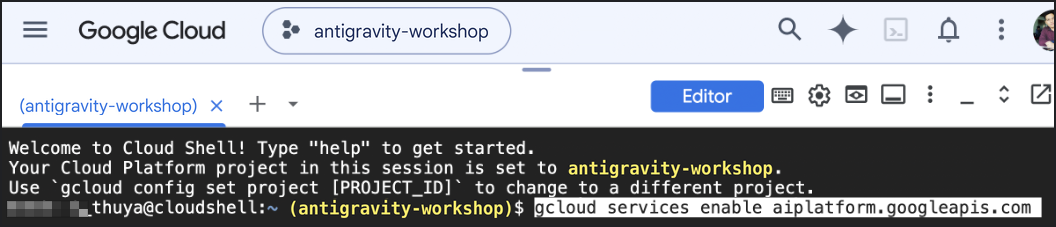
Wait a few seconds until Operation/... finished successfully is printed in your terminal.
Save your workspace configuration
In Cloud Shell, gcloud preferences are stored in a temporary folder per browser tab and do not carry over when you open Cloud Code Editor in a new tab. Create your ~/antigravity-workspace folder in $HOME (which persists across all Cloud Shell and Cloud Code Editor sessions) and save your project settings to .env:
mkdir -p ~/antigravity-workspace
cat <<EOF > ~/antigravity-workspace/.env
AGY_ADC_AUTH=true
CLOUDSDK_CORE_PROJECT=$(gcloud config get-value project)
GOOGLE_CLOUD_QUOTA_PROJECT=$(gcloud config get-value project)
EOF
🔍 Check your work
Load your saved .env file and confirm that an active gcloud account is selected, your project ID is populated, an active billing account (such as GDP Credit or your own billing account name) is linked, and the Agent Platform API is enabled:
set -a && source ~/antigravity-workspace/.env && set +a
ACTIVE_ACCOUNT=$(gcloud auth list --filter=status:ACTIVE --format="value(account)" 2>/dev/null)
if [ -z "$ACTIVE_ACCOUNT" ]; then
  echo "No active account selected. Refresh this browser tab and click Authorize (or run 'gcloud auth login --update-adc'), then re-run this check."
else
  BILLING_ACCOUNT=$([ -n "$GOOGLE_CLOUD_QUOTA_PROJECT" ] && gcloud billing projects describe "$GOOGLE_CLOUD_QUOTA_PROJECT" --format="value(billingAccountName)" 2>/dev/null)
  echo "Account: $ACTIVE_ACCOUNT"
  echo "Project: $GOOGLE_CLOUD_QUOTA_PROJECT"
  echo "Billing account: $([ -n "$BILLING_ACCOUNT" ] && (gcloud billing accounts describe "${BILLING_ACCOUNT##*/}" --format="value(displayName)" 2>/dev/null || echo "${BILLING_ACCOUNT##*/}"))"
  echo "Enabled API: $([ -n "$GOOGLE_CLOUD_QUOTA_PROJECT" ] && gcloud services list --enabled --filter="config.name=aiplatform.googleapis.com" --format="value(config.name)" 2>/dev/null)"
fi
You should see output similar to:
Account: your-account@gmail.com
Project: antigravity-workshop-513111
Billing account: [YYYY-MM-DD] GDP Credit: XXXX-XXXX-XXXX-XXXX
Enabled API: aiplatform.googleapis.com
Troubleshooting
- If
No active account selectedis printed, refresh your browser tab to re-open the Authorize Cloud Shell dialog and click Authorize (or rungcloud auth login --update-adc), then re-run the check above. - If
Project:is empty or shows a different project, run the project selection snippet and the workspace configuration snippet from above again. - If
Billing account:is empty or shows the wrong account, open Billing account management, select your project, and choose Change billing (see Enable, disable, or change billing for a project). - If
Enabled API:is empty, run thegcloud services enablecommand again.
4. Launch Antigravity CLI
Antigravity CLI (agy) is Google's terminal-based AI coding agent and comes pre-installed in Cloud Code Editor. In this step, you open Cloud Code Editor, load your saved workspace folder, and start Antigravity CLI.
Open Cloud Code Editor
- In your browser window, open a new tab and go to https://ide.cloud.google.com.
- If prompted with an Authorize Cloud Shell dialog, click Authorize:
- Once Cloud Code Editor finishes loading, confirm that a terminal pane is visible at the bottom of the window. If not, open one from the top menu bar with View > Terminal. You should see a terminal:

Load your workspace
- Open
~/antigravity-workspaceas your active workspace in Cloud Code Editor by running the following command:
cloudshell workspace ~/antigravity-workspace
- Cloud Code Editor reloads with
antigravity-workspaceopen in the Explorer sidebar. If the terminal pane closes, reopen it with View > Terminal. - (Optional) Press
Cmd + Option + Bon macOS orCtrl + Alt + Bon Windows and Linux to close the Secondary Side Bar (Gemini Code Assist) and give yourself more room.
Start Antigravity CLI
- In the Cloud Code Editor terminal, load the
.envfile you saved in~/antigravity-workspaceso Antigravity CLI authenticates with Application Default Credentials and bills model usage to your project:
cd ~/antigravity-workspace
set -a && source .env && set +a
echo "Project: $GOOGLE_CLOUD_QUOTA_PROJECT"
You should see output similar to:
Project: antigravity-workshop-513111
- From your
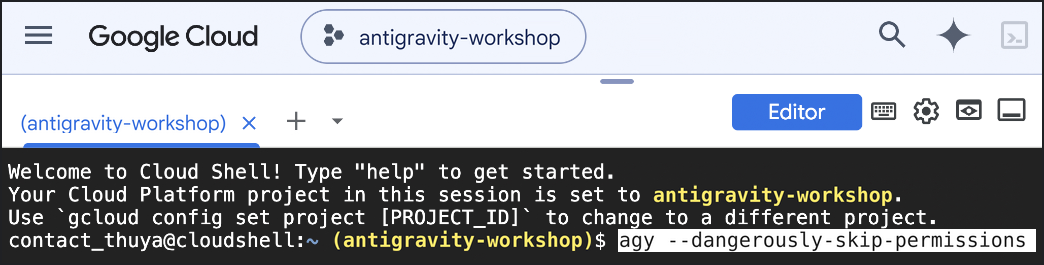
~/antigravity-workspacedirectory, start Antigravity CLI with--dangerously-skip-permissionsso file edits and terminal commands run without manual confirmation prompts during the workshop:
agy --dangerously-skip-permissions
Complete the first-run prompts
When you launch agy for the first time in Cloud Code Editor:
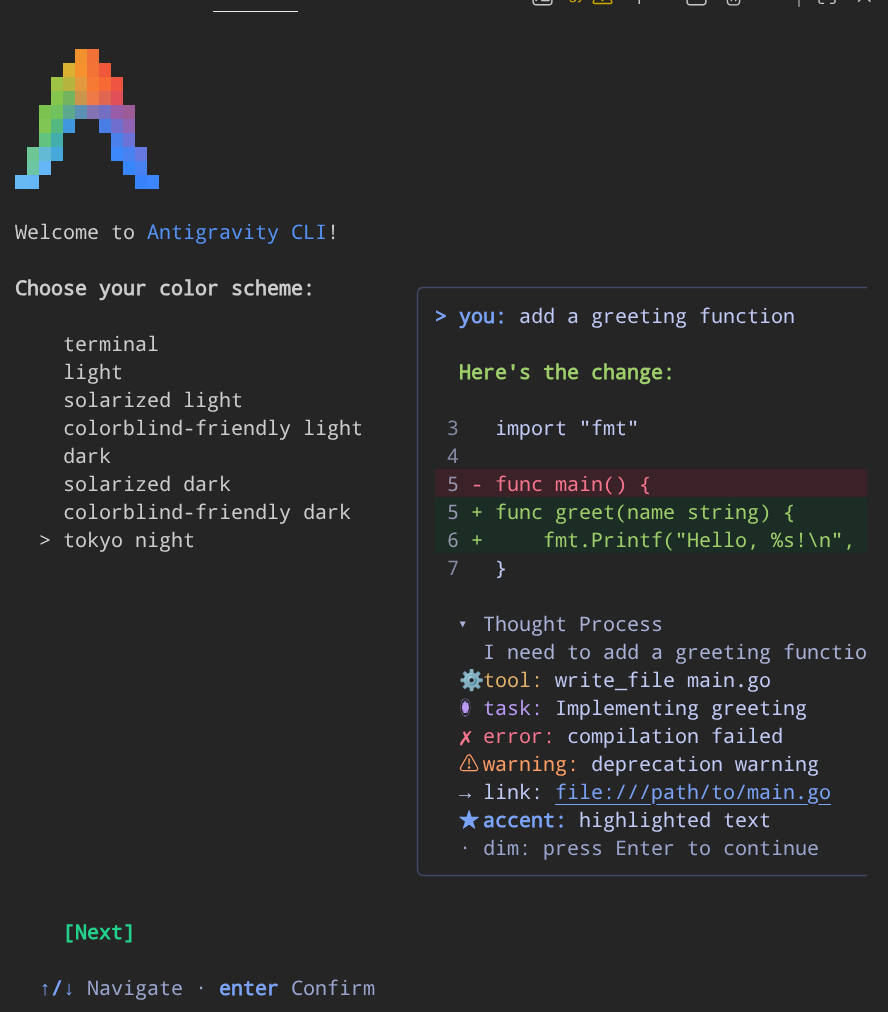
- Select your preferred color scheme using the Up and Down arrow keys and press Enter:
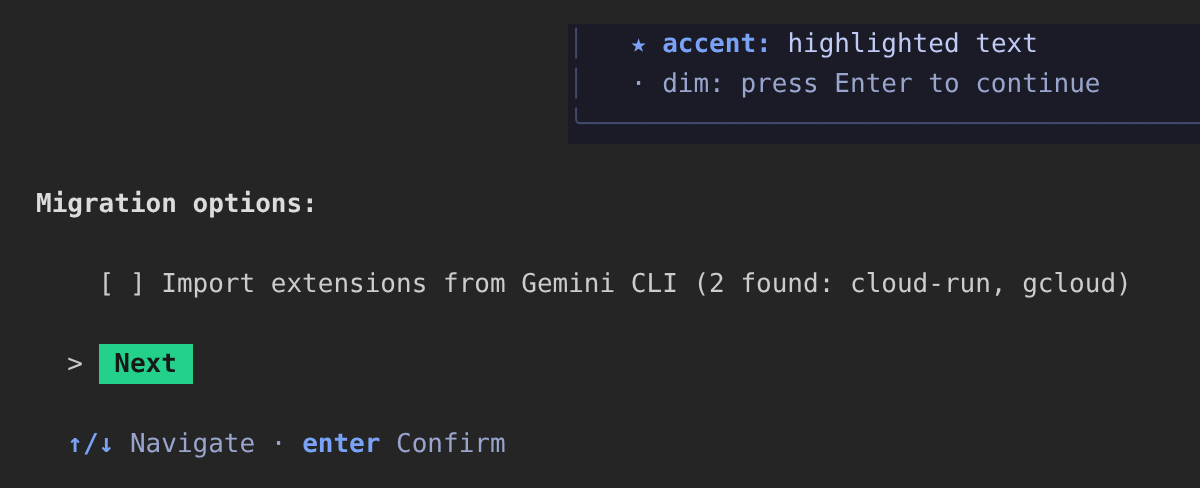
- If Migration options (
[ ] Import extensions from Gemini CLI) appears below the color scheme list, pressing Enter moves focus onto that checkbox rather than continuing. Press the Down arrow key (or Tab) to highlight Next, then press Enter:
- On the Terms of Service & Data Use screen, press Enter to select Done.
- When asked whether you trust the files in
~/antigravity-workspace, press Enter to confirm Yes, I trust this folder.
🔍 Check your work
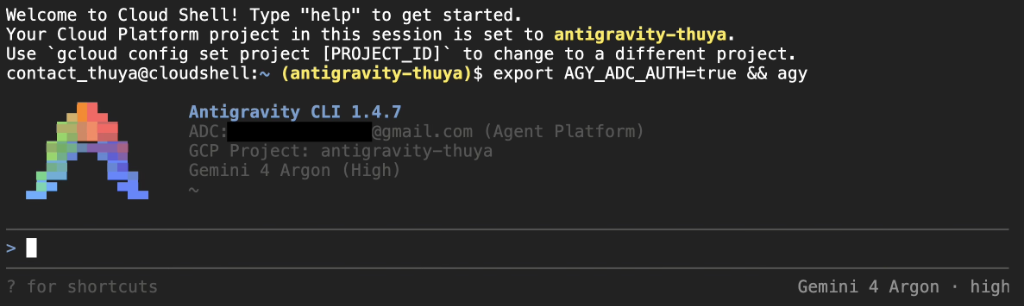
Once the interactive session loads, confirm that the Antigravity CLI banner displays your Google account under ADC: (Agent Platform), your active GCP Project:, and the interactive > prompt. You should see output similar to:
Antigravity CLI 1.4.7
ADC: your-account@gmail.com (Agent Platform)
GCP Project: antigravity-workshop-513111
Gemini 4 Argon (High)
~/antigravity-workspace

>
Keep Antigravity CLI open at the > prompt and continue to the next step to select your model and run sample prompts.
5. Switch model and try prompts
Inside an active Antigravity CLI session, you can switch models at any time with the /model slash command before sending coding or research tasks to the agent.
Switch to Gemini 4 Argon (High)
Copy and paste the following command into the Antigravity CLI > prompt and press Enter to select Gemini 4 Argon (High):
/model gemini-4-argon-high
Antigravity CLI confirms Model set to Gemini 4 Argon (High) (or Model already set to Gemini 4 Argon (High) if it is already active), and the bottom-right corner of the terminal displays Gemini 4 Argon · high.
Try sample prompts
Copy and paste one or more of the prompts below into Antigravity CLI and press Enter. Each prompt relies only on Python's standard library or pre-installed Cloud Shell tools so it completes in under a minute.
Build and test a CLI task tracker
Create a Python CLI task tracker in todo.py using only the standard library that lets me add, list, and complete tasks saved to tasks.json. Write unit tests in test_todo.py and run them to verify everything passes.
Generate a Cloud Shell environment report
Inspect this Cloud Shell environment (Python version, gcloud version, active Google Cloud project, and available disk space) and save a clean Markdown summary to environment-report.md.
Analyze simulated server logs
Write a Python script in log_analyzer.py using only the standard library that generates 200 sample HTTP access log lines, calculates request counts by status code and p95 latency, prints a summary table, and runs the script.
🔍 Check your work
- Open the Explorer sidebar in Cloud Code Editor to inspect the files Antigravity CLI generated for you.
- When you are ready to exit back to your Cloud Code Editor terminal prompt, paste
/exitand press Enter (or pressCtrl + Dtwice):
/exit
- List the files Antigravity CLI created in your workspace:
ls -la ~/antigravity-workspace
You should see output similar to (depending on which prompt you ran):
total 20
drwxr-xr-x 2 user user 4096 Oct 30 04:30 .
drwxr-xr-x 8 user user 4096 Oct 30 04:25 ..
-rw-r--r-- 1 user user  118 Oct 30 04:26 .env
-rw-r--r-- 1 user user 1420 Oct 30 04:30 test_todo.py
-rw-r--r-- 1 user user 1850 Oct 30 04:30 todo.py
Whenever you want to return to your agent session later from a new terminal, run cd ~/antigravity-workspace && set -a && source .env && set +a, start agy --dangerously-skip-permissions, and type /resume to pick up an earlier conversation.
6. Link Antigravity app (Optional)
If you also want to run agents locally on your laptop, you can link the Antigravity desktop app (macOS, Windows, or Linux) to the same billing-enabled Google Cloud project you set up earlier.
Install the app or sign out of a personal plan
- Download and install Antigravity for your operating system from https://antigravity.google/download, then open the app.
- If you previously signed in with Continue with Google (the personal starter plan), click Settings in the bottom-left corner, open Account, and click Sign Out to return to the Welcome to Antigravity screen.
Sign in and select Pay As You Go
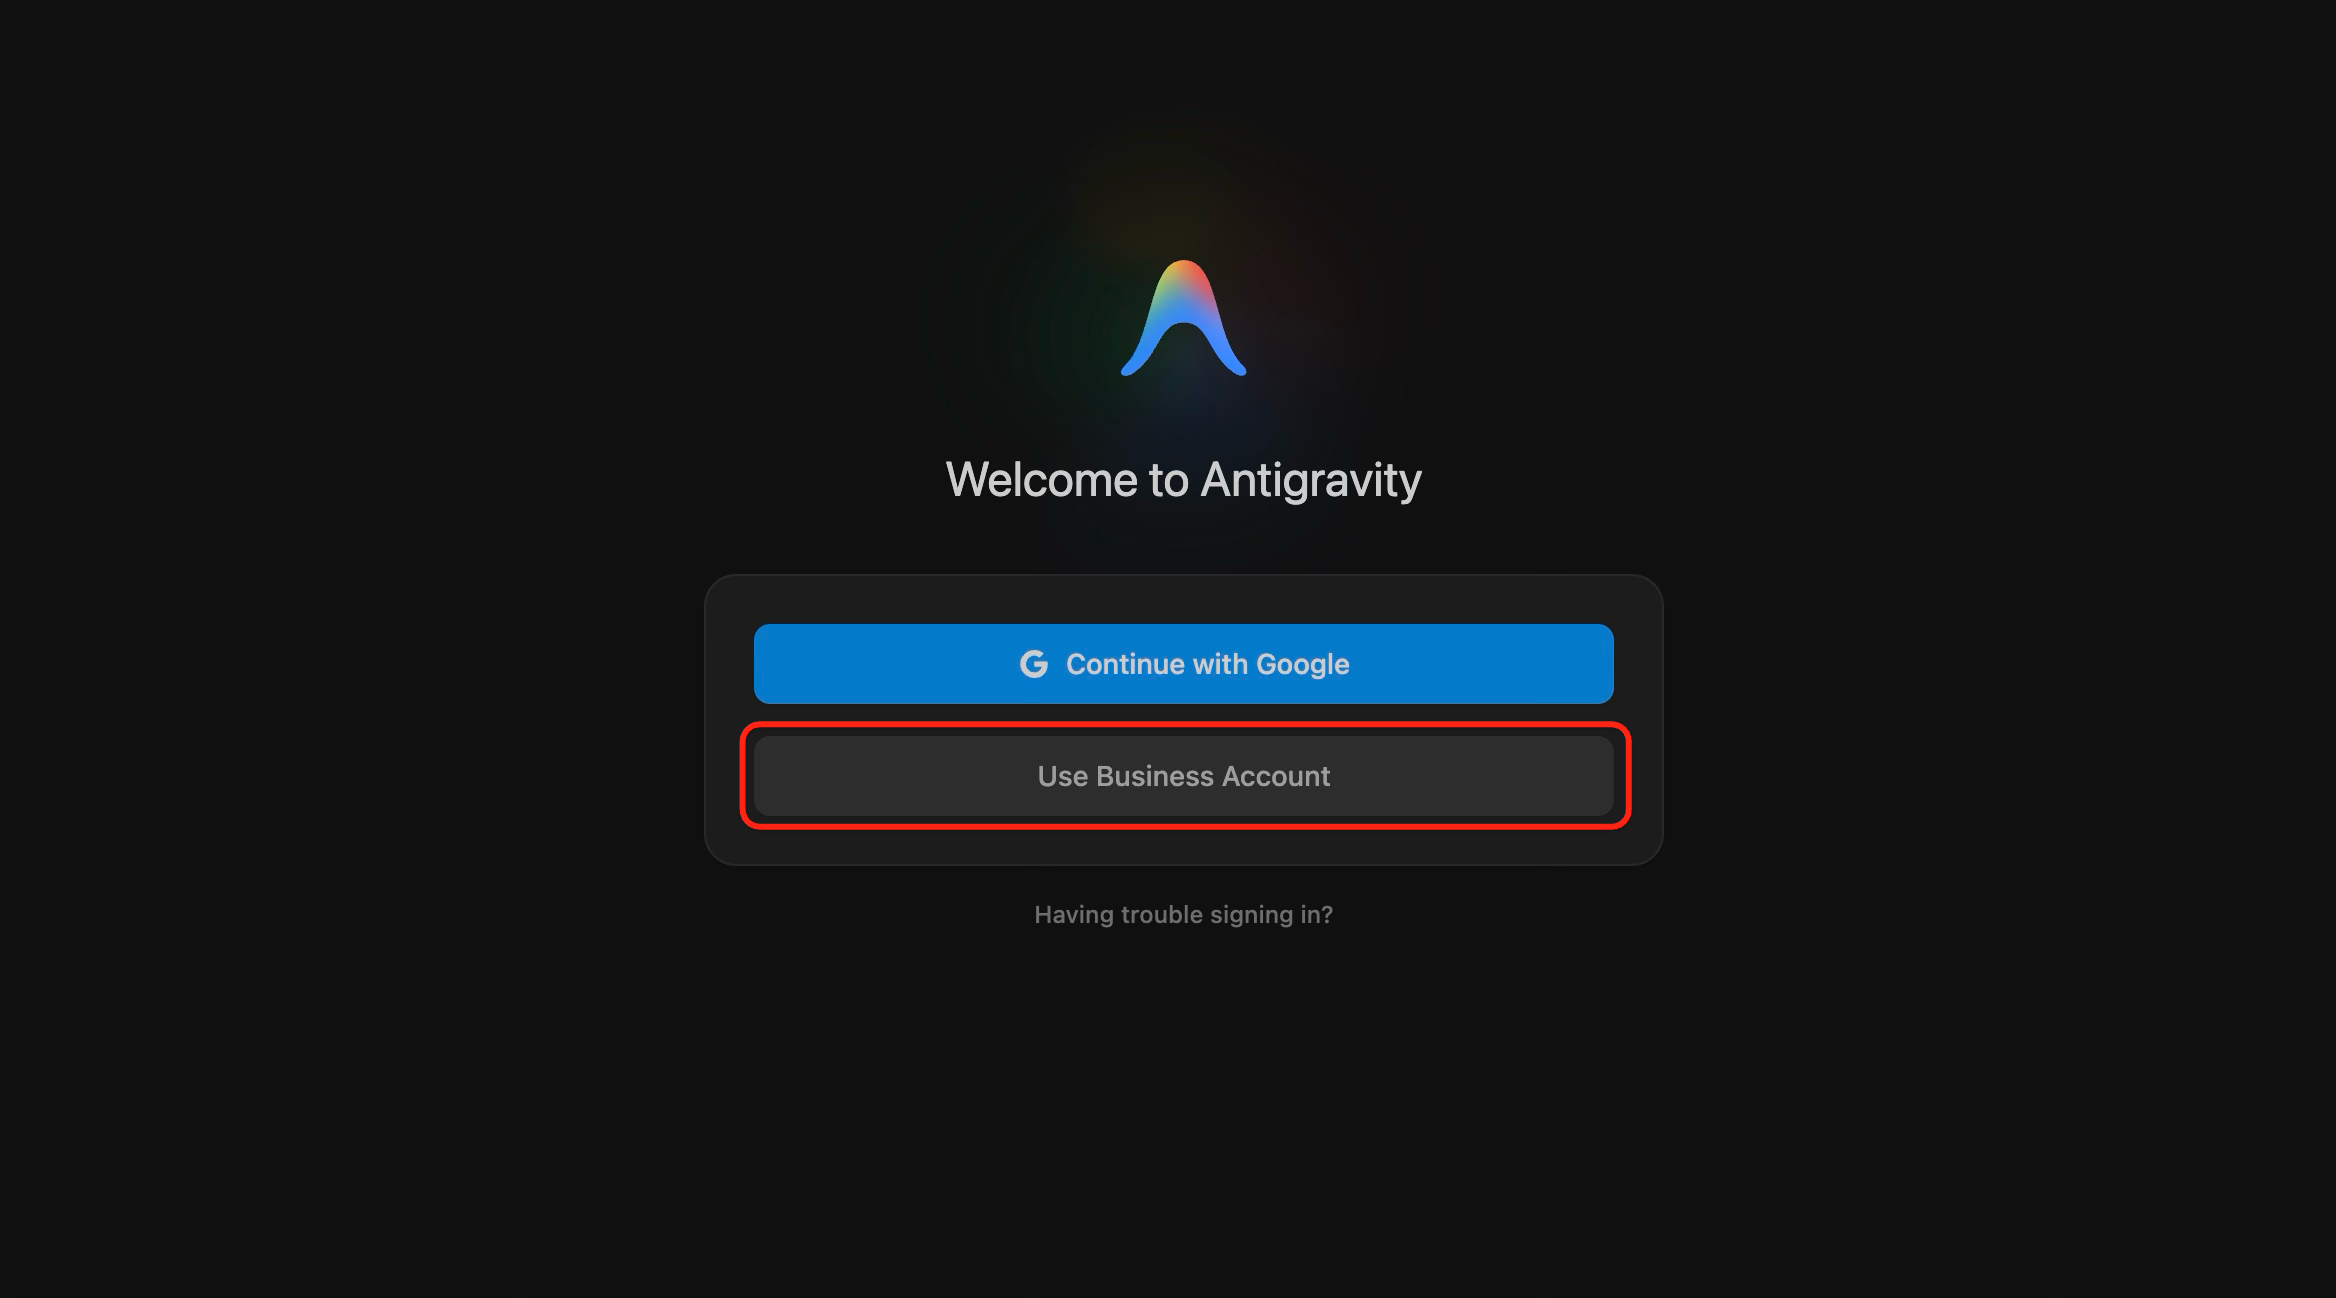
- On the Welcome to Antigravity screen, click Use Business Account:
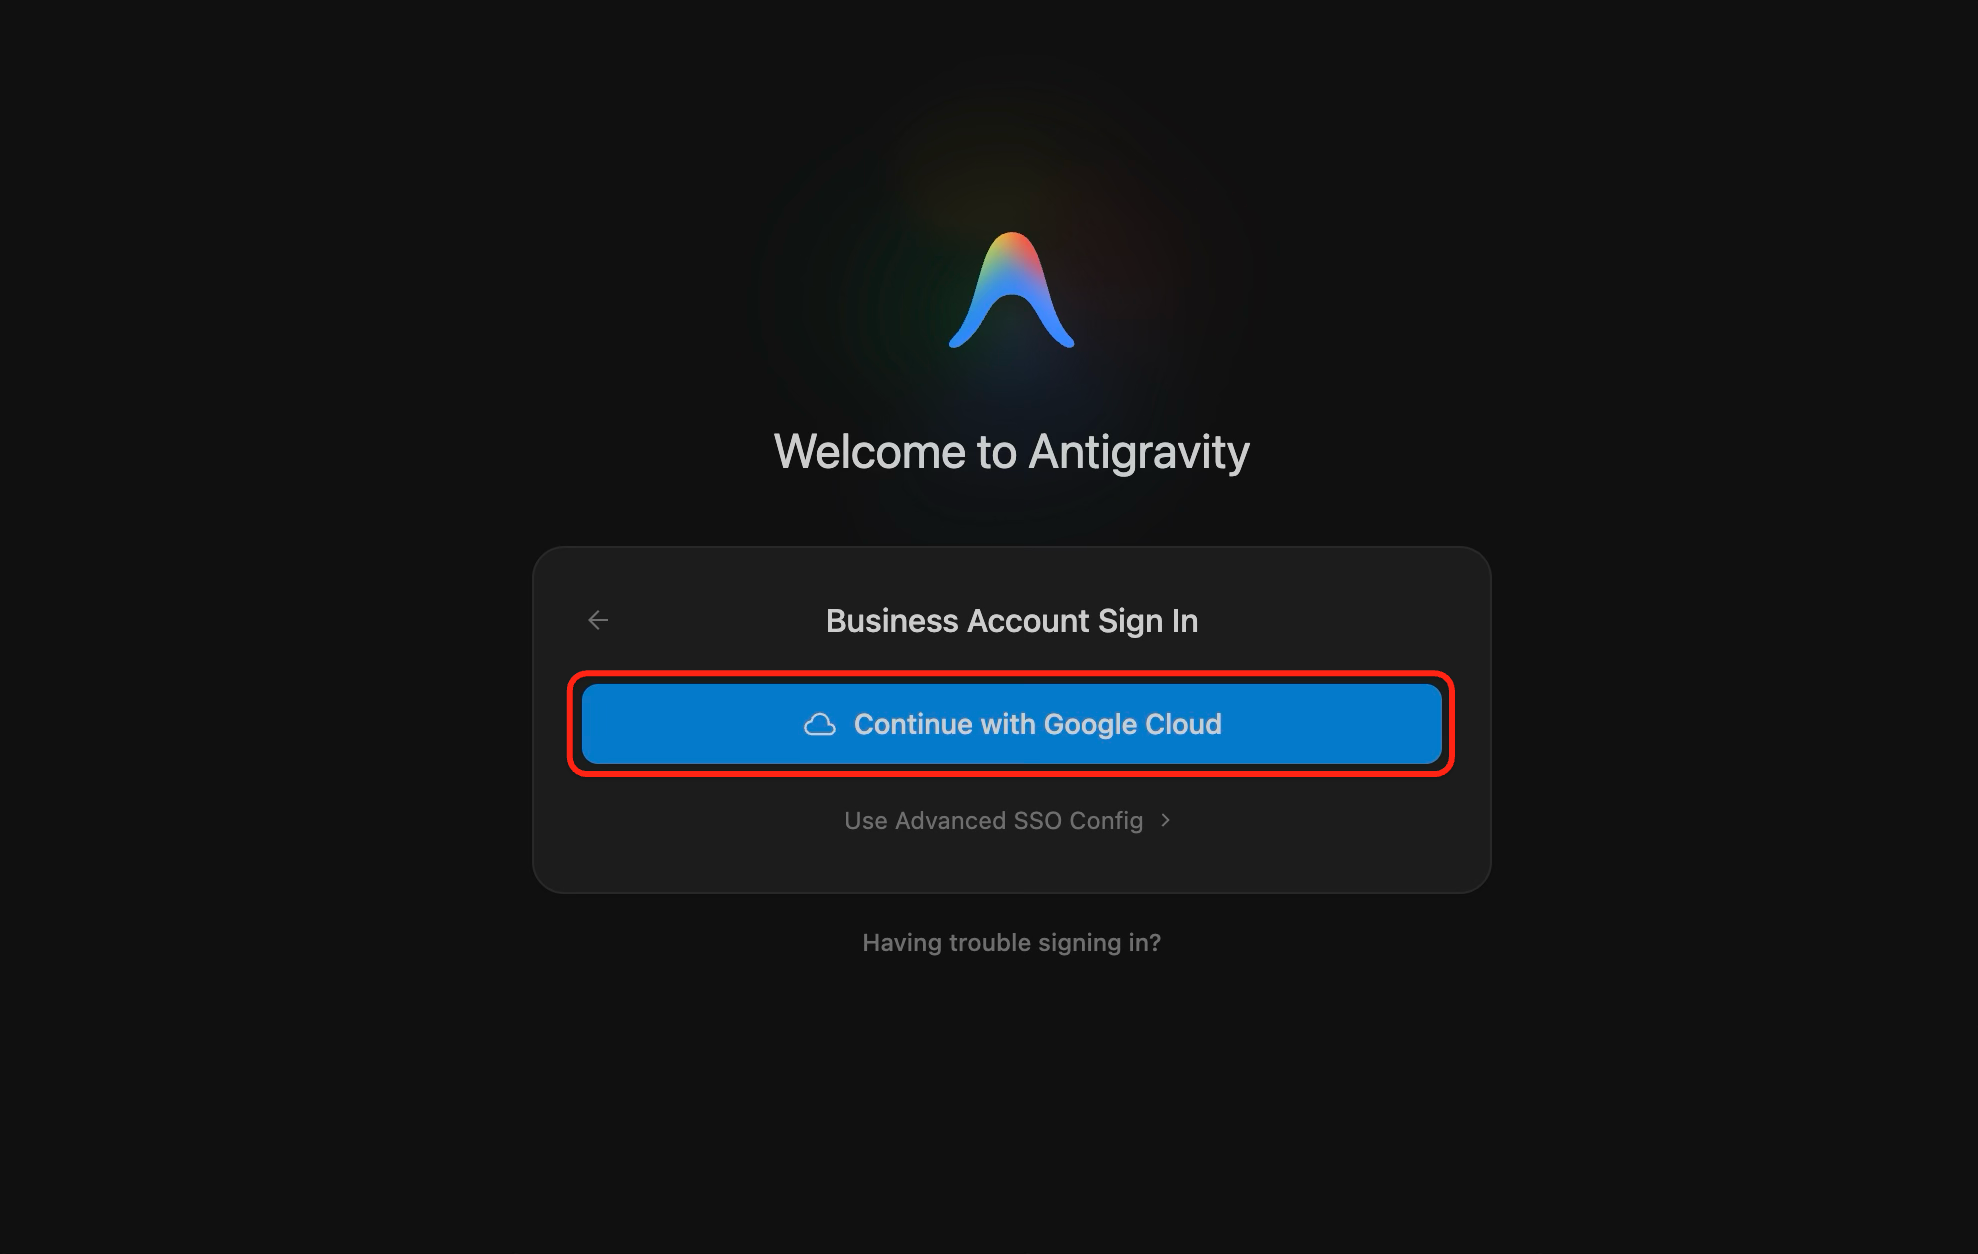
- On the Business Account Sign In screen, click Continue with Google Cloud and complete the browser sign-in using the same Google account that owns your Google Cloud project:
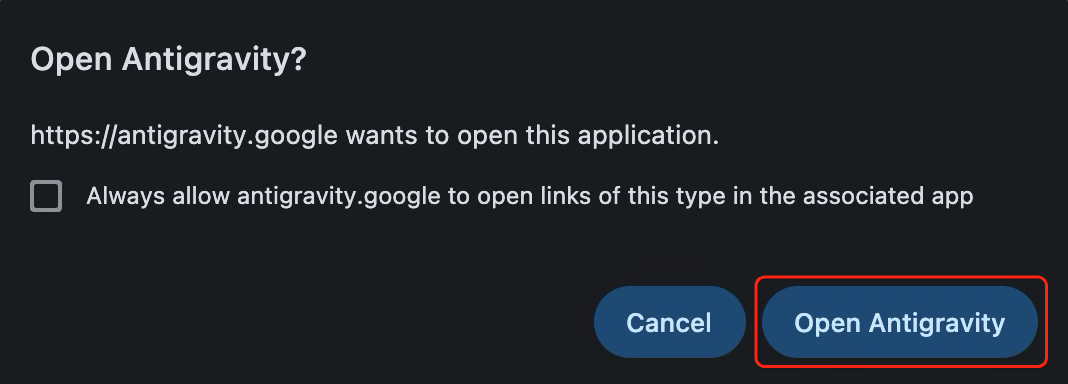
- When your browser prompts Open Antigravity?, click Open Antigravity:
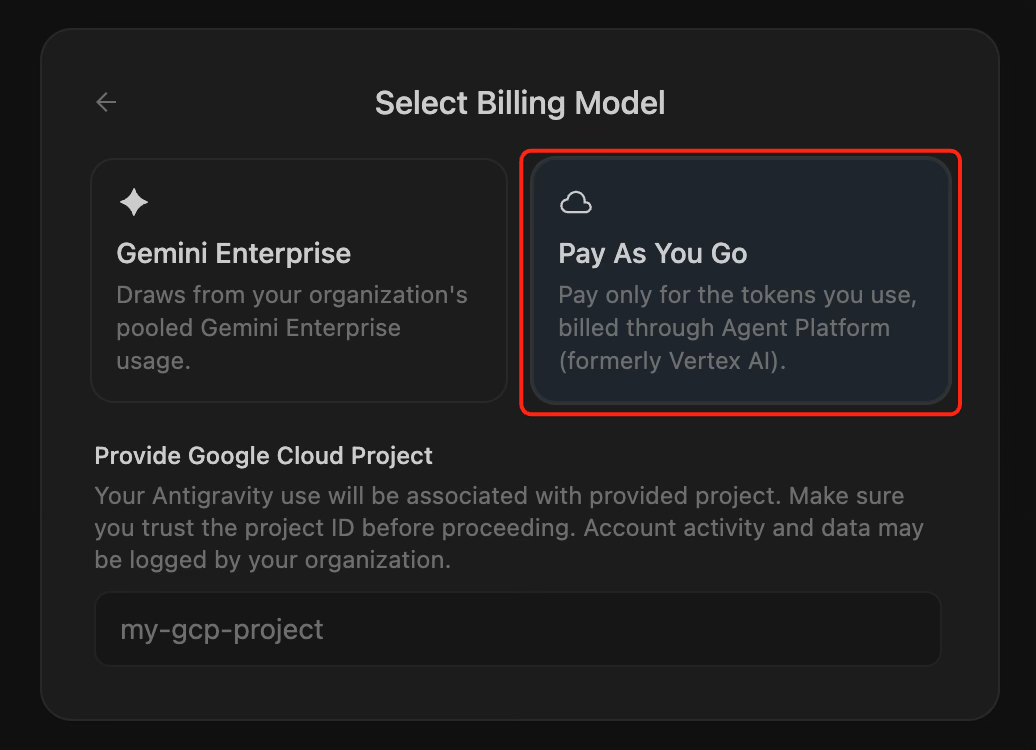
- Return to the Antigravity app. On the Select Billing Model screen, click the Pay As You Go card:
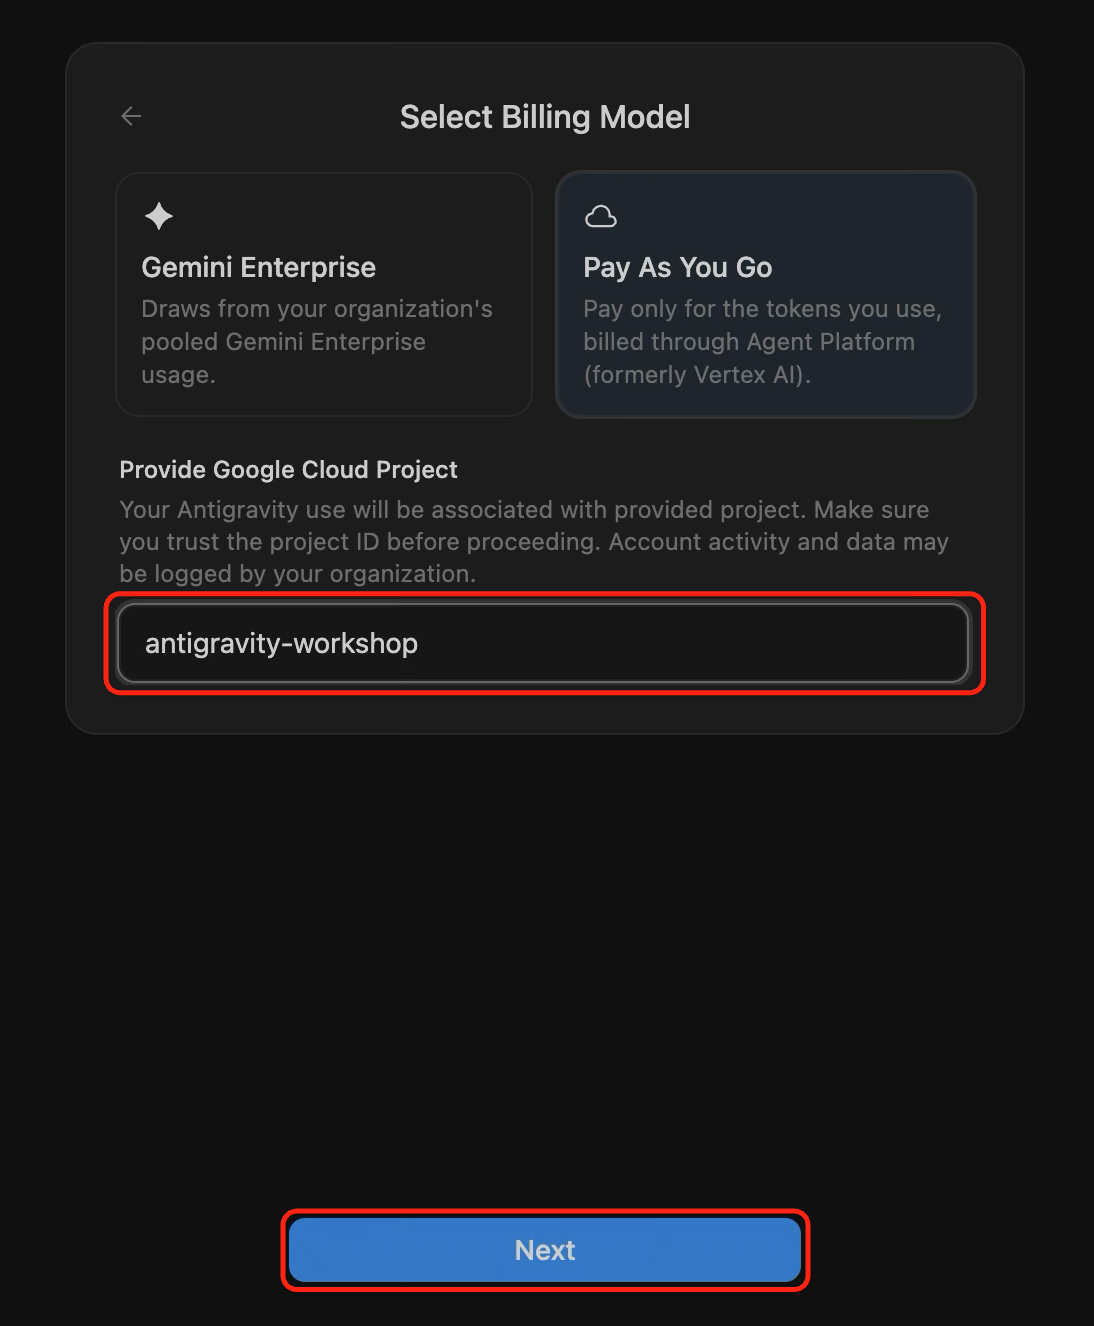
- Under Provide Google Cloud Project, paste your Project ID from earlier (for example,
antigravity-workshop-513111) and click Next:
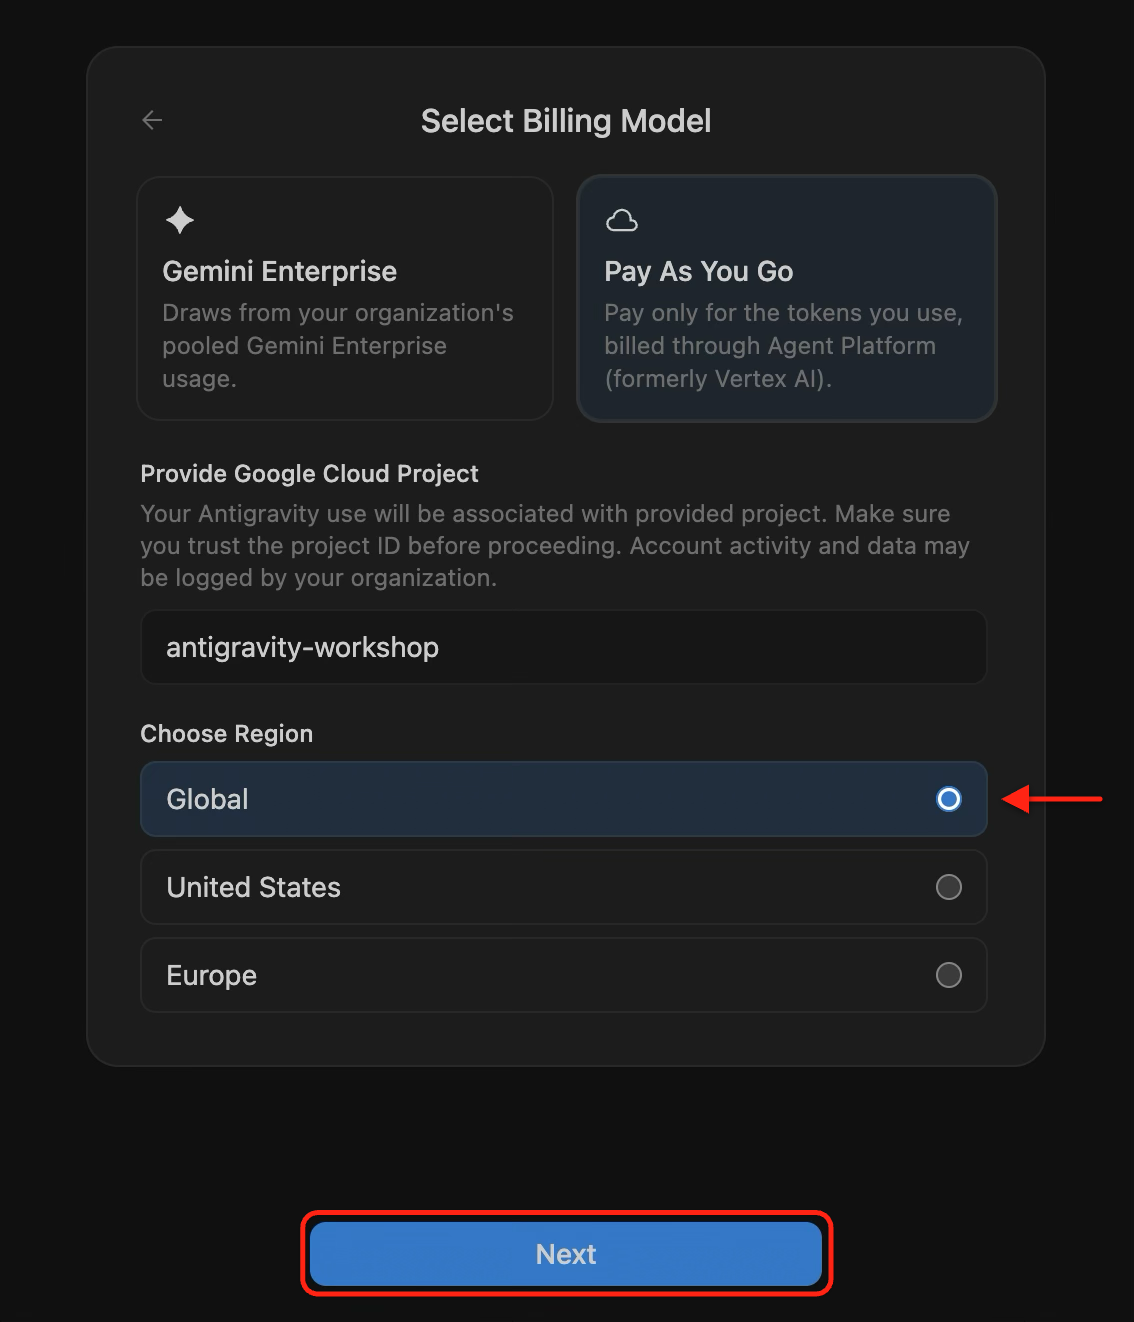
- Under Choose Region, select Global and click Next:
- Complete any remaining first-run theme or terms prompts to open your Antigravity workspace.
🔍 Check your work
- In the bottom-left corner of the Antigravity app, click Settings and open Account.
- Confirm that Your Plan shows
Gemini Enterprise Pay-as-you-goand Project ID displays your Google Cloud project. You should see output similar to:
Your Plan: Gemini Enterprise Pay-as-you-go
Project ID: antigravity-workshop-513111
You can switch or update your linked Google Cloud project at any time by clicking Manage next to Your Plan in Settings > Account.
7. Congratulations
You have set up your Google Cloud environment, run your first agentic prompts with Gemini 4 Argon in Antigravity CLI, and learned how to link your Google Cloud project in the Antigravity desktop app!
What you accomplished
- (Optional) Claimed Google Cloud credits from the Google Developer Program, or connected an existing Cloud Billing account
- Created a billing-enabled Google Cloud project, enabled the Agent Platform API, and saved your workspace configuration in
~/antigravity-workspace/.env - Authenticated Antigravity CLI with Application Default Credentials and launched it in Cloud Code Editor
- Selected Gemini 4 Argon (High) using
/model gemini-4-argon-highand ran sample prompts in your workspace - (Optional) Linked your Google Cloud project in the Antigravity desktop app using Pay As You Go billing