
1. Introduction
In this codelab, you will learn about Google Antigravity, an agentic development platform that is designed to help you develop in this era of agents. Antigravity 2.0 serves as your AI agents' central command center, providing a unified platform to launch, monitor, and orchestrate their activities.
With the 2.0 launch, Antigravity is no longer just an Agent Manager integrated with an IDE. It is now a complete ecosystem of products designed for the agent-first era:
- Antigravity: The flagship standalone application for macOS, Linux, and Windows. This is your command center to manage multiple local agents in parallel, run scheduled tasks and more. Unlike its predecessor, the Agent Manager, Antigravity 2.0 is a standalone application that functions independently of an IDE.
- Antigravity IDE: The original fully-featured, agentic IDE remains available (and recommended for developers!). It comes with the agent manager, artifacts, and a deep understanding of your codebase.
- Antigravity CLI: A command-line interface for terminal-based agent interactions. This will not be covered in this tutorial.
- Antigravity SDK: Tools for developers to programmatically integrate Antigravity into their own systems. This will not be covered in this tutorial.
- Antigravity for IDEs: This has been recently released. This integrates Antigravity's autonomous agent capabilities directly into your favorite editor with official extensions for Visual Studio Code, Jetbrains, Zed and more. In case you do not wish to use any of these extensions, you can use the standalone Antigravity IDE mentioned above.
In this codelab, we will heavily focus on Antigravity and touch briefly upon the Antigravity IDE. The other two components, Antigravity CLI and Antigravity SDK, are not covered.
If you are interested in a codelab on Antigravity CLI, which is a terminal-based application, refer to the codelab: Getting Started with Antigravity CLI.
What you'll learn
- Installing and configuring Antigravity.
- Exploring key concepts of Antigravity like working with Agents, Projects and more.
- Customizing Antigravity via various settings and as per your preferences.
What you'll need
Antigravity needs to be locally installed on your system. The product is available on Mac, Windows and specific Linux distributions. In addition to your own machine, you will need the following:
- Chrome web browser.
- A Gmail account (Personal Gmail account).
This codelab is designed for users and developers of all levels.
Reporting issues
As you work through the codelab and with Antigravity, you might encounter problems.
For codelab related issues (typos, wrong instructions), please open a bug with the Report a mistake button in the bottom-left corner of this codelab:
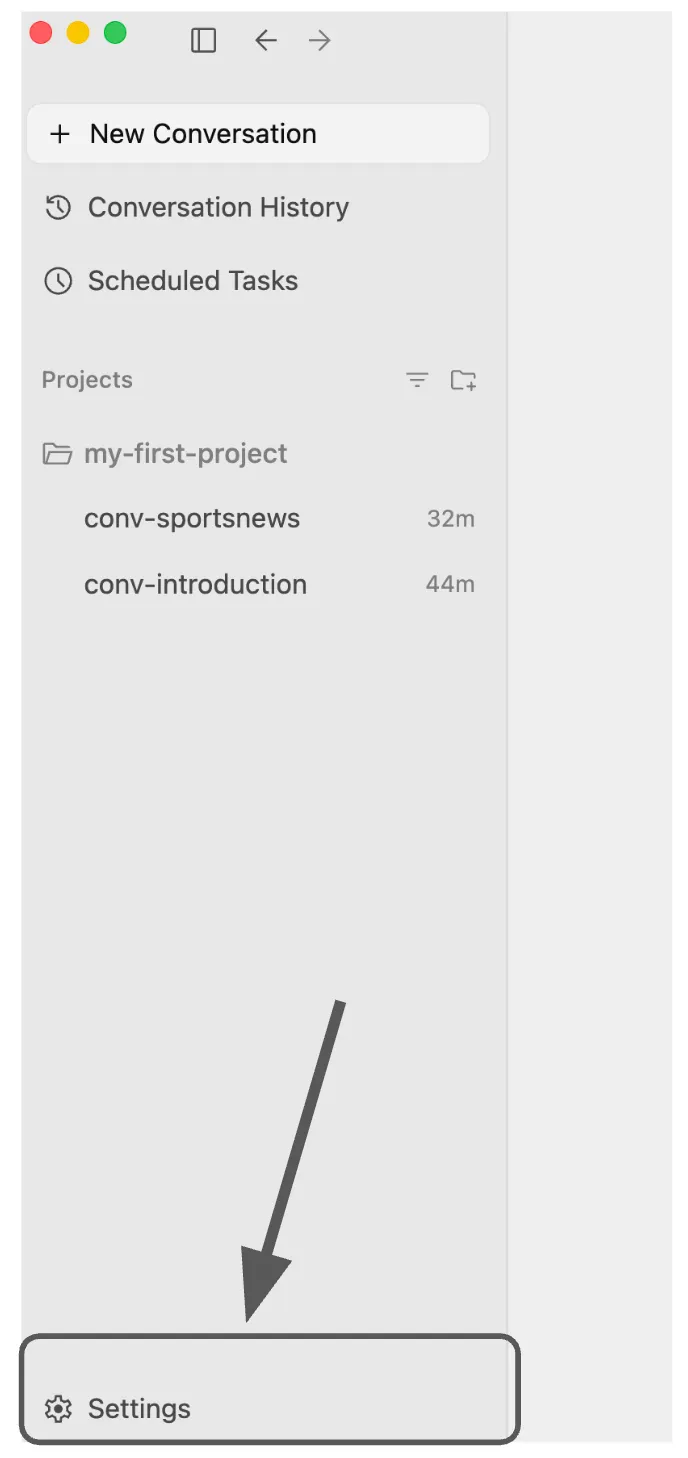
For bugs or feature requests related to Antigravity, please report the issue within Antigravity. You can report product feedback by clicking on Settings, available in the bottom left corner of the Antigravity product. And then choosing the option Provide Feedback.
2. Installation
Installing Antigravity
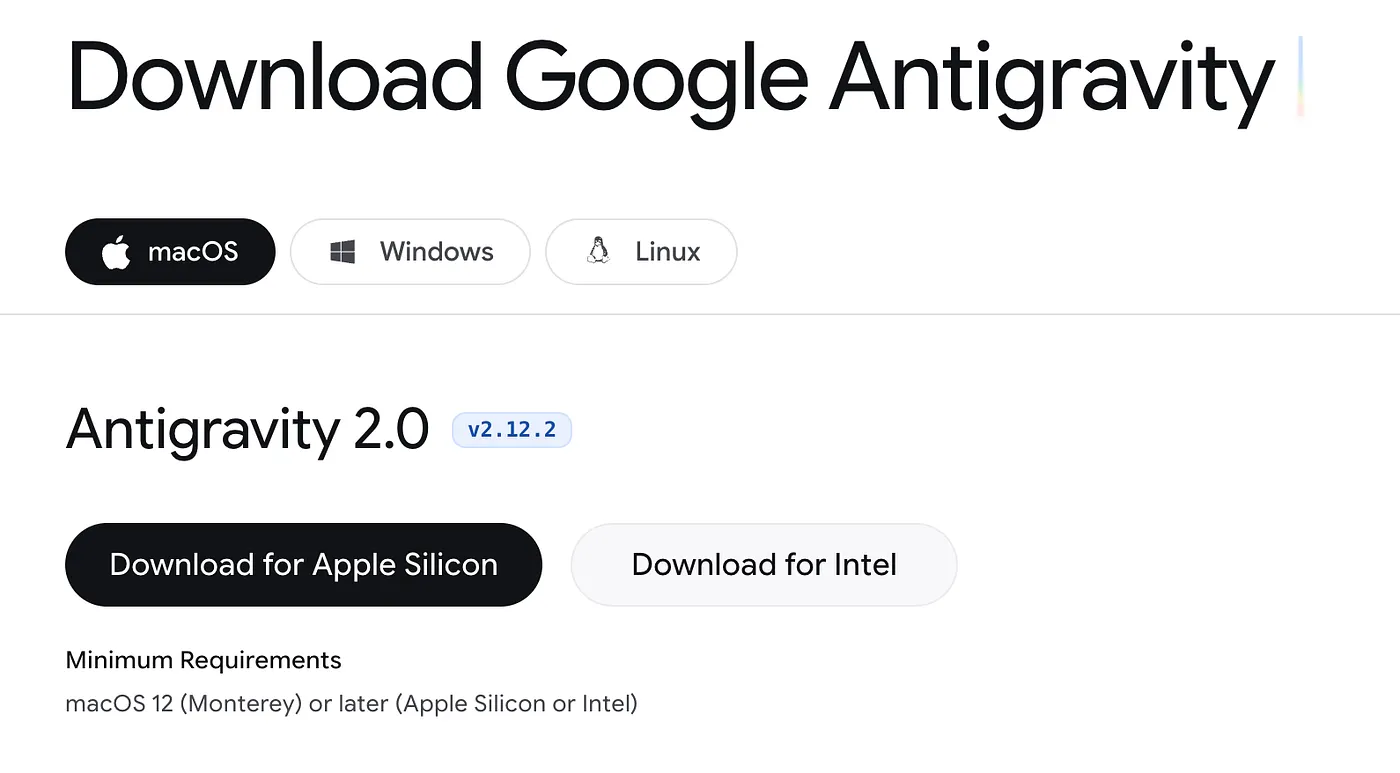
Go to the Google Antigravity download page page. Download the Antigravity application for your operating system (macOS, Linux, or Windows).
Run the installer. It shows the following screen:
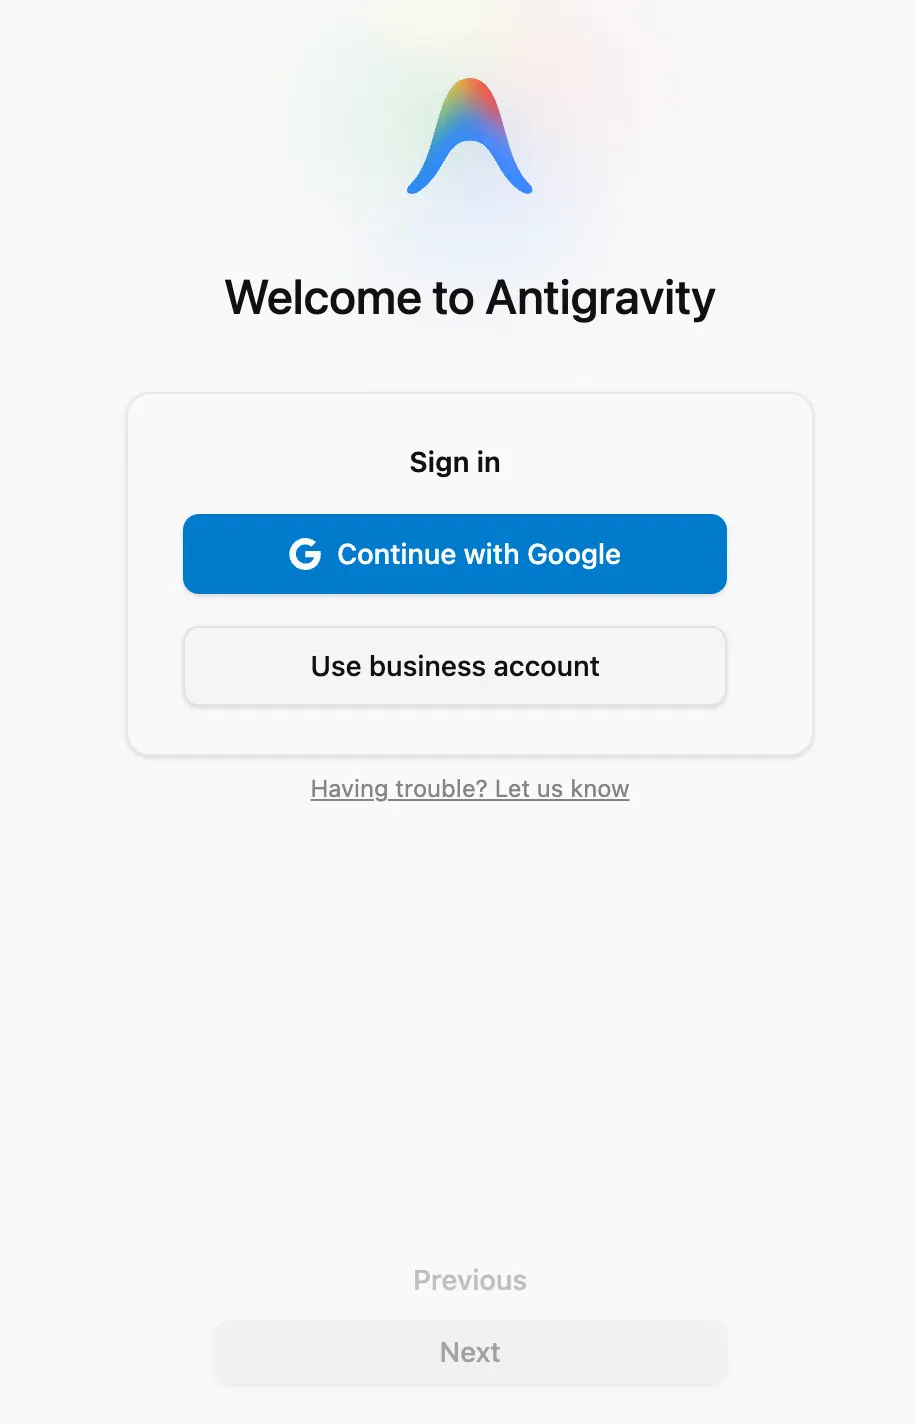
There are 2 options:
- Continue with Google: You can use your personal Google account here and Antigravity supports a starter pack with personal Gmail. In case you have purchased the Google AI Pro / Ultra packages on your Google Account, then appropriate Antigravity quota limits will be applied.
- Use business account: This applies if you are using this in an Enterprise project, where you have a Google Cloud Project and your organization has purchased licenses. Alternatively, you can use the Google Cloud Project along with Agent Platform in a pay as you go fashion. We will not be using this option here.
Click on Continue with Google and login with your Google account. Complete the authentication and it should show the following:
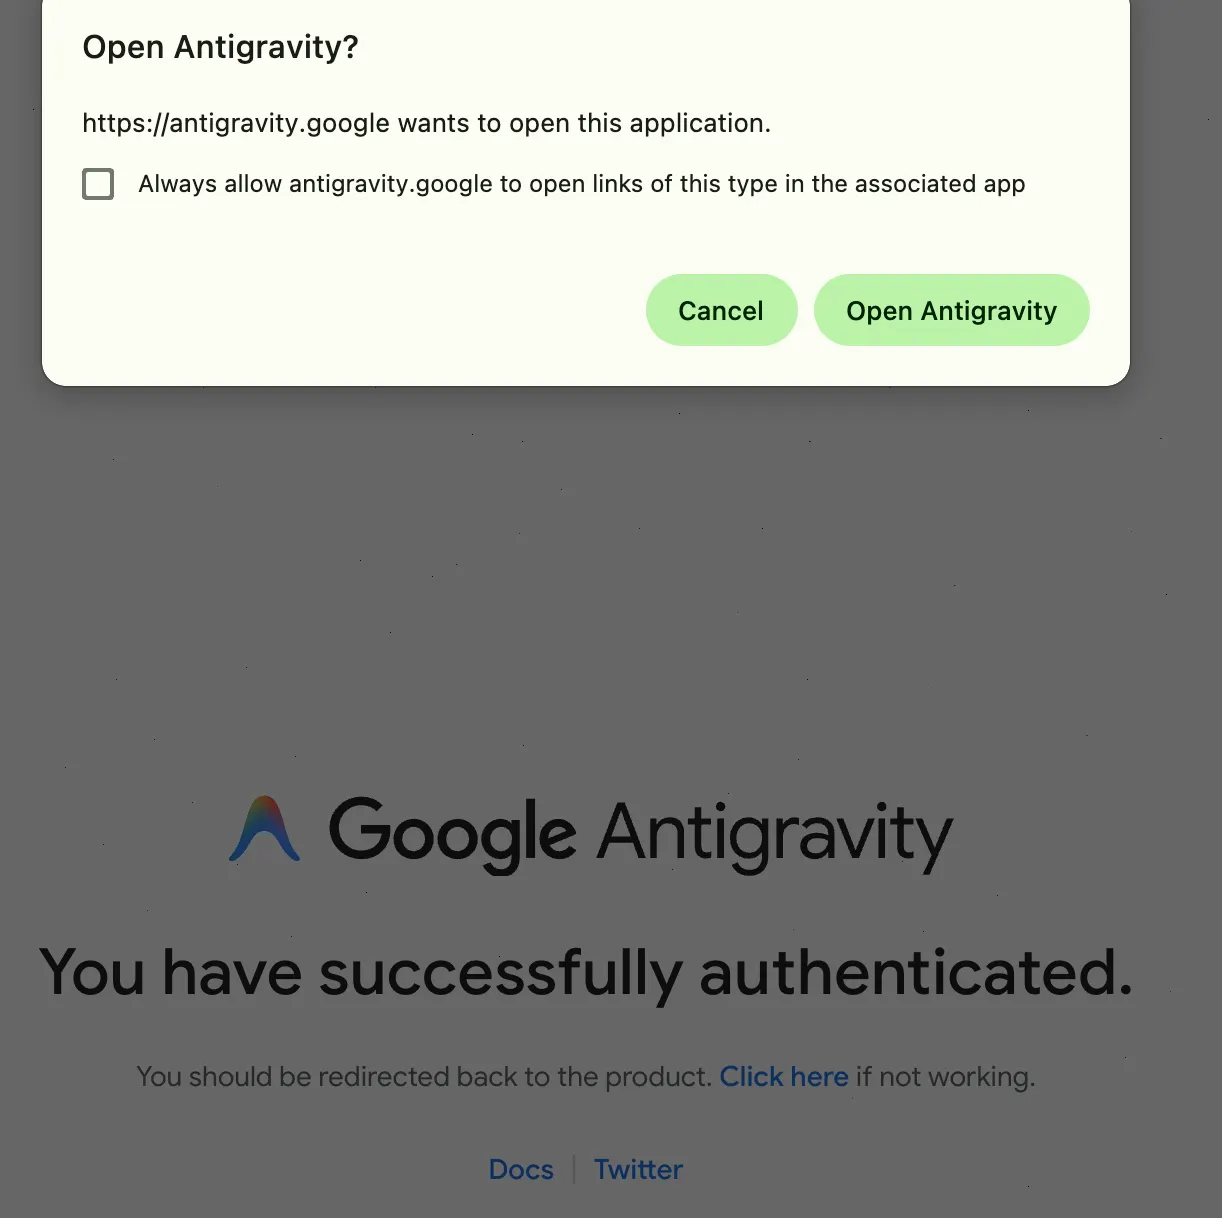
Click on Open Antigravity and it will continue with the rest of the process.
You can select a Theme, one or more Google plugins that you can augment Antigravity with (you can ignore all of that for now) and a Terms / Conditions screen. Accept it, click on Finish and you should see an interface of Antigravity that looks like the following:
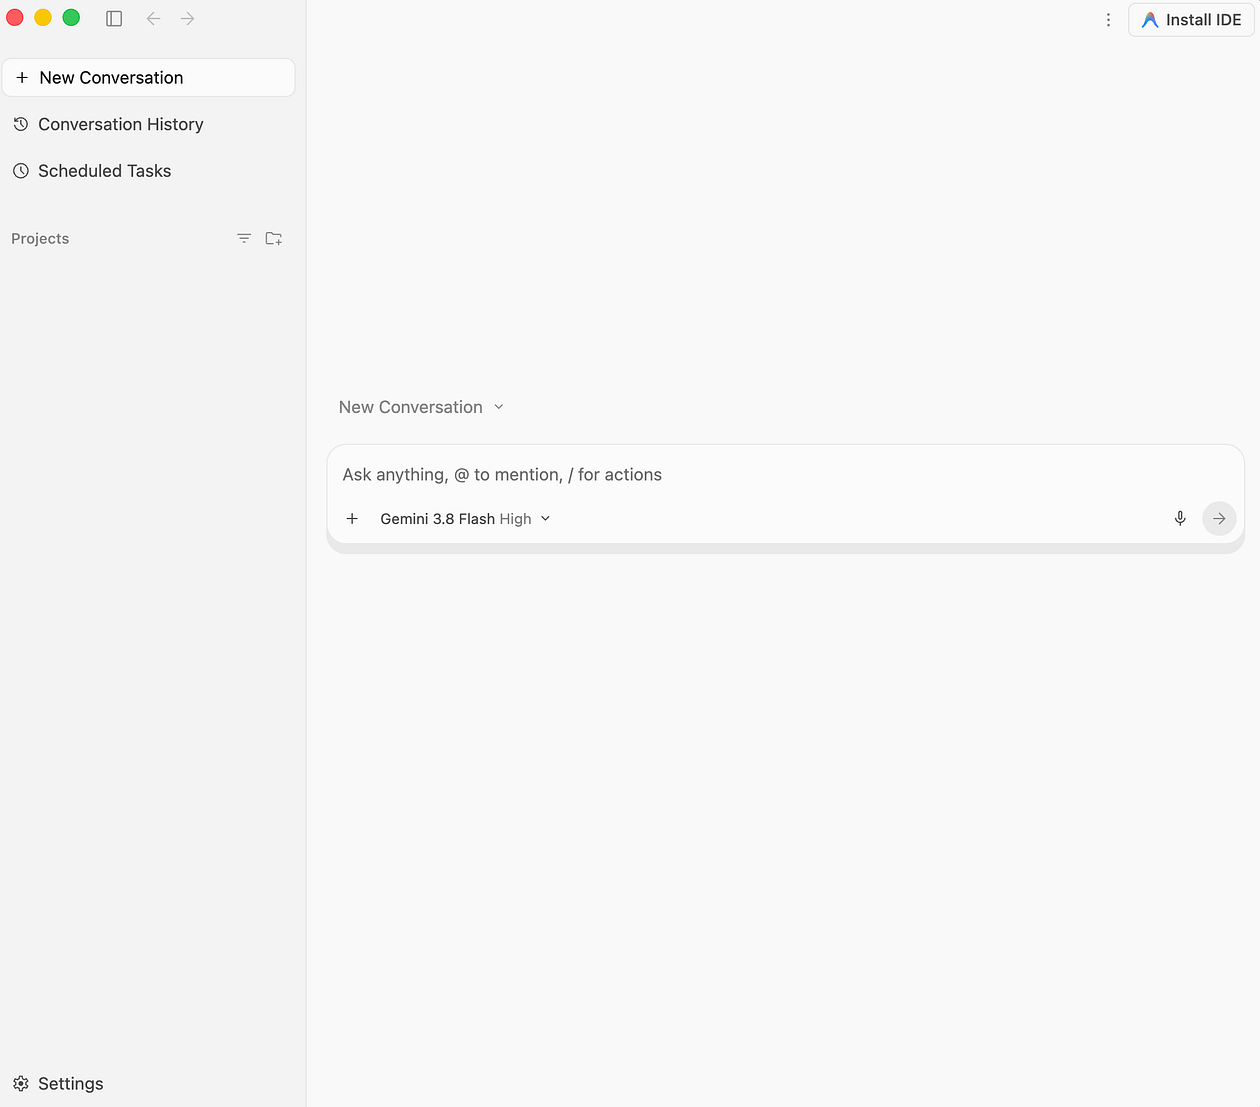
We will get to the interface in a while but we are all set for the moment.
Install Antigravity IDE
In the above screen, you should see an Install IDE button in the top right corner. That should take you to Google Antigravity IDE download page or you can go there directly too.
Click the Download button. This will take you to a page where you can either download the Antigravity Extension for your favourite IDES (Visual Studio Code, Zed, Jetbrains, etc) or you can download the standalone Antigravity IDE installer as given below:
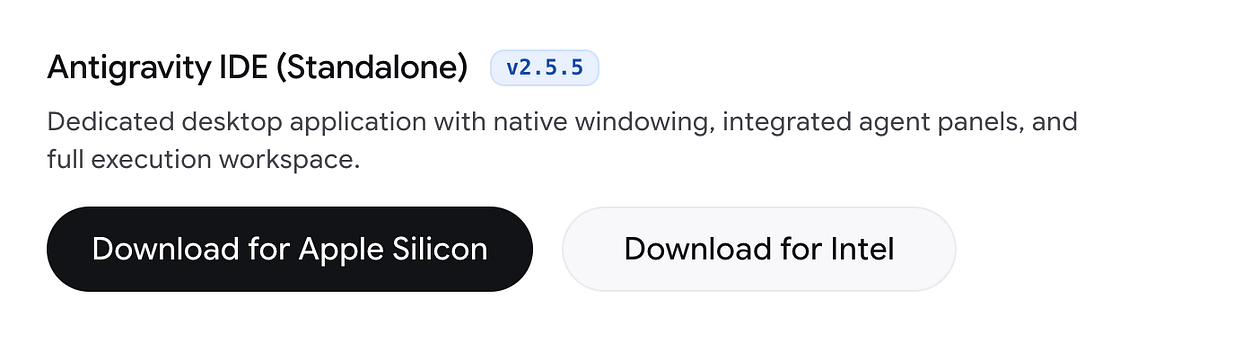
Download the appropriate installer. Run the installer, login with the same Google Account and go ahead with the installation. Go with defaults for every step ranging from IDE, Default Actions, Plugins and more.
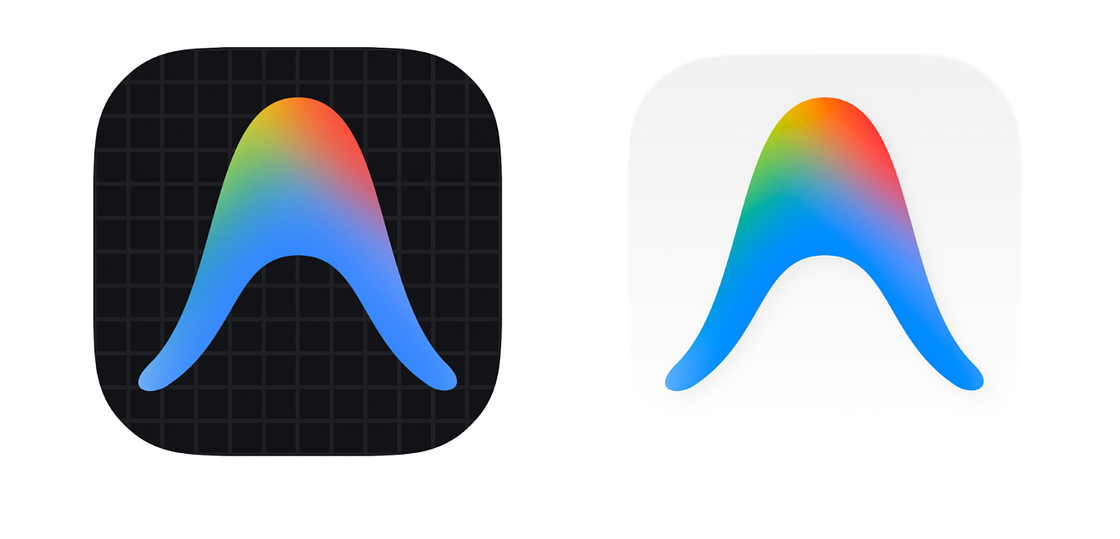
You will see two icons in your dock: Antigravity 2.0 (white background) and Antigravity IDE (black grid background).
3. Antigravity 2.0 Interface
Go ahead and launch Antigravity, if you have done so so atready. Ideally, you should see a screen that looks like this. If you have installed the standalone Antigravity IDE, then the top right corner button will be Open IDE and not Install IDE.
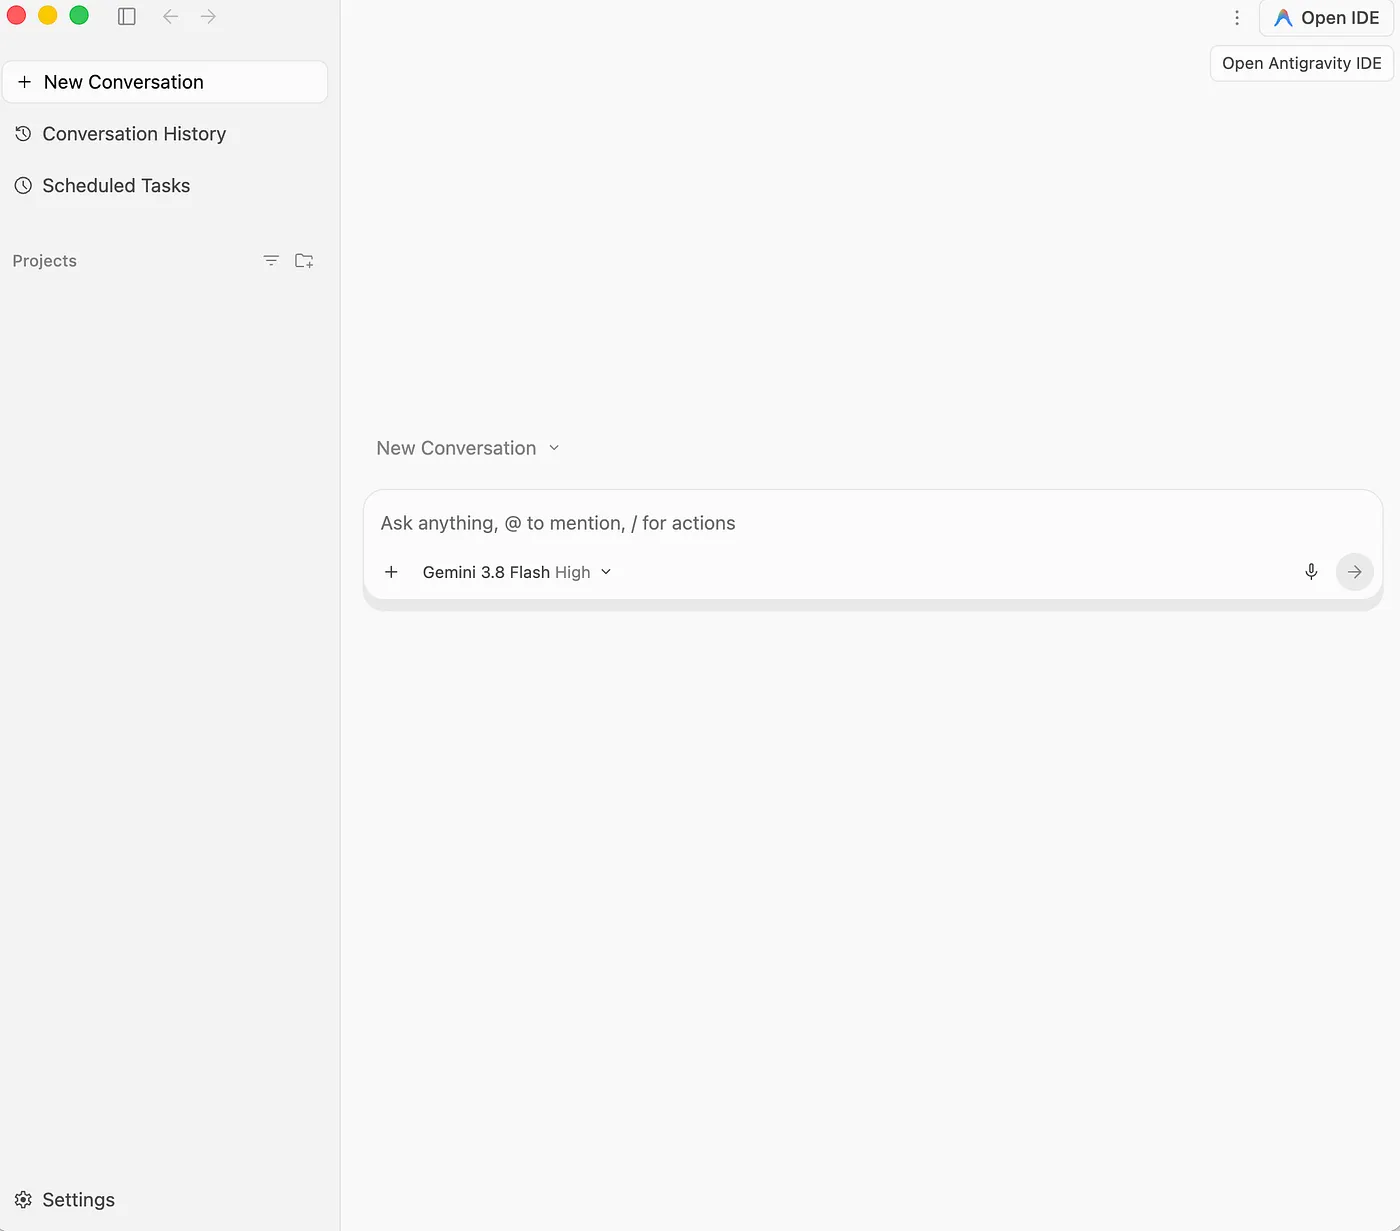
We will get to the Settings option in the lower left corner, as we go along this tutorial, as we need.
Projects
Let's understand the concept of Projects first in Antigravity. This is key because if you notice the interface in the right pane, it clearly says Select Project and Antigravity uses a project-centric approach to ensure the agents have access to the right files, tools, permissions and more.
A project is a combination of folders defining the environment and the scope of your agent. Instead of forcing an agent to operate within a single folder, a project can work with one or multiple folders (e.g., a frontend and a backend repo), providing your agents with all of the context required for your codebase. All projects have their own isolated agent settings, allowing you to customize different projects' security settings independently.
Let's create our first project. In your home folder on your local machine, create a folder named $HOME/agy2-projects/my-first-project . Note that it does not have to be an empty folder.
We are now going to create our first project in Antigravity by defining what folders constitute the project. In our initial case here, it will be just one folder i.e. $HOME/agy2-projects/my-first-project.
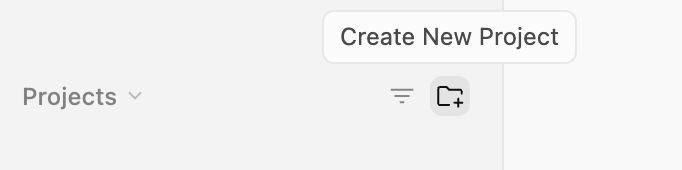
In the left navigation bar, you will see a Projects section. Click on Create New Project button as shown below:
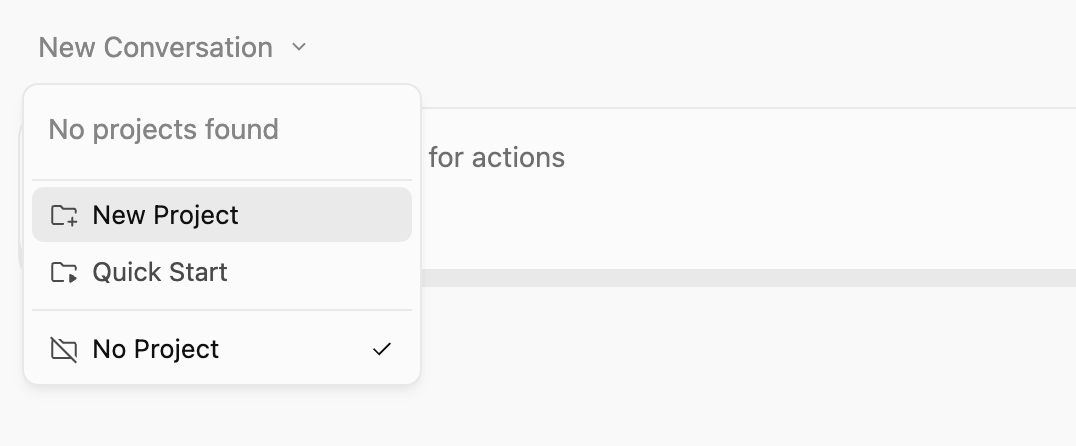
Alternately, you can also click on the New Conversation link in the main panel and you should see the New Project option as shown below:
Either way, click on New Project as shown below:
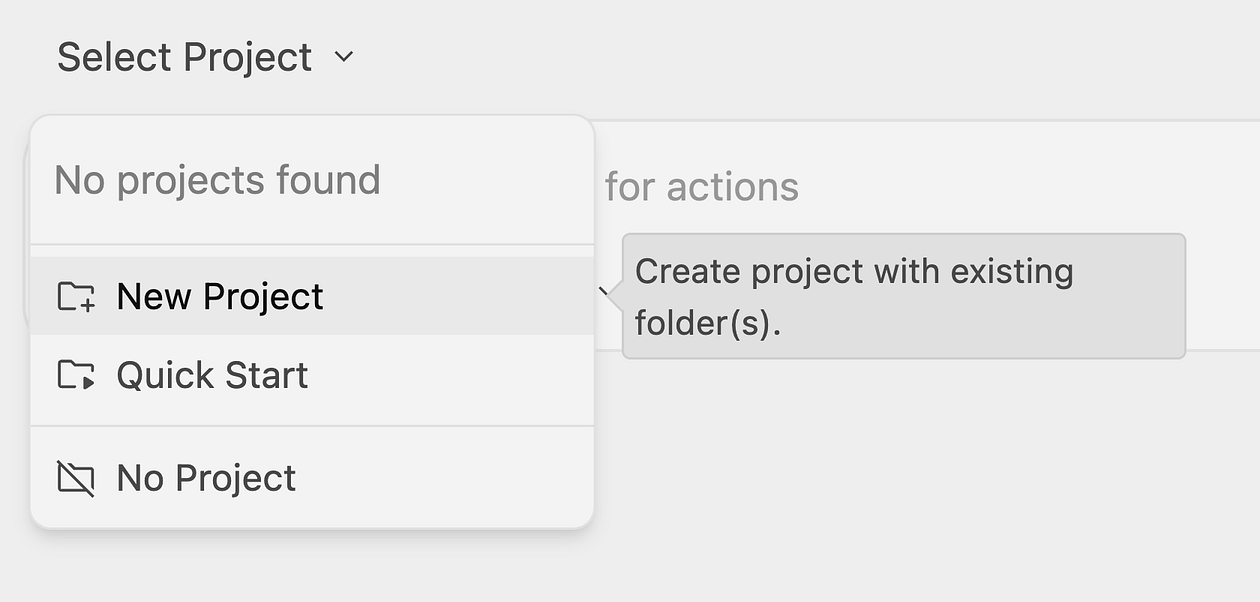
It will ask you to select a folder for your project by opening up the Folder or File Explorer. Select the folder, in our case, it is $HOME/agy2-projects/my-first-project.
So currently we have defined a project my-first-project and it points to a folder i.e. $HOME/agy2-projects/my-first-project.
You might ask if a Project can have only one folder. What if I want to have a project that has both front-end-code and back-end-code folders. You can add more folders, so that Antigravity has a full context while working with your projects. Click on the Project settings for the specific project (my-first-project) as shown below:
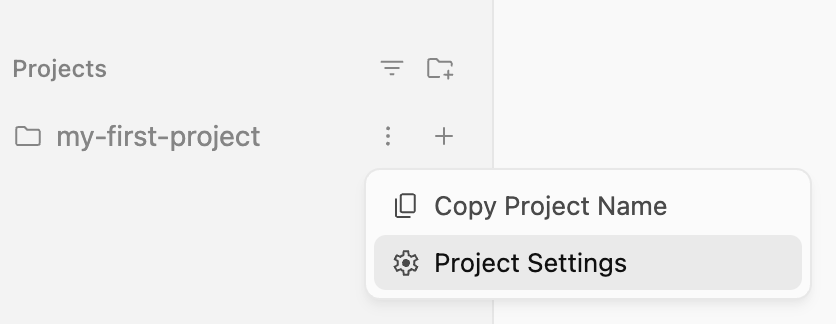
This will bring up the Project Settings dialog for the specific project and you will notice that it contains the option of adding more folders via the Add Folder option.
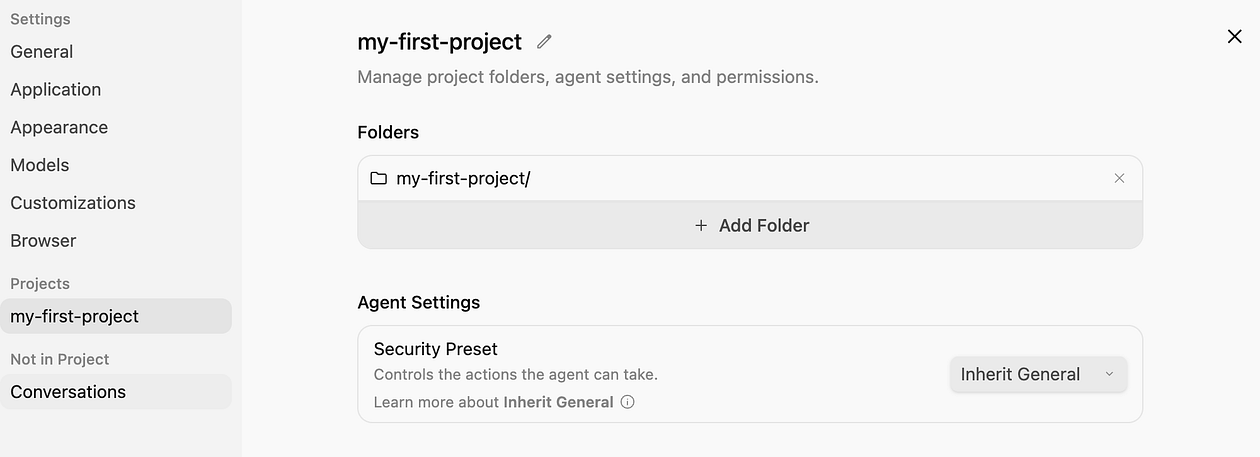
You can still add more folders to the Project, as you can notice (via Add Folder), but for now, we are fine with this and we can click on the Create button.
You can close the settings page now.
One of the key things that you would have noticed is that "All projects have their own isolated agent settings, allowing you to customize different projects' security settings independently." So at any point in time, if you want to tweak the behaviour of Antigravity for your specific project, you can go into Project Settings and modify specific settings as needed.
In simple words, each project inherits permissions around reviewing artifacts, tools allowed, MCP Server configuration from a global configuration that is available via Settings in the main interface. However, you can set individually these permissions and more per project, thereby getting a lot more flexibility and keeping the context and tools lean and mean for your specific project.
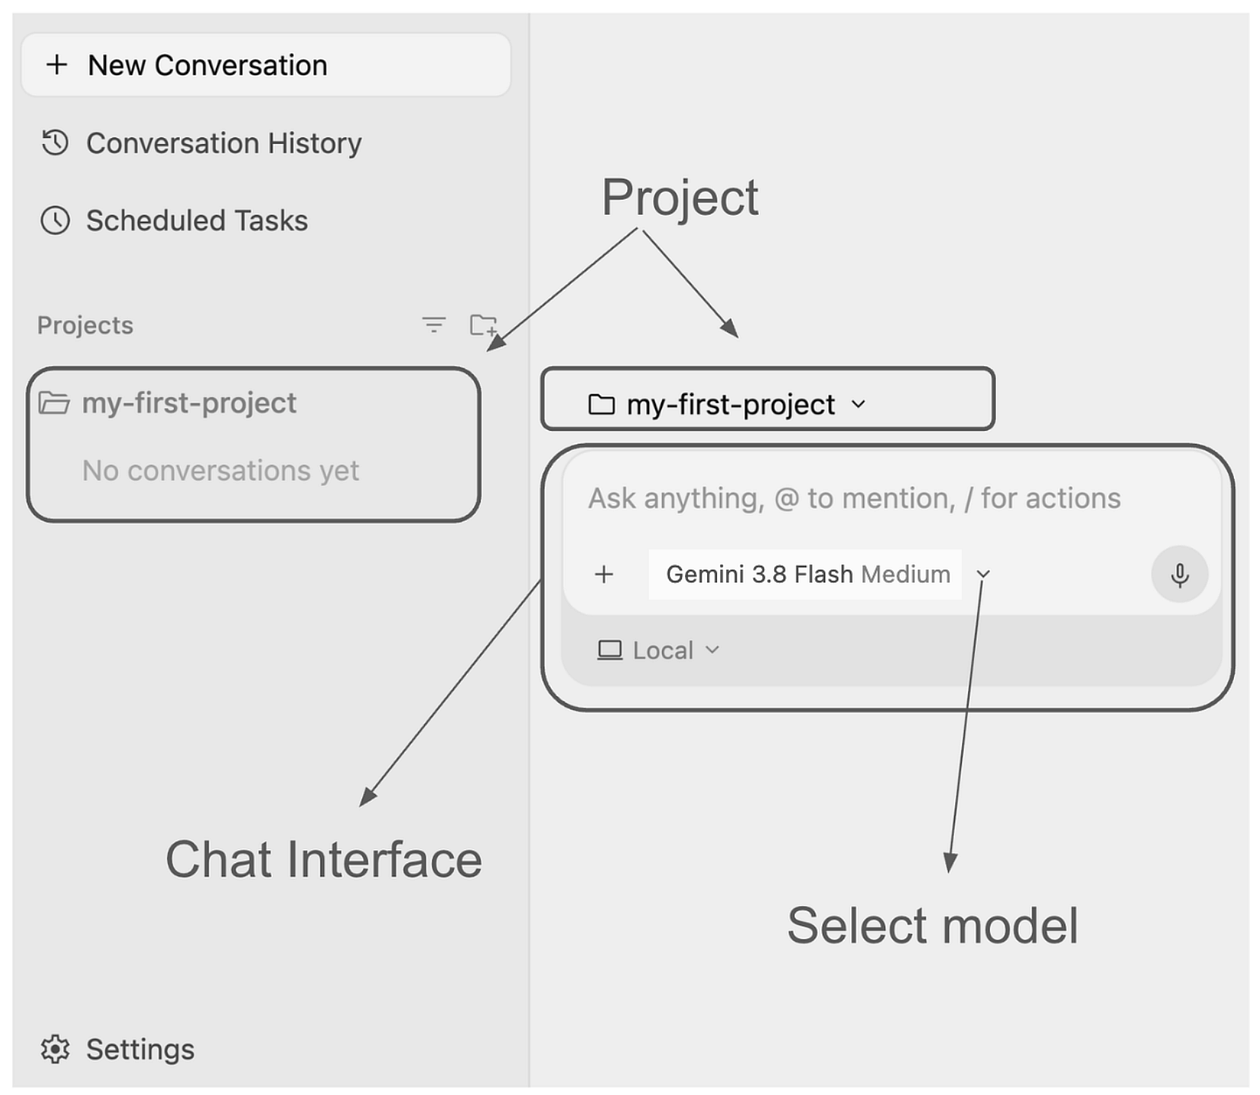
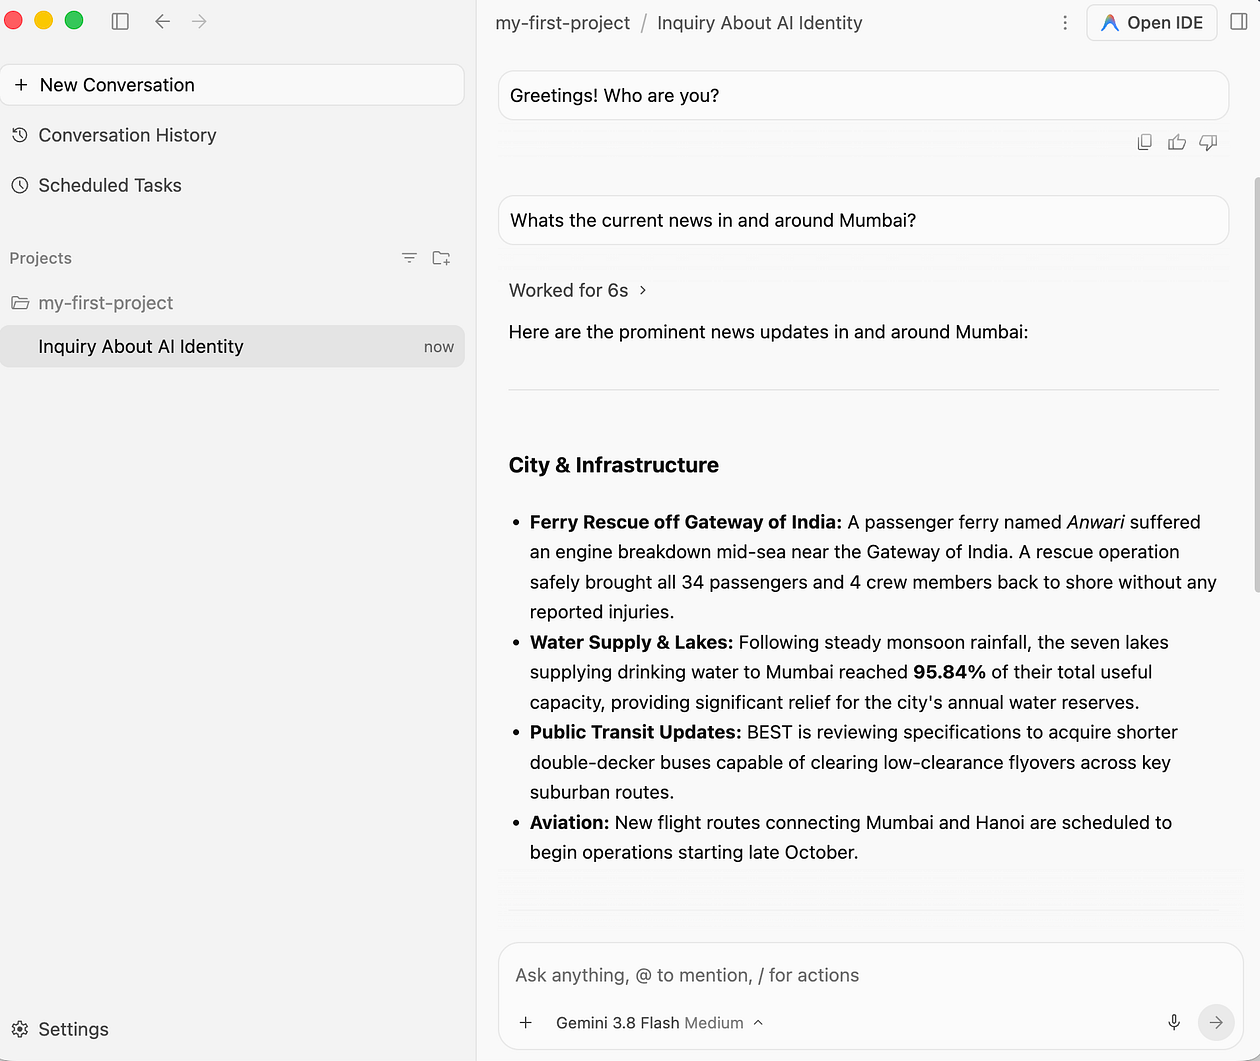
For now, let's say Hi to our wonderful agent by clicking on Start first conversation. Once you do that, you will see the following screen and our first project that now appears both in the list of projects on the left and currently as the project in which the Agent will work when you give it messages via the Chat Interface. Notice that you can select the Model, pass additional context via the + sign or @ or / actions and so on.
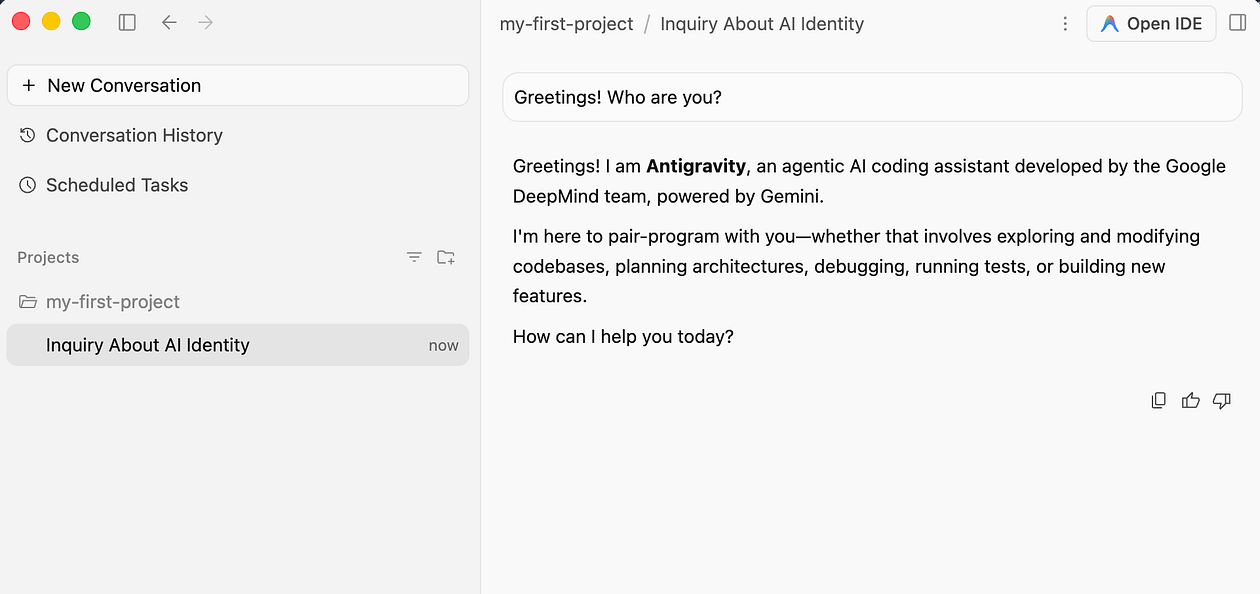
Let's greet our Agent with a message and it responds accordingly.
I have another request to get me the news and it does a good job.
Conversations
What we have done here is that in our Project (my-first-project), we started a conversation thread and currently there is a series of messages (user message and agent responses) that are present in the thread.
You will see that this conversation thread remains a single one and it appears on the left side grouped under the project.
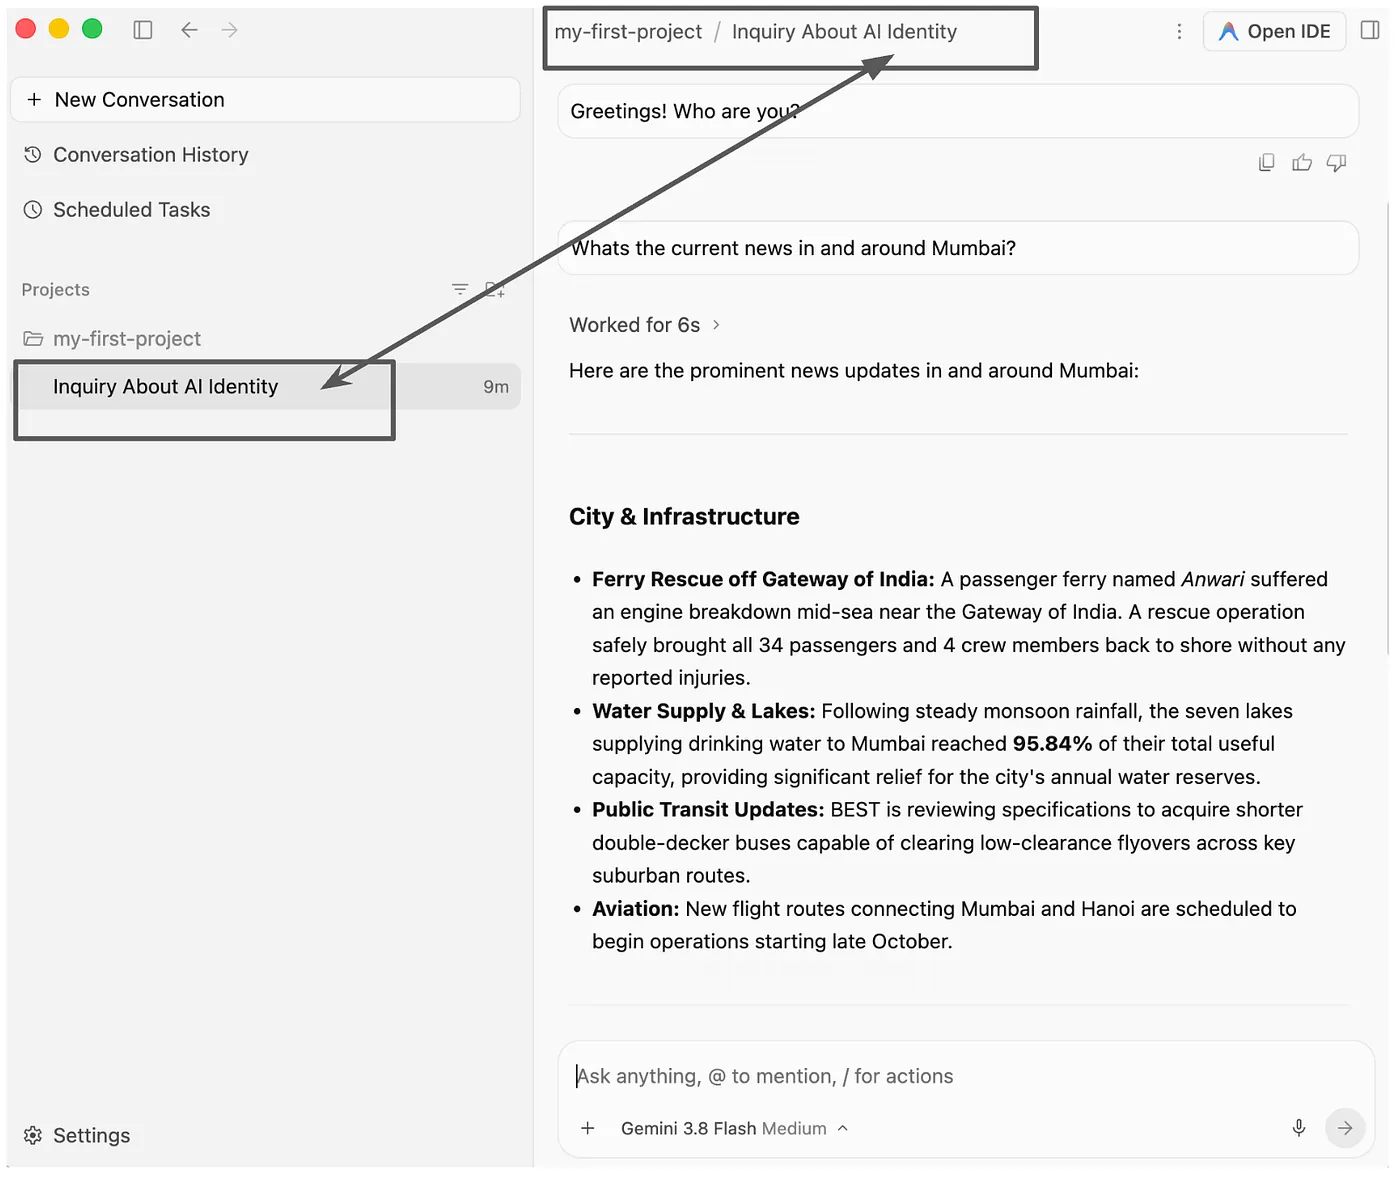
Now, let's do something interesting and give a name to this conversation thread. Let's call it conv-introduction.
To do that Click on the three vertical dots, next to the conversation. It will show you 3 options. Choose the Rename action.
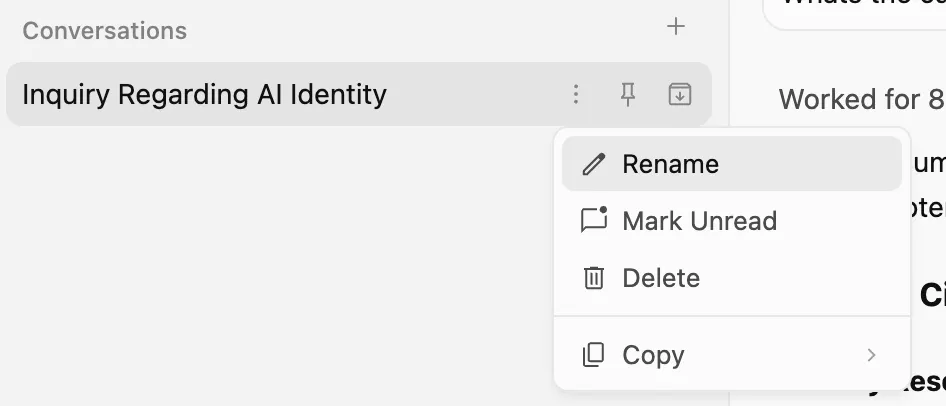
Give the value conv-introduction or any name that makes sense to you.
Now, if you'd like to have a completely new conversation in the project, click the + (New Conversation in Project) sign next to the project as shown below.
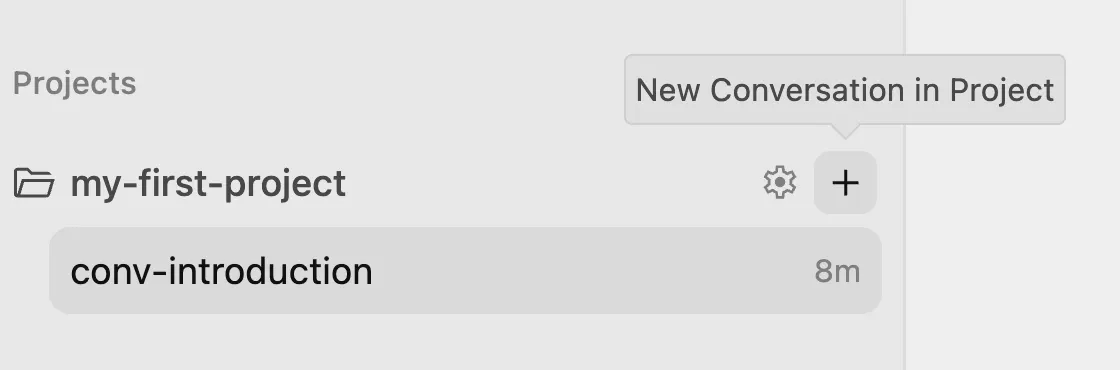
You are now into a totally new conversation.
Let's ask some sports news from across the world. Note that we are still in the my-first-project i.e. "Give me some sports news from across the world".
This gives me some news around the sports world and you can notice that now we have two conversation threads in the same project.
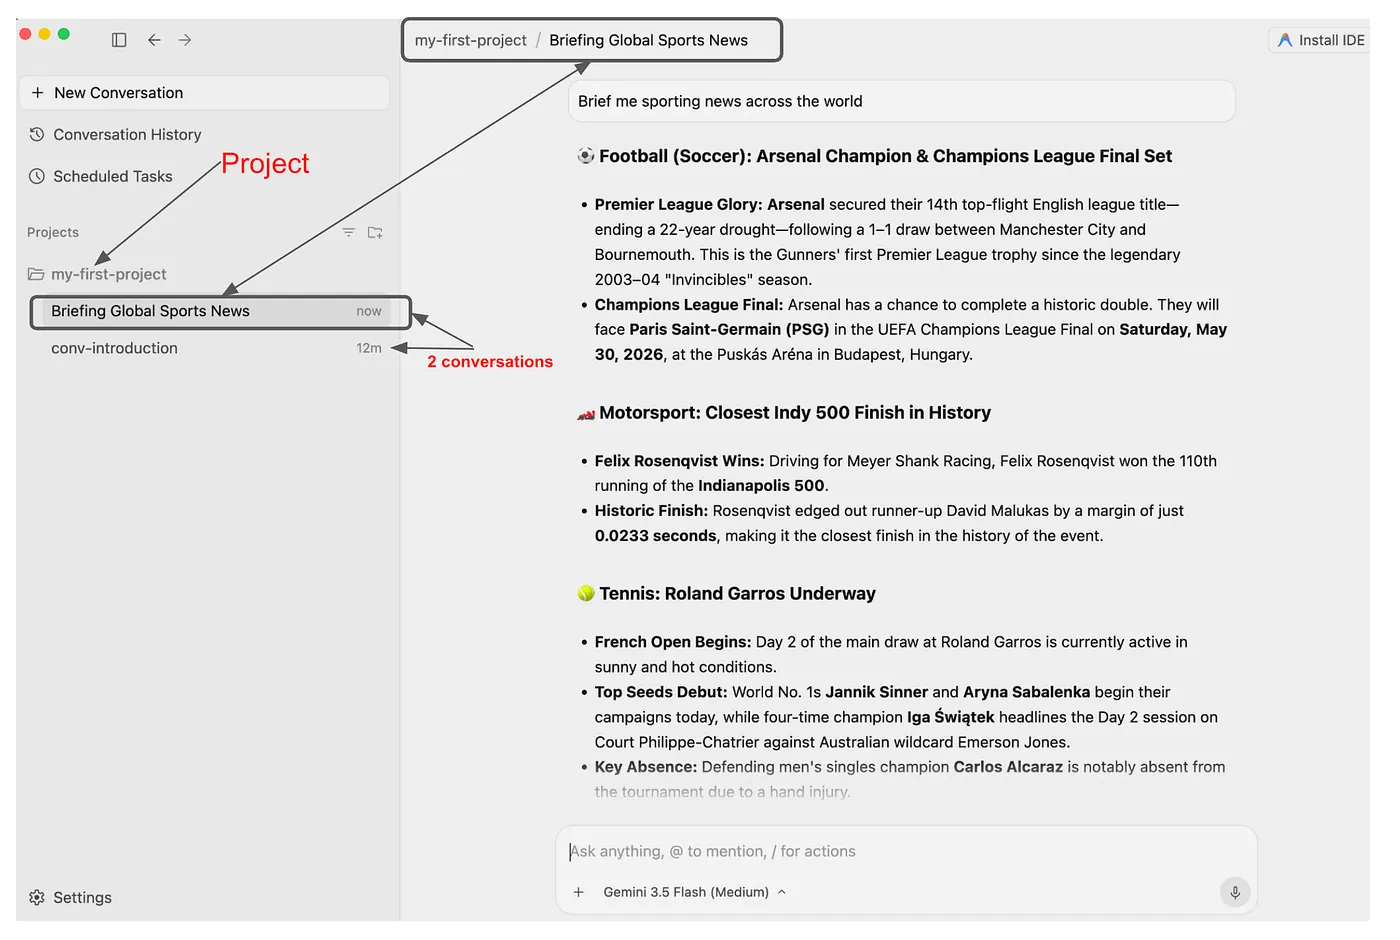
Let's rename this conversation to conv-sportsnews. If you'd like to see all the conversations that have happened so far, you can visit the Conversation History in the top left as shown below:
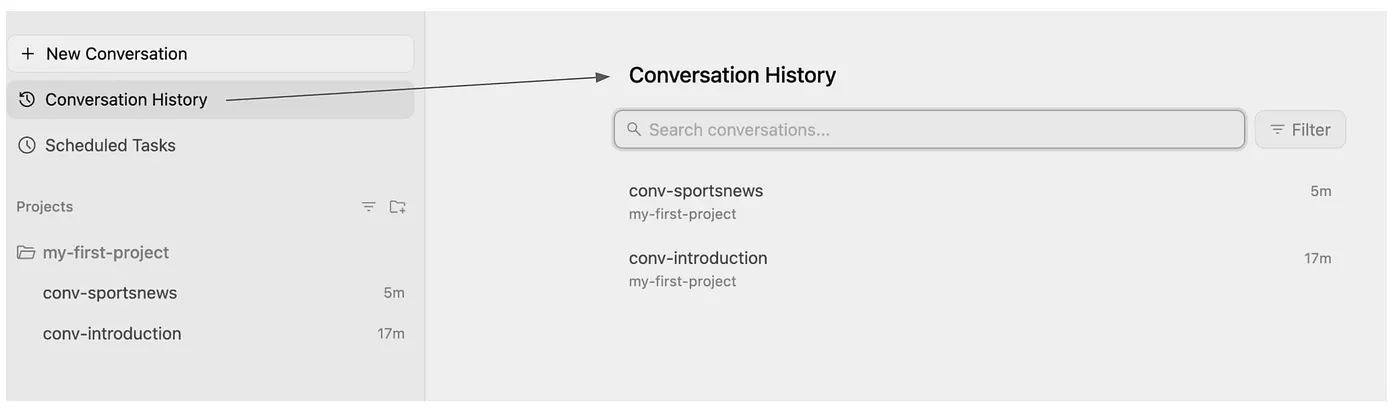
At any point in time, you have the option of having a new conversation either in the current project or a new project via the New Conversation option at the top.
Project Settings
Now let's get back to the Project Settings that we earlier talked about. When you create a project in Antigravity, it inherits default permissions, which you can override specifically if you'd like.
To get to the project settings for a specific project, click on the settings gear icon next to each project in the left navigation bar.
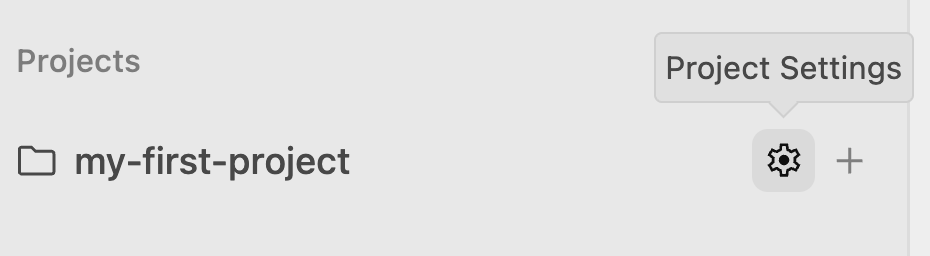
This will lead you to the specific Project (i.e. my-first-project) settings as shown below:
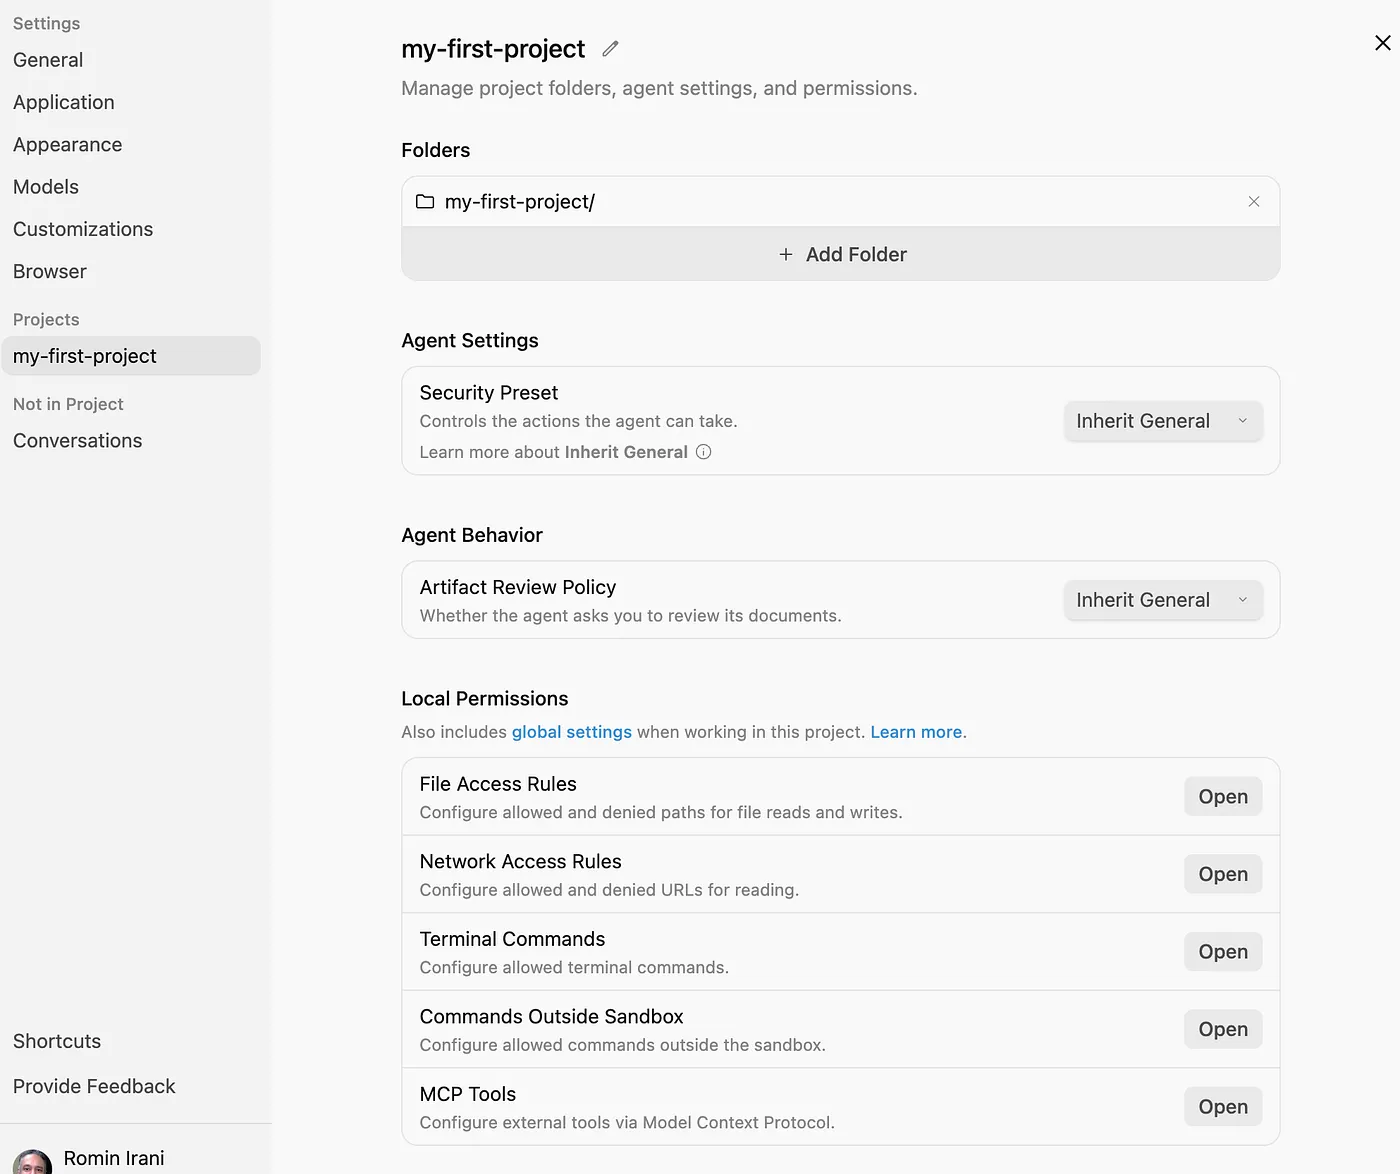
Notice on the left side under projects, the my-first-project is selected. If there were more projects, these would be visible under this list and you can easily select any of the projects and tweak their settings as needed.
Now, let's focus on the right side, the project settings shown for my-first-project. You will notice that it has the single folder that we had added to this project. You can add more folders from here too.
I suggest that you first go through the entire list and see the flexibility now provided to help you change a ton of settings as per your project customization requirements.
These include:
- Security Preset: You can determine if you'd like all terminal commands and file accesses to be reviewed first by you before the agent can perform actions.
- Agent Behaviour: In case of artifacts generated, for example the implementation_plan.md , where you would like to review before asking the agent to go ahead and execute the plan.
- Various Local Permissions i.e. file paths allowed for access, which URLs are allowed or blocked for the Agent, etc.
- You can even configure which specific MCP Tools are allowed for this Project. This is quite useful to prevent all globally configured MCP Servers to be made available to the Agent in this project.
Note: At any point in time, you can go to the settings for Antigravity or even project settings via the main settings option in the Antigravity interface.
4. Slash Commands
There are some interesting slash / commands available in Antigravity. In your conversation chat interface, if you type / , you should see the commands as shown below:

Consider the /browser command. It is an explicit command to launch the browser and ask it to do something.
Try browsing to a website as shown below:
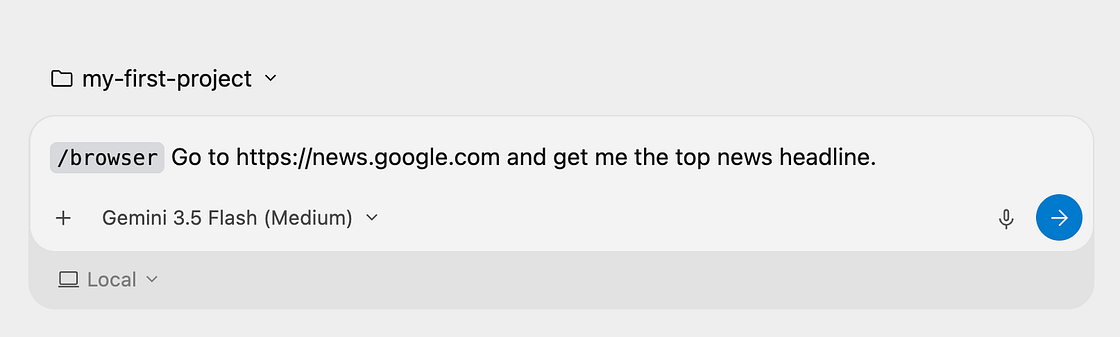
This spawns up a browser sub-agent that attempts to launch a debugging session with Chrome and asks your permission first:
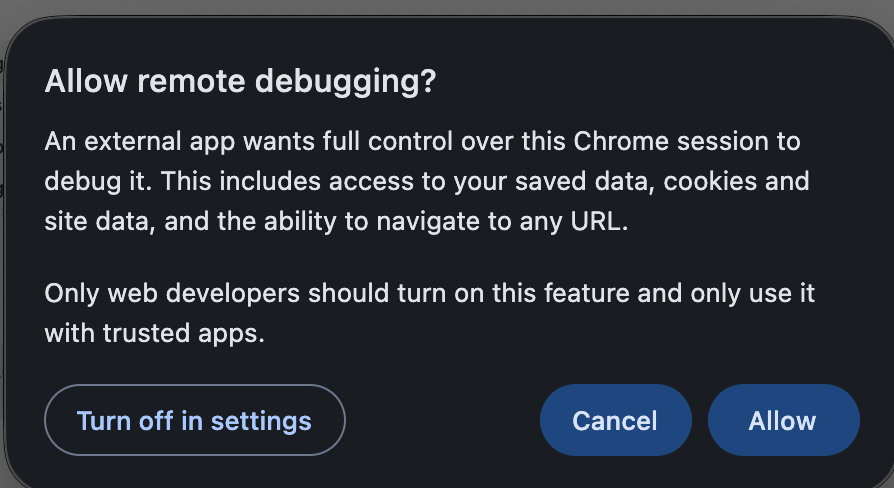
Once you allow it, the browser will visit the site, get the latest news and then you will have hte data returned to you in Antigravity.
The /schedule command is useful if you'd like to set up recurring or one-off tasks for the agent to execute at fixed intervals or on a schedule (e.g. 9:00 AM on Monday, Wednesday).
At the same time, you are provided the same facility to do this via the user interface and that is covered in the Scheduling Commands section in the next step.
5. Scheduling Commands
You can use the Schedule option in the main interface to automate recurring tasks or set one-time reminders in your specific projects.
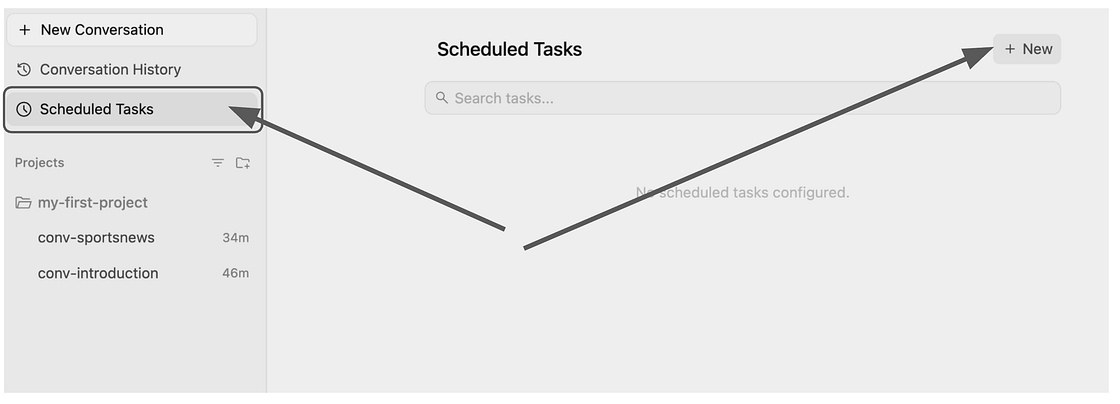
Let's create a daily task that reminds us of our daily 6 PM meeting. Click on New and fill out the details as shown below:
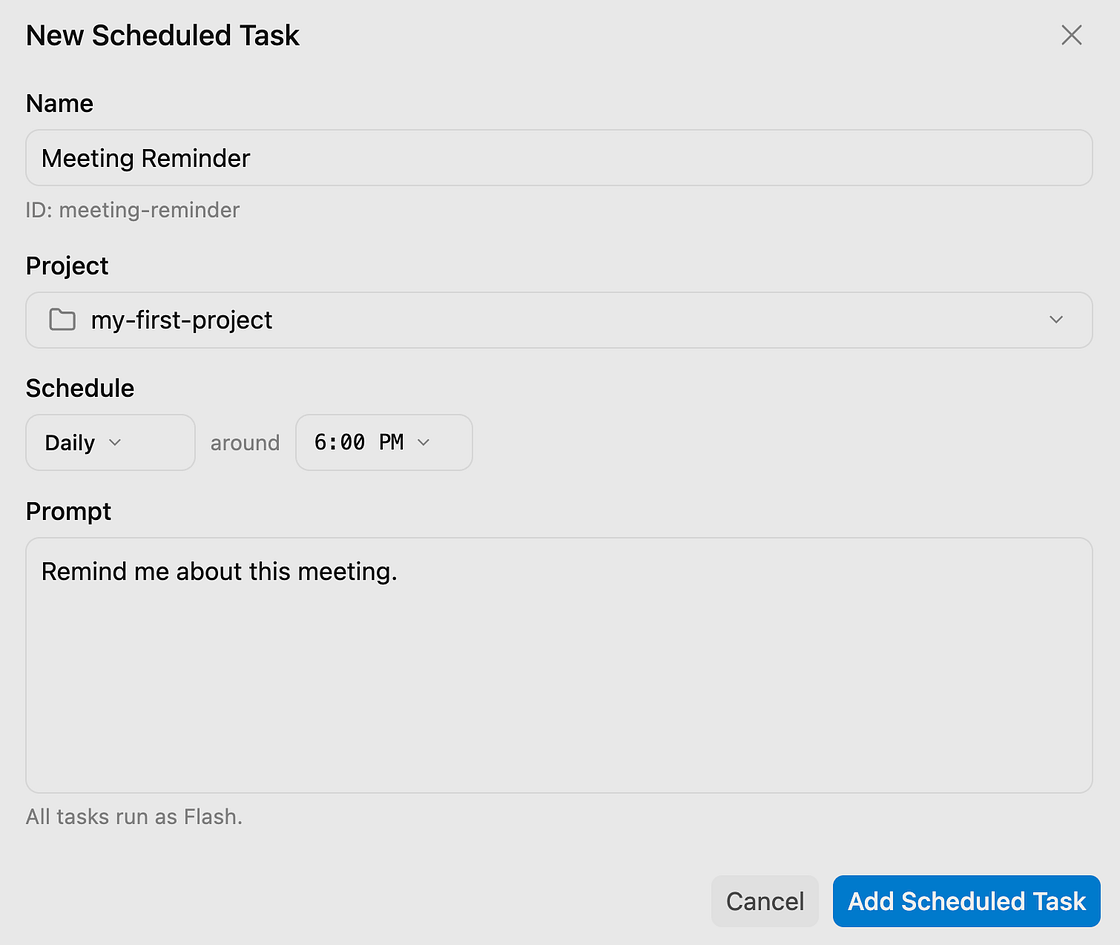
Click on Add Scheduled Task and then will add the task to the list of scheduled tasks as shown below:
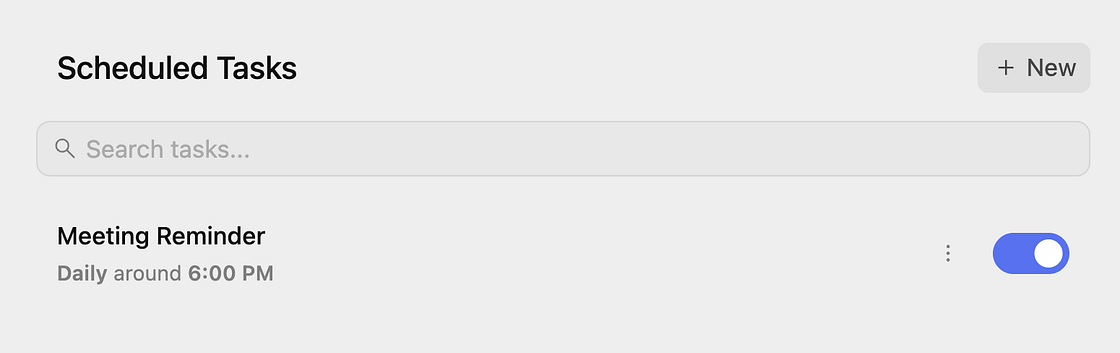
Let's add another one that reminds us to take a break every 20 mins:
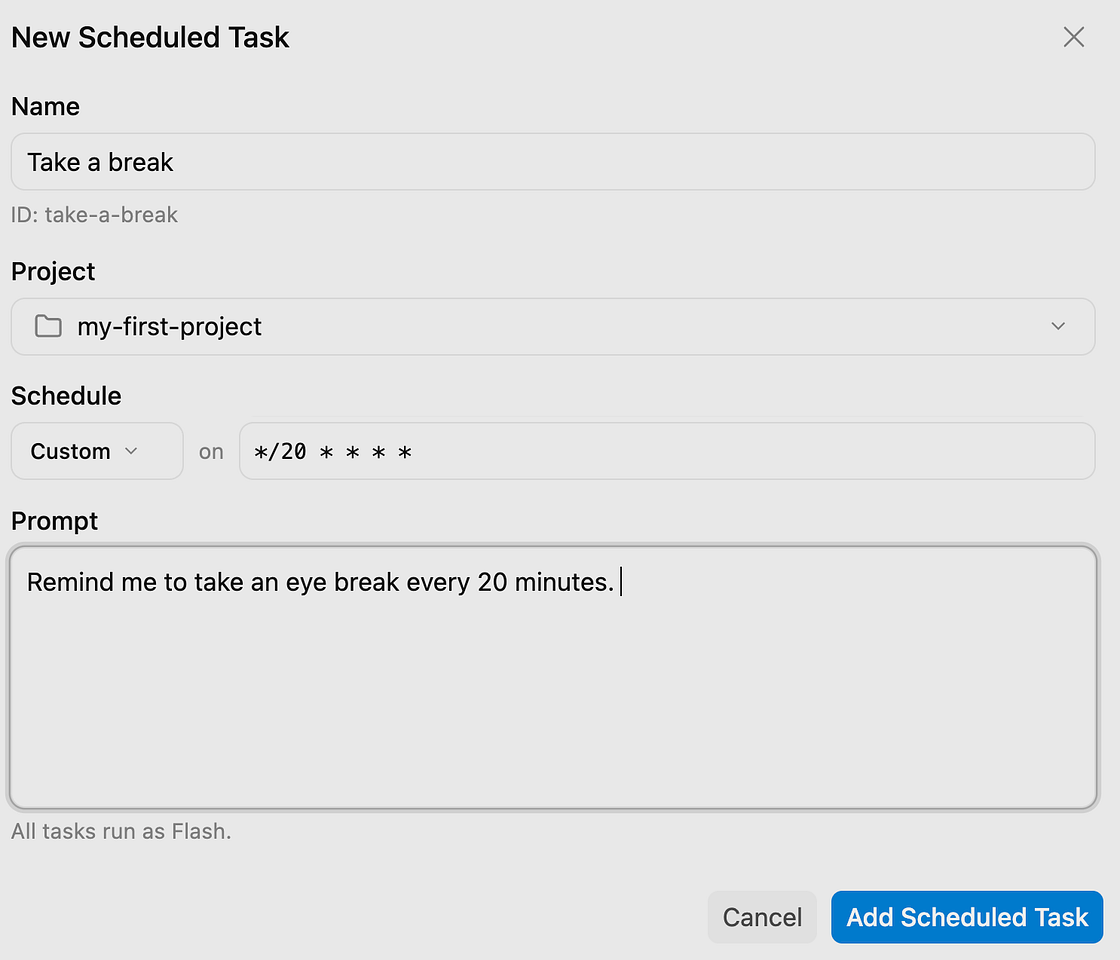
We have two scheduled tasks now, as shown below:
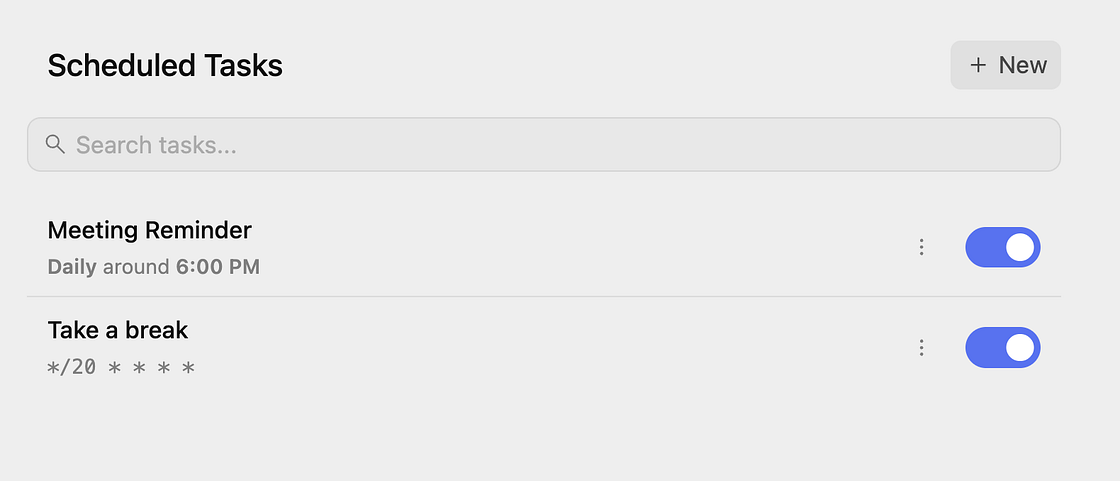
You can disable or delete any of the tasks. Remember that we have used basic prompts but your prompts could be detailed, could be invoking tools (talking to external systems) and doing a lot more work behind the scenes on a regular interval, based on your requirements.
6. Model Context Protocol (MCP) Servers
The Model Context Protocol (MCP) is the standard to help connect agents to external systems. They play a key role in ensuring that the agent remains grounded in terms of your data and integration.
Antigravity supports MCP servers, both local and remote. It also ships with integrations to several MCP servers that work with Google Cloud services and they are simply one-click installs with a few configuration data.
The latest version of Antigravity 2.0 has made it easy to add MCP Servers to Antigravity.
Go to Settings → Customizations and you should see the MCP Server configuration as shown below:
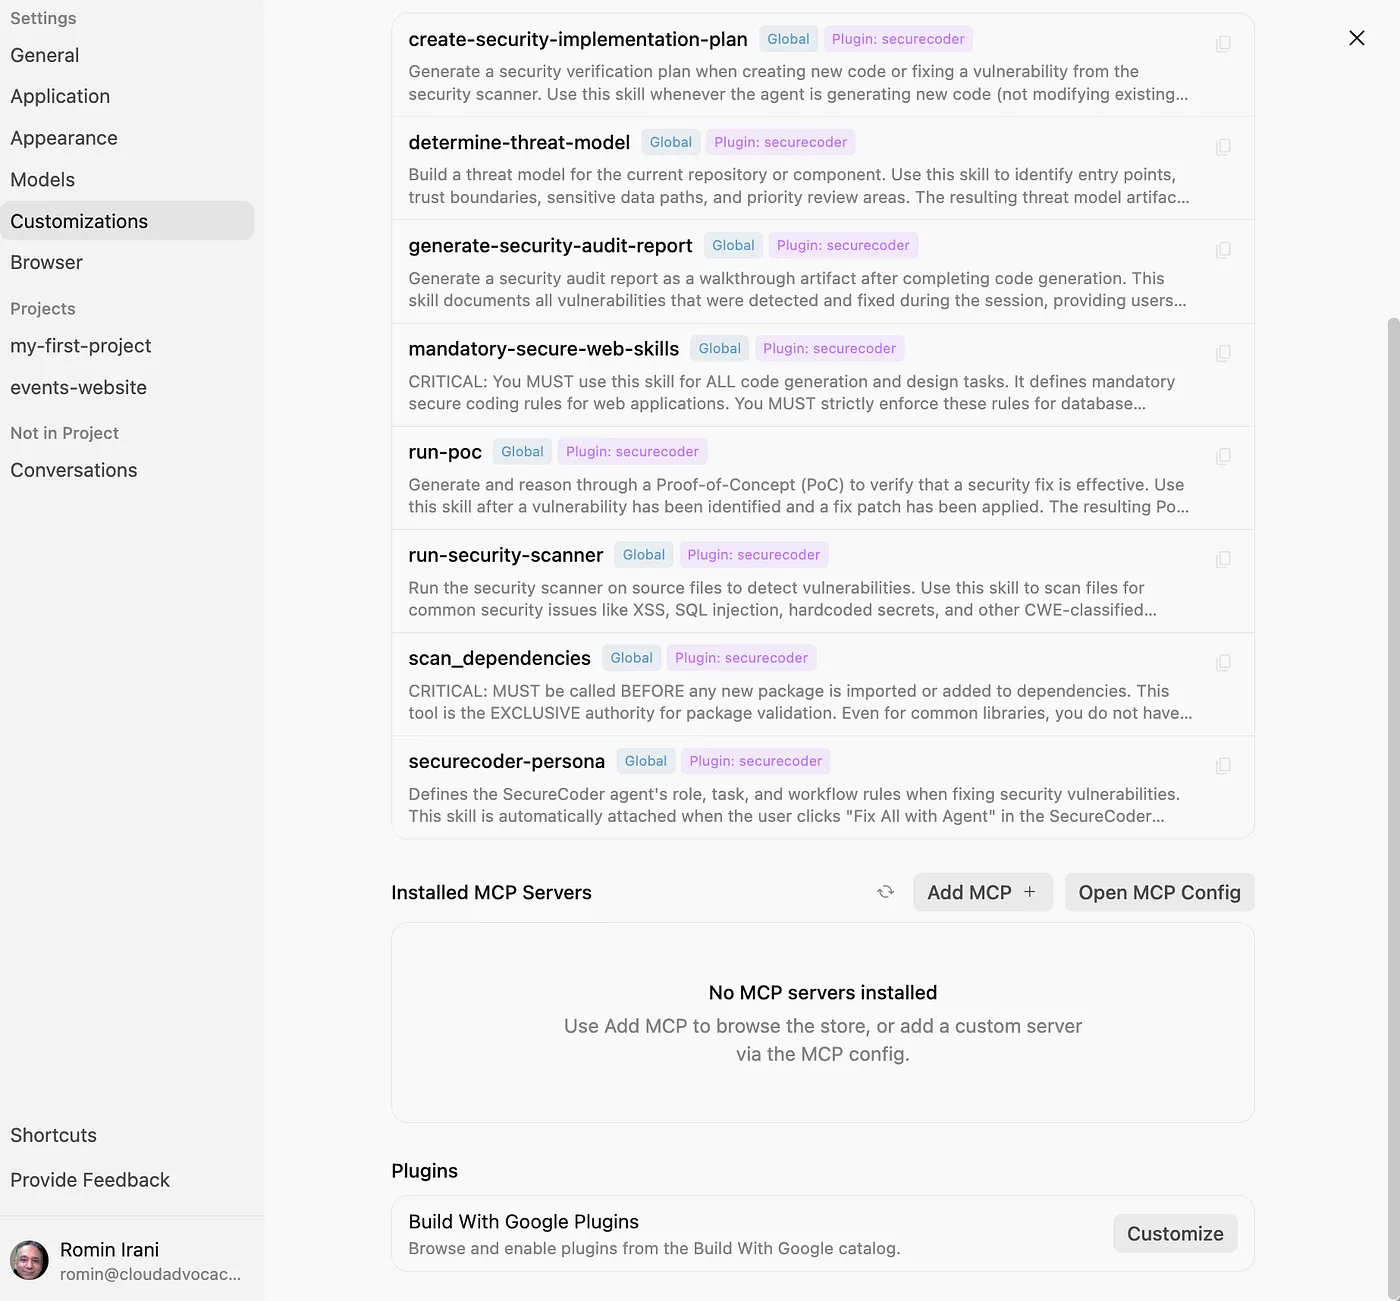
Go to the Installed MCP Servers section in the above configuration as shown below:
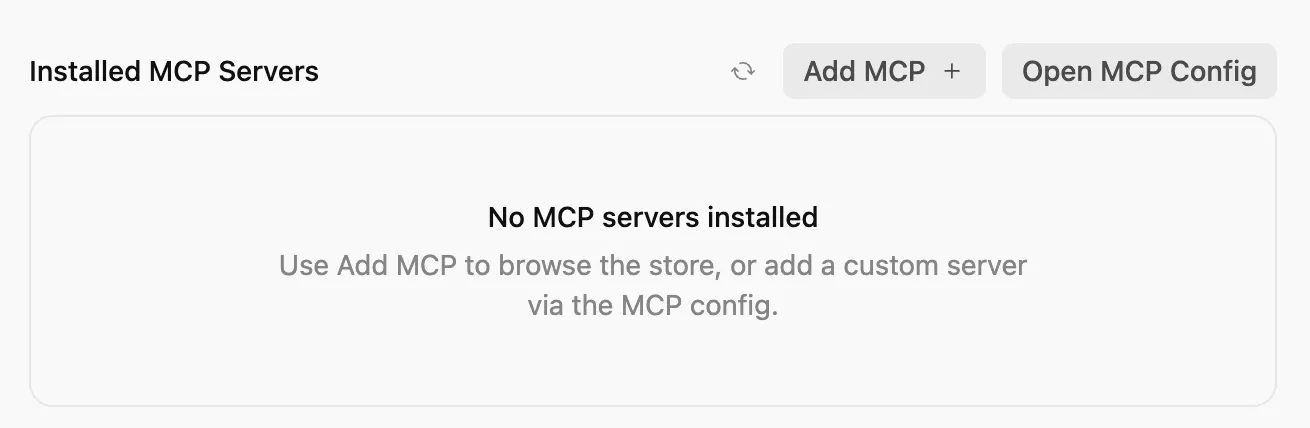
If you click on the Open MCP Config button, you will be led to the file present in $HOME/.gemini/config/mcp_config.json and that is where all your configuration goes. If you are familiar with the MCP Servers configuration file, you can directly edit and save the contents in the file.
You can see that it is empty at this point in time.
To configure an MCP Server, all you need to do is click on the Add MCP button.
This brings up a huge list of pre-configurations available for several MCP Servers, especially Google Cloud services that have been packaged as MCP Servers. A screen is shown below:
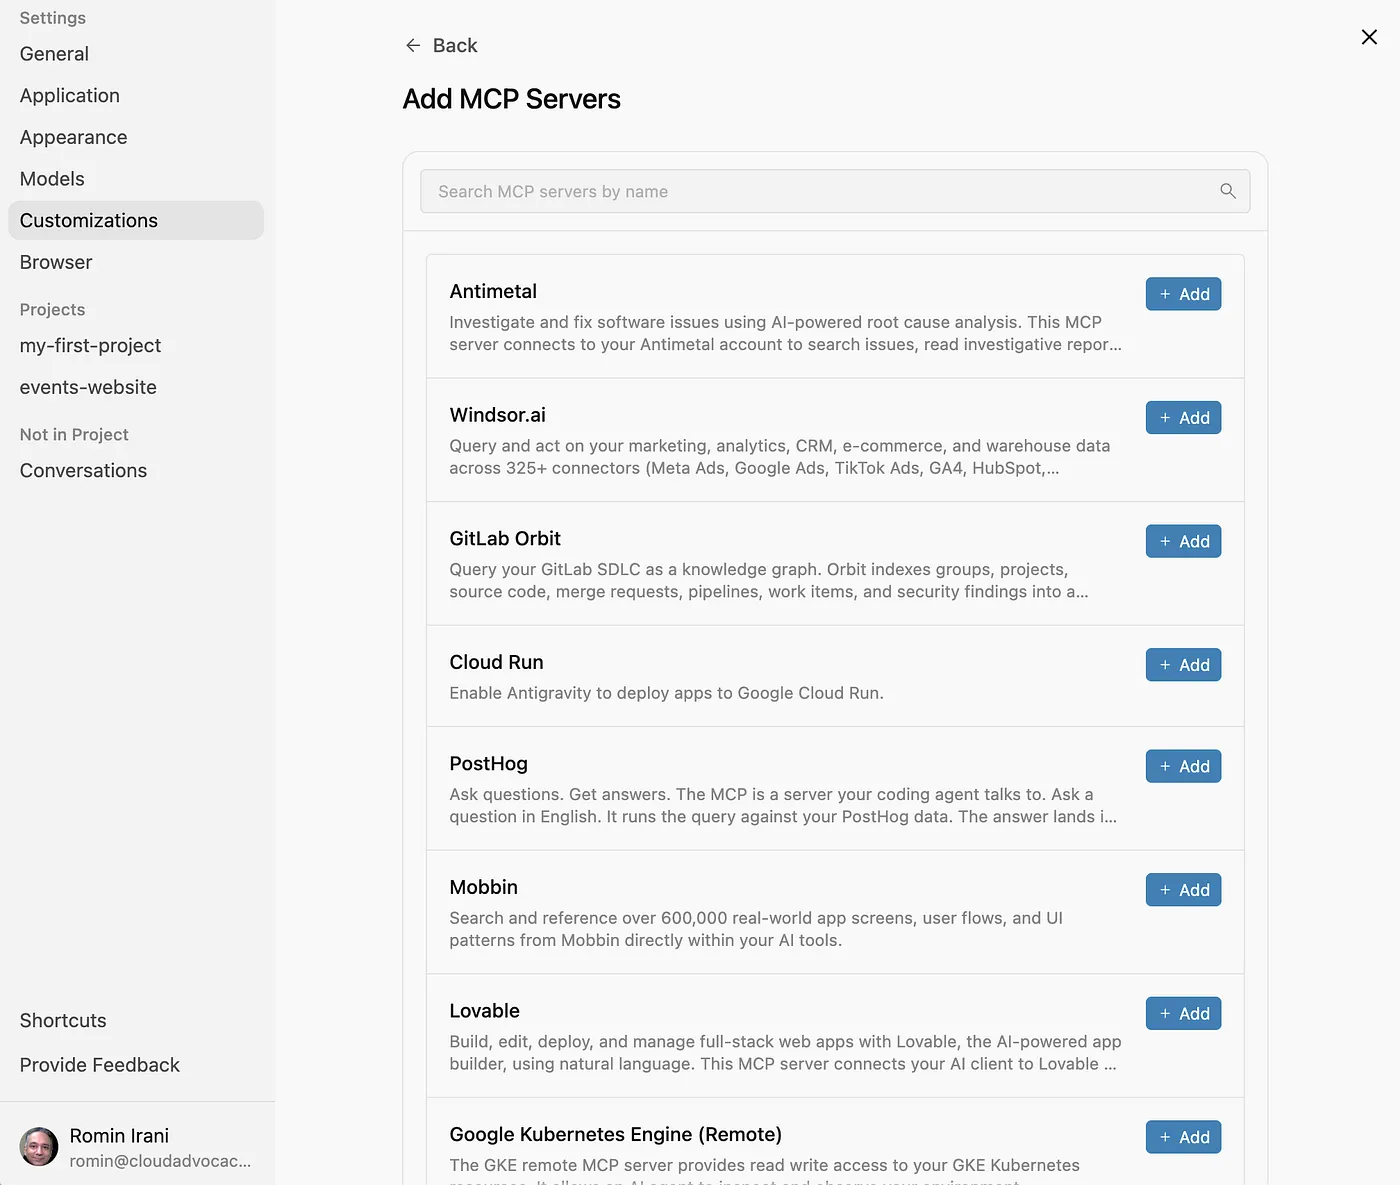
Feel free to add any of them. For e.g. I clicked Add next to the Google Cloud Run MCP Server and it installed it.
It adds it to the list of MCP Servers as shown below, along with the tools that the MCP Server exposes. You can simply enable/disable a tool by clicking on the specific tool name tooltip below or even simply disable the entire MCP Server by toggling on the on / off switch.
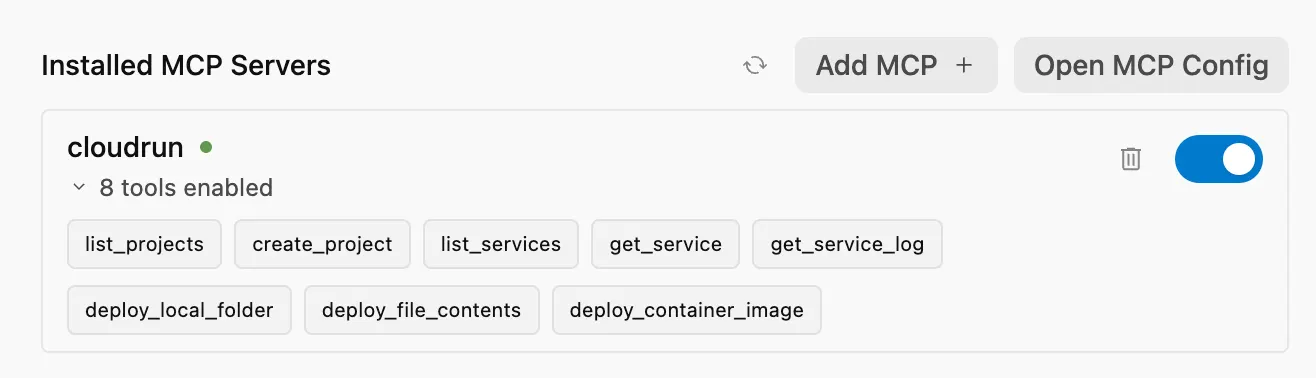
If you click the Open MCP Config button, you will see that the entry was added to the mcp_config.json file, as shown below:
{
 "mcpServers": {
   "cloudrun": {
     "command": "npx",
     "args": [
       "-y",
       "@google-cloud/cloud-run-mcp"
     ]
   }
 }
}
If you have been working with existing remote MCP Servers, you can simply add the details into the $HOME/.gemini/config/mcp_config.json file.
To use the configured MCP servers, you can ask Antigravity something that requires an MCP server. For example, you can have the cloudrun-mcp server enabled and ask Antigravity the following: Build and deploy a Cloud Run service. This should prompt Antigravity to look for and use the cloudrun-mcp server to configure and deploy a Cloud Run service.
7. Artifacts
Antigravity creates Artifacts as it plans and gets its work done as a way to communicate its work and get feedback from the human user. These are rich markdown files, architecture diagrams, images, browser recordings, code diffs, and so on.
Artifacts solve the trust gap. When an agent claims to fix a bug, the developer previously had to read the code to verify. In Antigravity, the agent produces an artifact to prove it.
These are the main artifacts produced by Antigravity:
Task Lists: Before writing code, the agent generates a structured plan. You don't typically need to edit this plan but you can review it and in some cases, add a comment to change it, if needed.Implementation Plan: This is used to architect changes within your codebase to accomplish a task. These plans contain technical details on what revisions are necessary and are meant to be reviewed by the user, unless you have your artifact review policy set to Always Proceed.Walkthrough: This is created once the agent has completed task implementation, as a summary of the changes and how to test them.Code diffs: While technically not an artifact, Antigravity also produces code diffs that you can review and comment on.Screenshots: The agent captures the state of the UI before and after a change.
To understand artifacts better, go ahead and create a conversation with a new or existing project with the following prompt:
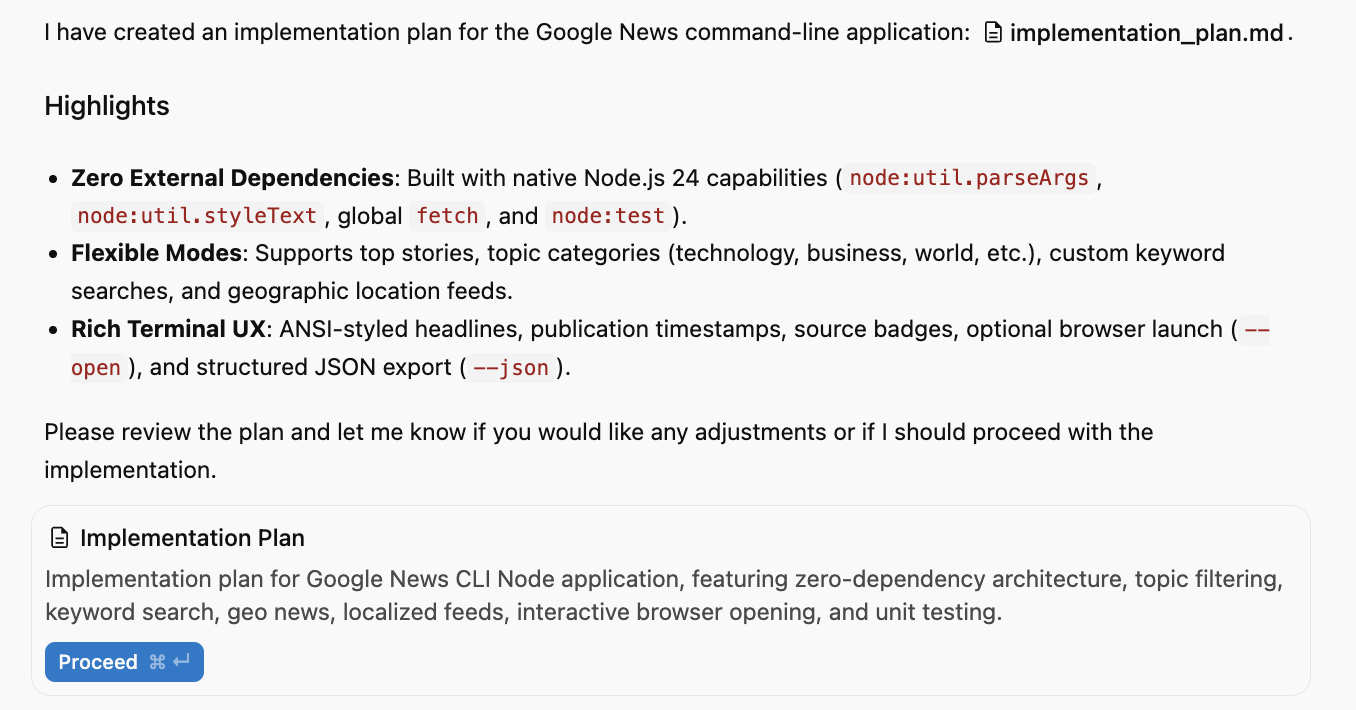
Design a Node application that I can run from the command line to get me the latest news from Google.
The Agent takes off and comes back with our first artifact: Implementation Plan.
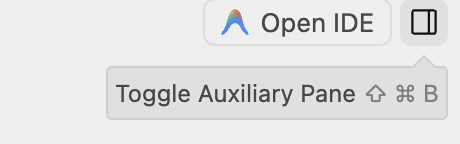
You can look at any of the artifacts produced by Antigravity by toggling the Auxiliary Pane shown in the top right corner.
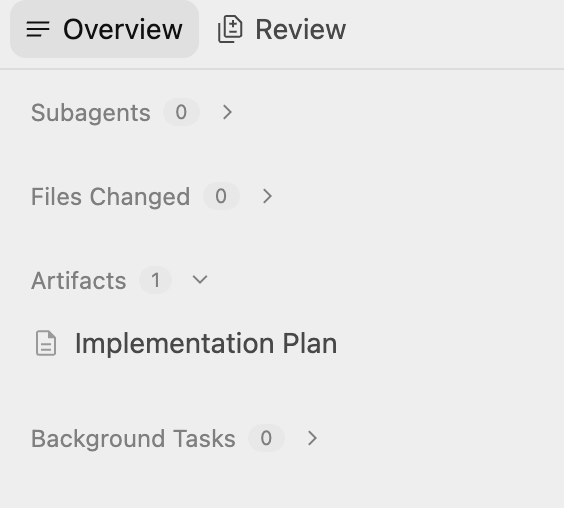
If you toggle the Auxiliary Pane, you see the following output, which mentions that there is 1 Artifact generated (Implementation Plan).
Click on the Implementation Plan to see the details, as shown below:
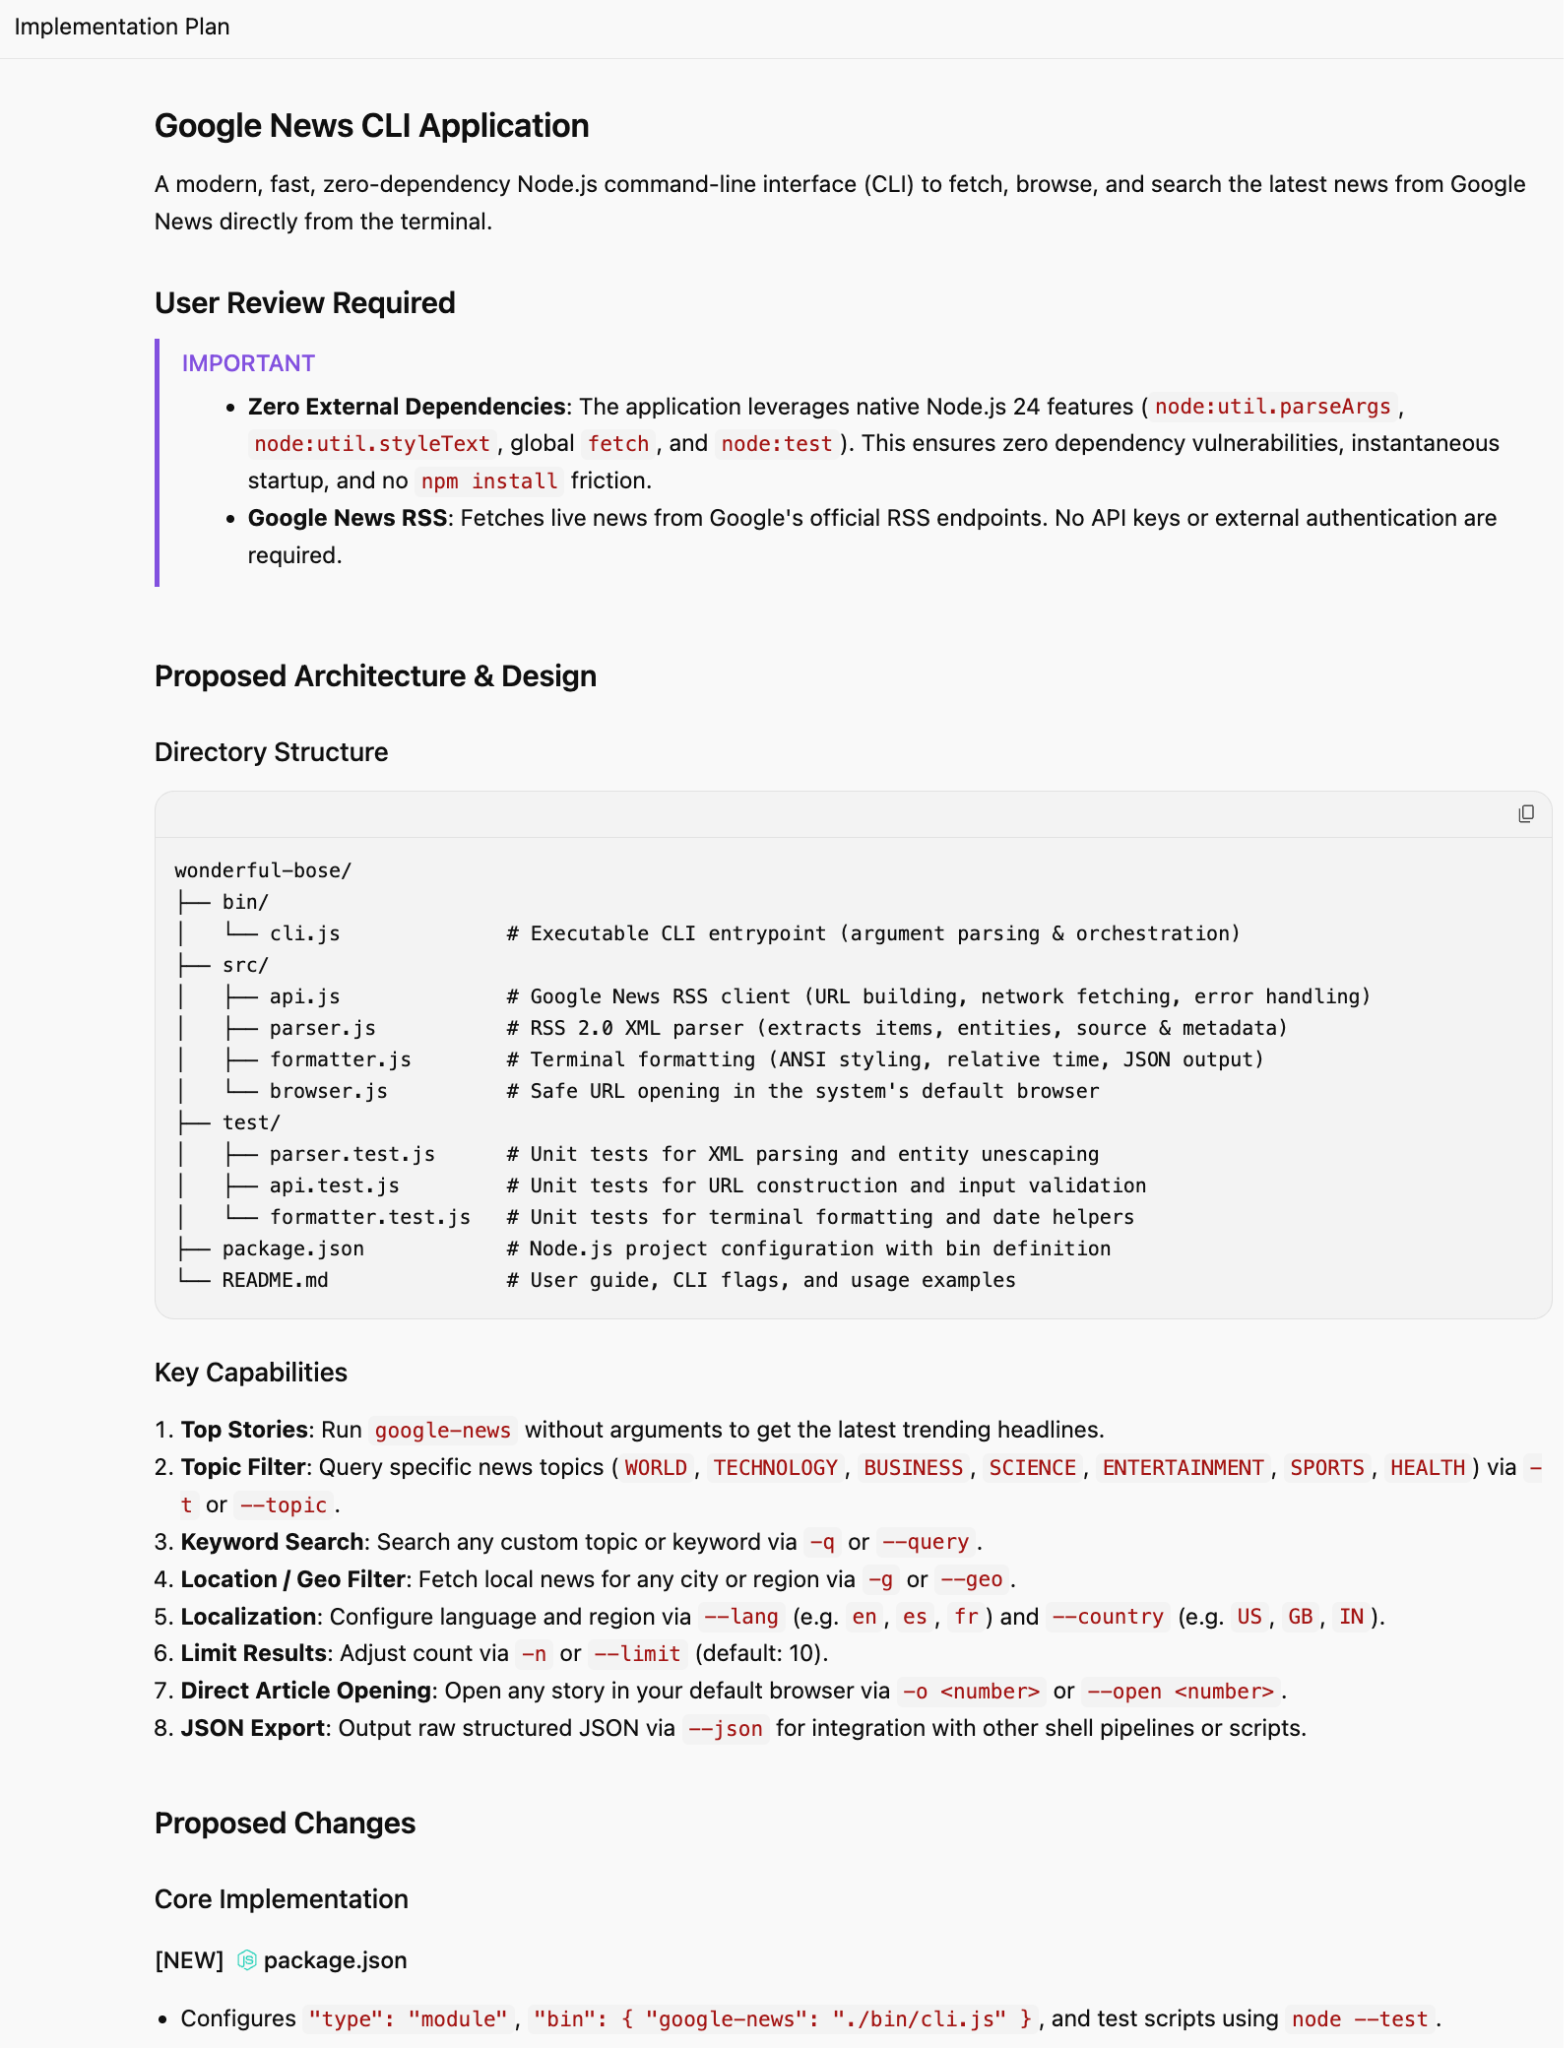
For now, we are ok with the plan and simply click on the Proceed button to move forward.
You might be asked for permissions to move ahead, so please allow that.
When everything is completed, tested and verified by the Agent, you will get a message saying that the task has been completed.
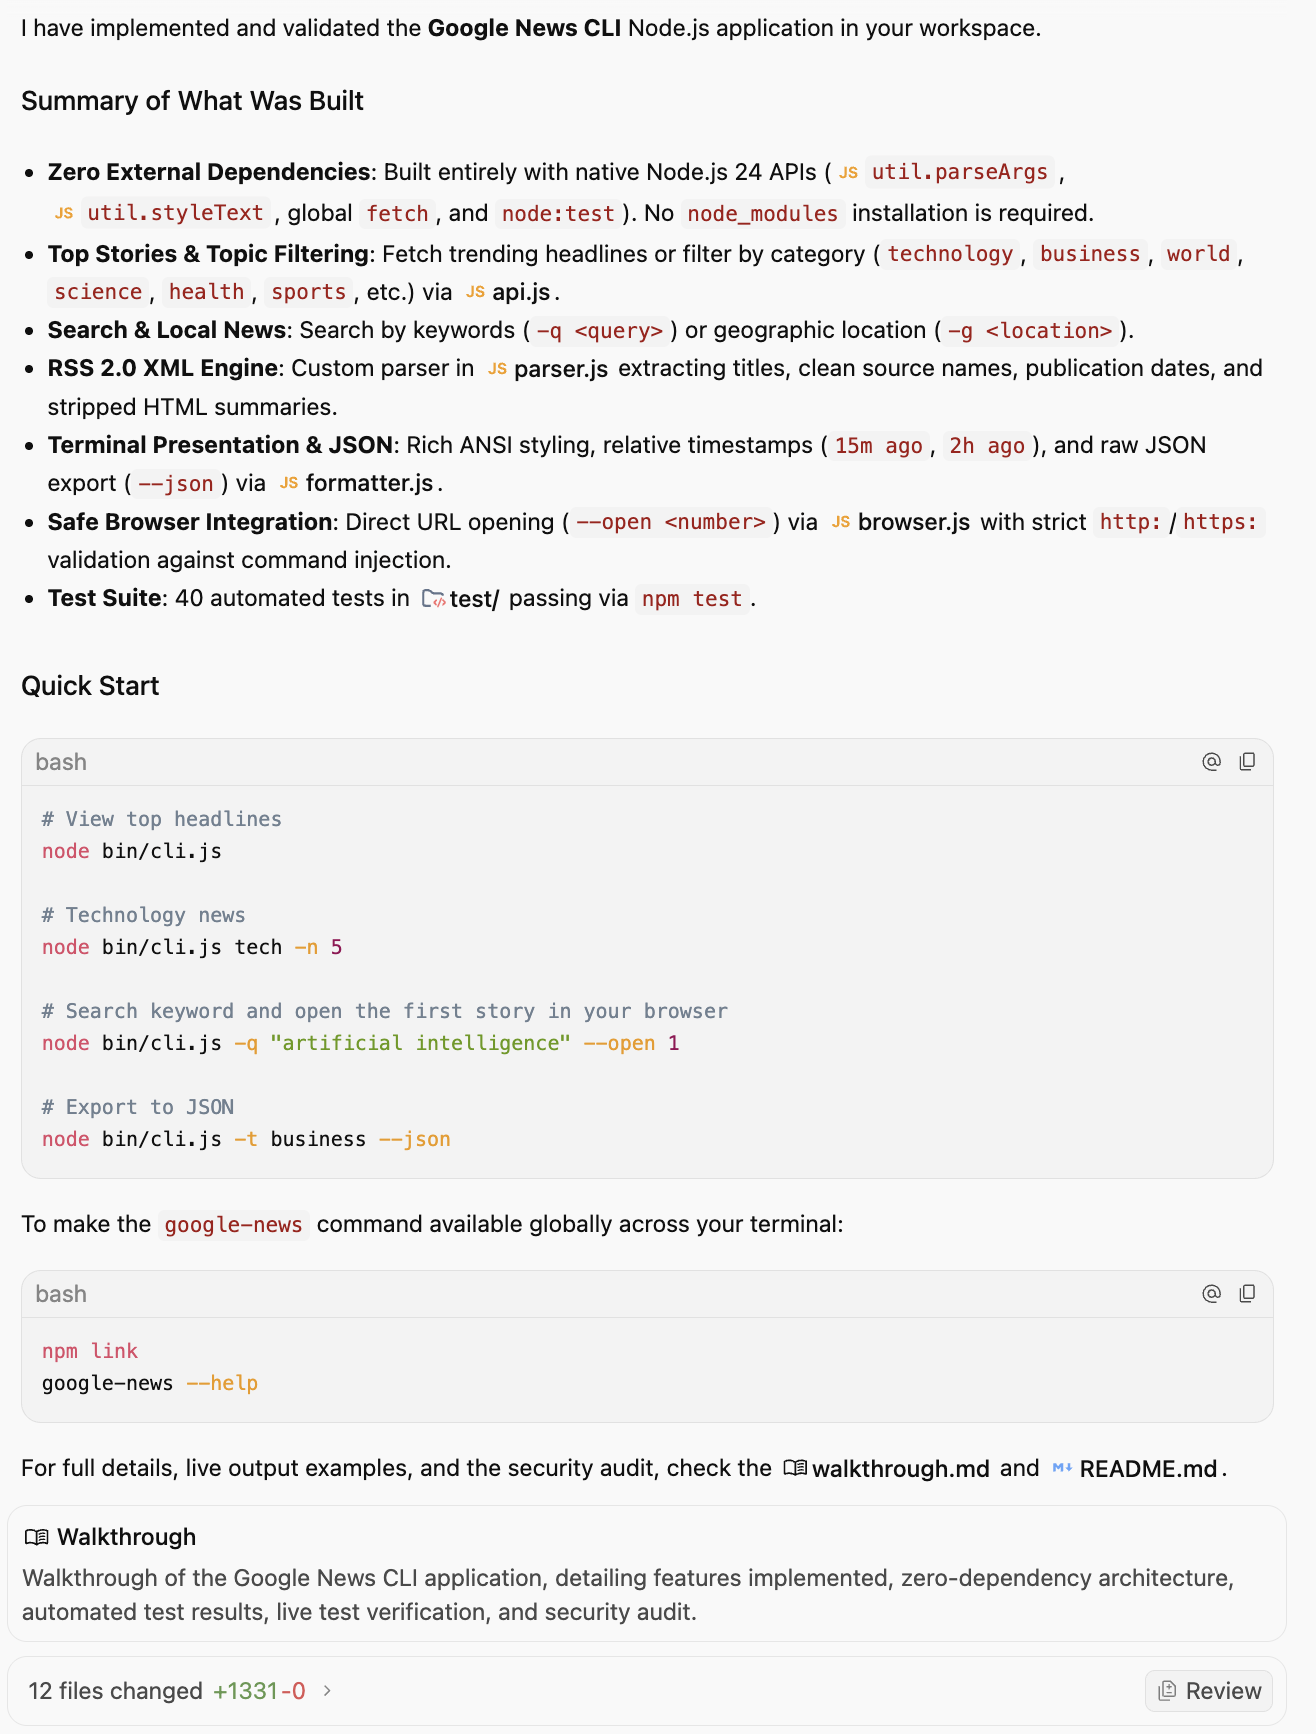
Another artifact called the Walkthrough is now ready. You can see the final list as shown below. A few things to note, there are not just Artifacts (Task, Walkthrough and Implementation Plan) but also Source Files (package.json , cli.js).
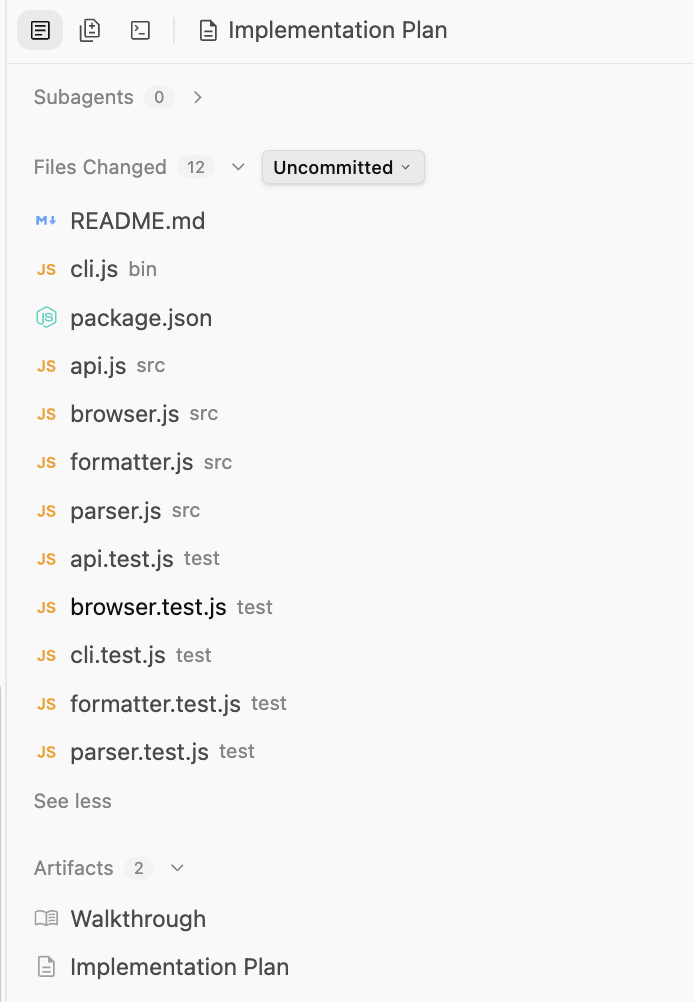
You may not need a full-fledged Editor / IDE to view the files generated. You can click on the package.json or index.js files and you will be able to see the content, comment on it.
8. Antigravity IDE
You can opt to use the Antigravity IDE that we installed earlier in this codelab, if you prefer an IDE. You will notice that when you go to toggle the Auxiliary Panel in the main Antigravity interface, there is an Open IDE option.
Click on that to open the Antigravity IDE. You might see a warning at the launch of the Antigravity IDE, that looks like this:
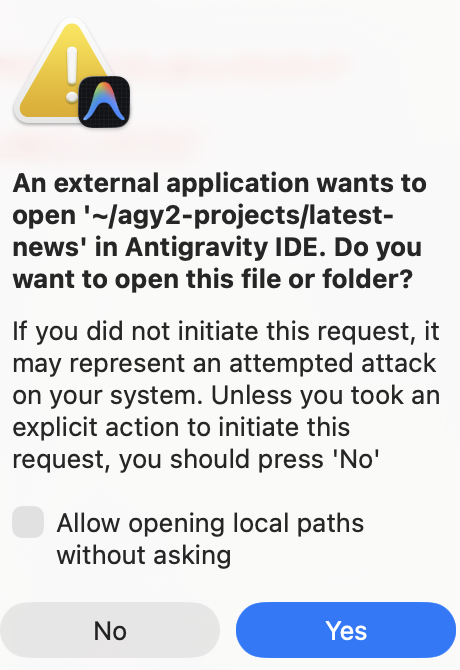
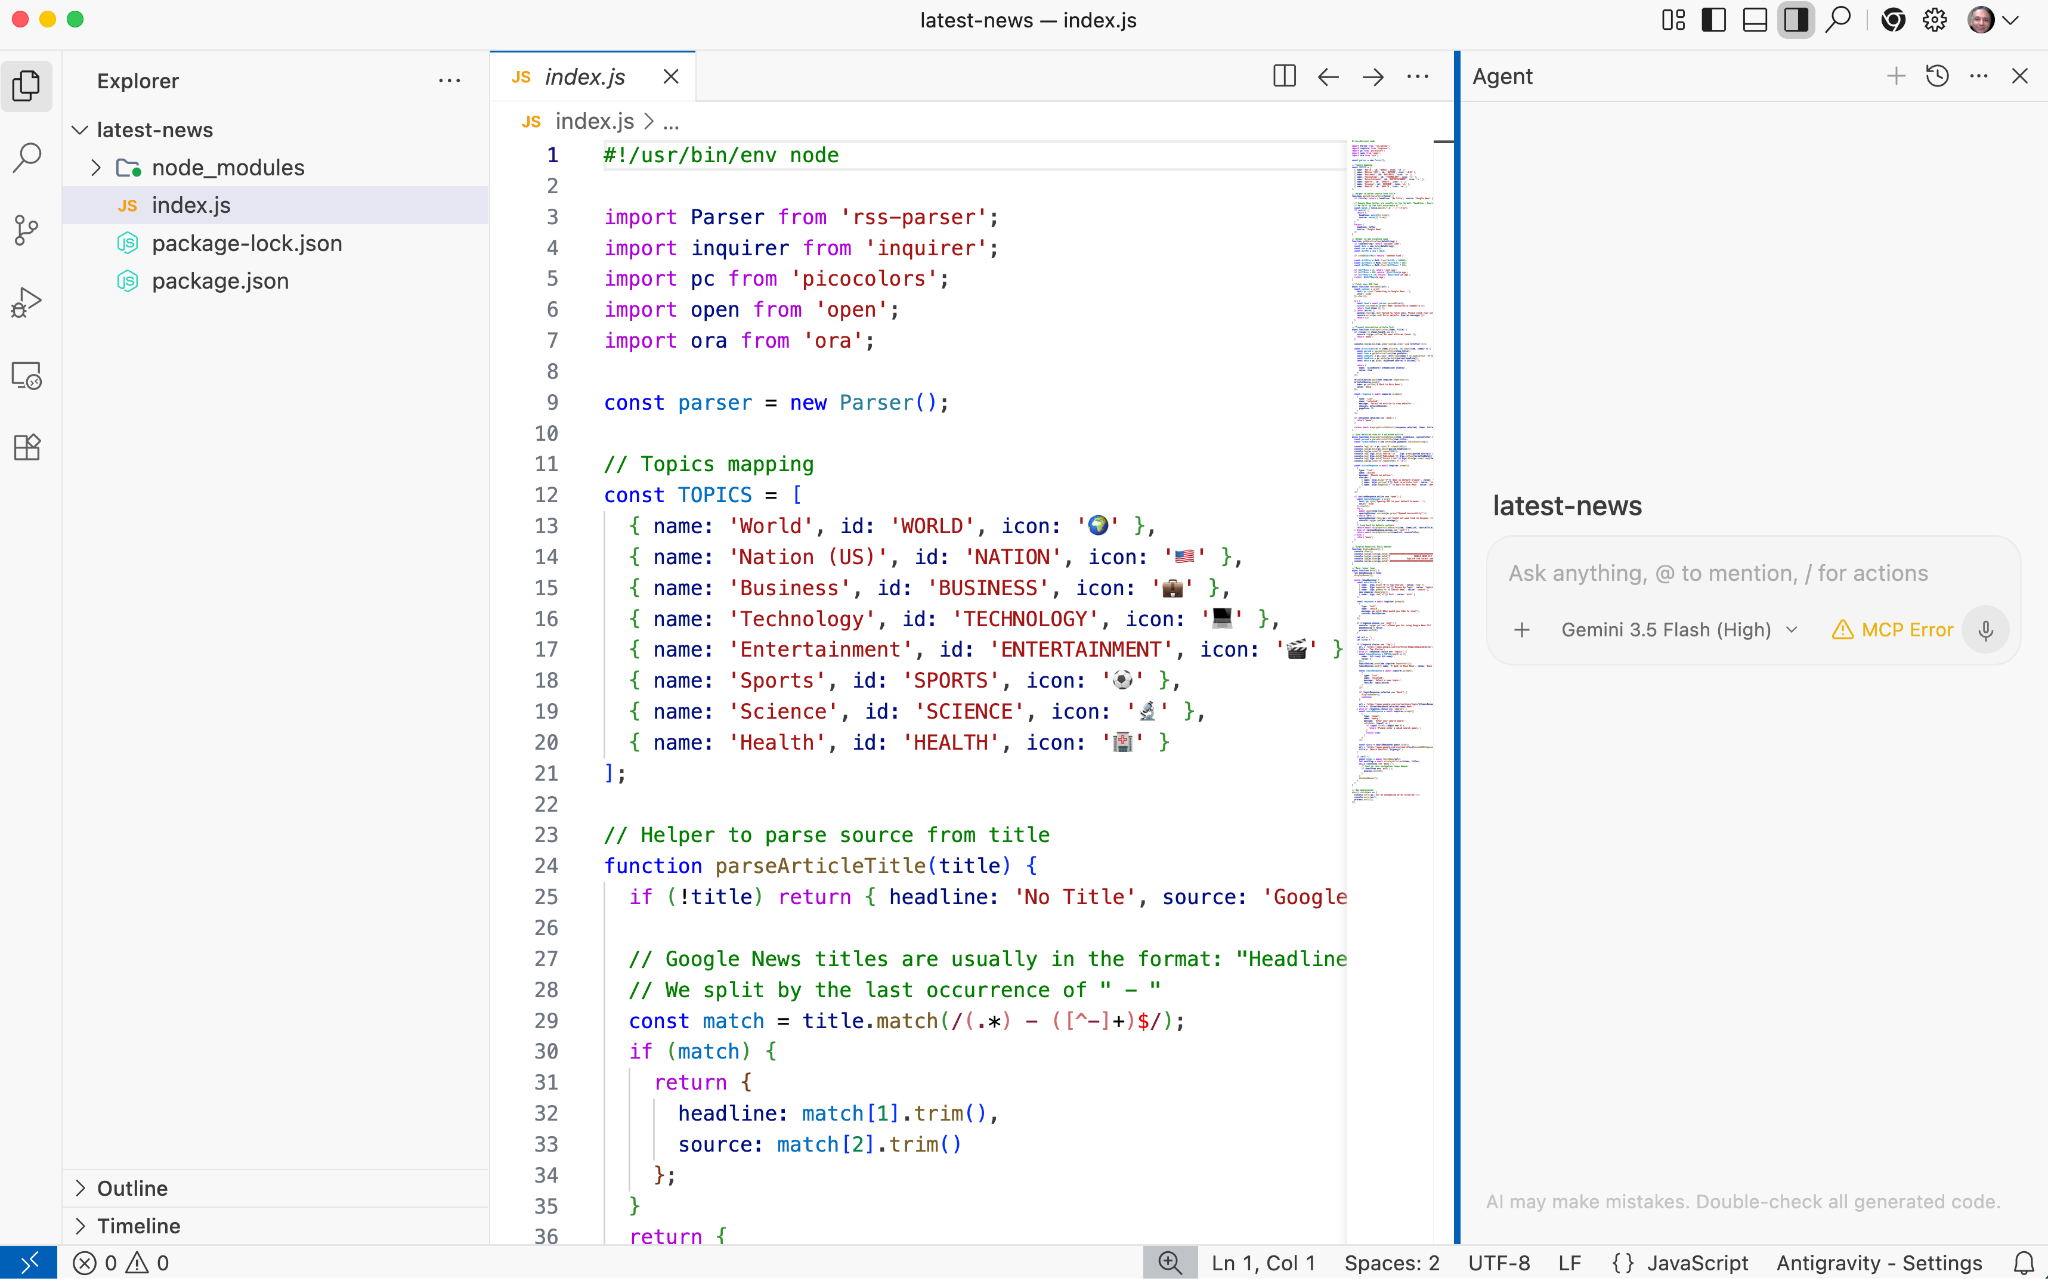
This is normal. Go ahead and click on Yes. This will bring up the Antigravity IDE, which should be familiar to anyone who has used an IDE before. It has all the folders/files generated, an editor and an Agent Panel, where you can chat with the Agent about the code (explain, generate, fix, etc).
9. Skills
While Antigravity's underlying models are powerful generalists, they don't know your specific project context or team standards. Loading every single rule or tool into the agent's context window leads to tool bloat, higher costs, latency, and confusion.
Skills solve this through progressive disclosure. A skill is a specialized package of knowledge that sits dormant until needed. It is only loaded into the agent's context when your specific request matches the skill's description .
Structure and Scope
Skills are directory-based packages. You can define them in two scopes depending on your needs:
- Global Scope (
~/.gemini/config/skills/): Available across all Antigravity products (Antigravity, Antigravity IDE, Antigravity CLI) and projects. - Project/Workspace Scope (
<project-root>/.agents/skills/): This would make the skill available only within a specific project.
The Anatomy of a Skill
A typical skill directory looks like this :
my-skill/
├── SKILL.md    #(Required) metadata & instructions.
├── scripts/    # (Optional) Python or Bash scripts for execution.
├── references/ # (Optional) text, documentation, or templates.
└── assets/     # (Optional) Images or logos.
Let's add some skills now.
Code Review Skill
This is an instruction-only skill i.e. we only need to create the SKILL.md file, that will contain the metadata and the skills instructions. Let's create a skill that provides details to the agent to review code changes for bugs, style issues and best practices.
Assuming that you are in a specific project folder (e.g. $HOME/agy2-projects/my-skills-project) the first step is to create a directory in the project folder that will contain the skill.
mkdir -p .agents/skills/code-review
Create a SKILL.md file in the project folder e.g. .agents/skills/code-review that we just created, with the content shown below:
---
name: code-review
description: Reviews code changes for bugs, style issues, and best practices. Use when reviewing PRs or checking code quality.
---

# Code Review Skill

When reviewing code, follow these steps:

## Review checklist

1. **Correctness**: Does the code do what it's supposed to?
2. **Edge cases**: Are error conditions handled?
3. **Style**: Does it follow project conventions?
4. **Performance**: Are there obvious inefficiencies?

## How to provide feedback

- Be specific about what needs to change
- Explain why, not just what
- Suggest alternatives when possible
Notice that the SKILL.md file above contains the metadata (name and description) at the top and then the instructions. When the agent loads, it will only read the metadata of the skills and it will only load the full skills instructions, only when needed.
Let us validate the Code Review skill. Open up a conversation in Antigravity in a specific project of your choice and provide the following prompt.
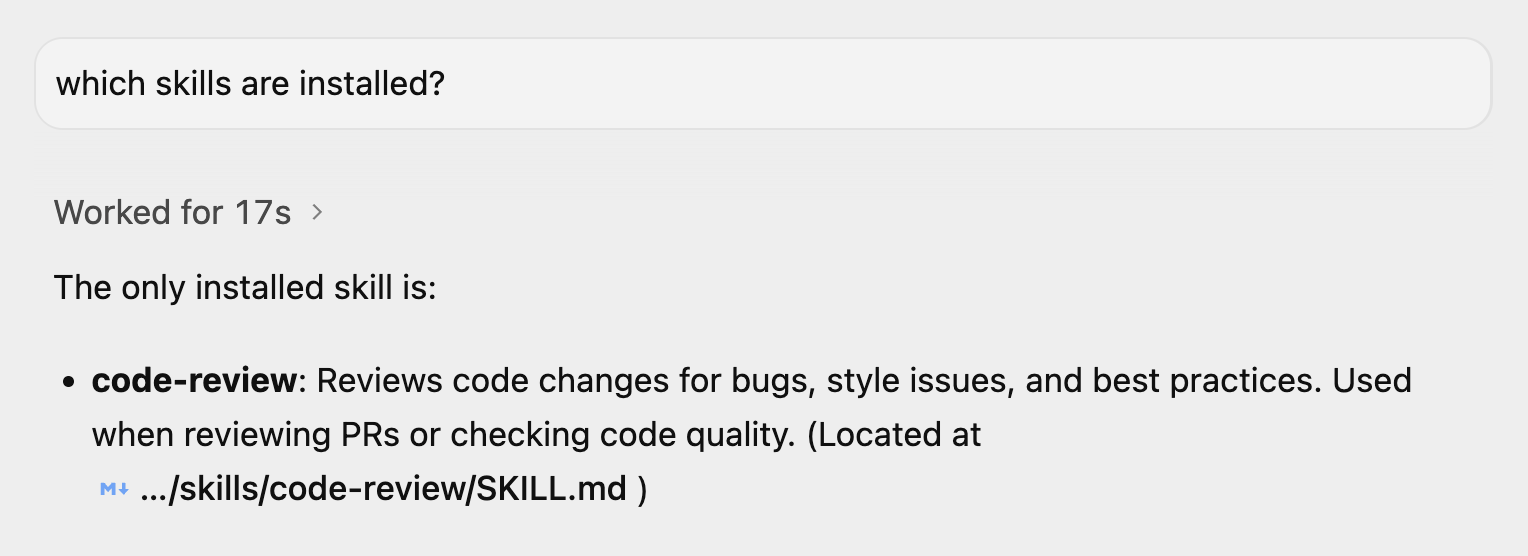
It should show the code-review skill.
Try it out
Create a new file named demo_bad_code.py in the $HOME/agy2-projects/my-skills-project with the contents shown below:
import time

def get_user_data(users, id):
   # Find user by ID
   for u in users:
       if u['id'] == id:
            return u
   return None

def process_payments(items):
   total = 0
   for i in items:
       # Calculate tax
       tax = i['price'] * 0.1
       total = total + i['price'] + tax
       time.sleep(0.1) # Simulate slow network call

   return total

def run_batch():
   users = [{'id': 1, 'name': 'Alice'}, {'id': 2, 'name': 'Bob'}]
   items = [{'price': 10}, {'price': 20}, {'price': 100}]

   u = get_user_data(users, 3)
   print("User found: " + u['name']) # Will crash if None

   print("Total: " + str(process_payments(items)))

if __name__ == "__main__":
   run_batch()
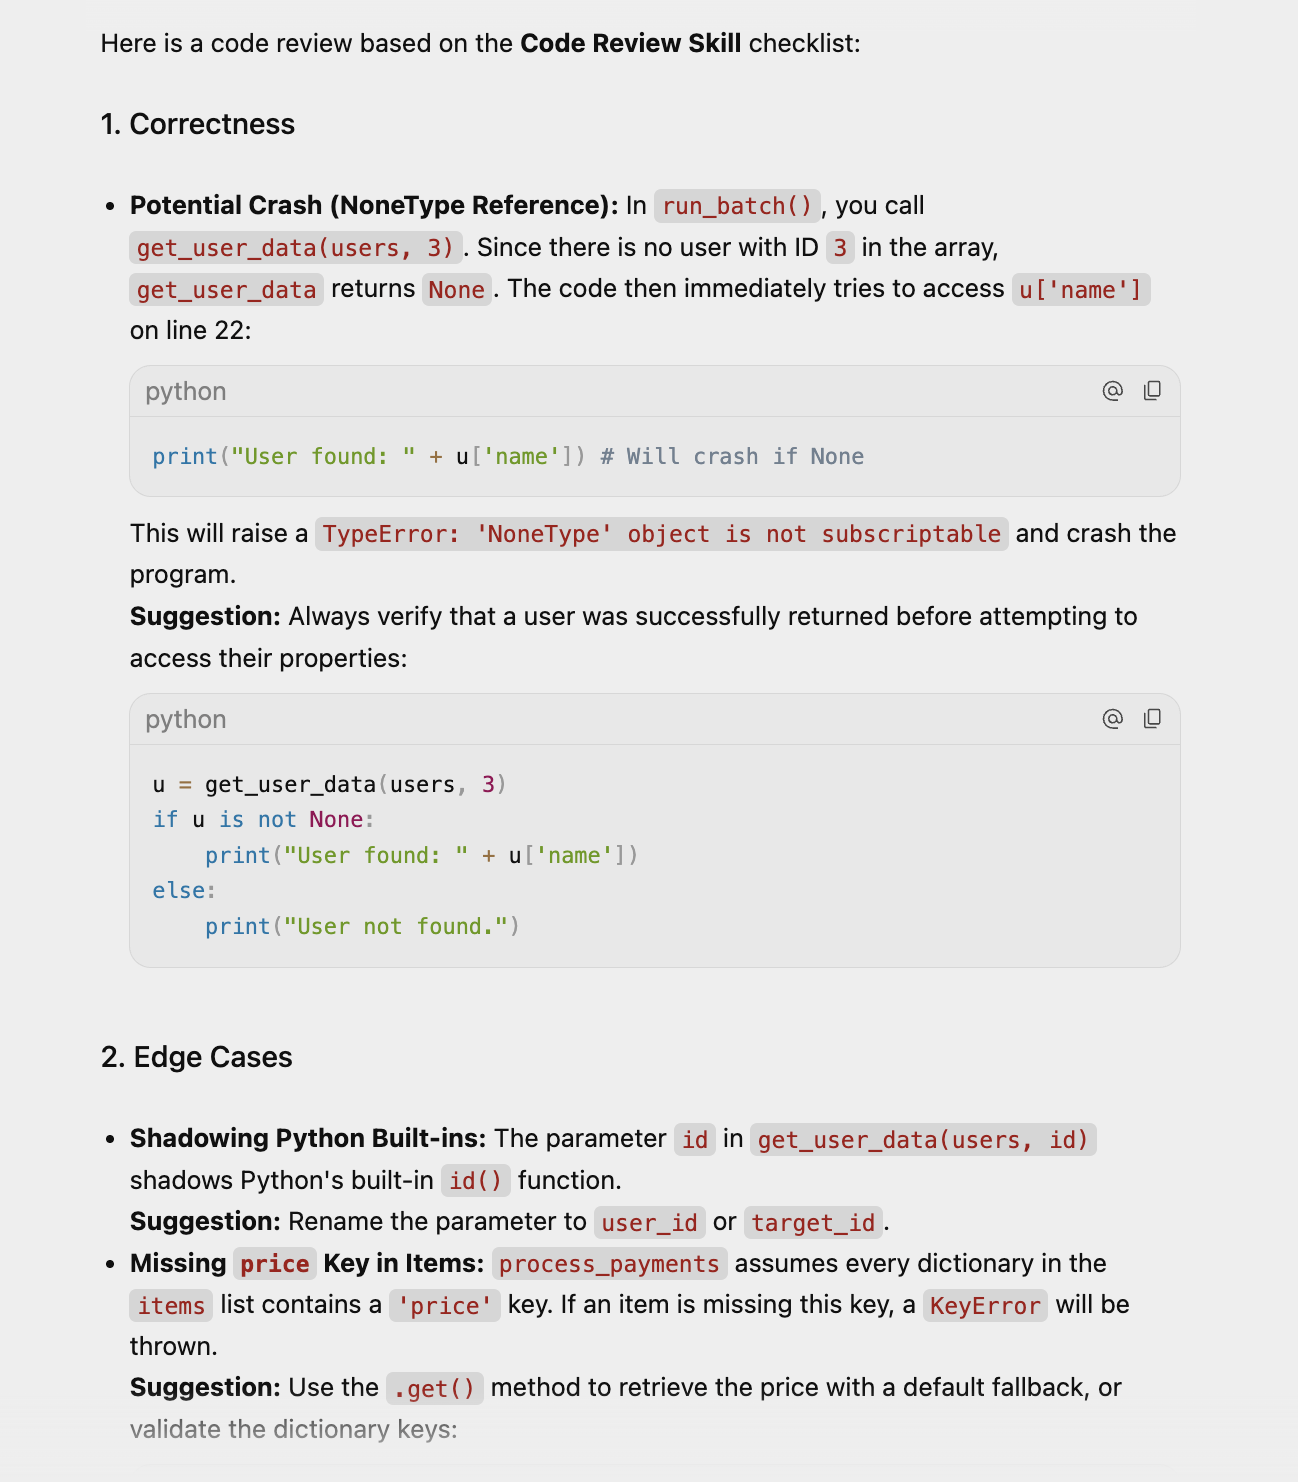
Open a new conversation in a specific project in Antigravity and give the following prompt: review the @demo_bad_code.py file.
The Agent should identify the code-review skill, load the details and then perform the action as per the instructions given in the code-review/SKILL.md file.
A sample output is shown below:
10. Conclusion
Congratulations! You have now successfully installed Antigravity 2.0, configured your environment, and learned how to control your agents.
What's Next? To see Antigravity 2.0 in action building real-world applications, you can look at the following codelab:
- Build and Deploy to Google Cloud with Antigravity: This codelab shows how to design, build, and deploy a serverless application to Google Cloud.
Reference docs
- Official Site : https://antigravity.google/
- Documentation: https://antigravity.google/docs/home
- Use cases : https://antigravity.google/use-cases
- Download : https://antigravity.google/download
- Youtube Channel for Google Antigravity : https://www.youtube.com/@googleantigravity