1. Introduction
In this codelab, you will learn about Google Antigravity (referred as Antigravity for the rest of the document), an agentic development platform, evolving the IDE into the agent-first era.
Unlike standard coding assistants that just autocomplete lines, Antigravity provides a "Mission Control" for managing autonomous agents that can plan, code, and even browse the web to help you build.
Antigravity is designed as an agent-first platform. It presupposes that the AI is not just a tool for writing code but an autonomous actor capable of planning, executing, validating, and iterating on complex engineering tasks with minimal human intervention.
What you'll learn
- Installing and configuring Antigravity.
- Exploring key concepts of Antigravity like Agent Manager, Editor, Browser and more.
- Customizing Antigravity with your own rules and workflow, along with security considerations.
What you'll need
Currently Antigravity is available as a preview for personal Gmail accounts. It comes with a free quota to use premier models.
Antigravity needs to be locally installed on your system. The product is available on Mac, Windows and specific Linux distributions. In addition to your own machine, you would need the following:
- Chrome web browser
- A Gmail account (Personal Gmail account).
This codelab, designed for users and developers of all levels (including beginners).
Reporting issues
As you work through the codelab and with Antigravity, you might encounter problems.
For codelab related issues (typos, wrong instructions), please open a bug with Report a mistake button in bottom left corner of this codelab:

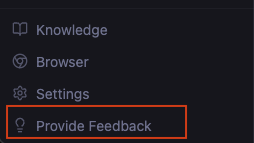
For bugs or feature requests related to Antigravity, please report the issue within Antigravity. You can do this in Agent Manager with the Provide Feedback link in the bottom left corner:
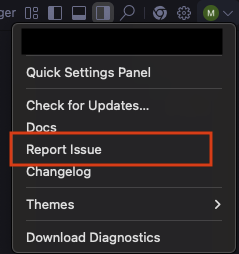
You can also go to the editor with the Report Issue link under your profile icon:
2. Installation
If you don't have Antigravity installed already, let's begin with installing Antigravity. Currently the product is available for preview and you can use your personal Gmail account to get started with it.
Go to the downloads page and click on the appropriate operating system version that is applicable to your case. Launch the application installer and install the same on your machine. Once you have completed the installation, launch the Antigravity application. You should see a screen similar to the following:
Please proceed with clicking on Next each time. Key steps are detailed below:
- Choose setup flow: This brings up the option for you to import from your existing VS Code or Cursor settings. We will go with a fresh start.
- Choose an Editor theme type: We will go with the dark theme but it's entirely up to you.
- How do you want to use the Antigravity agent?
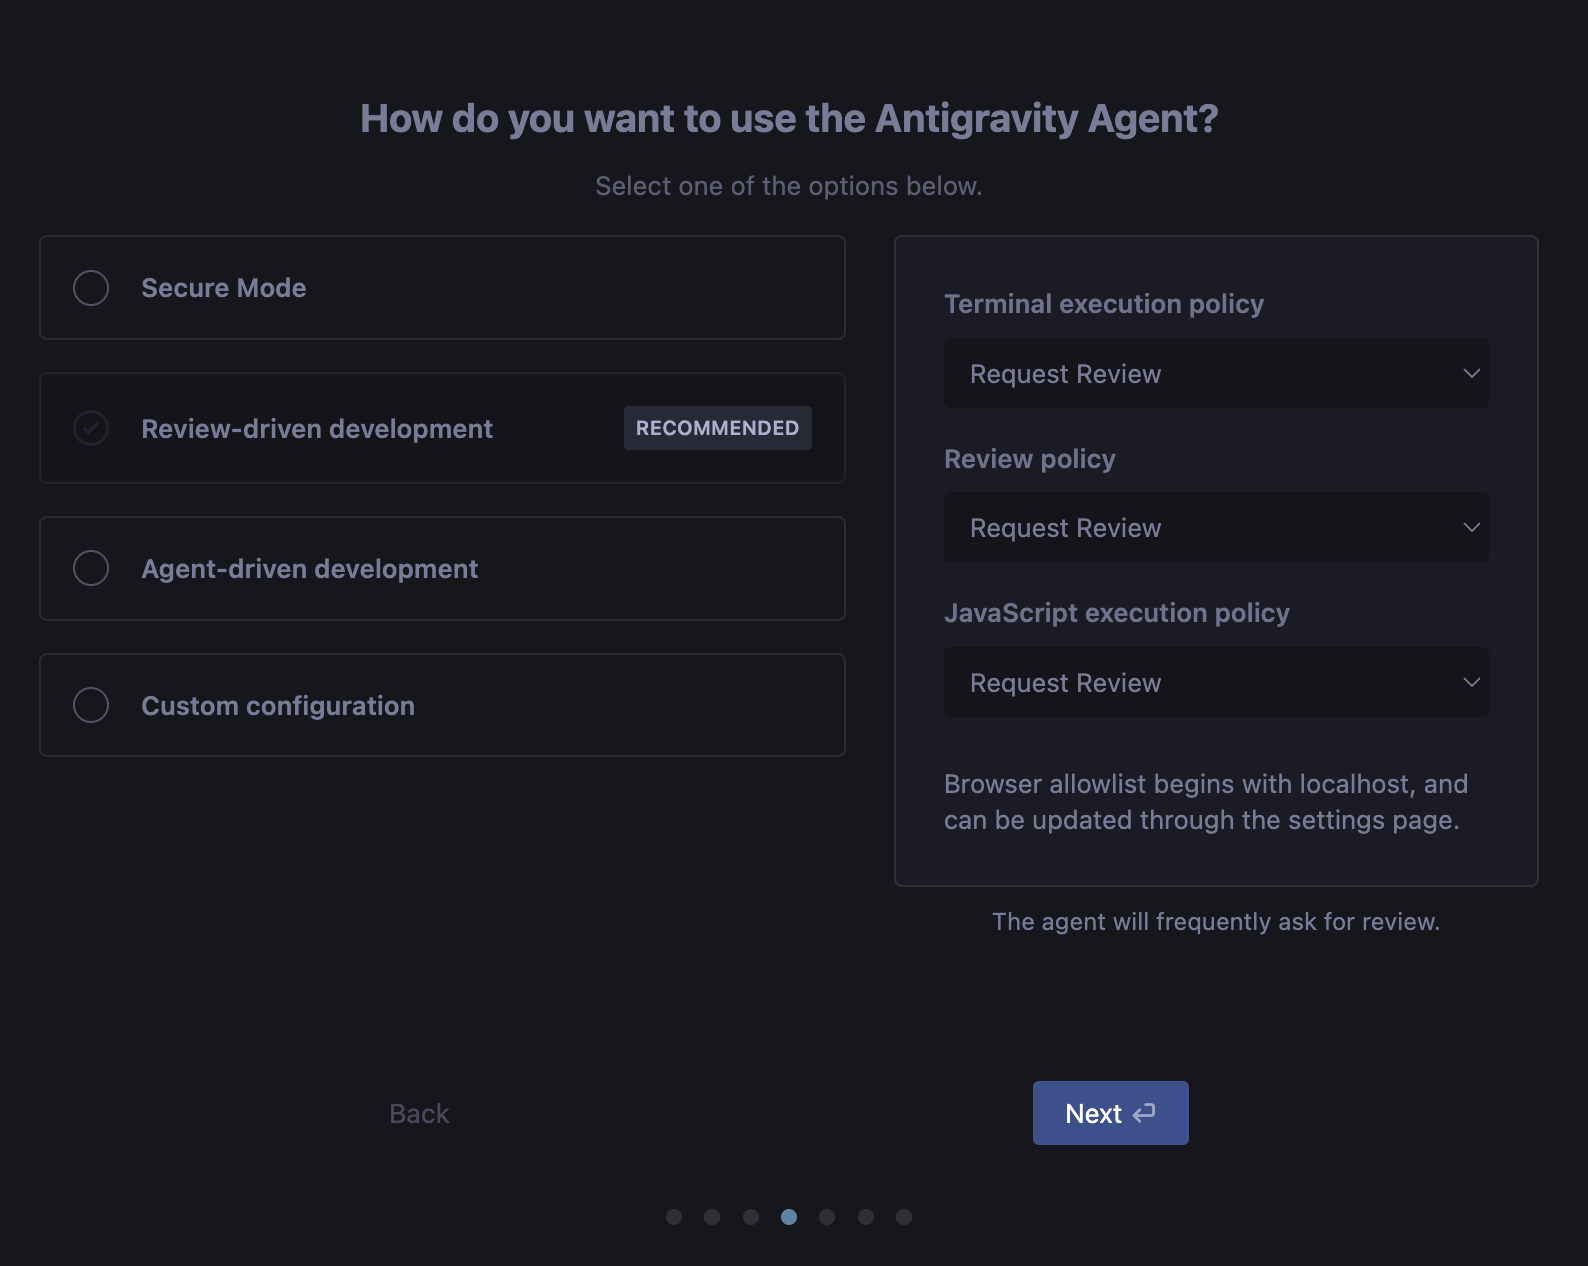
Let's understand this in a bit more detail. Remember that settings can be changed at any time via Antigravity User Settings (Cmd + ,).
Before we delve into the options, let us look at some specific properties (which you see to the right of the dialog).
Terminal Execution policy
This is about giving the Agent the ability to execute commands (applications/tools) in your terminal:
- Always proceed: Always auto-execute terminal commands (except those in a configurable deny list).
- Request review: Request user review and approval before executing terminal commands.
Review policy
As the Agent goes about its task, it creates various artifacts (task plan, implementation plan, etc). The review policy is set such that you can determine who decides if it needs to be reviewed. Should you always want to review it, or let the agent decide on this. Accordingly, there are three options here too.
- Always Proceed: Agent never asks for review.
- Agent Decides: Agent will decide when to ask for review.
- Request Review: Agent always asks for review.
JavaScript Execution policy
When enabled, the agent can use browser tools to open URLs, read web pages, and interact with browser content. This policy controls how JavaScript is executed in the browser.
- Always Proceed: Agent will not stop to ask for permission to run Javascript in the browser. This provides the Agent with maximum autonomy to perform complex actions and validation in the browser, but also has the highest exposure to security exploits.
- Request review: Agent will always stop to ask for permission to run Javascript code in the browser.
- Disabled: Agent will never run Javascript code in the browser.
Now that we have understood different policies, the 4 options on the left are nothing but specific settings for the terminal execution, review, and JavaScript execution policies for 3 of them and a 4th option available where we can completely custom control it. These 4 options are available so that we can choose how much autonomy you want to give to the Agent to execute commands in the terminal and get artifacts reviewed before moving ahead with the task.
These 4 options are:
- Secure mode: Secure Mode provides enhanced security controls for the Agent, allowing you to restrict its access to external resources and sensitive operations. When Secure Mode is enabled, several security measures are enforced to protect your environment.
- Review-driven development (recommended): The agent will frequently ask for review.
- Agent-driven development: The agent will never ask for review.
- Custom configuration
The Review-driven development option is a good balance and the recommended one since it allows the agent to make a decision and come back to the user for approval.
Next is the Configure your Editor settings page where you can choose your preferences for the following:
- Keybindings: Configure your keybindings.
- Extensions: Install popular language and other recommended extensions.
- Command Line: Install the command line tool to open Antigravity with
agy.
Now, you're ready to Sign in to Google. As mentioned earlier, Antigravity is available in preview mode and free if you have a personal Gmail account. Sign in now with your account. This will open up the browser allowing you to sign in. On successful authentication, you will see a message similar to the one below and it will lead you back to the Antigravity application. Go with the flow.
Finally, Terms of Use. You can make a decision if you'd like to opt-in or not and then click on Next.
This will lead you to the moment of truth, where Antigravity will be waiting to collaborate with you.
3. Agent Manager
We are ready to get started!
Antigravity forks the open-source Visual Studio Code (VS Code) foundation but radically alters the user experience to prioritize agent management over text editing. The interface is bifurcated into two distinct primary windows: the Editor and the Agent Manager. This separation of concerns mirrors the distinction between individual contribution and engineering management.
Agent Manager: Mission Control
Upon launching Antigravity, the user is typically greeted not by a file tree, but by the Agent Manager, as shown below:
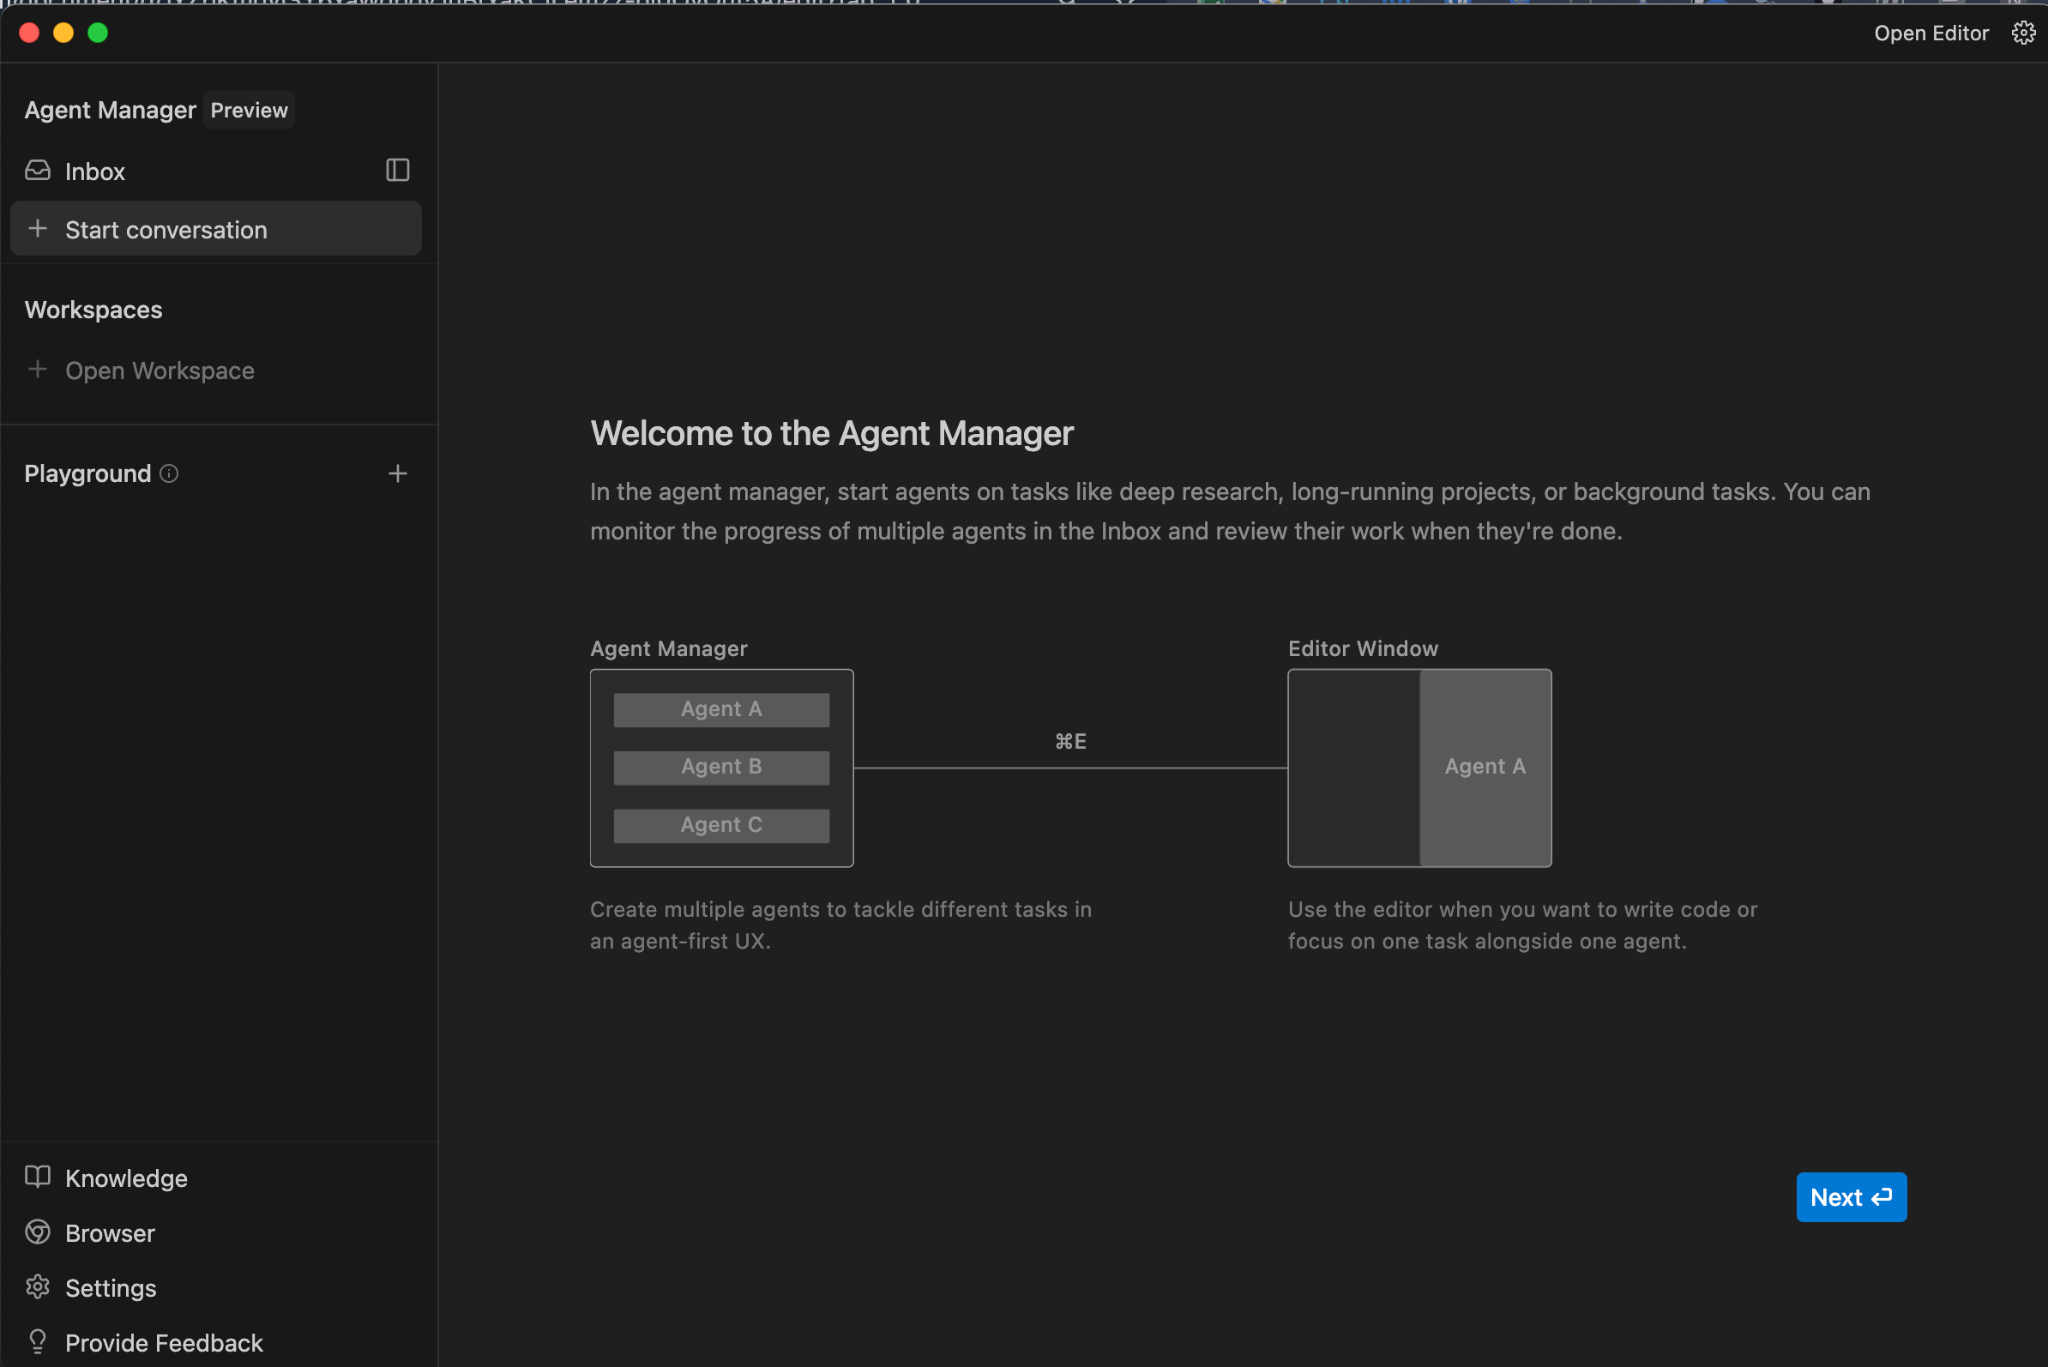
This interface acts as a Mission Control dashboard. It is designed for high-level orchestration, allowing developers to spawn, monitor, and interact with multiple agents operating asynchronously across different workspaces or tasks.
In this view, the developer acts as an architect. They define high-level objectives, examples could be:
- Refactor the authentication module
- Update the dependency tree
- Generate a test suite for the billing API
As the diagram above indicates, each of these requests spawns a dedicated agent instance. The UI provides a visualization of these parallel work streams, displaying the status of each agent, the Artifacts they have produced (plans, results, diffs), and any pending requests for human approval.
This architecture addresses a key limitation of previous IDEs that had more of a chatbot experience, which were linear and synchronous. In a traditional chat interface, the developer must wait for the AI to finish generating code before asking the next question. In Antigravity's Manager View, a developer can dispatch five different agents to work on five different bugs simultaneously, effectively multiplying their throughput.
If you click on Next above, you have the option to open a workspace.
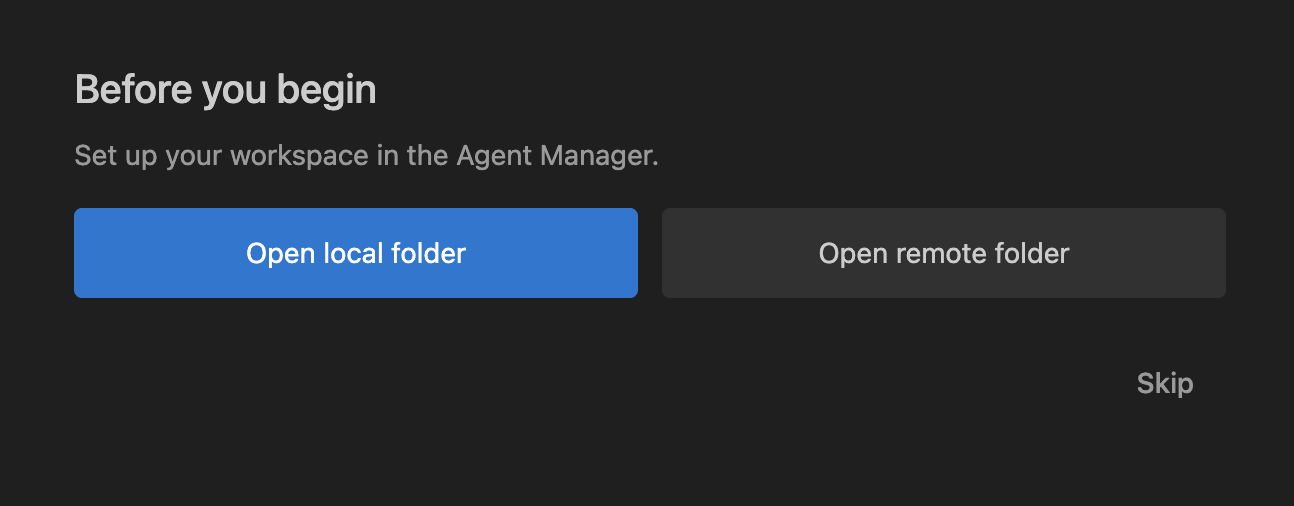
Think of workspace as you knew from VS Code and you will be done. So we can open up a local folder by clicking on the button and then selecting a folder to start with. In my case, I had a folder in my home folder named my-agy-projects and I selected that. You can use a completely different folder. Note, you can completely skip this step if you'd like and you can open up a workspace at any time later too.
Once you complete this step, you will be in the Agent Manager window, which is shown below:
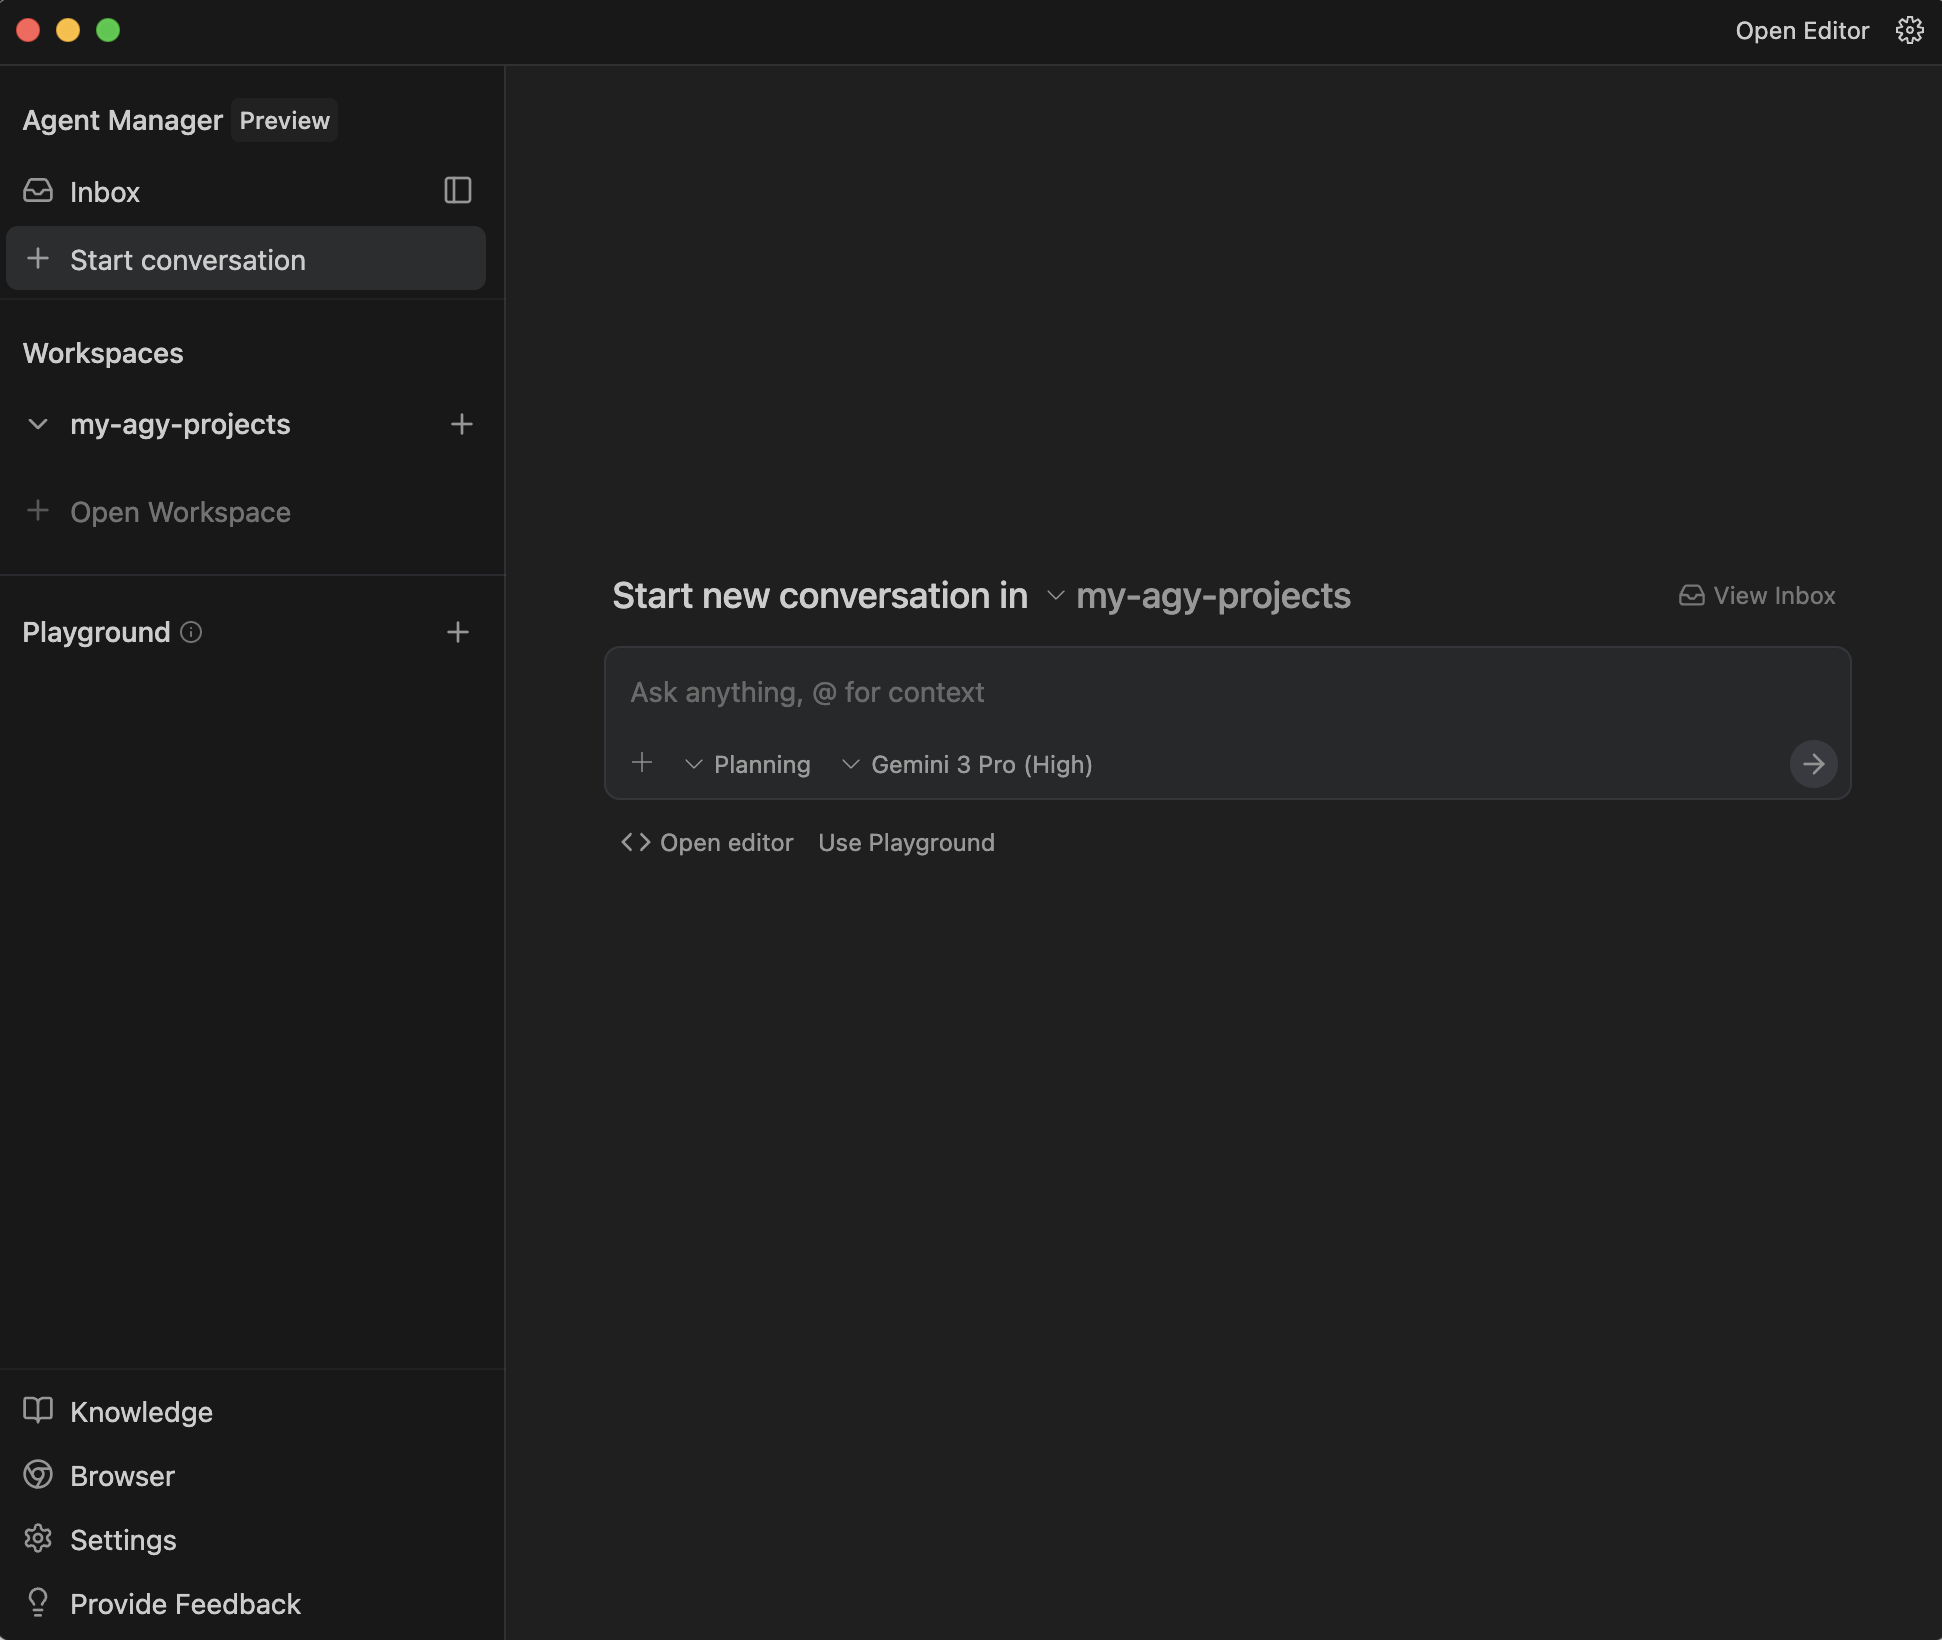
You will notice that the application is immediately geared to start a new conversation in the workspace folder (my-agy-projects) that was selected. You can use your existing knowledge of working with other AI applications (Cursor, Gemini CLI) and use @ and other ways to include additional context while prompting.
Do look at both the Planning and the Model Selection dropdowns. The Model Selection dropdown allows you to choose from one of the models available at the moment, for your Agent to use. The list is shown below:
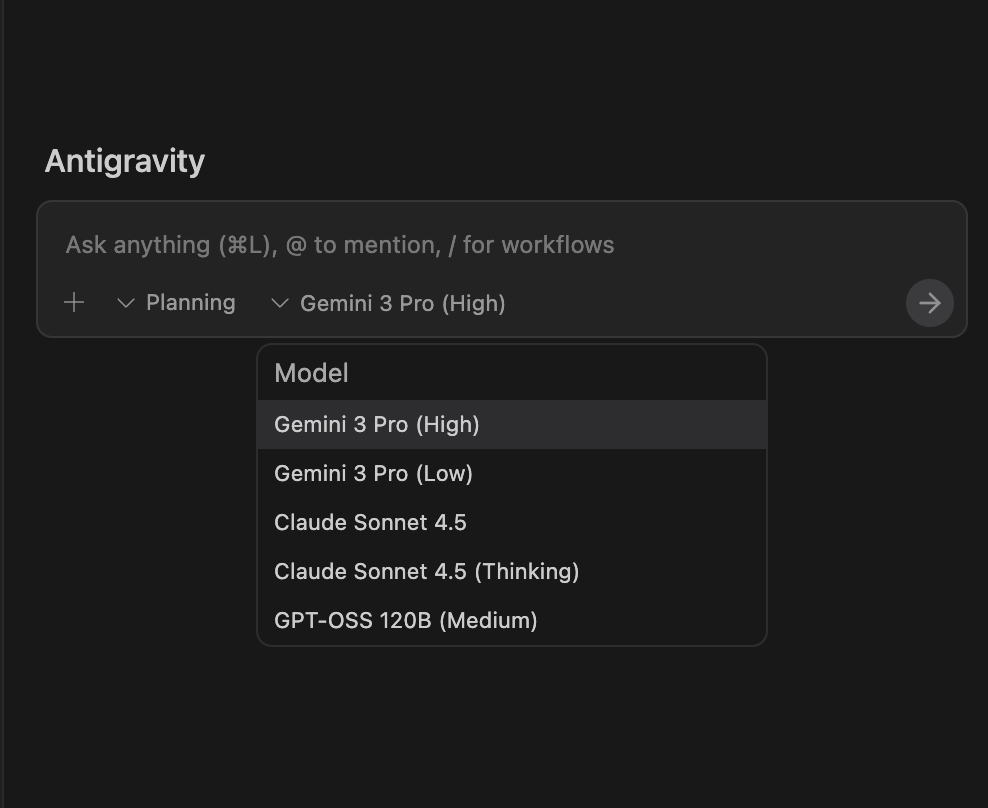
Similarly, we find that the Agent is going to be in a default Planning mode. But we can also go for the Fast mode.
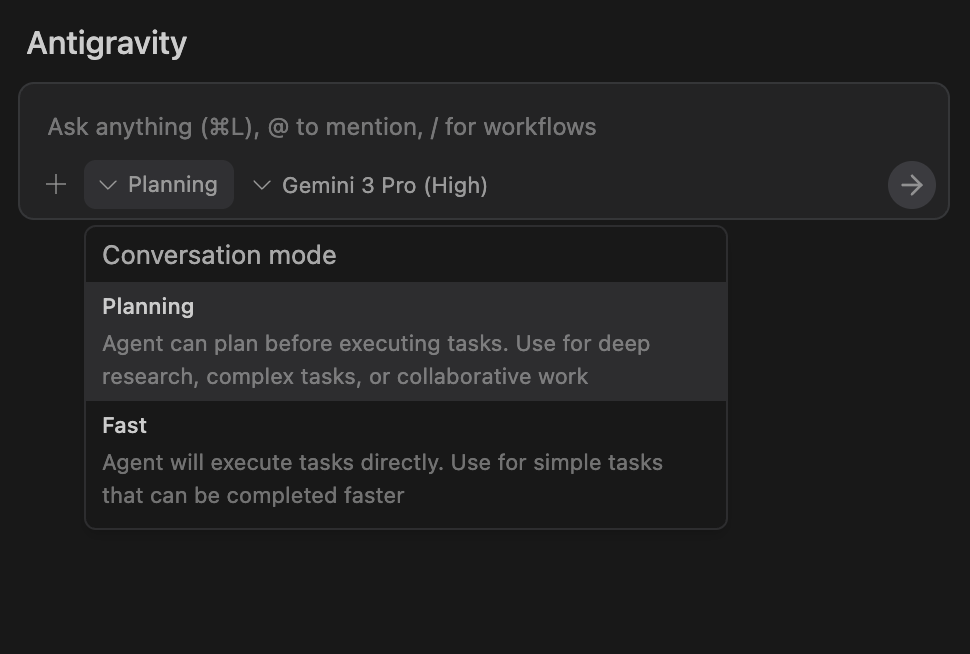
Let's look at what the documentation says on this:
Planning: An Agent can plan before executing tasks. Use for deep research, complex tasks, or collaborative work. In this mode, the Agent organizes its work in task groups, produces Artifacts, and takes other steps to thoroughly research, think through, and plan its work for optimal quality. You will see a lot more output here.Fast: An Agent will execute tasks directly. Use for simple tasks that can be completed faster, such as renaming variables, kicking off a few bash commands, or other smaller, localized tasks. This is helpful for when speed is an important factor, and the task is simple enough that there is low worry of worse quality.
If you are familiar with the thinking budget and similar terms in agents, think of this as the ability to control the thinking of the agent, thereby having a direct impact on the thinking budget. We will go with the defaults for now but do remember that at the time of the launch, Gemini 3 Pro model availability is as per limited quotas to everyone, so do expect appropriate messages indicating if you have exhausted those free quotas for Gemini 3 usage.
Let's spend a bit of time now on the Agent Manager (window) here and understand a few things, so that it's clear about the basic building blocks, how you navigate in Antigravity and more. The Agent Manager window is produced below:
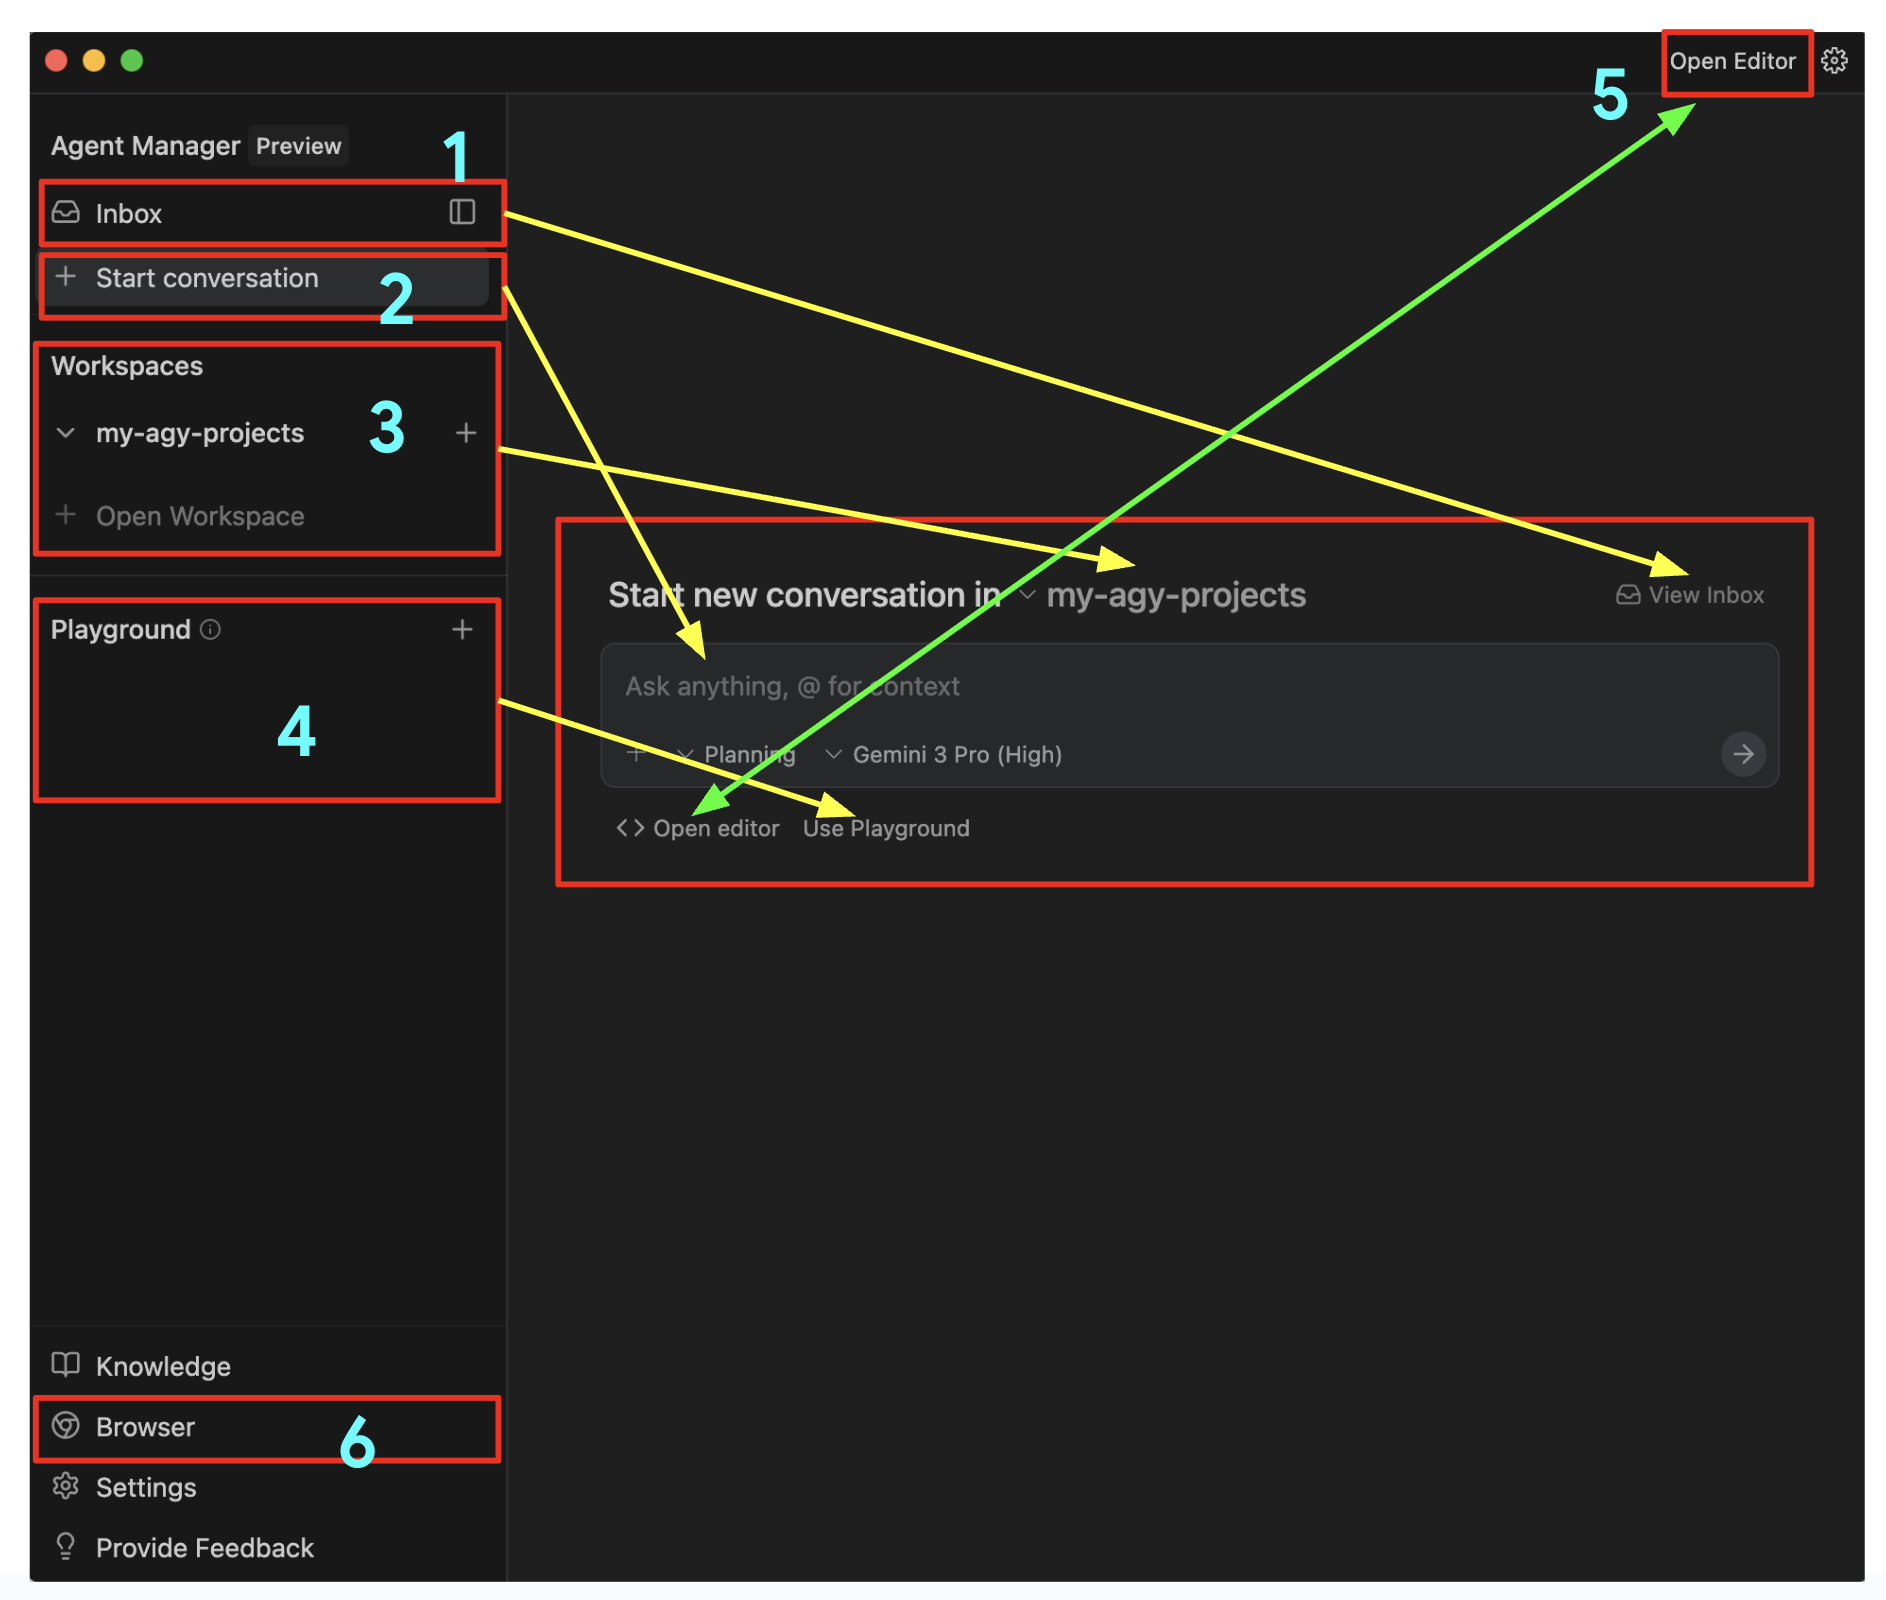
Please refer to the above diagram with the numbers:
Inbox: Think of this as a way to track all your conversations in one place. As you send Agents off on their tasks, these will appear in the Inbox and you can click on the Inbox to get a list of all the current conversations. Tapping on any of the conversations will lead you to all the messages that have been exchanged, status of the tasks, what the Agent has produced or even if it is waiting for an approval from your side on the tasks. This is a great way to come back later to a previous task that you were working on. A very handy feature.Start Conversation: Click on this to begin a new conversation. This will directly lead you to the input where it saysAsk anything.Workspaces: We mentioned about Workspaces and that you can work across any workspace that you want. You can add more workspaces at any time and can select any workspace while starting the conversation.Playground: This is a great way by which you can simply start a conversation with the agent and then if you'd like to convert that into a workspace, where you have stricter control over the files, etc. Think of this as a scratch area.Editor View: So far we are in the Agent Manager view. You can switch at any time to the Editor view, if you'd like. This will show you your workspace folder and any files generated. You can directly edit the files there, or even provide inline guidance, command in the editor, so that the Agent can do something or change as per your modified recommendations/instructions. We will cover the Editor View in detail in a later section.Browser: Finally, we come to one of the clear differentiators that makes Antigravity very powerful and that is its close integration with the Chrome browser. Let's get going with setting up the browser in the next section.
4. Antigravity Browser
As per the documentation, when the agent wants to interact with the browser, it invokes a browser subagent to handle the task at hand. The browser subagent runs a model specialized to operate on the pages that are open within the Antigravity-managed browser, which is different from the model you selected for the main agent.
This subagent has access to a variety of tools that are necessary to control your browser, including clicking, scrolling, typing, reading console logs, and more. It can also read your open pages through DOM capture, screenshots, or markdown parsing, as well as taking videos.
This means that we need to launch and install the Antigravity browser extension. Let's do that by actually starting a conversation in the Playground and going through the steps.
Select Playground and give the following task go to antigravity.google to the Agent as shown below:
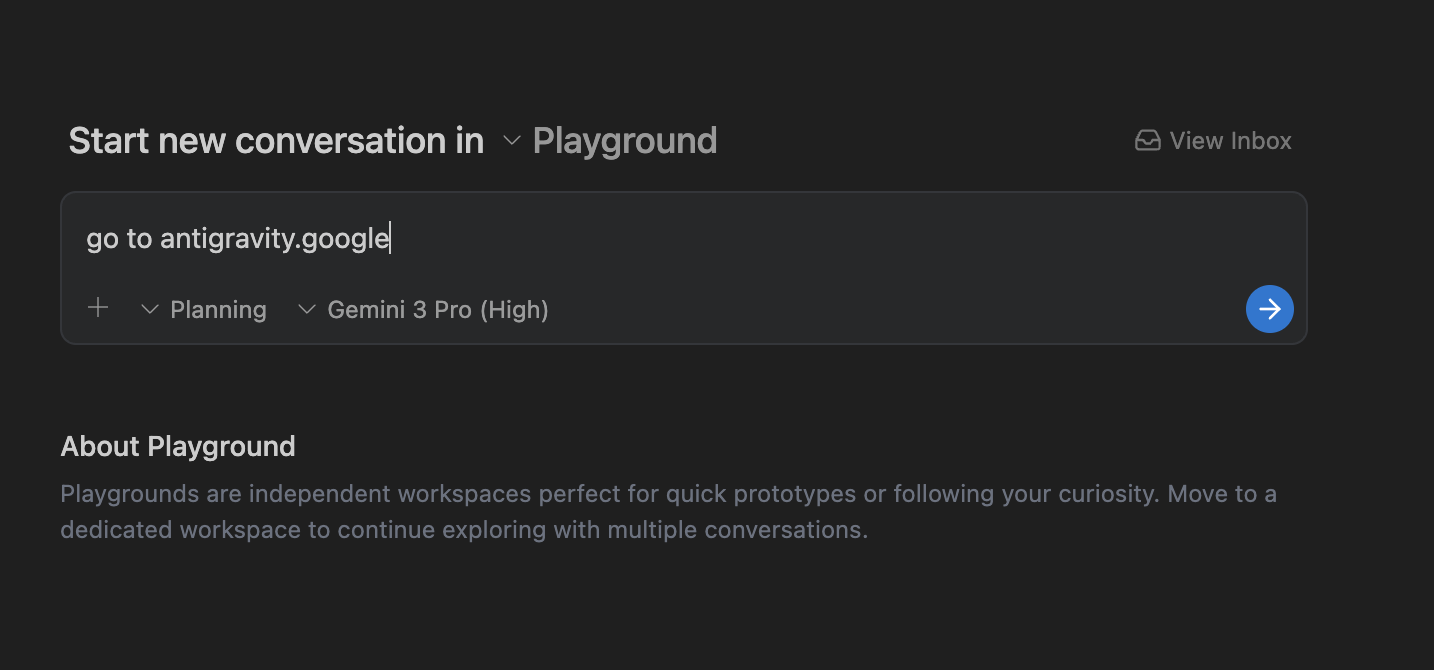
Submit the task. You will see the agent analyzing the task and you can inspect the thought process. At some point, it will correctly proceed and mention that it needs to set up the browser agent as shown below. Click on Setup.
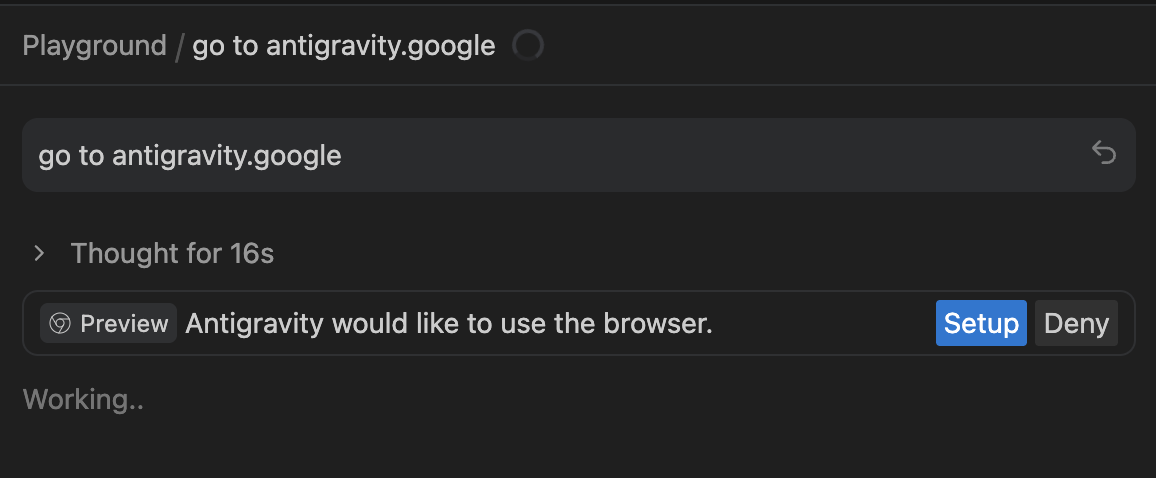
This will bring up the browser and display a message to install the extension as shown below:
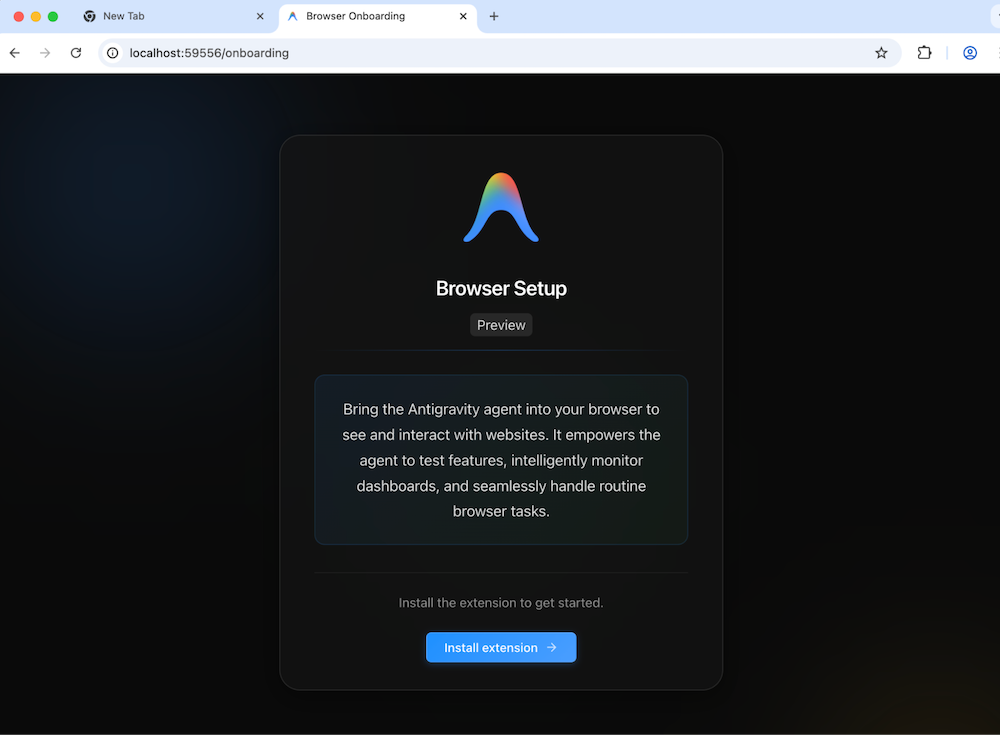
Go ahead and you will be led to the Chrome Extension that you can then install.

Once you successfully install the extension, Antigravity Agent will get to work and indicate that it is expecting you to allow it permission to do its task. You should see some activity in the browser window that has been opened:
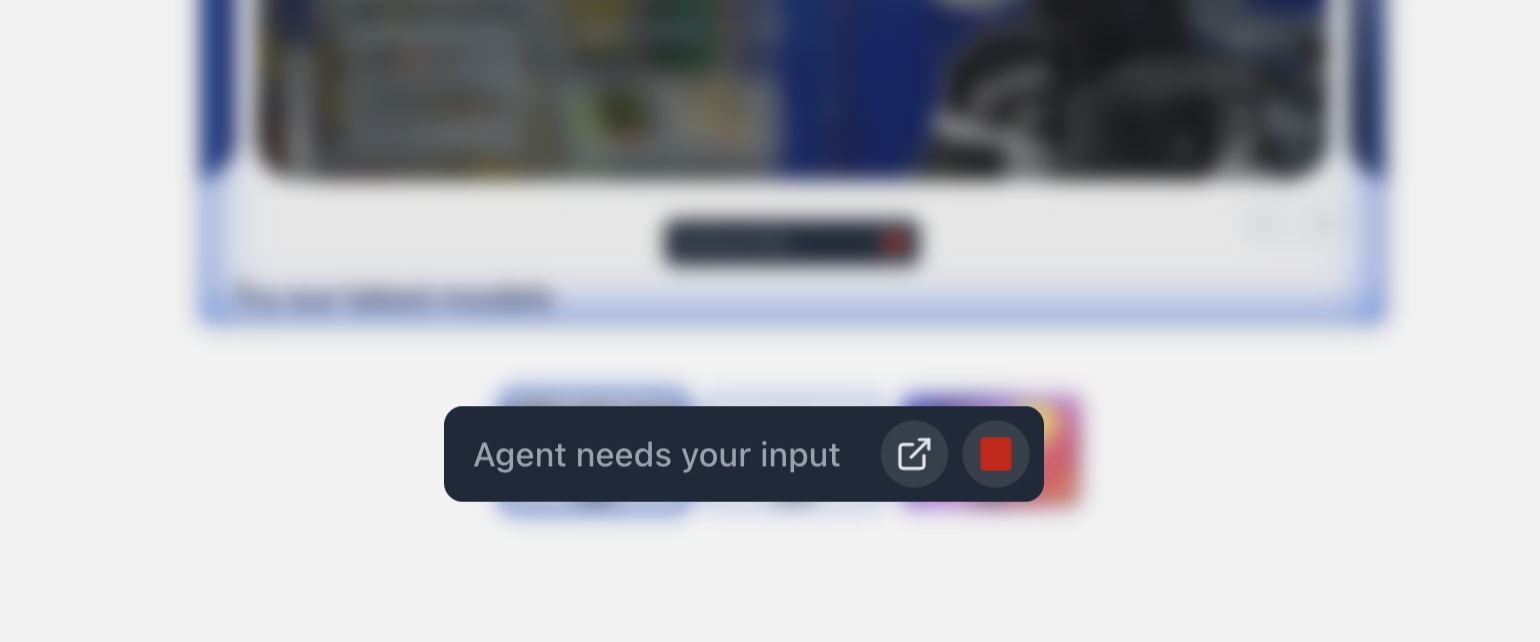
Switch back the Agent Manager view and you should see the following:
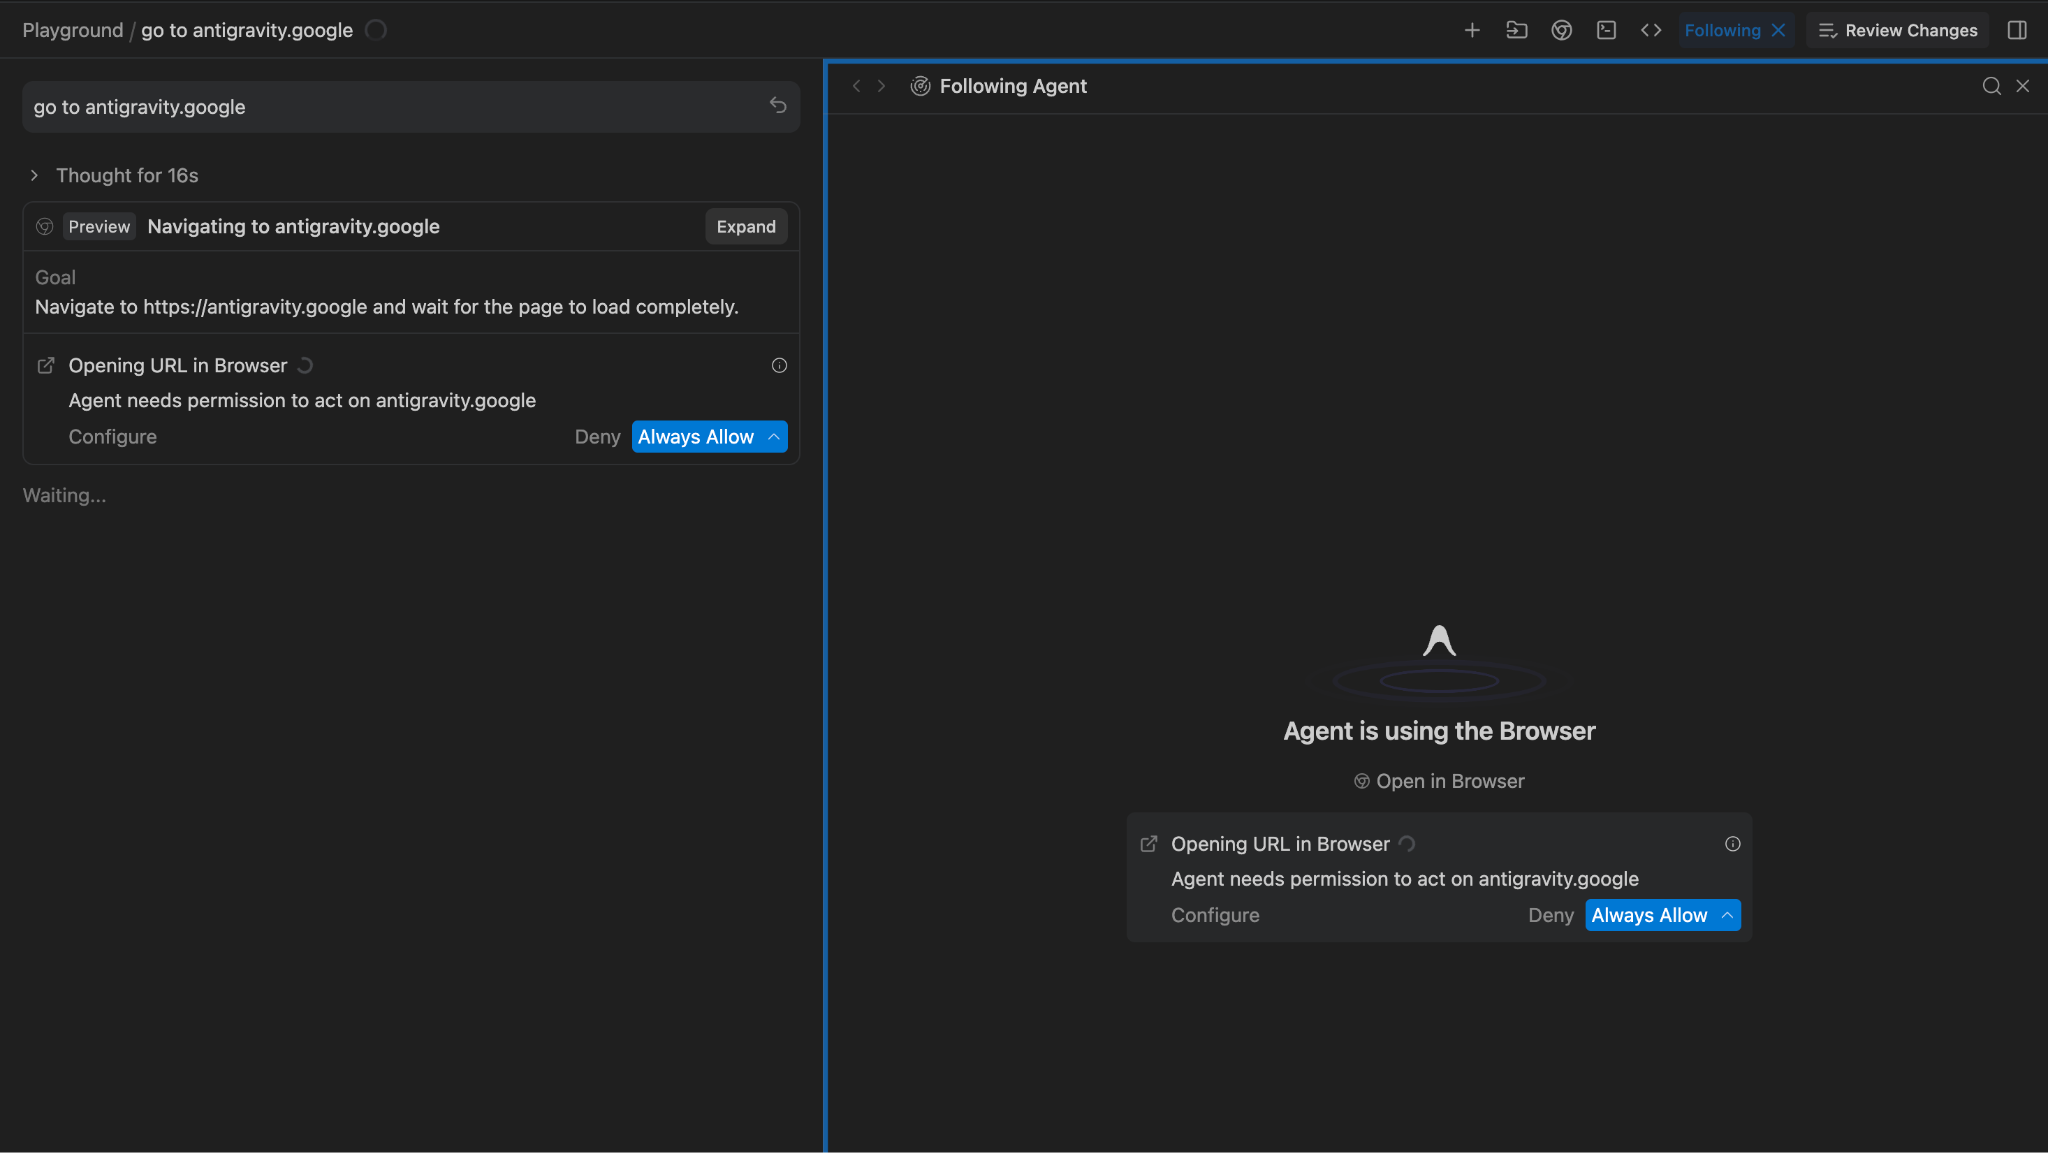
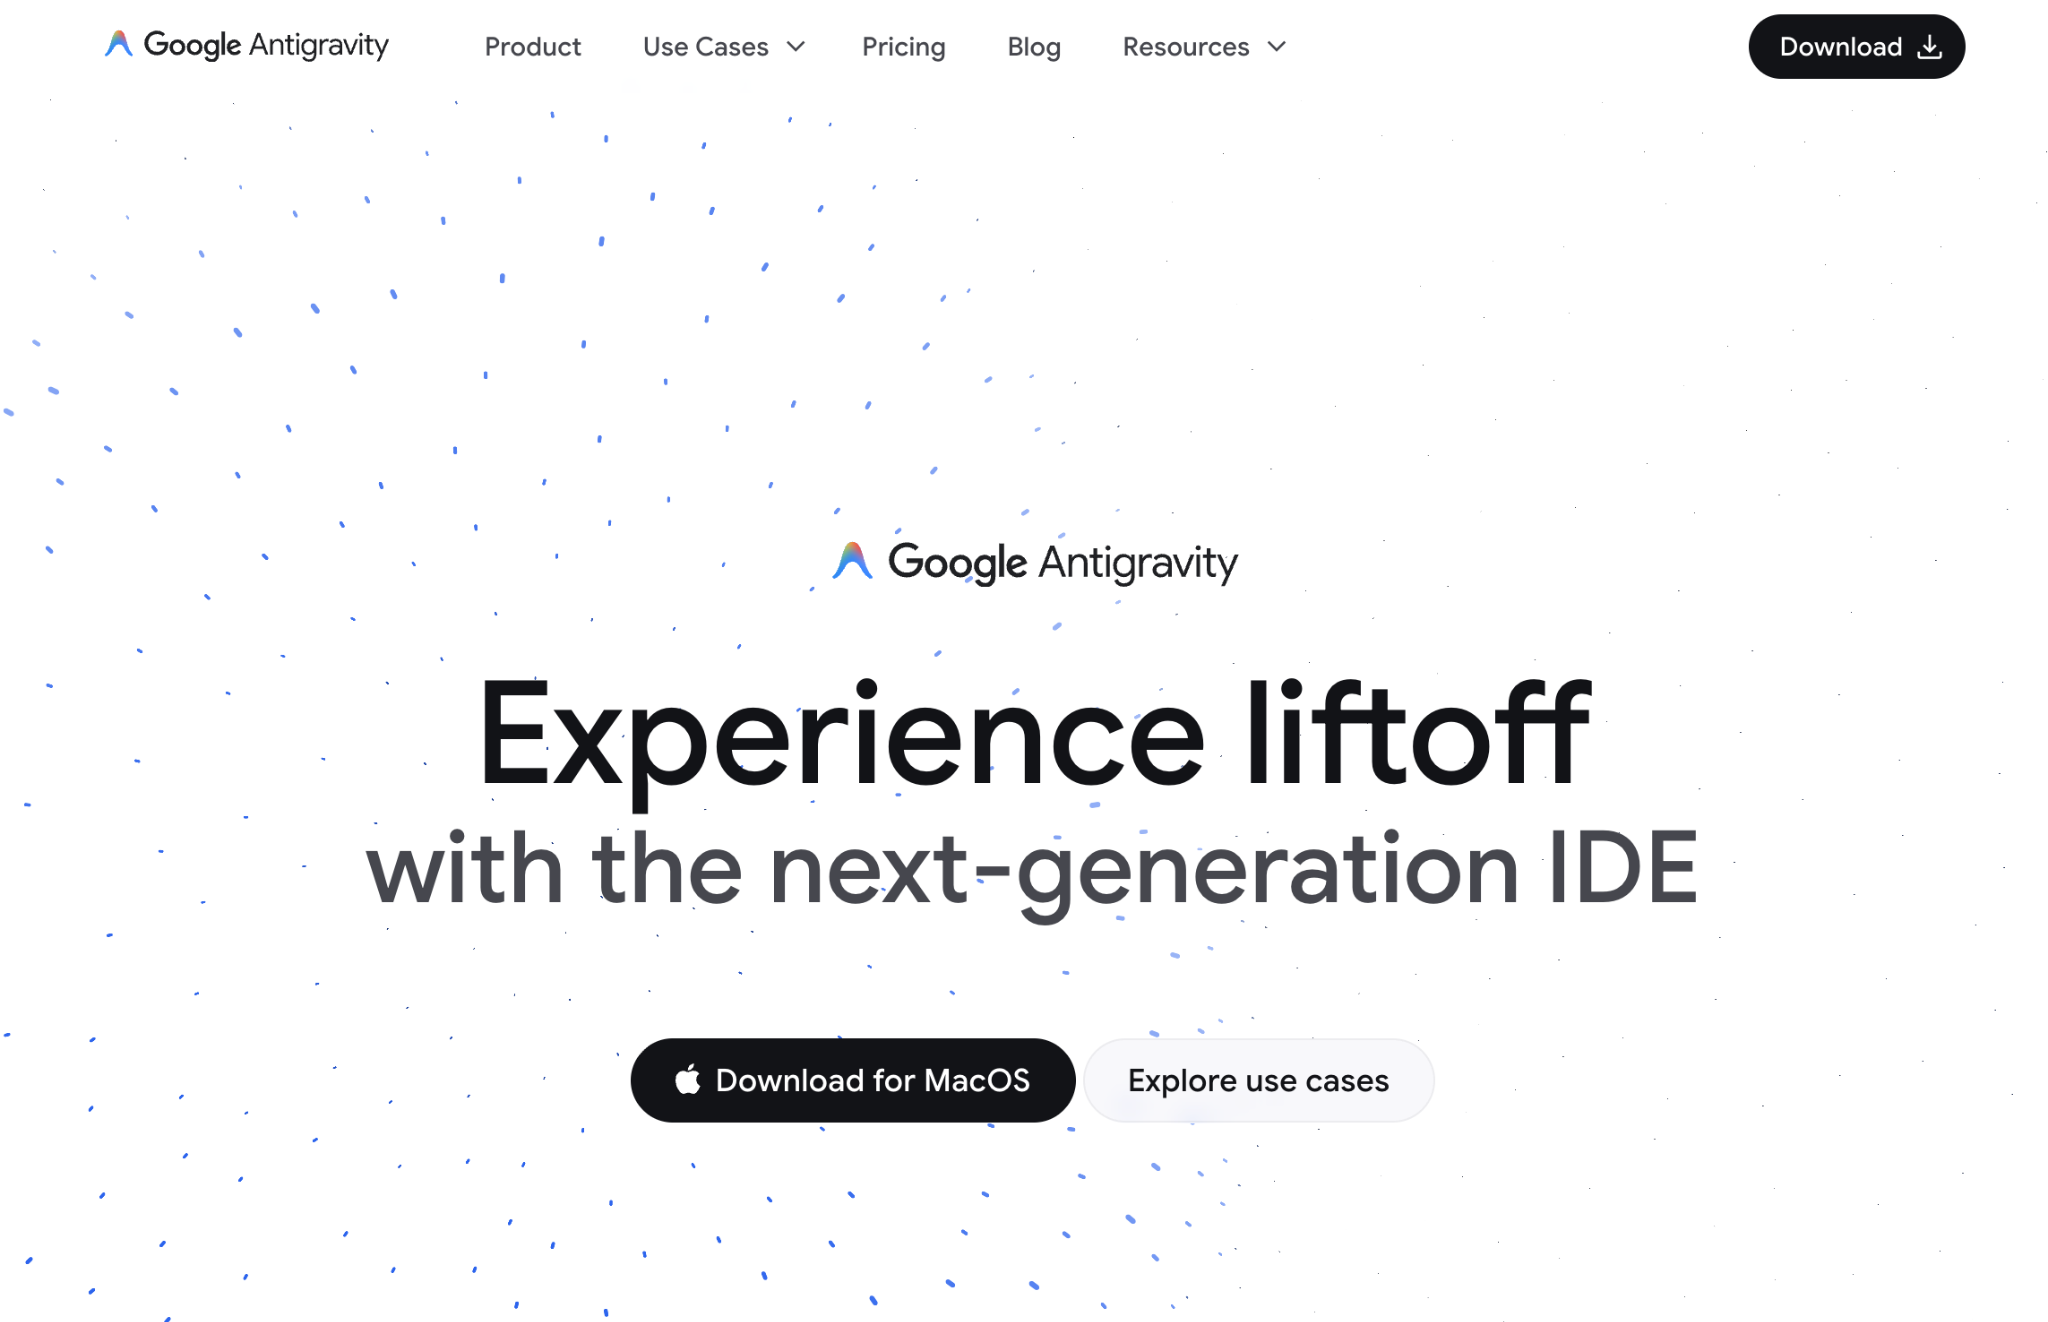
This is exactly what we expected to happen since we asked the Agent to go and visit the antigravity.google website. Give it the permission and you will find that the website was safely navigated to, as shown below:
5. Artifacts
Antigravity creates Artifacts as it plans and gets its work done as a way to communicate its work and get feedback from the human user. These are rich markdown files, architecture diagrams, images, browser recordings, code diffs, and so on.
Artifacts solve the "Trust Gap". When an agent claims, "I have fixed the bug" the developer previously had to read the code to verify. In Antigravity, the agent produces an artifact to prove it.
These are the main artifacts produced by Antigravity:
Task Lists: Before writing code, the agent generates a structured plan. You don't typically need to edit this plan but you can review it and in some cases, add a comment to change it, if needed.Implementation Plan: This is used to architect changes within your codebase to accomplish a task. These plans contain technical details on what revisions are necessary and are meant to be reviewed by the user, unless you have your artifact review policy set to "Always Proceed".Walkthrough: This is created once the agent has completed task implementation, as a summary of the changes and how to test them.Code diffs: While technically not an artifact, Antigravity also produces code diffs that you can review and comment on.Screenshots: The agent captures the state of the UI before and after a change.Browser Recordings: For dynamic interactions (e.g., "Click the login button, wait for the spinner, verify the dashboard loads"), the agent records a video of its session. The developer can watch this video to verify that the functional requirement is met without running the app themselves.
Artifacts are produced and appear in both the Agent Manager and Editor views.
In the Editor view, on the bottom right corner, you can click on Artifacts:
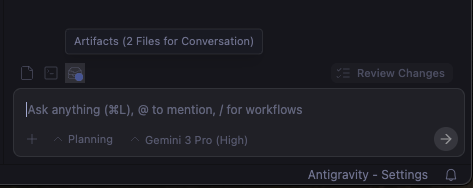
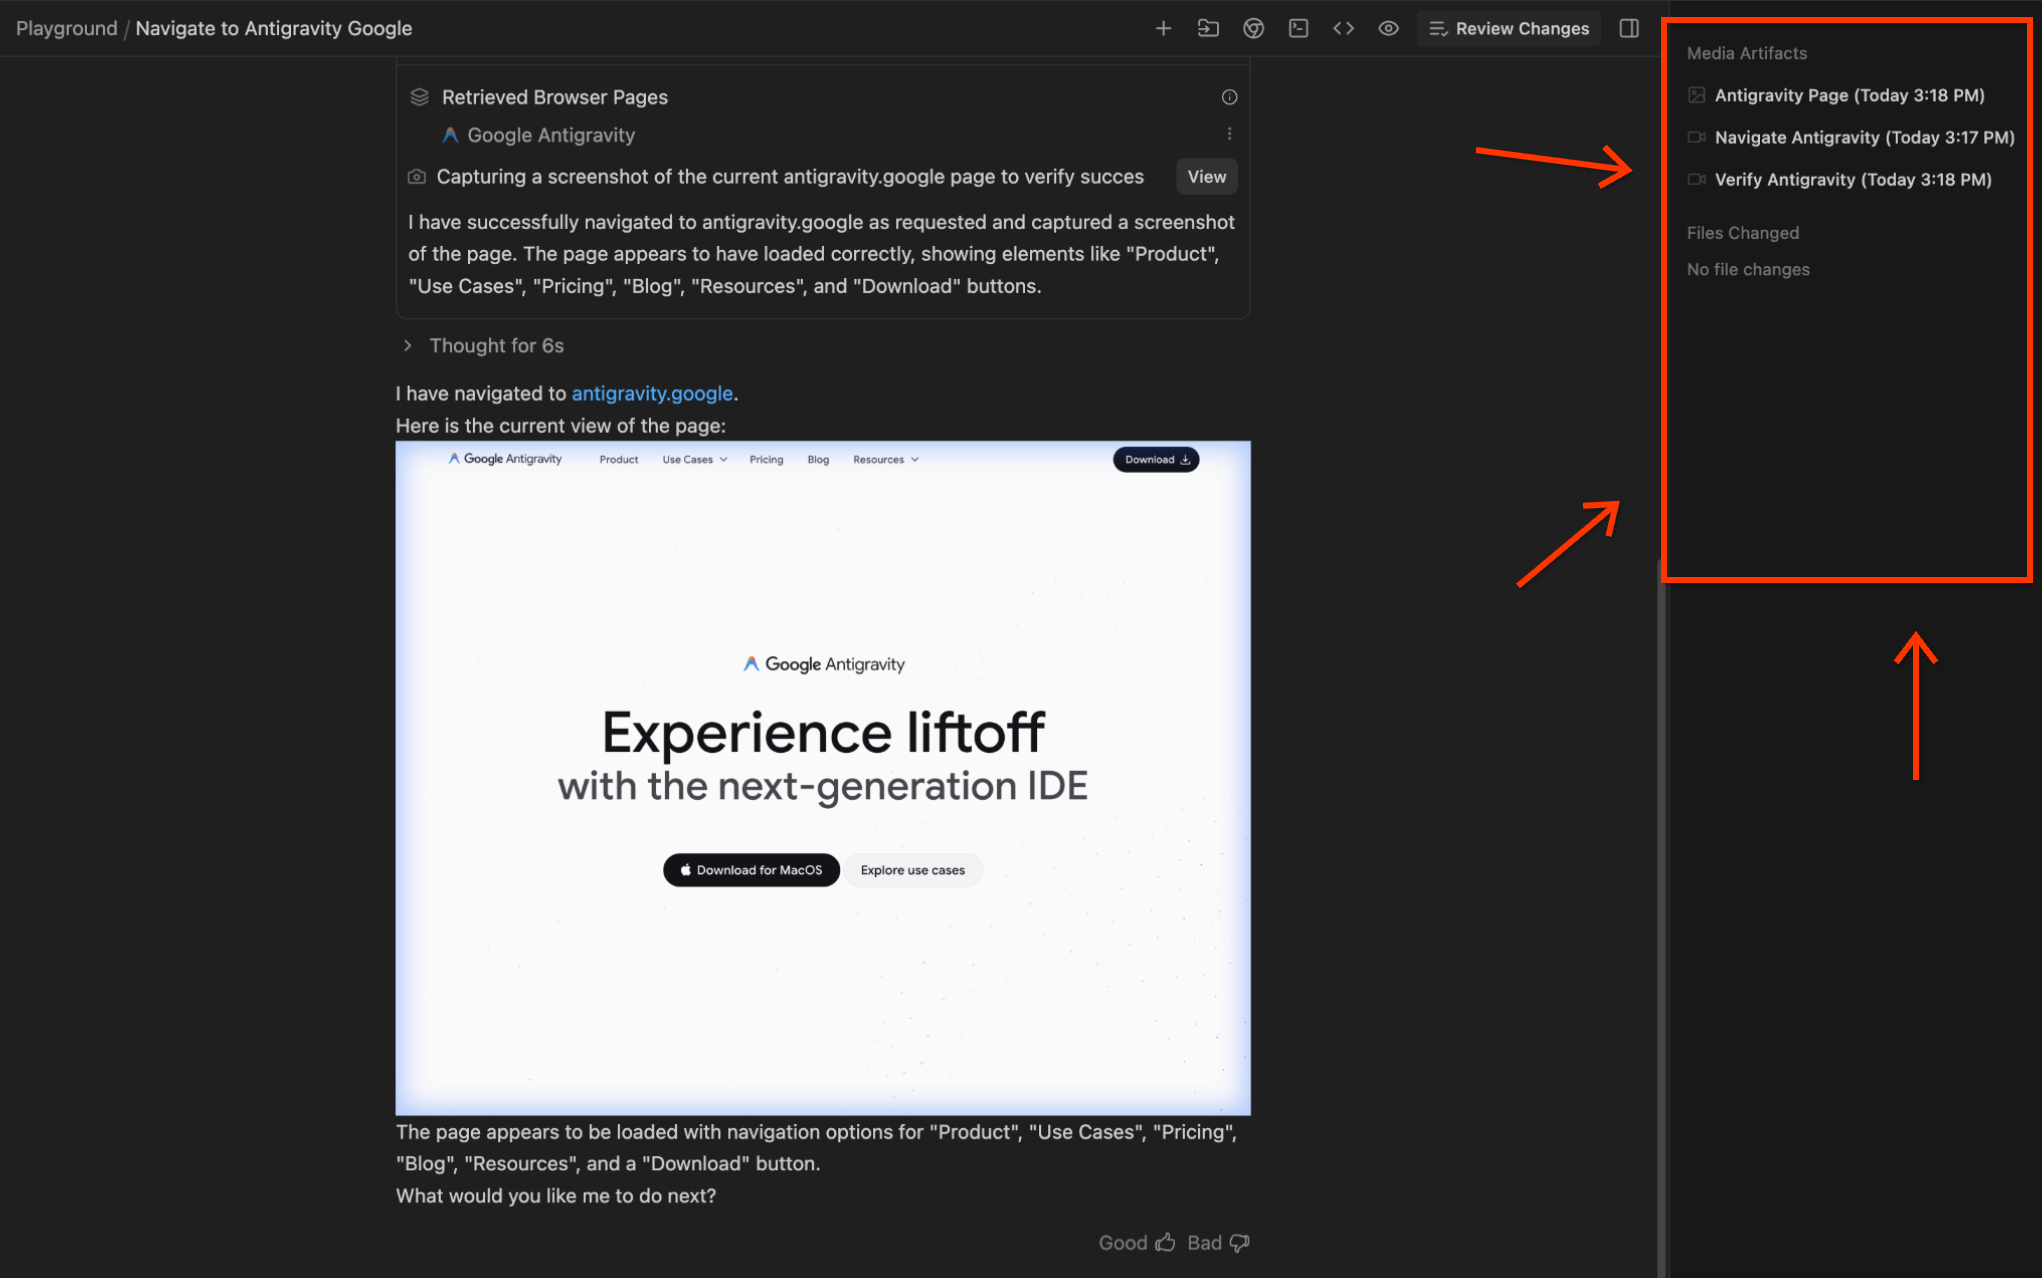
In the Agent Manager view, on the top right, next to Review changes, you should be able to see a button to toggle the artifacts or if it's toggled on, you can see the generated artifacts list:

You should see the Artifacts view as shown below. In our case here, we instructed the Agent to visit the antigravity.google page and hence it has captured the screenshot, created a video of the same:
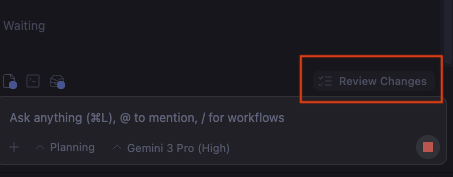
You can see code diffs in Review Changes in the Editor view:
Developers can interact with these artifacts and code diffs using "Google Docs-style comments." You can select a specific action or task, provide a command the way you would like it to be and then submit that to the agent. The agent will then ingest this feedback and iterate accordingly. Think about using interactive Google Docs, where you provide feedback to the author and the author then reiterates on that.
6. Revisit the Inbox
If you have started a few conversations with the Agents, you should now take a look at your Inbox in the Agent Manager window. This will show you all the conversations. Click on any of the conversations to see the history of that conversation, the artifacts produced and more. In our case, after we ran the first conversation, our Inbox shows the conversation listed, as shown below:
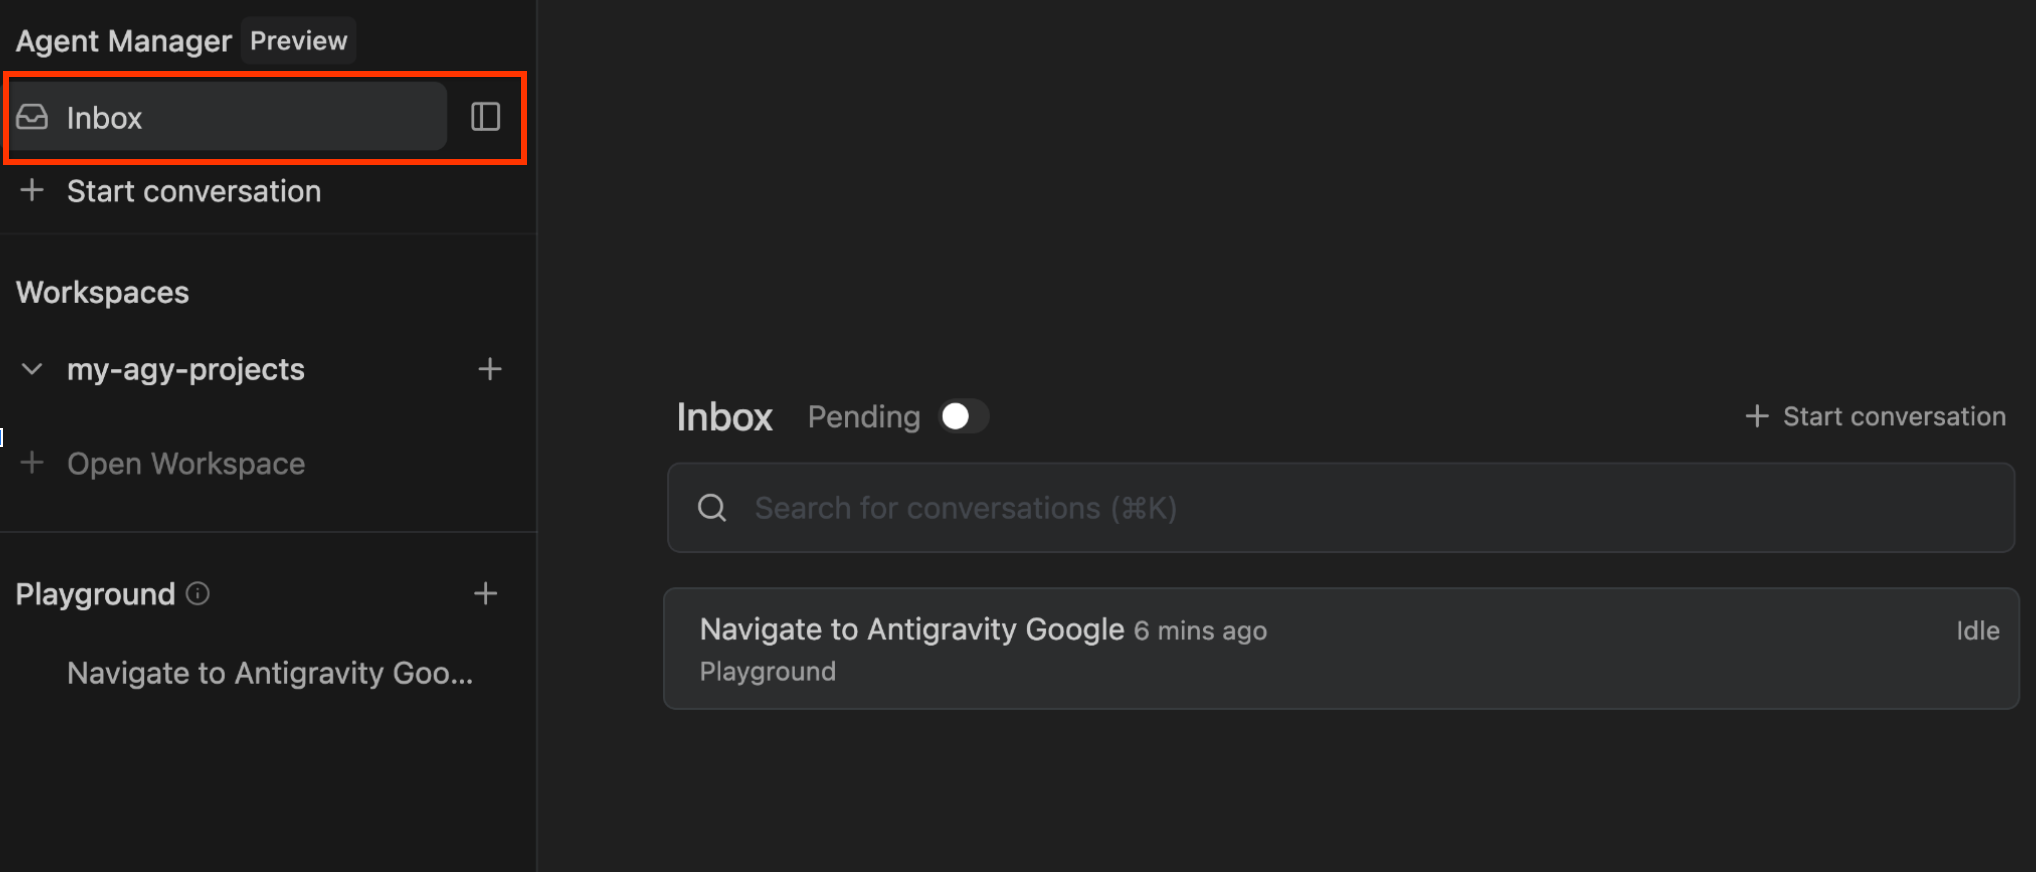
Clicking on that conversation will provide you the details:
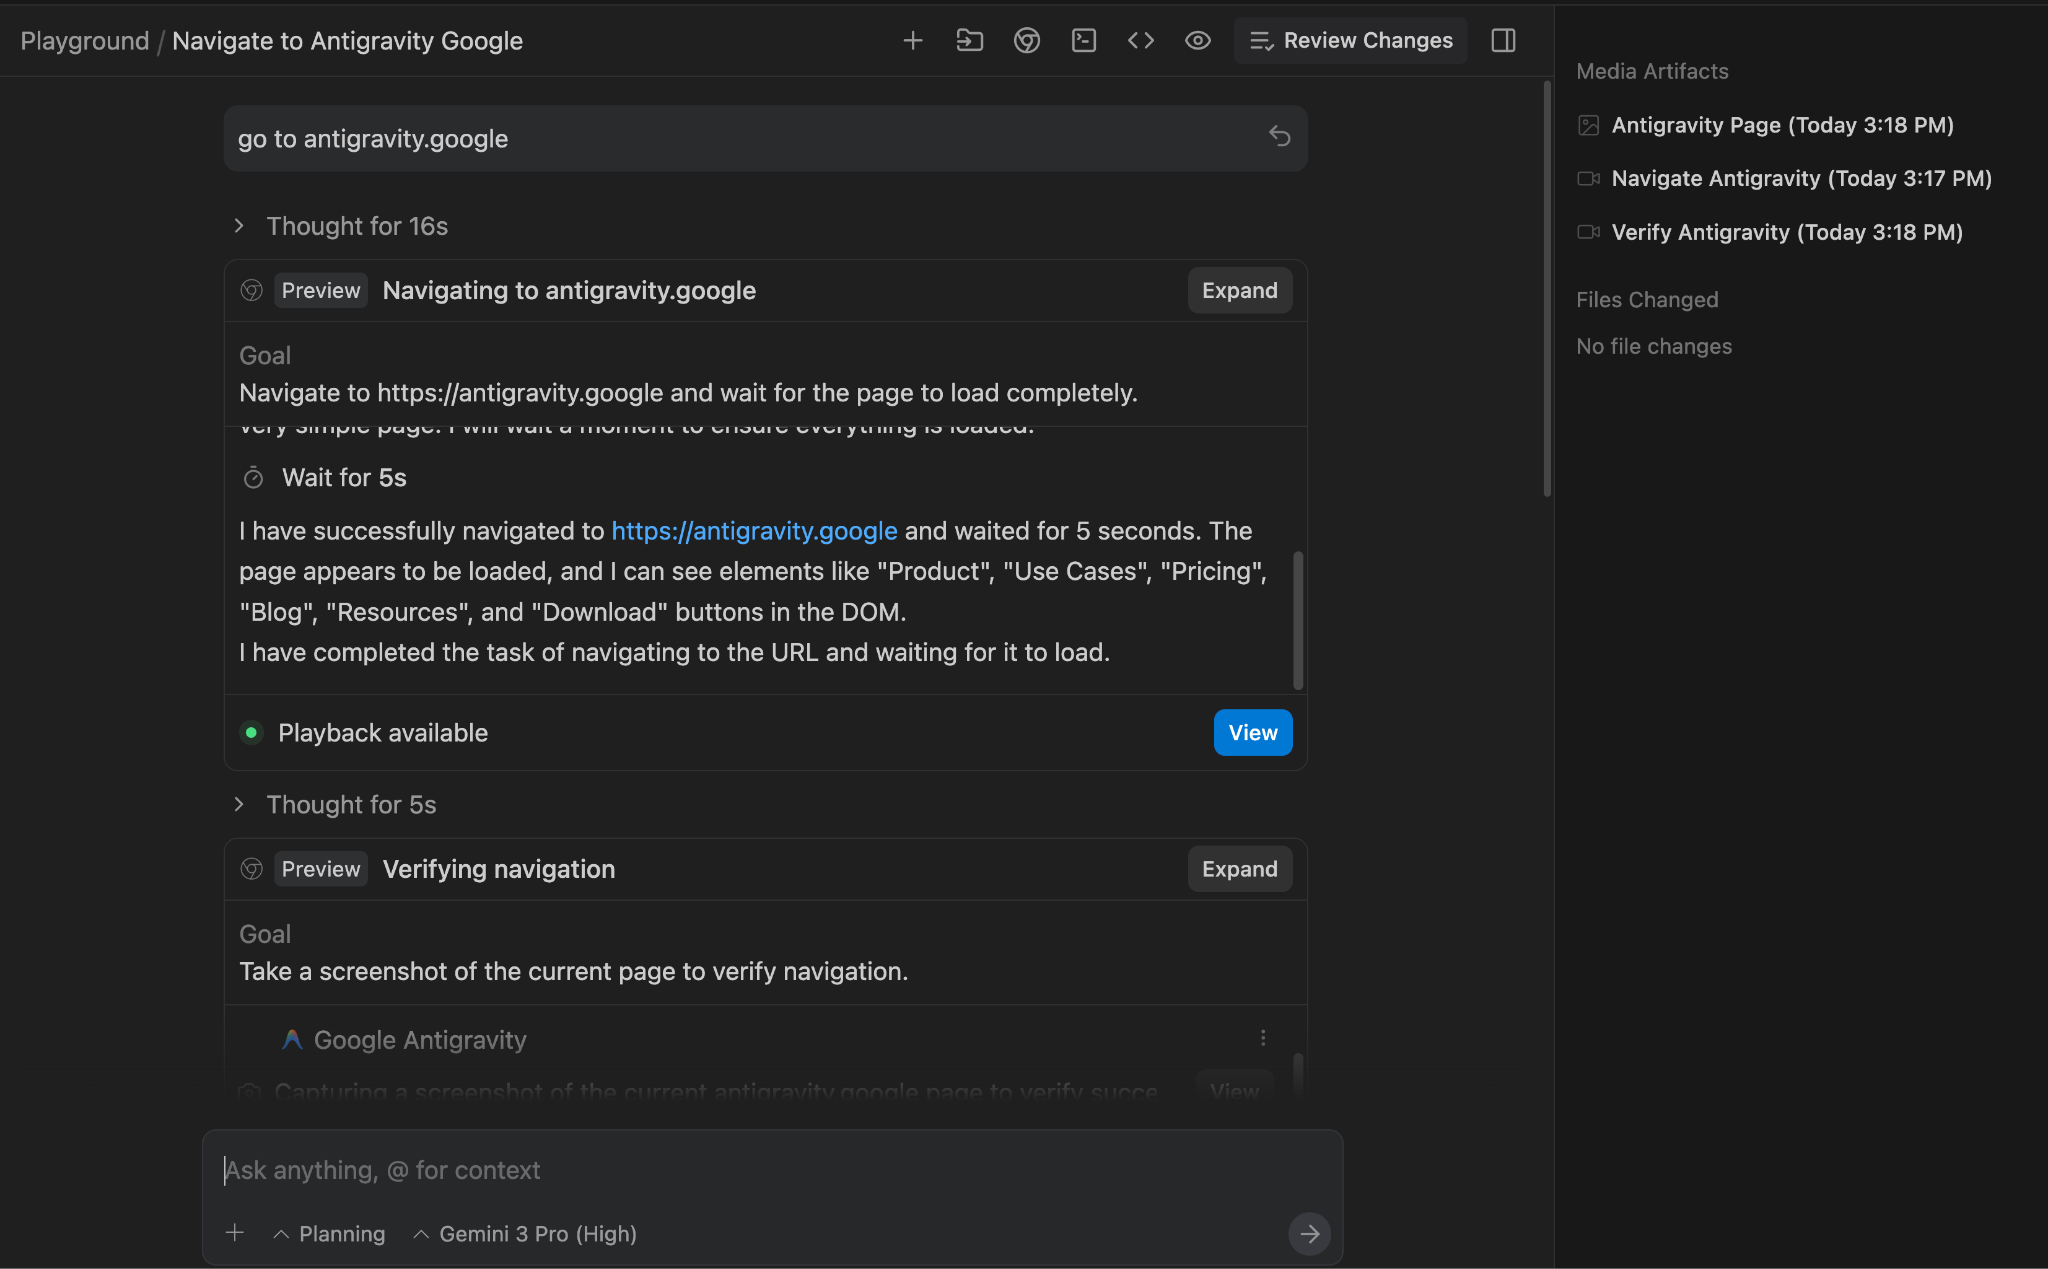
You can continue the conversation from here too.
7. Editor
The editor retains the familiarity of VS Code, ensuring that the muscle memory of seasoned developers is respected. It includes the standard file explorer, syntax highlighting, and extensions ecosystem.
You can click on the Open Editor button right on the top right in Agent Manager to go to the Editor.
Setup and Extensions
In a typical setup, you'd have the editor, the terminal, and the agent visible:
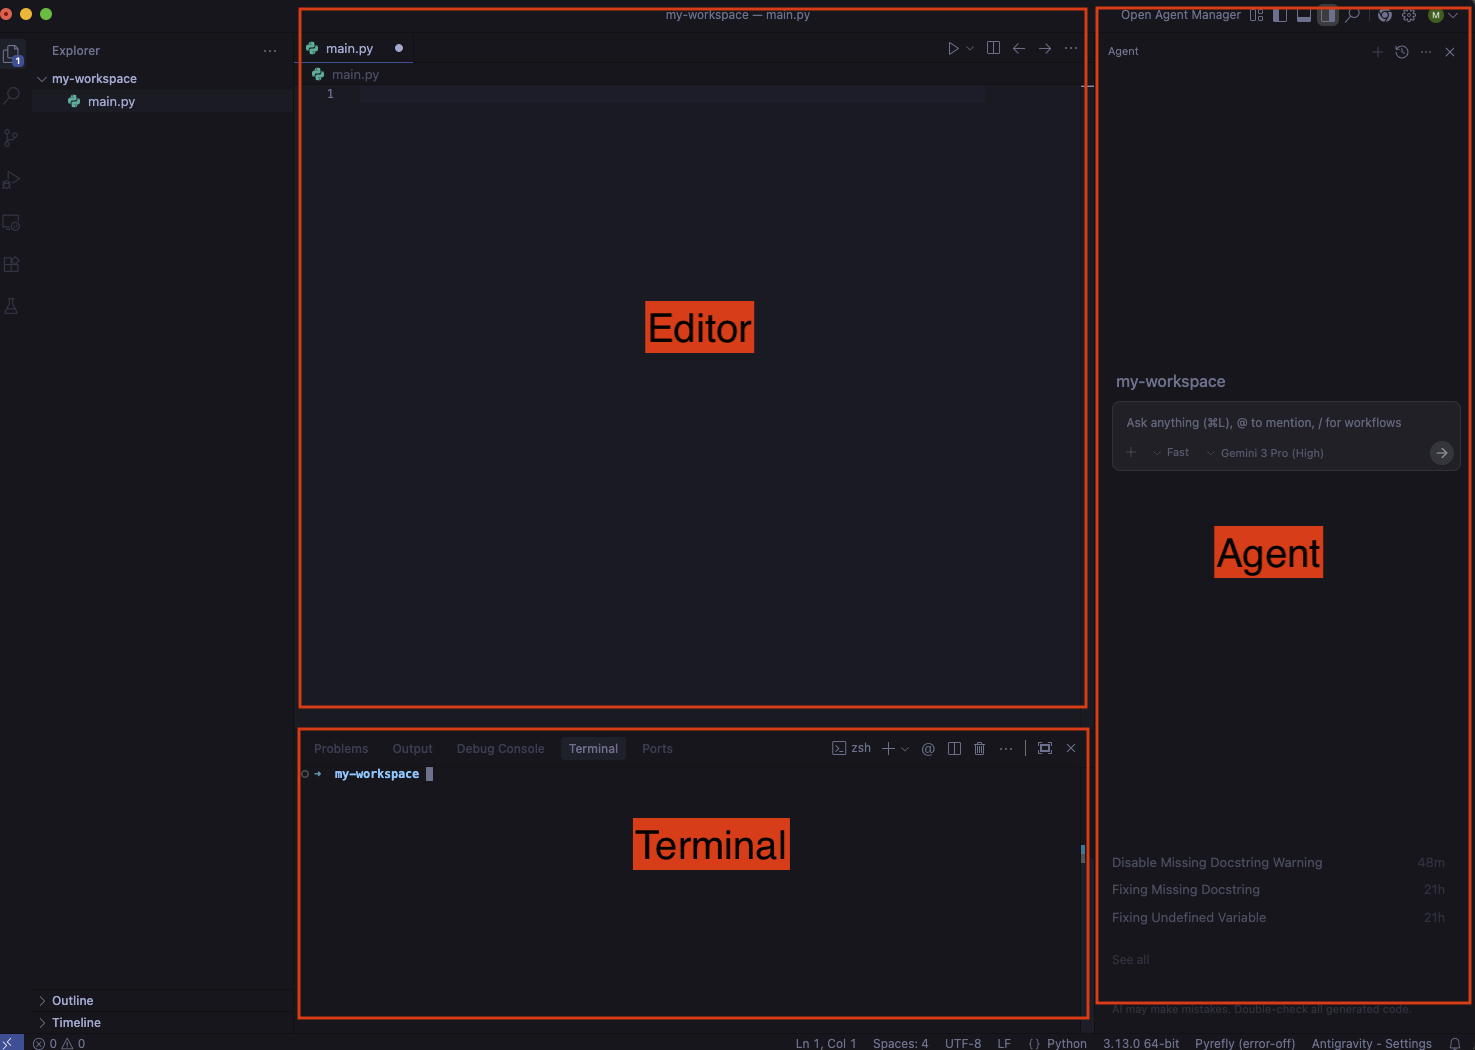
If this is not the case, you can toggle terminal and agent panels as follows:
- To toggle the terminal panel, use the
Ctrl + `shortcut. - To toggle the agent panel, use the
Cmd + Lshortcut.
Additionally, Antigravity can install some extensions during setup but depending on the programming language you're using, you probably need to install more extensions. For example, for Python development, these are the extensions you might choose to install:
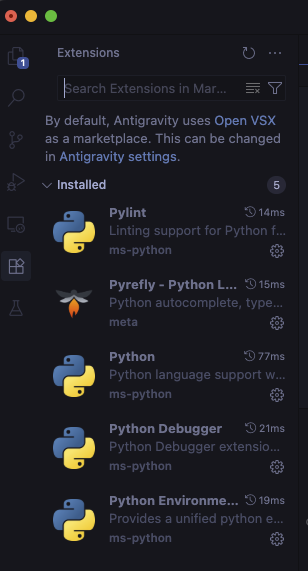
Editor
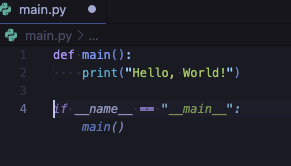
Auto-complete
As you type code in the editor, a smart auto-complete kicks in that you can simply tab in:
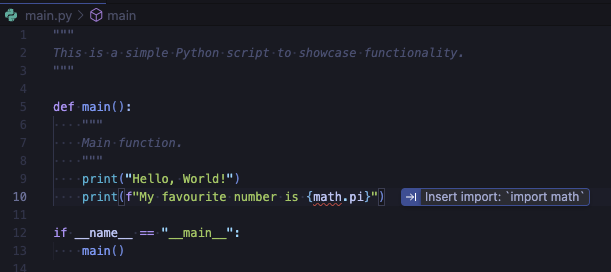
Tab to import
You get tab to import suggestion to add missing dependencies:
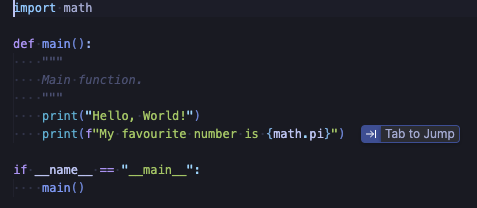
Tab to jump
You get tab to jump suggestions to get the cursor to the next logical place in the code:
Commands
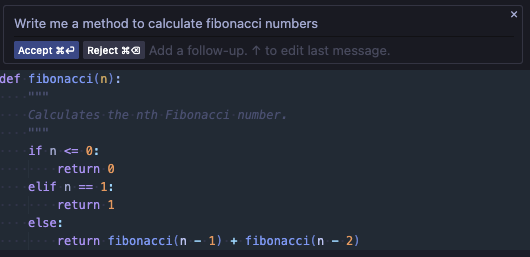
You can trigger commands with Cmd + I in the editor or terminal for inline completions using natural language.
In the editor, you can ask for a method to calculate Fibonacci numbers and then accept or reject it:
In the terminal, you can get terminal command suggestions:

Agent Side Panel
From the editor, you can toggle the agent side panel in multiple ways.
Manual open
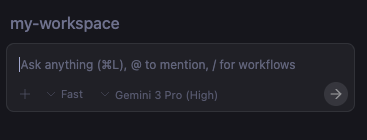
You can manually toggle the agent panel on the right with the Cmd + L shortcut.
You can start asking questions, use @ to include more context such as files, directories, MCP servers, or use / to refer to a workflow (a saved prompt):
You can also choose between two conversation modes: Fast or Planning :
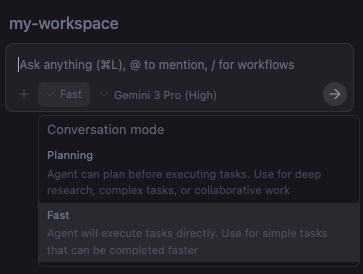
Fast is recommended for quick tasks whereas Planning is recommended for more complex tasks where the agent creates a plan that you can approve.
You can also choose different models for the conversation:
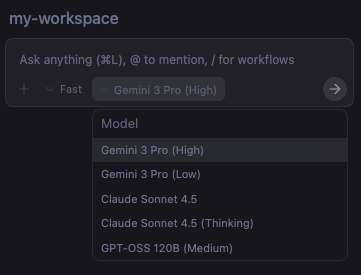
Explain and fix
Another way of triggering the agent is to hover over a problem and selecting Explain and fix:

Send problems to agent
You can also go to the Problems section and select Send all to Agent to get the agent to try to fix those problems:

Send terminal output to agent
You can even select a part of the terminal output and send it to the agent with Cmd + L:

Toggling between Editor and Agent Manager
At any point, you can switch between the editor mode and the full agent manager mode via the Open Agent Manager button on the top right when you are in editor mode and back by clicking on the Open Editor button on the top right when you are in the agent manager mode.
Alternately, you also use Cmd + E keyboard shortcut to toggle between the two modes.
8. Provide Feedback
At the heart of Antigravity is its ability to effortlessly gather your feedback at every stage of the experience. As the agent works on a task, it creates different artifacts along the way:
- An implementation plan and a task list (before coding)
- Code diffs (as it generates code)
- A walkthrough to verify the results (after coding)
These artifacts are a way for Antigravity to communicate its plans and progress. More importantly, they're also a way for you to provide feedback to the agent in Google docs style comments. This is very useful to effectively steer the agent in the direction you want.
Let's try to build a simple to-do list application and see how we can provide feedback to Antigravity along the way.
Planning mode
First, you need to make sure that Antigravity is in Planning mode (instead of Fast mode).You can select this in the agent side panel chat. This makes sure that Antigravity creates an implementation plan and a task list before jumping into code. Then, try a prompt, something like this: Create a todo list web app using Python. This will kickstart the agent to start planning and produce an implementation plan.
Implementation plan
An implementation plan is an overview of what Antigravity intends to do, which tech stack it will use, and a high-level description of the proposed changes.
Implementation Plan - Python Todo App
Goal
Create a simple, functional, and aesthetically pleasing Todo List web application using Python (Flask).

Tech Stack
Backend: Python with Flask
Frontend: HTML5, CSS3 (Vanilla), Jinja2 templates
...
This is also the first place that you can provide feedback. In our case, the agent wants to use Flask as the Python web framework. We can add a comment to the implementation plan to use FastAPI instead. Once you add the comment, either submit the comment or ask Antigravity to Proceed with the updated implementation plan.
Task list
After the implementation plan is updated, Antigravity creates a task list. This is a concrete list of steps Antigravity will follow to create and verify the app.
Task Plan
 Create requirements.txt
 Create directory structure (static/css, templates)
 Create static/css/style.css
 Create templates/index.html
 Create main.py with FastAPI setup and Database logic
 Verify application
This is the second place where you can provide feedback.
For example, in our use case, you can add more detailed verification instructions by adding the following comment: Verify application by adding, editing, and deleting a todo item and taking a screenshot.
Code changes
At this point, Antigravity will generate some code in new files. You can Accept all or Reject all these changes in the agent chat side panel without looking into details.
You can also click on Review changes to see the details of changes and add detailed comments on the code. For example, we can add the following comment in main.py: Add basic comments to all methods
This is a great way of iterating on code with Antigravity.
Walkthrough
Once Antigravity is done with coding, it starts the server, it opens up a browser to verify the app. It will do some manual testing like adding tasks, updating tasks, etc. All thanks to the Antigravity browser extension. In the end, it creates a walkthrough file to summarize what it did to verify the app. This includes a screenshot or a verification flow with a browser recording.
You can comment on the screenshot or the browser recording in the walkthrough too. For example, we can add a comment Change the blue theme to orange theme and submit. After the comment is submitted, Antigravity makes the changes, verifies the results, and updates the walkthrough
Undo changes
Last but not least, after each step, if you're not happy with the change, you have the option of undoing it from the chat. You just choose the ↩️ Undo changes up to this point in the chat.
9. Rules and Workflows
Antigravity comes with a couple of customization options: Rules and Workflows.
While in Editor mode, click on the ... on the top right corner and choose Customizations, you will see Rules and Workflows:
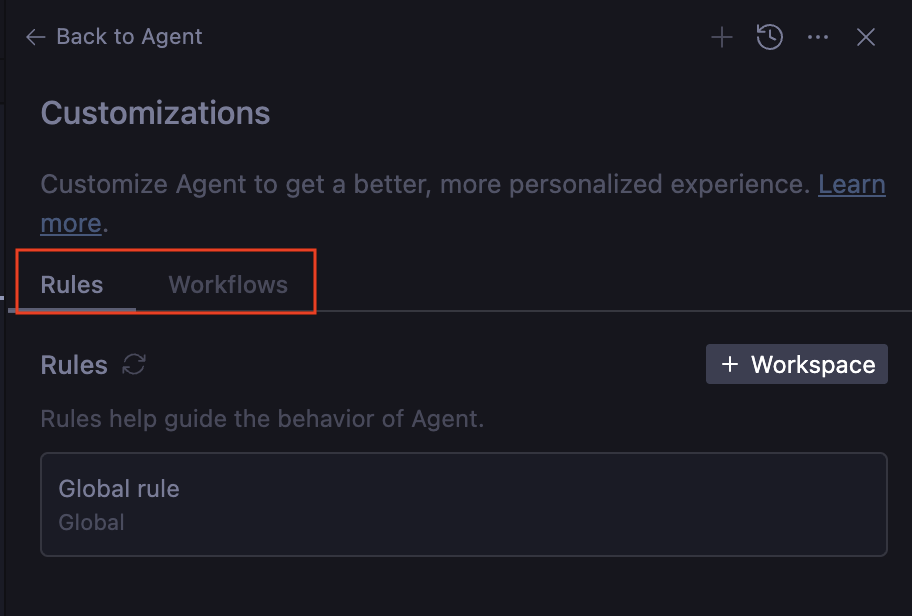
Rules help guide the behavior of the agent. These are guidelines you can provide to make sure the agent follows as it generates code and tests. For example, you might want the agent to follow a certain code style, or to always document methods. You can add these as rules and the agent will take them into account.
Workflows are saved prompts that you can trigger on demand with /, as you interact with the agent. They also guide the behavior of the agent but they're triggered by the user on demand.
A good analogy is that Rules are more like system instructions whereas Workflows are more like saved prompts that you can choose on demand.
Both Rules and Workflows can be applied globally or per workspace and saved to the following locations:
- Global rule:
~/.gemini/GEMINI.md - Global workflow:
~/.gemini/antigravity/global_workflows/global-workflow.md - Workspace rules:
your-workspace/.agent/rules/ - Workspace workflows:
your-workspace/.agent/workflows/
Let's add some rules and workflows in the workspace.
Add a rule
First, let's add a code style rule. Go to Rules and select the +Workspace button. Give it a name such as code-style-guide with the following code style rules:
* Make sure all the code is styled with PEP 8 style guide
* Make sure all the code is properly commented
Second, let's add another rule to make sure the code is generated in a modular way with examples in a code-generation-guide rule:
* The main method in main.py is the entry point to showcase functionality.
* Do not generate code in the main method. Instead generate distinct functionality in a new file (eg. feature_x.py)
* Then, generate example code to show the new functionality in a new method in main.py (eg. example_feature_x) and simply call that method from the main method.
The two rules are saved and ready:
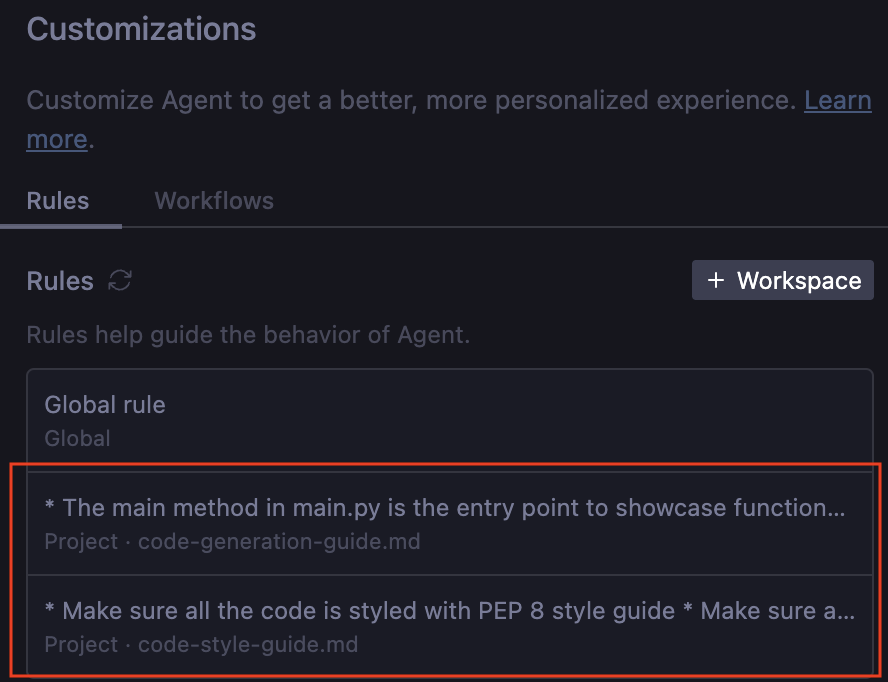
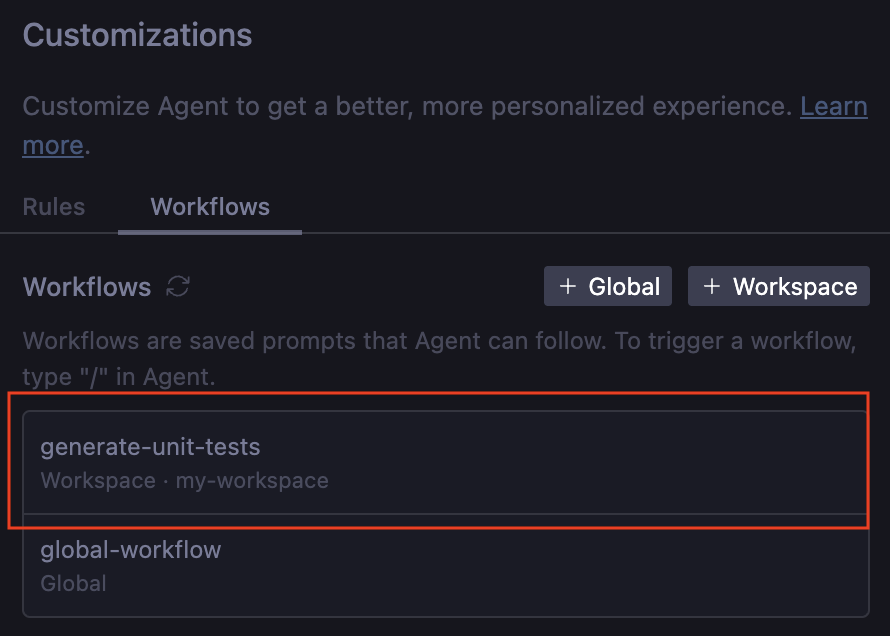
Add a workflow
Let's also define a workflow to generate unit tests. This will allow us to trigger unit tests once we're happy with the code (rather than the agent generating unit tests all the time).
Go to Workflows and select the +Workspace button. Give it a name such as generate-unit-tests with the following:
* Generate unit tests for each file and each method
* Make sure the unit tests are named similar to files but with test_ prefix
The workflow is also ready to go now:
Try it out
Let's now see rules and workflows in action. Create a skeleton main.py file in your workspace:
def main():
    pass

if __name__ == "__main__":
    main()
Now, go to the agent chat window and ask the agent: Implement binary search and bubble sort.
After a minute or two, you should get three files in the workspace: main.py, bubble_sort.py, binary_search.py. You'll also notice that all the rules are implemented: the main file is not cluttered and has the example code, each feature is implemented in its own file, all the code is documented and in good style:
from binary_search import binary_search, binary_search_recursive
from bubble_sort import bubble_sort, bubble_sort_descending


def example_binary_search():
    """
    Demonstrate binary search algorithm with various test cases.
    """
    ...

def example_bubble_sort():
    """
    Demonstrate bubble sort algorithm with various test cases.
    """
    ...

def main():
    """
    Main entry point to showcase functionality.
    """
    example_binary_search()
    example_bubble_sort()
    print("\n" + "=" * 60)


if __name__ == "__main__":
    main()
Now that we're happy with the code, let's see if we can trigger the generate unit test workflow.
Go to the chat and start typing /generate and Antigravity already knows about our workflow:

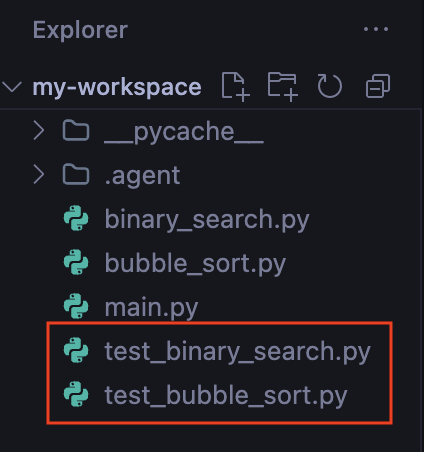
Select generate-unit-tests and enter. After a few seconds, you'll get new files in your workspace: test_binary_search.py, test_bubble_sort.py with a number of tests already implemented!
Nice!
10. Skills
While Antigravity's underlying models (like Gemini) are powerful generalists, they don't know your specific project context or team standards . Loading every single rule or tool into the agent's context window leads to "tool bloat", higher costs, latency and confusion.
Antigravity Skills solve this through Progressive Disclosure. A Skill is a specialized package of knowledge that sits dormant until needed. It is only loaded into the agent's context when your specific request matches the skill's description .
Structure and Scope
Skills are directory-based packages. You can define them in two scopes depending on your needs:
- Global Scope (
~/.gemini/antigravity/skills/): Available across all your projects (e.g., "Format JSON", "General Code Review") . - Workspace Scope (
<workspace-root>/.agent/skills/): Available only within a specific project (e.g., "Deploy to this app's staging", "Generate boilerplate for this specific framework") .
The Anatomy of a Skill
A typical skill directory looks like this :
my-skill/
├── SKILL.md    #(Required) metadata & instructions.
├── scripts/    # (Optional) Python or Bash scripts for execution.
├── references/ # (Optional) text, documentation, or templates.
└── assets/     # (Optional) Images or logos.
Let's add some skills now.
Code Review Skill
This is an instruction-only skill i.e. we only need to create the SKILL.md file, that will contain the metadata and the skills instructions. Let's create a global skill that provides details to the agent to review code changes for bugs, style issues and best practices.
First up, create the directory that will contain this global skill.
mkdir -p ~/.gemini/antigravity/skills/code-review
Create a SKILL.md file in the above directory with the content shown below:
---
name: code-review
description: Reviews code changes for bugs, style issues, and best practices. Use when reviewing PRs or checking code quality.
---

# Code Review Skill

When reviewing code, follow these steps:

## Review checklist

1. **Correctness**: Does the code do what it's supposed to?
2. **Edge cases**: Are error conditions handled?
3. **Style**: Does it follow project conventions?
4. **Performance**: Are there obvious inefficiencies?

## How to provide feedback

- Be specific about what needs to change
- Explain why, not just what
- Suggest alternatives when possible
Notice that the SKILL.md file above contains the metadata (name and description) at the top and then the instructions. The Agent when it loads will only read the metadata for the skills that you have configured and it will load the instructions for the skill, only if required.
Try it out
Create a file named demo_bad_code.py with the contents as shown below:
import time

def get_user_data(users, id):
   # Find user by ID
   for u in users:
       if u['id'] == id:
            return u
   return None

def process_payments(items):
   total = 0
   for i in items:
       # Calculate tax
       tax = i['price'] * 0.1
       total = total + i['price'] + tax
       time.sleep(0.1) # Simulate slow network call

   return total

def run_batch():
   users = [{'id': 1, 'name': 'Alice'}, {'id': 2, 'name': 'Bob'}]
   items = [{'price': 10}, {'price': 20}, {'price': 100}]

   u = get_user_data(users, 3)
   print("User found: " + u['name']) # Will crash if None

   print("Total: " + str(process_payments(items)))

if __name__ == "__main__":
   run_batch()
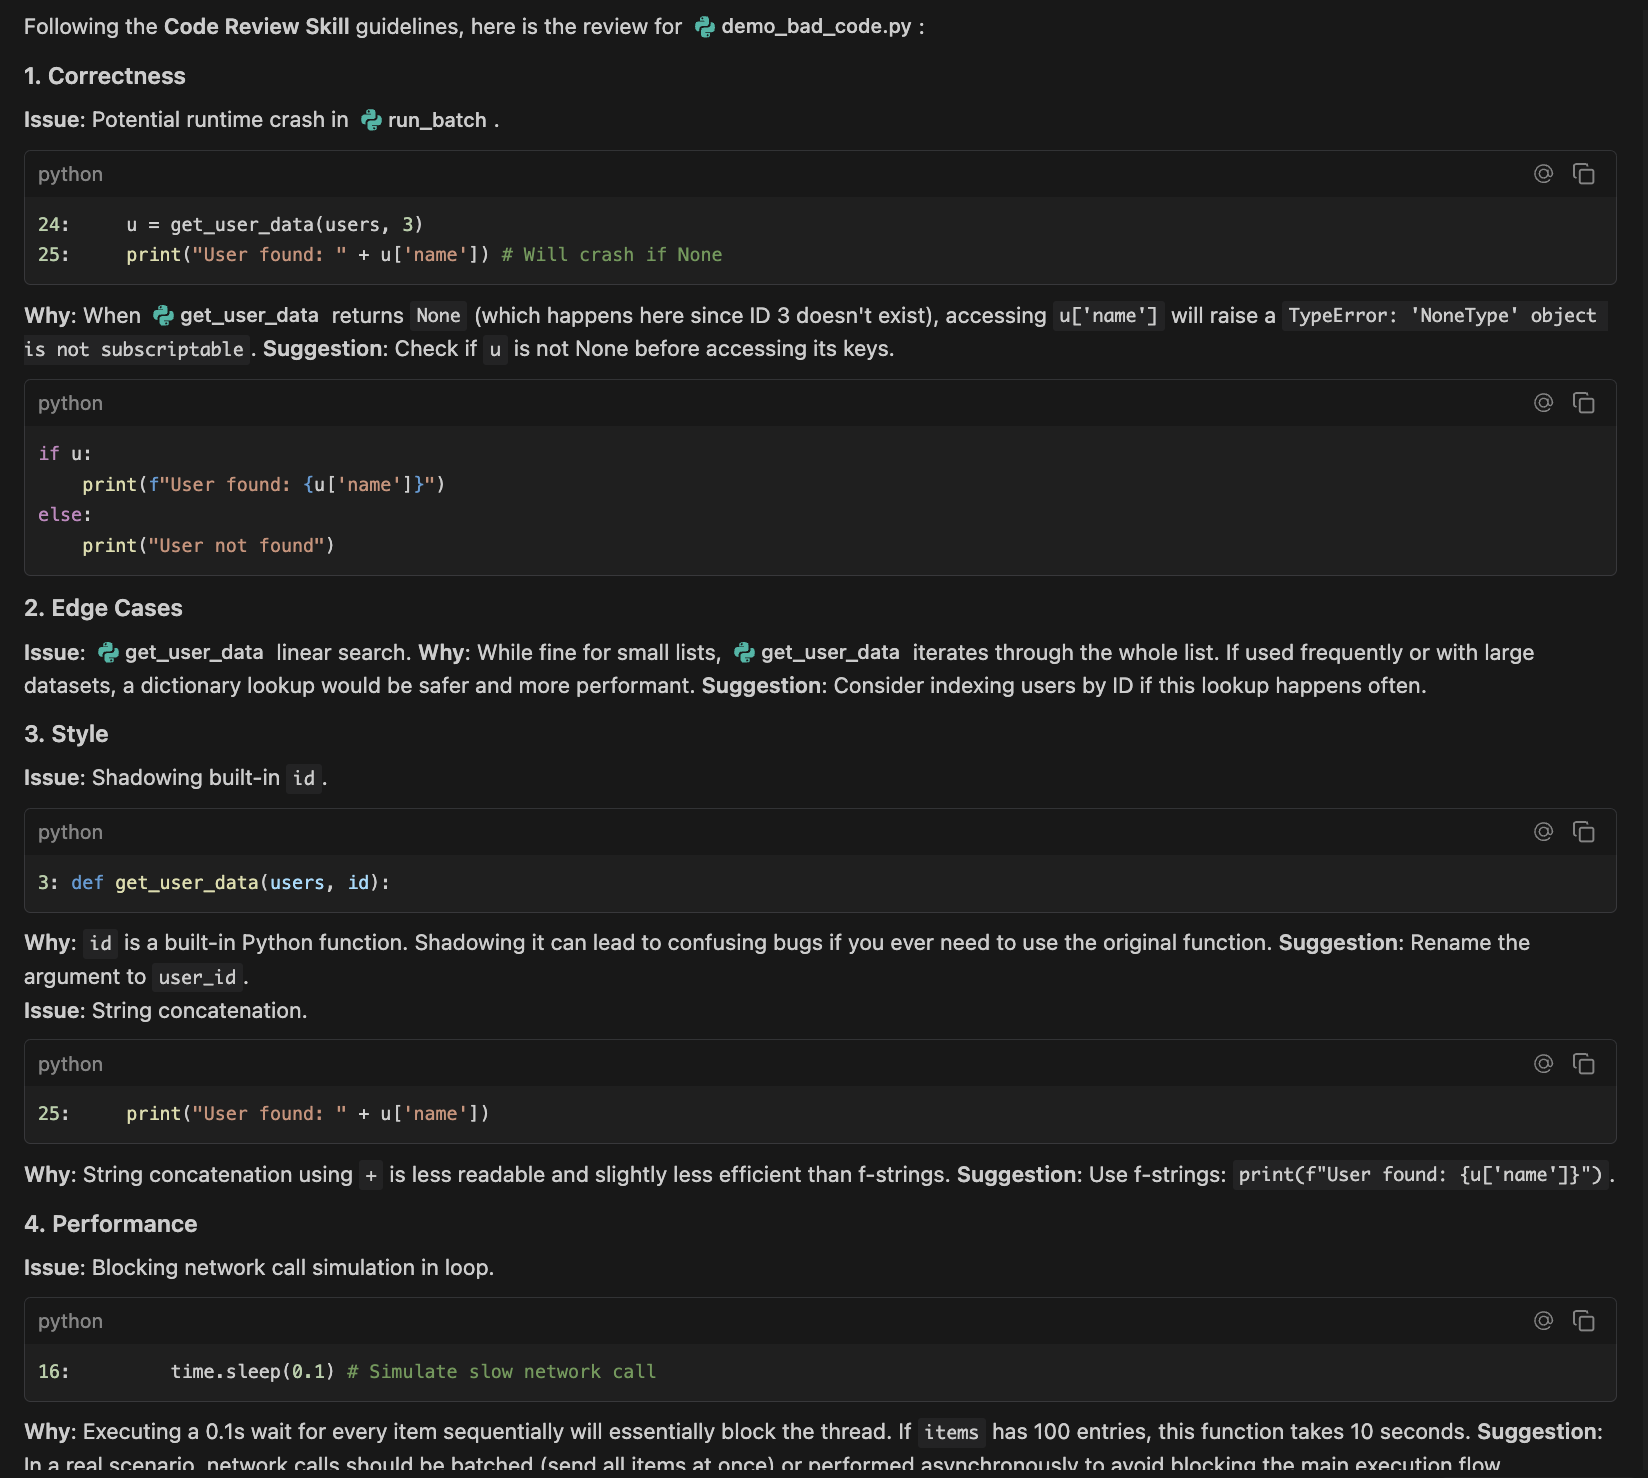
Ask the agent: review the @demo_bad_code.py file. The Agent should identify the code-review skill, load the details and then perform the action as per the instructions given in the code-review/SKILL.md file.
A sample output is shown below:
The Code Header Template Skill
Sometimes a skill needs to use a large block of static text (like a license header). Putting this text directly into the prompt is wasteful. Instead, we put it in a resources/ folder and instruct the agent to read it only when necessary .
First up, create the directory that will contain this workspace skill.
mkdir -p .agent/skills/license-header-adder/resources
Create .agent/skills/license-header-adder/resources/HEADER.txt with your license text:
/*
 * Copyright (c) 2026 YOUR_COMPANY_NAME LLC.
 * All rights reserved.
 * This code is proprietary and confidential.
 */
Create a .agent/skills/license-header-adder/SKILL.md file with contents as shown below:
---
name: license-header-adder
description: Adds the standard corporate license header to new source files.
---

# License Header Adder

This skill ensures that all new source files have the correct copyright header.

## Instructions
1. **Read the Template**: Read the content of `resources/HEADER.txt`.
2. **Apply to File**: When creating a new file, prepend this exact content.
3. **Adapt Syntax**:
   - For C-style languages (Java, TS), keep the `/* */` block.
   - For Python/Shell, convert to `#` comments.
Try it out
Ask the Agent the following: Create a new Python script named data_processor.py that prints 'Hello World'.
The agent will read the template, convert the C-style comments to Python style, and prepend them to your new file automatically.
By creating these skills, you have effectively turned the generalist Gemini model into a specialist for your project. You have codified your best practices, whether it's following your code review guidelines or license headers. Instead of repeatedly prompting the AI to "remember to add the license" or "fix the commit format," the agent now instinctively knows how to work on your team.
11. Securing the Agent
Giving an AI agent access to your terminal and browser is a double-edged sword. It enables autonomous debugging and deployment but also opens vectors for Prompt Injection and Data Exfiltration.
Antigravity addresses this through a granular permission system revolving around Terminal Command Auto Execution policies, Allow Lists, and Deny Lists.
When you first configure Antigravity, or via the settings menu, you must select a Terminal Command Auto Execution policy. This setting dictates the agent's autonomy regarding shell commands.
You can view your current settings for this by going to Antigravity — Settings, then Advanced Settings. You should see the Terminal section for the Agent settings. Keep this table in mind, should you want to change this setting to something else:
Policy Mode | Description |
Off | The agent never auto-executes terminal commands unless explicitly allowed. |
Auto | The agent decides whether to execute based on internal safety models. It asks for permission for risky commands. |
Turbo | The agent always auto-executes commands unless explicitly denied. |
Configuring the Allow List
The Allow List is used primarily with the Off policy. It represents a positive security model, meaning everything is forbidden unless expressly permitted. This is the most secure configuration.
Step-by-Step Configuration
- Set the Terminal Command Auto Execution setting to Off.
- Add the following command in the Allow List Terminal Commands by clicking on the Add button next to it :
ls -al. You can add other terminal commands too, if you'd like.
Testing the Allow List
- Ask the agent:
List the files in this directory. - The agent runs
lsautomatically. - Ask the agent:
Delete the <some file> - The agent will attempt
rm <filepath>, but Antigravity will block it and force a user review becausermis not in the allow list. You should have Antigravity asking you for permission before running the command.
Configuring the Deny List
The Deny List is the safeguard for the Turbo (and sometimes Auto) policy. It represents a negative security model, meaning everything is allowed unless expressly forbidden. This relies on the developer anticipating every possible danger, which is a risky proposition, but one that offers maximum speed.
Step-by-Step Configuration
- Set the Terminal Command Auto Execution setting to Turbo.
- Add the following commands in the Deny List Terminal Commands by clicking on the Add button next to it.
- rm
- sudo
- curl
- wget
Testing the Deny List
- Ask the agent:
Check the version of python. - The agent runs
python --versionautomatically. - Ask the agent:
Downloadwww.google.comhome page. - The agent attempts to
curl. Antigravity detectscurlin the denylist and blocks execution, prompting you for manual approval.
Browser Security
Antigravity's ability to browse the web is a superpower, but also a vulnerability. An agent visiting a compromised documentation site could encounter a prompt injection attack.
To help prevent this, you can implement a Browser URL Allowlist for the browser agent.
You can view your current settings for this by going to Antigravity — Settings and then Advanced Settings. You should see the Browser URL Allowlist section for the Browser settings as shown below:
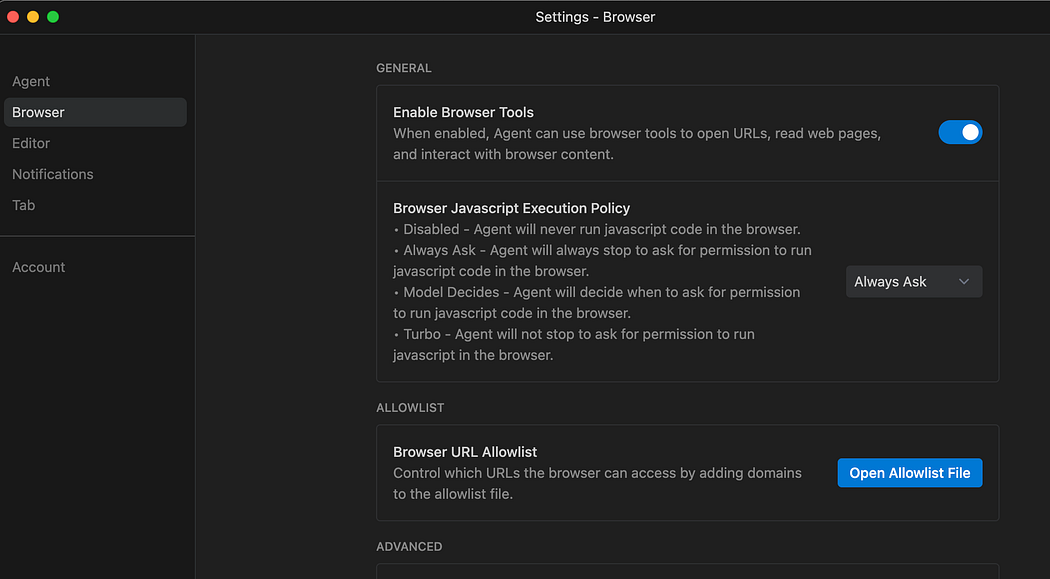
Click on the Open Allowlist File and that opens up the file in the folder HOME/.gemini/antigravity/browserAllowlist.txt. You can ensure that only trusted domains are entered over here.
12. Conclusion and Next Steps
Congratulations! You have now successfully installed Antigravity, configured your environment, and learned how to control your agents.
What's Next? To see Antigravity in action building real-world applications, you can look at the following codelabs:
- Building with Google Antigravity: This codelab shows how to build several applications including a dynamic conference website and a productivity app.
- Build and Deploy to Google Cloud with Antigravity: This codelab shows how to design, build, and deploy a serverless application to Google Cloud.
Reference docs
- Official Site : https://antigravity.google/
- Documentation: https://antigravity.google/docs
- Usecases : https://antigravity.google/use-cases
- Download : https://antigravity.google/download
- Youtube Channel for Google Antigravity : https://www.youtube.com/@googleantigravity
