
1. Overview
This lab demonstrates features and capabilities designed to streamline the development workflow for software engineers tasked with developing Python applications in a containerized environment. Typical container development requires the user to understand details of containers and the container build process. Additionally, developers typically have to break their flow, moving out of their IDE to test and debug their applications in remote environments. With the tools and technologies mentioned in this tutorial, developers can work effectively with containerized applications without leaving their IDE.
What you will learn
In this lab you will learn methods for developing with containers in GCP including:
- Creating a new Python starter application
- Walk through the development process
- Develop a simple CRUD rest service
2. Setup and Requirements
Self-paced environment setup
- Sign-in to the Google Cloud Console and create a new project or reuse an existing one. If you don't already have a Gmail or Google Workspace account, you must create one.

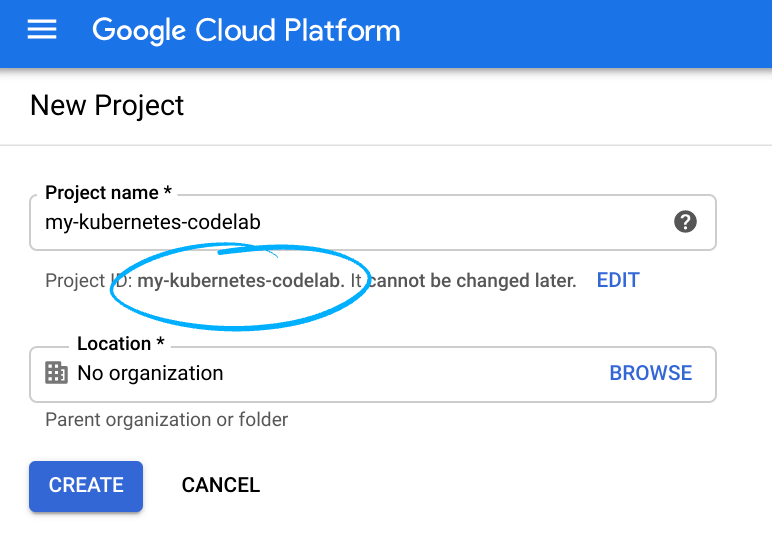
- The Project name is the display name for this project's participants. It is a character string not used by Google APIs, and you can update it at any time.
- The Project ID must be unique across all Google Cloud projects and is immutable (cannot be changed after it has been set). The Cloud Console auto-generates a unique string; usually you don't care what it is. In most codelabs, you'll need to reference the Project ID (and it is typically identified as
PROJECT_ID), so if you don't like it, generate another random one, or, you can try your own and see if it's available. Then it's "frozen" after the project is created. - There is a third value, a Project Number which some APIs use. Learn more about all three of these values in the documentation.
- Next, you'll need to enable billing in the Cloud Console in order to use Cloud resources/APIs. Running through this codelab shouldn't cost much, if anything at all. To shut down resources so you don't incur billing beyond this tutorial, follow any "clean-up" instructions found at the end of the codelab. New users of Google Cloud are eligible for the $300 USD Free Trial program.
Start Cloudshell Editor
This lab was designed and tested for use with Google Cloud Shell Editor. To access the editor,
- access your google project at https://console.cloud.google.com.
- In the top right corner click on the cloud shell editor icon
- A new pane will open in the bottom of your window
- Click on the Open Editor button
- The editor will open with an explorer on the right and editor in the central area
- A terminal pane should also be available in the bottom of the screen
- If the terminal is NOT open use the key combination of `ctrl+`` to open a new terminal window
Environment Setup
In Cloud Shell, set your project ID and the project number for your project. Save them as PROJECT_ID and PROJECT_ID variables.
export PROJECT_ID=$(gcloud config get-value project)
export PROJECT_NUMBER=$(gcloud projects describe $PROJECT_ID \
    --format='value(projectNumber)')
Get the source code
- The source code for this lab is located in the container-developer-workshop in GoogleCloudPlatform on GitHub. Clone it with the command below then change into the directory.
git clone https://github.com/GoogleCloudPlatform/container-developer-workshop.git &&
cd container-developer-workshop/labs/python
mkdir music-service && cd music-service
cloudshell workspace .
If the terminal is NOT open use the key combination of `ctrl+`` to open a new terminal window
Provision the infrastructure used in this lab
In this lab you will deploy code to GKE and access data stored in a Spanner database. The setup script below prepares this infrastructure for you. The provisioning process will take over 10 minutes. You can continue with the next few steps while the setup is processing.
../setup.sh
3. Create a new Python starter application
- Create a file called
requirements.txtand copy the following contents into it
Flask
gunicorn
google-cloud-spanner
ptvsd==4.3.2
- Create a file named
app.pyand paste the following code into it
import os
from flask import Flask, request, jsonify
from google.cloud import spanner

app = Flask(__name__)

@app.route("/")
def hello_world():
    message="Hello, World!"
    return message

if __name__ == '__main__':
    server_port = os.environ.get('PORT', '8080')
    app.run(debug=False, port=server_port, host='0.0.0.0')
- Create a file named Dockerfile and paste the following into it
FROM python:3.8
ARG FLASK_DEBUG=0
ENV FLASK_DEBUG=$FLASK_DEBUG
ENV FLASK_APP=app.py
WORKDIR /app
COPY requirements.txt .
RUN pip install --trusted-host pypi.python.org -r requirements.txt
COPY . .
ENTRYPOINT ["python3", "-m", "flask", "run", "--port=8080", "--host=0.0.0.0"]
Note: FLASK_DEBUG=1 allows you to auto reload code changes to a Python flask app. This Dockerfile allows you to pass this value as a build argument.
Generate Manifests
In your terminal execute the following command to generate a default skaffold.yaml and deployment.yaml
- Initialize Skaffold with the following command
skaffold init --generate-manifests
When prompted use the arrows to move your cursor and the spacebar to select the options.
Choose:
8080for the portyto save the configuration
Update Skaffold Configurations
- Change default application name
- Open
skaffold.yaml - Select the image name currently set as
dockerfile-image - Right click and choose Change All Occurrences
- Type in the new name as
python-app - Further edit the build section to
- add
docker.buildArgsto passFLASK_DEBUG=1 - Sync settings to load any changes to
*.pyfiles from IDE to running container
After the edits, the build section in the skaffold.yaml file would be as under:
build:
 artifacts:
 - image: python-app
   docker:
     buildArgs:
       FLASK_DEBUG: 1
     dockerfile: Dockerfile
   sync:
     infer:
     - '**/*.py'
Modify Kubernetes Configuration File
- Change the default Name
- Open
deployment.yamlfile - Select the image name currently set as
dockerfile-image - Right click and choose Change All Occurrences
- Type in the new name as
python-app
4. Walking through the development process
With the business logic added you can now deploy and test your application. The following section will highlight the use of the Cloud Code plugin. Among other things, this plugin integrates with skaffold to streamline your development process. When you deploy to GKE in the following steps, Cloud Code and Skaffold will automatically build your container image, push it to a Container Registry, and then deploy your application to GKE. This happens behind the scenes abstracting the details away from the developer flow.
Deploy to Kubernetes
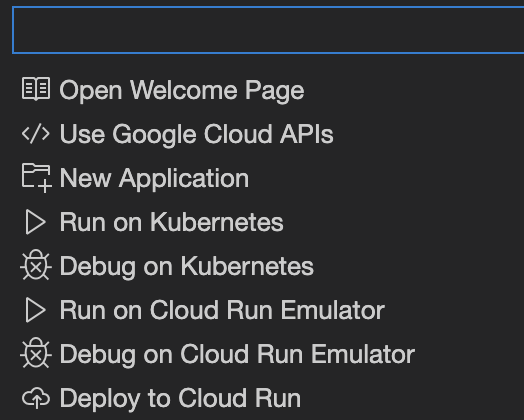
- In the pane at the bottom of Cloud Shell Editor, select Cloud Code 

- In the panel that appears at the top, select Run on Kubernetes.. If prompted, select Yes to use the current Kubernetes context.
This command starts a build of the source code and then runs the tests. The build and tests will take a few minutes to run. These tests include unit tests and a validation step that checks the rules that are set for the deployment environment. This validation step is already configured, and it ensures that you get warning of deployment issues even while you're still working in your development environment.
- The first time you run the command a prompt will appear at the top of the screen asking if you want the current kubernetes context, select "Yes" to accept and use the current context.
- Next a prompt will be displayed asking which container registry to use. Press enter to accept the default value provided
- Select the Output tab in the lower pane to view progress and notifications

- Select "Kubernetes: Run/Debug - Detailed" in the channel drop down to the right to view additional details and logs streaming live from the containers

When the build and tests are done, the Output tab says: Attached debugger to container "python-app-8476f4bbc-h6dsl" successfully., and the URL http://localhost:8080 is listed.
- In the Cloud Code terminal, hover over the first URL in the output (http://localhost:8080), and then in the tool tip that appears select Open Web Preview.
- A new browser tab will open and display the message
Hello, World!
Hot Reload
- Open the
app.pyfile - Change the greeting message to
Hello from Python
Notice immediately that in the Output window, Kubernetes: Run/Debug view, the watcher syncs the updated files with the container in Kubernetes
Update initiated
Build started for artifact python-app
Build completed for artifact python-app

Deploy started
Deploy completed

Status check started
Resource pod/python-app-6f646ffcbb-tn7qd status updated to In Progress
Resource deployment/python-app status updated to In Progress
Resource deployment/python-app status completed successfully
Status check succeeded
...
- If you switch to
Kubernetes: Run/Debug - Detailedview, you will notice it recognizes file changes then builds and redeploys the app
files modified: [app.py]
Syncing 1 files for gcr.io/veer-pylab-01/python-app:3c04f58-dirty@sha256:a42ca7250851c2f2570ff05209f108c5491d13d2b453bb9608c7b4af511109bd
Copying files:map[app.py:[/app/app.py]]togcr.io/veer-pylab-01/python-app:3c04f58-dirty@sha256:a42ca7250851c2f2570ff05209f108c5491d13d2b453bb9608c7b4af511109bd
Watching for changes...
[python-app] * Detected change in '/app/app.py', reloading
[python-app] * Restarting with stat
[python-app] * Debugger is active!
[python-app] * Debugger PIN: 744-729-662
- Refresh your browser to see the updated results.
Debugging
- Go to the Debug view and stop the current thread
 .
. - Click on
Cloud Codein the bottom menu and selectDebug on Kubernetesto run the application indebugmode.
- In the
Kubernetes Run/Debug - Detailedview ofOutputwindow, notice that skaffold will deploy this application in debug mode.
- The first time this is run a prompt will ask where the source is inside the container. This value is related to the directories in the Dockerfile.
Press Enter to accept the default

It will take a couple of minutes for the application to build and deploy.
- When the process completes. You'll notice a debugger attached.
Port forwarding pod/python-app-8bd64cf8b-cskfl in namespace default, remote port 5678 -> http://127.0.0.1:5678
- The bottom status bar changes its color from blue to orange indicating that it is in Debug mode.
- In the
Kubernetes Run/Debugview, notice that a Debuggable container is started
**************URLs*****************
Forwarded URL from service python-app: http://localhost:8080
Debuggable container started pod/python-app-8bd64cf8b-cskfl:python-app (default)
Update succeeded
***********************************
Utilize Breakpoints
- Open the
app.pyfile - Locate the statement which reads
return message - Add a breakpoint to that line by clicking the blank space to the left of the line number. A red indicator will show to note the breakpoint is set
- Reload your browser and note the debugger stops the process at the breakpoint and allows you to investigate the variables and state of the application which is running remotely in GKE
- Click down into the VARIABLES section
- Click Locals there you'll find the
"message"variable. - Double click on the variable name "message" and in the popup, change the value to something different like
"Greetings from Python" - Click the Continue button in the debug control panel

- Review the response in your browser which now shows the updated value you just entered.
- Stop the "Debug" mode by pressing the stop button and remove the breakpoint by clicking on the breakpoint again.
5. Developing a Simple CRUD Rest Service
At this point your application is fully configured for containerized development and you've walked through the basic development workflow with Cloud Code. In the following sections you practice what you've learned by adding rest service endpoints connecting to a managed database in Google Cloud.
Code the rest service
The code below creates a simple rest service that uses Spanner as the database backing the application. Create the application by copying the following code into your application.
- Create the main application by replacing
app.pywith the following contents
import os
from flask import Flask, request, jsonify
from google.cloud import spanner


app = Flask(__name__)


instance_id = "music-catalog"

database_id = "musicians"

spanner_client = spanner.Client()
instance = spanner_client.instance(instance_id)
database = instance.database(database_id)


@app.route("/")
def hello_world():
    return "<p>Hello, World!</p>"

@app.route('/singer', methods=['POST'])
def create():
    try:
        request_json = request.get_json()
        singer_id = request_json['singer_id']
        first_name = request_json['first_name']
        last_name = request_json['last_name']
        def insert_singers(transaction):
            row_ct = transaction.execute_update(
                f"INSERT Singers (SingerId, FirstName, LastName) VALUES" \
                f"({singer_id}, '{first_name}', '{last_name}')"
            )
            print("{} record(s) inserted.".format(row_ct))

        database.run_in_transaction(insert_singers)

        return {"Success": True}, 200
    except Exception as e:
        return e


@app.route('/singer', methods=['GET'])
def get_singer():

    try:
        singer_id = request.args.get('singer_id')
        def get_singer():
            first_name = ''
            last_name = ''
            with database.snapshot() as snapshot:
                results = snapshot.execute_sql(
                    f"SELECT SingerId, FirstName, LastName FROM Singers " \
                    f"where SingerId = {singer_id}",
                    )
                for row in results:
                    first_name = row[1]
                    last_name = row[2]
                return (first_name,last_name )
        first_name, last_name = get_singer()
        return {"first_name": first_name, "last_name": last_name }, 200
    except Exception as e:
        return e


@app.route('/singer', methods=['PUT'])
def update_singer_first_name():
    try:
        singer_id = request.args.get('singer_id')
        request_json = request.get_json()
        first_name = request_json['first_name']

        def update_singer(transaction):
            row_ct = transaction.execute_update(
                f"UPDATE Singers SET FirstName = '{first_name}' WHERE SingerId = {singer_id}"
            )

            print("{} record(s) updated.".format(row_ct))

        database.run_in_transaction(update_singer)
        return {"Success": True}, 200
    except Exception as e:
        return e


@app.route('/singer', methods=['DELETE'])
def delete_singer():
    try:
        singer_id = request.args.get('singer')

        def delete_singer(transaction):
            row_ct = transaction.execute_update(
                f"DELETE FROM Singers WHERE SingerId = {singer_id}"
            )
            print("{} record(s) deleted.".format(row_ct))

        database.run_in_transaction(delete_singer)
        return {"Success": True}, 200
    except Exception as e:
        return e

port = int(os.environ.get('PORT', 8080))
if __name__ == '__main__':
    app.run(threaded=True, host='0.0.0.0', port=port)
Add Database Configurations
To connect to Spanner securely, set the application up to use Workload Identities. This enables your application to act as its own service account and have individual permissions when accessing the database.
- Update
deployment.yaml. Add the following code at the end of the file (ensure you keep the tab indents in the example below)
      serviceAccountName: python-ksa
      nodeSelector:
        iam.gke.io/gke-metadata-server-enabled: "true"
Deploy and Validate Application
- In the pane at the bottom of Cloud Shell Editor, select
Cloud Codethen selectDebug on Kubernetesat the top of the screen. - When the build and tests are done, the Output tab says:
Resource deployment/python-app status completed successfully, and a url is listed: "Forwarded URL from service python-app: http://localhost:8080" - Add a couple of entries.
From cloudshell Terminal, run the command below
curl -X POST http://localhost:8080/singer -H 'Content-Type: application/json' -d '{"first_name":"Cat","last_name":"Meow", "singer_id": 6}'
- Test the GET by running the command below in the terminal
curl -X GET http://localhost:8080/singer?singer_id=6
- Test Delete: Now try to delete an entry by running the following command. Change the value of item-id if required.
curl -X DELETE http://localhost:8080/singer?singer_id=6
This throws an error message
500 Internal Server Error
Identify and fix the issue
- Debug mode and find the issue. Here are some tips:
- We know something is wrong with the DELETE as it is not returning the desired result. So you would set the breakpoint in
app.pyin thedelete_singermethod. - Run step by step execution and watch the variables at each step to observe the values of local variables in the left window.
- To observe specific values such as
singer_idandrequest.argsin the add these variables to the Watch window.
- Notice that the value assigned to
singer_idisNone. Change the code to fix the issue.
The fixed code snippet would look like this.
@app.route('/delete-singer', methods=['DELETE', 'GET'])
def delete_singer():
    try:
        singer_id = request.args.get('singer_id')
- Once the application is restarted, test again by trying to delete.
- Stop the debugging session by clicking on the red square in the debug toolbar
6. Cleanup
Congratulations! In this lab you've created a new Python application from scratch and configured it to work effectively with containers. You then deployed and debugged your application to a remote GKE cluster following the same developer flow found in traditional application stacks.
To clean up after completing the lab:
- Delete the files used in the lab
cd ~ && rm -rf container-developer-workshop
- Delete the project to remove all related infrastructure and resources