
1. Introduction
Starting with the basics and progressing to the development of multi-tool agents, this codelab provides a comprehensive introduction to building agents with ADK.
At its simplest, an AI Agent is a software system that uses a Large Language Model (LLM) as its "reasoning engine" to achieve a goal by autonomously performing a sequence of tasks.
If an LLM is a highly capable consultant that can give you advice, an AI Agent is a proactive engineer that can use tools to execute that advice.
LLM vs Agents
The Brain (LLM): Provides reasoning, planning, and natural language understanding. It decides what needs to be done.
The Hands (Tools): These are the APIs, SDKs, and custom functions that allow the agent to interact with the real world. It executes the plan.
The Agent Development Kit (ADK)
The Agent Development Kit (ADK) is a specialized framework designed to simplify the creation, deployment, and orchestration of AI agents. It provides the standardized building blocks needed to transform a static Large Language Model into a dynamic agent capable of executing code, calling APIs, and managing multi-step workflows.
A Multi-tool Agent is an orchestrator that can select and sequence different specialized functions—like a search engine, a database, and a calculator—to solve complex problems. It intelligently determines which tool to use for each step and can pass the output of one action as the input for the next to achieve a final goal.
What you'll build
In this codelab, you will build a "Healthy Hints" Agent, an intelligent nutritional consultant that transitions from simple text reasoning to a multi-tool powerhouse. You will start by creating a basic conversational agent that understands nutrition concepts, then progressively equip it with a Storage SDK tool to archive ingredient images and a Vision tool to "read" and analyze those images. By the end of this lab, you will have a fully functional orchestrator that can take an uploaded photo of a food label, store it in a cloud bucket for record-keeping, and immediately provide "Healthy Hints" for each ingredient.
2. Prerequisites
- A Google Cloud Project with Billing enabled
- A web browser
Create your project
- In the Google Cloud Console, on the project selector page, select or create a Google Cloud project.
- Make sure that billing is enabled on your Cloud project. Learn how to check if billing is enabled on a project.
Activate Cloud Shell
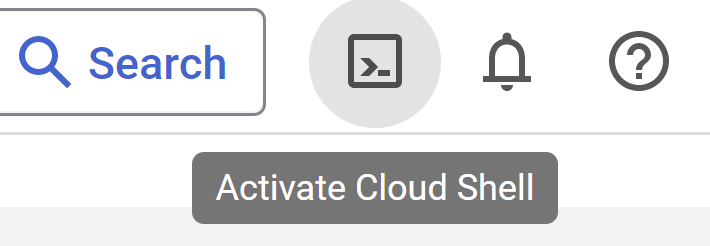
- You will use Cloud Shell, a command-line environment running in Google Cloud Console that comes pre-loaded with required languages installed. From the Cloud Console, click Activate Cloud Shell on top right corner:
- Once connected to Cloud Shell, you should see that you are already authenticated and that the project is set to your project ID. Run the following command in Cloud Shell to confirm that you're authenticated:
gcloud auth list
- Run the following command in Cloud Shell to confirm that the gcloud command knows about your project:
gcloud config list project
- If your project is not set, use the following command to set it:
gcloud config set project <YOUR_PROJECT_ID>
Refer documentation for gcloud commands and usage.
Open Editor
- For this codelab, we're going to use the inbuilt Cloud editor. In the cloud shell window, click on the Open editor button on the top right corner. This will open up a VSCode Editor for you.

3. ADK Setup
Let's move to Cloud Shell Terminal we activated in the previous section:
- Create & Activate Virtual Environment (Recommended)
From your Cloud Shell Terminal, create a Virtual Environment:
python -m venv .venv
Activate the Virtual Environment:
source .venv/bin/activate
- Install ADK
pip install google-adk
4. Google API Key
Create Google API key using AI Studio:
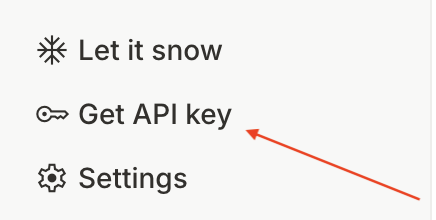
- Visit https://aistudio.google.com/ and from the left bottom menu, click on
Get API Key
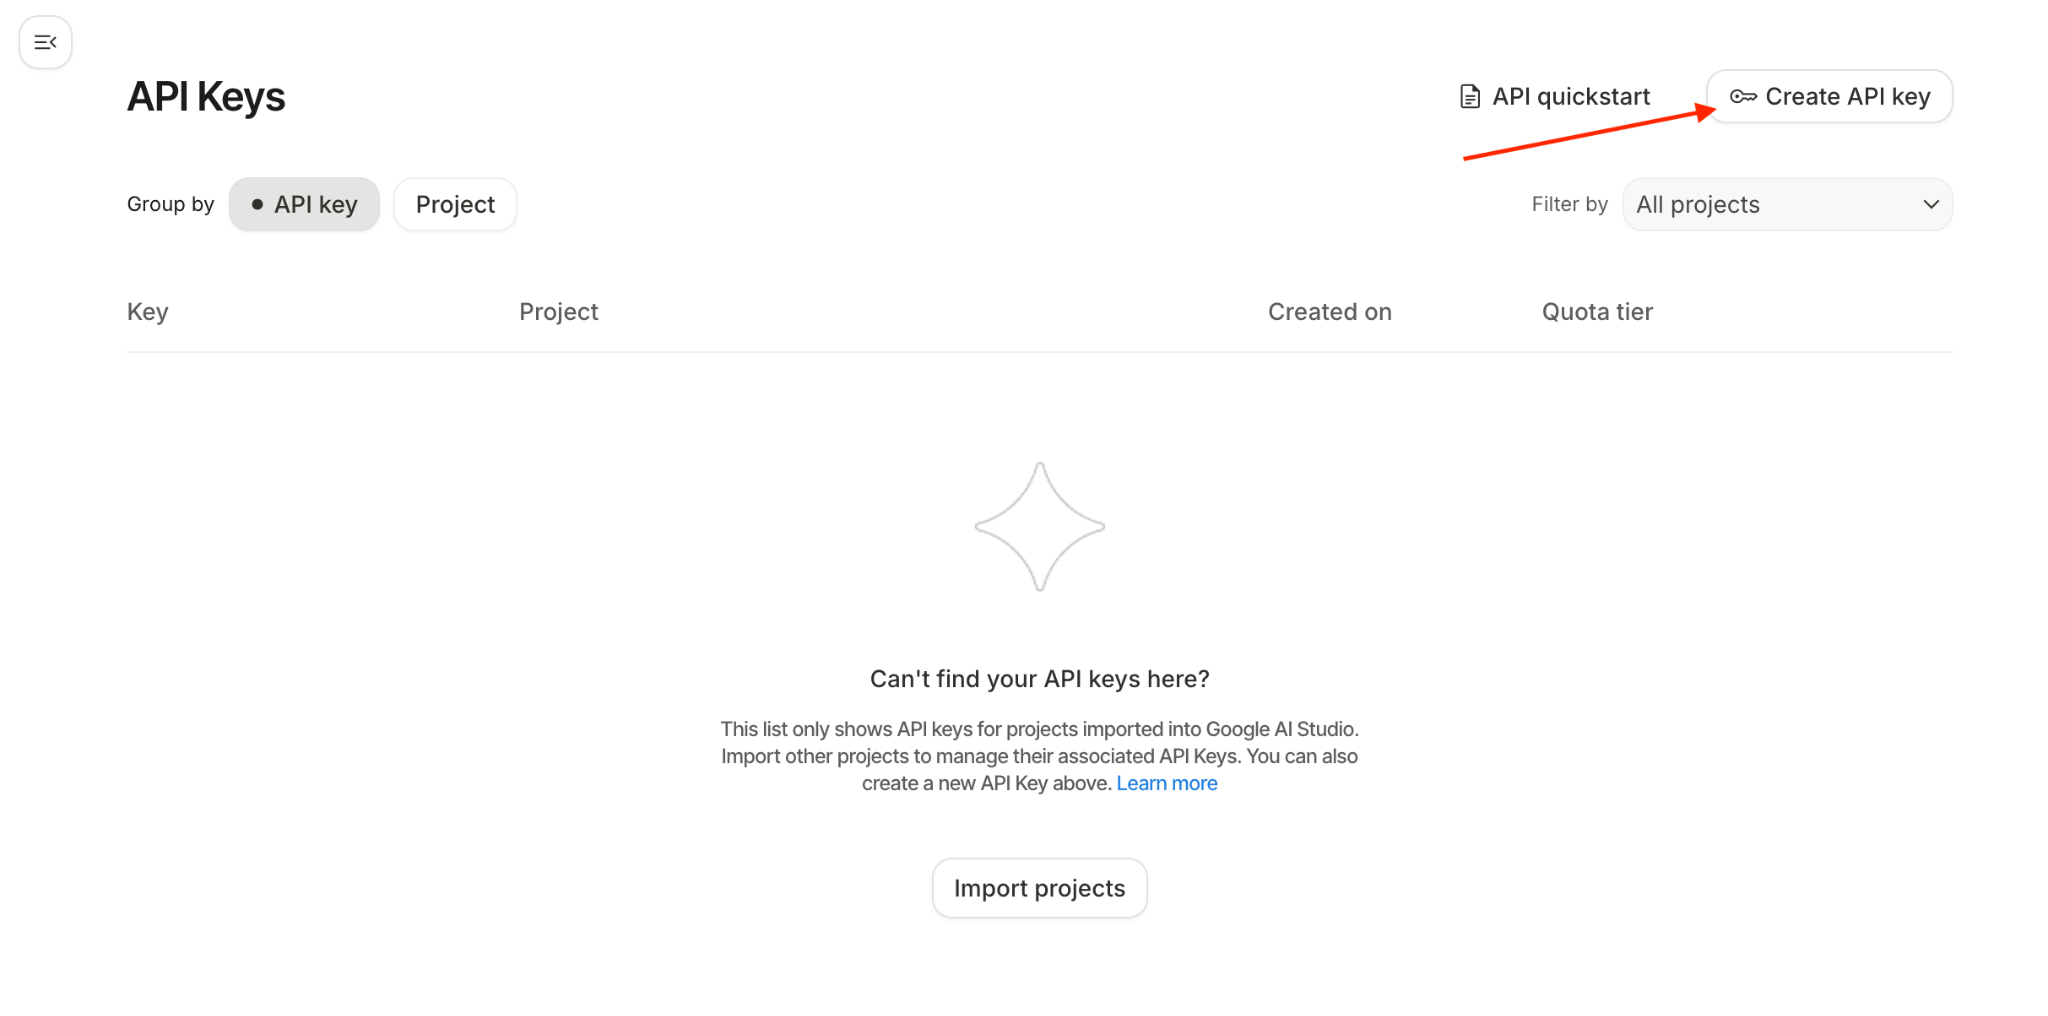
- You'll see an API Keys window, click on Create API key in this window:
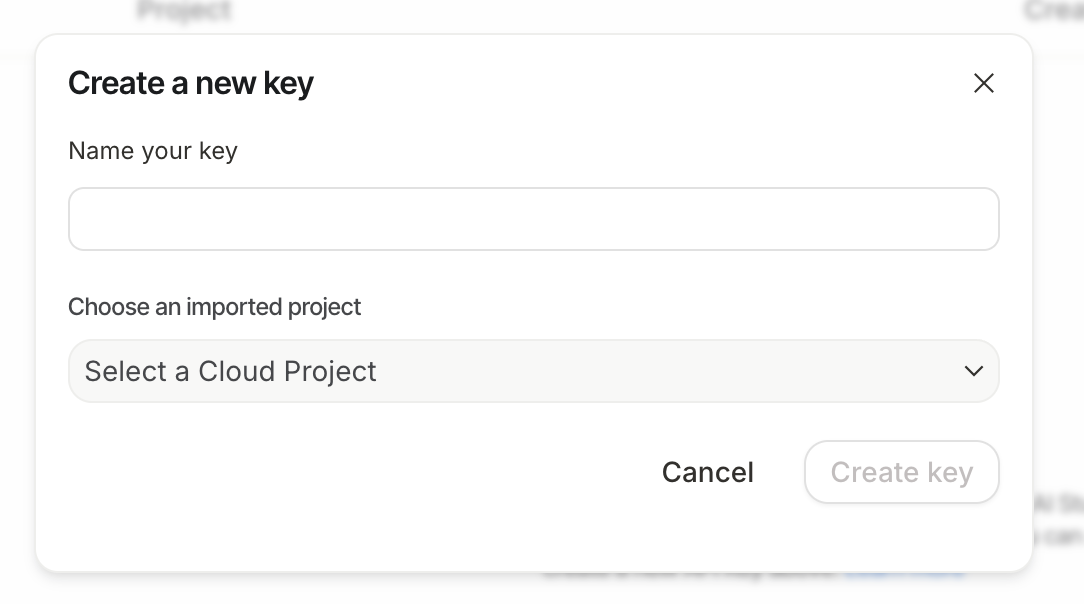
- You'll see a pop-up for creating a new key. Name the key as:
healthy-hints-key
Go to the dropdown "Choose an imported project"
- Click on
Import Project, there'll be a side window which lists all your Google Cloud projects, select the one that you want to work with.
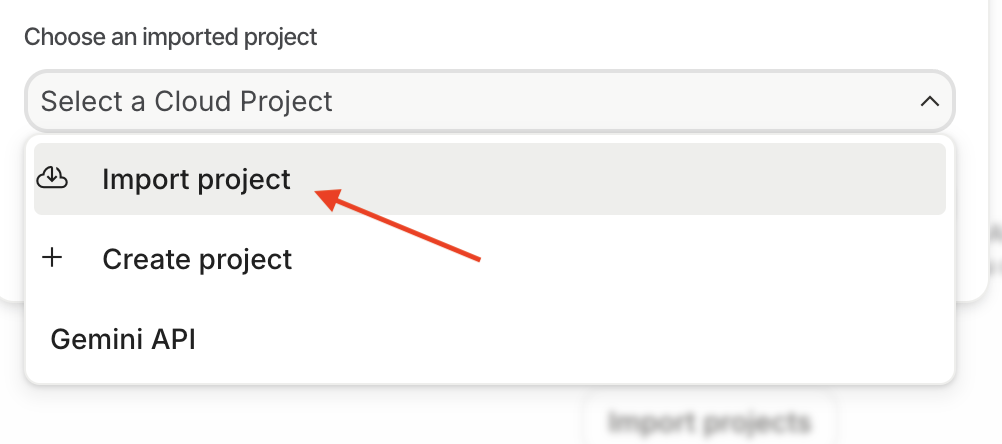
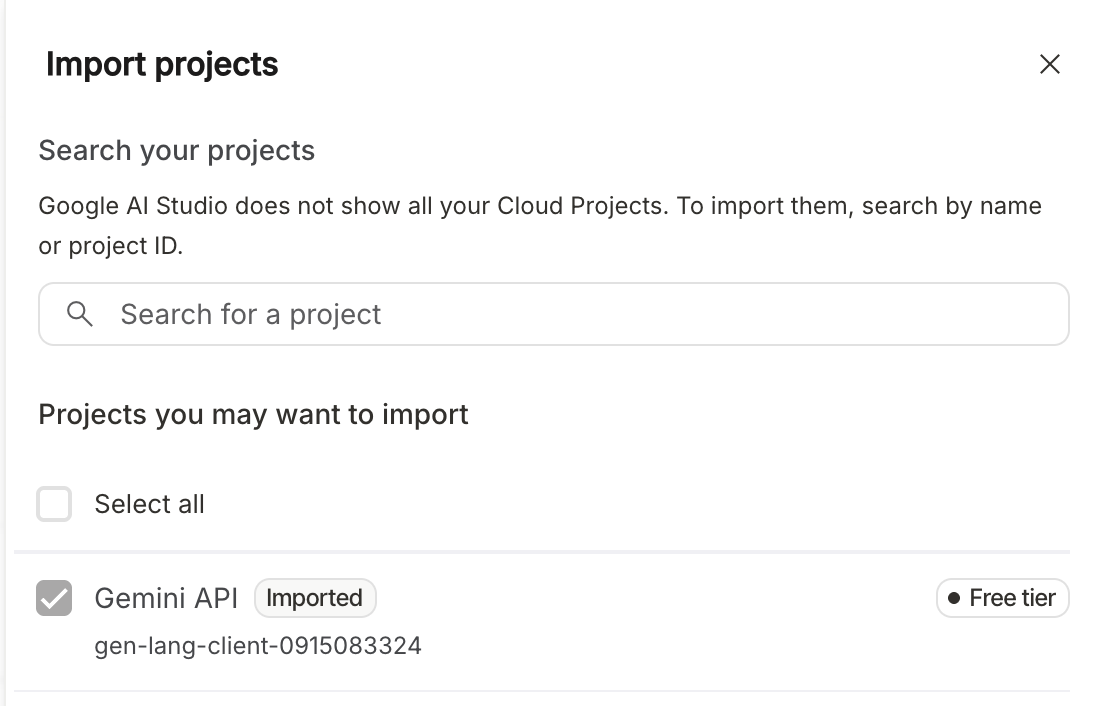
Click on Import

- The dropdown will now be updated with the project you just imported. Select the project from the dropdown. Click on Create Key now. You'll now see the list of API keys created. Click on the copy icon of the API key you just created.

5. Sample Agent
- From Cloud Shell Terminal, create a root directory for your agent in your desired project location:
adk create healthy_hints

You can choose any model but for this codelab, we'll go ahead with gemini-2.5-flash
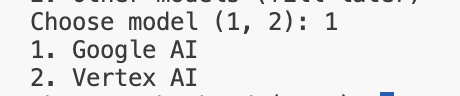
For this codelab, we'll use Google AI. Paste the API key you created in the previous step.

- Let's open the folder we just created. On the leftmost menu, click on the icon
 , click File -> Open Folder. Select the folder
 healthy_hintsthat just got created, this will typically reside in the/home/<username>folder. - The
healthy_hintsfolder structure would typically look like this:
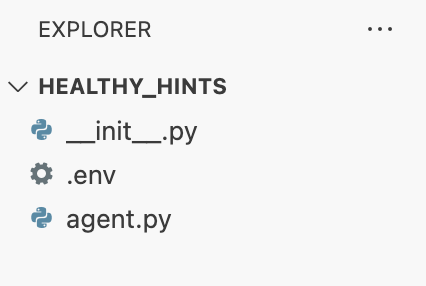
- You'll see a .env file which has your Google API key. You can use this file to set any environment variable.
- Another file named
agent.pyis also created and that's our main agent file. This is where a sample root agent is created. Let's look closely at the content of this file, we first import thellm_agentfrom ADK. We then use the ADK DSL to create the root agent. We specify the model name asGemini-2.5-flash, name the agent, provide a nice description of it. Instruction is the most important thing here, this is where we tell agent what it needs to do in a natural language. - This sample agent is pretty generic, it'll just answer any question a user has.
- Let's now run this agent locally. There are two ways you can interact with this agent : CLI and Web.
- CLI: Run the following command from outside the
healthy_hintsdirectory
adk run healthy_hints
Or if you're inside the healthy_hints directory, run the following command:
adk run .
You'll see a similar output:

Go ahead and write "hi" or any question that you have. The answer may be different for each and everyone, that's the nature of GenAI.
- Web: Run the following command from the parent directory of
healthy_hints:
adk web
6. Multi-tool Agent
a Tool is a modular piece of code—typically a function or an API—that allows an agent to interact with the world beyond its internal knowledge.
Types of Tools in ADK
- Function Tools: Custom logic you write yourself. For example, a function that connects to your specific database or a custom "Log Parser" for your company's unique format.
- Built-in Tools: Ready-to-use capabilities provided by Google or ADK, such as Google Search, Code Interpreter, or Google RAG Engine.
- Agents-as-Tools: In advanced "Multi-tool" or "Multi-agent" systems, one specialized agent can act as a tool for another. For example, a "Search Agent" can be a tool used by a "Research Manager Agent."
In this codelab, we'll cover the Function Tools. Now, let's advance our agent and make it multi-tool.
Let's add a new method get_weather in agent.py
def get_weather(city: str) -> dict:
  """Retrieves the current weather report for a specified city.

  Args:
    city (str): The name of the city for which to retrieve the weather report.

  Returns:
    dict: status and result or error msg.
  """
  if city.lower() == "new york":
    return {
      "status": "success",
      "report": (
          "The weather in New York is sunny with a temperature of 25 degrees"
          " Celsius (77 degrees Fahrenheit)."
      ),
    }
  else:
    return {
      "status": "error",
      "error_message": f"Weather information for '{city}' is not available.",
    }
Let's modify the agent.py and change the name, description & instruction of the agent:
root_agent = Agent(
    model='gemini-2.5-flash',
    name='healthy_hints_agent',
    description='Agent to answer questions about the weather in a city.',
    instruction='You are a helpful agent who can answer user questions about the weather in a city.',
    tools=[get_weather],
)
So far we have created only one tool. Now let's create multiple tools:
Let's create another method called get_current_time :
def get_current_time(city: str) -> dict:
  """Returns the current time in a specified city.

  Args:
    city (str): The name of the city for which to retrieve the current time.

  Returns:
    dict: status and result or error msg.
  """

  if city.lower() == "new york":
    tz_identifier = "America/New_York"
  else:
    return {
      "status": "error",
      "error_message": (
        f"Sorry, I don't have timezone information for {city}."
      ),
    }

  tz = ZoneInfo(tz_identifier)
  now = datetime.datetime.now(tz)
  report = (
    f'The current time in {city} is {now.strftime("%Y-%m-%d %H:%M:%S %Z%z")}'
  )
  return {"status": "success", "report": report}
And let's modify our agent to invoke this tool as well:
root_agent = Agent(
  model='gemini-2.5-flash',
  name='healthy_hints_agent',
  description='Agent to answer questions about the time and weather in a city.',
  instruction='You are a helpful agent who can answer user questions about the time and weather in a city.',
  tools=[get_weather, get_current_time],
)
We have modified the description, instruction and tools accordingly. Now let's go ahead and run this updated agent. This time, the agent would respond with current time and weather too.
7. SDK Integration
Now that we know how to use multiple tools. Let's work with some real life examples. Let's create healthy hints agent. Our agenda here's that we upload any image which has a list of ingredients, to our agent and the agent will tell us about each ingredient which is healthy or not.
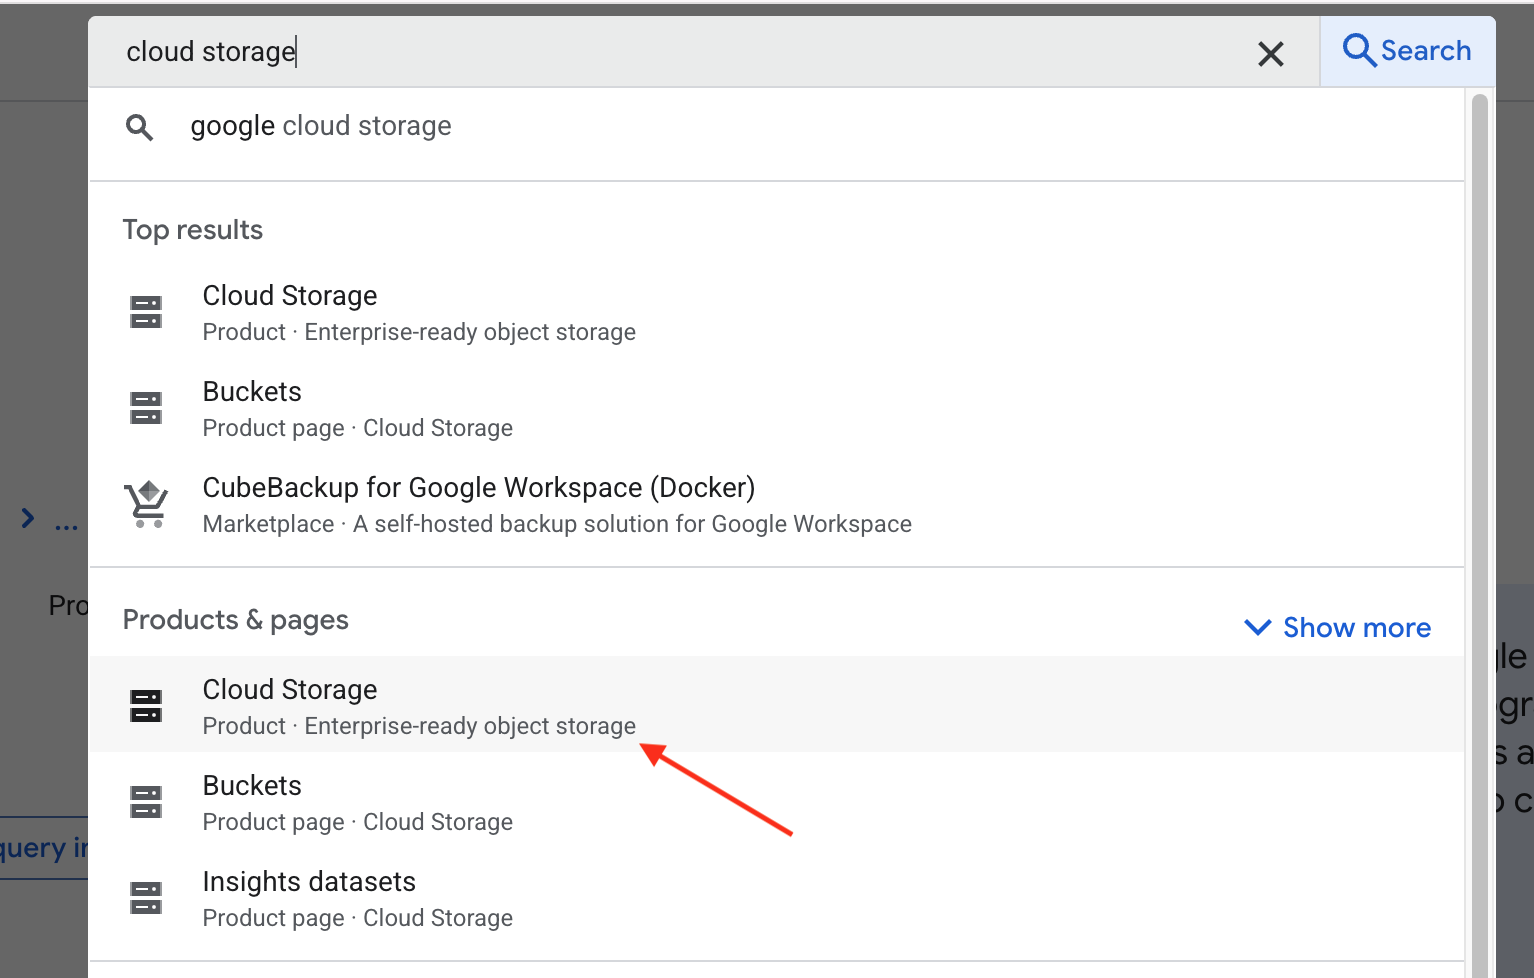
- Let's create a bucket first, to upload the image, in google cloud storage. Let's open a new tab and navigate to https://console.cloud.google.com/ and in the search bar, type cloud storage. Now, select Cloud Storage under Products & pages:
This will take you to the overview page of Google Cloud Storage. Click on the Create bucket button. In the create bucket page, enter the name of the bucket. The name can be anything but for this codelab, we'll go ahead and put it as healthy-hints-bucket-kolkata . Leave everything else as is and click on Create button.
- Let's create a new file called
requirements.txtand addgoogle-cloud-storagein it. We're going to make use of Python Storage SDK to upload the image in Storage.
Let's first install the dependencies:
pip install -r requirements.txt
You may need to enable the Storage API first. Run the following command in your terminal to do so:
gcloud services enable storage.googleapis.com
Let's now add a new tool to upload the image.
def upload_image() -> str:
  storage_client = storage.Client()
  bucket_name = "healthy-hints-bucket-kolkata"
  bucket = storage_client.bucket(bucket_name)
  blob = bucket.blob("ingredirents")
  blob.upload_from_filename(<image-file-path>)
- Now, let's update our agent so that it uses the new tool:
root_agent = Agent(
  model='gemini-2.5-flash',
  name='healthy_hints_agent',
  description='Agent to upload image to Google Cloud Storage',
  instruction='You are a helpful agent who will upload the image to Google Cloud Storage using `upload_image` tool.',
  tools=[upload_image],
)
- We'll now add another tool to read the ingredients out fo the image. Let's add
google-cloud-visioninrequirements.txtand install the new dependency.
pip install -r requirements.txt
Again, you may need to enable the Vision API first. Run the following command in your terminal to do so:
gcloud services enable vision.googleapis.com
Now let's add a new tool read_ingredients :
def read_ingredients() -> str:
  vision_client = vision.ImageAnnotatorClient()

  with io.open("/home/bajajnehaa/healthy_hints/images/Ingredients-list.jpg", 'rb') as image_file:
    content = image_file.read()

  image = vision.Image(content=content)
  response = vision_client.text_detection(image=image)
  texts = response.text_annotations
  return texts[0].description
And let's now update our agent to use this tool
root_agent = Agent(
  model='gemini-2.5-flash',
  name='healthy_hints_agent',
  description='Agent to upload image to Google Cloud Storage, read the list of ingredients from the image and explain if the ingredient is healthy or not',
  instruction='You are a helpful agent who will upload the image to Google Cloud Storage using `upload_image` tool, read the ingredients of the image using `read_ingredients` tool and explain if the ingredient is healthy or not in one line.',
  tools=[upload_image, read_ingredients],
)
8. Conclusion
Congratulations on completing the Healthy Hints codelab! You have successfully transformed a standard AI from a text generator into a proactive Multi-tool Agent. By using the ADK to integrate the Vision API and Cloud Storage SDK, you've given your agent the "eyes" to read labels and the "memory" to archive them. You've seen how the agent autonomously decides when to save a file and how to interpret raw data to provide real-world health advice.
Moving forward, these principles serve as a blueprint for any automated system. Whether you are managing cloud infrastructure or building personal assistants, the core remains the same: define specialized tools and let the agent orchestrate the logic. As a next step, try adding more tools like a "Nutritional Database" or an "Email Tool" to expand your agent's impact.