
1. 簡介
本程式碼實驗室從基礎概念開始,逐步說明如何開發多工具代理程式,全面介紹如何使用 ADK 建構代理程式。
簡單來說,AI 代理是一種軟體系統,會使用大型語言模型 (LLM) 做為「推論引擎」,自主執行一連串工作來達成目標。
如果 LLM 是能提供建議的顧問,AI 代理就是能運用工具執行建議的工程師。
LLM 與代理程式
大腦 (LLM):提供推論、規劃和自然語言理解功能。並決定需要執行的動作。
雙手 (工具):這些是 API、SDK 和自訂函式,可讓代理與現實世界互動。執行計畫。
Agent Development Kit (ADK)
Agent Development Kit (ADK) 是一個專用架構,可簡化 AI 代理的建立、部署和自動化調度管理作業。這項服務提供標準化建構區塊,可將靜態大型語言模型轉換為動態代理程式,執行程式碼、呼叫 API 及管理多步驟工作流程。
多工具代理是自動調度管理工具,可選取及排序不同的專用函式 (例如搜尋引擎、資料庫和計算機),解決複雜問題。這項功能會智慧判斷每個步驟要使用的工具,並將一個動作的輸出內容做為下一個動作的輸入內容,以達成最終目標。
建構項目
在本程式碼研究室中,您將建構「健康提示」代理程式,這是一個智慧營養顧問,可從簡單的文字推論轉變為多工具強大功能。首先,您會建立可瞭解營養概念的基本對話式代理程式,然後逐步為其配備 Storage SDK 工具,以便封存食材圖片,並配備 Vision 工具,以便「讀取」及分析這些圖片。完成本實驗室後,您將擁有功能齊全的自動調度管理工具,可接收上傳的食品標籤照片、儲存在雲端 bucket 中以供記錄,並立即提供每種食材的「健康提示」。
2. 必要條件
- 已啟用計費功能的 Google Cloud 專案
- 網路瀏覽器
建立專案
- 在 Google Cloud 控制台的專案選取器頁面中,選取或建立 Google Cloud 專案。
- 確認 Cloud 專案已啟用計費功能。瞭解如何檢查專案是否已啟用計費功能。
啟用 Cloud Shell
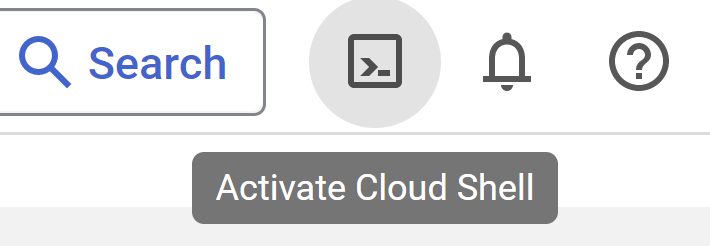
- 您將使用 Cloud Shell,這是 Google Cloud 控制台執行的指令列環境,已預先載入必要語言。在 Cloud 控制台,點選右上角的「啟用 Cloud Shell」:
- 連至 Cloud Shell 後,您應該會看到驗證已完成,專案也已設為獲派的專案 ID。在 Cloud Shell 中執行下列指令,確認您已通過驗證:
gcloud auth list
- 在 Cloud Shell 中執行下列指令,確認 gcloud 指令知道您的專案:
gcloud config list project
- 如果未設定專案,請使用下列指令來設定:
gcloud config set project <YOUR_PROJECT_ID>
如要瞭解 gcloud 指令和用法,請參閱說明文件。
開啟編輯器
- 在本程式碼研究室中,我們將使用內建的 Cloud 編輯器。在 Cloud Shell 視窗中,按一下右上角的「開啟編輯器」按鈕。系統會開啟 VSCode 編輯器。

3. ADK 設定
前往上一節啟動的 Cloud Shell 終端機:
- 建立及啟動虛擬環境 (建議)
在 Cloud Shell 終端機中建立虛擬環境:
python -m venv .venv
啟動虛擬環境:
source .venv/bin/activate
- 安裝 ADK
pip install google-adk
4. Google API 金鑰
使用 AI Studio 建立 Google API 金鑰:
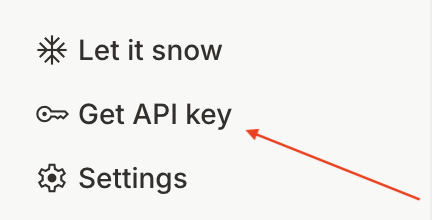
- 前往 https://aistudio.google.com/,然後按一下左下選單中的
Get API Key
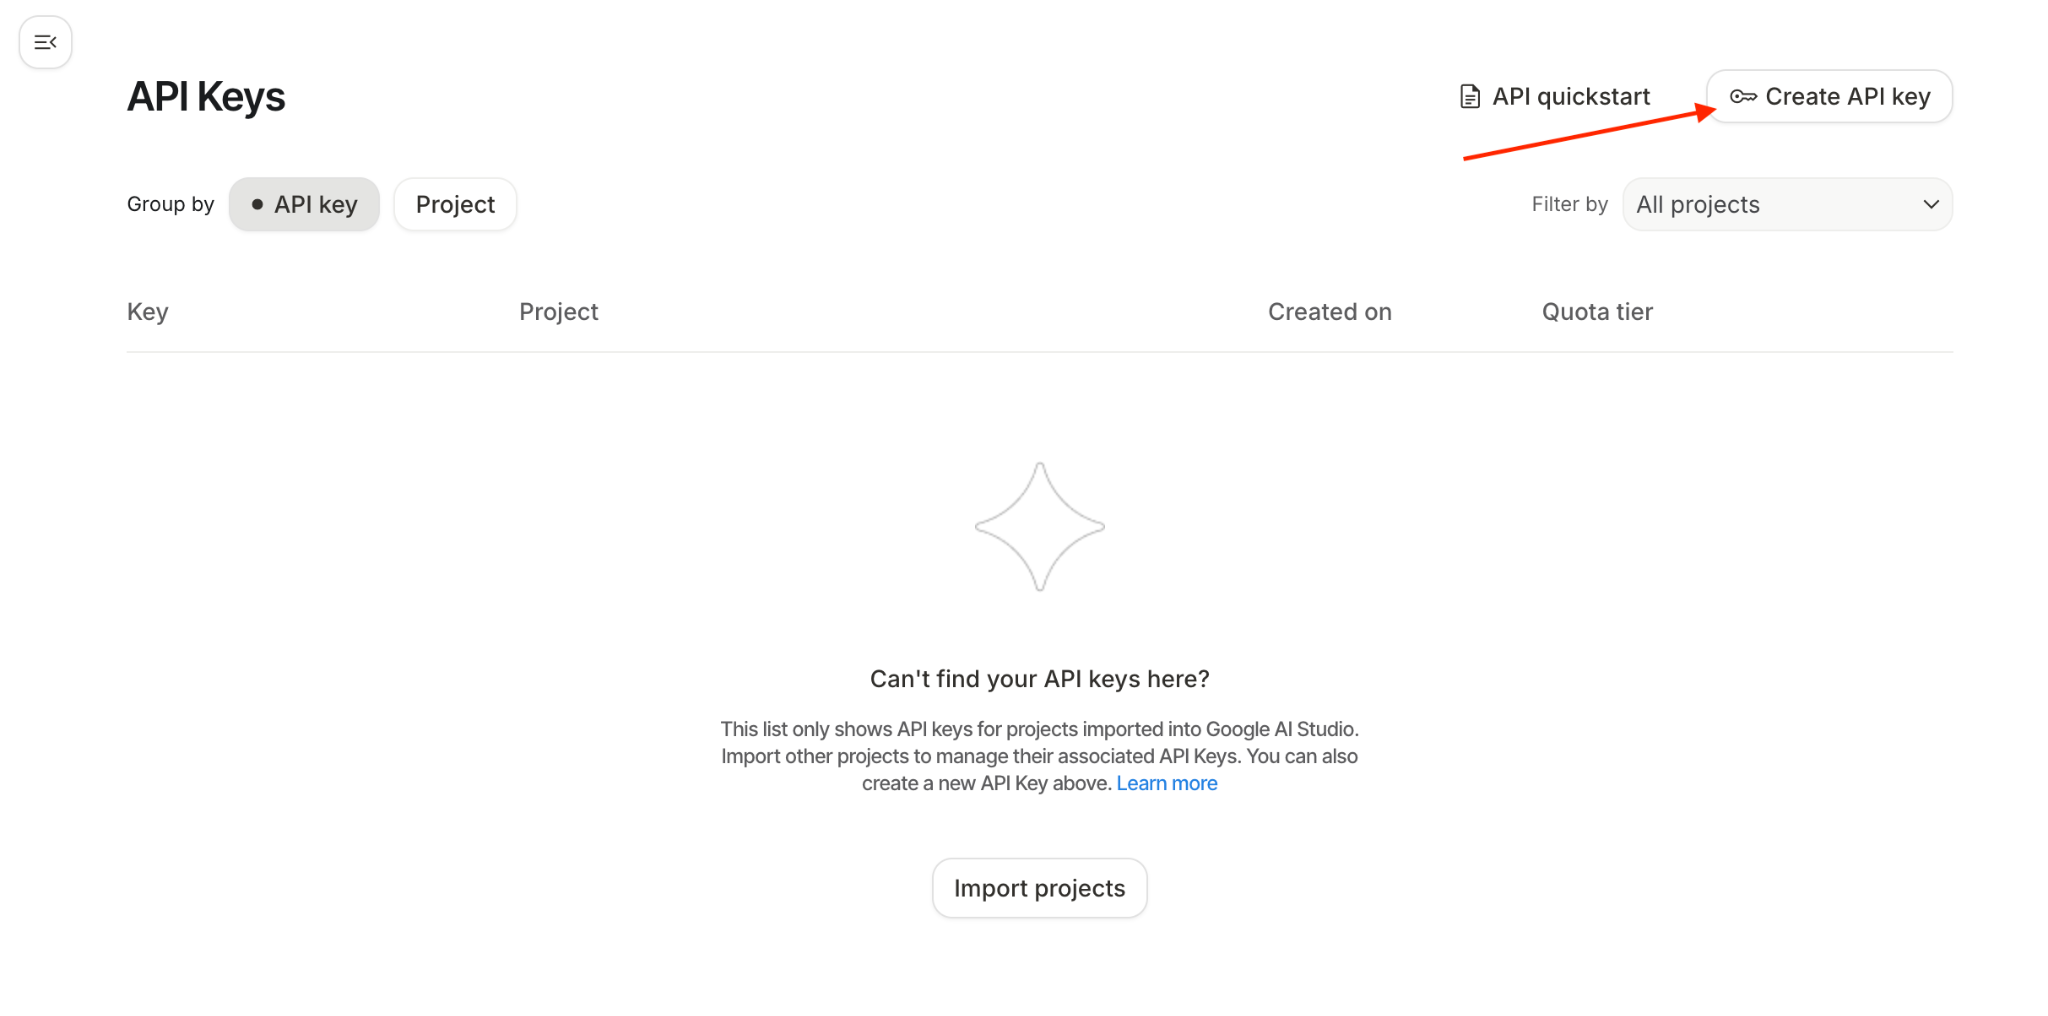
- 系統會顯示「API 金鑰」視窗,請點選這個視窗中的「建立 API 金鑰」:
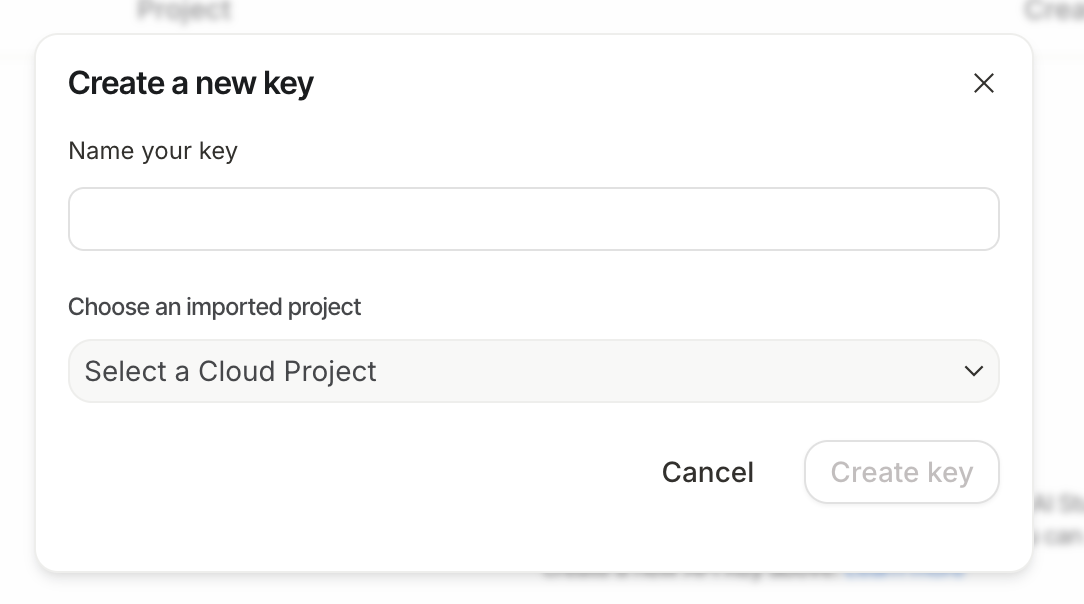
- 系統會顯示建立新金鑰的彈出式視窗。將金鑰命名為:
healthy-hints-key
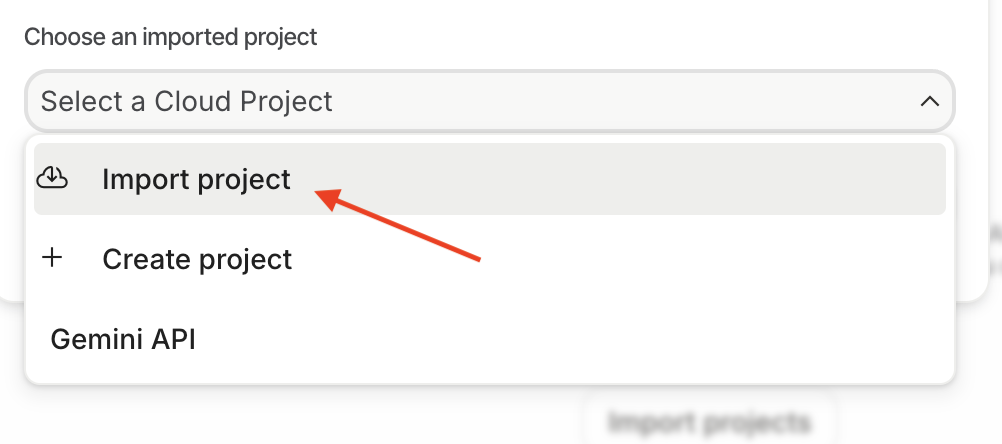
前往「選擇匯入的專案」下拉式選單
- 按一下
Import Project,側邊視窗會列出所有 Google Cloud 專案,請選取要使用的專案。
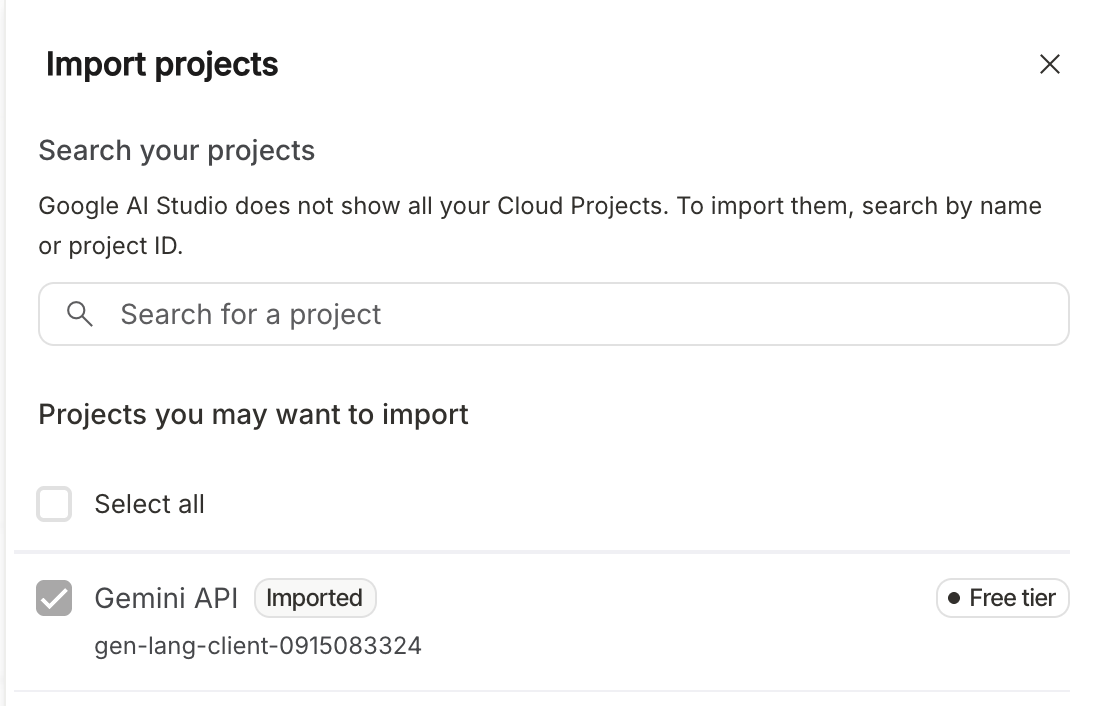
按一下「匯入」

- 下拉式選單現在會更新為您剛匯入的專案。從下拉式選單中選取專案。按一下「立即建立金鑰」。現在您會看到已建立的 API 金鑰清單。按一下剛建立的 API 金鑰複製圖示。

5. 範例代理程式
- 在 Cloud Shell 終端機中,於所需專案位置為代理程式建立根目錄:
adk create healthy_hints

您可以選擇任何模型,但在本程式碼研究室中,我們將使用 gemini-2.5-flash
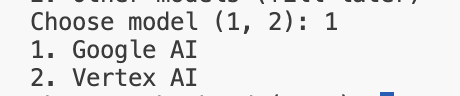
在本程式碼研究室中,我們將使用 Google AI。貼上您在上一個步驟中建立的 API 金鑰。

- 開啟剛建立的資料夾。在最左側的選單中,按一下圖示
 ,然後依序點選「檔案」->「開啟資料夾」。選取剛建立的資料夾
 healthy_hints,這個資料夾通常會位於/home/<username>資料夾中。 healthy_hints資料夾結構通常如下所示:
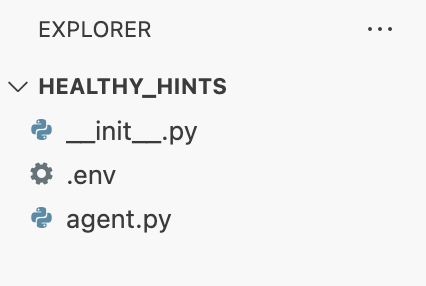
- 您會看到 .env 檔案,其中包含 Google API 金鑰。您可以使用這個檔案設定任何環境變數。
- 系統也會建立另一個名為
agent.py的檔案,這是我們的主要代理程式檔案。系統會在此建立範例根代理程式。讓我們仔細看看這個檔案的內容,首先從 ADK 匯入llm_agent。接著,我們使用 ADK DSL 建立根代理程式。我們將模型名稱指定為Gemini-2.5-flash,為代理命名,並提供簡要說明。指令是這裡最重要的內容,我們會以自然語言告訴代理程式需要執行的動作。 - 這個範例代理程式相當通用,可回答使用者的任何問題。
- 現在我們要在本機執行這個代理程式。您可以透過 CLI 和網頁與這個代理程式互動。
- CLI:從
healthy_hints目錄外部執行下列指令
adk run healthy_hints
或者,如果您位於 healthy_hints 目錄中,請執行下列指令:
adk run .
您會看到類似以下的輸出內容:

請輸入「你好」或任何問題。每個人的答案可能都不一樣,這就是生成式 AI 的特性。
- 網頁:從
healthy_hints的上層目錄執行下列指令:
adk web
6. 多功能工具代理程式
工具是一段模組化程式碼 (通常是函式或 API),可讓代理與內部知識以外的世界互動。
ADK 中的工具類型
- 函式工具:您自行編寫的自訂邏輯。舉例來說,可連線至特定資料庫的函式,或是適用於貴公司獨特格式的自訂「記錄剖析器」。
- 內建工具:Google 或 ADK 提供的即用型功能,例如 Google 搜尋、程式碼解譯器或 Google RAG 引擎。
- Agents-as-Tools:在進階的「多工具」或「多代理」系統中,一個專用代理可以做為另一個代理的工具。舉例來說,「搜尋代理」可以是「研究管理員代理」使用的工具。
在本程式碼研究室中,我們將介紹函式工具。現在,讓我們進一步開發代理,使其成為多工具代理。
在 agent.py 中新增 get_weather 方法
def get_weather(city: str) -> dict:
  """Retrieves the current weather report for a specified city.

  Args:
    city (str): The name of the city for which to retrieve the weather report.

  Returns:
    dict: status and result or error msg.
  """
  if city.lower() == "new york":
    return {
      "status": "success",
      "report": (
          "The weather in New York is sunny with a temperature of 25 degrees"
          " Celsius (77 degrees Fahrenheit)."
      ),
    }
  else:
    return {
      "status": "error",
      "error_message": f"Weather information for '{city}' is not available.",
    }
讓我們修改 agent.py,變更代理程式的名稱、說明和指令:
root_agent = Agent(
    model='gemini-2.5-flash',
    name='healthy_hints_agent',
    description='Agent to answer questions about the weather in a city.',
    instruction='You are a helpful agent who can answer user questions about the weather in a city.',
    tools=[get_weather],
)
目前為止,我們只建立了一項工具。現在建立多個工具:
讓我們建立另一個名為 get_current_time 的方法:
def get_current_time(city: str) -> dict:
  """Returns the current time in a specified city.

  Args:
    city (str): The name of the city for which to retrieve the current time.

  Returns:
    dict: status and result or error msg.
  """

  if city.lower() == "new york":
    tz_identifier = "America/New_York"
  else:
    return {
      "status": "error",
      "error_message": (
        f"Sorry, I don't have timezone information for {city}."
      ),
    }

  tz = ZoneInfo(tz_identifier)
  now = datetime.datetime.now(tz)
  report = (
    f'The current time in {city} is {now.strftime("%Y-%m-%d %H:%M:%S %Z%z")}'
  )
  return {"status": "success", "report": report}
接著,請修改代理程式,一併叫用這項工具:
root_agent = Agent(
  model='gemini-2.5-flash',
  name='healthy_hints_agent',
  description='Agent to answer questions about the time and weather in a city.',
  instruction='You are a helpful agent who can answer user questions about the time and weather in a city.',
  tools=[get_weather, get_current_time],
)
我們已據此修改說明、操作說明和工具。現在請執行這個更新後的代理程式。這次代理程式也會回覆目前時間和天氣。
7. 整合 SDK
我們現在知道如何使用多種工具,讓我們來看看幾個實際案例。我們來建立健康提示代理程式。我們在這裡的目標是將含有成分清單的圖片上傳至代理程式,代理程式會告訴我們每種成分是否健康。
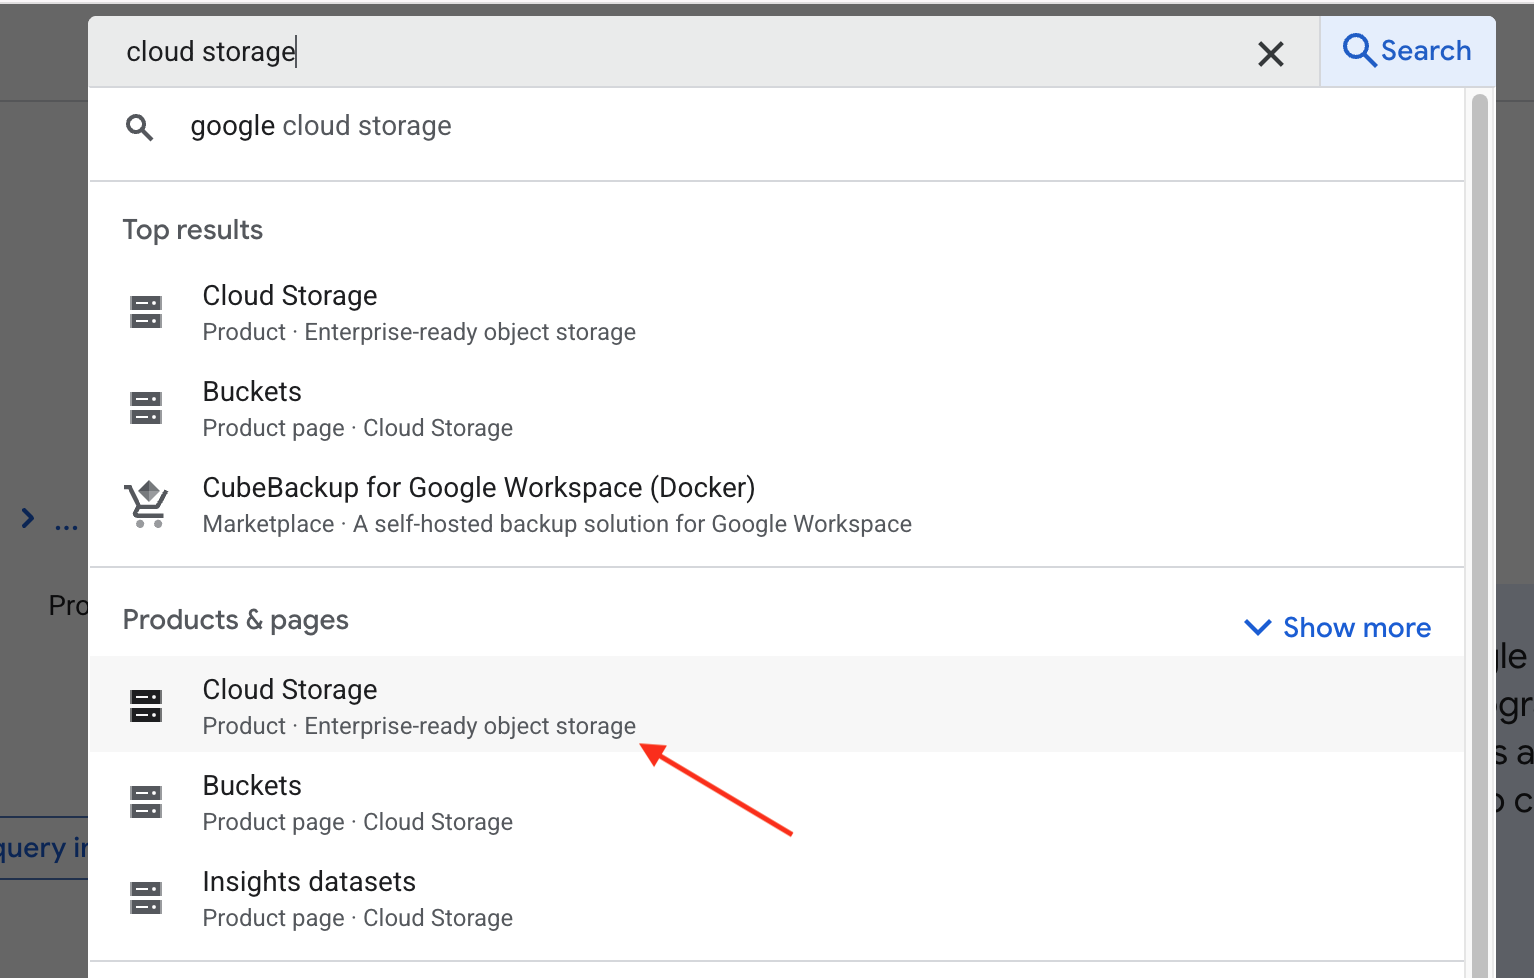
- 首先,我們要在 Google Cloud Storage 中建立 bucket,以便上傳圖片。開啟新分頁,前往 https://console.cloud.google.com/,然後在搜尋列中輸入「Cloud Storage」。現在,請在「產品和頁面」下方選取 Cloud Storage:
系統會將您導向 Google Cloud Storage 的總覽頁面。按一下 Create bucket 按鈕。在建立 bucket 頁面中,輸入 bucket 名稱。名稱可以是任何內容,但在此程式碼研究室中,我們將其設為 healthy-hints-bucket-kolkata。其餘設定均保留預設狀態,然後點選 Create 按鈕。
- 建立名為
requirements.txt的新檔案,並在其中加入google-cloud-storage。我們將使用 Python Storage SDK 上傳圖片至 Storage。
首先,請安裝依附元件:
pip install -r requirements.txt
您可能需要先啟用 Storage API。如要這麼做,請在終端機中執行下列指令:
gcloud services enable storage.googleapis.com
現在來新增上傳圖片的新工具。
def upload_image() -> str:
  storage_client = storage.Client()
  bucket_name = "healthy-hints-bucket-kolkata"
  bucket = storage_client.bucket(bucket_name)
  blob = bucket.blob("ingredirents")
  blob.upload_from_filename(<image-file-path>)
- 現在,讓我們更新代理程式,以便使用新工具:
root_agent = Agent(
  model='gemini-2.5-flash',
  name='healthy_hints_agent',
  description='Agent to upload image to Google Cloud Storage',
  instruction='You are a helpful agent who will upload the image to Google Cloud Storage using `upload_image` tool.',
  tools=[upload_image],
)
- 我們現在要新增另一個工具,讀出圖片中的食材。在
requirements.txt中新增google-cloud-vision,然後安裝新的依附元件。
pip install -r requirements.txt
同樣地,您可能需要先啟用 Vision API。如要這麼做,請在終端機中執行下列指令:
gcloud services enable vision.googleapis.com
現在新增工具 read_ingredients:
def read_ingredients() -> str:
  vision_client = vision.ImageAnnotatorClient()

  with io.open("/home/bajajnehaa/healthy_hints/images/Ingredients-list.jpg", 'rb') as image_file:
    content = image_file.read()

  image = vision.Image(content=content)
  response = vision_client.text_detection(image=image)
  texts = response.text_annotations
  return texts[0].description
現在,讓我們更新代理,使用這項工具
root_agent = Agent(
  model='gemini-2.5-flash',
  name='healthy_hints_agent',
  description='Agent to upload image to Google Cloud Storage, read the list of ingredients from the image and explain if the ingredient is healthy or not',
  instruction='You are a helpful agent who will upload the image to Google Cloud Storage using `upload_image` tool, read the ingredients of the image using `read_ingredients` tool and explain if the ingredient is healthy or not in one line.',
  tools=[upload_image, read_ingredients],
)
8. 結語
恭喜您完成「健康提示」程式碼研究室!您已成功將標準 AI 從文字生成工具轉換為主動式多工具代理程式。使用 ADK 整合 Vision API 和 Cloud Storage SDK 後,代理程式就能「看」到標籤並「記住」這些標籤,以便封存。您已瞭解代理程式如何自主決定儲存檔案的時機,以及如何解讀原始資料來提供實際的健康建議。
未來,這些原則將做為所有自動化系統的藍圖。無論您是管理雲端基礎架構,還是建構個人助理,核心概念都一樣:定義專用工具,然後讓代理程式協調邏輯。接下來,請嘗試新增「營養資料庫」或「電子郵件工具」等工具,擴大代理程式的影響力。