
1. Introduction
In this codelab, you will set up n8n on Google Cloud Run. n8n is an open-source workflow automation tool that allows users to connect different applications and services to automate repetitive tasks.
The codelab is based on the n8n documentation guide, that explains how to host n8n on Google Cloud Run. We will be installing and configuring a version of n8n that is a more durable, production-grade deployment of n8n on Cloud Run. It includes resources such as a database for persistence and secret manager for sensitive data.
What you'll do
- Deploy n8n on Google Cloud Run,which is a fully managed, serverless compute platform that runs stateless containers on Google's infrastructure.
What you'll learn
- Provisioning and populating a Cloud SQL for PostgreSQL database that will act as a persistent and durable version for our n8n installation.
- Provision the n8n container image to Google Cloud Run.
- Test out the installation of n8n on Google Cloud Run.
What you'll need
- Chrome web browser
- A Gmail account
- A Cloud Project with billing enabled
2. Before you begin
Create a project
- In the Google Cloud Console, on the project selector page, select or create a Google Cloud project.
- Make sure that billing is enabled for your Cloud project. Learn how to check if billing is enabled on a project .
- You'll use Cloud Shell, a command-line environment running in Google Cloud that comes preloaded with bq. Click Activate Cloud Shell at the top of the Google Cloud console.
- Once connected to Cloud Shell, you check that you're already authenticated and that the project is set to your project ID using the following command:
gcloud auth list
- Run the following command in Cloud Shell to confirm that the gcloud command knows about your project.
gcloud config list project
- If your project is not set, use the following command to set it:
gcloud config set project <YOUR_PROJECT_ID>
- Enable the required APIs via the command shown below. This could take a few minutes, so please be patient.
gcloud services enable run.googleapis.com \
                       sqladmin.googleapis.com \
                       secretmanager.googleapis.com
On successful execution of the command, you should see a message similar to the one shown below:
Operation "operations/..." finished successfully.
If any API is missed, you can always enable it during the course of the implementation. Refer documentation for gcloud commands and usage.
Finally, we are going to set a couple of environment variables that we shall be using in the scripts that we will run in the next few steps. In your Cloud Shell Terminal, execute the following two commands (Remember to replace GCP_PROJECT_ID and GCP_REGION with the respective values for your project id and the region (e.g. us-central1) where you want this deployment to be done. We are going with us-central1 for the deployment.
export PROJECT_ID=GCP_PROJECT_ID
export REGION=us-central1
3. Create a Cloud SQL instance
We will be using a Google Cloud SQL for PostgreSQL instance, which will be our persistence layer to store our n8n instance and execution data. This is required so that our setup is durable.
Cloud SQL for PostgreSQL is a fully-managed database service that helps you set up, maintain, manage, and administer your PostgreSQL relational databases on Google Cloud Platform.
Run the following command in Cloud Shell to create the instance:
gcloud sql instances create n8n-db \
--database-version=POSTGRES_15 \
--tier db-g1-small \
--region=us-central1 \
--edition=ENTERPRISE \
--root-password=postgres
This command takes approximately 5 minutes to execute. Once the command is successfully executed, you should see an output that indicates that the command is done, along with your Cloud SQL instance information like NAME, DATABASE_VERSION, LOCATION, etc.
Do note that we have used the root-password value as postgres. If you change it to something else, please keep that handy.
4. Setup n8n Database and database user credentials
Now that we have our Cloud SQL for PostgreSQL instance ready, we can create our n8n database in that, along with storing our database password and encryption key in Google Cloud Secrets Manager.
First up, let's create a database, named n8n in our Cloud SQL instance (n8n-db) that we created. All the commands below are to be run in Google Cloud Shell terminal.
gcloud sql databases create n8n --instance=n8n-db
On successful creation, you should see a message as follows:
Creating Cloud SQL database...done.
Created database [n8n].
instance: n8n-db
name: n8n
project: YOUR_GCP_PROJECT_ID
Now that the database is created, let's create a user account for that database. We are going to use the following credentials:
- user id :
n8n-user - password :
n8n
Note: In case you want to use another password that is stronger (recommended for production), you should use that instead of the password that we have chosen here i.e. n8n, but do ensure that you use it consistently in the next few commands too.
The command to create the database user is given below:
gcloud sql users create n8n-user \
    --instance=n8n-db \
    --password="n8n"
At this point, it is a good idea to store the credentials for the user database password and encryption key to Google Cloud Secret Manager, which is a secure and convenient storage system for API keys, passwords, certificates, and other sensitive data.
We begin with the following command that takes the password that we have used (n8n) and pipes it into the gcloud secrets create command. Our secret key will be n8n-db-password.
printf "n8n" | gcloud secrets create n8n-db-password --replication-policy="automatic" --data-file=-
Similarly, we will use the next set of commands to generate an encryption key and then create a secret variable n8n-encryption-key that will hold the value.
openssl rand -base64 -out my-encryption-key 42

gcloud secrets create n8n-encryption-key \
    --data-file=my-encryption-key \
    --replication-policy="automatic"
5. Create a Service Account for Google Cloud Run
We are going to deploy n8n on Google Cloud Run in the next step. To prepare for that, we are going to create a Service Account that Cloud Run will use to execute n8n workflows. For this, we want to ensure that the Service Account that we create has only the minimum requirement roles/permissions on Google Cloud.
Given our current requirements, we will need the following roles for the Service Account that we create:
roles/cloudsql.client: This is needed for the Service Account to access our Cloud SQL databaseroles/secretAccessor: We will need to provide this role to access the Secret manager keys for bothn8n-db-passwordandn8n-encryption-key.
Let's begin. All the commands below have to be executed in Google Cloud Shell. The first one creates the Service Account and then we provide the required roles as discussed. Run each of the commands one after the other. If you are asked for specify a condition for any of the commands below, choose "None".
gcloud iam service-accounts create n8n-service-account \
    --display-name="n8n Service Account"

export SA_NAME=n8n-service-account@$PROJECT_ID.iam.gserviceaccount.com

gcloud secrets add-iam-policy-binding n8n-db-password \
    --member="serviceAccount:$SA_NAME" \
    --role="roles/secretmanager.secretAccessor"

gcloud secrets add-iam-policy-binding n8n-encryption-key \
    --member="serviceAccount:$SA_NAME" \
    --role="roles/secretmanager.secretAccessor"

gcloud projects add-iam-policy-binding $PROJECT_ID \
    --member="serviceAccount:$SA_NAME" \
    --role="roles/cloudsql.client"
We are now set to deploy the n8n container image to Google Cloud Run.
6. Deploy n8n to Google Cloud Run
Run the following command in Google Cloud Shell:
gcloud run deploy n8n \
    --image=n8nio/n8n:latest \
    --command="/bin/sh" \
    --args="-c,sleep 5;n8n start" \
    --region=$REGION \
    --allow-unauthenticated \
    --port=5678 \
    --memory=2Gi \
    --no-cpu-throttling \--set-env-vars="N8N_PORT=5678,N8N_PROTOCOL=https,N8N_ENDPOINT_HEALTH=health,DB_TYPE=postgresdb,DB_POSTGRESDB_DATABASE=n8n,DB_POSTGRESDB_USER=n8n-user,DB_POSTGRESDB_HOST=/cloudsql/$PROJECT_ID:$REGION:n8n-db,DB_POSTGRESDB_PORT=5432,DB_POSTGRESDB_SCHEMA=public,GENERIC_TIMEZONE=UTC,QUEUE_HEALTH_CHECK_ACTIVE=true" \
    --set-secrets="DB_POSTGRESDB_PASSWORD=n8n-db-password:latest,N8N_ENCRYPTION_KEY=n8n-encryption-key:latest" \
    --add-cloudsql-instances=$PROJECT_ID:$REGION:n8n-db \
    --service-account=$SA_NAME
The deployment is likely to take about a minute. On successful deployment, you should see a message similar to the one shown below:
Deploying container to Cloud Run service [n8n] in project [YOUR_PROJECT_ID] region [us-central1]
Deploying new service...
  Setting IAM Policy...done
  Creating Revision...done
  Routing traffic...done
Done.
Service [n8n] revision [n8n-00001-8nh] has been deployed and is serving 100 percent of traffic.
Service URL: https://n8n-<SOME_ID>.us-central1.run.app
Note down the Service URL in the above output, since you will be using that in the next step to launch the n8n console.
7. Run a n8n workflow
Launch a browser and visit the Service URL that you obtained in the previous step. You can also obtain the Service URL from the Cloud Run home page, where you will see n8n listed as one of the services.
Note: If you get an error saying Cannot GET / screen or that n8n is starting up, this usually indicates that n8n is still starting up. You can refresh the page and it should eventually load.
Eventually you will see a screen as the one shown below, where you can setup the Owner Account:
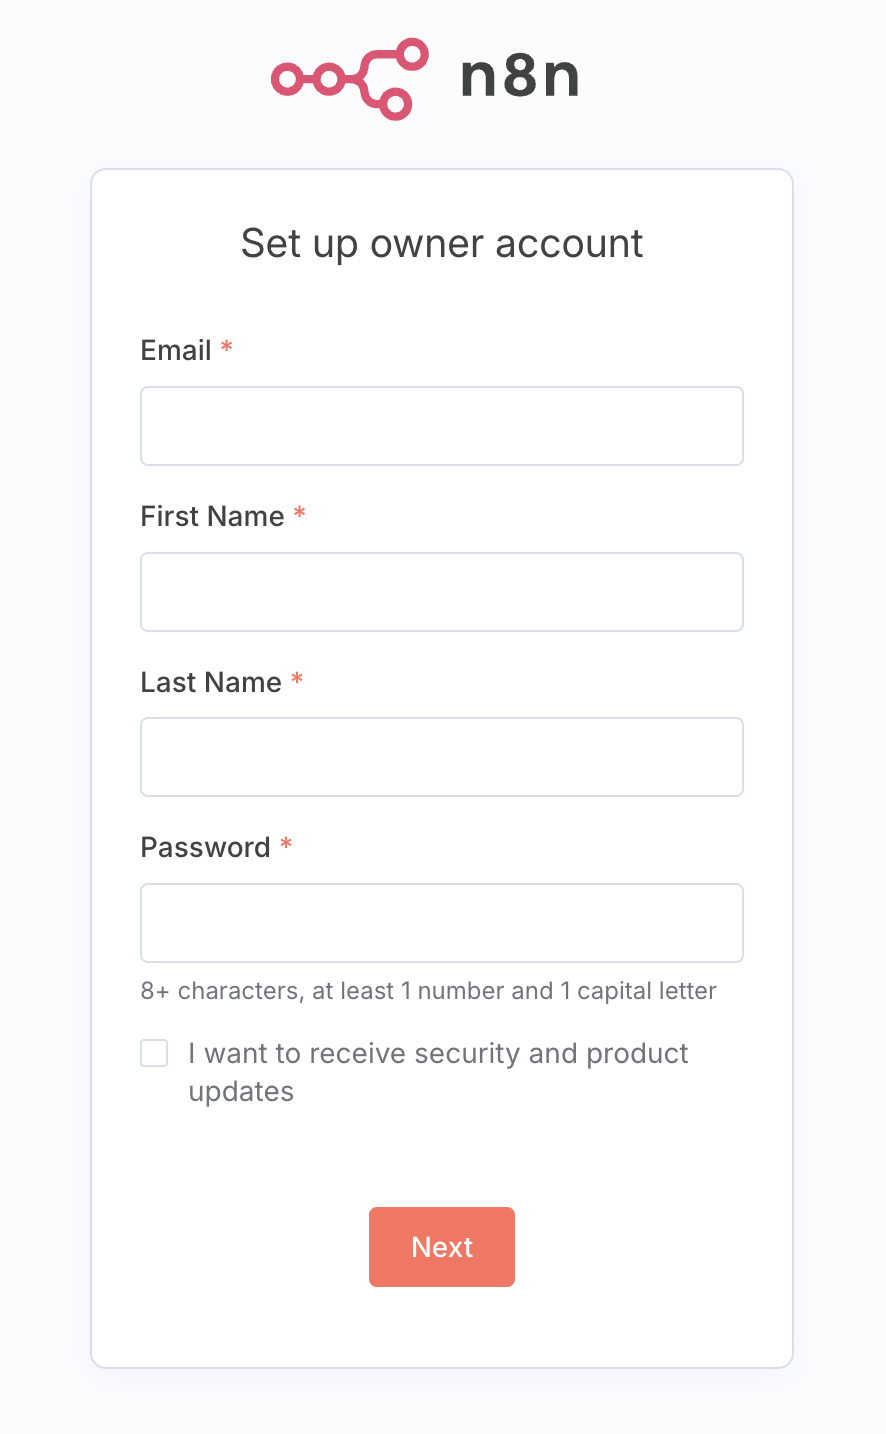
Fill up the required details, noting down the password and complete the setup. You can skip some of the steps, including the step that asks for sending a license key.
If all goes well, you should see the home page for n8n as shown below:
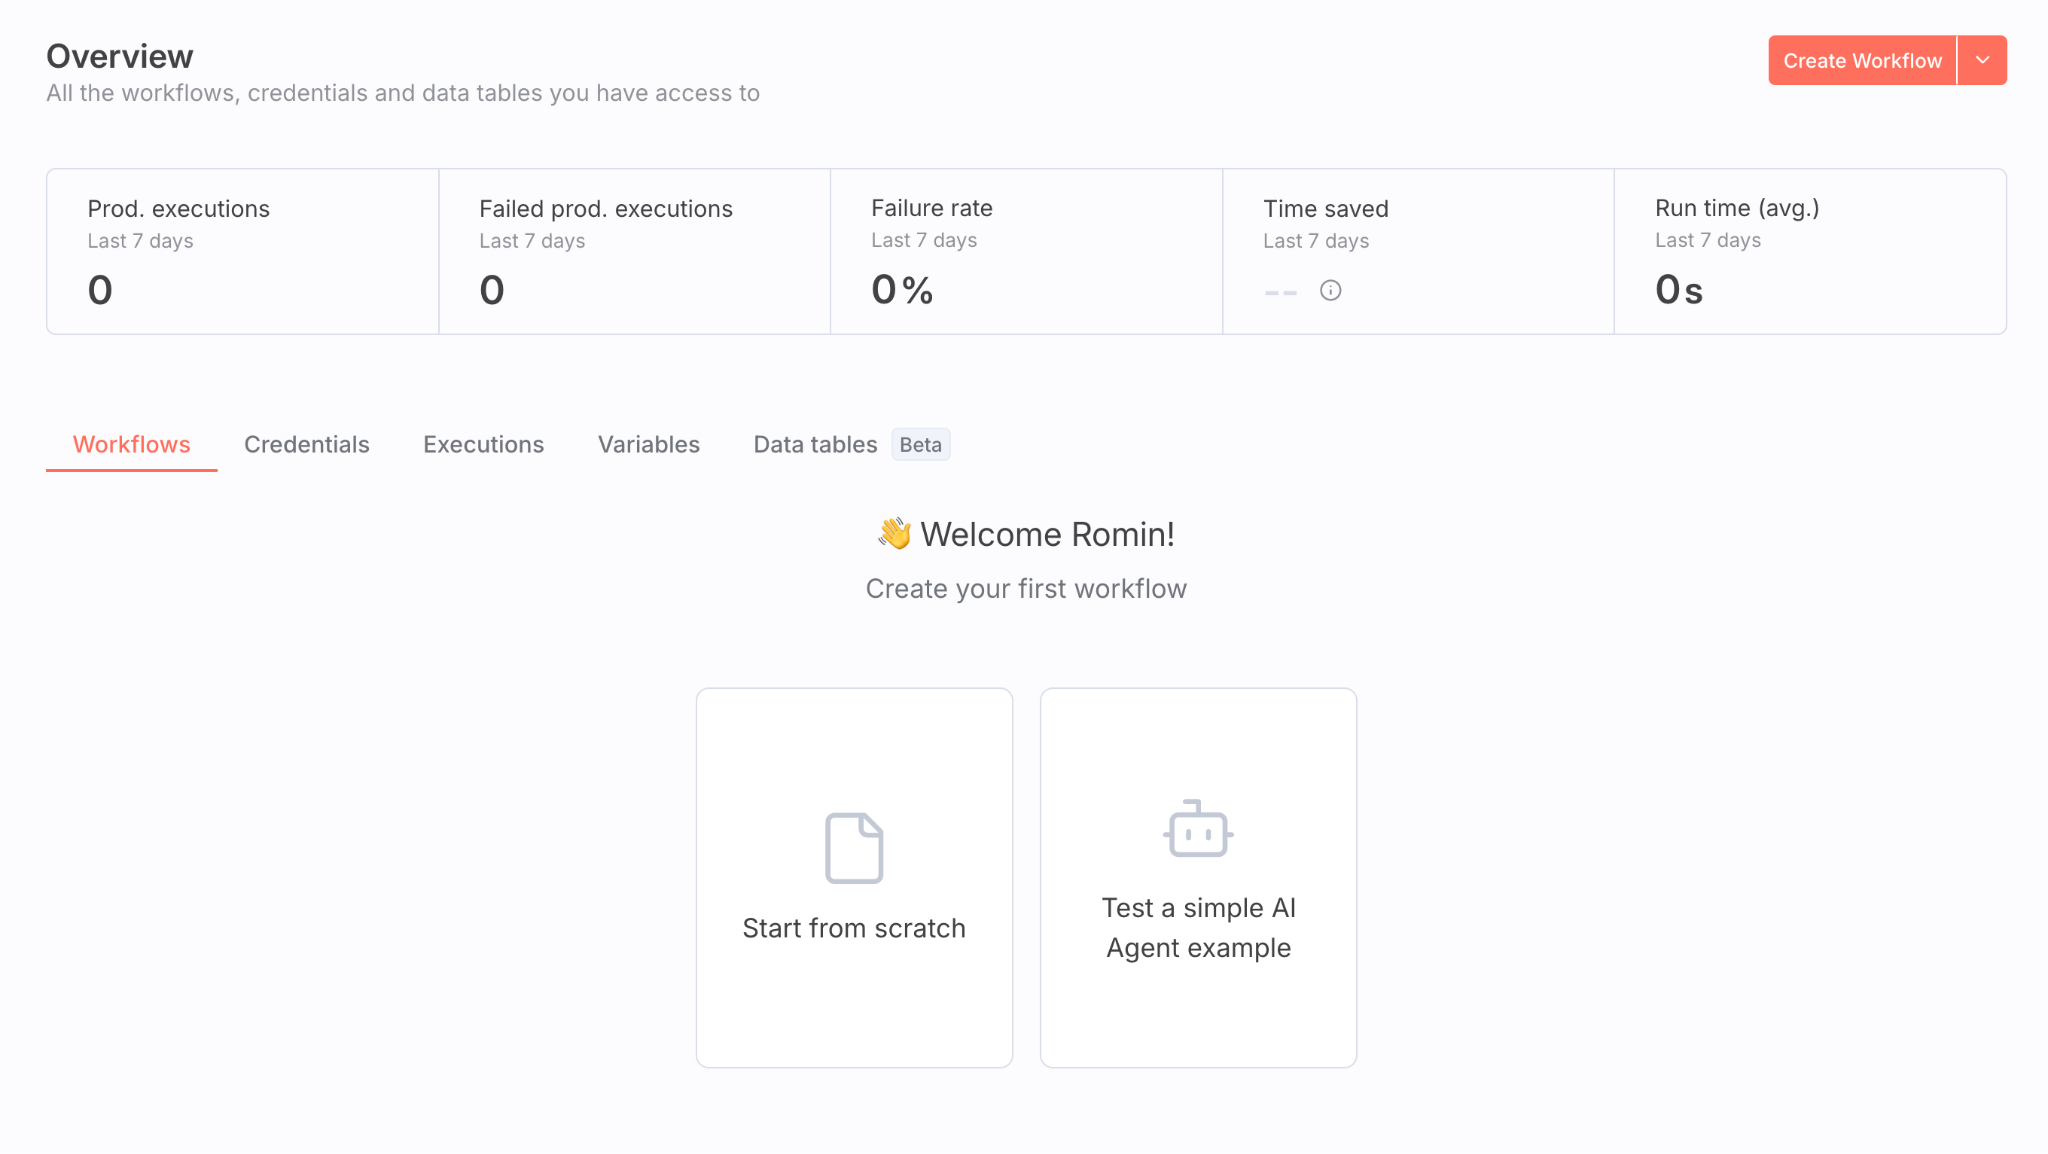
If you are familiar with n8n, you will be able to work your way through this and can complete the lab.
If you would like to take n8n for a small test drive, you can try the following workflow:
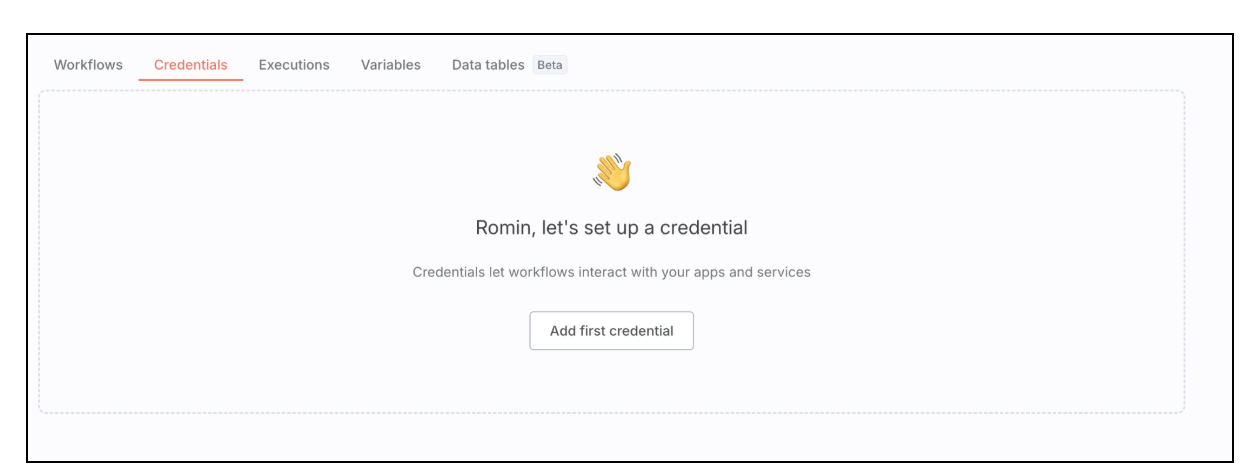
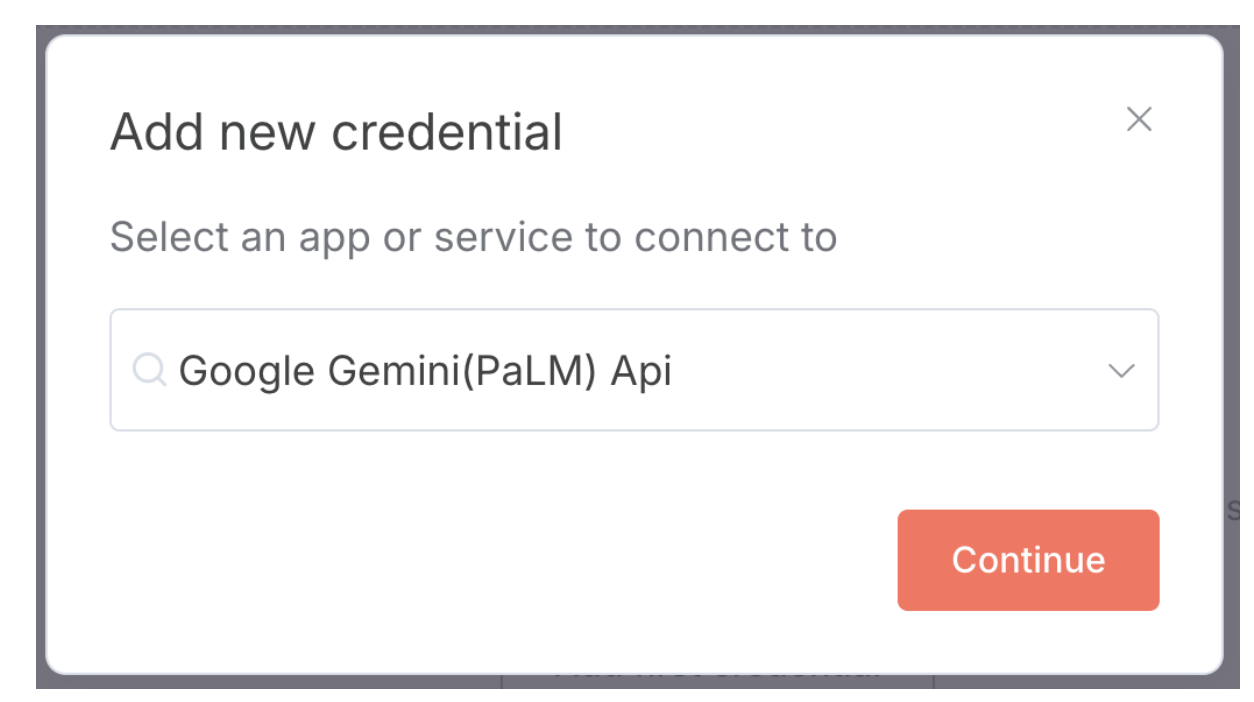
- Click on Credentials and then Add first credential.
- We will set up a Gemini API Key credential. Type gemini to bring up the Google Gemini (PaLM) Api option and then click on Continue.
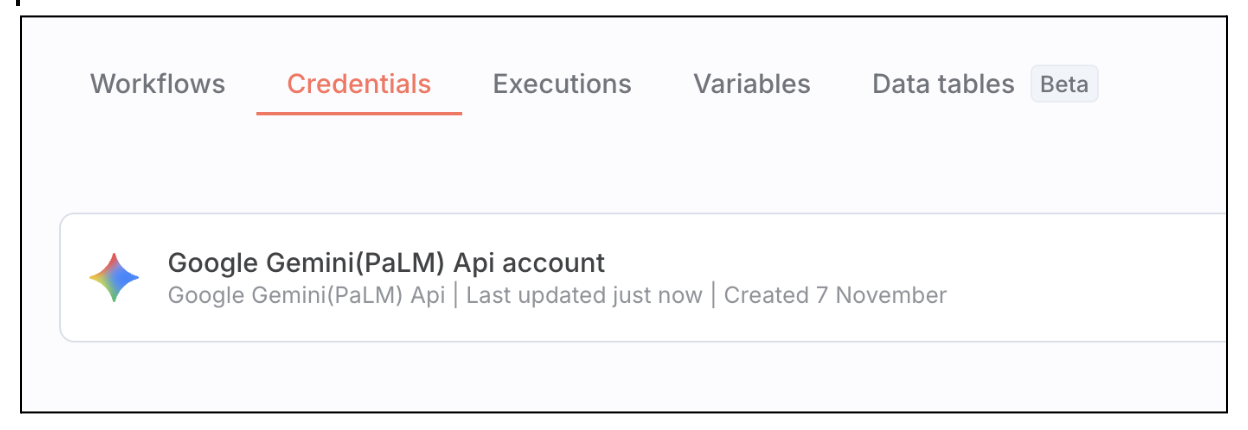
- You can get the Gemini API Key from https://aistudio.google.com/app/api-keys.
- Once you have the key, paste that. n8n will validate the key and the credential is now set up.
 5. Now go to the Workflows option and click on Start from scratch or create a new workflow. This will bring up a blank canvas, where you can build the following two nodes, one is a trigger (Simple Chat) and the other is an Agent, where we will set up the Credential that we created, so that the Agent model will be Google Gemini. You should finally have a workflow that looks like this:
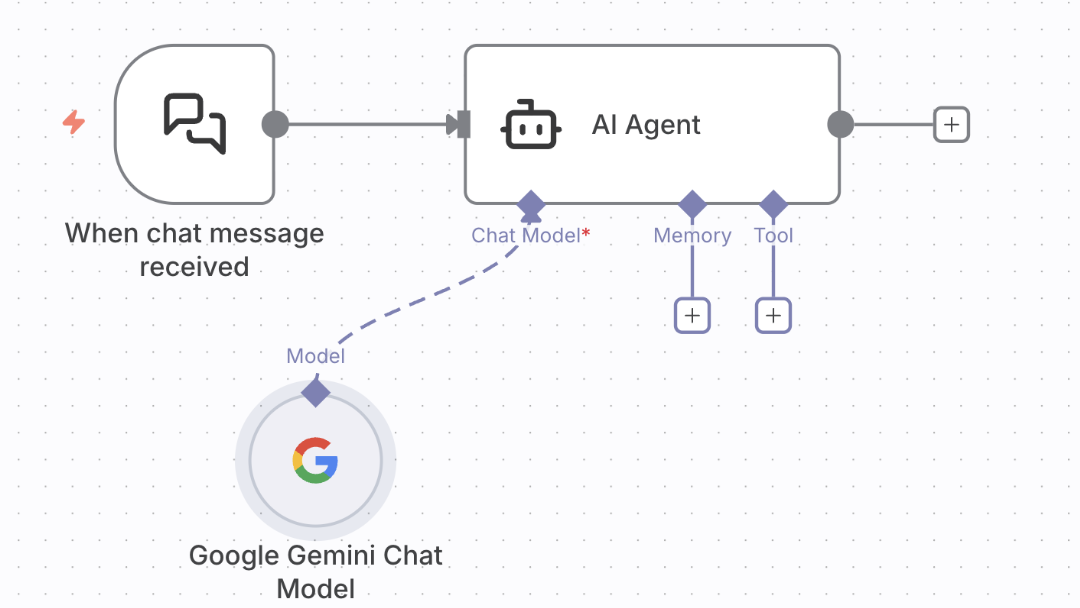
- You can run this workflow via the chat pane and if all goes well, get a response to your prompts. Sample execution screens are shown below:
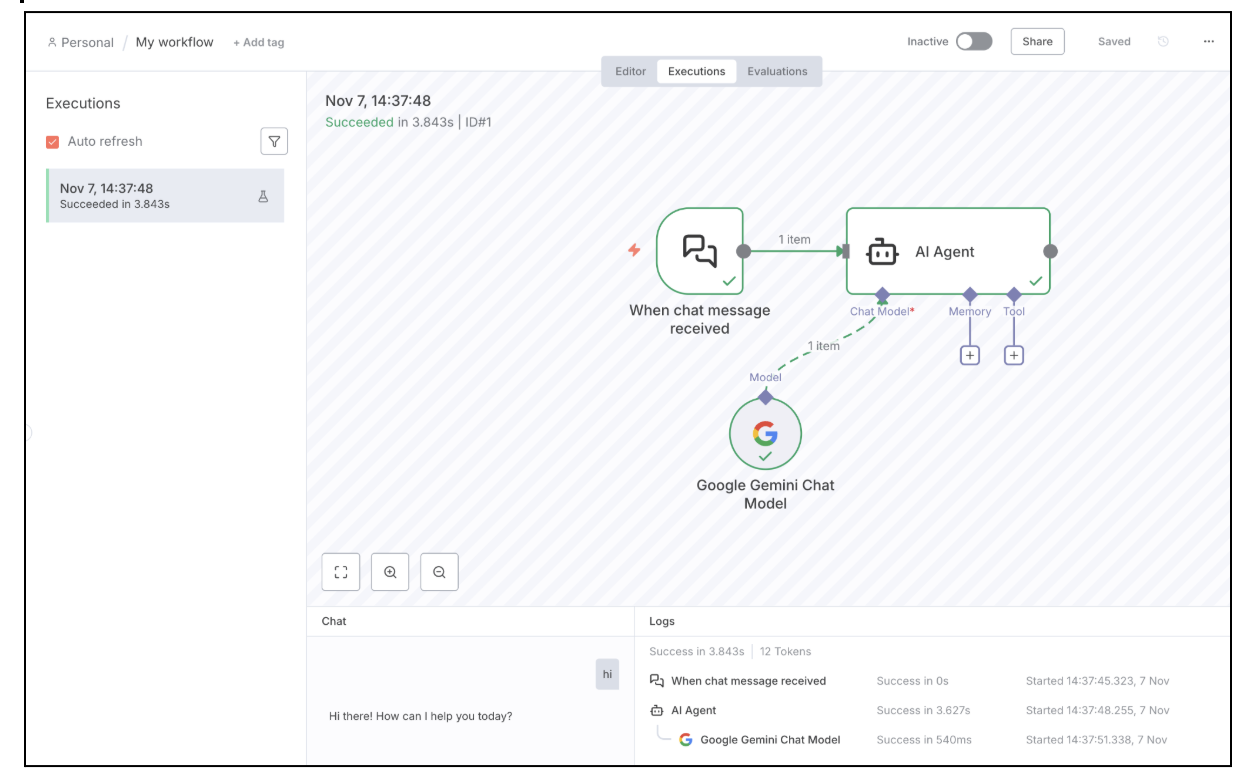
This completes our validation of our n8n deployment on Google Cloud Run.
8. Cleanup
If you have opted to use this codelab to learn how to install and run n8n on Google Cloud Run and not for production / permanent requirement, you can avoid ongoing charges to your Google Cloud account, it's important to delete the resources we created during this workshop.
We will be deleting the Cloud SQL instance and delete the Cloud Run service that we have deployed.
Ensure that the following environment variables are set correctly, as per your project and region:
export PROJECT_ID="YOUR_PROJECT_ID"
export REGION="YOUR_REGION"
The following two commands deletes the Cloud Run services that we have deployed:
gcloud run services delete n8n --platform=managed --region=${REGION} --project=${PROJECT_ID} --quiet
The following command deletes the Cloud SQL instance:
gcloud sql instances delete n8n-db
The following two commands deletes the Secret Manager keys that we created:
gcloud secrets delete n8n-db-password

gcloud secrets delete n8n-encryption-key
9. Congratulations
Congratulations, you've successfully deployed n8n on Google Cloud Run and validated the setup with a sample workflow.