
1. Introduction
In this codelab, you will learn how to deploy a full-stack application using Google Cloud Application Design Center (ADC). You will deploy "The Cymbal London Concierge" application, which includes a Vue 3 frontend, a FastAPI backend, and an MCP server that holds the data for the application.
ADC lets you define your application architecture visually and deploy it as a single unit, managing dependencies and connections automatically.
What you'll do
- Set up Application Design Center.
- Visually assemble the application components.
- Deploy the application architecture.
- Verify the running application.
- Verify the application was registered to App Hub.
- Verify the application metrics, traces and logs in Application Monitoring.
What you'll need
- A web browser such as Chrome.
- A Google Cloud project with billing enabled.
This codelab is for developers of all levels, including beginners.
Estimated Duration: 45 minutes Estimated Cost: Under $2.00 USD
2. Setup
Project setup
Create a Google Cloud Project
- In the Google Cloud Console, on the project selector page, select or create a Google Cloud project.
- Make sure that billing is enabled for your Cloud project. Learn how to check if billing is enabled on a project.
Start Cloud Shell
Cloud Shell is a command-line environment running in Google Cloud that comes preloaded with necessary tools.
- Click Activate Cloud Shell at the top of the Google Cloud console.
- Once connected to Cloud Shell, verify your authentication:
gcloud auth list - Confirm your project is configured:
gcloud config get project - If your project is not set as expected, set it:
export PROJECT_ID=<YOUR_PROJECT_ID>
gcloud config set project $PROJECT_ID
3. Set up Application Design Center
Before you can assemble your application, you need to set up your workspace in ADC.
- In the Google Cloud Console, search for Application Design Center and navigate to it.
- If this is your first time using ADC in this project, you will see a setup screen.
- Click Go to Setup.
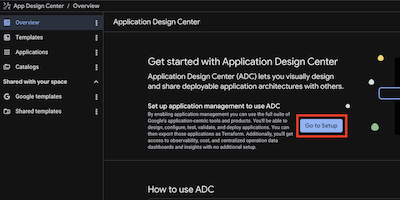
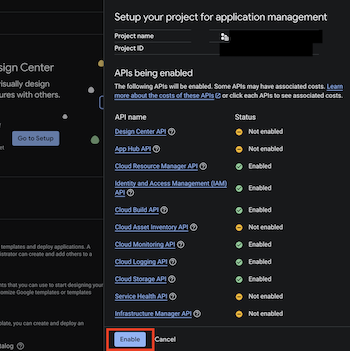
- You will be prompted to enable required APIs if they are not already enabled. Click Enable to proceed.
4. Exploring ADC Features
In this task, you learn the core components of ADC: Spaces, Catalogs, and Templates.
ADC Spaces
A Space is a location for creating templates and deploying apps. Each space belongs to a Google Cloud project. ADC creates a default-space during initial setup, but you are free later to create other spaces in different regions.
To view your spaces via the terminal, perform the following steps:
- Click Open Editor on the Cloud Shell toolbar or use the terminal.
- Run the following command:
gcloud alpha design-center spaces list \
--project="your PROJECT ID" \
--location=us-central1
You should see an output that looks like this that indicates that the default-space is present for the region.
createTime: '20XXXX-XX-XXT09:19:29.456016967Z'
displayName: default-space
enableGcpSharedTemplates: true
name: projects/your-project-id/locations/us-central1/spaces/default-space
5. Assemble the Template
In this step, you will take on the role of a Platform Team engineer. Your goal is to create a reusable, secure, and compliant template for agentic applications in your organization. You will add components and configure restrictions to ensure that any application deployed from this template complies with your company's cloud policies.
1. Create a New Design
- In the ADC console, click Templates > Create Template.
- Name your template
simple-3-tier-agentic-appas this template will be used to deploy theCymbal London Conciergeapplication, and other similar applications.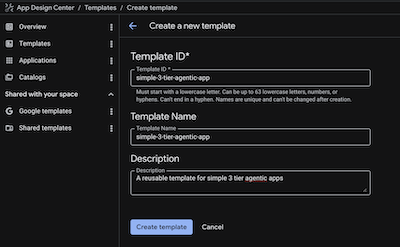
2. Add the Data MCP Server
This component handles the database interactions and vector search.
- Click Add Component > Cloud Run (Service). If you click on that component, you will see a component id in the top right corner. It will be of the form
cloud-run-1. We can change it todata-mcp-server, by editing it in the code view (discussed later), but let's leave it as it is.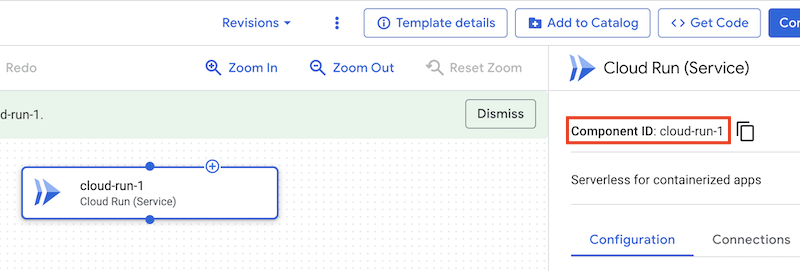
- Enter the Service Name:
data-mcp-server. - Under Show advanced settings, Set the Members to:
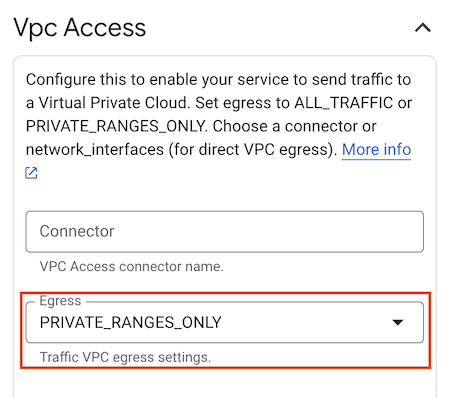
allUsers. (Note: In a production environment, you would likely restrict this, but we use it here for codelab simplicity.) - Under Show advanced settings, Set the VPC ACCESS, set the Egress to:
PRIVATE_RANGES_ONLY. - Optionally, under Show advanced settings, uncheck Enable Prometheus Sidecar.
- Click Save.
3. Add the Agent Backend
This is the FastAPI application that orchestrates the agentic behavior.
- Click Add Component > Cloud Run (Service).
- Name it
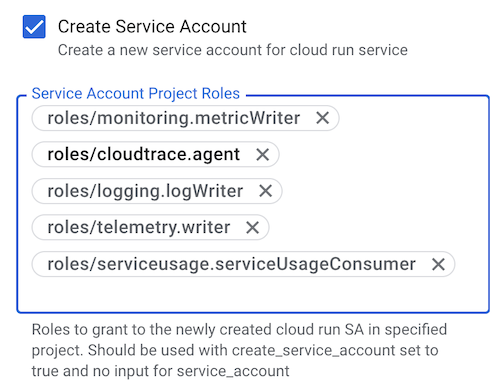
agent-backend. - Under Show advanced fields, check the Create Service Account and add the following roles under Service Account Project Roles one at a time:
roles/monitoring.metricWriterroles/logging.logWriterroles/cloudtrace.agentroles/telemetry.writerroles/serviceusage.serviceUsageConsumer. These roles will allow the agent to use Cloud Monitoring, Cloud Logging, and Cloud Trace. Compliance Config: The platform team enforces the principle of least privilege by explicitly listing required roles.
- Under Show advanced settings, Set the Members to:
allUsers. - Under Show advanced settings, Set the VPC ACCESS, set the Egress to:
PRIVATE_RANGES_ONLY. - Optionally, under Show advanced settings, uncheck Enable Prometheus Sidecar.
- Connect the
agent-backendtodata-mcp-server, by dragging a connection from theagent-backendto thedata-mcp-server. - Click Save.
4. Add the Frontend
The front end UI.
- Click Add Component > Cloud Run (Service).
- Enter the Service Name:
frontend. - Under Show advanced settings, uncheck Create Service Account
- Under Show advanced settings, Set the Ingress to:
INGRESS_TRAFFIC_INTERNAL_LOADBALANCER. Compliance Config: Direct public access to the frontend container is blocked, forcing traffic through the load balancer. - Under Show advanced settings, Set the Members to:
allUsers.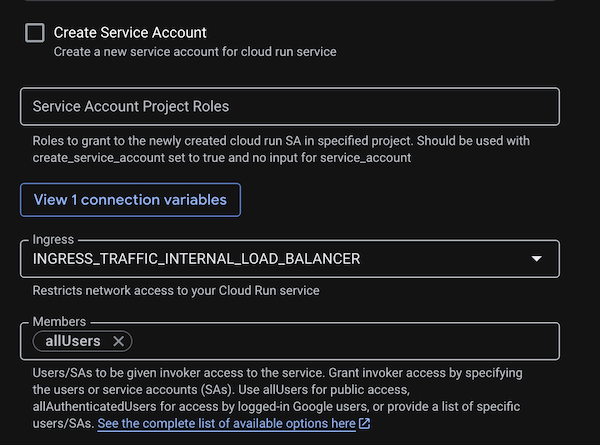
- Optionally, under Show advanced settings, uncheck Enable Prometheus Sidecar.
- Click Save.
- Connect the
frontendtoagent-backend, by dragging a connection from thefrontendto theagent-backend.
5. Add a vertex AI component
- Click Add Component > Vertex AI.
- Name it
vertex-ai. - Connect it to the
agent-backendand thedata-mcp-serverby dragging two connections from thevertex-aito theagent-backendanddata-mcp-serverrespectively. The rolesaiplatform.userwill already assigned to the service accounts ofagent-backendanddata-mcp-serverby the virtue of them being connected to the vertex AI component.
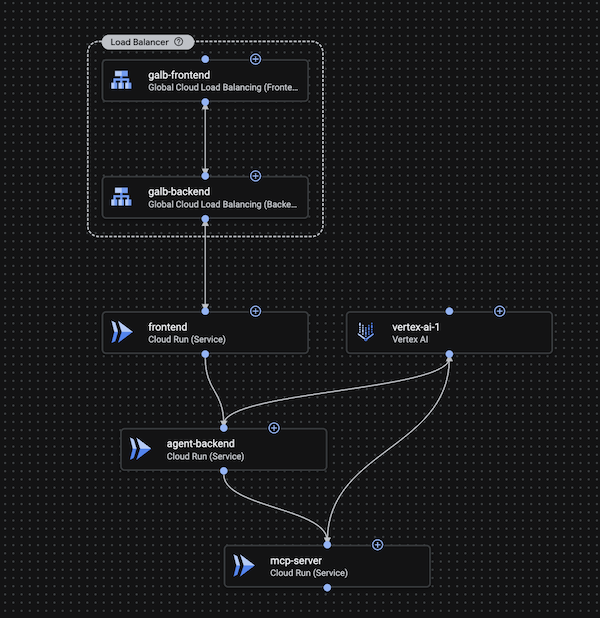
6. Add the Global Load Balancer
The Load Balancer exposes your frontend to the public internet. In ADC, this is split into a Backend and a Frontend component.
A. Add the Load Balancer Backend
- Click **Add Component > Global Cloud Load Balancing (Backend).
- Name it
galb-backend. - Click Add Connection and connect it to
frontend.
B. Add the Load Balancer Frontend
- Click **Add Component > Global Cloud Load Balancing (Frontend).
- Name it
galb-frontend. - Click Add Connection and connect it to
galb-backend. - Connect the
galb-frontendtogalb-backend, by dragging a connection from thegalb-frontendto thegalb-backend.
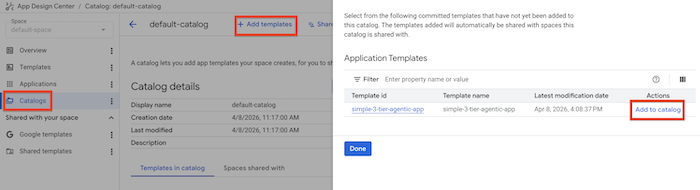
Share the Template in the Catalog
A Catalog allows you to share app templates across different Spaces, enabling architecture governance. A catalog acts as a central repository for templates that are created and approved for sharing by the platform team. Sharing catalogs between spaces avoids duplicated effort for common projects, and streamlines startup times.
Now, add your template to the catalog:
- Click the Catalogs tab.
- Click Add Templates and select the
simple-3-tier-agentic-apptemplate. - Click Add to Catalog.
You can find templates in three locations: Google Templates (predefined patterns), Shared Templates (shared across your organization), and Templates (custom blueprints in your space).
6. Deploy the Application
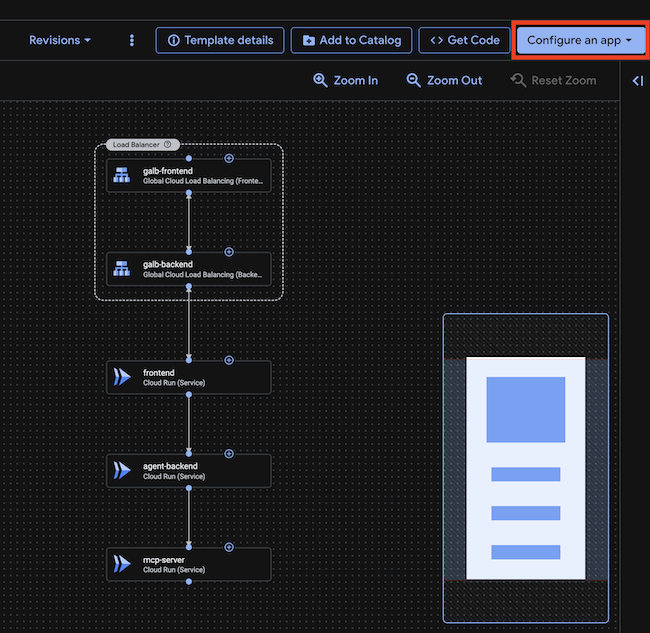
Now it is time to play the role of an app developer who wants to use this template to deploy the cymbal-london-concierge application.
- In the ADC console, reopen the template in the Templates tab, and click on Configure app button.
- Click Create new application.
- Configure the Application:
- Application Name:
cymbal-london-concierge - Deployment project: Your project id
- Region:
us-central1 - Input Attributes>Environment:
Development - Input Attributes>Criticality:
Low
- Application Name:
- Click Create Application.For a production deployment, you would select ‘Production' for Environment and ‘High' for Criticality. These are tags that will help your SREs and operations team sort and prioritize work on any issues that occur.
- This should open up the deployment details page with the application template. Given that this is only a template, we still need to add configuration that is specific to our application.
- Let's configure the frontend. Click on the frontend component.
- Click on Containers > Edit Container.
- We need to replace the generic container image with the one we want to use for our application.
- Set the Container Image to:
us-central1-docker.pkg.dev/o11y-movie-guru/london-travel-agency/frontend:codelab-c2c6-v1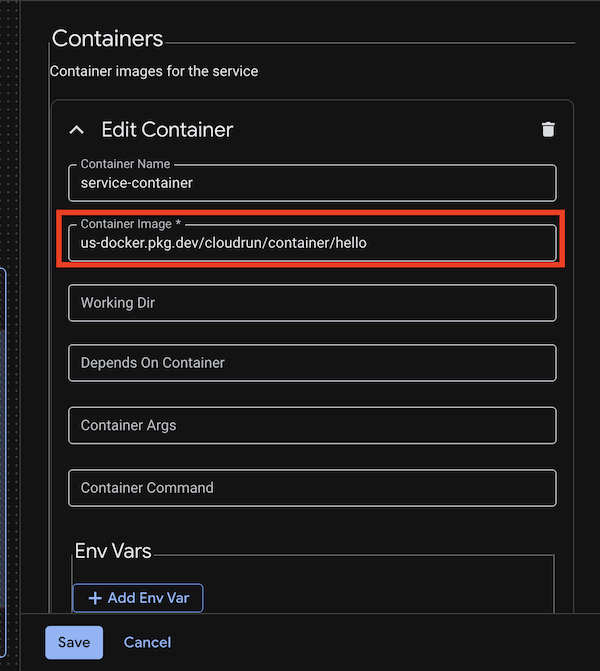
- Set the port
http1to80. - Set the following Environment Variables:
API_BASE_URL:module.cloud-run-2.service_uri(ensure that thecloud-run-2is the name of the agent backend component, if not replace it with the actual name of the component)
- Click Save.
- Let's configure the agent backend. Click on the agent-backend component.
- Click on Containers > Edit Container.
- We need to replace the generic container image with the one we want to use for our application.
- Set the Container Image to:
us-central1-docker.pkg.dev/o11y-movie-guru/london-travel-agency/agent:codelab-c2c6-v1 - Set the following Environment Variables:
GOOGLE_CLOUD_PROJECT:GOOGLE_CLOUD_LOCATION:us-central1DATA_BACKEND_URL:module.cloud-run-1.service_uri(ensure that thecloud-run-1is the name of the data mcp server component, if not replace it with the actual name of the component)- Set the port
http1to8000. - Click Save.
- Let's configure the data mcp server. Click on the data-mcp-server component.
- Click on Containers > Edit Container.
- We need to replace the generic container image with the one we want to use for our application.
- Set the Container Image to:
us-central1-docker.pkg.dev/o11y-movie-guru/london-travel-agency/data_mcp:codelab-c2c6-v1 - Set the following Environment Variables:
GOOGLE_CLOUD_PROJECT:GOOGLE_CLOUD_LOCATION:us-central1DB_TYPE:sqliteEMBEDDING_MODEL:text-embedding-005- Set the port
http1to8002. - Click Save.
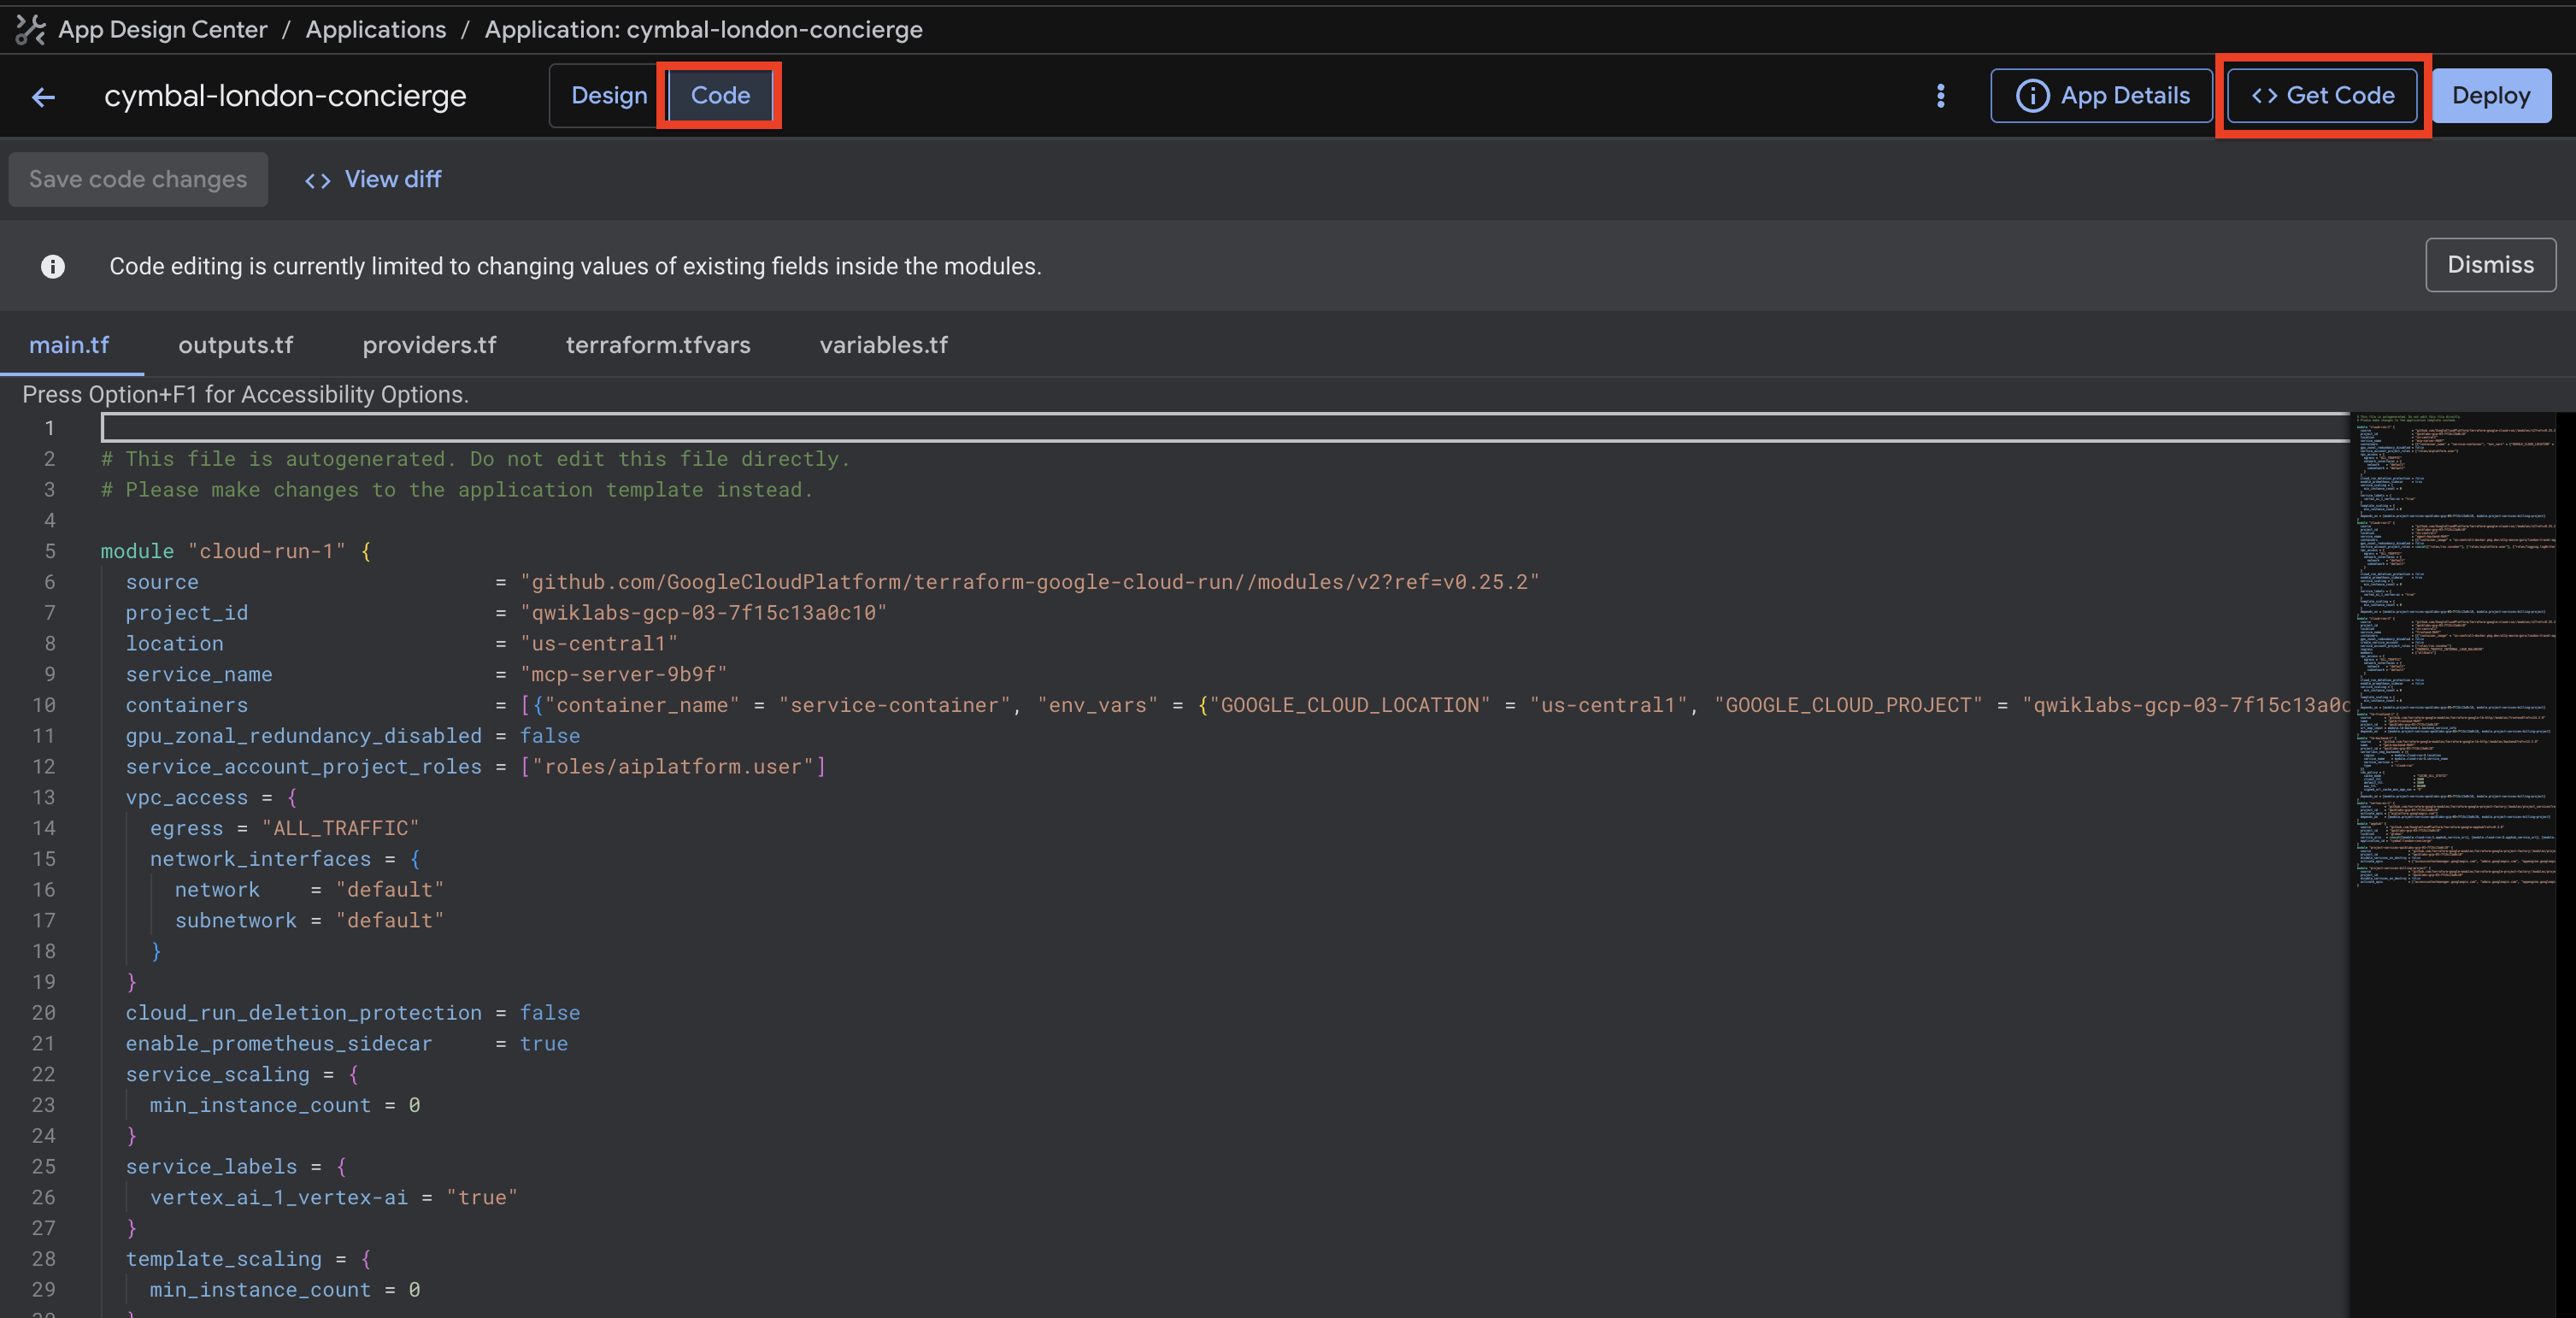
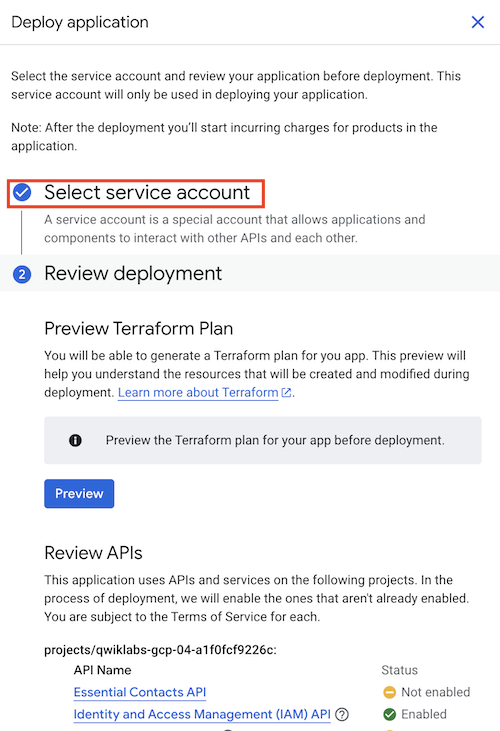
- Click on the Code button on the top of the page to view the terraform code for the application. You can also download the terraform code for the application by clicking on the Get Code button to store it in your code base.
- Click on the Deploy button on the top right corner of the page to deploy the application.
- The deployment page will ask you to create a service account for the deployment pipeline or choose an existing one. Click on Create Service Account (it will autofill a name) and then Proceed. This will take a few seconds to create a new service account.
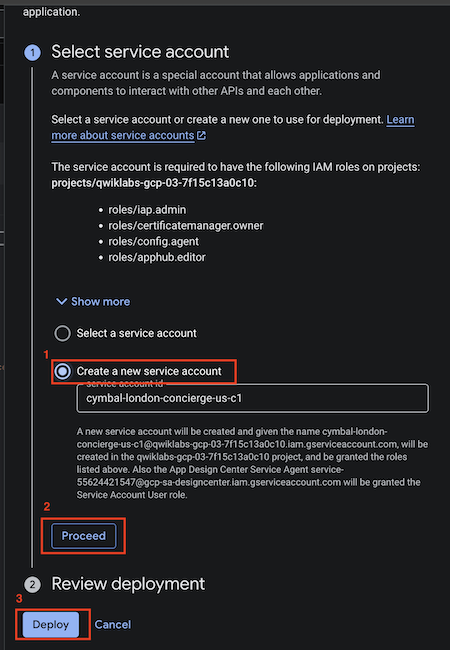
- Once the service account is created, the page will refresh and you will see the Select Service Account with a checkmark next to it.
- Then click Deploy at the bottom of the page.
- It will take a few minutes to complete. Once the deployment is complete, you will see a green checkmark next to each component. You can also check the status of the deployment by clicking on the Link to logs button which will open the cloud build logs. It might take a few minutes for the button to show up.

- You can view the cloud build logs to see the status of the deployment or if there are any errors that may occur while deploying the application. You can also directly go to the cloud build logs by searching for Cloud Build in the Google Cloud console and clicking on History. The application will take about 5-8 minutes to deploy.

- Once the deployment is complete, you will see a green checkmark next to the Deployment status field.

7. Verify the Application
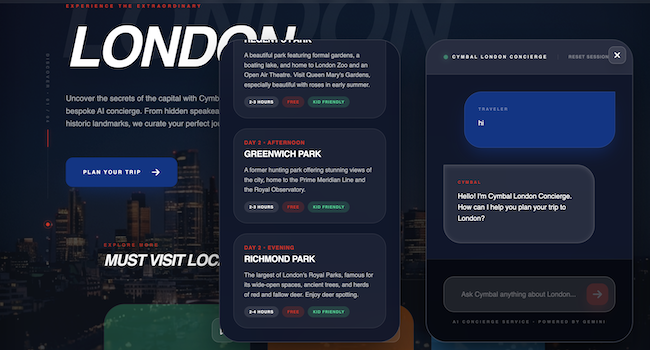
Let's test if the agent is alive. In the outputs section of the deployment details page, you will see the URL of the frontend component. Copy that URL and paste it in your browser. Make sure you use http and not https. Also accept any warnings you may get in the browser because the frontend is using http.
Chat with the app and ask it to create an itinerary for a trip to London.
8. App Hub and Application Monitoring
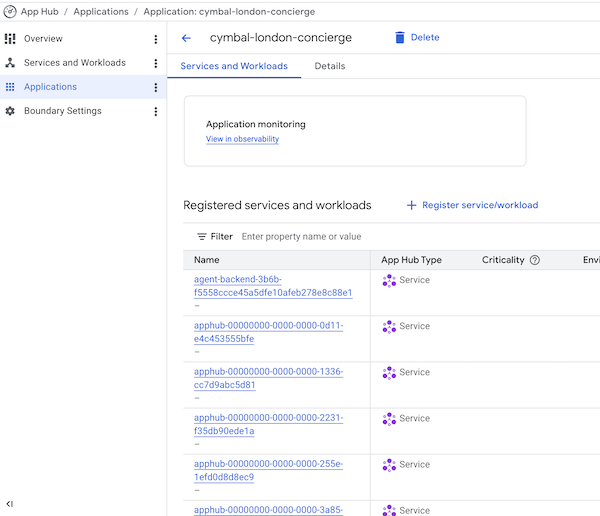
- In the ADC console, click on the View app in App Hub button on the top right corner of the page.
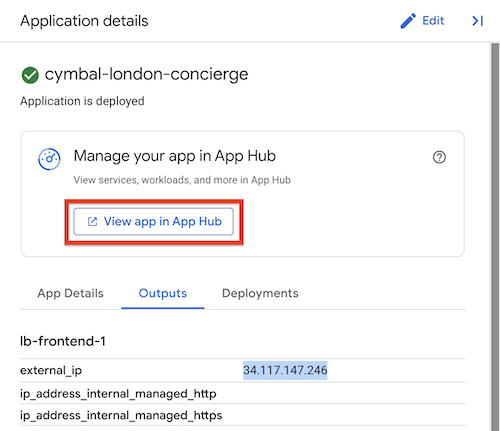
- This will open up the app in App Hub. App Hub is a central place to view and manage all your applications, transitioning you from a resource-centric to an application-centric view. Creating an app using ADC automatically creates an app in App Hub. You should see all the workloads and services that make up the application listed here. Instead of viewing the resources in the cloud as individual resources, you can view them as a part of a single application, simplifying management and governance.
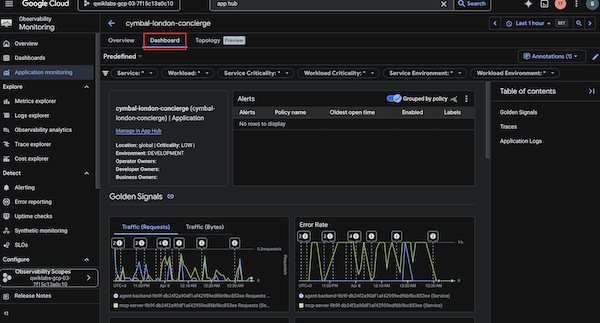
- Click on the View in Observability button. This should open up the application in the Observability console.
- Open the Dashboard view. The dashboard gives you an overview of the application's performance and health by providing metrics such as the 4 golden signals: request rate, error rate, latency, and saturation. This application-centric monitoring is crucial for maintaining reliability. You can also view Logs and Traces for the application, allowing you to correlate signals and pinpoint bottlenecks. This is especially important in a complex agentic application like this, where slow responses from Vertex AI or the Data MCP server can degrade the user experience.
- Guided Exploration: Ask the agent a specific question in the app (e.g., "What are the best places to visit in London?"). Then, go back to the Observability console and view the Traces list. Find the trace corresponding to your request. Click on it to see the detailed waterfall view. Notice how you can see the time spent in the frontend, the agent backend, and the calls to Vertex AI. This allows you to identify exactly where latency is introduced.
9. Congratulations
Congratulations! You have deployed a 3-tier application architecture using ADC.
What you've learned
- How to visually assemble a cloud architecture using ADC.
- How to set up ADC and enable APIs via UI.
- How to deploy applications using ADC.
- How to use App Hub for an application-centric view of your resources.
- How to monitor application health using the Observability Dashboard.