
1. Overview
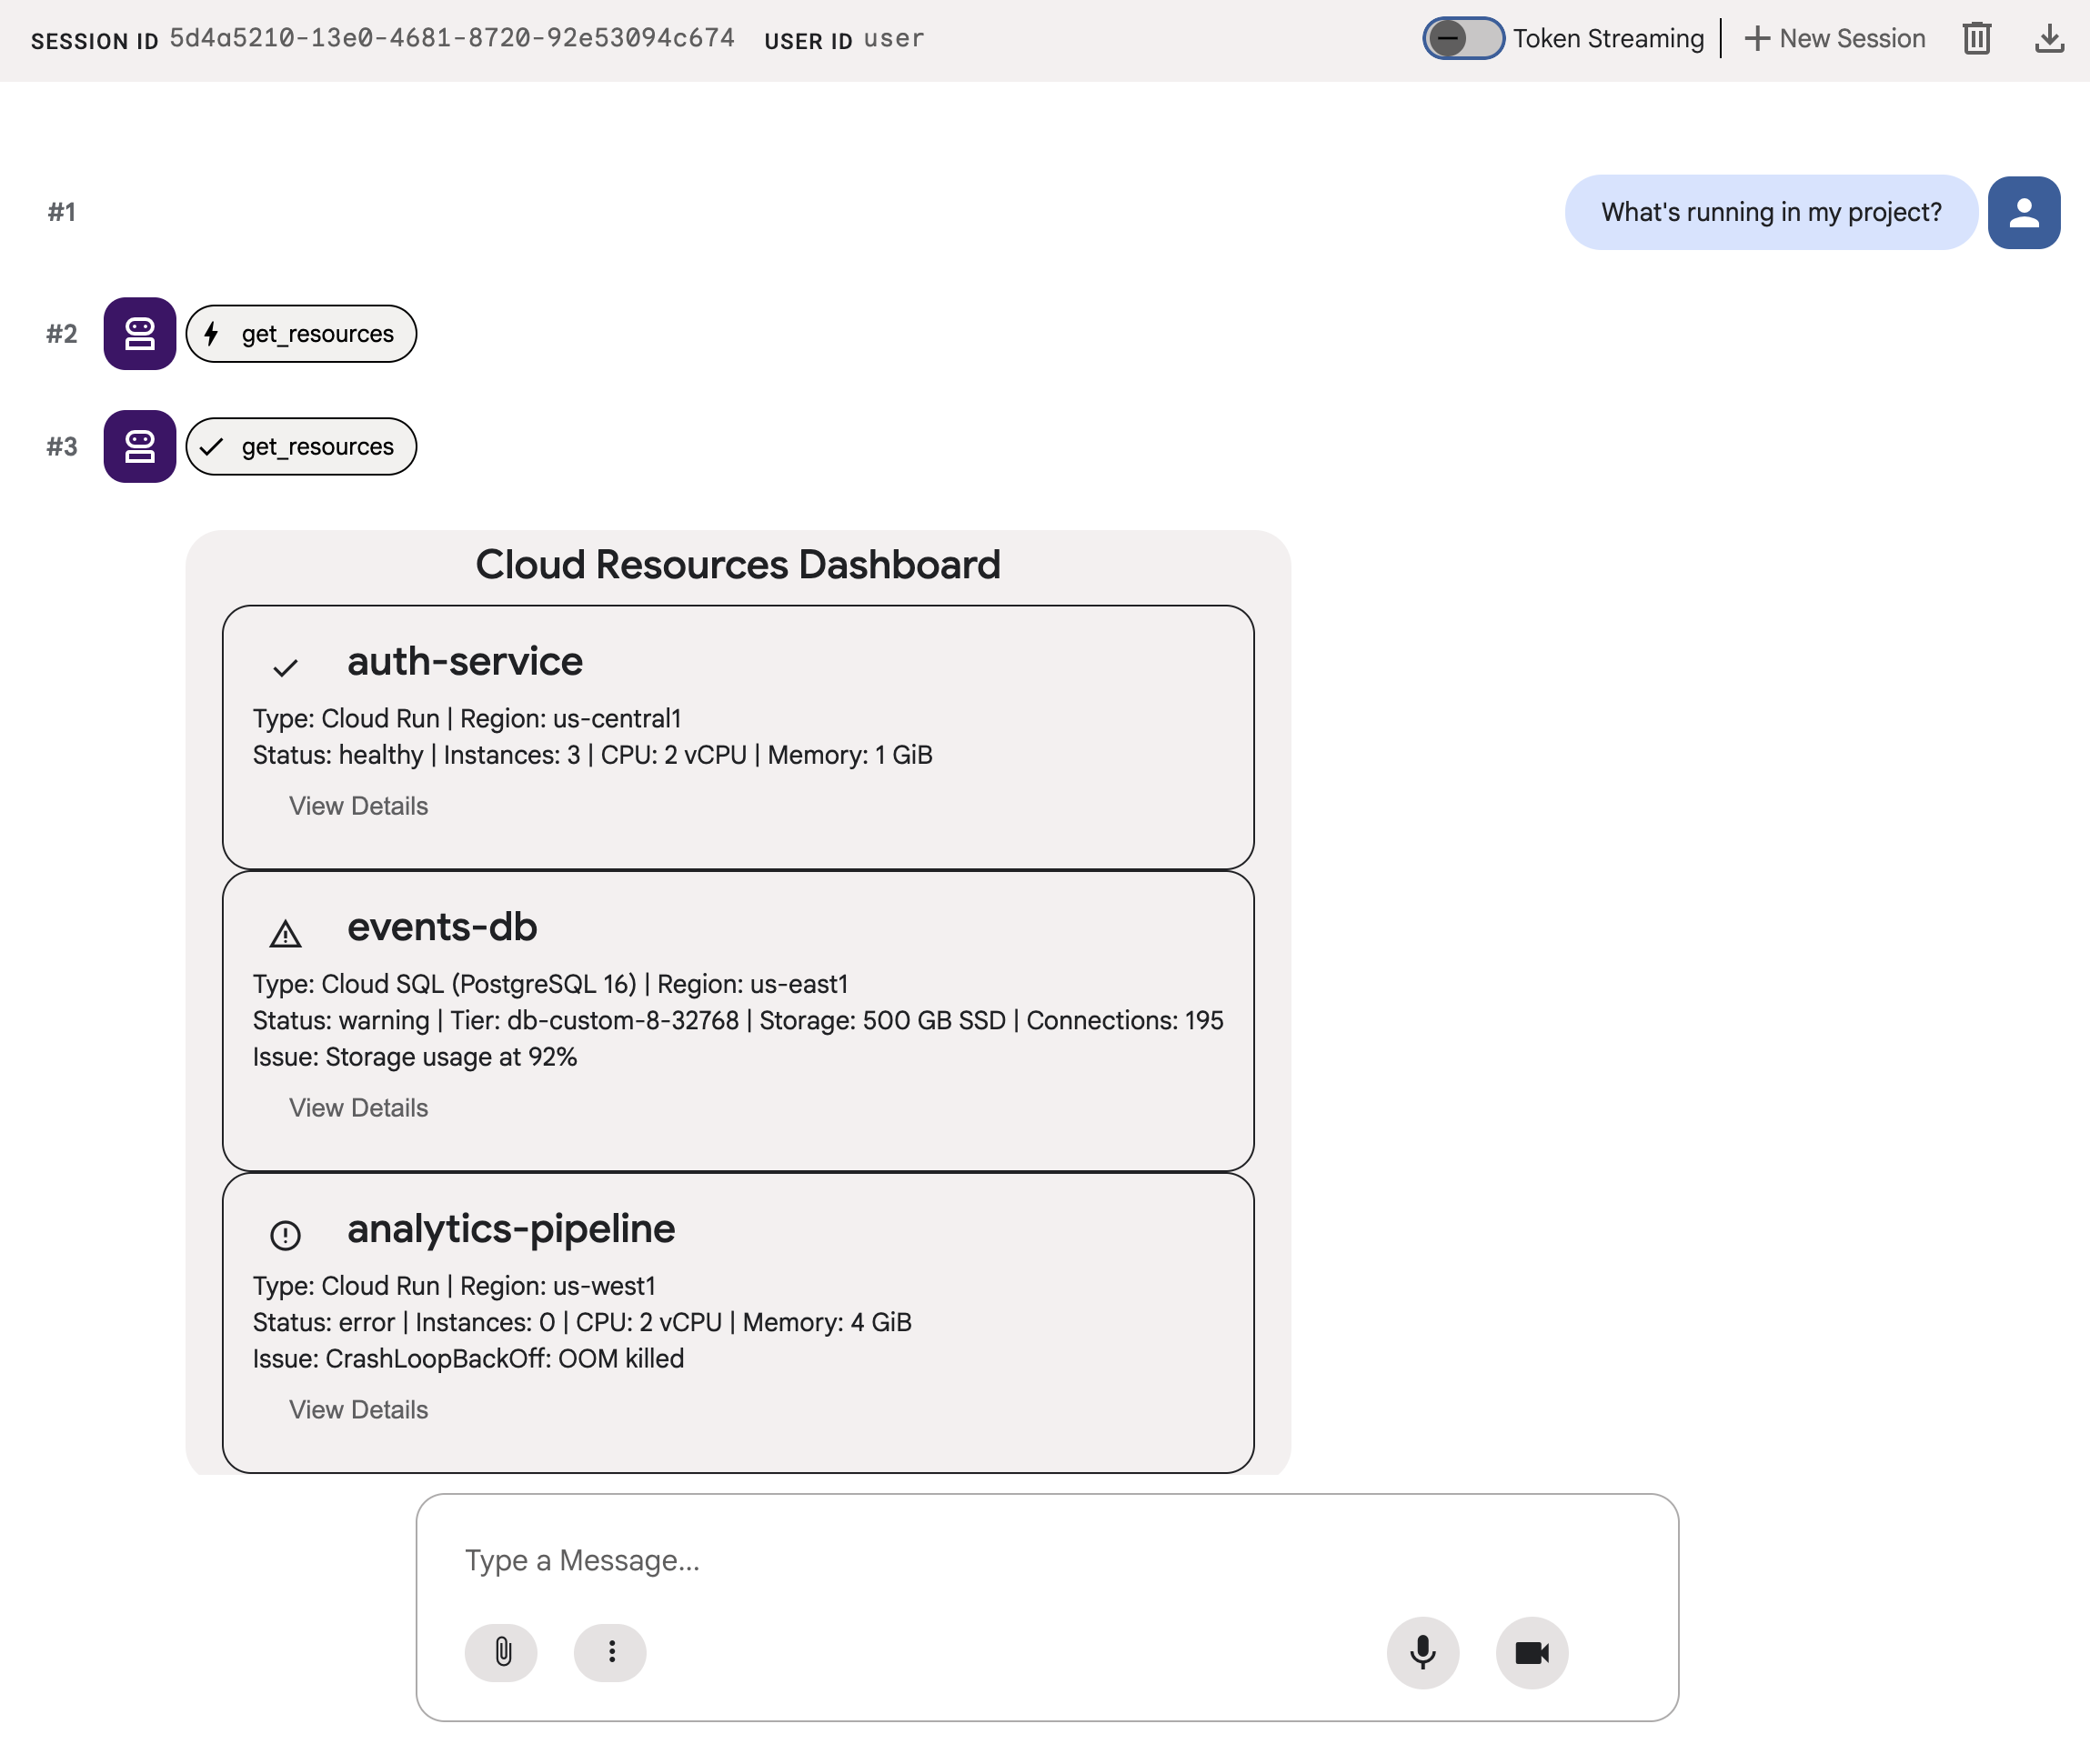
Most AI agents reply with text. In this codelab, you'll use A2UI to let your agent reply with a user interface instead. The agent describes cards, lists, buttons, and forms in JSON, using a catalog of standard components, and the client renders them with its own native widgets, so new layouts don't need new frontend code.
You'll build the agent with Agent Development Kit (ADK).
What you'll build
A mock cloud infrastructure dashboard in three stages:
- A standard agent that returns resource data as plain text
- An A2UI agent that returns the same data as structured A2UI JSON
- A rendered agent that displays the A2UI JSON as interactive UI components in the ADK dev UI
What you'll learn
- How A2UI works: 18 primitives, the messages that build a UI, and the flat component model
- How to use the A2UI SDK to prompt an ADK agent to generate A2UI JSON
- How to render A2UI components in
adk web
What you'll need
- A Google Cloud project with billing enabled
- A web browser such as Chrome
- Python 3.12+ and uv, if you run the code on your own machine instead of Cloud Shell
This codelab is for intermediate developers who have some familiarity with Python and Google Cloud.
This codelab takes approximately 20 minutes to complete.
The resources created in this codelab should cost less than $5.
2. Set up your environment
Create a Google Cloud Project
- In the Google Cloud Console, on the project selector page, select or create a Google Cloud project.
- Make sure that billing is enabled for your Cloud project. Learn how to check if billing is enabled on a project.
Start Cloud Shell Editor
To launch a Cloud Shell session from the Google Cloud console, click Activate Cloud Shell in your Google Cloud console.
This launches a session in the bottom pane of your Google Cloud console.
To launch the editor, click Open Editor on the toolbar of the Cloud Shell window.
Enable APIs
In the Cloud Shell Editor toolbar, click Terminal and New Terminal, then run the following command to enable the required APIs:
gcloud services enable aiplatform.googleapis.com
Install dependencies
In the terminal, run the following commands to create a folder for this codelab, with an a2ui_agent folder inside it for your agent code, and install Agent Development Kit (ADK) and the A2UI SDK:
mkdir -p ~/adk-a2ui/a2ui_agent
cd ~/adk-a2ui
uv init --bare
uv add google-adk a2ui-agent-sdk
uv creates an isolated Python environment for this codelab, so you don't need to activate anything. Prefix Python commands with uv run.
3. Build the agent
Start with a standard ADK agent that returns plain text. This is what most agent apps look like today.
Configure your project settings
In the terminal, run the following command to create a2ui_agent/.env with your project and location, and to have ADK call Gemini through your Google Cloud project. ADK loads this file automatically, so the settings also work in new terminals.
cat > ~/adk-a2ui/a2ui_agent/.env <<EOF
GOOGLE_CLOUD_PROJECT=$(gcloud config get project)
GOOGLE_CLOUD_LOCATION=global
GOOGLE_GENAI_USE_ENTERPRISE=True
EOF
Define tool and mock data
Create a2ui_agent/resources.py with the following contents. This tool returns a list of cloud resources with their status.
RESOURCES = [
    {
        "name": "auth-service",
        "type": "Cloud Run",
        "region": "us-west1",
        "status": "healthy",
        "cpu": "2 vCPU",
        "memory": "1 GiB",
        "instances": 3,
        "url": "https://auth-service-abc123.run.app",
        "last_deployed": "2026-04-18T14:22:00Z",
    },
    {
        "name": "events-db",
        "type": "Cloud SQL",
        "region": "us-east1",
        "status": "warning",
        "tier": "db-custom-8-32768",
        "storage": "500 GB SSD",
        "connections": 195,
        "version": "PostgreSQL 16",
        "issue": "Storage usage at 92%",
    },
    {
        "name": "analytics-pipeline",
        "type": "Cloud Run",
        "region": "us-west1",
        "status": "error",
        "cpu": "2 vCPU",
        "memory": "4 GiB",
        "instances": 0,
        "url": "https://analytics-pipeline-ghi789.run.app",
        "last_deployed": "2026-04-10T16:45:00Z",
        "issue": "CrashLoopBackOff: OOM killed",
    },
]

def get_resources() -> list[dict]:
    """Get all cloud resources in the current project.
    Returns a list of cloud infrastructure resources including their
    name, type, region, status, and type-specific details.
    Status is one of: healthy, warning, error. Resources with
    warning or error status include an 'issue' field describing
    the problem.
    """
    return RESOURCES
Define the agent
Create a2ui_agent/agent.py with the following contents:
from google.adk.agents import Agent
from google.adk.models import Gemini
from google.genai import types
from .resources import get_resources

root_agent = Agent(
    model=Gemini(
        model="gemini-3.8-flash",
        retry_options=types.HttpRetryOptions(attempts=5),
    ),
    name="cloud_dashboard",
    description="A cloud infrastructure assistant that reports on project resources.",
    instruction=(
        "You are a cloud infrastructure assistant. When users ask about their "
        "cloud resources, use the get_resources tool to fetch the current state. "
        "Summarize the results clearly in plain text."
    ),
    tools=[get_resources],
)
4. Test the agent
ADK includes a dev UI that you can use to interact with and send prompts to your agent in a browser for testing.
Start ADK dev UI
In your Cloud Shell Editor terminal, run the following command to start the ADK dev UI:
uv run adk web --port 8080 --allow_origins "*" --reload_agents
You should see a message similar to the following:
+-----------------------------------------------------------------------------+
| ADK Web Server started                                                      |
|                                                                             |
| For local testing, access at http://127.0.0.1:8080.                         |
+-----------------------------------------------------------------------------+
Open ADK dev UI
You can open the ADK dev UI in your browser by Ctrl or Cmd clicking on the local testing URL, or by clicking the Web Preview button and selecting Preview on Port 8080.
Once you are viewing the ADK dev UI, select a2ui_agent from the drop-down menu.
Send sample prompts
Send a sample prompt to the agent:
What's running in my project?
Now try another sample prompt and you'll get more text output:
Does anything need my attention?
Your conversation should look similar to the following:
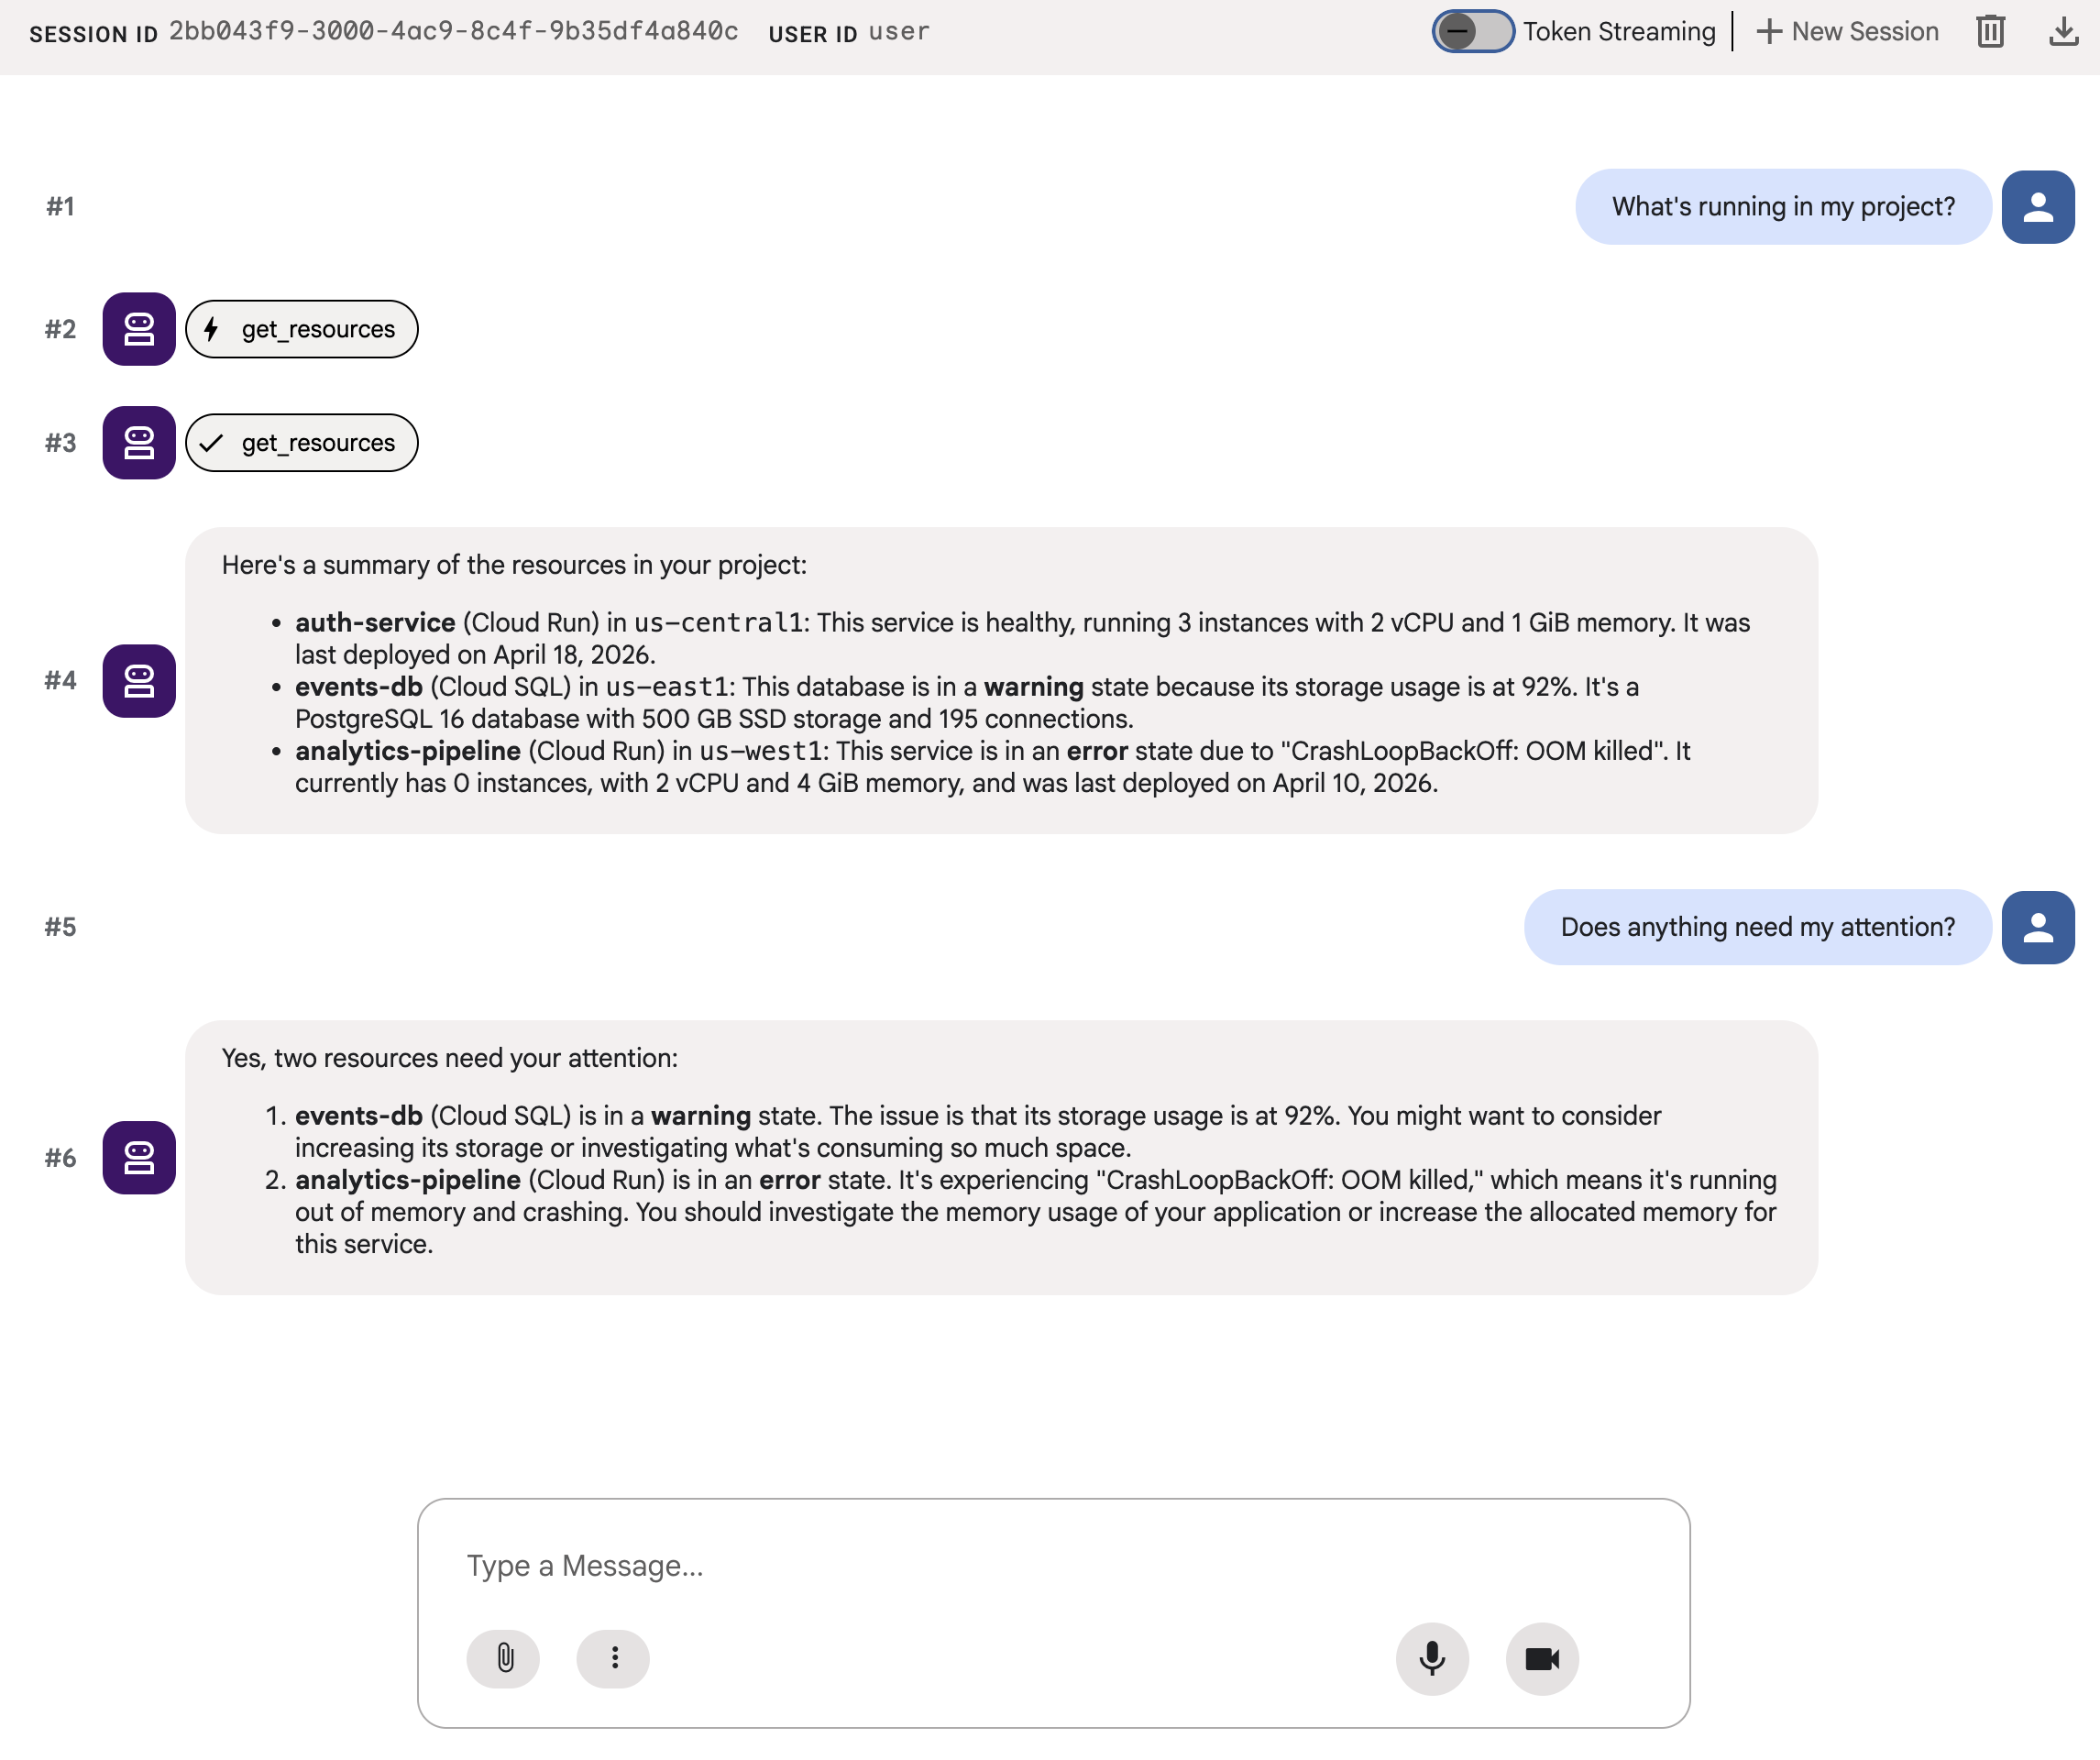
The answer is accurate, but it's a wall of text.
5. Generate A2UI JSON
Next, switch the agent from plain text to A2UI.
The A2UI Python SDK includes a prompt generator that writes system prompts for you. It teaches the LLM the full A2UI component catalog, the correct property names and types, and the JSON structure.
Update the agent
Replace the contents of a2ui_agent/agent.py with the following:
from google.adk.agents import Agent
from google.adk.agents.callback_context import CallbackContext
from google.adk.models import Gemini
from google.adk.models.llm_response import LlmResponse
from google.genai import types
from a2ui.inference_formats.direct_json import DirectJsonFormat
from a2ui.basic_catalog.provider import BasicCatalog
from .resources import get_resources

a2ui_format = DirectJsonFormat(
    version="0.8",
    catalogs=[BasicCatalog.get_config("0.8")],
)

instruction = a2ui_format.prompt_generator.generate(
    role_description=(
        "You are a cloud infrastructure assistant. When users ask about "
        "their cloud resources, use the get_resources tool to fetch the "
        "current state."
    ),
    workflow_description=(
        "Analyze the user's request and return structured UI when appropriate."
    ),
    ui_description=(
        "Use cards for resource summaries, rows and columns for comparisons, "
        "icons for status indicators, and buttons for drill-down actions. "
        "Do NOT use markdown formatting in text values. Use the usageHint "
        "property for heading levels instead. "
        "Respond ONLY with the A2UI JSON array. Do NOT include any text "
        "outside the JSON. Put all explanations into Text components."
    ),
    include_schema=True,
    include_examples=True,
)


def show_raw_json(
    callback_context: CallbackContext,
    llm_response: LlmResponse,
) -> LlmResponse | None:
    """Show the A2UI JSON as text so you can read it, instead of rendering it."""
    if not llm_response.content or not llm_response.content.parts:
        return None
    for part in llm_response.content.parts:
        if part.text:
            part.text = (
                part.text
                .replace("<a2ui-json>", "```json\n")
                .replace("</a2ui-json>", "\n```")
            )
    return llm_response


root_agent = Agent(
    model=Gemini(
        model="gemini-3.8-flash",
        retry_options=types.HttpRetryOptions(attempts=5),
    ),
    name="cloud_dashboard",
    description="A cloud infrastructure assistant that renders rich A2UI interfaces.",
    instruction=instruction,
    tools=[get_resources],
    after_model_callback=show_raw_json,
)
show_raw_json shows the A2UI JSON as text so you can read it. You'll remove it later to see the UI render.
The prompt_generator.generate() method combines your role description with the full A2UI JSON schema and few-shot examples, so the LLM knows exactly how to format its output. You don't need to write the component catalog by hand.
This codelab uses A2UI version 0.8 (version="0.8"), which is the version that the adk web A2UI renderer supports.
6. Test the JSON output
If you still have the ADK dev UI running from earlier, it should automatically reload the changes that you made to your agent.
Select a2ui_agent, start a new session by clicking on +New Session on the top right of the ADK dev UI, then send the same prompt as before:
What's running in my project?
This time, the agent responds with A2UI JSON instead of plain text. You'll see structured messages such as beginRendering and surfaceUpdate (and sometimes dataModelUpdate) in the chat output, in a JSON code block.
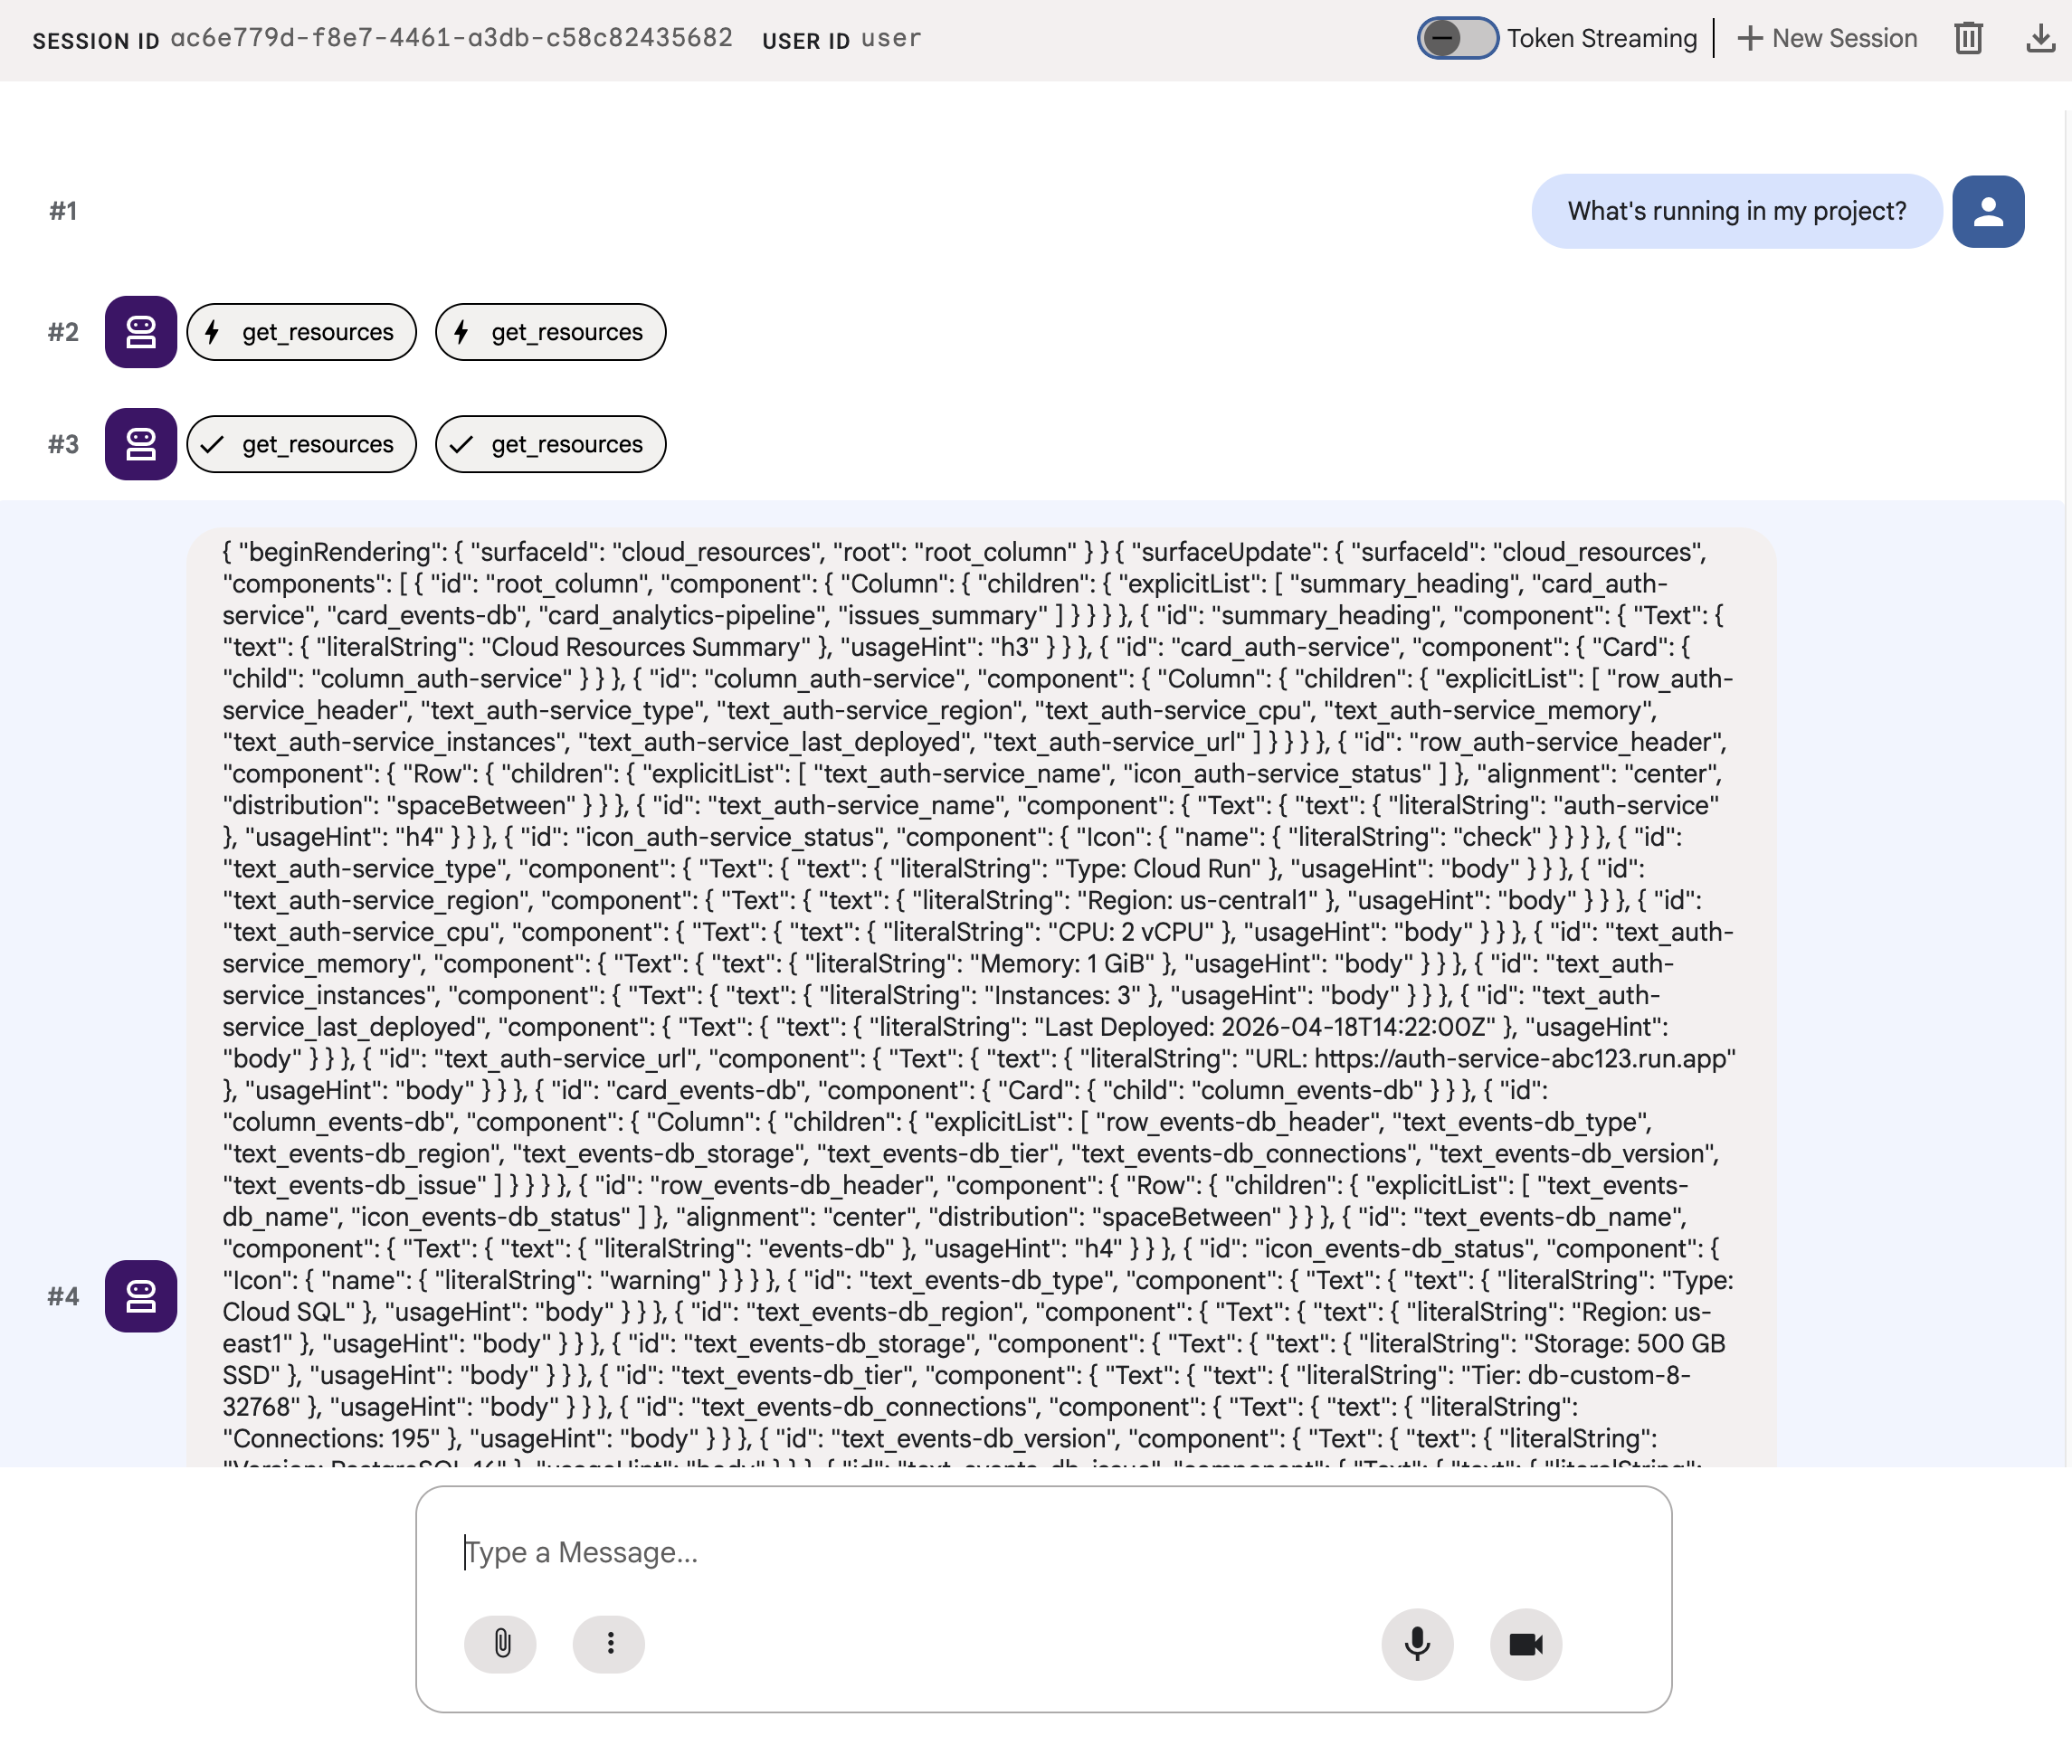
The JSON describes a rich UI with cards, icons, and buttons, but show_raw_json keeps it as text so you can read it. Next, you'll look at how this JSON is structured, and then remove show_raw_json to render it as actual UI components.
7. Understand A2UI
Look at the JSON your agent just generated. A2UI has three types of messages for building a UI. Your agent's output might not use all three every time:
1. beginRendering
Creates a rendering surface and names the root component:
{"beginRendering": {"surfaceId": "default", "root": "main-column"}}
2. surfaceUpdate
Sends the component tree as a flat list with ID references (not nested):
{"surfaceUpdate": {"surfaceId": "default", "components": [
  {"id": "main-column", "component": {"Column": {"children": {"explicitList": ["title", "card1"]}}}},
  {"id": "title", "component": {"Text": {"text": {"literalString": "My Resources"}, "usageHint": "h1"}}},
  {"id": "card1", "component": {"Card": {"child": "card1-content"}}},
  {"id": "card1-content", "component": {"Text": {"text": {"path": "service_name"}}}}
]}}
3. dataModelUpdate
Sends the data separately from the structure:
{"dataModelUpdate": {"surfaceId": "default", "contents": [
  {"key": "service_name", "valueString": "auth-service"},
  {"key": "status", "valueString": "healthy"}
]}}
Components bind to data using {"path": "key"}. You can update data without resending the component tree.
The 18 primitives
Category | Components |
Layout | Card, Column, Row, List, Tabs, Divider, Modal |
Display | Text, Image, Icon, Video, AudioPlayer |
Input | TextField, DateTimeInput, MultipleChoice, CheckBox, Slider |
Action | Button |
The agent builds different layouts, like a browse view, a priority dashboard, or a configuration form, from these same components. See the component reference for details on each one.
8. Render A2UI components
The SDK wraps A2UI in standard adk web recognizes them and renders the components with its built-in A2UI renderer. To see it, remove show_raw_json.
Update the agent
Replace the contents of a2ui_agent/agent.py with the following. The only changes from the previous step are that the show_raw_json function, its after_model_callback parameter, and the two imports it used are gone:
from google.adk.agents import Agent
from google.adk.models import Gemini
from google.genai import types
from a2ui.inference_formats.direct_json import DirectJsonFormat
from a2ui.basic_catalog.provider import BasicCatalog
from .resources import get_resources

a2ui_format = DirectJsonFormat(
    version="0.8",
    catalogs=[BasicCatalog.get_config("0.8")],
)

instruction = a2ui_format.prompt_generator.generate(
    role_description=(
        "You are a cloud infrastructure assistant. When users ask about "
        "their cloud resources, use the get_resources tool to fetch the "
        "current state."
    ),
    workflow_description=(
        "Analyze the user's request and return structured UI when appropriate."
    ),
    ui_description=(
        "Use cards for resource summaries, rows and columns for comparisons, "
        "icons for status indicators, and buttons for drill-down actions. "
        "Do NOT use markdown formatting in text values. Use the usageHint "
        "property for heading levels instead. "
        "Respond ONLY with the A2UI JSON array. Do NOT include any text "
        "outside the JSON. Put all explanations into Text components."
    ),
    include_schema=True,
    include_examples=True,
)

root_agent = Agent(
    model=Gemini(
        model="gemini-3.8-flash",
        retry_options=types.HttpRetryOptions(attempts=5),
    ),
    name="cloud_dashboard",
    description="A cloud infrastructure assistant that renders rich A2UI interfaces.",
    instruction=instruction,
    tools=[get_resources],
)
9. Test the rendered UI
If you still have the ADK dev UI running from earlier, it should automatically reload the changes that you made to your agent.
Refresh the browser tab, select a2ui_agent, then start a new session by clicking on +New Session on the top right of the ADK dev UI and send the same prompt as before:
What's running in my project?
This time, adk web renders the A2UI components as actual UI: cards with status indicators, resource details, and action buttons.
Try a different prompt to see how the agent composes a different UI from the same set of primitives:
Does anything need my attention?
Finally, try another prompt to generate a different UI to deploy a new service:
I need to deploy a new service
All three prompts use the same agent, tool, and components, but each one produces a different UI that fits what you asked.
10. Clean Up
To avoid leaving local servers running, clean up the resources:
- In the terminal running
adk web, press Ctrl+C to stop the agent server.
If you created a project specifically for this codelab, you can delete the entire project:
gcloud projects delete <YOUR_PROJECT_ID>
11. Congratulations
You built an ADK agent that generates rich, interactive UI using A2UI.
What you learned
- A2UI is a protocol with 18 declarative primitives and a few simple messages that build a UI
- The A2UI SDK generates system prompts that teach the LLM the component catalog
- The same agent, tool, and primitives compose different UIs for different intents
- A2UI components can be rendered directly in
adk webduring development
Build a production frontend
In this codelab, you rendered A2UI inside adk web for development and testing.
For production, you would build a frontend using one of the official A2UI renderers:
Platform | Renderer | Install |
Web (React) |
|
|
Web (Lit) |
|
|
Web (Angular) |
|
|
Mobile/Desktop | Flutter GenUI SDK |
Reference docs
What's Next
Explore learning resources to build and deploy enterprise-grade agents with Gemini Enterprise Agent Ready (GEAR).