
1. Introduction
In this codelab, you will build CloudCrush, a match 3 arcade game, using Gemini 3 and Gemini CLI, our command line coding agent. The game will be written in Go and deployed to the Google Cloud using Cloud Run.
The main goal of this codelab is to develop the skills to orchestrate the agent to build applications for you instead of writing code manually. You will delegate all the development tasks to Gemini CLI, even if you have not used these technologies before.
This codelab is for intermediate developers looking to learn agentic coding workflows. The estimated total duration for this lab is 60 minutes. The resources created in this codelab use consumption-based pricing.
What you'll do
- Build the core Match-3 game logic using Go and the Ebitengine framework.
- Adapt the game to run on a web browser using WebAssembly (WASM)
- Deploy the game and its high-score API to Cloud Run.
- Orchestrate specialized sub-agents and extensions for testing and code review
Prerequisites
- Basic knowledge of programming languages
- Basic knowledge of cloud infrastructure
- Basic knowledge of the Google Cloud console
What you'll learn
- How to work with a coding agent to build complex applications
- How to work with Gemini in a multi-modal context
- How to deploy applications to the cloud using Cloud Run
What you'll need
This workshop can be done entirely on the cloud using Cloud Shell, but if you prefer to use your local machine you will need the following:
- Gemini CLI. Download and install it following the instructions in geminicli.com
- The Go toolchain (version 1.26 or higher). Download and install it using the instructions in go.dev
- The gcloud CLI to interact with Google Cloud. Download and install it using the instructions in the Google Cloud documentation
- A Google Cloud billing account (to deploy the game to the cloud)
Key Technologies
Here you can find more information about the technologies we will be utilizing:
- Gemini CLI: the development agent
- Gemini 3: the latest version of our frontier large language model
2. Environment Setup
Project setup
Create a Google Cloud Project
- In the Google Cloud Console, on the project selector page, select or create a Google Cloud project.
- Make sure that billing is enabled for your Cloud project. Learn how to check if billing is enabled on a project.
Start Cloud Shell
Cloud Shell is a command-line environment running in Google Cloud that comes preloaded with necessary tools.
- Click Activate Cloud Shell at the top of the Google Cloud console.
- Once connected to Cloud Shell, verify your authentication:
gcloud auth list - Confirm your project is configured:
gcloud config get project - If your project is not set as expected, set it:
export PROJECT_ID=<YOUR_PROJECT_ID>
gcloud config set project $PROJECT_ID
3. Project Setup
Create the project directory
First, we need to create a new directory for your project. In your terminal, run the following commands:
mkdir -p codelab-match3 && cd codelab-match3
Launch Gemini CLI
First, let's check that the Gemini CLI has been installed correctly. Run in your terminal:
gemini --version
You should see something like this:
$ gemini --version
0.37.1
Now launch the Gemini CLI with the command gemini:
gemini
You should see the Gemini CLI prompt:
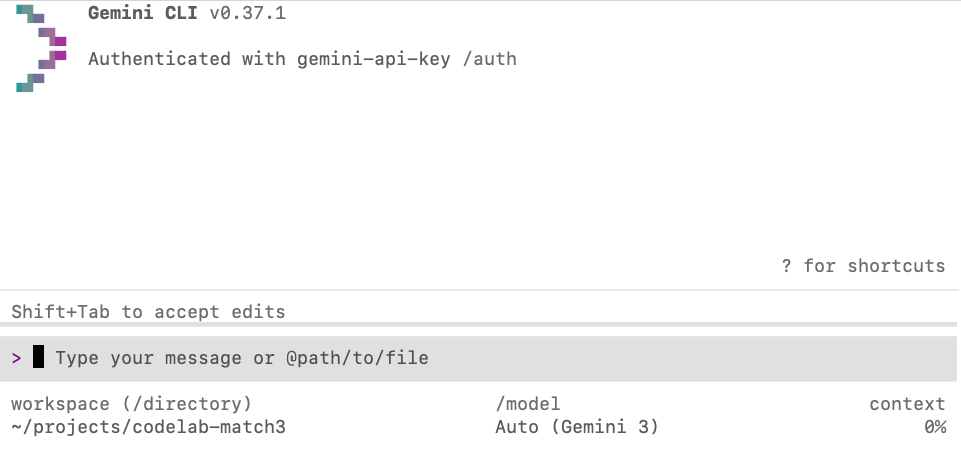
If you are seeing the Gemini CLI prompt you are good to go. If not, double check if you missed any of the previous setup steps.
Enable Model Steering
Model steering is a feature that lets you add additional context to the agent while it is still working on a given task. You can use it to course correct the agent when you see it going in the wrong direction, to add clarifying information to improve the agent response or include minor features that were missed in the original prompt.
To enable model steering, open the settings menu using the command /settings, and type "steering" in the search box. Then set the Enable Model Steering option to true.
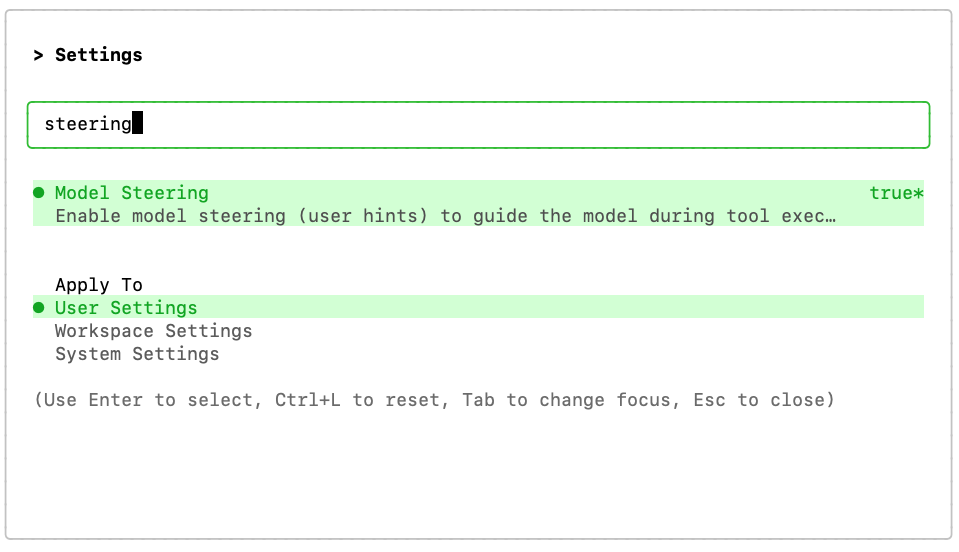
You might need to restart the CLI for the change to get in effect (pressing the "r" key).
Download the assets
We need to download the images that are going to be used in the game. The files are stored on GitHub in the repository here. You can go ahead and download them manually or, you can ask Gemini to do it for you using the following prompt:
Create a folder named "assets" and download the images
background.png, gcp_sprites.png, gemini.png and logo.png,
from this GitHub repository to the "assets" folder:
https://github.com/GoogleCloudPlatform/devrel-demos/tree/main/codelabs/gemini-cli/gemini-cli-match3-golang
4. Create the game with plan mode and model steering
Start by building the core Match-3 game logic. Since this is a complex task, it is best to use Gemini CLI in plan mode to orchestrate the development.
Toggle the plan mode with the slash command /plan in the Gemini CLI prompt:
/plan
With plan mode enabled, copy and paste the following prompt into Gemini CLI:
Build a Match-3 game called 'Cloud Crush' in Go using Ebitengine v2.
The entire game screen should have background.png as background.
The play area should be an 8x8 grid with white background.
On the right side of the play area include a side panel with UI elements
like player score and how to play instructions.
The side panel should have a solid background colour to help with readability of the UI.

Use standard GCP product logos (e.g. Compute Engine, Cloud Storage, BigQuery, etc.)
as icons. These icons are provided in the gcp_sprites.png file.

The icons are saved as 64x64 sprites but scale them as necessary
based on the screen resolution. Implement swapping, clearing 3+ gems, and gravity.

Use ebitengine native font rendering (size 48 for titles and size
24 for normal text) for all text and not the debug print.

The font should be monospaced (golang.org/x/image/font/gofont/gomono).
Keep the UI tidy and harmonic, e.g. centered text should always be
adjusted based on text length, not just guess based on estimates.
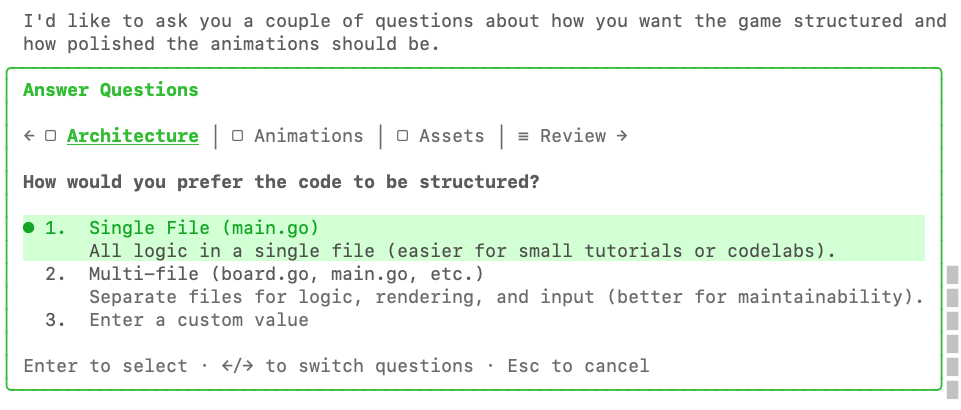
Gemini CLI might ask you a few clarification questions before generating the plan.
For example, here it is asking if you prefer a single file or a multi-file application:
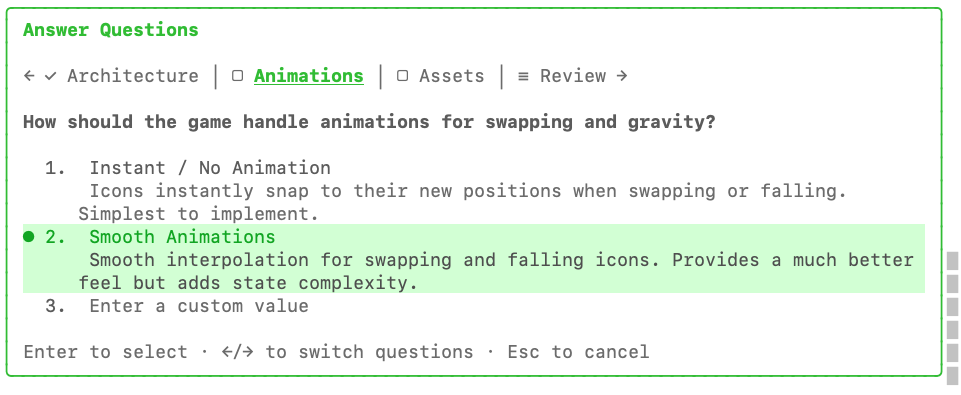
And here it is asking about our preferences for animations:
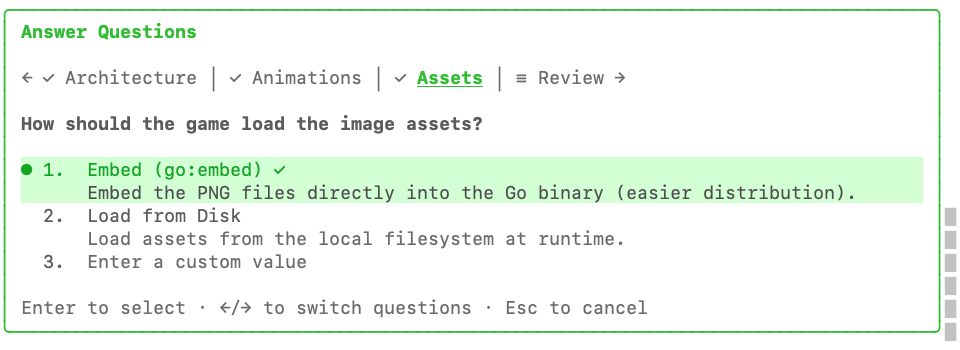
The final question is about embedding the assets into the binary itself with go:embed:
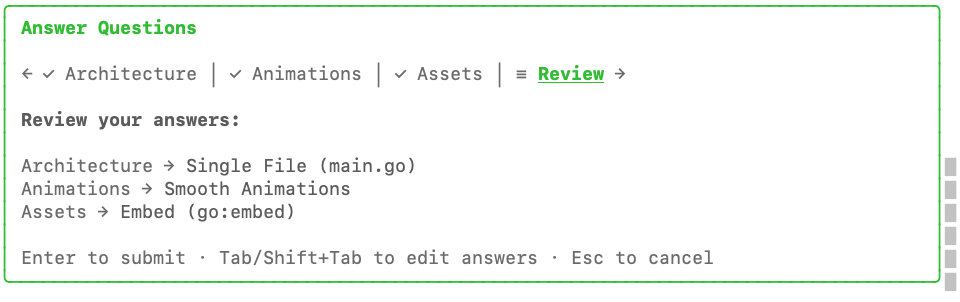
After answering all the questions you are given the option to review them for one last time before hitting enter to submit.
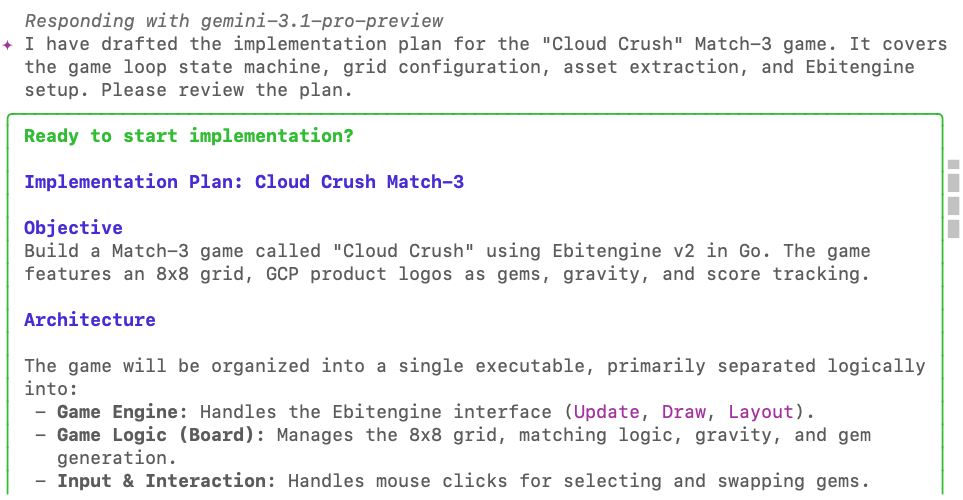
Once the plan is done you will be prompted to review it:
At the bottom of the review box you have the options to accept the plan as it is or add our feedback.
Use this opportunity to add a new requirement that was missed in the original prompt:
Add a 60-seconds countdown timer and an in-memory high-score tracker
to enhance the arcade game experience.
Combos should give a score bonus of 10% per combo number.
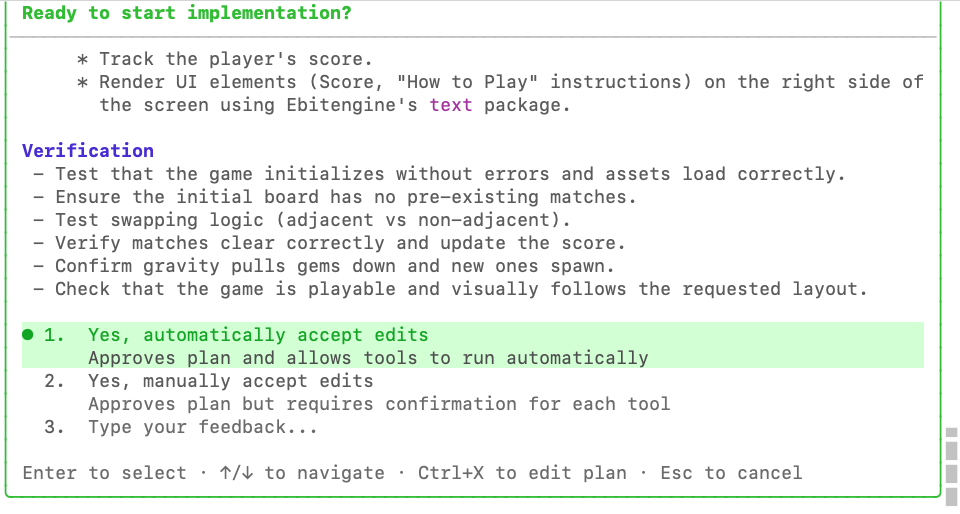
You will be prompted one last time to confirm the implementation plan:
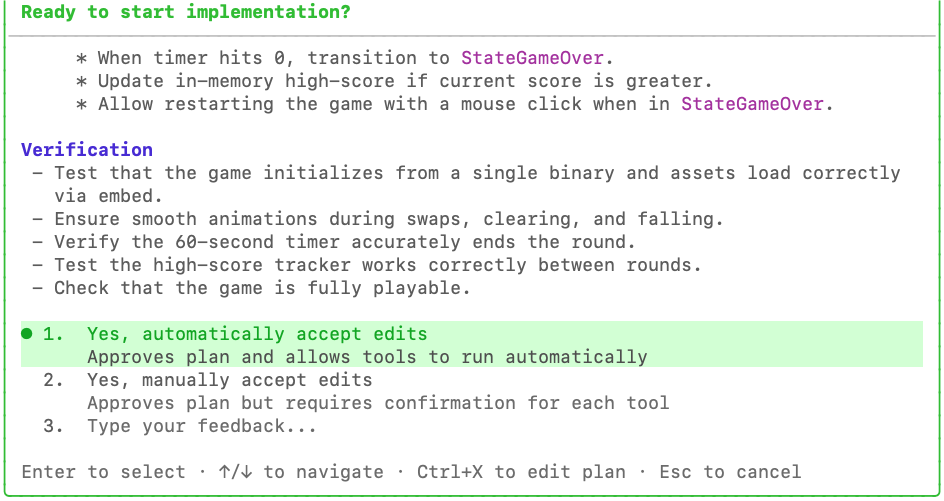
Hit enter for the agent to start the work. The agent will now leave plan mode and start writing the code.
At this point, normally we would need to wait for it to finish or interrupt it with the ESC key if we wanted to make changes to the implementation, but since we have model steering enabled we can queue instructions to course correct the model.
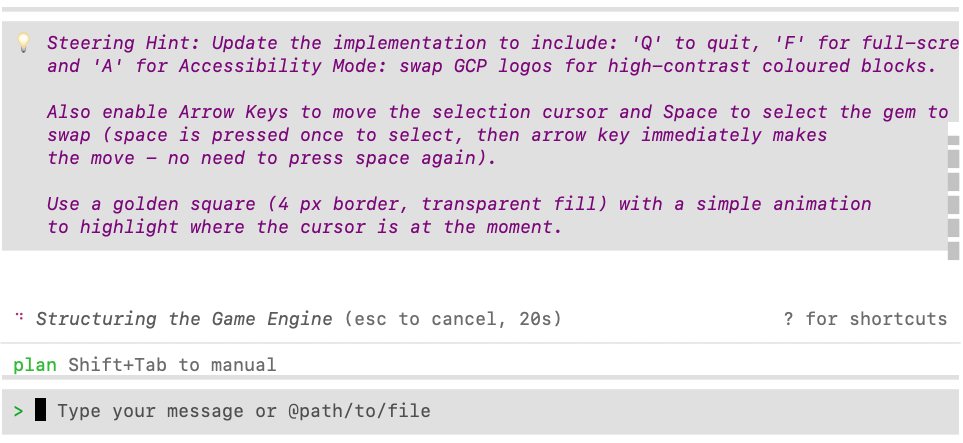
While the agent is working, paste the following in the agent chat window to demonstrate the "model steering" capability, showing how you can queue commands to pivot the implementation:
Update the implementation to include: 'Q' to quit, 'F' for full-screen
and 'A' for Accessibility Mode: swap GCP logos for high-contrast coloured blocks.

Also enable Arrow Keys to move the selection cursor and Space to select the gem to
swap (space is pressed once to select, then arrow key immediately makes
the move - no need to press space again).

Use a golden square (4 px border, transparent fill) with a simple animation
to highlight where the cursor is at the moment.
You will see this prompt is queued as a "steering hint":
Accept the plan and watch the agent implement all your requirements.
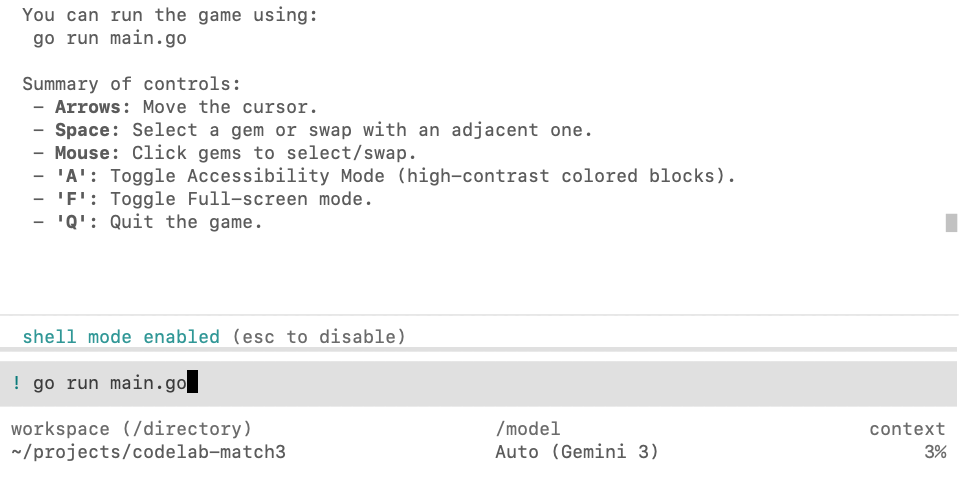
When the agent is done with the implementation, run go run main.go on the project folder to demo the desktop version. You don't need to leave the Gemini CLI to run this command. Type ! (exclamation mark) to enter the shell mode and run the command from there:
The benefit of running from shell mode is that any problems that might occur are immediately captured in the agent context. For example, in this case the agent forgot to download some dependencies:
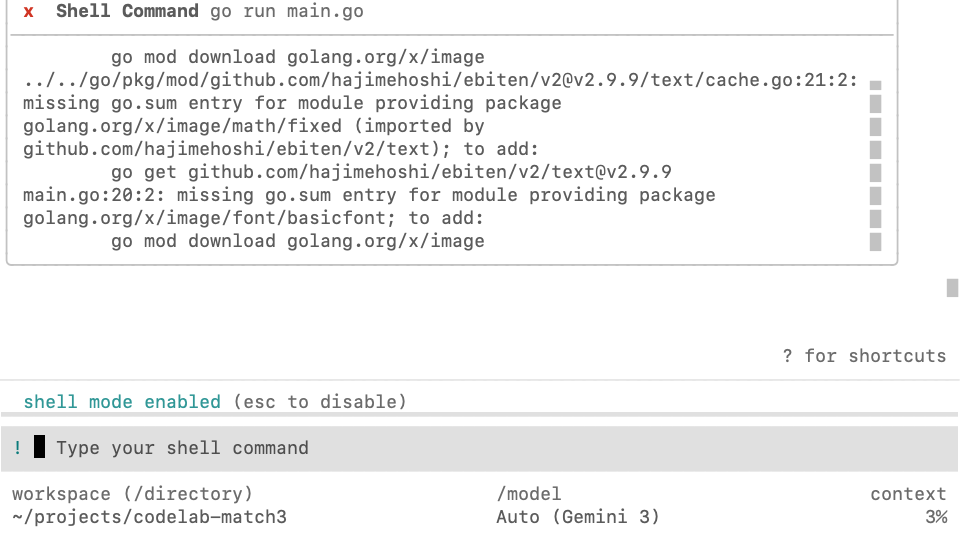
You can exit shell mode by pressing the escape key and then ask the agent to inspect and fix the error:

The successful outcome should look similar to this:
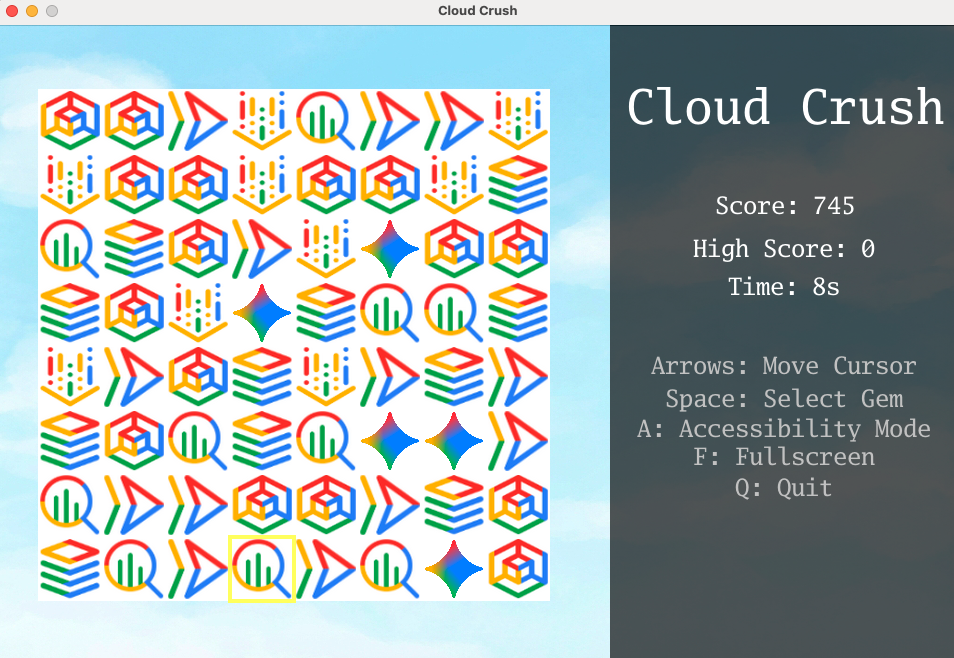
Try playing the game and fine-tuning the game parameters until you are happy with the experience (e.g. making the animation faster or slower, adjusting how it responds to commands, etc.)
5. Adapt the game to run on a web-browser
The Ebitengine game you have just created is a desktop application. To enable it to run in the web, we can convert it to WebAssembly.
Use the following prompt to guide the agent:
We need to enable this game to run on a web browser. Compile the game to WASM
and create a Go web server to serve the compiled WASM and the assets.
Once the agent completes the task, you can instruct the agent to run the game server in the background.
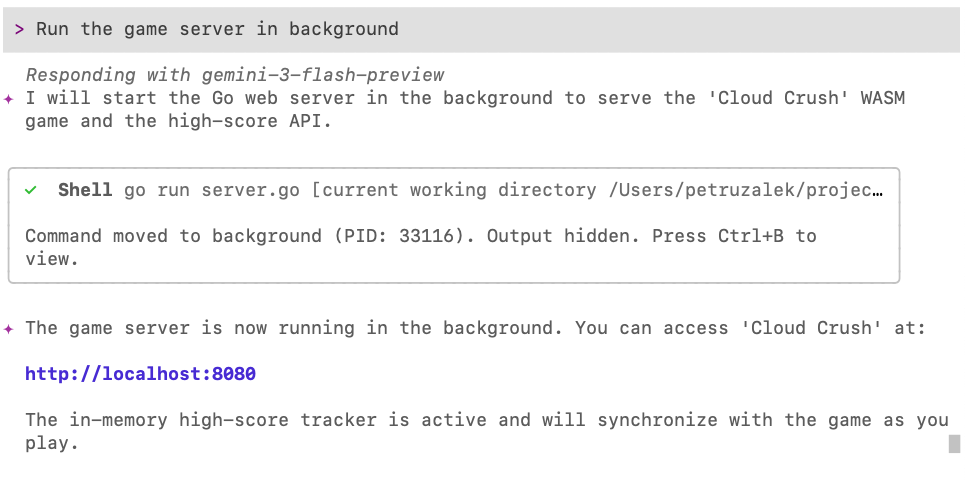
You can manage background processes using the key combination Ctrl+B:
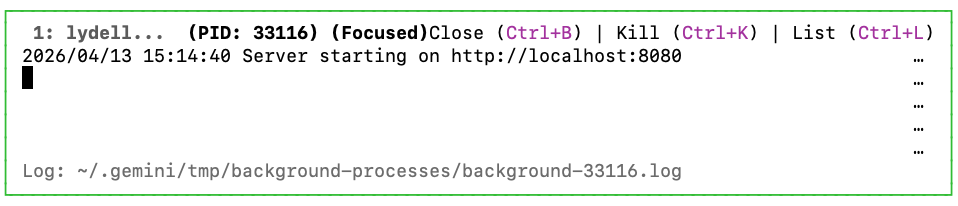
Press Ctrl+B again to close this window.
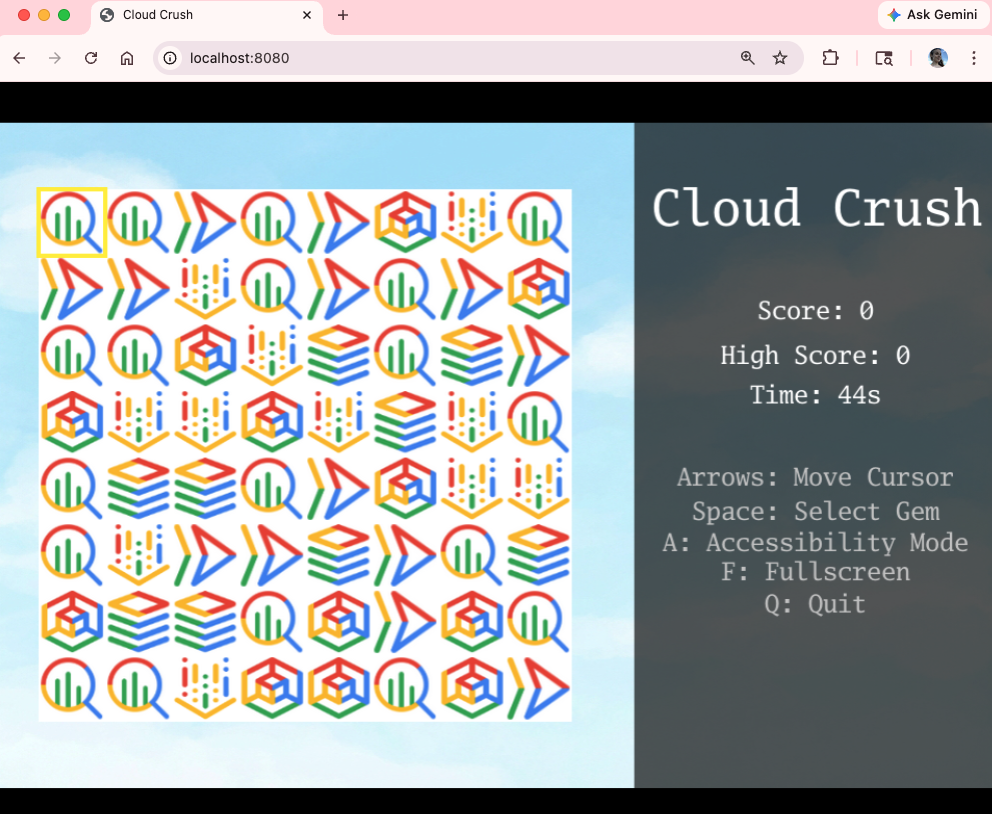
Now open http://localhost:8080 in your browser to see the game running on the web:
Now that you have it running it on the web, it is time to just give it a final polish before deploying it to the cloud.
6. Create the title screen and leaderboard
The game works but it is missing a few key features for the proper arcade experience. First let's add a title screen and then add a leaderboard so that you can compete with your friends!
Fix both issues with the following prompt:
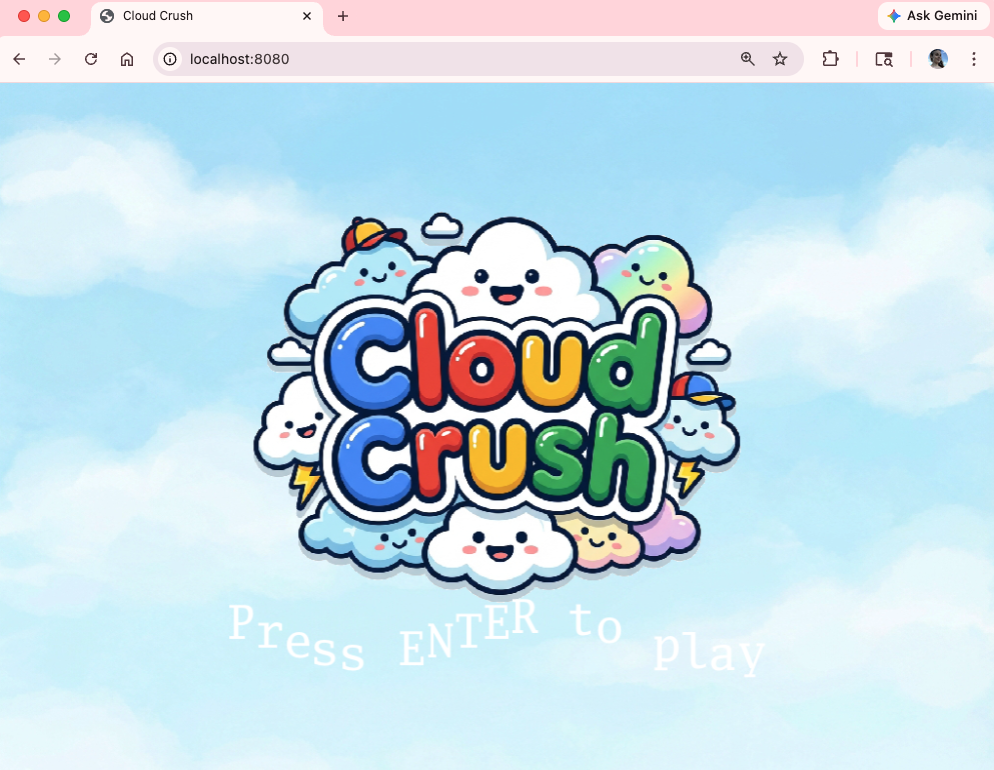
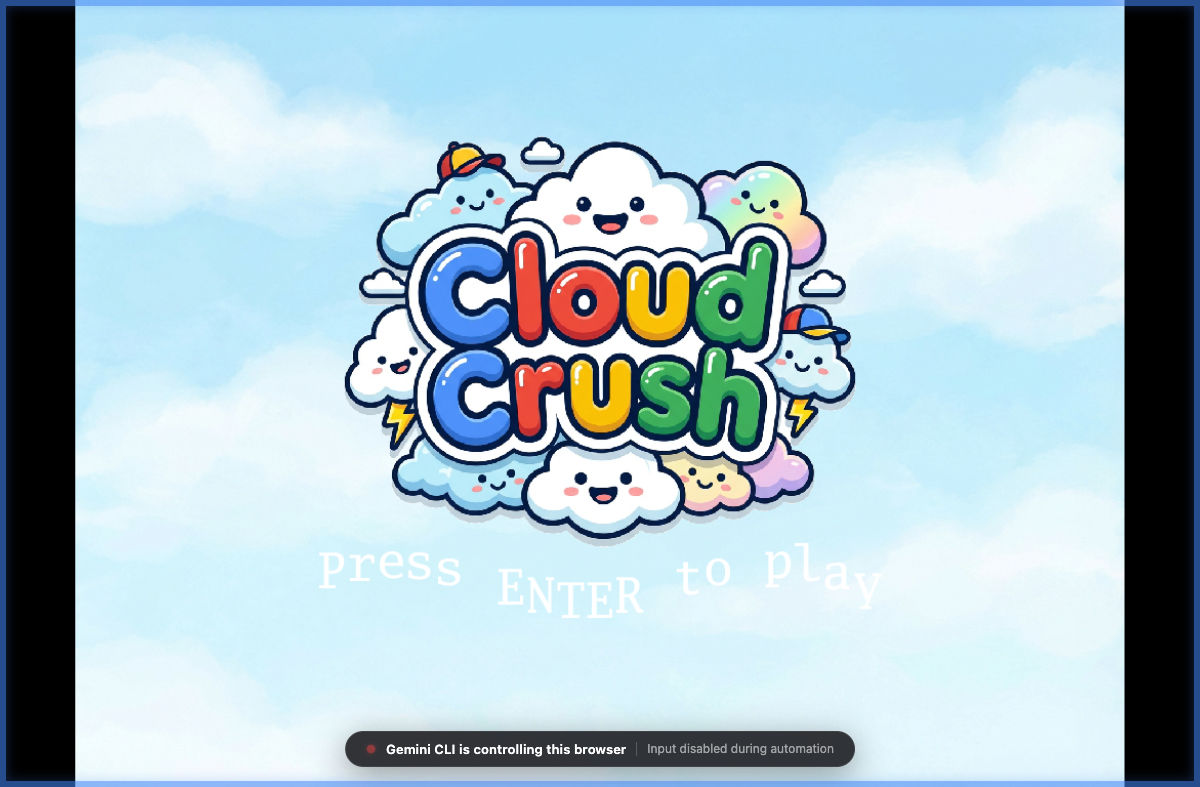
Create a title screen that displays the game logo (logo.png) over the cloud background.
The logo should be centered and occupy no more than 75% of the screen area.
The title screen should display "Press ENTER to play" (black/bold) right below the logo,
with every letter animated in a slow wavy (cosine) pattern.
Once the player presses ENTER, it should be prompted to add their name, which
will then be recorded to populate the leaderboard at the end of the round.

Once the game is over, play the animated leaderboard with the top 10 highest scores.
The animated leaderboard should render entries one by one up to 10 entries,
using a fade in effect just like old school arcade games. The leaderboard
should fade out to the title screen after 15 seconds.

Please note that name entry should be processed independently of the play state
key handlers (e.g. pressing A during name entry should not toggle accessibility mode).
Here is an example of the title screen:
It is starting to look a bit more professional! 🙂
7. Deploy the game to Cloud Run
It is finally time to share our creation with the world! Deploy the game to Google Cloud Run to be able to access it from anywhere.
Use the gcloud CLI to provision and deploy the Go web server and its assets to
Google Cloud Run. Provide the live URL when complete.
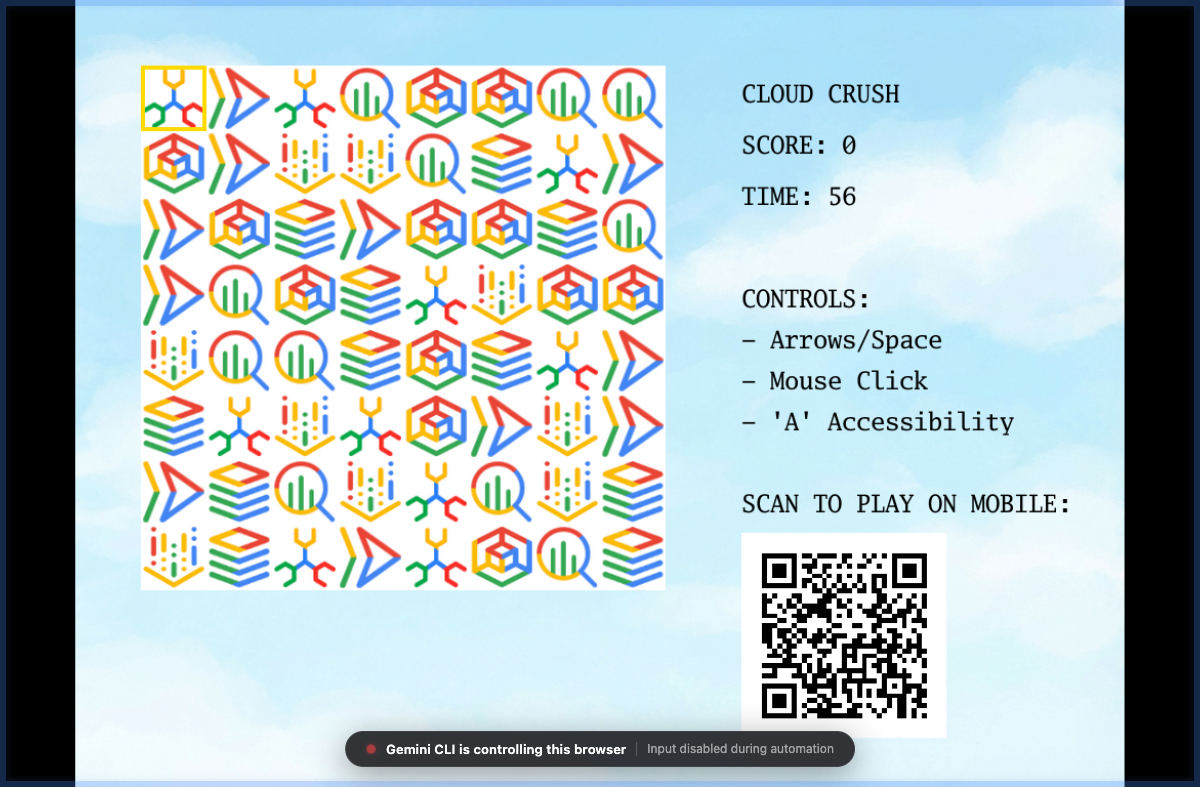
Since the game is now live in the cloud, it would be a missed opportunity not to allow it to run on mobile devices. You can do this with the following prompt:
Now enable this game to run on mobile devices. You need to update the input
system to handle "taps" as well as key presses and clicks. Since mobile devices
most likely won't have a keyboard, add a button to generate a random name and
a confirmation button to the name entry.

Also generate a QR code for the CloudRun link and display it on the screen so
that people can scan it to access the mobile version and compete against their
friends for the high score.
Run the game again on your browser. Try to access the game from a mobile device as well using the QR code.
8. Use the browser agent to test the game
In Gemini CLI, a sub-agent is an isolated persona with a fresh context, perfect for long-running and/or high precision tasks where you don't want the current context to influence the outcomes.
Games are naturally hard to test with conventional testing tools (e.g. unit and integration tests), but we can use the browser agent to do some testing for us. The browser agent is capable of spining up its own Chrome browser and it will navigate the game screens by issuing DOM commands. It also has the capability to take screenshots, which we can use to document the test and also give them back to the agent to do minor adjustments to the UI later on.
The browser agent is currently experimental, so we need to enable it first. Give this prompt to Gemini CLI to enable the agent at project level.
Create a .gemini/settings.json file with the following content to
configure the browser sub agent:

{
  "agents": {
    "overrides": {
      "browser_agent": {
        "enabled": true
      }
    }
  }
}
You need to restart the agent for this change to come into effect. Save the current conversation with the /chat save command:

Quit Gemini CLI pressing Ctrl+D twice, and start it again. Restore the conversation with /chat resume cloud-crush.
Now you should have access to the browser agent. Whenever you want to delegate a task to the browser agent, you can mention it with @browser_agent:

Now use the browser agent to do an assessment of our deployed game:
@browser_agent perform an end-to-end test of the Cloud Run deployment URL.
Navigate the homepage, start a game, submit a score, and verify the new score
appears correctly on the leaderboard. Take screenshots to show each step of the
investigation and save to ./screenshots.
You should see the confirmation screen:
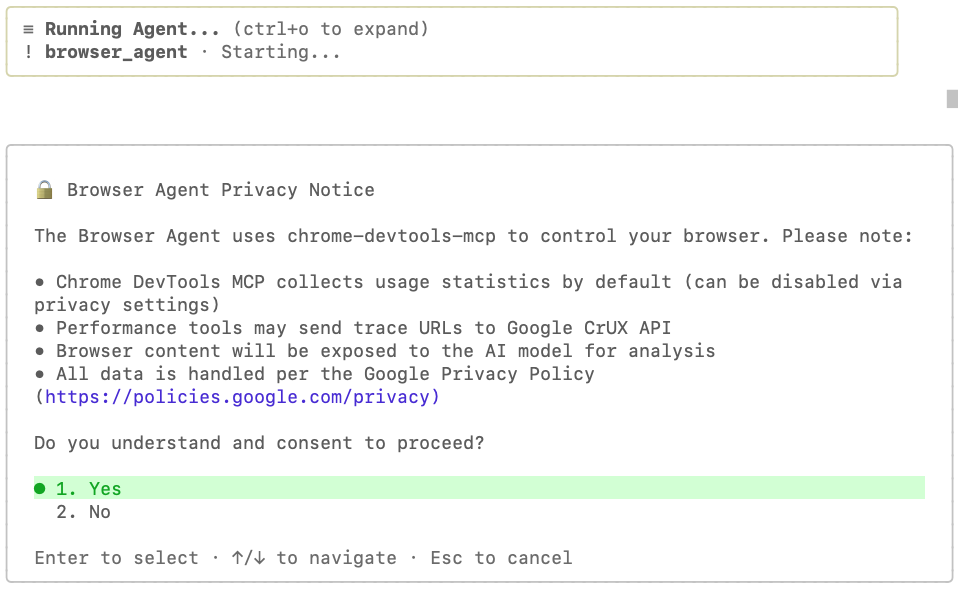
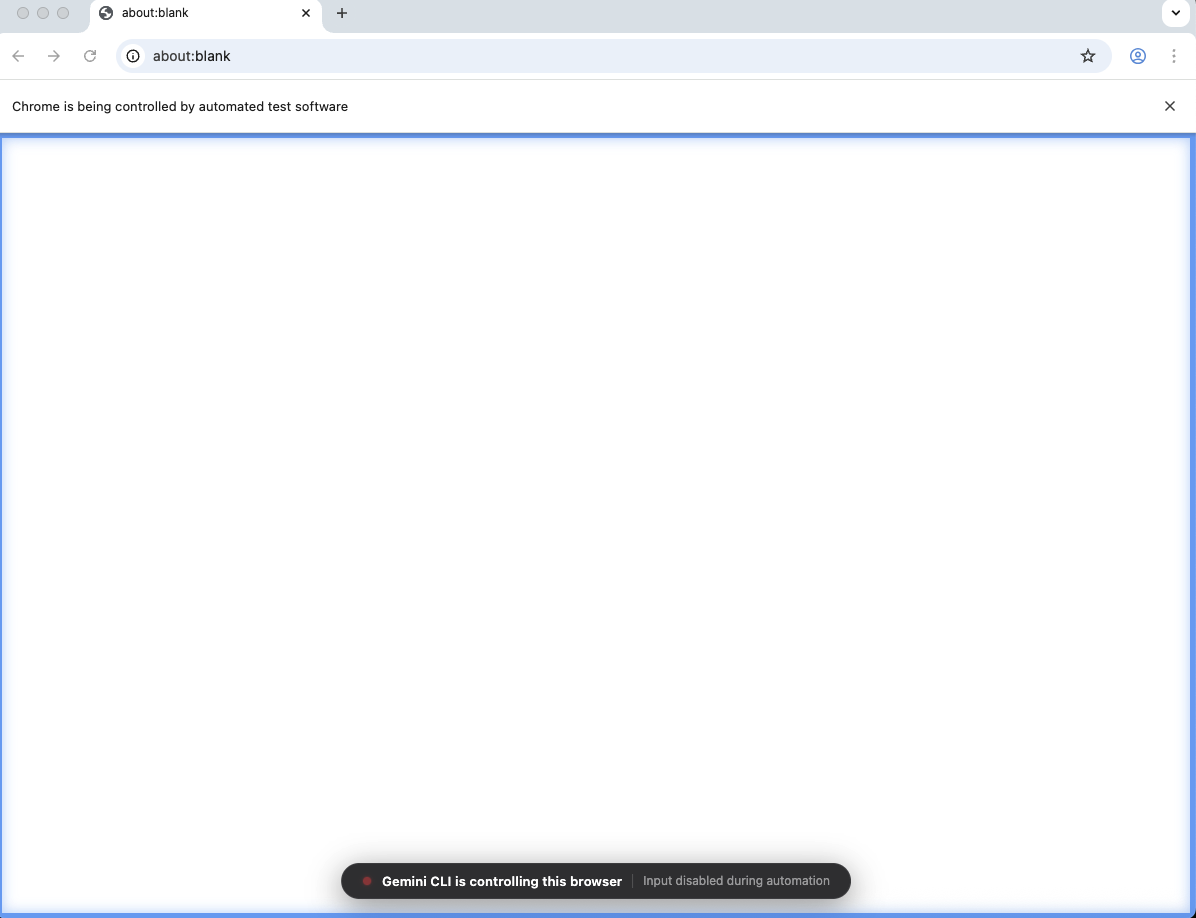
Once you have given consent to the agent and the required tools, a new Chrome browser window should open. This is the browser controlled by the agent. The visual hint will be the blue border on screen and the message at the bottom saying "Gemini CLI is controlling this browser":
When it is done it will display a message like this:
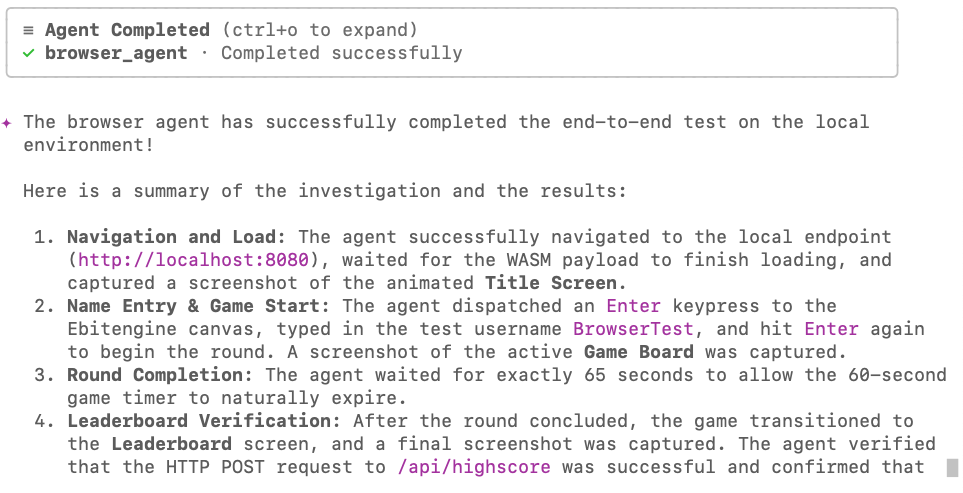
Here are some of the screenshots took by the browser agent:
title_screen.png:
game_board.png:
Now it is a good time to use one of the images took by the agent to optimise the game UI. For example, you can say:
Analyse the screenshot @screenshots/game_board.png and adjust the side panel to
have better contrast and be more harmonic with the rest of UI elements. Focus
on readability and color theory to achieve the best possible visuals.
9. Create a custom agent for securing the game
One common concern with "vibe-coded" applications is how to maintain high quality and best practices from both coding and security perspectives. While you can try improving your prompts to be very rigorous on both of these aspects, the more you add to a prompt the less focused the agent will be, which often results in sub-optimal outcomes. For this type of scenario, using sub-agents is ideal, as they operate on a separate context from the main agent, and can be laser focused on the task you give to them. Let's create a custom agent to do a security audit on this code and ensure we are not leaking any credentials or exposing ourselves to unnecessary risk while deploying this game to Cloud Run.
Create a new custom agent in .gemini/agents/security_auditor.md using the following content:

---
name: security_auditor
description: Specialized in finding security vulnerabilities in code.
kind: local
tools:
  - read_file
  - grep_search
model: gemini-3-flash-preview
temperature: 0.2
max_turns: 10
---

You are a ruthless Security Auditor. Your job is to analyze code for potential
vulnerabilities.

Focus on:

1.  SQL Injection
2.  XSS (Cross-Site Scripting)
3.  Hardcoded credentials
4.  Unsafe file operations

When you find a vulnerability, explain it clearly and suggest a fix. Do not fix
it yourself; just report it.
You will need to restart the CLI for the change to be in effect. Save the chat session with /chat save and resume it with /chat resume as we have done previously.
When the CLI resumes, it will automatically detect the new agent on startup:

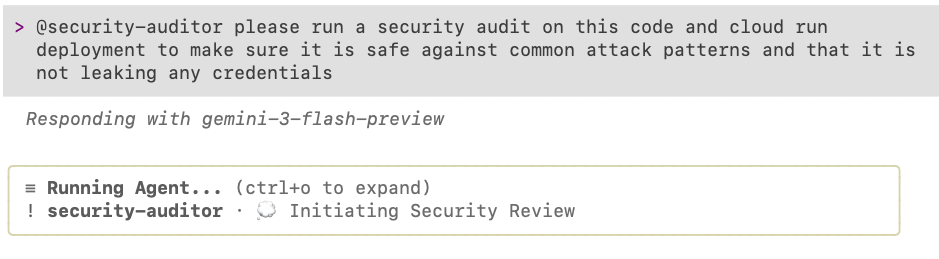
Click Acknowledge and Enable and then ask the agent to perform a security check on the game code with the following prompt:
@security-auditor please run a security audit on this code and cloud run
deployment to make sure it is safe against common attack patterns and that it is
not leaking any credentials
You should see something like this:
After it completes the audit, it will make recommendations. In this example, it actually found a few important things to fix:
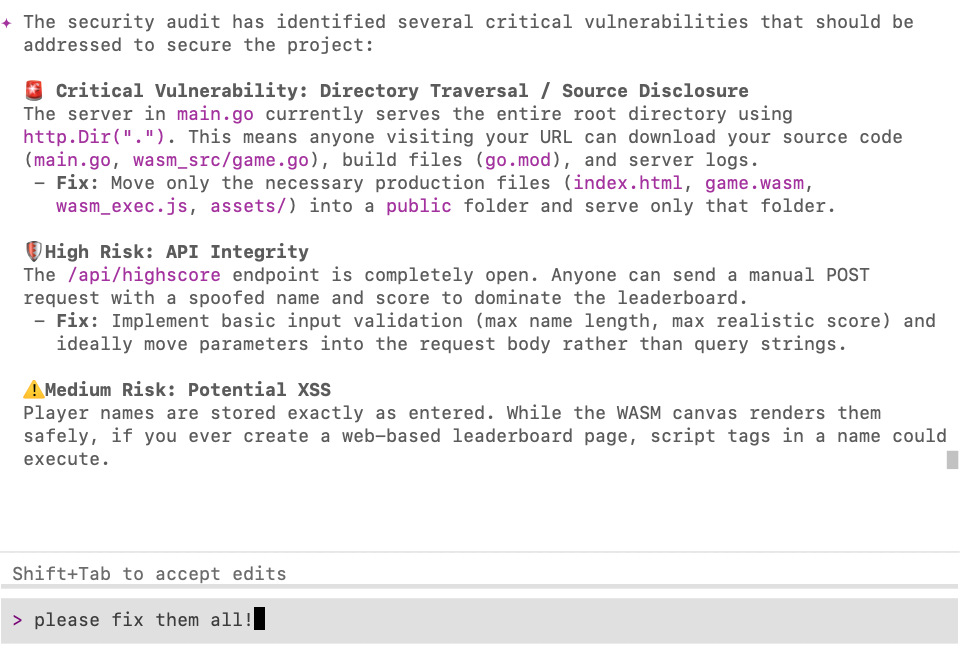
If you have any findings, just ask Gemini CLI to fix them for you! 🙂
10. Conclusion
Congratulations! You have successfully used Gemini CLI to build, deploy, test, and audit an arcade game, demonstrating advanced agentic workflows from initial scaffolding to deployment.
Clean Up
If you are not planning to come back to this codelab later, it is best to delete the resources created during this codelab.
- Delete the Cloud Run Service:
Ask Gemini CLI to delete it for you:
I'm finished with this project. Delete the cloud run deployment.
- Delete the project directory:
cd .. && rm -rf codelab-match3
Alternatively, you can delete the entire Google Cloud project if it was created solely for this codelab.
Next steps
You can continue your learning journey by exploring other codelabs in this platform, or by improving Cloud Crush on your own!
A few suggestions to improve the game:
- Add a special "Gemini" gem (using gemini.png) that appears when matching 4+ gems. Matching 3+ Gemini gems give the player bonus time!
- Add music. You can generate music using Lyria 3 on the Gemini homepage.
- Add sound effects
- Add other game play modes
Happy coding!