
1. Introduction
Welcome to the "Fabric of Unified Intelligence" codelab! This codelab is part of the Google Cloud Next ‘26 keynote demos.
In this lab, you will explore how to use Gemini Enterprise to orchestrate multiple agents deployed on Cloud Run, share context for seamless handoffs and streamlined workflows.
Imagine you are a product manager at "Organic Living," a fictional modern furniture brand. You want to launch a new product line, but standard market research and design processes take too long. In this lab, you will deploy a team of AI agents to automate and accelerate this process:
- Product Strategy Agent: Refines product concepts based on market data.
- Market Research Agent: Analyzes trends and customer feedback.
- Orchestrator Agent: Coordinates the workflow between other agents.
- Dev Agent: Translates plans into action by creating tickets and scaffolding code.
By the end of this lab, you will have a working multi-agent system deployed on Cloud Run, and orchestrated using Gemini Enterprise demonstrating the power of unified intelligence.
Prerequisites
- Basic familiarity with the Google Cloud Console and
gcloudCLI.
What you'll do
- Deploy a Multi-agent system on Cloud Run.
- Register your agents with Gemini Enterprise.
- Through Gemini Enterprise you will execute workflows to:
- Analyze your data and generate insights from your data.
- Create videos for your products with Veo.
- Generate requirements for your Dev team to update the website based on insights.
What you'll need
- A web browser such as Chrome.
- A Google account
2. Environment Setup
Project Setup
Create a Google Cloud Project
- In the Google Cloud Console, on the project selector page, select or create a Google Cloud project.
- Make sure that billing is enabled for your Cloud project. Learn how to check if billing is enabled on a project.
Activate Cloud Shell
Cloud Shell is a command-line environment running in Google Cloud that comes preloaded with necessary tools.
- Click Activate Cloud Shell at the top of the Google Cloud console.
- Once connected to Cloud Shell, verify your authentication:
gcloud auth list - Confirm your project is configured:
gcloud config get project - If your project is not set as expected, set it:
export PROJECT_ID=<YOUR_PROJECT_ID>
gcloud config set project $PROJECT_ID
Initialize Environment Variables File
To ensure your environment variables are retained if your Cloud Shell session disconnects, you will save them to a file and source it when needed.
- In Cloud Shell, create the file and add your Project ID to it:
echo "export PROJECT_ID=$(gcloud config get-value project)" > ~/lab_env.sh
source ~/lab_env.sh
Obtain Gemini API Key from AI Studio
The Market Research Agent wraps the Gemini Deep Research Interactions API. The deep_research tool calls the Gemini Deep Research Interactions API, which is currently only available through the AI Studio endpoint. It creates a separate genai.Client with vertexai=False and authenticates using an API key stored in the GEMINI_API_KEY environment variable.
- Go to Google AI Studio.
- Sign in with your Google account.
- Click Create API key.
- Name the key
Unified Intelligence Agents. - Under Choose an imported project, select your project or import it.
- Click Create Key.
- Copy the generated API key from the details pane.
- In Cloud Shell, save this key to your lab environment file (replace
YOUR_GEMINI_API_KEYwith the actual key):echo "export GEMINI_API_KEY=\"YOUR_GEMINI_API_KEY\"" >> ~/lab_env.sh source ~/lab_env.sh
Enable APIs
- In Cloud Shell, enable the required APIs for this lab:
gcloud services enable \
  cloudresourcemanager.googleapis.com \
  aiplatform.googleapis.com \
  storage.googleapis.com \
  run.googleapis.com \
  bigquery.googleapis.com \
  cloudbuild.googleapis.com \
  iam.googleapis.com \
  discoveryengine.googleapis.com \
  geminidataanalytics.googleapis.com \
  cloudaicompanion.googleapis.com \
  secretmanager.googleapis.com
Clone the Repository
Before you can set up the dataset and agents, you need to clone the repository containing the source code and data scripts.
- In Cloud Shell, clone the
next-26-keynotesrepository:cd $HOME git clone https://github.com/GoogleCloudPlatform/next-26-keynotes.git
3. Data and Resource Configuration
Set up BigQuery Data and Agent
In this step, you will create a BigQuery dataset, populate it with mock furniture inventory and sales data, and create a BigQuery Data Agent to analyze this data.
- In Cloud Shell, navigate to the
datadirectory:cd $HOME/next-26-keynotes/genkey/fabric-unified-intelligence/data - Authenticate with application-default credentials, run this command and follow the prompts:
gcloud auth application-default login - Run the setup script to create the dataset, tables, and view:
chmod +x setup_bigquery.sh ./setup_bigquery.sh- Dataset:
unified_intelligence_fabric_demo - Table:
furniture_stock - Table:
furniture_sales - View:
dead_stock_view
- Dataset:
- Run the python script to populate the tables with sample data using
uv:uv run --with google-cloud-bigquery ./populate_tables.py - Create BigQuery Data Agent:
- Go to the BigQuery Agents Hub in the Cloud Console.
- Under Agent Catalog Click New Agent.
- Set the Agent Name to
Unified Intelligence Data Agent. - Set the Knowledge Source to the tables in the dataset you just created (
furniture_stock,furniture_sales).- Search for the tables by typing
furniture. - Hit return.
- Select the two tables (
furniture_stock,furniture_sales). - Click Add.
- Search for the tables by typing
- Click Publish.
- When prompted to share the agent, click "Cancel". You will add roles to the Compute Service Account in a later step.
- Test the Agent:
- In the test chat on the right, ask a question like:
What are the furniture items with the highest stock? - Verify that it returns results based on the sample data. You should see a table in the output similar to this.

- In the test chat on the right, ask a question like:
- Save Data Agent ID:
- On the left-side of the screen, you should see the ID of the agent you just created. It will look like
agent_ba43c386-ae82-45e0-a2b5-1928440f0926.

- Copy the ID.
- Run the following command in Cloud Shell to save it, replacing
YOUR_AGENT_IDwith the actual ID:
echo "export BQ_DATA_AGENT_ID=YOUR_AGENT_ID" >> ~/lab_env.sh source ~/lab_env.sh - On the left-side of the screen, you should see the ID of the agent you just created. It will look like
Create a Shared Folder
In this step, you will create a folder in your Google Drive and share it with the Cloud Run service account. This folder will be used by the agents to save and share files (like generated requirements).
- Navigate to Google Drive.
- Click New > New folder, name it
Unified Intelligence Lab, and click Create. - Right-click the newly created folder and select Share > Share.
- In Cloud Shell, run the following command to get the email address of the default Compute Engine service account:
PROJECT_NUMBER=$(gcloud projects describe $(gcloud config get-value project) --format="value(projectNumber)") echo "${PROJECT_NUMBER}-compute@developer.gserviceaccount.com" - Copy the email address from the output.
- In the Google Drive share dialog, add this email address.
- Set the role to Editor.
- Open the folder and copy the ID from the URL. The URL will look like
https://drive.google.com/drive/folders/YOUR_FOLDER_ID. Copy the alphanumeric string at the end of the URL, which appears after/folders/. - In Cloud Shell, save this ID to your lab environment file (replace
YOUR_FOLDER_IDwith your actual ID):echo "export GOOGLE_DRIVE_FOLDER_ID=YOUR_FOLDER_ID" >> ~/lab_env.sh source ~/lab_env.sh
Create GCS buckets
In Cloud Shell, run the following commands to create GCS buckets for artifacts/tasks, campaign videos, and logs:
gcloud storage buckets create gs://$(gcloud config get-value project)-artifacts --location=us-central1
gcloud storage buckets create gs://$(gcloud config get-value project)-videos --location=us-central1
gcloud storage buckets create gs://$(gcloud config get-value project)-logs --location=us-central1
Make Video Bucket Public
To allow the website to access the videos, make the video bucket public:
gcloud storage buckets add-iam-policy-binding gs://$(gcloud config get-value project)-videos --member=allUsers --role=roles/storage.objectViewer
Grant IAM Roles
In this section, you will grant IAM roles for your user and several service accounts/agents.
Grant Roles to your user
To use the Discovery Engine (Search and Conversation) features, run the following commands in Cloud Shell to grant the Discovery Engine User role to your user account:
source ~/lab_env.sh

echo "export USER_ACCOUNT=$(gcloud config get-value account)" >> ~/lab_env.sh
source ~/lab_env.sh

gcloud projects add-iam-policy-binding $PROJECT_ID \
  --member="user:$USER_ACCOUNT" \
  --role="roles/discoveryengine.user"
Grant Roles to the Compute Engine service account
In Cloud Shell, run the following commands to grant roles to the Compute Engine service account:
source ~/lab_env.sh

PROJECT_NUMBER=$(gcloud projects describe $PROJECT_ID --format="value(projectNumber)")
echo "export PROJECT_NUMBER=${PROJECT_NUMBER}" >> ~/lab_env.sh
echo "export COMPUTE_SA=\"${PROJECT_NUMBER}-compute@developer.gserviceaccount.com\"" >> ~/lab_env.sh
source ~/lab_env.sh

gcloud projects add-iam-policy-binding $PROJECT_ID \
  --member="serviceAccount:$COMPUTE_SA" \
  --role="roles/storage.objectAdmin"

gcloud projects add-iam-policy-binding $PROJECT_ID \
  --member="serviceAccount:$COMPUTE_SA" \
  --role="roles/aiplatform.user"

gcloud projects add-iam-policy-binding $PROJECT_ID \
  --member="serviceAccount:$COMPUTE_SA" \
  --role="roles/cloudtrace.agent"

gcloud projects add-iam-policy-binding $PROJECT_ID \
  --member="serviceAccount:$COMPUTE_SA" \
  --role="roles/geminidataanalytics.dataAgentUser"

gcloud projects add-iam-policy-binding $PROJECT_ID \
  --member="serviceAccount:$COMPUTE_SA" \
  --role="roles/geminidataanalytics.dataAgentStatelessUser"

gcloud projects add-iam-policy-binding $PROJECT_ID \
  --member="serviceAccount:$COMPUTE_SA" \
  --role="roles/bigquery.dataViewer"

gcloud iam service-accounts add-iam-policy-binding $COMPUTE_SA \
  --member="serviceAccount:$COMPUTE_SA" \
  --role="roles/iam.serviceAccountTokenCreator" \
  --project=$PROJECT_ID

gcloud projects add-iam-policy-binding $PROJECT_ID \
  --member="serviceAccount:$COMPUTE_SA" \
  --role="roles/cloudbuild.builds.builder"

gcloud projects add-iam-policy-binding $PROJECT_ID \
  --member="serviceAccount:$COMPUTE_SA" \
  --role="roles/run.invoker"

gcloud projects add-iam-policy-binding $PROJECT_ID \
  --member="serviceAccount:$COMPUTE_SA" \
  --role="roles/secretmanager.secretAccessor"
Grant Roles to the Discovery Engine Service Account
In Cloud Shell, run the following commands to grant roles to the Discovery Engine Service Account:
source ~/lab_env.sh

echo "export DISCOVERY_ENGINE_SA=\"service-\${PROJECT_NUMBER}@gcp-sa-discoveryengine.iam.gserviceaccount.com\"" >> ~/lab_env.sh
source ~/lab_env.sh

gcloud projects add-iam-policy-binding $PROJECT_ID \
  --member="serviceAccount:$DISCOVERY_ENGINE_SA" \
  --role="roles/run.invoker"

gcloud projects add-iam-policy-binding $PROJECT_ID \
  --member="serviceAccount:$DISCOVERY_ENGINE_SA" \
  --role="roles/aiplatform.user"
Grant Roles to the AI Platform Reasoning Engine Service Agent
In Cloud Shell, run the following commands to grant roles to the AI Platform Reasoning Engine Service Agent:
source ~/lab_env.sh

echo "export AI_PLATFORM_RE_SA=\"service-\${PROJECT_NUMBER}@gcp-sa-aiplatform-re.iam.gserviceaccount.com\"" >> ~/lab_env.sh
source ~/lab_env.sh

gcloud projects add-iam-policy-binding $PROJECT_ID \
  --member="serviceAccount:$AI_PLATFORM_RE_SA" \
  --role="roles/storage.objectViewer"
4. Configure and Deploy the Agents
Configure and deploy all the custom agents needed for this codelab.
Configure and Deploy the Product Strategy Agent
In this step, you will deploy the Product Strategy Agent to Cloud Run and register it to the Gemini Enterprise app. This agent is responsible for refining product concepts based on market data.
Prerequisites
But first, you will configure the environment variables for the Product Strategy Agent.
- In Cloud Shell, navigate to the Product Strategy Agent directory:
cd $HOME/next-26-keynotes/genkey/fabric-unified-intelligence/agents/product-strategy - Run the following command to copy the
.env.samplefile to.env:cp .env.sample .env - In Cloud Shell, run the following commands to populate the
.envfile with your project details:source ~/lab_env.sh sed -i "s/YOUR_PROJECT_ID/${PROJECT_ID}/" .env sed -i "s/YOUR_VEO_GCS_BUCKET/${PROJECT_ID}-videos/" .env sed -i "s/YOUR_GOOGLE_DRIVE_FOLDER_ID/${GOOGLE_DRIVE_FOLDER_ID}/" .env sed -i "s/YOUR_LOGS_BUCKET_NAME/${PROJECT_ID}-logs/" .env
Deploy the Product Strategy Agent
- Deploy to Cloud Run Now, in Cloud Shell, deploy the agent to Cloud Run. The repository includes a
Makefilethat simplifies this process:make deploy - In Cloud Shell, run the following command to get the URL of the deployed service and save it to your lab environment file:
source ~/lab_env.sh
PRODUCT_STRATEGY_URL=$(gcloud run services describe product-strategy --region us-central1 --format 'value(status.url)')
echo "export PRODUCT_STRATEGY_URL=\"${PRODUCT_STRATEGY_URL}\"" >> ~/lab_env.sh
source ~/lab_env.sh
Configure and Deploy the Market Research Agent
In this step, you will deploy the Market Research Agent to Cloud Run and register it to the Gemini Enterprise app. This agent analyzes trends and customer feedback.
Prerequisites
But first, you will configure the environment variables for the Market Research Agent, including an API key for the Deep Research tool.
- In Cloud Shell, navigate to the
market-researchdirectory:cd $HOME/next-26-keynotes/genkey/fabric-unified-intelligence/agents/market-research - Run the following command to copy the
.env.samplefile to.env:cp .env.sample .env - In Cloud Shell, run the following commands to populate the
.envfile with your project details:source ~/lab_env.sh sed -i "s/YOUR_PROJECT_ID/${PROJECT_ID}/" .env sed -i "s/YOUR_LOGS_BUCKET_NAME/${PROJECT_ID}-logs/" .env
Create secrets
The GEMINI_API_KEY variable is stored in Secret Manager and mounted into the Cloud Run revision at deploy time.
- In Cloud Shell, add the
GEMINI_API_KEYto your.envfile:source ~/lab_env.sh echo "GEMINI_API_KEY=${GEMINI_API_KEY}" >> .env - Run the following command to push secret values from your local
.envto Secret Manager:make create-secrets - Run the following command to grant Cloud Run access to the secret:
make grant-secret-access
Deploy the Market Research Agent to Cloud Run
- In Cloud Shell, deploy the agent using the
Makefile:make deploy - In Cloud Shell, run the following command to get the URL of the deployed service and save it to your lab environment file:
source ~/lab_env.sh
MARKET_RESEARCH_URL=$(gcloud run services describe market-research --region us-central1 --format 'value(status.url)')
echo "export MARKET_RESEARCH_URL=\"${MARKET_RESEARCH_URL}\"" >> ~/lab_env.sh
source ~/lab_env.sh
Configure and Deploy the Orchestrator Agent
In this step, you will deploy the Orchestrator Agent to Cloud Run and register it to the Gemini Enterprise app. This agent coordinates the workflow between the other agents.
Prerequisites
But first, you will configure the environment variables for the Orchestrator Agent. It needs to know the URLs of the Product Strategy and Market Research agents you deployed in the previous steps.
- In Cloud Shell, navigate to the
orchestratordirectory:cd $HOME/next-26-keynotes/genkey/fabric-unified-intelligence/agents/orchestrator - Run the following command to copy the
.env.samplefile to.env:cp .env.sample .env - In Cloud Shell, run the following commands to populate the
.envfile with your project details and BigQuery Data Agent configuration:source ~/lab_env.sh sed -i "s/YOUR_PROJECT_ID/${PROJECT_ID}/" .env sed -i "s|http://localhost:8002|${MARKET_RESEARCH_URL}|" .env sed -i "s|http://localhost:8001|${PRODUCT_STRATEGY_URL}|" .env sed -i "s/YOUR_BQ_DATA_AGENT_PROJECT/${PROJECT_ID}/" .env sed -i "s/YOUR_BQ_DATA_AGENT_ID/${BQ_DATA_AGENT_ID}/" .env sed -i "s/YOUR_LOGS_BUCKET_NAME/${PROJECT_ID}-logs/" .env
Deploy the Orchestrator Agent
- In Cloud Shell, deploy the Orchestrator agent using the
Makefile:make deploy
Once deployed, you will get a URL for the Orchestrator Agent.
- In Cloud Shell, run the following command to get the URL of the deployed service and save it to your lab environment file:
source ~/lab_env.sh
ORCHESTRATOR_URL=$(gcloud run services describe orchestrator --region us-central1 --format 'value(status.url)')
echo "export ORCHESTRATOR_URL=\"${ORCHESTRATOR_URL}\"" >> ~/lab_env.sh
source ~/lab_env.sh
Configure and Deploy the Dev Agent
In this step, you will deploy the Dev Agent to Cloud Run and register it to the Gemini Enterprise app. This agent translates plans into action by creating tasks and scaffolding code. The Dev Agent can integrate with Jira to create tickets and that is what is shown in the keynote demo. However, for this codelab, we will skip Jira integration and have the agent save tasks to Google Cloud Storage instead.
Prerequisites
But first, you will configure the environment variables for the Dev Agent.
- In Cloud Shell, navigate to the
dev-agentdirectory:cd $HOME/next-26-keynotes/genkey/fabric-unified-intelligence/agents/dev-agent - Run the following command to copy the
.env.samplefile to.env:cp .env.sample .env - In Cloud Shell, run the following commands to populate the
.envfile with your project details:source ~/lab_env.sh sed -i "s/YOUR_PROJECT_ID/${PROJECT_ID}/" .env sed -i "s/YOUR_ASSET_BUCKET_NAME/${PROJECT_ID}-artifacts/" .env sed -i "s/YOUR_VEO_GCS_BUCKET/${PROJECT_ID}-videos/" .env sed -i "s/YOUR_LOGS_BUCKET_NAME/${PROJECT_ID}-logs/" .env
Deploy the Dev Agent
- In Cloud Shell, deploy the Dev agent using the
Makefile:make deploy
Once deployed, you will get a URL for the Dev Agent.
- In Cloud Shell, run the following command to get the URL of the deployed service and save it to your lab environment file:
source ~/lab_env.sh
DEV_AGENT_URL=$(gcloud run services describe dev-agent --region us-central1 --format 'value(status.url)')
echo "export DEV_AGENT_URL=\"${DEV_AGENT_URL}\"" >> ~/lab_env.sh
source ~/lab_env.sh
5. Set up Gemini Enterprise and Register Agents
In this codelab, we are using Gemini Enterprise to register and manage the agents, allowing them to interact with Workspace and other enterprise systems and making them available for users to interact with.
You will need to sign up for a trial of Gemini Enterprise Plus for this codelab. You will also create an App that you will use to register your Agents.
Sign up for Gemini Enterprise Trial
Because we already enabled the Discovery Engine API, you do not need to explicitly start a trial. You are instead presented with a different button to create your first app.
- Navigate to the Gemini Enterprise page in Google Cloud Console.
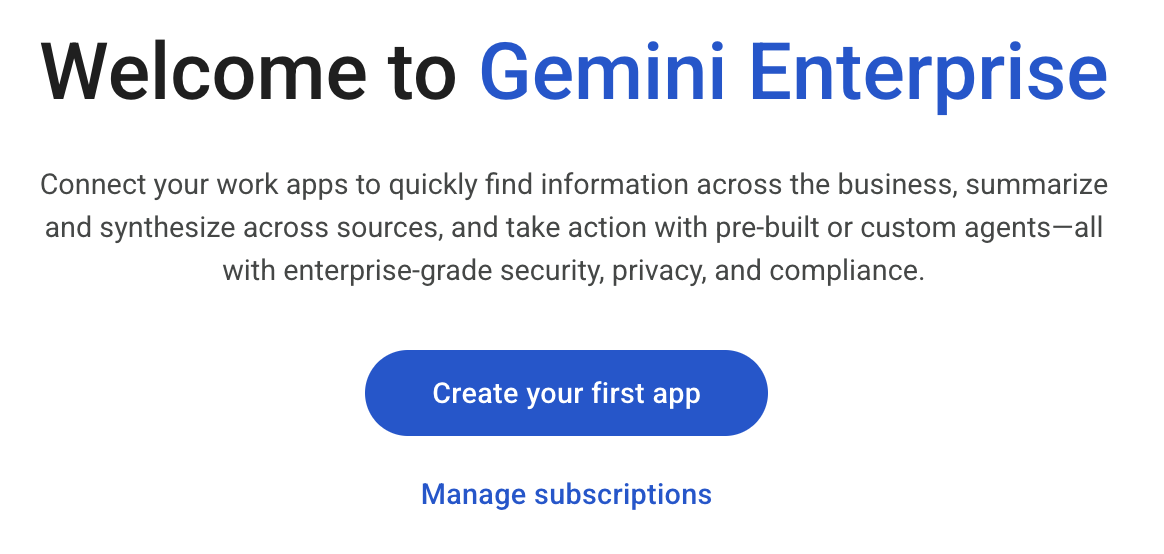
- You are presented with a welcome screen. Click on "Create your first app".
Create an Application
- Enter
n26-unifiedfor the app name. Note the free trial banner presented on the screen.
- Leave other fields as default and click "Create".
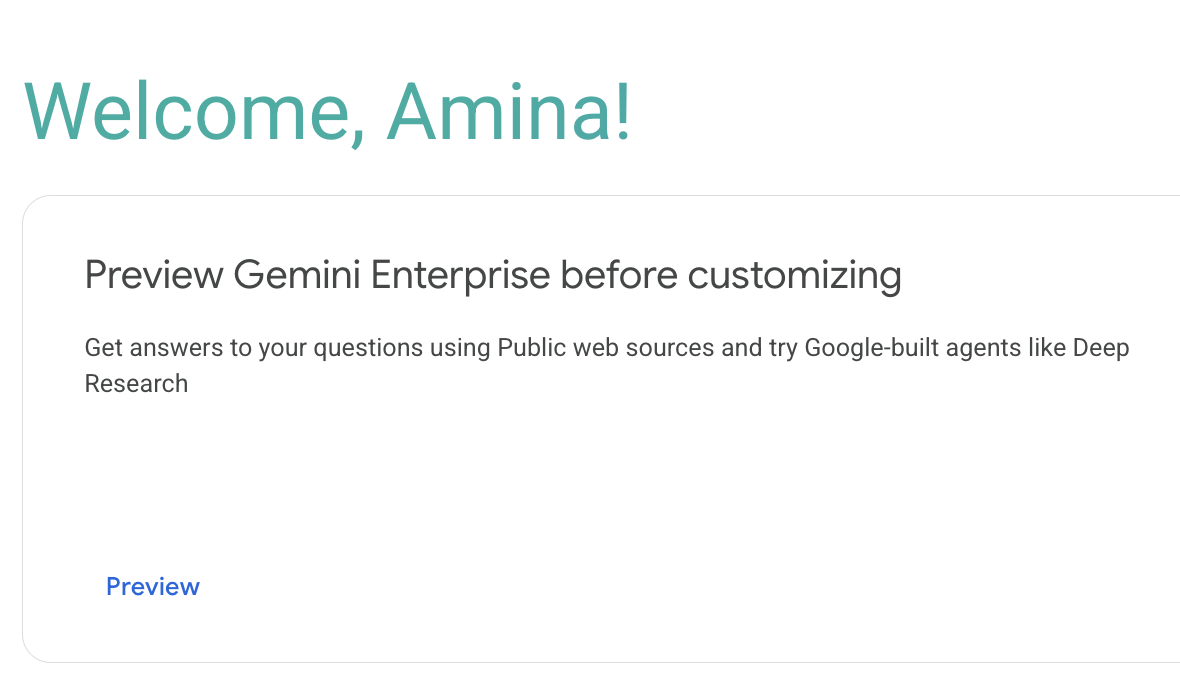
- You are presented with a welcome screen. Click the Preview link.
- A new window will pop-up with the Gemini Enterprise web application. Note the URL at the top of the screen in the URL bar. You will need this URL in future sections to access the application. It should look similar to
https://vertexaisearch.cloud.google.com/home/cid/ebb52d4a-b33b-4007-a180-91d02fa124e1.
Register Custom Agents
In order for Gemini Enterprise to use your Agent, you need to register the agent with a Gemini Enterprise Application. Custom agents deployed to Cloud Run can be registered with the A2A (Agent-to-Agent) integration.
- In a separate window in the console, navigate to the Gemini Enterprise Apps screen
- Click on the app named
n26-unified - In the left-side navigation, Click on Agents
Register the Product Strategy Agent
- Get the agent card, in Cloud Shell, run this command:
source ~/lab_env.sh TOKEN=$(gcloud auth print-identity-token) curl -H "Content-Type: application/json" \ -H "Authorization: Bearer ${TOKEN}" $PRODUCT_STRATEGY_URL/.well-known/agent-card.json | jq - Click + Add agent
- Click on Custom agent via A2A
- Paste the Agent Card JSON from the previous step in the textbox.
- Click Preview Agent Details.
- Click Next
- Click Skip & Finish for Agent authorization.
- On the User permissions tab, grant All users the Agent User role.
- Click Save.
Register the Market Research Agent with Gemini Enterprise Application
- Get the agent card, in Cloud Shell, run this command:
source ~/lab_env.sh TOKEN=$(gcloud auth print-identity-token) curl -H "Content-Type: application/json" \ -H "Authorization: Bearer ${TOKEN}" $MARKET_RESEARCH_URL/.well-known/agent-card.json | jq - Click + Add agent
- Click on Custom agent via A2A
- Paste the Agent Card JSON from the previous step in the textbox.
- Click Preview Agent Details.
- Click Next
- Click Skip & Finish for Agent authorization.
- On the User permissions tab, grant All users the Agent User role.
- Click Save.
Register the Orchestrator Agent
- Get the agent card, in Cloud Shell, run this command:
source ~/lab_env.sh TOKEN=$(gcloud auth print-identity-token) curl -H "Content-Type: application/json" \ -H "Authorization: Bearer ${TOKEN}" $ORCHESTRATOR_URL/.well-known/agent-card.json | jq - Click + Add agent
- Click on Custom agent via A2A
- Paste the Agent Card JSON from the previous step in the textbox.
- Click Preview Agent Details.
- Click Next
- Click Skip & Finish for Agent authorization.
- On the User permissions tab, grant All users the Agent User role.
- Click Save.
Register the Dev Agent
- Get the agent card, in Cloud Shell, run this command:
source ~/lab_env.sh TOKEN=$(gcloud auth print-identity-token) curl -H "Content-Type: application/json" \ -H "Authorization: Bearer ${TOKEN}" $DEV_AGENT_URL/.well-known/agent-card.json | jq - Click + Add agent
- Click on Custom agent via A2A
- Paste the Agent Card JSON from the previous step in the textbox.
- Click Preview Agent Details.
- Click Next
- Click Skip & Finish for Agent authorization.
- On the User permissions tab, grant All users the Agent User role.
- Click Save.
6. Act 1: Strategy & Orchestration in Gemini Enterprise
In this section of the lab, you will play the role of the VP of Merchandising at "Organic Living," in charge of revitalizing product lines with flat/declining sales.
To bring some less popular product lines back to life, you will ask your agent to analyze trends, identify dead stock in your warehouse, and orchestrate a relaunch campaign. You will see how Gemini Enterprise orchestrates multiple agents to answer a single, complex prompt.
Navigate to the Gemini Enterprise App URL
This is the URL you took note of in Step 4: Set up Gemini Enterprise and Register Agents. If you do not have the URL, you can get it by following these steps:
- Navigate to the Gemini Enterprise Apps screen
- Click on the app named
n26-unified - Click on the URL starting with
https://vertexaisearch.cloud.google.com
Prompt the agent to help with your task
- Start in the new chat by typing in the chat box on your homepage or click New chat in the left-side navigation.
- Add the following prompt:
Analyze current interior design trends and identify dead stock in our warehouse that matches the trend. Orchestrate a relaunch campaign - Click Submit (the icon with the paper airplane) and watch the Orchestrator Agent work its magic.
Observe the output
With that one prompt, multiple agents complete a series of tasks in minutes instead of hours.
- Market Research Agent, powered by Deep Research, analyzes the latest Google Search information to find latest design trends.
- Data Insights Agent connects to global product data and feeds the research findings into our internal catalog to identify "dead stock" items (low-velocity inventory) that match these trend criteria.
- Product Strategy Agent pulls everything together to generate a relaunch campaign strategy based on the research and data from the other agents.
Approve the plan and observe the output
- Respond with
Yesto approve the plan - Observe the output
- Starts with insights from the Market Research Agent and includes an extensive plan including a website rebrand.
- Includes data retrieved from our product data using the BigQuery Data Agent we set up earlier.
- Note the sources at the bottom of the output to give you confidence in the analysis and recommendations.
Generate videos based on the new Organic Living style
- In the chat, ask the Product Strategy Agent to generate videos. Start by typing
@Productand selecting the Product Strategy Agent from the list. - Add the following prompt:
generate three videos for the landing page - Gemini will use the Product Strategy Agent to generate video assets and provide URLs for them.
Coordinate with the dev team
In the keynote demo, the Dev Agent sent a Google Chat notification to the dev team. However, we have removed that step from this codelab as incoming webhooks are not supported on personal Gmail accounts. Instead, the Dev Agent will focus on creating the task in Google Cloud Storage.
- In the chat, ask the Dev Agent to create a task for the dev team. Start by typing
@Devand selecting the Dev Agent from the list. - Add the following prompt:
create a task for the dev team to get started on the new product landing page. - Observe the output. The Dev Agent will confirm that it has created a task and provide a Task ID (e.g.
TASK-A3F7B2C1). Take note of this Task ID, as you will need it in Act 2.
7. Act 2: Build in Gemini CLI
In this act, you switch to the role of the developer. You have been assigned to build and launch the landing page for the new campaign, following up on the task created in Act 1.
You will use Gemini CLI to build the "Organic Living" website based on a design specification found in the task file. Gemini CLI is an open-source AI agent that brings the power of Gemini to the command line. It is already pre-installed in your Cloud Shell environment.
Configure Gemini CLI
- In Cloud Shell, create a new directory for your website project and navigate to it:
mkdir -p $HOME/website cd $HOME/website - Copy the
GEMINI.mdinstructions and the design image from the cloned repository to your working directory:cp $HOME/next-26-keynotes/genkey/fabric-unified-intelligence/gemini-cli/GEMINI.md . cp $HOME/next-26-keynotes/genkey/fabric-unified-intelligence/gemini-cli/Organic_Living_Website_Design.png . - Create the agent configuration directory and create the
dev-agent.mdfile:source ~/lab_env.sh mkdir -p ~/.gemini/agents cat > ~/.gemini/agents/dev-agent.md <<EOF --- kind: remote name: dev-agent agent_card_url: ${DEV_AGENT_URL}/.well-known/agent-card.json description: "Task assistant. Use for: creating/looking up/starting APPDEV tasks." auth: type: google-credentials --- EOF
Start Prompting
- Run
gemini-clito start the interaction:source ~/lab_env.sh gemini - You will be asked if you trust the files in this folder. Select option 1. Trust folder (website).
- Type
authand hit return in the gemini cli prompt. - Select Use Gemini API key. This will automatically use the
GEMINI_API_KEYenvironment variable you loaded fromlab_env.sh.
- At the
gemini>prompt, tell the agent you want to work on the task created in Act 1 (replaceTASK-A3F7B2C1with the actual Task ID you noted):@dev-agent let me work on TASK-A3F7B2C1 - Now, ask the agent to build the website:
Build and deploy itGEMINI.mdfile in the current directory and begin building the website according to the specifications. - Once the build and deployment are complete, the agent will output the results, including the URL of the deployed Cloud Run service.
- Click on the provided URL to open the new "Organic Living" website in a new tab and verify that it matches the design specifications.
8. Recap
In this codelab, you have successfully demonstrated the power of the "Fabric of Unified Intelligence" by completing a complex, multi-step workflow across different roles and environments:
- Orchestrated a Multi-Agent System: In Gemini Enterprise, you used a single prompt to engage a team of agents (Market Research, Data Insights, and Product Strategy) to analyze trends, identify inventory, and develop a relaunch strategy. One prompt gets many things done without needing to complete each task separately.
- Generated Multimedia Assets: You used the Product Strategy Agent to generate video assets for the new product line.
- Simulated Cross-Role Handoff: You used the Dev Agent to generate a task in GCS, simulating a handoff from the business team to the development team. The system maintained shared context without needing you to directly share it.
- Built a Website with Gemini CLI: In Cloud Shell, you switched to the developer role and used Gemini CLI to build and deploy a landing page based on the task created in the previous step and design specifications in
GEMINI.md.
This workflow highlights how Gemini Enterprise can connect different tools, data sources, and roles to streamline complex business processes.
9. Clean Up
This lab creates a lot of resources and because of that we recommend deleting the entire project to avoid a lengthy clean up step.
- In Cloud Shell, run the following command to delete the entire Google Cloud project:
source ~/lab_env.sh
gcloud projects delete "${PROJECT_ID}"
10. Congratulations
Congratulations! You have successfully completed the "Fabric of Unified Intelligence" codelab.