
1. Introduction
Agentic code authoring tools based on the VS Code ecosystem have become very popular. Cursor and Antigravity are just two examples. This codelab will demonstrate how LookML can be written with these code tools.
What you'll do
In this codelab, you will use Looker's VS Code extension to modify a LookML model in order to add a new measure, test the new measure, then build a LookML dashboard using that new measure. All this will be done by prompting a Coding Agent.
What you'll need
- A Looker instance where you have developer privileges.
- Basic familiarity with Looker, including Creating a new LookML project, Viewing and interacting with Explores in Looker.
- An API client_id and client_secret for your user on the Looker instance.
- VS Code based Coding Agent. For this guide, we will use Antigravity.
- A GitHub account.
- A Google Cloud project with BigQuery enabled.
Audience: LookML Developers, Data Engineers, and Architects.
2. Set up your Looker instance
Create a Google Cloud Project
- In the Google Cloud Console, on the project selector page, select or create a Google Cloud project.
- Make sure that billing is enabled for your Cloud project. Learn how to check if billing is enabled on a project.
Connect Looker to the datasource
- In Looker, under Admin go to the Databases heading and select Connections.
- Click Add Connection in the top right of the screen.
- Create a new data source for the Cymbal Gadgets dataset. Name it
cymbal_gadgets. SelectGoogle BigQuery Standard SQLfor the SQL Dialect.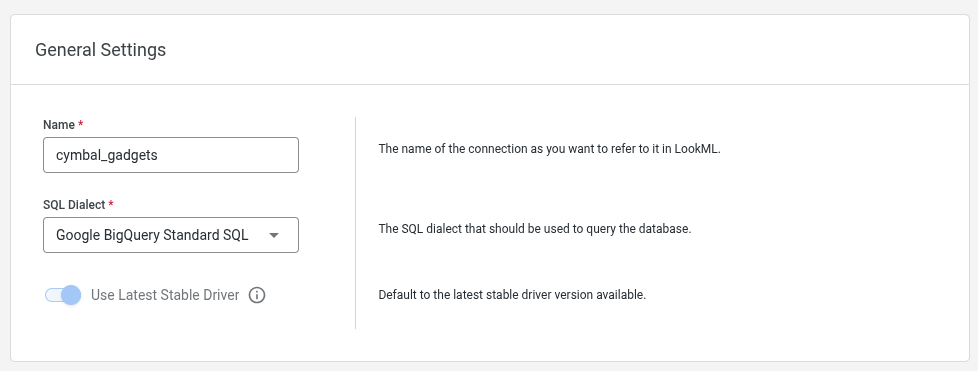
- On the next page, enter your Google Cloud project name, the storage project
looker-private-demo, and the dataset namecymbal_gadgets.
- Accept the defaults for all remaining fields and complete the new data source creation process.
- In the SQL Runner confirm that you can query the dataset by running
SELECT count(*)
FROM looker-private-demo.cymbal_gadgets.transactions
Import the project from GitHub
- Fork the project
https://github.com/looker-open-source/cymbal_gadgetsfrom GitHub into your own repository. You cannot add a deploy key to a project you don't own, so forking is necessary to link the project to Looker. - Enable Development Mode.
- Select Develop then Projects.
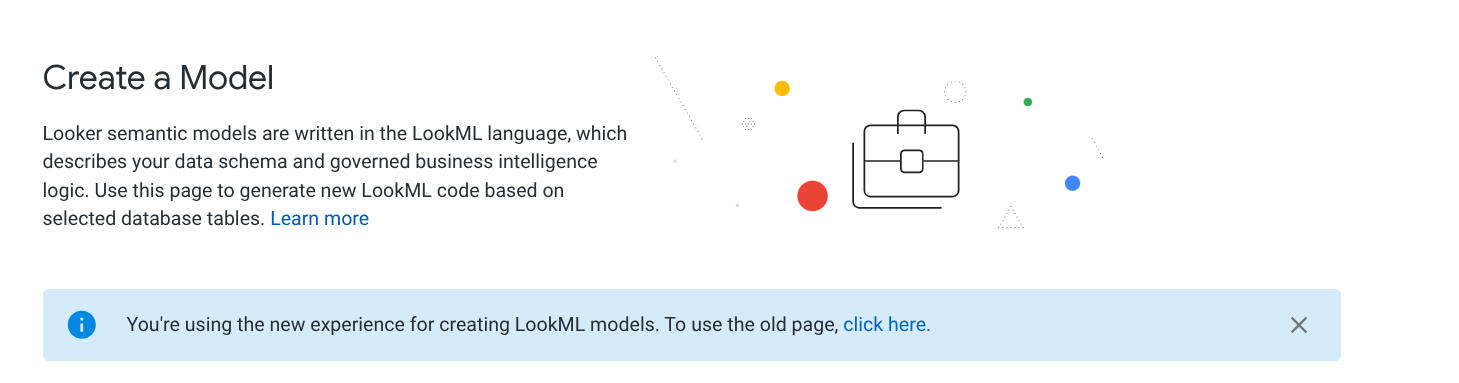
- From the LookML Projects page click New Model.
- Click the link to use the old LookML Model creation page.
- Create a new blank project in Looker named
cymbal_gadgets.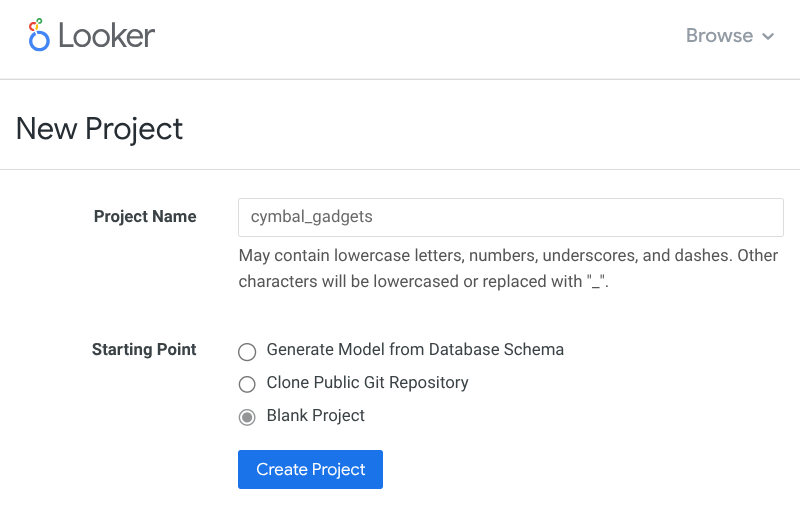
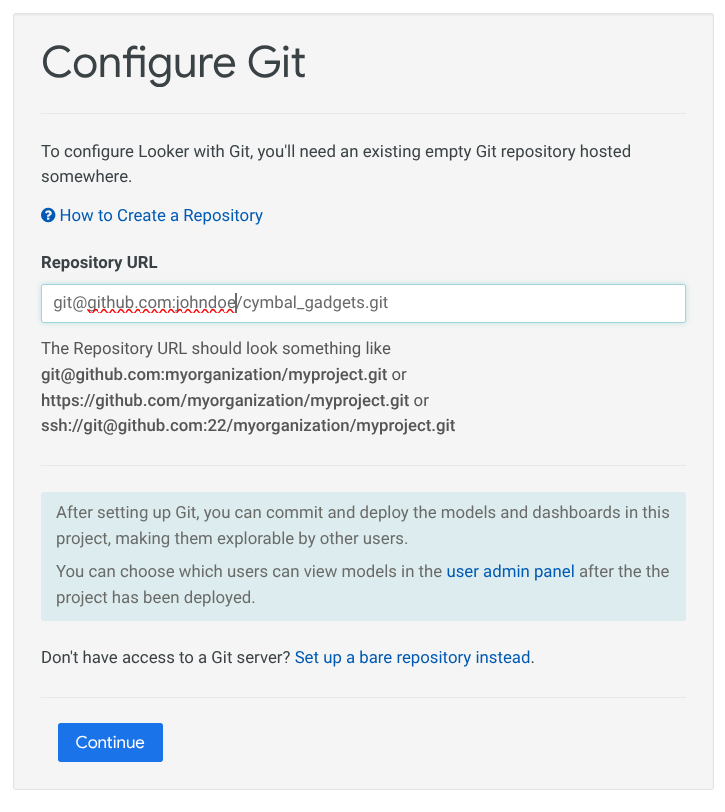
- Choose Configure Git to connect it to the forked repository you created.
- Add the
Deploy Keyto your Git repository. Be sure to click to box to allow write access with the deploy key.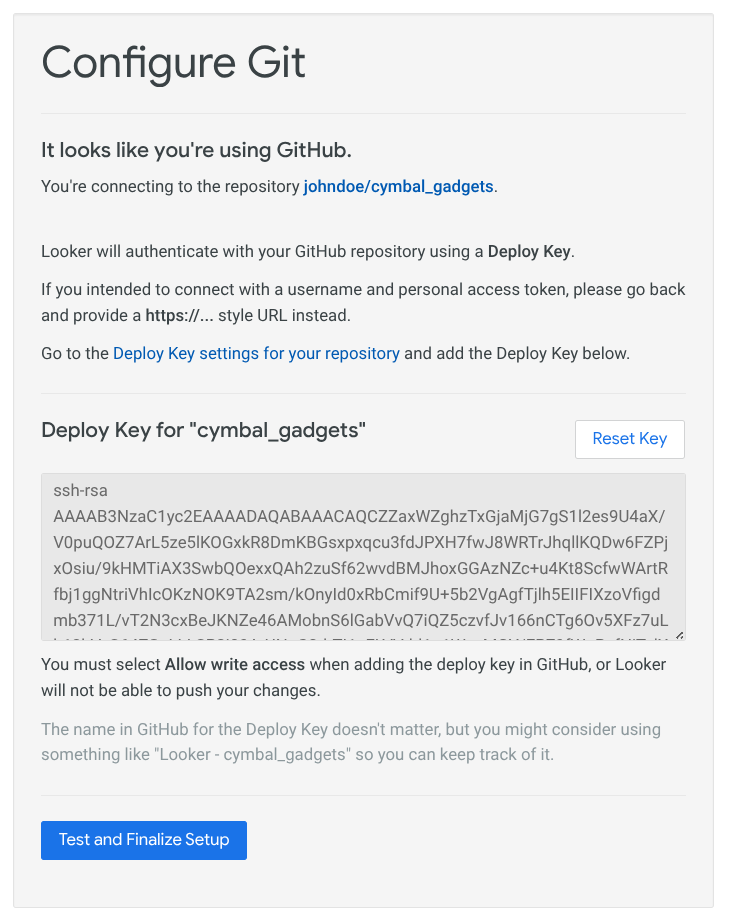
- Then choose Test and Finalize Setup.
- Verify that the project and the data source work by querying data from the explore "🛍️ Cymbal Gadgets: Transactions & Sales".
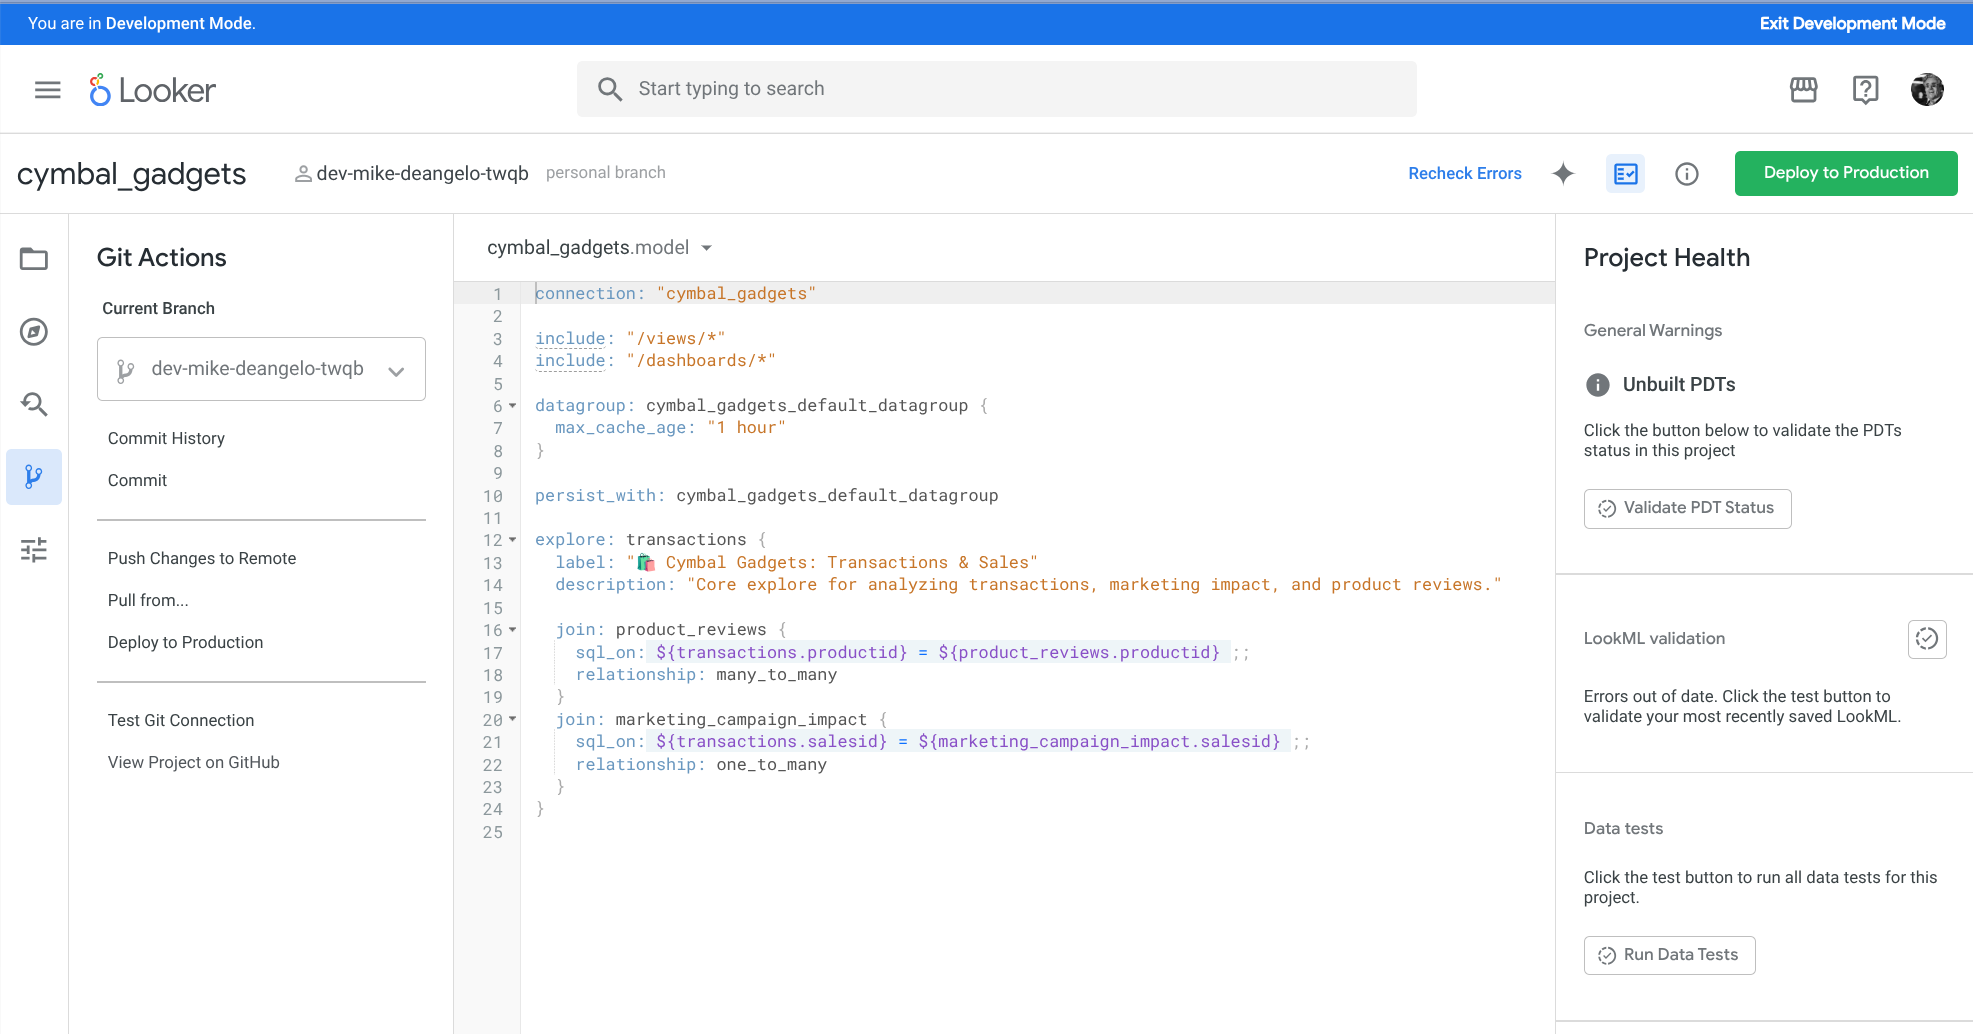
- Open the
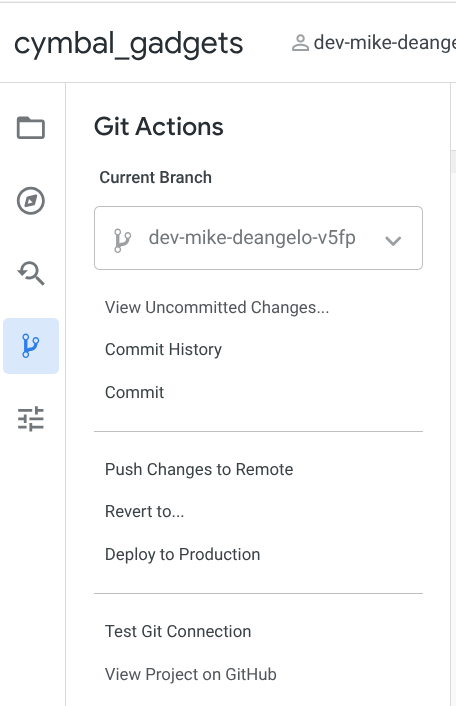
cymbal_gadgetsproject in the LookML editor and press the Create Developer Copy button in the upper right. - Under Git Actions click Push Changes To Remote so that the dev branch is available from GitHub.
- From a terminal session on your computer, run the following:
cd $HOME git clone git@github.com:YOUR_GITHUB_USER/cymbal_gadgets.git cd cymbal_gadgets git checkout YOUR_DEV_BRANCHYOUR_GITHUB_USER. Also substitute your dev branch name forYOUR_DEV_BRANCH. Your dev branch will be named something likedev-john-doe-jhgr- that is the worddevfollowed by your first and last name, followed by a short random string. You will find your personal dev branch at the top of the LookML editor in the Looker UI.
3. Setup up your Agentic IDE
Install VS Code extension
In the IDE, click the Extensions icon on the left panel. Then search for "Looker" and install the official extension from Google by clicking the install button.
Install MCP Toolbox for Databases server
To provide Antigravity with access to the Looker API (run queries, inspect SQL, inspect the LookML model, and inspect connection schema information), you need a running, local MCP Toolbox for Databases server. MCP Toolbox comes with the official Looker MCP implementation. In this section you will set this up and configure it for your Looker instance.
- First you need an API
client_idandclient_secret. Use the Looker API Keys guide to generate theclient_idandclient_secretfor your user. You will also need the base URL for your Looker instance. - Now you will use npx to install the MCP Toolbox. You can provide your Looker instance URL and API credentials as inline environment variables, or you can set them in your shell environment. Run this in shell environment for Mac and Linux:
LOOKER_BASE_URL="https://your-instance.looker.com" \ LOOKER_CLIENT_ID="YOUR_CLIENT_ID" \ LOOKER_CLIENT_SECRET="YOUR_CLIENT_SECRET" \ npx @toolbox-sdk/server --prebuilt=looker,looker-dev$env:LOOKER_BASE_URL="https://your-instance.looker.com" $env:LOOKER_CLIENT_ID="YOUR_CLIENT_ID" $env:LOOKER_CLIENT_SECRET="YOUR_CLIENT_SECRET" npx @toolbox-sdk/server --prebuilt=looker,looker-dev
Configure the VS Code extension
In this step, you will configure the VS Code extension to connect to Looker and the Looker MCP server.
- In Antigravity, use CMD-SHIFT-P (Mac) or CTRL+SHIFT+P (Linux/Windows) to open the command palette and choose
Preferences: Open Workspace Settings (JSON). - Add the following to your Workspace Settings to configure the extension using
client_idandclient_secret. For thelooker.projectIdusecymbal_gadgets:{ "looker.instanceURL": "https://your-instance.looker.com", "looker.clientId": "YOUR_API_KEY_CLIENT_ID", "looker.clientSecret": "YOUR_API_KEY_CLIENT_SECRET", "looker.projectId": "cymbal_gadgets" }
Open your editor
- Open Antigravity.
- Click File > Open Folder....
- Navigate to and select the
cymbal_gadgetsfolder.
4. Create a Customer Lifetime Value measure
First you will create a new measure in the existing LookML model using the Agent. A Customer Lifetime Value measure will be useful in this retail use case. You will use the Agent to determine the methodology and LookML for this measure.
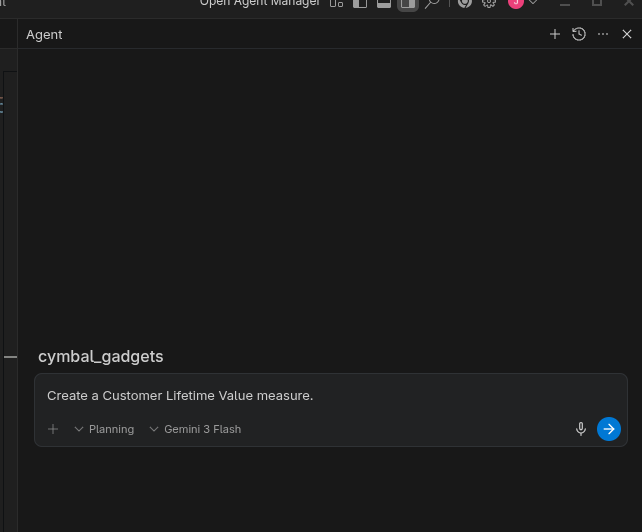
Prompt the Agent
In the cymbal_gadgets project in your Antigravity workspace, you should have a new conversation interface on the right. Start the conversation in Planning mode using the latest Gemini model with the prompt: Create a Customer Lifetime Value measure.
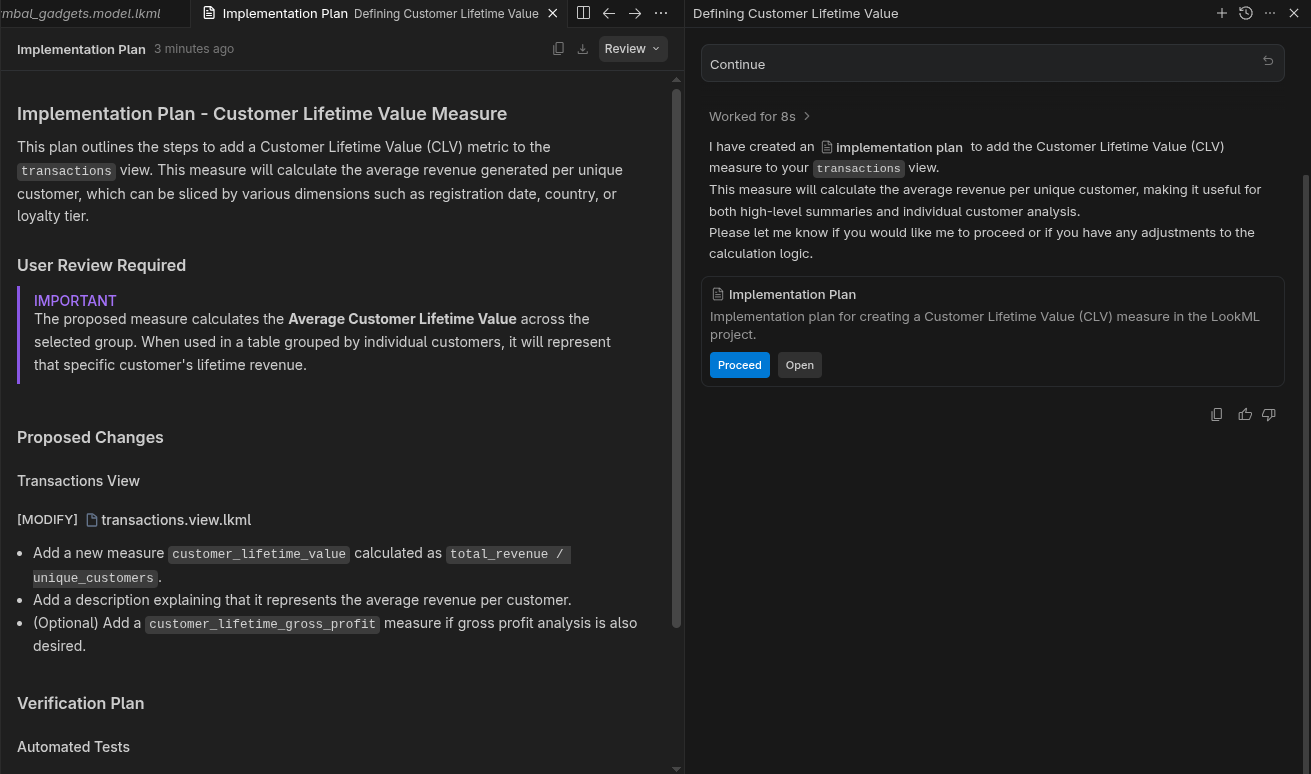
Check the implementation plan
The Agent will first create an implementation plan. Open the implementation plan to review it, then click the Proceed button.
Review the LookML
Review the changed LookML. Make sure that the changes make sense and are valid.
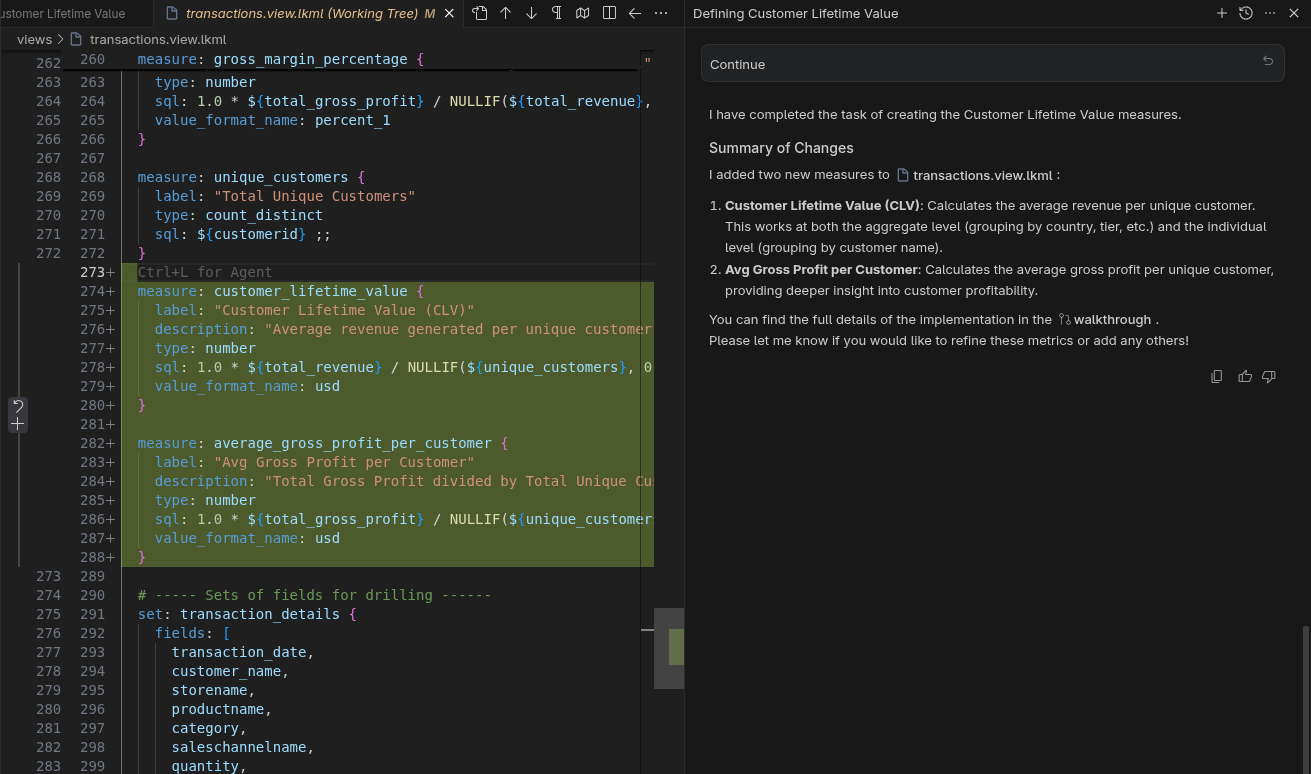
The modified LookML is automatically synced with Looker by the VS Code extension. It can be tested in Development Mode.
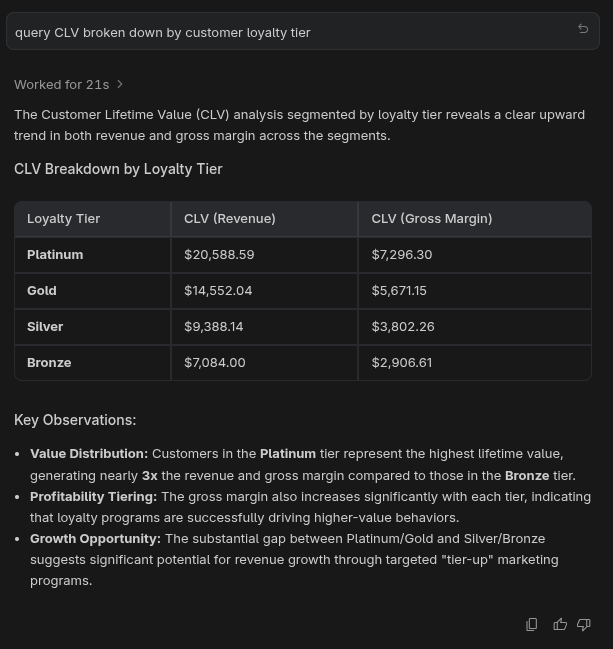
Test in IDE
Prompt Antigravity to query CLV broken down by customer loyalty tier. Antigravity will use the Looker MCP Server to find the models, examine the available fields, and run a query using Looker. The result will be something like this:
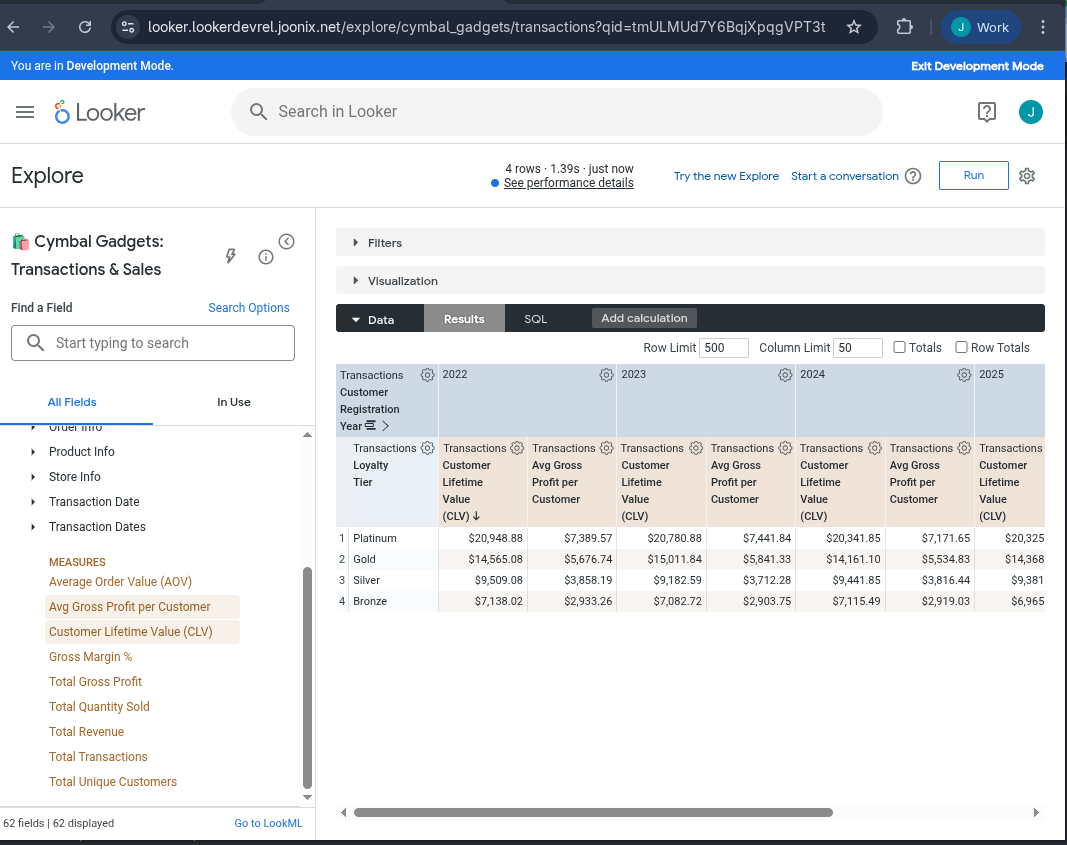
Test in Looker
In Looker, with Development Mode activated, open the 🛍️ Cymbal Gadgets: Transactions & Sales explore. Select the Customer Lifetime Value measure then pivot by the Customer Registration Year. Run the query. It should look similar to this.
5. Create a Customer Lifetime Value dashboard
Now we are going to try a more complex example. We will ask the agent to create an entirely new LookML dashboard.
Request a new dashboard from the Agent
Switch back to Antigravity. In the same conversation, ensure Planning mode and the latest Gemini model are selected. Then prompt Create a dashboard showing customer lifetime value based on customer loyalty tier.
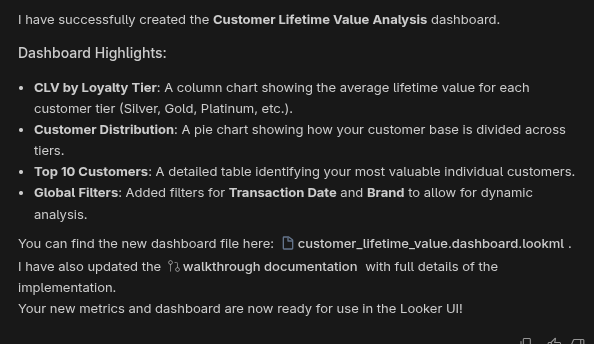
Again, approve the implementation plan and accept the code changes. Now this new LookML file will sync with Looker automatically.
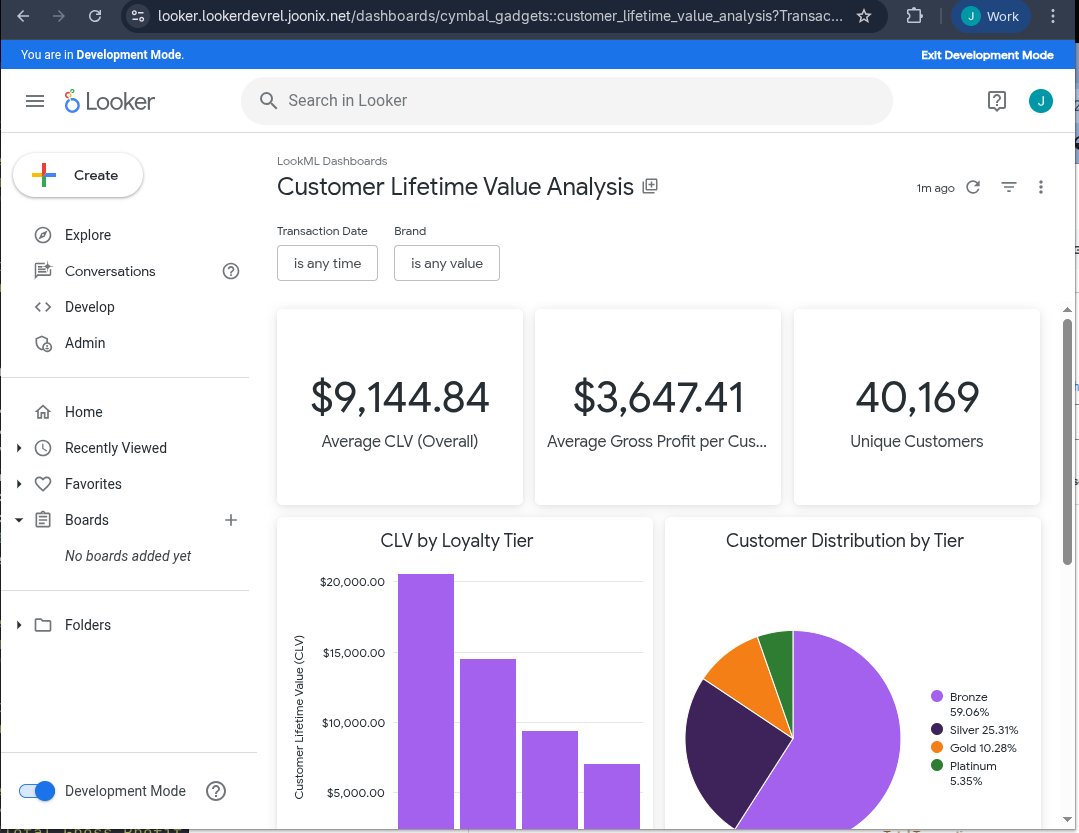
Test in Looker
In Development Mode, navigate to the folder LookML Dashboards. Select the newly created dashboard to view it.
6. Clean up
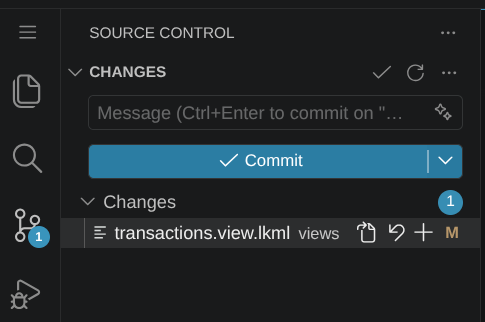
- In Antigravity under the Source Control pane, revert the LookML changes if wanted. Next to each modified LookML file there will be a symbol like ↶ to revert the file. Press that button for each file.
- In Looker select Admin then Database then Connections. Click the gear icon for the
cymbal_gadgetsconnection and choose Delete. Confirm that you want to delete the connection. - In Looker use Development Mode. Select Develop then the
cymbal_gadgetsproject. Under Project Settings select Delete Project. Confirm that you want to delete the project by typing the name of the project -cymbal_gadgets- then selecting the button labeled Permanently Delete cymbal_gadgets.
7. Congratulations
Congratulations for completing the codelab.
What we've covered
- How to modify LookML with an Agent.
- How to verify implementation plans.
- How to test from the IDE.
- How to test in the Looker UI.
- How to create a new dashboard with an Agent.
Things to try
Now try the following prompts in the UI to see different capabilities of the agentic IDE:
- Good descriptions are critical for both users and AI. Prompt the Agent to add descriptions to all the fields that don't have one.
- Ask the Agent to add more timeframes to one of the Dimension Groups.
- Ask the Agent to perform a query like "revenue broken down by product category pivoted by Quarter."