
1. Overview
With this codelab, we will demonstrate a simple, easy-to-do method for setting up AlloyDB.

What you'll build
As part of this, you will create an AlloyDB instance and cluster in one click installation and you'll learn to set it up quickly in your future projects as well.
Requirements
2. Before you begin
Create a project
- In the Google Cloud Console, on the project selector page, select or create a Google Cloud project.
- Make sure that billing is enabled for your Cloud project. Learn how to check if billing is enabled on a project.
- You'll use Cloud Shell, a command-line environment running in Google Cloud. Click Activate Cloud Shell at the top of the Google Cloud console.

- Once connected to Cloud Shell, you check that you're already authenticated and that the project is set to your project ID using the following command:
gcloud auth list
- Run the following command in Cloud Shell to confirm that the gcloud command knows about your project.
gcloud config list project
- If your project is not set, use the following command to set it:
gcloud config set project <YOUR_PROJECT_ID>
- Enable the required APIs: Follow the link and enable the APIs.
Alternatively you can use the gcloud command for this. Refer documentation for gcloud commands and usage.
3. Why AlloyDB for your business data & AI?
AlloyDB for PostgreSQL isn't just another managed Postgres service. It is a fundamental modernization of the engine designed for the AI era. Here is why it stands alone compared to standard databases:
- Hybrid Transactional & Analytical Processing (HTAP)
Most databases force you to move data to a data warehouse for analytics. AlloyDB has a built-in Columnar Engine that automatically keeps relevant data in a column store in-memory. This makes analytical queries up to 100x faster than standard PostgreSQL, allowing you to run real-time business intelligence on your operational data without complex ETL pipelines.
- Native AI Integration:
AlloyDB bridges the gap between your data and Generative AI. With the google_ml_integration extension, you can call Vertex AI models (like Gemini) directly within your SQL queries. This means you can perform sentiment analysis, translation, or entity extraction as a standard database transaction, ensuring data security and minimizing latency.
- Superior Vector Search:
While standard PostgreSQL uses pgvector, AlloyDB supercharges it with the ScaNN index (Scalable Nearest Neighbors), developed by Google Research. This provides significantly faster vector similarity search and higher recall at scale compared to standard HNSW indexes found in other Postgres offerings. It enables you to build high-performance RAG (Retrieval Augmented Generation) applications natively.
- Performance at Scale:
AlloyDB offers up to 4x faster transactional performance than standard PostgreSQL. It separates compute from storage, allowing them to scale independently. The storage layer is intelligent, handling write-ahead logging (WAL) processing to offload work from the primary instance.
- Enterprise Availability:
It offers a 99.99% uptime SLA, inclusive of maintenance. This level of reliability for a PostgreSQL-compatible database is achieved through a cloud-native architecture that ensures rapid failure recovery and storage durability.
4. AlloyDB setup
In this lab we'll use AlloyDB as the database for the test data. It uses clusters to hold all of the resources, such as databases and logs. Each cluster has a primary instance that provides an access point to the data. Tables will hold the actual data.
Let's create an AlloyDB cluster, instance and table where the test dataset will be loaded.
- Click the button or Copy the link below to your browser where you have the Google Cloud Console user logged in.
Alternative approach to clicking the above button (recommended):
# 1. Clone the repository
git clone https://github.com/GoogleCloudPlatform/devrel-demos.git

# 2. Navigate to the project directory
cd devrel-demos/infrastructure/easy-alloydb-setup
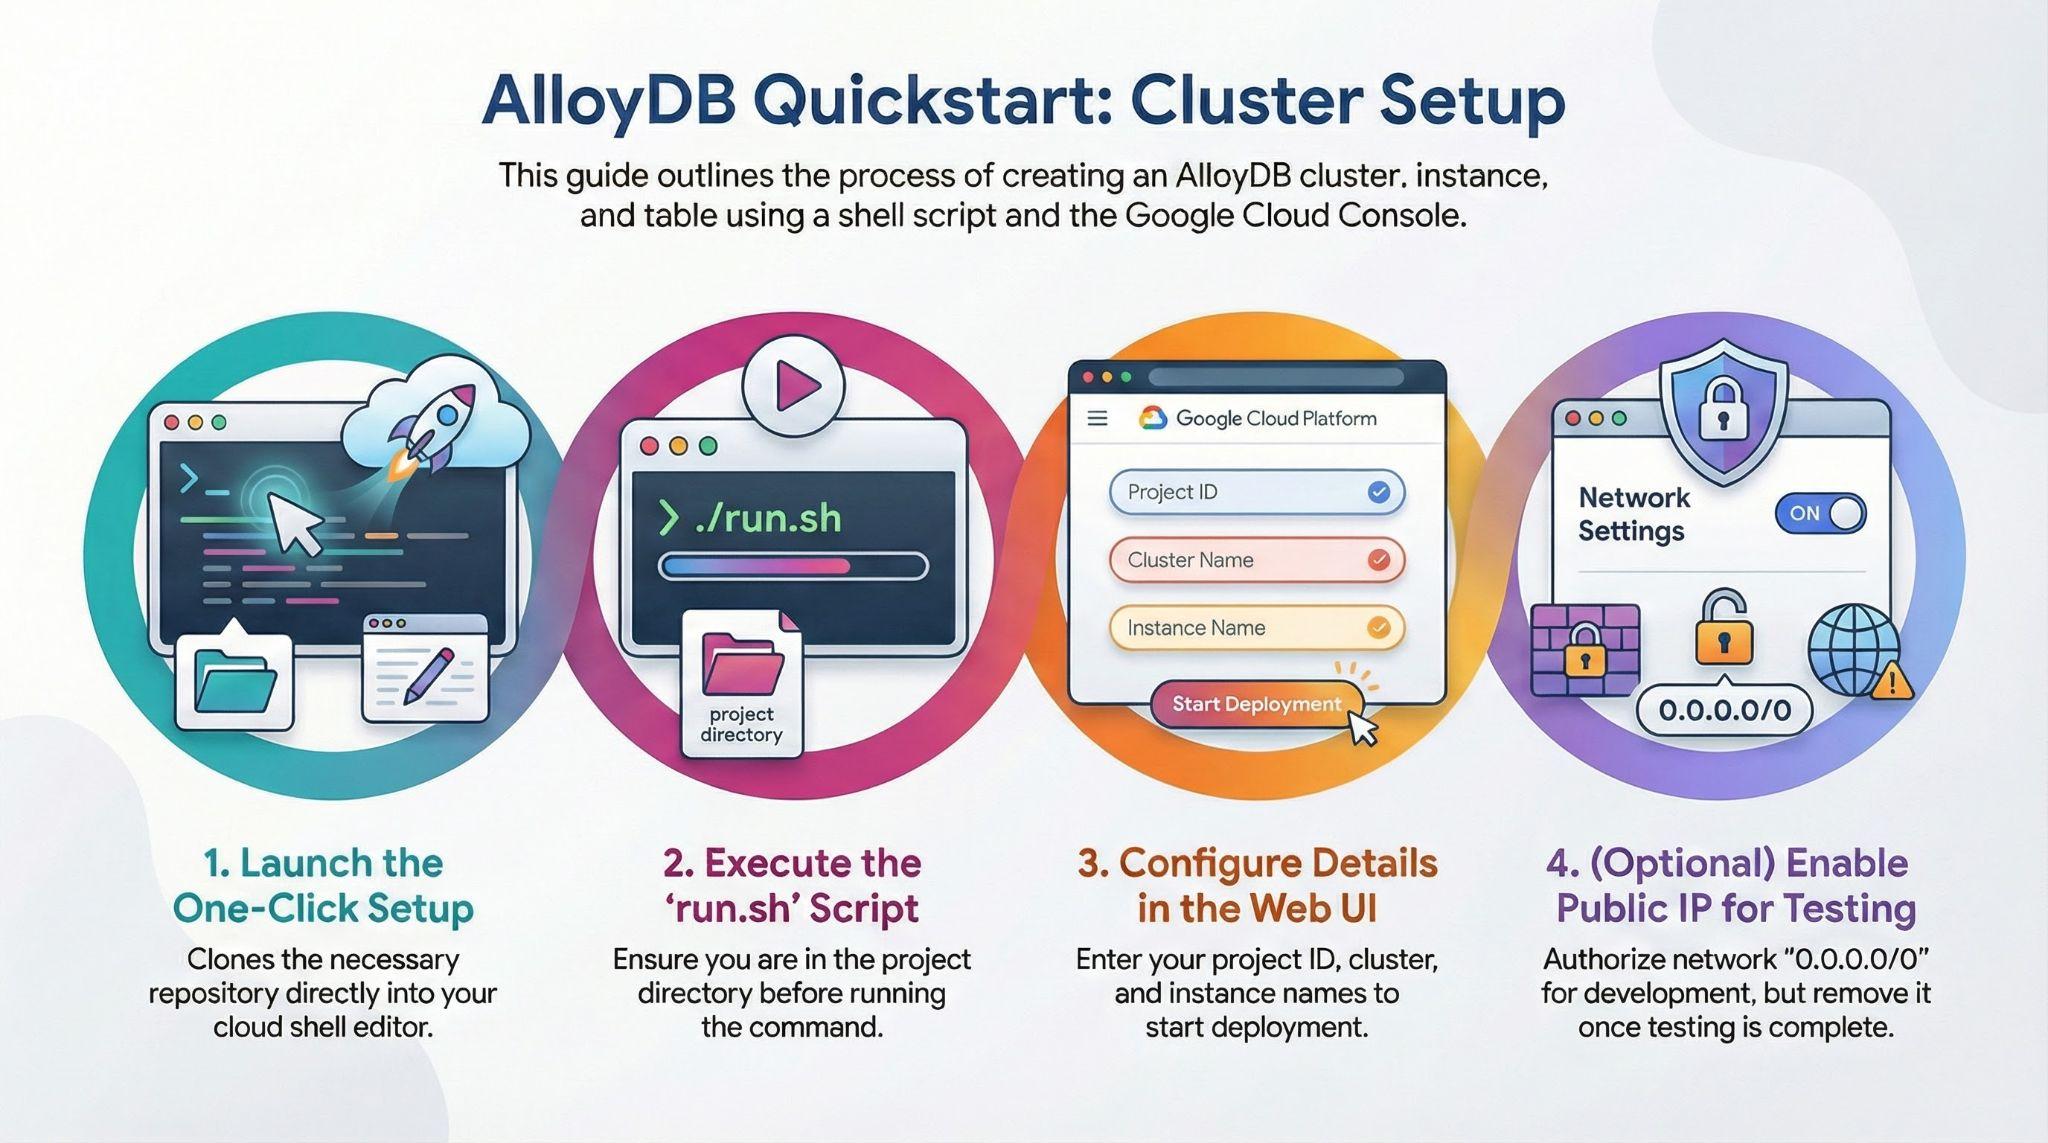
- Once this step is complete the repo will be cloned to your local cloud shell editor and you will be able to run the command below from within the project folder (important to make sure you are in the project directory):
sh run.sh
- Now use the UI (clicking the link in the terminal or clicking the "preview on web" link in the terminal.
- Enter your details for project id, cluster and instance names to get started.
- Go grab a coffee while the logs scroll & you can read about how it's doing this behind the scenes here.
5. Setup Illustrated
6. Cleanup
Once this trial lab is done, do not forget to delete alloyDB cluster and instance.
It should clean up the cluster along with its instance(s).
7. Congratulations
You're good to go!!!
Get started with setting up your data with AlloyDB quick & easy!!!