
1. 概览
在此 Codelab 中,您将构建一个供应链编排器代理。此应用可让用户使用自然语言分析库存、跟踪物流和管理供应链风险。
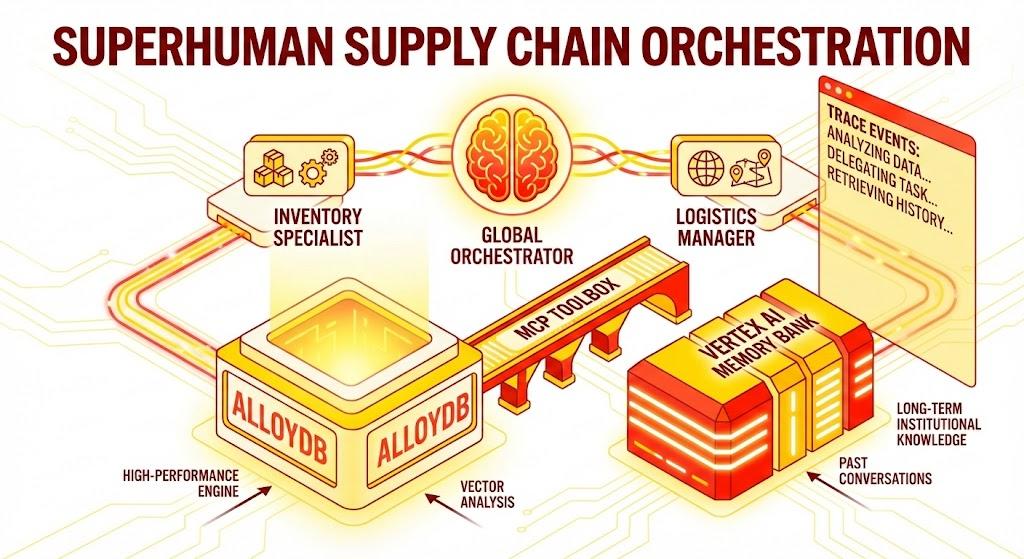
我们将利用 Google 的智能体开发套件 (ADK) 构建一个多智能体架构,该架构可保持上下文、通过 Vertex AI 记忆库记住用户偏好,并通过 MCP Toolbox 与 AlloyDB 中存储的海量数据集进行交互。
构建内容
一个 Python Flask 应用,包含:
全局编排器代理:管理对话流程和委托的根代理。
专家智能体:“InventorySpecialist”和“LogisticsManager”用于处理特定领域的任务。
记忆集成:使用 Vertex AI 记忆库的短期会话记忆和长期记忆。
叙事界面:一种可视化代理推理过程(跟踪记录上下文)的 Web 界面。
学习内容
- 如何使用 Google ADK 创建专业代理和子代理。
- 如何集成 Vertex AI 记忆库以实现长期智能体记忆。
- 如何使用 MCP Toolbox 将代理连接到 AlloyDB 数据工具。
- 如何实现 ADK 回调来跟踪和直观呈现智能体推理过程。
- 如何使用 Cloud Run 部署解决方案或在本地运行。
架构
技术堆栈
- AlloyDB for PostgreSQL:作为高性能运营数据库,可存储 5 万多条供应链记录。它支持向量搜索和检索。
- MCP Toolbox for Databases:充当“编排指挥家”,将 AlloyDB 数据公开为智能体可调用的可执行工具。
- 智能体开发套件 (ADK):用于定义智能体、指令和工具的框架。
- Vertex AI 记忆库:提供长期记忆,使智能体能够跨会话回忆起用户偏好和过去的互动。
- Vertex AI 会话服务:管理短期对话上下文。
流程
- 用户查询:用户提出问题(例如“查看 Premium Ice Cream 的库存”)。
- 记忆检查:编排器检查记忆库中是否有相关的过往信息(例如“用户是 EMEA 区域的区域经理”)。
- 委托:编排器将任务委托给 InventorySpecialist。
- 工具执行:专家使用 MCP Toolbox 提供的工具查询 AlloyDB。
- 回答:智能体处理数据并返回采用 Markdown 格式的表格。
- 记忆存储:重要的互动会保存回记忆库。
要求
2. 准备工作
创建项目
- 在 Google Cloud Console 的项目选择器页面上,选择或创建一个 Google Cloud 项目。
- 确保您的 Cloud 项目已启用结算功能。了解如何检查项目是否已启用结算功能。
- 您将使用 Cloud Shell,它是在 Google Cloud 中运行的命令行环境。点击 Google Cloud 控制台顶部的“激活 Cloud Shell”。

- 连接到 Cloud Shell 后,您可以使用以下命令检查自己是否已通过身份验证,以及项目是否已设置为您的项目 ID:
gcloud auth list
- 在 Cloud Shell 中运行以下命令,以确认 gcloud 命令了解您的项目。
gcloud config list project
- 如果项目未设置,请使用以下命令进行设置:
gcloud config set project <YOUR_PROJECT_ID>
- 启用必需的 API:点击此链接并启用相应的 API。
或者,您也可以使用 gcloud 命令来完成此操作。如需了解 gcloud 命令和用法,请参阅文档。
注意事项和问题排查
“幽灵项目” 综合征 | 您运行了 |
结算 路障 | 您已启用项目,但忘记了结算账号。AlloyDB 是一款高性能引擎;如果“油箱”(结算)为空,它将无法启动。 |
API 传播 延迟 | 您点击了“启用 API”,但命令行仍显示 |
配额 Quags | 如果您使用的是全新试用账号,则可能会达到 AlloyDB 实例的区域配额。如果 |
“隐藏”服务代理 | 有时,AlloyDB 服务代理不会自动获得 |
3. 数据库设置
我们应用的核心是 AlloyDB for PostgreSQL。我们利用了其强大的向量功能和集成的列式引擎,为 5 万多条 SCM 记录生成了嵌入。这实现了近乎实时的向量分析,使我们的代理能够在数毫秒内识别海量数据集中的库存异常或物流风险。
在本实验中,我们将使用 AlloyDB 作为测试数据的数据库。它使用集群来保存所有资源,例如数据库和日志。每个集群都有一个主实例,可提供对数据的接入点。表将包含实际数据。
我们来创建 AlloyDB 集群、实例和表,以便加载测试数据集。
- 点击相应按钮,或将下方的链接复制到已登录 Google Cloud 控制台用户的浏览器中。
或者,您也可以从已兑换结算账号的项目中前往 Cloud Shell 终端,然后使用以下命令克隆 GitHub 代码库 并前往相应项目:
git clone https://github.com/AbiramiSukumaran/easy-alloydb-setup

cd easy-alloydb-setup
- 完成此步骤后,代码库将克隆到本地 Cloud Shell 编辑器,您将能够从项目文件夹中运行以下命令(请务必确保您位于项目目录中):
sh run.sh
- 现在,使用界面(点击终端中的链接或点击终端中的“在网页上预览”链接)。
- 输入项目 ID、集群名称和实例名称等详细信息,即可开始使用。
- 在日志滚动时,您可以去喝杯咖啡,然后点击此处了解该功能在后台的运作方式。
注意事项和问题排查
“耐心”问题 | 数据库集群是重型基础架构。如果您因 Cloud Shell 会话“看起来卡住了”而刷新页面或终止会话,最终可能会得到一个“幽灵”实例,该实例已部分完成预配,但无法在不进行人工干预的情况下删除。 |
区域不匹配 | 如果您在 |
僵尸集群 | 如果您之前曾使用过某个集群名称,但未删除该集群,脚本可能会提示该集群名称已存在。集群名称在项目中必须是唯一的。 |
Cloud Shell 超时 | 如果您的咖啡休息时间为 30 分钟,Cloud Shell 可能会进入休眠状态并断开 |
4. 架构配置
在 AlloyDB 集群和实例运行后,前往 AlloyDB Studio SQL 编辑器,启用 AI 扩展程序并预配架构。
您可能需要等待实例完成创建。完成后,使用您在创建集群时创建的凭据登录 AlloyDB。使用以下数据向 PostgreSQL 进行身份验证:
- 用户名:“
postgres” - 数据库:“
postgres” - 密码:“
alloydb”(或您在创建时设置的任何密码)
成功通过身份验证进入 AlloyDB Studio 后,您可以在编辑器中输入 SQL 命令。您可以使用最后一个窗口右侧的加号添加多个编辑器窗口。
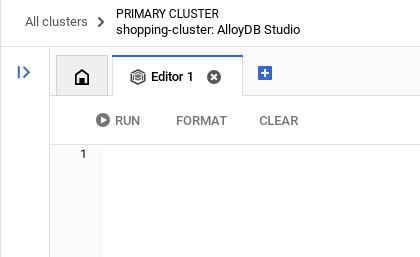
您将在编辑器窗口中输入 AlloyDB 命令,并根据需要使用“运行”“格式化”和“清除”选项。
启用扩展程序
在构建此应用时,我们将使用扩展程序 pgvector 和 google_ml_integration。借助 pgvector 扩展程序,您可以存储和搜索向量嵌入。google_ml_integration 扩展程序提供用于访问 Vertex AI 预测端点以在 SQL 中获取预测结果的函数。运行以下 DDL 以启用这些扩展程序:
CREATE EXTENSION IF NOT EXISTS google_ml_integration CASCADE;
CREATE EXTENSION IF NOT EXISTS vector;
创建表
您可以在 AlloyDB Studio 中使用以下 DDL 语句创建表:
DROP TABLE IF EXISTS shipments;
DROP TABLE IF EXISTS products;

-- 1. Product Inventory Table

CREATE TABLE products (
id SERIAL PRIMARY KEY,
name VARCHAR(255) NOT NULL,
category VARCHAR(100),
stock_level INTEGER,
distribution_center VARCHAR(100),
region VARCHAR(50),
embedding vector(768),
last_updated TIMESTAMP DEFAULT CURRENT_TIMESTAMP
);

-- 2. Logistics & Shipments
CREATE TABLE shipments (
shipment_id SERIAL PRIMARY KEY,
product_id INTEGER REFERENCES products(id),
status VARCHAR(50), -- 'In Transit', 'Delayed', 'Delivered', 'Pending'
estimated_arrival TIMESTAMP,
route_efficiency_score DECIMAL(3, 2)
);
embedding 列将允许存储某些文本字段的矢量值。
数据注入
运行以下 SQL 语句集,以将 50,000 条记录批量插入到商品表中:
-- We use a CROSS JOIN pattern with realistic naming segments to create meaningful variety
DO $$
DECLARE
brand_names TEXT[] := ARRAY['Artisan', 'Nature', 'Elite', 'Pure', 'Global', 'Eco', 'Velocity', 'Heritage', 'Aura', 'Summit'];
product_types TEXT[] := ARRAY['Ice Cream', 'Body Wash', 'Laundry Detergent', 'Shampoo', 'Mayonnaise', 'Deodorant', 'Tea', 'Soup', 'Face Cream', 'Soap'];
variants TEXT[] := ARRAY['Classic', 'Gold', 'Premium', 'Eco-Friendly', 'Organic', 'Night-Repair', 'Extra-Fresh', 'Zero-Sugar', 'Sensitive', 'Maximum-Strength'];
regions TEXT[] := ARRAY['EMEA', 'APAC', 'LATAM', 'NAMER'];
dcs TEXT[] := ARRAY['London-Hub', 'Mumbai-Central', 'Sao-Paulo-Logistics', 'Singapore-Port', 'Rotterdam-Gate', 'New-York-DC'];
BEGIN
INSERT INTO products (name, category, stock_level, distribution_center, region)
SELECT
b || ' ' || v || ' ' || t as name,
CASE
WHEN t IN ('Ice Cream', 'Mayonnaise', 'Tea', 'Soup') THEN 'Food & Refreshment'
WHEN t IN ('Body Wash', 'Shampoo', 'Deodorant', 'Face Cream', 'Soap') THEN 'Personal Care'
ELSE 'Home Care'
END as category,
floor(random() * 20000 + 100)::int as stock_level,
dcs[floor(random() * 6 + 1)] as distribution_center,
regions[floor(random() * 4 + 1)] as region
FROM
unnest(brand_names) b,
unnest(variants) v,
unnest(product_types) t,
generate_series(1, 50); -- 10 * 10 * 10 * 50 = 50,000 records
END $$;
让我们插入特定于演示的记录,以确保高管风格的问题得到可预测的答案
-- These ensure you have predictable answers for specific "Executive" questions
INSERT INTO products (name, category, stock_level, distribution_center, region) VALUES
('Magnum Ultra Gold Limited Edition', 'Food & Refreshment', 45, 'Rotterdam-Gate', 'EMEA'),
('Dove Pro-Health Deep Moisture', 'Personal Care', 12000, 'Mumbai-Central', 'APAC'),
('Hellmanns Real Organic Mayonnaise', 'Food & Refreshment', 8000, 'London-Hub', 'EMEA');
插入货件数据
-- Shipments Generation (More shipments than products)
INSERT INTO shipments (product_id, status, estimated_arrival, route_efficiency_score)
SELECT
id,
CASE
WHEN random() > 0.8 THEN 'Delayed'
WHEN random() > 0.4 THEN 'In Transit'
ELSE 'Delivered'
END,
NOW() + (random() * 10 || ' days')::interval,
(random() * 0.5 + 0.5)::decimal(3,2)
FROM products
WHERE random() > 0.3; -- Create shipments for ~70% of products


-- Add duplicate shipments for some products to show complex logistics
INSERT INTO shipments (product_id, status, estimated_arrival, route_efficiency_score)
SELECT id, 'In Transit', NOW() + INTERVAL '12 days', 0.88
FROM products
LIMIT 5000;
授予权限
运行以下语句,以授予对“embedding”函数的执行权限:
GRANT EXECUTE ON FUNCTION embedding TO postgres;
为 AlloyDB 服务账号授予 Vertex AI User 角色
在 Google Cloud IAM 控制台中,向 AlloyDB 服务账号(格式如下:service-<<PROJECT_NUMBER>>@gcp-sa-alloydb.iam.gserviceaccount.com)授予“Vertex AI 用户”角色访问权限。PROJECT_NUMBER 将包含您的项目编号。
或者,您也可以从 Cloud Shell 终端运行以下命令:
PROJECT_ID=$(gcloud config get-value project)


gcloud projects add-iam-policy-binding $PROJECT_ID \
  --member="serviceAccount:service-$(gcloud projects describe $PROJECT_ID --format="value(projectNumber)")@gcp-sa-alloydb.iam.gserviceaccount.com" \
--role="roles/aiplatform.user"
生成嵌入
接下来,我们为特定的有意义的文本字段生成向量嵌入:
WITH
 rows_to_update AS (
 SELECT
   id
 FROM
   products
 WHERE
   embedding IS NULL
 LIMIT
   5000 )
UPDATE
 products
SET
 embedding = ai.embedding('text-embedding-005', name || ' ' || category || ' ' || distribution_center || ' ' || region)::vector
FROM
 rows_to_update
WHERE
 products.id = rows_to_update.id
 AND embedding IS null;
在上述语句中,我们将限制设置为 5000,因此请务必反复高效运转该语句,直到表中没有列嵌入为 NULL 的行。
注意事项和问题排查
“密码遗忘”循环 | 如果您使用了“一键”设置,但不记得密码,请前往控制台中的实例基本信息页面,然后点击“修改”以重置 |
“找不到扩展程序”错误 | 如果 |
IAM 传播差距 | 您运行了 |
向量维度不匹配 | 将 |
项目 ID 拼写错误 | 在 |
5. 工具和工具箱设置
MCP Toolbox for Databases 是一款适用于数据库的开源 MCP 服务器。它通过处理连接池、身份验证和更多复杂性问题,让您能够更轻松、更快速、更安全地开发工具。工具箱可帮助您构建生成式 AI 工具,让智能体能够访问数据库中的数据。
我们将 Model Context Protocol (MCP) Toolbox for Databases 用作“指挥”。它充当代理和 AlloyDB 之间的标准化中间件。通过定义 tools.yaml 配置,该工具箱会自动将复杂的数据库操作公开为简洁的可执行工具,如 search_products_by_context 或 check_inventory_levels。这样一来,您就无需在代理逻辑中手动进行连接池管理或编写样板 SQL。
安装 Toolbox 服务器
在 Cloud Shell 终端中,创建一个文件夹来保存新的工具 YAML 文件和工具箱二进制文件:
mkdir scm-agent-toolbox

cd scm-agent-toolbox
在该新文件夹中,运行以下一组命令:
# see releases page for other versions
export VERSION=0.27.0
curl -L -o toolbox https://storage.googleapis.com/mcp-toolbox-for-databases/v$VERSION/linux/amd64/toolbox
chmod +x toolbox
接下来,进入 Cloud Shell 编辑器,在该新文件夹中创建 tools.yaml 文件,并将此代码库文件的内容复制到 tools.yaml 文件中。
sources:
    supply_chain_db:
        kind: "alloydb-postgres"
        project: "YOUR_PROJECT_ID"
        region: "us-central1"
        cluster: "YOUR_CLUSTER"
        instance: "YOUR_INSTANCE"
        database: "postgres"
        user: "postgres"
        password: "YOUR_PASSWORD"

tools:
  search_products_by_context:
    kind: postgres-sql
    source: supply_chain_db
    description: Find products in the inventory using natural language search and vector embeddings.
    parameters:
      - name: search_text
        type: string
        description: Description of the product or category the user is looking for.
    statement: |
     SELECT name, category, stock_level, distribution_center, region
      FROM products
      ORDER BY embedding <=> ai.embedding('text-embedding-005', $1)::vector
      LIMIT 5;

  check_inventory_levels:
    kind: postgres-sql
    source: supply_chain_db
    description: Get precise stock levels for a specific product name.
    parameters:
      - name: product_name
        type: string
        description: The exact or partial name of the product.
    statement: |
     SELECT name, stock_level, distribution_center, last_updated
      FROM products
      WHERE name ILIKE '%' || $1 || '%'
      ORDER BY stock_level DESC;

  track_shipment_status:
    kind: postgres-sql
    source: supply_chain_db
    description: Retrieve real-time logistics and shipping status for a specific region or product.
    parameters:
      - name: region
        type: string
        description: The geographical region to filter shipments (e.g., EMEA, APAC).
    statement: |
     SELECT p.name, s.status, s.estimated_arrival, s.route_efficiency_score
      FROM shipments s
      JOIN products p ON s.product_id = p.id
      WHERE p.region = $1
      ORDER BY s.estimated_arrival ASC;

  analyze_supply_chain_risk:
    kind: postgres-sql
    source: supply_chain_db
    description: Rerank and filter shipments based on risk profiles and efficiency scores using Google ML reranker.
    parameters:
      - name: risk_context
        type: string
        description: The business context for risk analysis (e.g., 'heatwave impact' or 'port strike').
    statement: |
     WITH initial_ranking AS (
      SELECT s.shipment_id, p.name, s.status, p.distribution_center,
      ROW_NUMBER() OVER () AS ref_number
      FROM shipments s
      JOIN products p ON s.product_id = p.id
      WHERE s.status != 'Delivered'
      LIMIT 10
      ),
      reranked_results AS (
      SELECT index, score FROM
      ai.rank(
      model_id => 'semantic-ranker-default-003',
      search_string => $1,
      documents => (SELECT ARRAY_AGG(name || ' at ' || distribution_center ORDER BY ref_number) FROM initial_ranking)
      )
      )
      SELECT i.name, i.status, i.distribution_center, r.score
      FROM initial_ranking i, reranked_results r
      WHERE i.ref_number = r.index
      ORDER BY r.score DESC;

toolsets:
   supply_chain_toolset:
     - search_products_by_context
     - check_inventory_levels
     - track_shipment_status
     - analyze_supply_chain_risk
现在,在本地服务器中测试 tools.yaml 文件:
./toolbox --tools-file "tools.yaml"
您也可以在界面中进行测试
./toolbox --ui
太棒了!!确认一切正常后,请按如下方式在 Cloud Run 中部署该应用。
Cloud Run 部署
- 设置 PROJECT_ID 环境变量:
export PROJECT_ID="my-project-id"
- 初始化 gcloud CLI:
gcloud init
gcloud config set project $PROJECT_ID
- 您必须启用以下 API:
gcloud services enable run.googleapis.com \
                       cloudbuild.googleapis.com \
                       artifactregistry.googleapis.com \
                       iam.googleapis.com \
                       secretmanager.googleapis.com
- 如果您还没有后端服务账号,请创建一个:
gcloud iam service-accounts create toolbox-identity
- 授予使用 Secret Manager 的权限:
gcloud projects add-iam-policy-binding $PROJECT_ID \
    --member serviceAccount:toolbox-identity@$PROJECT_ID.iam.gserviceaccount.com \
    --role roles/secretmanager.secretAccessor
- 向服务账号授予特定于 AlloyDB 源的其他权限(roles/alloydb.client 和 roles/serviceusage.serviceUsageConsumer)
gcloud projects add-iam-policy-binding $PROJECT_ID \
    --member serviceAccount:toolbox-identity@$PROJECT_ID.iam.gserviceaccount.com \
    --role roles/alloydb.client


gcloud projects add-iam-policy-binding $PROJECT_ID \
    --member serviceAccount:toolbox-identity@$PROJECT_ID.iam.gserviceaccount.com \
    --role serviceusage.serviceUsageConsumer
- 将 tools.yaml 上传为 Secret:
gcloud secrets create tools-scm-agent --data-file=tools.yaml
- 如果您已有密文,并想更新密文版本,请执行以下操作:
gcloud secrets versions add tools-scm-agent --data-file=tools.yaml
- 为要用于 Cloud Run 的容器映像设置环境变量:
export IMAGE=us-central1-docker.pkg.dev/database-toolbox/toolbox/toolbox:latest
- 使用以下命令将 Toolbox 部署到 Cloud Run:
如果您已在 AlloyDB 实例中启用公开访问权限(不建议这样做),请按照以下命令将应用部署到 Cloud Run:
gcloud run deploy toolbox-scm-agent \
    --image $IMAGE \
    --service-account toolbox-identity \
    --region us-central1 \
    --set-secrets "/app/tools.yaml=tools-scm-agent:latest" \
    --args="--tools-file=/app/tools.yaml","--address=0.0.0.0","--port=8080" \
    --allow-unauthenticated
如果您使用的是 VPC 网络,请使用以下命令:
gcloud run deploy toolbox-scm-agent \
    --image $IMAGE \
    --service-account toolbox-identity \
    --region us-central1 \
    --set-secrets "/app/tools.yaml=tools-scm-agent:latest" \
    --args="--tools-file=/app/tools.yaml","--address=0.0.0.0","--port=8080" \
    # TODO(dev): update the following to match your VPC details
    --network <<YOUR_NETWORK_NAME>> \
    --subnet <<YOUR_SUBNET_NAME>> \
    --allow-unauthenticated
6. 代理设置
借助智能体开发套件 (ADK),我们已从单体提示转向专业的多智能体架构:
- InventorySpecialist:专注于产品库存和仓储指标。
- LogisticsManager:全球运输路线和风险分析方面的专家。
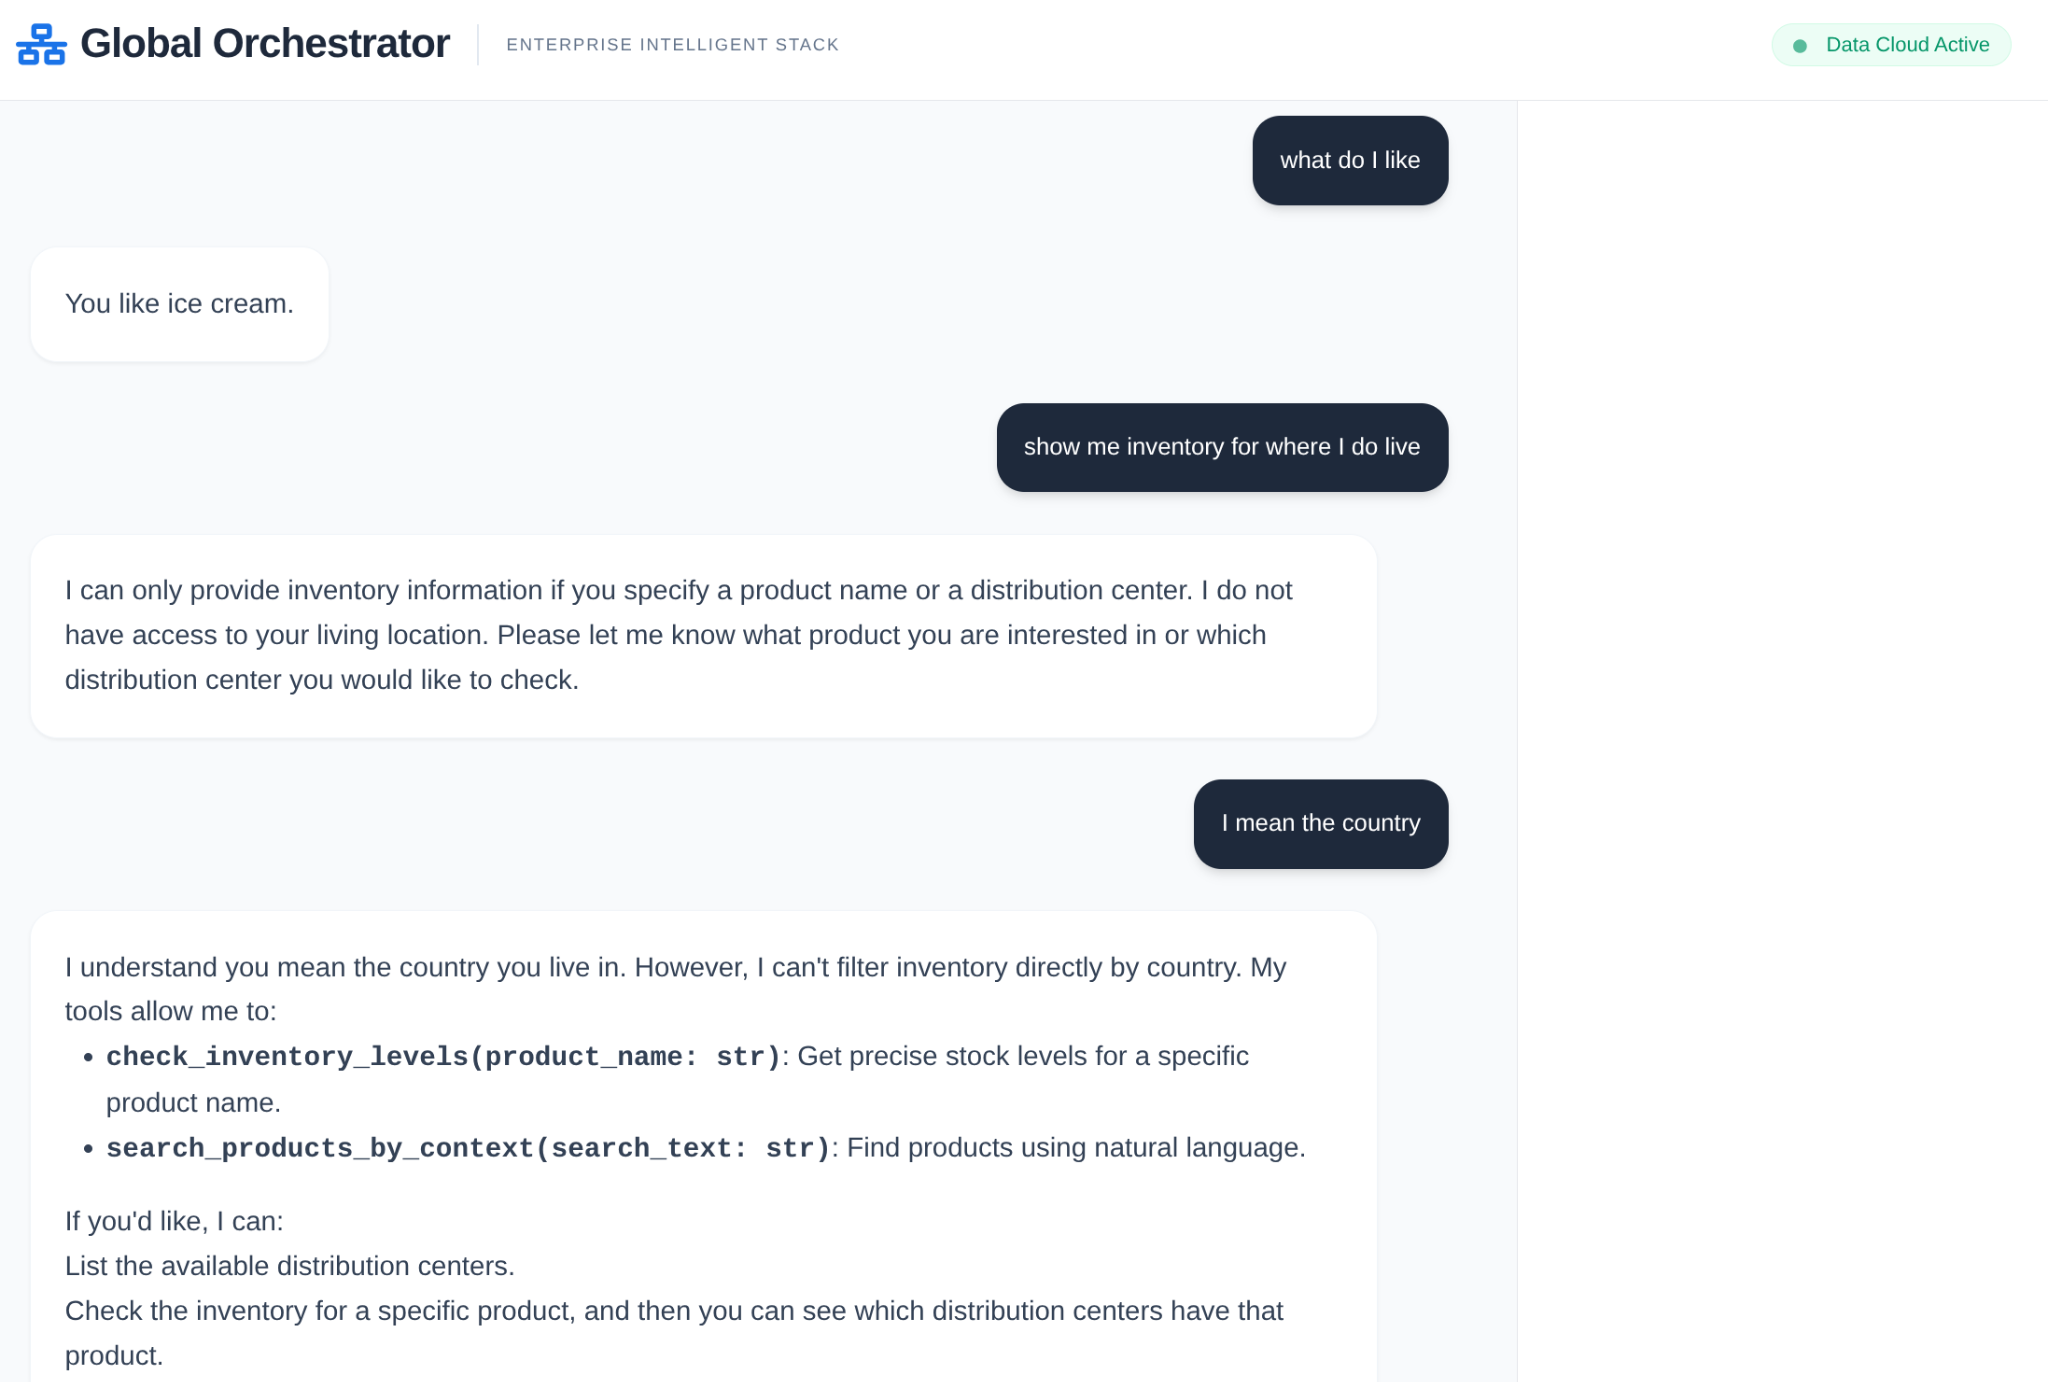
- GlobalOrchestrator:使用推理来委派任务和合成结果的“大脑”。
将此代码库克隆到您的项目中,然后我们来逐步了解一下。
如需克隆此项目,请在 Cloud Shell 终端中(在根目录中或从您要创建此项目的任何位置)运行以下命令:
git clone https://github.com/AbiramiSukumaran/scm-memory-agent
- 这应该会创建项目,您可以在 Cloud Shell 编辑器中验证这一点。
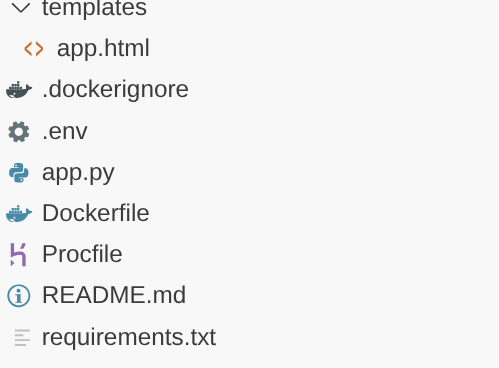
- 请务必使用项目和实例的值更新 .env 文件。
代码演示
Orchestrator 代理快速浏览
Go to app.py and you should be able to see the following snippet:
orchestrator = adk.Agent(
    name="GlobalOrchestrator",
    model="gemini-2.5-flash",
    description="Global Supply Chain Orchestrator root agent.",
    instruction="""
    You are the Global Supply Chain Brain. You are responsible for products, inventory and logistics.
    You also have access to the memory tool, remember to include all the information that the tool can provide you with about the user before you respond.
    1. Understand intent and delegate to specialists. As the Global Orchestrator, you have access to the full conversation history with the user.
    When you transfer a query to a specialist agent, sub agent or tool, share the important facts and information from your memory to them so they can operate with the full context.
    2. Ensure the final response is professional and uses Markdown tables for data.
    3. If a specialist provides a long list, ensure only the top 10 items are shown initially.
    4. Conclude with a brief, high-level executive summary of what the data implies.
    """,
    tools=[adk.tools.preload_memory_tool.PreloadMemoryTool()],
    sub_agents=[inventory_agent, logistics_agent],

    #after_agent_callback=auto_save_session_to_memory_callback,
)
此代码段是根的定义,根是编排代理,用于接收用户发起的对话或请求,并根据任务将对话或请求路由到相应的分代理或用户相应的工具。
- 下面我们来看看库存代理
inventory_agent = adk.Agent(
    name="InventorySpecialist",
    model="gemini-2.5-flash",
    description="Specialist in product stock and warehouse data.",
    instruction="""
    Analyze inventory levels.
    1. Use 'search_products_by_context' or 'check_inventory_levels'.
    2. ALWAYS format results as a clean Markdown table.
    3. If there are many results, display only the TOP 10 most relevant ones.
    4. At the end, state: 'There are additional records available. Would you like to see more?'
    """,
    tools=tools
)
此特定子代理专门用于处理与商品目录相关的活动,例如根据上下文搜索商品以及检查商品目录级别。
- 然后是物流子代理:
logistics_agent = adk.Agent(
    name="LogisticsManager",
    model="gemini-2.5-flash",
    description="Expert in global shipping routes and logistics tracking.",
    instruction="""
    Check shipment statuses.
    1. Use 'track_shipment_status' or 'analyze_supply_chain_risk'.
    2. ALWAYS format results as a clean Markdown table.
    3. Limit initial output to the top 10 shipments.
    4. Ask if the user needs the full manifest if more results exist.
    """,
    tools=tools
)
此特定分代理专门负责物流活动,例如跟踪货件和分析供应链中的风险。
- 我们目前讨论的所有 3 个代理都使用工具,并且通过我们在上一部分中已部署的 Toolbox 服务器引用工具。请参阅以下代码段:
from toolbox_core import ToolboxSyncClient

TOOLBOX_SERVER = os.environ["TOOLBOX_SERVER"]
TOOLBOX_TOOLSET = os.environ["TOOLBOX_TOOLSET"]

# --- ADK TOOLBOX CONFIGURATION ---
toolbox = ToolboxSyncClient(TOOLBOX_SERVER)
tools = toolbox.load_toolset(TOOLBOX_TOOLSET)
此特定分代理专门负责物流活动,例如跟踪货件和分析供应链中的风险。
7. Agent Engine
在初始运行中,创建 Agent Engine
import vertexai

GOOGLE_CLOUD_PROJECT = os.environ["GOOGLE_CLOUD_PROJECT"]
GOOGLE_CLOUD_LOCATION = os.environ["GOOGLE_CLOUD_LOCATION"]

client = vertexai.Client(
  project=GOOGLE_CLOUD_PROJECT,
  location=GOOGLE_CLOUD_LOCATION
)

agent_engine = client.agent_engines.create()
- 对于下一次运行,请更新 Agent Engine(使用记忆库)配置:
agent_engine = client.agent_engines.update(
    name=APP_NAME,
    config={
        "context_spec": {
            "memory_bank_config": {
                "generation_config": {
                    "model": f"projects/{PROJECT_ID}/locations/{GOOGLE_CLOUD_LOCATION}/publishers/google/models/gemini-2.5-flash"
                }
            }
        }
    })
8. 上下文、运行和内存
上下文管理分为两个不同的层,以确保代理感觉像是一个持续的合作伙伴,而不是一个无状态的机器人:
短期记忆(会话):通过 VertexAiSessionService 管理,用于跟踪单次互动中的即时事件记录(用户消息、工具响应)。
长期记忆 (Memory Bank):通过 adk.memorybankservice 由 Vertex AI Memory Bank 提供支持。此层会提取“有意义”的信息(例如用户对特定运输公司的偏好或仓库延迟的周期性),并在会话之间保留这些信息。
在对话范围内初始化会话以用于会话内存
此部分代码段用于为当前用户创建当前应用的会话。
from google.adk.sessions import VertexAiSessionService

...

session_service = VertexAiSessionService(
    project=PROJECT_ID,
    location=GOOGLE_CLOUD_LOCATION,
)

...

# Initialize the session *outside* of the route handler to avoid repeated creation
session = None
session_lock = threading.Lock()

async def initialize_session():
    global session
    try:
        session = await session_service.create_session(app_name=APP_NAME, user_id=USER_ID)
        print(f"Session {session.id} created successfully.")  # Add a log
    except Exception as e:
        print(f"Error creating session: {e}")
        session = None  # Ensure session is None in case of error

# Create the session on app startup
asyncio.run(initialize_session())
初始化 Vertex AI 记忆库以实现长期记忆
此部分代码段用于实例化代理引擎的 Vertex AI 记忆库服务对象。
from google.adk.memory import InMemoryMemoryService
from google.adk.memory import VertexAiMemoryBankService

...

try:
    memory_bank_service = adk.memory.VertexAiMemoryBankService(
        agent_engine_id=AGENT_ENGINE_ID,
        project=PROJECT_ID,
        location=GOOGLE_CLOUD_LOCATION,
    )
    #in_memory_service = InMemoryMemoryService()
    print("Memory Bank Service initialized successfully.")
except Exception as e:
    print(f"Error initializing Memory Bank Service: {e}")
    memory_bank_service = None

runner = adk.Runner(
    agent=orchestrator,
    app_name=APP_NAME,
    session_service=session_service,
    memory_service=memory_bank_service,
)

...
已配置的内容
在此代码段的这一部分中,我们配置了 Vertex AI 记忆库服务以实现长期记忆,它会根据上下文将特定应用针对特定用户的会话存储为 Vertex AI 记忆库中的记忆。
哪些内容作为代理执行的一部分运行?
   async def run_and_collect():
        final_text = ""
        try:
            async for event in runner.run_async(
                new_message=content,
                user_id=user_id,
                session_id=session_id
            ):
                if hasattr(event, 'author') and event.author:
                    if not any(log['agent'] == event.author for log in execution_logs):
                        execution_logs.append({
                            "agent": event.author,
                            "action": "Analyzing data requirements...",
                            "type": "orchestration_event"
                        })
                if hasattr(event, 'text') and event.text:
                    final_text = event.text
                elif hasattr(event, 'content') and hasattr(event.content, 'parts'):
                    for part in event.content.parts:
                        if hasattr(part, 'text') and part.text:
                            final_text = part.text
        except Exception as e:
            print(f"Error during runner.run_async: {e}")
            raise  # Re-raise the exception to signal failure
        finally:
            gc.collect()
            return final_text
它将用户输入的内容处理为 new_message 对象,其中包含用户 ID 和会话 ID。然后,代理接管对话,处理代理的回答并返回。
长期记忆中存储了哪些信息?
在应用和用户的范围内提取会话变量中的会话详细信息。
然后,使用“add_session_to_memory”方法将此会话添加为 Vertex AI 记忆库对象中当前用户的当前应用的记忆。
session = asyncio.run(session_service.get_session(app_name=APP_NAME, user_id=USER_ID, session_id=session.id))

if memory_bank_service and session:  # Check memory service AND session
                try:
                    #asyncio.run(in_memory_service.add_session_to_memory(session))
                    asyncio.run(memory_bank_service.add_session_to_memory(session))
                    '''
                    client.agent_engines.memories.generate(
                        scope={"app_name": APP_NAME, "user_id": USER_ID},
                        name=APP_NAME,
                        direct_contents_source={
                            "events": [
                                {"content": content}
                            ]
                        },
                        config={"wait_for_completion": True},
                    )
                    '''

                    print("Successfully added session to memory.******")
                    print(session.id)

                except Exception as e:
                    print(f"Error adding session to memory: {e}")
记忆检索
我们需要使用应用名称和用户名作为范围(因为这是我们存储记忆的范围)来检索存储的长期记忆,以便能够将其作为上下文的一部分传递给编排器和其他代理(如果适用)。
    results = client.agent_engines.memories.retrieve(
    name=APP_NAME,
    scope={"app_name": APP_NAME, "user_id": USER_ID}
    )
    # RetrieveMemories returns a pager. You can use `list` to retrieve all pages' memories.
    list(results)
    print(list(results))
检索到的记忆内容如何作为上下文的一部分加载?
我们在 Orchestrator 代理的定义中使用了以下属性,以便根代理从记忆库中预加载上下文。这是对我们从工具箱服务器访问的子代理工具的补充。
tools=[adk.tools.preload_memory_tool.PreloadMemoryTool()],
回调上下文
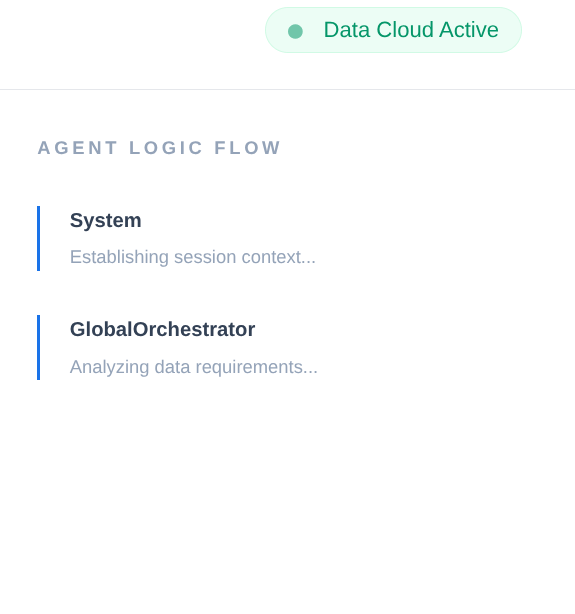
在企业供应链中,不能有“黑匣子”。我们使用 ADK 的 CallbackContext 来创建 Narrative Engine。通过钩入代理的执行过程,我们可以捕获每个思维过程和工具调用,并将它们流式传输到界面侧边栏。
- 轨迹事件:“GlobalOrchestrator 正在分析数据要求…”
- 轨迹事件:“Delegating to InventorySpecialist for stock levels...”
- 轨迹事件:“正在从内存库中检索历史供应商延迟模式...”
此审核轨迹对于调试至关重要,可确保人类操作员信任智能体的自主决策。
from google.adk.agents.callback_context import CallbackContext

...

# --- ADK CALLBACKS (Narrative Engine) ---
execution_logs = []

async def trace_callback(context: CallbackContext):
    """
    Captures agent and tool invocation flow for the UI narrative.
    """
    agent_name = context.agent.name
    event = {
        "agent": agent_name,
        "action": "Processing request steps...",
        "type": "orchestration_event"
    }
    execution_logs.append(event)
    return None

...
就是这样!我们已成功克隆项目,并详细介绍了代理、内存和上下文。
您可以前往克隆的代码库的项目文件夹,然后执行以下命令进行测试:
>> pip install -r requirements.txt

>> python app.py
这应该会在本地启动代理,您应该能够对其进行测试。
9. 我们将其部署到 Cloud Run
- 在 Cloud Shell 终端中运行以下命令,以在 Cloud Run 上部署该应用,其中项目已克隆,请确保您位于项目的根文件夹中。
在 Cloud Shell 终端中运行以下命令:
gcloud run deploy supply-chain-agent --source . --platform managed --region us-central1 --allow-unauthenticated --set-env-vars GOOGLE_CLOUD_PROJECT=<<YOUR_PROJECT>>,GOOGLE_CLOUD_LOCATION=us-central1,GOOGLE_GENAI_USE_VERTEXAI=TRUE,REASONING_ENGINE_APP_NAME=<<YOUR_APP_ENGINE_URL>>,TOOLBOX_SERVER=<<YOUR_TOOLBOX_SERVER>>,TOOLBOX_TOOLSET=supply_chain_toolset,AGENT_ENGINE_ID=<<YOUR_AGENT_ENGINE_ID>>
替换占位符 <<YOUR_PROJECT>>, <<YOUR_APP_ENGINE_URL>>, <<YOUR_TOOLBOX_SERVER>> 和 <<YOUR_AGENT_ENGINE_ID>> 的值
命令运行完毕后,系统会输出服务网址。复制。
- 向 Cloud Run 服务账号授予 AlloyDB Client 角色。这样一来,您的无服务器应用就可以安全地通过隧道连接到数据库。
在 Cloud Shell 终端中运行以下命令:
# 1. Get your Project ID and Project Number
PROJECT_ID=$(gcloud config get-value project)
PROJECT_NUMBER=$(gcloud projects describe $PROJECT_ID --format="value(projectNumber)")

# 2. Grant the AlloyDB Client role
gcloud projects add-iam-policy-binding $PROJECT_ID \
--member="serviceAccount:$PROJECT_NUMBER-compute@developer.gserviceaccount.com" \
--role="roles/alloydb.client"
现在,使用服务网址(您之前复制的 Cloud Run 端点)测试应用。
注意:如果您遇到服务问题,并且该问题将内存不足列为原因,请尝试将分配的内存限制增加到 1 GiB 以进行测试。

10. 清理
完成本实验后,请务必删除 AlloyDB 集群和实例。
它应清理集群及其实例。
11. 恭喜
通过结合 AlloyDB 的速度、MCP Toolbox 的编排效率和 Vertex AI Memory Bank 的“机构记忆”,我们构建了一个不断发展的供应链系统。它不仅能回答问题,还能记住您位于新加坡的仓库总是会因季风而出现延误,并在您提出要求之前主动建议重新规划货运路线。