
1. 總覽
在本程式碼研究室中,您將建構供應鏈自動調度管理工具代理程式。這項應用程式可讓使用者透過自然語言分析庫存、追蹤物流,以及管理供應鏈風險。
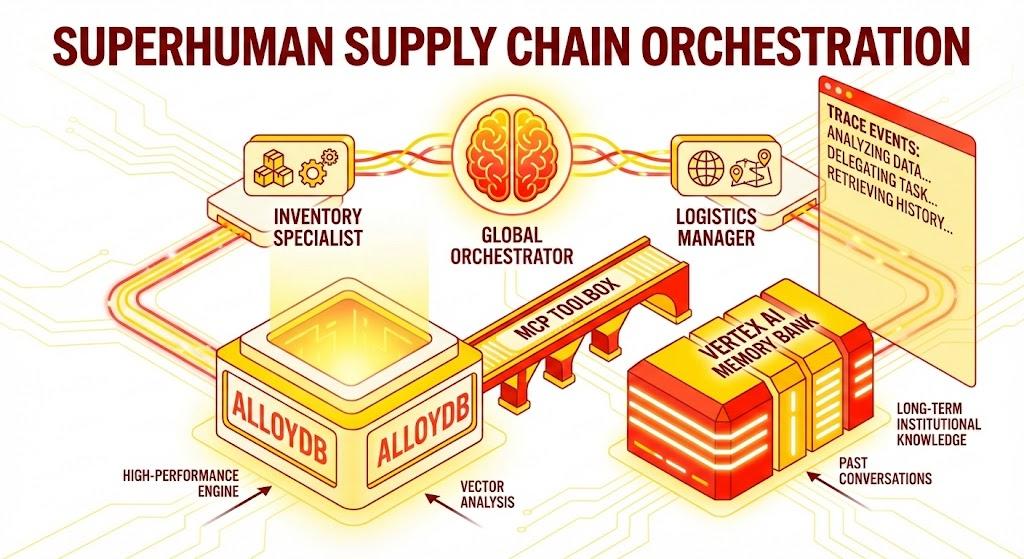
我們將運用 Google 的 Agent Development Kit (ADK) 建構多代理架構,透過 Vertex AI Memory Bank 維護內容、記住使用者偏好設定,並透過 MCP Toolbox 與 AlloyDB 中儲存的大量資料集互動。
建構項目
Python Flask 應用程式,包含:
全域自動調度管理代理:管理對話流程和委派作業的根代理。
專員代理:「InventorySpecialist」和「LogisticsManager」可處理特定領域的工作。
記憶體整合:短期工作階段記憶體和長期記憶體 (使用 Vertex AI Memory Bank)。
敘事 UI:這個網頁介面會以視覺化方式呈現代理程式的推論過程 (追蹤脈絡)。
課程內容
- 瞭解如何使用 Google ADK 建立專屬代理和子代理。
- 如何整合 Vertex AI Memory Bank,為代理提供長期記憶。
- 如何使用 MCP Toolbox 將代理程式連結至 AlloyDB 資料工具。
- 如何導入 ADK 回呼,追蹤及以視覺化方式呈現代理程式推論過程。
- 如何使用 Cloud Run 部署解決方案,或在本機運作執行解決方案。
架構
技術堆疊
- AlloyDB for PostgreSQL:做為高效能的營運資料庫,保存超過 50,000 筆供應鏈記錄。可支援向量搜尋和檢索。
- MCP Toolbox for Databases:扮演「協調大師」的角色,將 AlloyDB 資料公開為可執行的工具,供代理呼叫。
- Agent Development Kit (ADK):用於定義代理、指令和工具的框架。
- Vertex AI Memory Bank:提供長期記憶,讓代理在不同工作階段中記住使用者偏好和過往互動。
- Vertex AI 工作階段服務:管理短期對話脈絡。
流程
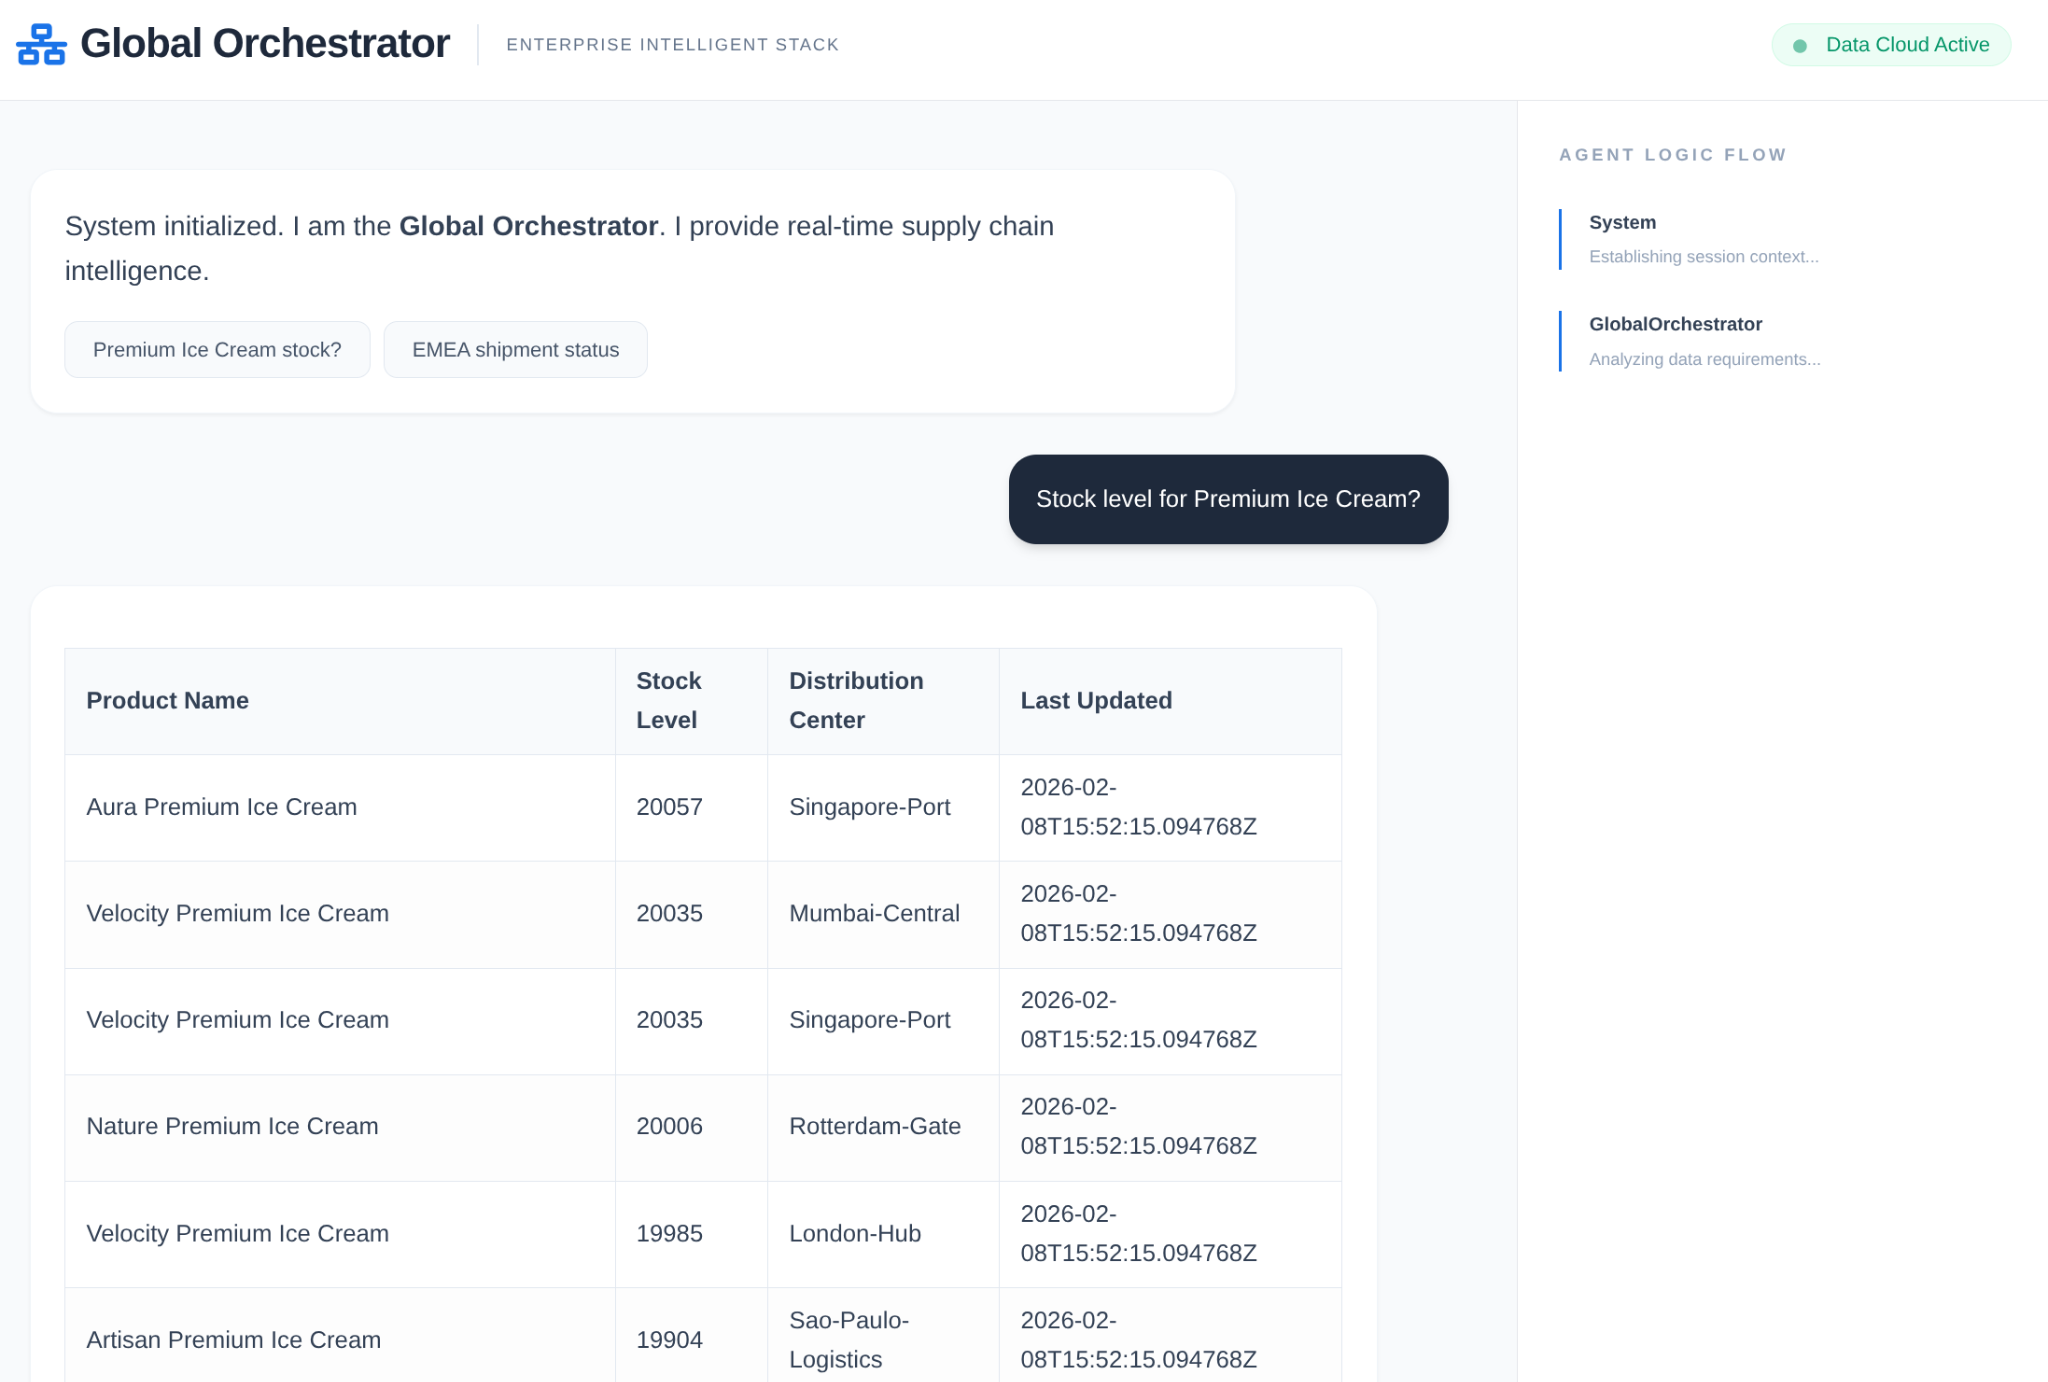
- 使用者查詢:使用者提出問題 (例如「Check stock for Premium Ice Cream」)。
- 記憶體檢查:Orchestrator 會檢查Memory Bank,找出相關的過往資訊 (例如「使用者是歐洲、中東和非洲地區的區域經理」)。
- 委派:自動調度管理工具會將工作委派給 InventorySpecialist。
- 工具執行:專員會使用 MCP Toolbox 提供的工具查詢 AlloyDB。
- 回覆:代理程式會處理資料,並傳回 Markdown 格式的表格。
- 記憶體儲存空間:系統會將重要互動儲存回 Memory Bank。
需求條件
2. 事前準備
建立專案
- 在 Google Cloud 控制台的專案選取器頁面中,選取或建立 Google Cloud 專案。
- 確認 Cloud 專案已啟用計費功能。瞭解如何檢查專案是否已啟用計費功能。
- 您將使用 Cloud Shell,這是 Google Cloud 中執行的指令列環境。按一下 Google Cloud 控制台頂端的「啟用 Cloud Shell」。

- 連至 Cloud Shell 後,請使用下列指令確認驗證已完成,專案也已設為獲派的專案 ID:
gcloud auth list
- 在 Cloud Shell 中執行下列指令,確認 gcloud 指令已瞭解您的專案。
gcloud config list project
- 如果未設定專案,請使用下列指令來設定:
gcloud config set project <YOUR_PROJECT_ID>
- 啟用必要的 API:按照這個連結啟用 API。
或者,您也可以使用 gcloud 指令執行這項操作。如要瞭解 gcloud 指令和用法,請參閱說明文件。
常見錯誤與疑難排解
「幽靈專案」 症候群 | 您執行了 |
帳單 路障 | 您已啟用專案,但忘記帳單帳戶。AlloyDB 是高效能引擎,如果「油箱」(帳單) 空了,就無法啟動。 |
API 傳播 延遲 | 您點選了「啟用 API」,但指令列仍顯示 |
配額 Quags | 如果您使用全新的試用帳戶,可能會達到 AlloyDB 執行個體的區域配額。如果 |
「隱藏」服務專員 | 有時系統不會自動將 |
3. 資料庫設定
我們應用程式的核心是 AlloyDB for PostgreSQL。我們運用了強大的向量功能和整合式資料欄引擎,為超過 50,000 筆 SCM 記錄生成嵌入內容。這項技術可近乎即時地進行向量分析,讓代理程式在毫秒內從大型資料集中找出庫存異常或物流風險。
在本實驗室中,我們將使用 AlloyDB 做為測試資料的資料庫。並使用「叢集」保存所有資源,例如資料庫和記錄檔。每個叢集都有一個「主要執行個體」,可做為資料的存取點。資料表會保存實際資料。
接下來,我們要建立 AlloyDB 叢集、執行個體和資料表,以便載入測試資料集。
- 按一下按鈕,或將下方連結複製到已登入 Google Cloud 控制台使用者的瀏覽器。
或者,您也可以前往已兌換帳單帳戶的專案,在 Cloud Shell 終端機中複製 GitHub 存放區 ,然後使用下列指令前往專案:
git clone https://github.com/AbiramiSukumaran/easy-alloydb-setup

cd easy-alloydb-setup
- 完成這個步驟後,存放區會複製到本機 Cloud Shell 編輯器,您就能從專案資料夾執行下列指令 (請務必確認您位於專案目錄中):
sh run.sh
- 現在請使用 UI (按一下終端機中的連結,或按一下終端機中的「preview on web」連結)。
- 輸入專案 ID、叢集和執行個體名稱的詳細資料,即可開始使用。
- 在記錄檔捲動時去買杯咖啡吧!您可以在這裡瞭解這項功能幕後的運作方式。
常見錯誤與疑難排解
「耐心」問題 | 資料庫叢集是龐大的基礎架構,如果因為「看似卡住」而重新整理頁面或終止 Cloud Shell 工作階段,您可能會得到「虛擬」執行個體,這類執行個體已部分佈建,但必須手動介入才能刪除。 |
區域不符 | 如果您在 |
殭屍叢集 | 如果您先前使用過相同名稱的叢集,但未刪除,指令碼可能會顯示叢集名稱已存在。叢集名稱在專案內不得重複。 |
Cloud Shell 逾時 | 如果咖啡休息時間為 30 分鐘,Cloud Shell 可能會進入休眠狀態,並中斷 |
4. 結構定義佈建
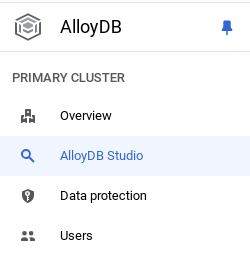
AlloyDB 叢集和執行個體啟動後,請前往 AlloyDB Studio SQL 編輯器啟用 AI 擴充功能,並佈建結構定義。
您可能需要等待執行個體建立完成。完成後,請使用建立叢集時建立的憑證登入 AlloyDB。使用下列資料向 PostgreSQL 進行驗證:
- 使用者名稱:「
postgres」 - 資料庫:「
postgres」 - 密碼:「
alloydb」(或您在建立時設定的密碼)
成功驗證 AlloyDB Studio 後,即可在編輯器中輸入 SQL 指令。如要新增多個編輯器視窗,請按一下最後一個視窗右側的加號。
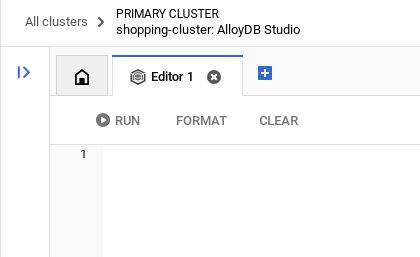
您會在編輯器視窗中輸入 AlloyDB 指令,並視需要使用「執行」、「格式化」和「清除」選項。
啟用擴充功能
我們會使用 pgvector 和 google_ml_integration 擴充功能建構這個應用程式。pgvector 擴充功能可讓您儲存及搜尋向量嵌入。google_ml_integration 擴充功能提供多種函式,可存取 Vertex AI 預測端點,在 SQL 中取得預測結果。執行下列 DDL,啟用這些擴充功能:
CREATE EXTENSION IF NOT EXISTS google_ml_integration CASCADE;
CREATE EXTENSION IF NOT EXISTS vector;
建立資料表
您可以在 AlloyDB Studio 中使用下列 DDL 陳述式建立資料表:
DROP TABLE IF EXISTS shipments;
DROP TABLE IF EXISTS products;

-- 1. Product Inventory Table

CREATE TABLE products (
id SERIAL PRIMARY KEY,
name VARCHAR(255) NOT NULL,
category VARCHAR(100),
stock_level INTEGER,
distribution_center VARCHAR(100),
region VARCHAR(50),
embedding vector(768),
last_updated TIMESTAMP DEFAULT CURRENT_TIMESTAMP
);

-- 2. Logistics & Shipments
CREATE TABLE shipments (
shipment_id SERIAL PRIMARY KEY,
product_id INTEGER REFERENCES products(id),
status VARCHAR(50), -- 'In Transit', 'Delayed', 'Delivered', 'Pending'
estimated_arrival TIMESTAMP,
route_efficiency_score DECIMAL(3, 2)
);
embedding 欄可儲存部分文字欄位的向量值。
資料擷取
執行下列 SQL 陳述式集,在產品資料表中大量插入 50000 筆記錄:
-- We use a CROSS JOIN pattern with realistic naming segments to create meaningful variety
DO $$
DECLARE
brand_names TEXT[] := ARRAY['Artisan', 'Nature', 'Elite', 'Pure', 'Global', 'Eco', 'Velocity', 'Heritage', 'Aura', 'Summit'];
product_types TEXT[] := ARRAY['Ice Cream', 'Body Wash', 'Laundry Detergent', 'Shampoo', 'Mayonnaise', 'Deodorant', 'Tea', 'Soup', 'Face Cream', 'Soap'];
variants TEXT[] := ARRAY['Classic', 'Gold', 'Premium', 'Eco-Friendly', 'Organic', 'Night-Repair', 'Extra-Fresh', 'Zero-Sugar', 'Sensitive', 'Maximum-Strength'];
regions TEXT[] := ARRAY['EMEA', 'APAC', 'LATAM', 'NAMER'];
dcs TEXT[] := ARRAY['London-Hub', 'Mumbai-Central', 'Sao-Paulo-Logistics', 'Singapore-Port', 'Rotterdam-Gate', 'New-York-DC'];
BEGIN
INSERT INTO products (name, category, stock_level, distribution_center, region)
SELECT
b || ' ' || v || ' ' || t as name,
CASE
WHEN t IN ('Ice Cream', 'Mayonnaise', 'Tea', 'Soup') THEN 'Food & Refreshment'
WHEN t IN ('Body Wash', 'Shampoo', 'Deodorant', 'Face Cream', 'Soap') THEN 'Personal Care'
ELSE 'Home Care'
END as category,
floor(random() * 20000 + 100)::int as stock_level,
dcs[floor(random() * 6 + 1)] as distribution_center,
regions[floor(random() * 4 + 1)] as region
FROM
unnest(brand_names) b,
unnest(variants) v,
unnest(product_types) t,
generate_series(1, 50); -- 10 * 10 * 10 * 50 = 50,000 records
END $$;
讓我們插入特定示範記錄,確保高階主管風格問題的答案可預測
-- These ensure you have predictable answers for specific "Executive" questions
INSERT INTO products (name, category, stock_level, distribution_center, region) VALUES
('Magnum Ultra Gold Limited Edition', 'Food & Refreshment', 45, 'Rotterdam-Gate', 'EMEA'),
('Dove Pro-Health Deep Moisture', 'Personal Care', 12000, 'Mumbai-Central', 'APAC'),
('Hellmanns Real Organic Mayonnaise', 'Food & Refreshment', 8000, 'London-Hub', 'EMEA');
插入出貨資料
-- Shipments Generation (More shipments than products)
INSERT INTO shipments (product_id, status, estimated_arrival, route_efficiency_score)
SELECT
id,
CASE
WHEN random() > 0.8 THEN 'Delayed'
WHEN random() > 0.4 THEN 'In Transit'
ELSE 'Delivered'
END,
NOW() + (random() * 10 || ' days')::interval,
(random() * 0.5 + 0.5)::decimal(3,2)
FROM products
WHERE random() > 0.3; -- Create shipments for ~70% of products


-- Add duplicate shipments for some products to show complex logistics
INSERT INTO shipments (product_id, status, estimated_arrival, route_efficiency_score)
SELECT id, 'In Transit', NOW() + INTERVAL '12 days', 0.88
FROM products
LIMIT 5000;
授予權限
執行下列陳述式,授予「embedding」函式的執行權:
GRANT EXECUTE ON FUNCTION embedding TO postgres;
為 AlloyDB 服務帳戶授予 Vertex AI 使用者角色
在 Google Cloud IAM 控制台中,將「Vertex AI 使用者」角色授予 AlloyDB 服務帳戶 (看起來像這樣:service-<<PROJECT_NUMBER>>@gcp-sa-alloydb.iam.gserviceaccount.com)。PROJECT_NUMBER 會顯示您的專案編號。
或者,您也可以從 Cloud Shell 終端機執行下列指令:
PROJECT_ID=$(gcloud config get-value project)


gcloud projects add-iam-policy-binding $PROJECT_ID \
  --member="serviceAccount:service-$(gcloud projects describe $PROJECT_ID --format="value(projectNumber)")@gcp-sa-alloydb.iam.gserviceaccount.com" \
--role="roles/aiplatform.user"
生成嵌入
接著,為特定有意義的文字欄位產生向量嵌入:
WITH
 rows_to_update AS (
 SELECT
   id
 FROM
   products
 WHERE
   embedding IS NULL
 LIMIT
   5000 )
UPDATE
 products
SET
 embedding = ai.embedding('text-embedding-005', name || ' ' || category || ' ' || distribution_center || ' ' || region)::vector
FROM
 rows_to_update
WHERE
 products.id = rows_to_update.id
 AND embedding IS null;
在上述陳述式中,我們將限制設為 5000,因此請務必運作執行,直到資料表中沒有任何資料列的資料欄嵌入為 NULL 為止。
常見錯誤與疑難排解
「密碼失憶」迴圈 | 如果您使用「一鍵」設定,但忘記密碼,請前往控制台的「執行個體基本資訊」頁面,然後按一下「編輯」重設 |
「找不到擴充功能」錯誤 | 如果 |
IAM 傳播落差 | 您已執行 |
向量維度不符 |
|
專案 ID 拼字錯誤 | 在 |
5. 工具與工具箱設定
MCP Toolbox for Databases 是資料庫專用的開放原始碼 MCP 伺服器。這項服務可處理連線集區、驗證和其他複雜作業,讓您更輕鬆、快速且安全地開發工具。您可以透過 Toolbox 建構生成式 AI 工具,讓代理程式存取資料庫中的資料。
我們使用 Model Context Protocol (MCP) Toolbox for Databases 做為「指揮家」。這項服務可做為代理程式與 AlloyDB 之間的標準化中介軟體。定義 tools.yaml 設定後,工具箱會自動將複雜的資料庫作業公開為可執行的乾淨工具,例如 search_products_by_context 或 check_inventory_levels。這樣就不必在代理程式邏輯中手動建立連線集區或樣板 SQL。
安裝 Toolbox 伺服器
在 Cloud Shell 終端機中,建立資料夾來儲存新的工具 YAML 檔案和工具箱二進位檔:
mkdir scm-agent-toolbox

cd scm-agent-toolbox
在該新資料夾中,執行下列指令集:
# see releases page for other versions
export VERSION=0.27.0
curl -L -o toolbox https://storage.googleapis.com/mcp-toolbox-for-databases/v$VERSION/linux/amd64/toolbox
chmod +x toolbox
接著,在該新資料夾中建立 tools.yaml 檔案,方法是前往 Cloud Shell 編輯器,然後將這個存放區檔案的內容複製到 tools.yaml 檔案。
sources:
    supply_chain_db:
        kind: "alloydb-postgres"
        project: "YOUR_PROJECT_ID"
        region: "us-central1"
        cluster: "YOUR_CLUSTER"
        instance: "YOUR_INSTANCE"
        database: "postgres"
        user: "postgres"
        password: "YOUR_PASSWORD"

tools:
  search_products_by_context:
    kind: postgres-sql
    source: supply_chain_db
    description: Find products in the inventory using natural language search and vector embeddings.
    parameters:
      - name: search_text
        type: string
        description: Description of the product or category the user is looking for.
    statement: |
     SELECT name, category, stock_level, distribution_center, region
      FROM products
      ORDER BY embedding <=> ai.embedding('text-embedding-005', $1)::vector
      LIMIT 5;

  check_inventory_levels:
    kind: postgres-sql
    source: supply_chain_db
    description: Get precise stock levels for a specific product name.
    parameters:
      - name: product_name
        type: string
        description: The exact or partial name of the product.
    statement: |
     SELECT name, stock_level, distribution_center, last_updated
      FROM products
      WHERE name ILIKE '%' || $1 || '%'
      ORDER BY stock_level DESC;

  track_shipment_status:
    kind: postgres-sql
    source: supply_chain_db
    description: Retrieve real-time logistics and shipping status for a specific region or product.
    parameters:
      - name: region
        type: string
        description: The geographical region to filter shipments (e.g., EMEA, APAC).
    statement: |
     SELECT p.name, s.status, s.estimated_arrival, s.route_efficiency_score
      FROM shipments s
      JOIN products p ON s.product_id = p.id
      WHERE p.region = $1
      ORDER BY s.estimated_arrival ASC;

  analyze_supply_chain_risk:
    kind: postgres-sql
    source: supply_chain_db
    description: Rerank and filter shipments based on risk profiles and efficiency scores using Google ML reranker.
    parameters:
      - name: risk_context
        type: string
        description: The business context for risk analysis (e.g., 'heatwave impact' or 'port strike').
    statement: |
     WITH initial_ranking AS (
      SELECT s.shipment_id, p.name, s.status, p.distribution_center,
      ROW_NUMBER() OVER () AS ref_number
      FROM shipments s
      JOIN products p ON s.product_id = p.id
      WHERE s.status != 'Delivered'
      LIMIT 10
      ),
      reranked_results AS (
      SELECT index, score FROM
      ai.rank(
      model_id => 'semantic-ranker-default-003',
      search_string => $1,
      documents => (SELECT ARRAY_AGG(name || ' at ' || distribution_center ORDER BY ref_number) FROM initial_ranking)
      )
      )
      SELECT i.name, i.status, i.distribution_center, r.score
      FROM initial_ranking i, reranked_results r
      WHERE i.ref_number = r.index
      ORDER BY r.score DESC;

toolsets:
   supply_chain_toolset:
     - search_products_by_context
     - check_inventory_levels
     - track_shipment_status
     - analyze_supply_chain_risk
現在在本機伺服器中測試 tools.yaml 檔案:
./toolbox --tools-file "tools.yaml"
你也可以在 UI 中測試
./toolbox --ui
太棒了!確認一切正常運作後,請按照下列步驟在 Cloud Run 中部署。
Cloud Run 部署作業
- 設定 PROJECT_ID 環境變數:
export PROJECT_ID="my-project-id"
- 初始化 gcloud CLI:
gcloud init
gcloud config set project $PROJECT_ID
- 您必須啟用下列 API:
gcloud services enable run.googleapis.com \
                       cloudbuild.googleapis.com \
                       artifactregistry.googleapis.com \
                       iam.googleapis.com \
                       secretmanager.googleapis.com
- 如果沒有後端服務帳戶,請建立一個:
gcloud iam service-accounts create toolbox-identity
- 授予使用 Secret Manager 的權限:
gcloud projects add-iam-policy-binding $PROJECT_ID \
    --member serviceAccount:toolbox-identity@$PROJECT_ID.iam.gserviceaccount.com \
    --role roles/secretmanager.secretAccessor
- 將 AlloyDB 來源專屬的其他權限授予服務帳戶 (roles/alloydb.client 和 roles/serviceusage.serviceUsageConsumer)
gcloud projects add-iam-policy-binding $PROJECT_ID \
    --member serviceAccount:toolbox-identity@$PROJECT_ID.iam.gserviceaccount.com \
    --role roles/alloydb.client


gcloud projects add-iam-policy-binding $PROJECT_ID \
    --member serviceAccount:toolbox-identity@$PROJECT_ID.iam.gserviceaccount.com \
    --role serviceusage.serviceUsageConsumer
- 將 tools.yaml 上傳為密鑰:
gcloud secrets create tools-scm-agent --data-file=tools.yaml
- 如果您已有密鑰,並想更新密鑰版本,請執行下列指令:
gcloud secrets versions add tools-scm-agent --data-file=tools.yaml
- 將環境變數設為要用於 Cloud Run 的容器映像檔:
export IMAGE=us-central1-docker.pkg.dev/database-toolbox/toolbox/toolbox:latest
- 執行下列指令,將 Toolbox 部署至 Cloud Run:
如果您已在 AlloyDB 執行個體中啟用公開存取權 (不建議),請按照下列指令將應用程式部署至 Cloud Run:
gcloud run deploy toolbox-scm-agent \
    --image $IMAGE \
    --service-account toolbox-identity \
    --region us-central1 \
    --set-secrets "/app/tools.yaml=tools-scm-agent:latest" \
    --args="--tools-file=/app/tools.yaml","--address=0.0.0.0","--port=8080" \
    --allow-unauthenticated
如果您使用 虛擬私有雲網路,請使用下列指令:
gcloud run deploy toolbox-scm-agent \
    --image $IMAGE \
    --service-account toolbox-identity \
    --region us-central1 \
    --set-secrets "/app/tools.yaml=tools-scm-agent:latest" \
    --args="--tools-file=/app/tools.yaml","--address=0.0.0.0","--port=8080" \
    # TODO(dev): update the following to match your VPC details
    --network <<YOUR_NETWORK_NAME>> \
    --subnet <<YOUR_SUBNET_NAME>> \
    --allow-unauthenticated
6. 設定代理程式
我們使用 Agent Development Kit (ADK),從單一提示轉向專門的多代理架構:
- InventorySpecialist:專注於產品庫存和倉庫指標。
- LogisticsManager:全球航運路線和風險分析專家。
- GlobalOrchestrator:這個「大腦」會運用推論能力委派工作,並整合發現項目。
將這個存放區複製到專案中,然後逐步瞭解。
如要複製這個存放區,請在 Cloud Shell 終端機 (在根目錄或要建立這個專案的任何位置) 執行下列指令:
git clone https://github.com/AbiramiSukumaran/scm-memory-agent
- 這應該會建立專案,您可以在 Cloud Shell 編輯器中驗證。
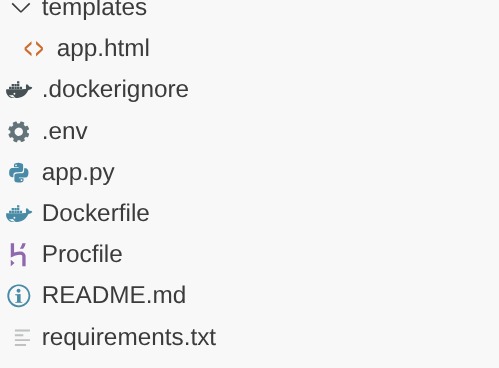
- 請務必使用專案和執行個體的值更新 .env 檔案。
程式碼逐步操作說明
快速瞭解 Orchestrator Agent
Go to app.py and you should be able to see the following snippet:
orchestrator = adk.Agent(
    name="GlobalOrchestrator",
    model="gemini-2.5-flash",
    description="Global Supply Chain Orchestrator root agent.",
    instruction="""
    You are the Global Supply Chain Brain. You are responsible for products, inventory and logistics.
    You also have access to the memory tool, remember to include all the information that the tool can provide you with about the user before you respond.
    1. Understand intent and delegate to specialists. As the Global Orchestrator, you have access to the full conversation history with the user.
    When you transfer a query to a specialist agent, sub agent or tool, share the important facts and information from your memory to them so they can operate with the full context.
    2. Ensure the final response is professional and uses Markdown tables for data.
    3. If a specialist provides a long list, ensure only the top 10 items are shown initially.
    4. Conclude with a brief, high-level executive summary of what the data implies.
    """,
    tools=[adk.tools.preload_memory_tool.PreloadMemoryTool()],
    sub_agents=[inventory_agent, logistics_agent],

    #after_agent_callback=auto_save_session_to_memory_callback,
)
這個程式碼片段是根的定義,也就是協調代理,負責接收使用者傳送的對話或要求,並根據工作將對應的子代理或使用者轉送至對應的工具。
- 我們來看看目錄代理程式
inventory_agent = adk.Agent(
    name="InventorySpecialist",
    model="gemini-2.5-flash",
    description="Specialist in product stock and warehouse data.",
    instruction="""
    Analyze inventory levels.
    1. Use 'search_products_by_context' or 'check_inventory_levels'.
    2. ALWAYS format results as a clean Markdown table.
    3. If there are many results, display only the TOP 10 most relevant ones.
    4. At the end, state: 'There are additional records available. Would you like to see more?'
    """,
    tools=tools
)
這個子代理專門處理目錄活動,例如根據情境搜尋產品,以及檢查庫存量。
- 接著是物流次級代理人:
logistics_agent = adk.Agent(
    name="LogisticsManager",
    model="gemini-2.5-flash",
    description="Expert in global shipping routes and logistics tracking.",
    instruction="""
    Check shipment statuses.
    1. Use 'track_shipment_status' or 'analyze_supply_chain_risk'.
    2. ALWAYS format results as a clean Markdown table.
    3. Limit initial output to the top 10 shipments.
    4. Ask if the user needs the full manifest if more results exist.
    """,
    tools=tools
)
這個子代理專門處理物流活動,例如追蹤貨件和分析供應鏈中的風險。
- 我們目前討論的所有 3 個代理程式都會使用工具,而工具是透過我們已在上一節部署的 Toolbox 伺服器參照。請參閱下列程式碼片段:
from toolbox_core import ToolboxSyncClient

TOOLBOX_SERVER = os.environ["TOOLBOX_SERVER"]
TOOLBOX_TOOLSET = os.environ["TOOLBOX_TOOLSET"]

# --- ADK TOOLBOX CONFIGURATION ---
toolbox = ToolboxSyncClient(TOOLBOX_SERVER)
tools = toolbox.load_toolset(TOOLBOX_TOOLSET)
這個子代理專門處理物流活動,例如追蹤貨件和分析供應鏈中的風險。
7. Agent Engine
在初始執行階段中建立 Agent Engine
import vertexai

GOOGLE_CLOUD_PROJECT = os.environ["GOOGLE_CLOUD_PROJECT"]
GOOGLE_CLOUD_LOCATION = os.environ["GOOGLE_CLOUD_LOCATION"]

client = vertexai.Client(
  project=GOOGLE_CLOUD_PROJECT,
  location=GOOGLE_CLOUD_LOCATION
)

agent_engine = client.agent_engines.create()
- 下次執行時,請使用 Memory Bank 設定更新 Agent Engine:
agent_engine = client.agent_engines.update(
    name=APP_NAME,
    config={
        "context_spec": {
            "memory_bank_config": {
                "generation_config": {
                    "model": f"projects/{PROJECT_ID}/locations/{GOOGLE_CLOUD_LOCATION}/publishers/google/models/gemini-2.5-flash"
                }
            }
        }
    })
8. 背景資訊、執行與記憶體
為確保代理程式感覺像是持續合作夥伴,而非無狀態的機器人,情境管理分為兩個不同的層級:
短期記憶 (工作階段):透過 VertexAiSessionService 管理,追蹤單一互動中的即時事件記錄 (使用者訊息、工具回應)。
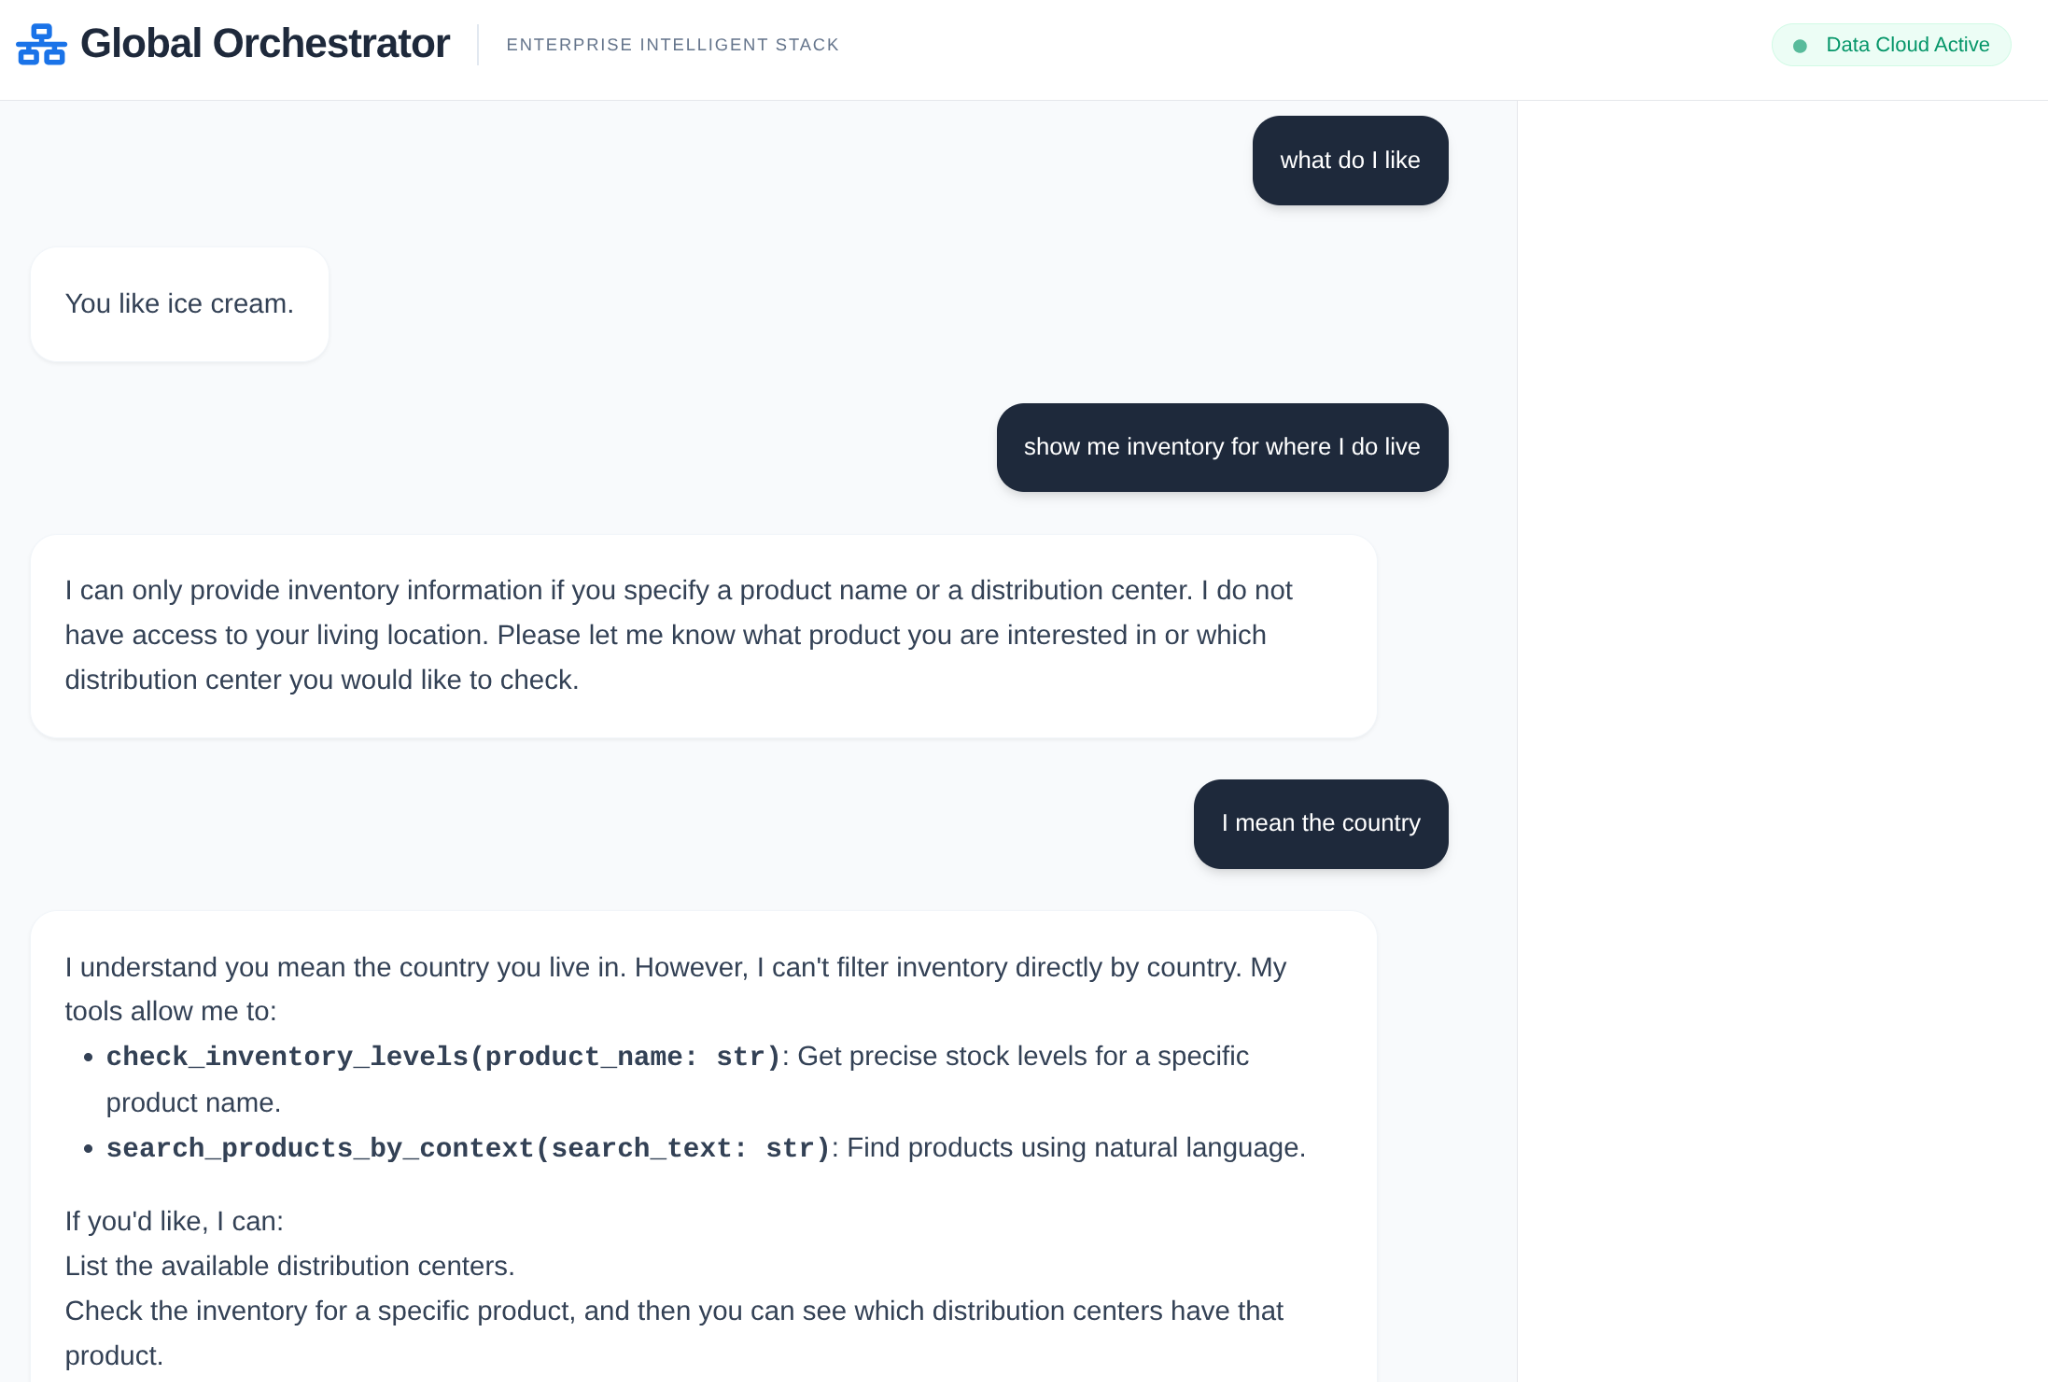
長期記憶 (Memory Bank):透過 adk.memorybankservice 採用 Vertex AI Memory Bank。這個層會擷取「有意義」的資訊 (例如使用者偏好的特定貨運公司或倉庫延遲出貨的頻率),並在不同工作階段中保留這些資訊。
在對話範圍內初始化工作階段,以供工作階段記憶體使用
這個程式碼片段部分會為目前使用者建立目前應用程式的工作階段。
from google.adk.sessions import VertexAiSessionService

...

session_service = VertexAiSessionService(
    project=PROJECT_ID,
    location=GOOGLE_CLOUD_LOCATION,
)

...

# Initialize the session *outside* of the route handler to avoid repeated creation
session = None
session_lock = threading.Lock()

async def initialize_session():
    global session
    try:
        session = await session_service.create_session(app_name=APP_NAME, user_id=USER_ID)
        print(f"Session {session.id} created successfully.")  # Add a log
    except Exception as e:
        print(f"Error creating session: {e}")
        session = None  # Ensure session is None in case of error

# Create the session on app startup
asyncio.run(initialize_session())
初始化 Vertex AI Memory Bank,做為長期記憶體
這是程式碼片段的一部分,可例項化代理程式引擎的 Vertex AI Memory Bank 服務物件。
from google.adk.memory import InMemoryMemoryService
from google.adk.memory import VertexAiMemoryBankService

...

try:
    memory_bank_service = adk.memory.VertexAiMemoryBankService(
        agent_engine_id=AGENT_ENGINE_ID,
        project=PROJECT_ID,
        location=GOOGLE_CLOUD_LOCATION,
    )
    #in_memory_service = InMemoryMemoryService()
    print("Memory Bank Service initialized successfully.")
except Exception as e:
    print(f"Error initializing Memory Bank Service: {e}")
    memory_bank_service = None

runner = adk.Runner(
    agent=orchestrator,
    app_name=APP_NAME,
    session_service=session_service,
    memory_service=memory_bank_service,
)

...
設定內容
在這段程式碼中,我們設定了 Vertex AI Memory Bank 服務,用於長期記憶體,可將特定應用程式的特定使用者工作階段,以記憶體的形式儲存在 Vertex AI Memory Bank 中。
代理執行時會執行哪些項目?
   async def run_and_collect():
        final_text = ""
        try:
            async for event in runner.run_async(
                new_message=content,
                user_id=user_id,
                session_id=session_id
            ):
                if hasattr(event, 'author') and event.author:
                    if not any(log['agent'] == event.author for log in execution_logs):
                        execution_logs.append({
                            "agent": event.author,
                            "action": "Analyzing data requirements...",
                            "type": "orchestration_event"
                        })
                if hasattr(event, 'text') and event.text:
                    final_text = event.text
                elif hasattr(event, 'content') and hasattr(event.content, 'parts'):
                    for part in event.content.parts:
                        if hasattr(part, 'text') and part.text:
                            final_text = part.text
        except Exception as e:
            print(f"Error during runner.run_async: {e}")
            raise  # Re-raise the exception to signal failure
        finally:
            gc.collect()
            return final_text
這項函式會將使用者的輸入內容處理為 new_message 物件,並在範圍內加入使用者 ID 和工作階段 ID。接著由服務專員接手,系統會處理並傳回服務專員的回覆。
長期記憶體會儲存哪些內容?
系統會擷取應用程式和使用者範圍內的工作階段詳細資料,並儲存在工作階段變數中。
接著,系統會使用「add_session_to_memory」方法,將這項工作階段新增為 Vertex AI Memory Bank 物件目前應用程式的目前使用者記憶體。
session = asyncio.run(session_service.get_session(app_name=APP_NAME, user_id=USER_ID, session_id=session.id))

if memory_bank_service and session:  # Check memory service AND session
                try:
                    #asyncio.run(in_memory_service.add_session_to_memory(session))
                    asyncio.run(memory_bank_service.add_session_to_memory(session))
                    '''
                    client.agent_engines.memories.generate(
                        scope={"app_name": APP_NAME, "user_id": USER_ID},
                        name=APP_NAME,
                        direct_contents_source={
                            "events": [
                                {"content": content}
                            ]
                        },
                        config={"wait_for_completion": True},
                    )
                    '''

                    print("Successfully added session to memory.******")
                    print(session.id)

                except Exception as e:
                    print(f"Error adding session to memory: {e}")
記憶檢索
我們需要使用應用程式名稱和使用者名稱做為範圍 (因為這是我們儲存記憶體的範圍),擷取儲存的長期記憶體,才能將其做為情境的一部分,傳遞至協調器和其他適用的代理程式。
    results = client.agent_engines.memories.retrieve(
    name=APP_NAME,
    scope={"app_name": APP_NAME, "user_id": USER_ID}
    )
    # RetrieveMemories returns a pager. You can use `list` to retrieve all pages' memories.
    list(results)
    print(list(results))
系統如何載入擷取的記憶內容做為背景資訊?
我們在 Orchestrator 代理程式的定義中使用下列屬性,讓根代理程式從記憶體庫預先載入背景資訊。除了我們從子代理的工具箱伺服器存取的工具外,
tools=[adk.tools.preload_memory_tool.PreloadMemoryTool()],
回呼背景資訊
在企業供應鏈中,您不能有「黑箱」。我們使用 ADK 的 CallbackContext 建立 Narrative Engine。透過連結至代理程式的執行作業,我們擷取每個思考過程和工具呼叫,並將其串流至 UI 側欄。
- 追蹤事件:「GlobalOrchestrator is analyzing data requirements...」(GlobalOrchestrator 正在分析資料需求...)
- 追蹤事件:「Delegating to InventorySpecialist for stock levels...」(將庫存量委派給 InventorySpecialist...)
- 追蹤事件:「正在從 Memory Bank 擷取歷史供應商延遲模式...」
這項稽核記錄對於偵錯非常重要,可確保人工操作員信任代理程式的自主決策。
from google.adk.agents.callback_context import CallbackContext

...

# --- ADK CALLBACKS (Narrative Engine) ---
execution_logs = []

async def trace_callback(context: CallbackContext):
    """
    Captures agent and tool invocation flow for the UI narrative.
    """
    agent_name = context.agent.name
    event = {
        "agent": agent_name,
        "action": "Processing request steps...",
        "type": "orchestration_event"
    }
    execution_logs.append(event)
    return None

...
這樣就大功告成了!我們已成功複製專案,並詳細說明代理程式、記憶體和內容。
如要測試,請前往複製存放區的專案資料夾,然後執行下列指令:
>> pip install -r requirements.txt

>> python app.py
這項指令會在本地啟動代理程式,您應該可以測試。
9. 將其部署至 Cloud Run
- 在專案複製完成的 Cloud Shell 終端機中執行下列指令,將其部署至 Cloud Run。請務必位於專案的根資料夾中。
在 Cloud Shell 終端機中執行下列指令:
gcloud run deploy supply-chain-agent --source . --platform managed --region us-central1 --allow-unauthenticated --set-env-vars GOOGLE_CLOUD_PROJECT=<<YOUR_PROJECT>>,GOOGLE_CLOUD_LOCATION=us-central1,GOOGLE_GENAI_USE_VERTEXAI=TRUE,REASONING_ENGINE_APP_NAME=<<YOUR_APP_ENGINE_URL>>,TOOLBOX_SERVER=<<YOUR_TOOLBOX_SERVER>>,TOOLBOX_TOOLSET=supply_chain_toolset,AGENT_ENGINE_ID=<<YOUR_AGENT_ENGINE_ID>>
將預留位置 <<YOUR_PROJECT>>, <<YOUR_APP_ENGINE_URL>>, <<YOUR_TOOLBOX_SERVER>> 和 <<YOUR_AGENT_ENGINE_ID>> 的值替換為實際值
指令完成後,會輸出服務網址。複製。
- 將 AlloyDB Client 角色授予 Cloud Run 服務帳戶。這樣一來,無伺服器應用程式就能安全地連線至資料庫。
在 Cloud Shell 終端機中執行下列指令:
# 1. Get your Project ID and Project Number
PROJECT_ID=$(gcloud config get-value project)
PROJECT_NUMBER=$(gcloud projects describe $PROJECT_ID --format="value(projectNumber)")

# 2. Grant the AlloyDB Client role
gcloud projects add-iam-policy-binding $PROJECT_ID \
--member="serviceAccount:$PROJECT_NUMBER-compute@developer.gserviceaccount.com" \
--role="roles/alloydb.client"
現在請使用服務網址 (先前複製的 Cloud Run 端點) 測試應用程式。
注意:如果遇到服務問題,且系統指出原因為記憶體不足,請嘗試將分配的記憶體上限提高至 1 GiB,然後進行測試。

10. 清理
完成本實驗室後,別忘了刪除 AlloyDB 叢集和執行個體。
這項作業應會清理叢集及其執行個體。
11. 恭喜
我們結合 AlloyDB 的速度、MCP Toolbox 的自動化調度管理效率,以及 Vertex AI Memory Bank 的「機構記憶體」,打造出不斷進化的供應鏈系統。不只能回答問題,還會記得新加坡倉庫經常因季風而延誤,並在你提出要求前,主動建議重新安排貨運路線。