
1. Introduction
Vibe-coding an MVP is fast — but adding features to it by throwing more prompts at the wall is how projects break. You need a way to bring structure and real-world context into AI-assisted development. That's where Antigravity CLI comes in — an AI coding agent that runs in your terminal. On its own, it can understand your code base, run commands, and edit files. Its real power comes from what you plug into it:
- skills give the agent methodology and domain knowledge — a methodology skill enforces structured development workflows, while a domain skill provides accurate API knowledge so the agent doesn't hallucinate.
- MCP servers give the agent live connections to external systems — letting it inspect real schemas, run queries, and validate its work against actual data instead of relying on stale training knowledge.
Skills shape how the agent thinks; MCP shapes what the agent can see and interact with. Together, they turn a general-purpose coding agent into one that follows a structured workflow grounded in real-world data. This codelab walks you through that combination, from installing plugins to shipping a feature.
What you'll build
The patterns in this codelab — installing skills for methodology and domain knowledge, connecting MCP servers for live data access, and running a spec-driven development cycle — apply to any feature you build with Antigravity CLI, regardless of language, framework, or Google Cloud products. To make these patterns concrete, you work through a specific example: adding BigQuery integration to an e-commerce analytics dashboard.
The starter app is a FastAPI web app that reads sales data from static CSV files and renders charts (revenue trends, top products, order status breakdown, category performance). By the end, the app queries live data from BigQuery — Google Cloud's serverless data warehouse that lets you run SQL queries over large datasets without managing infrastructure. Specifically, you connect to the thelook_ecommerce dataset, unlocking the full catalog of orders, products, and customers that a 500-row CSV can't provide. You build this feature entirely through Antigravity CLI, guided by skills and MCP.
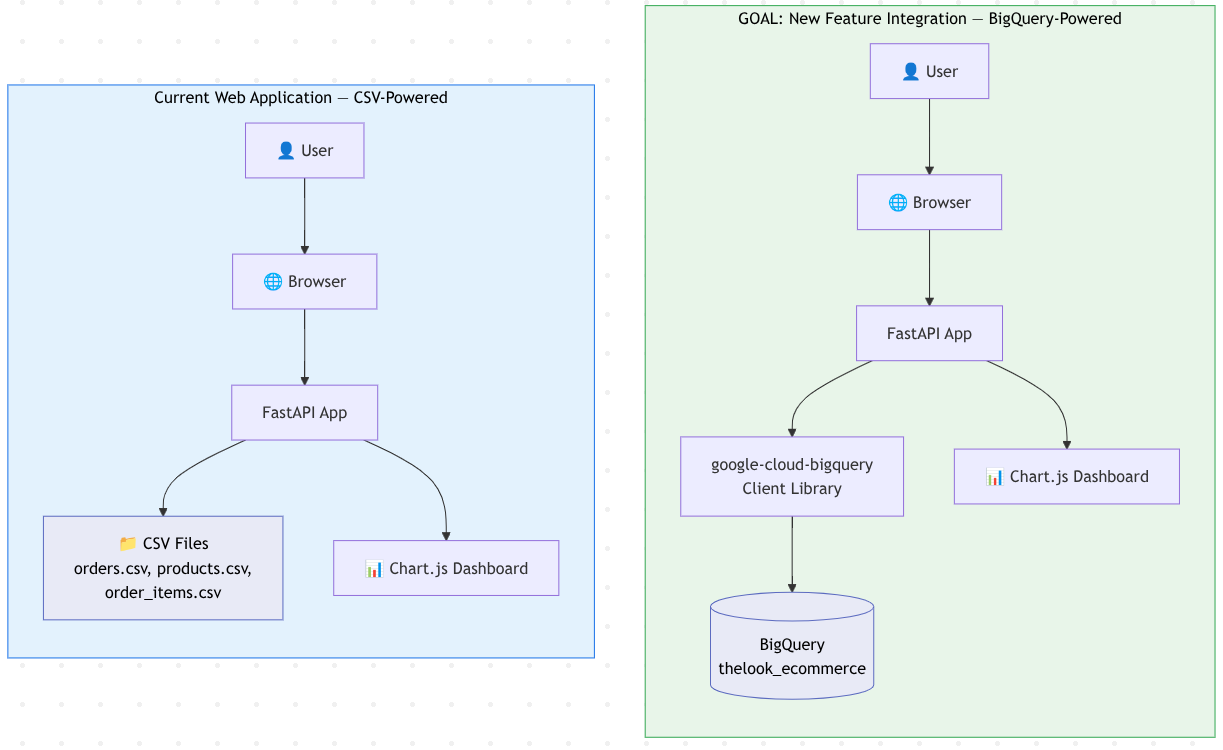
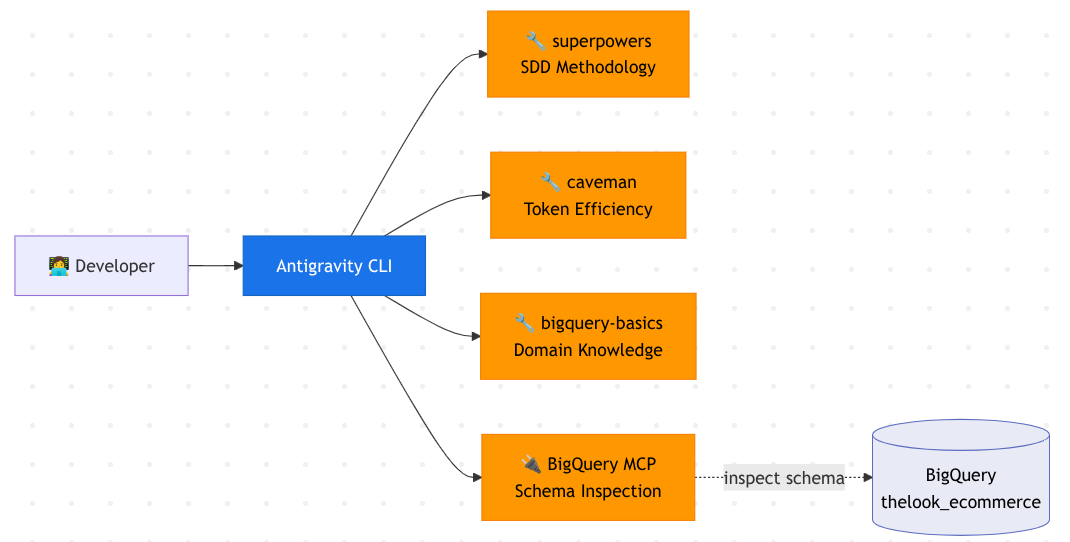
The agent configuration that we will use with Antigravity CLI will look like this
What you'll learn
- How to use Antigravity CLI in Cloud Shell — launch, navigate the TUI, and run slash commands
- What agent skills are and how the progressive disclosure pattern (metadata → instructions → resources) keeps context efficient
- Three categories of skills: methodology (superpowers), efficiency (caveman), and domain knowledge (google/skills)
- What MCP is and how to configure a remote MCP server (BigQuery MCP) for Antigravity CLI
- How to run a spec-driven development cycle: specify → plan → implement
- (Optional) How sub-agents in Antigravity CLI works and how to manage them
- How to integrate the
google-cloud-bigqueryPython client library into a FastAPI app - (Optional) How to deploy the app to Cloud Run using Antigravity CLI with a domain skill
Prerequisites
- A Google Cloud account
- Basic familiarity with Python, REST APIs, and Terminal command
2. Set Up Your Environment
This step clones the starter repository, configures your Google Cloud project, and enables the APIs you need.
Open Cloud Shell
Open Cloud Shell in your browser. Cloud Shell provides a pre-configured environment with all the tools you need for this codelab. Click Authorize when prompted to
Then click "View" -> "Terminal" to open the terminal.Your interface should look similar to this
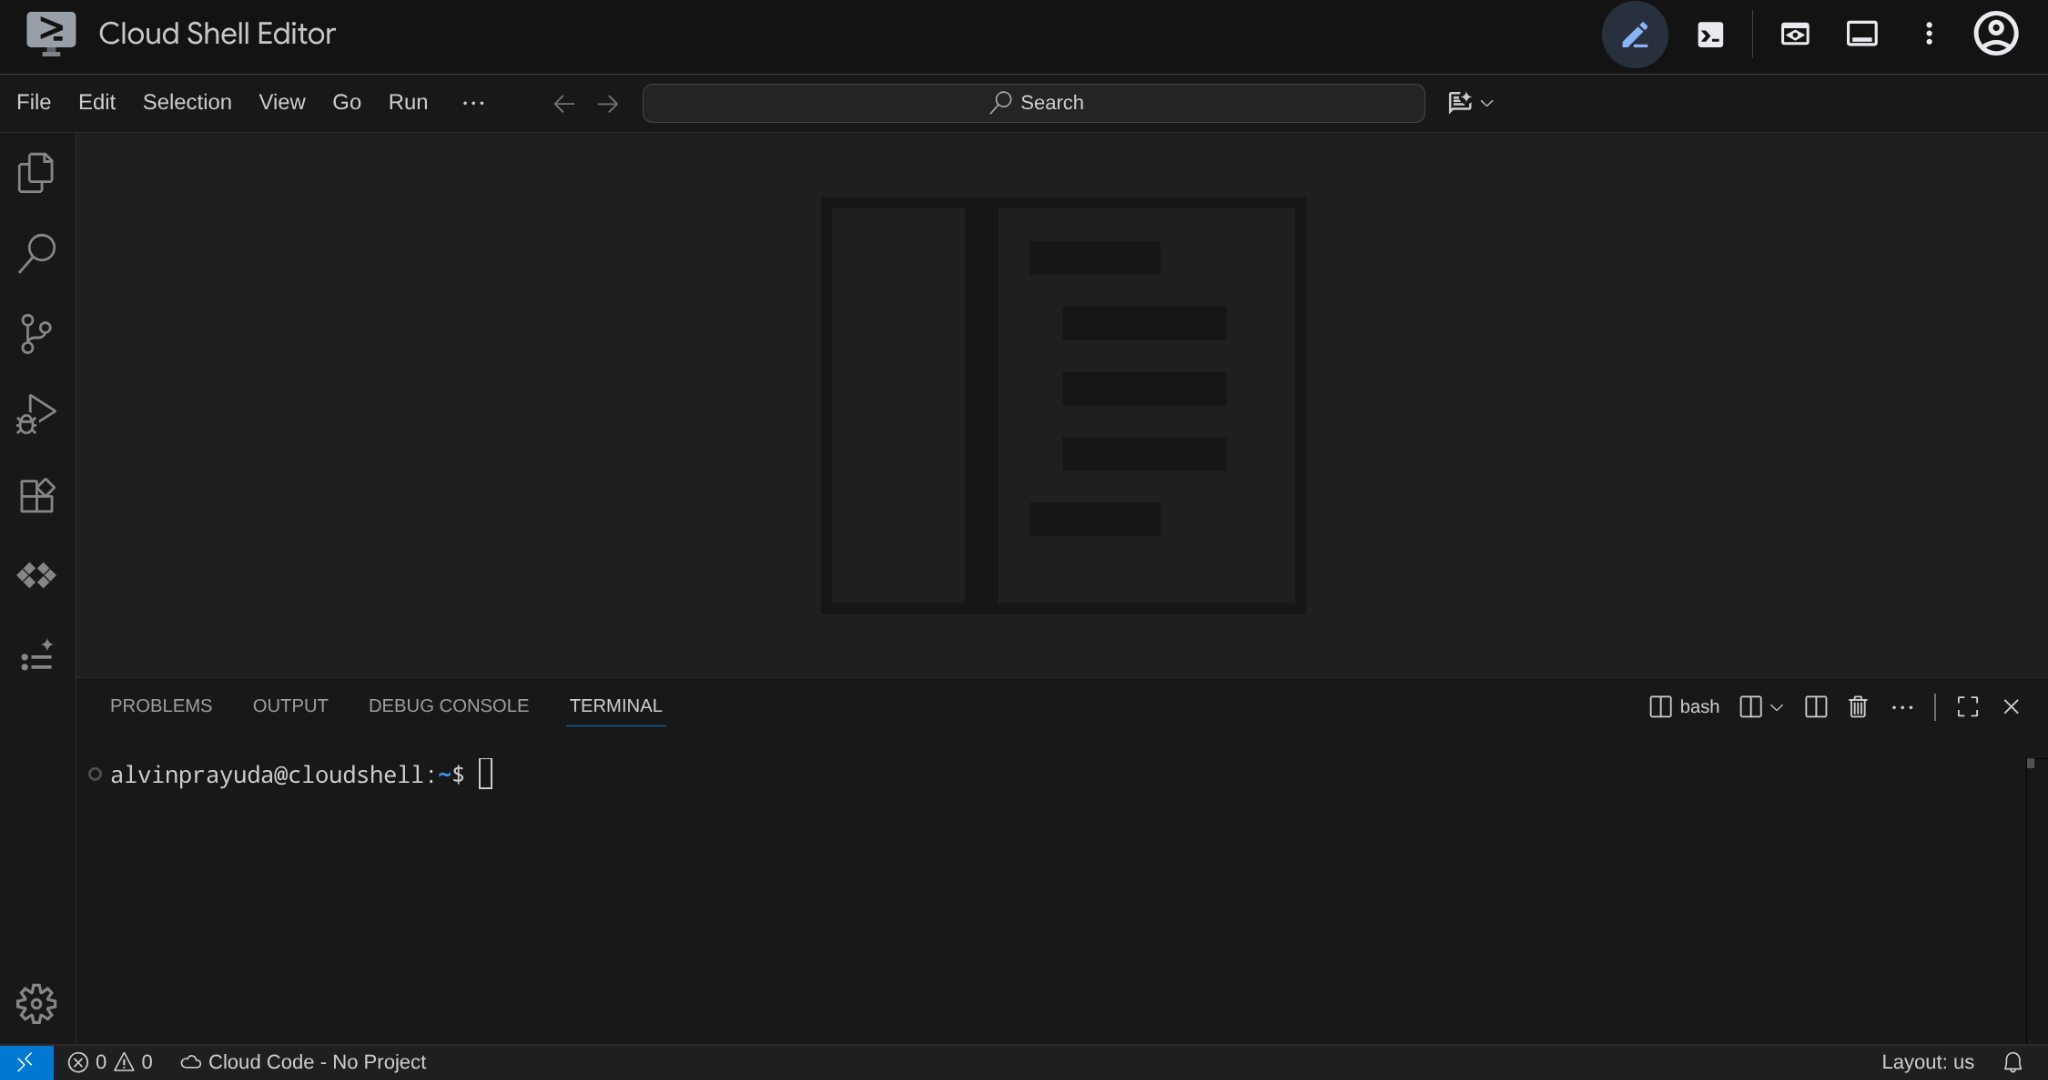
This will be our main interface, IDE on top, terminal on the bottom
Set up your working directory
Clone the companion repository that contains the starter code for this codelab:
git clone https://github.com/alphinside/sdd-agy-bigquery-dashboard.git
cloudshell workspace sdd-agy-bigquery-dashboard && cd sdd-agy-bigquery-dashboard
This repository contains a complete, working e-commerce dashboard app that reads from static CSV files. Throughout this codelab, you use Antigravity CLI to add BigQuery integration as a new feature.
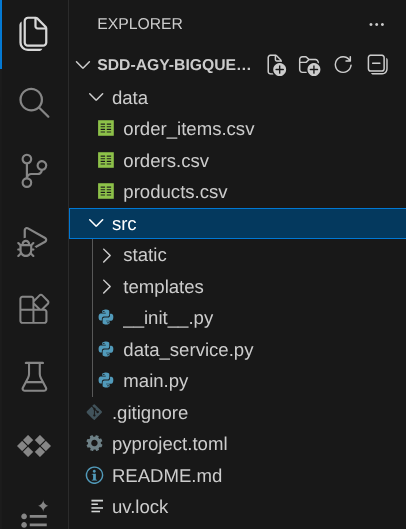
The key files and directories:
src/main.py— FastAPI application with API endpoints that serve dashboard datasrc/data_service.py— data layer that reads from CSV files using pandassrc/templates/dashboard.html— Jinja2 template with Chart.js visualizationsdata/— static CSV files (orders.csv,products.csv,order_items.csv) containing a small subset of e-commerce data
The app is a straightforward read-only dashboard: main.py defines API endpoints, data_service.py reads CSV files and returns structured data, and dashboard.html renders that data as charts. The BigQuery integration you build replaces data_service.py with a module that queries live data instead of reading static files.
Configure Terminal
Create Google Cloud Project ( Optional )
To create a new project, you can do it from Cloud Console UI by clicking on the Project Picker on the top left and click New Project

OR, if you want a quicker method, run the following command in the terminal
PROJECT_ID="sdd-agy-cli-$(openssl rand -hex 5)"
gcloud projects create "$PROJECT_ID"
echo $PROJECT_ID
This will create a Google Cloud project with randomised project ID. The command outputs the generated project ID — use it as YOUR_PROJECT_ID in the configuration later on.
Activating Terminal
Now, we will need to configure our terminal with the selected Google Cloud Project. Run the following command to list your available projects and find the project ID that you want to select
gcloud projects list
It will show list like this, remember or copy the project ID that you will use
PROJECT_ID: alvin-exploratory-2
NAME: alvin-exploratory-2
PROJECT_NUMBER: 109790610330
Now run the following command to create a script to activate the terminal ( or you can just create this file by yourself )
cloudshell edit configure_terminal.sh
Then copy the following code to the script
#!/bin/bash

gcloud config set project YOUR_PROJECT_ID
export GOOGLE_CLOUD_PROJECT=$(gcloud config get-value project)
echo $GOOGLE_CLOUD_PROJECT
Replace YOUR_PROJECT_ID with your project ID. The previous command also exports the project ID as an environment variable for use throughout the codelab. After that save the file and execute it
bash configure_terminal.sh
Verify the project is set correctly by checking the yellow text next to your working directory in the Cloud Shell terminal prompt. It should display your project ID.

Enable required APIs
Next, we will interact with BigQuery which is related to our use case scenario. Enable the Google Cloud APIs needed for this codelab:
gcloud services enable bigquery.googleapis.com
This API will enable us to access Bigquery. Now let's prepare our initial dataset for this codelab scenario
3. Set up the BigQuery dataset
Here is the scenario: your company already has e-commerce data stored in BigQuery — orders, products, and order items. You develop an application to show the order data dashboard but currently it only reads a small CSV extract of this data so that you can focus on frontend initially. Now, you want to upgrade it to query BigQuery directly for the full dataset.
To simulate this, you use TheLook E-commerce — a Google-maintained public dataset with realistic synthetic e-commerce data (125,000+ orders, 29,000+ products). You copy the relevant tables into your own project's BigQuery instance so they act as "your company's data."
In Cloud Shell, we already have bq CLI that we can utilize to interact with BigQuery directly, hence we can directly prepare our data.
Create a dataset in your project:
bq mk --dataset $GOOGLE_CLOUD_PROJECT:thelook_ecommerce
Copy the three tables from the public dataset into your new dataset:
bq cp bigquery-public-data:thelook_ecommerce.orders $GOOGLE_CLOUD_PROJECT:thelook_ecommerce.orders
bq cp bigquery-public-data:thelook_ecommerce.order_items $GOOGLE_CLOUD_PROJECT:thelook_ecommerce.order_items
bq cp bigquery-public-data:thelook_ecommerce.products $GOOGLE_CLOUD_PROJECT:thelook_ecommerce.products
Verify the tables are in your dataset:
bq ls $GOOGLE_CLOUD_PROJECT:thelook_ecommerce
You should see three tables listed: orders, order_items, and products.
   tableId     Type    Labels   Time Partitioning   Clustered Fields
 ------------- ------- -------- ------------------- ------------------
  order_items   TABLE
  orders        TABLE
  products      TABLE
Run a quick test query to confirm the data is accessible:
bq query --nouse_legacy_sql \
  "SELECT COUNT(*) as total_orders FROM \`$GOOGLE_CLOUD_PROJECT.thelook_ecommerce.orders\`"
+--------------+
| total_orders |
+--------------+
|       125957 |
+--------------+
You should see a count of over 100,000 orders.
4. Run the Initial Web App
Before upgrading the app, let's run it in its current state to see what the CSV-powered dashboard looks like.
uv is a fast Python package and project manager written in Rust ( docs). This codelab uses it for speed and simplicity. If you utilize cloudshell for this tutorial, it is already pre-installed in the instance. See this tutorial if you wish to install it for your local
Install the project dependencies which will also prepare the virtual environment for you:
uv sync
After that, if you are familiar with Python, instead of executing a python command, we will execute every command with uv binary. Launch the FastAPI development server:
uv run uvicorn src.main:app --host 0.0.0.0 --port 8080
Open the dashboard in your browser using Cloud Shell's Web Preview feature. Click the Web Preview button (the eye icon in the Cloud Shell toolbar) and select Preview on port 8080.
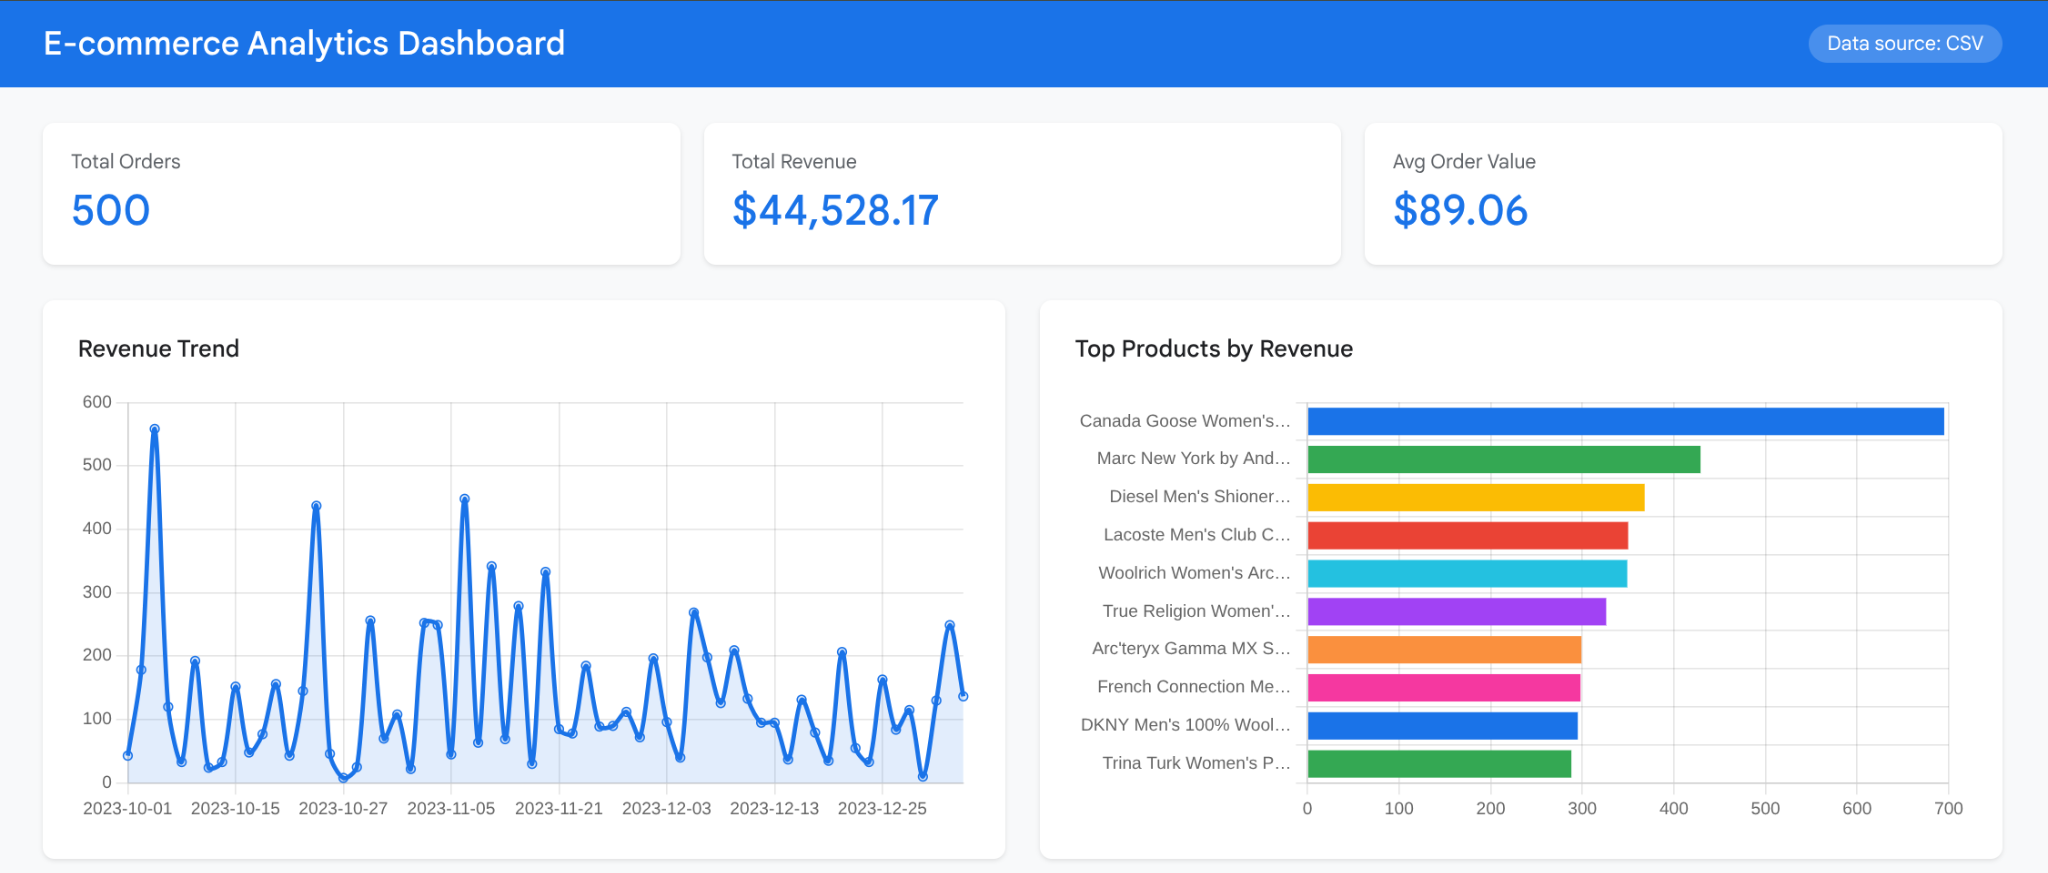
The dashboard displays four chart panels:
- Revenue Trend — a line chart showing daily revenue over the date range in the CSV data
- Top Products by Revenue — a horizontal bar chart ranking products by total sales
- Order Status Breakdown — a doughnut chart showing the distribution of Complete, Shipped, Processing, Cancelled, and Returned orders
- Category Performance — a horizontal bar chart showing revenue by product category
Notice the Data source: CSV badge in the header. The summary cards show totals computed from 500 orders and ~750 order items — a small subset of the full TheLook dataset. The date range is limited to October–December 2023.
This is our baseline app, now we will upgrade it to be integrated with BigQuery with the help of Antigravity CLI.
5. Set Up Antigravity CLI
This step introduces Antigravity CLI, walks through the Terminal User Interface and installs three categories of plugins to boost our development workflow. Along the way, you learn what agent skills and MCP are and how they extend an AI coding agent's capabilities.
What is Antigravity CLI?
Antigravity CLI is a variant of Google's AI coding agent: Antigravity for the terminal. It is a lightweight Terminal User Interface (TUI) built in Go that connects to the same agent harness powering the Antigravity 2.0 desktop application. It reads your codebase, runs commands, edits files, and connects to external tools via MCP — all from the terminal.
If you use Cloud Shell for this tutorial, Antigravity CLI is pre-installed in it already. You can check by running the following command
agy --help
It will show the following command options details
Usage of agy:
  --add-dir                       Add a directory to the workspace (repeatable) (default [])
  -c                              Short alias for --continue
  --continue                      Continue the most recent conversation
  --conversation                  Resume a previous conversation by ID
  --dangerously-skip-permissions  Auto-approve all tool permission requests without prompting
  -i                              Short alias for --prompt-interactive
  --log-file                      Override CLI log file path
  --model                         Model for the current CLI session
  --new-project                   Create a new project for this session
  -p                              Short alias for --print
  --print                         Run a single prompt non-interactively and print the response
  --print-timeout                 Timeout for print mode wait (default 5m0s)
  --project                       Project ID for the current CLI session
  --prompt                        Alias for --print
  --prompt-interactive            Run an initial prompt interactively and continue the session
  --sandbox                       Run in a sandbox with terminal restrictions enabled

Available subcommands:
  changelog       Show changelog and release notes
  help            Show help for subcommands
  install         Configure environment paths and shell settings
  models          List available models
  plugin          Manage plugins (install, uninstall, list, enable, disable)
  plugins         Alias for plugin
  update          Update CLI
Launch Antigravity CLI
Now, we will need to set up the Antigravity CLI if you use it for the first time. In your new terminal tab, launch it
agy
If you run it for the first time, it will ask you to select the authentication method
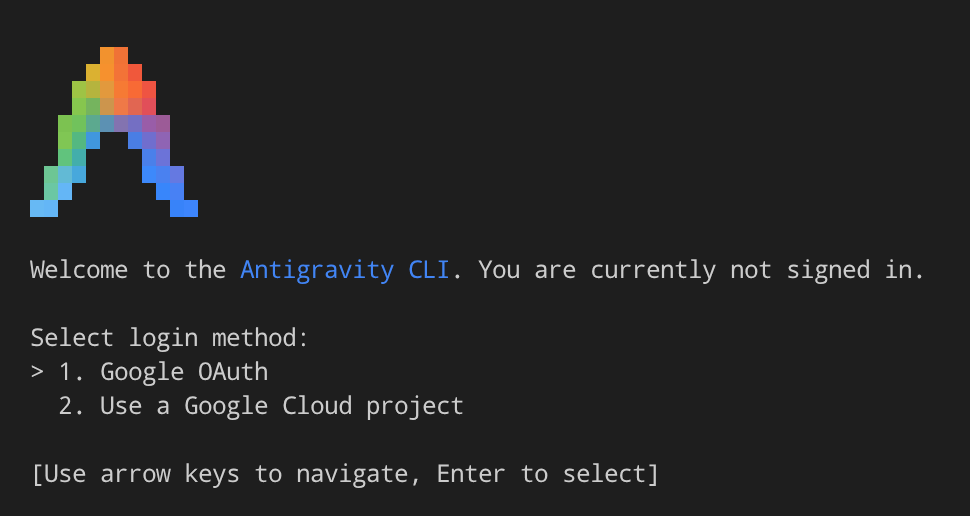
For this tutorial, let's use Google OAuth , it will ask you to open a URL where you will prompted to select Google account that you will use for login.
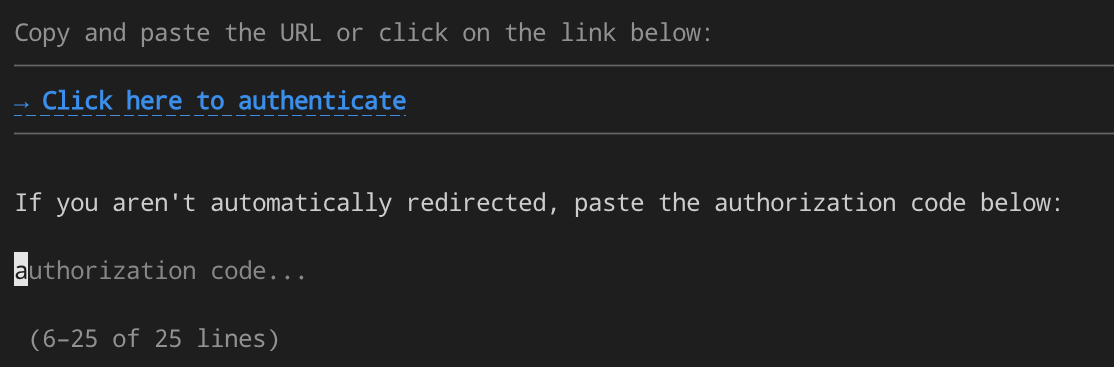
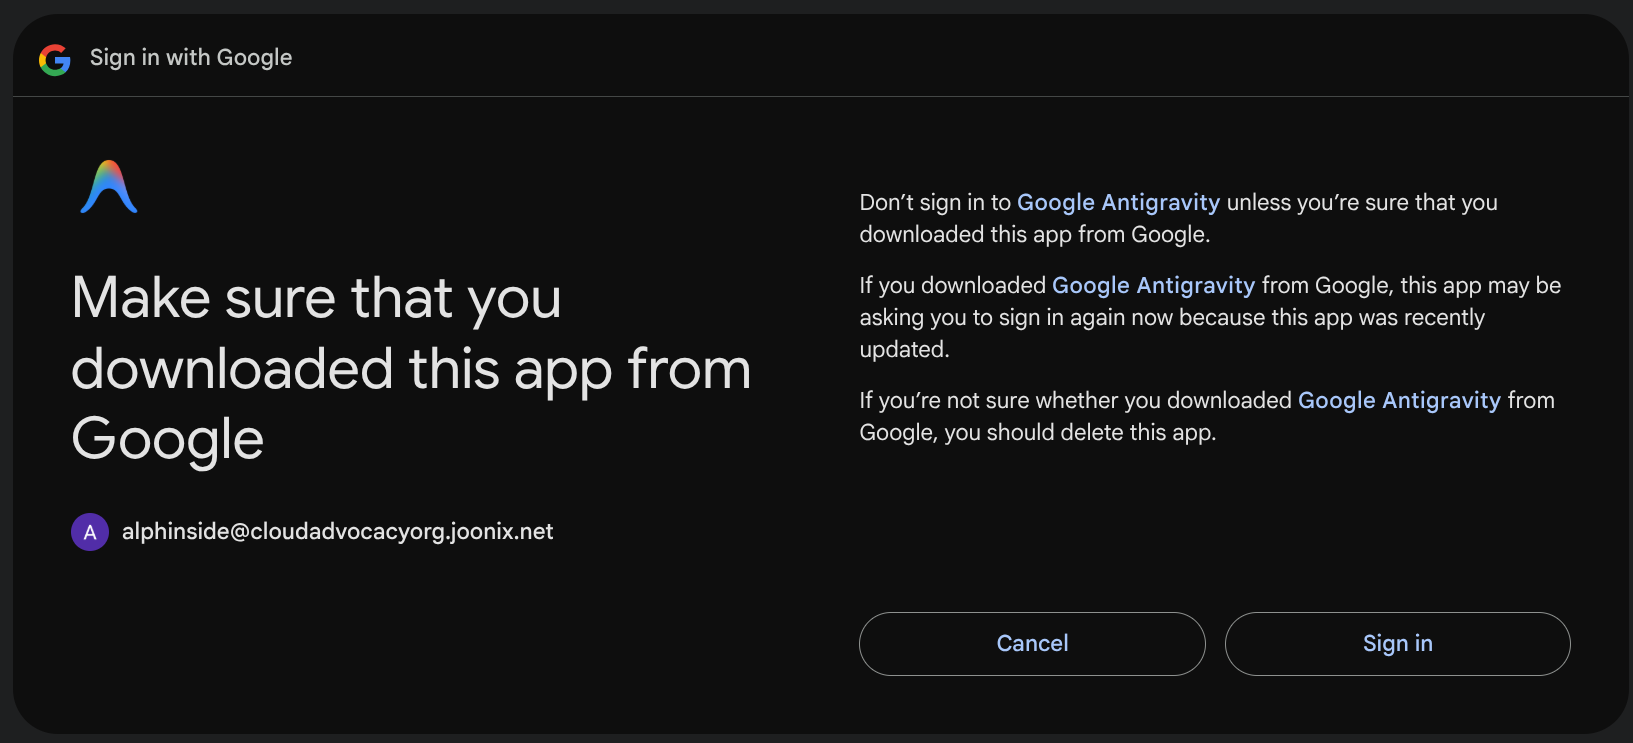
After clicking authenticate, select the Google account and click Sign In
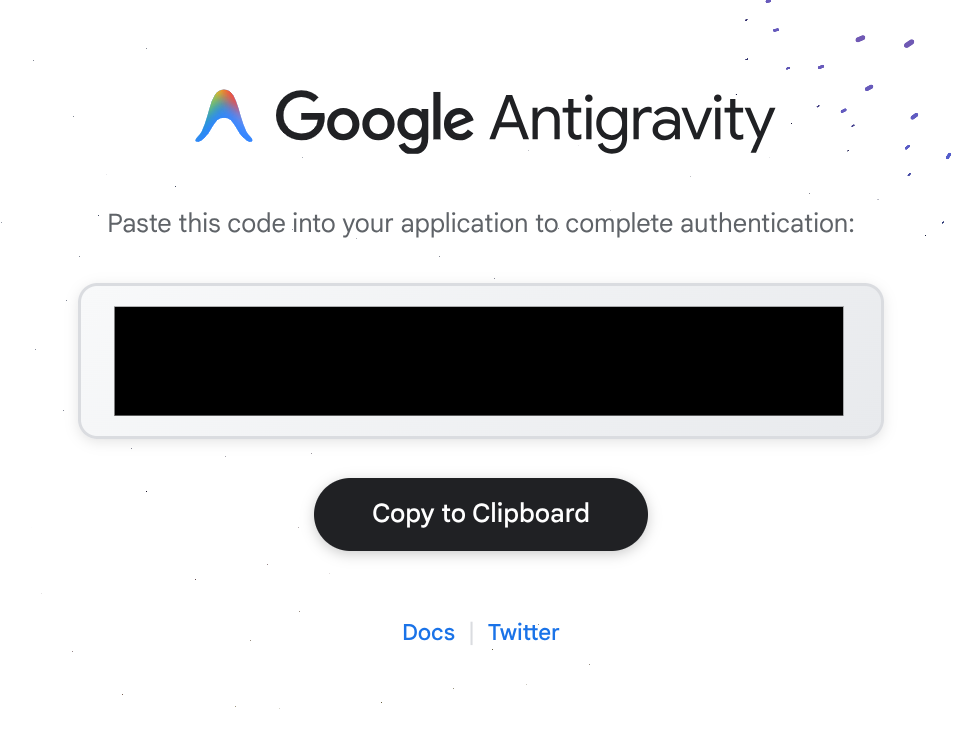
It will show you a string to be copied, click Copy to Clipboard to copy it
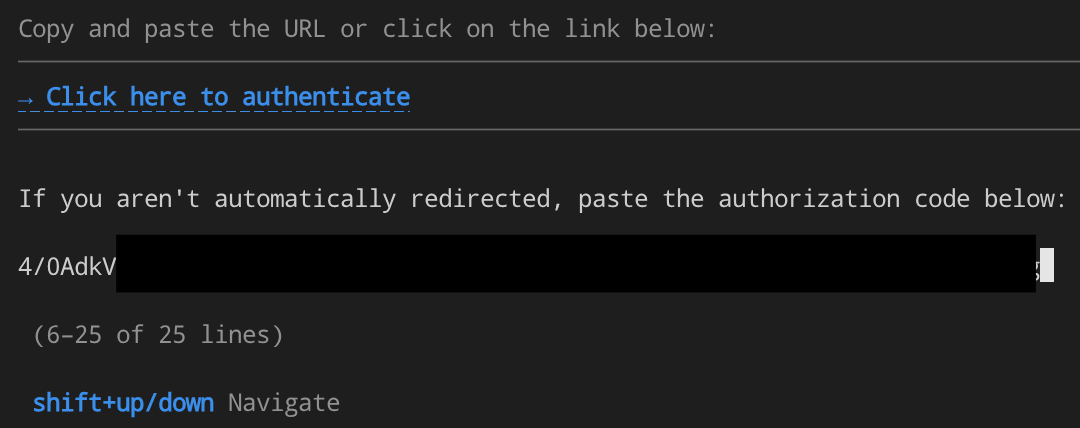
Then paste it to Antigravity CLI prompt like shown below
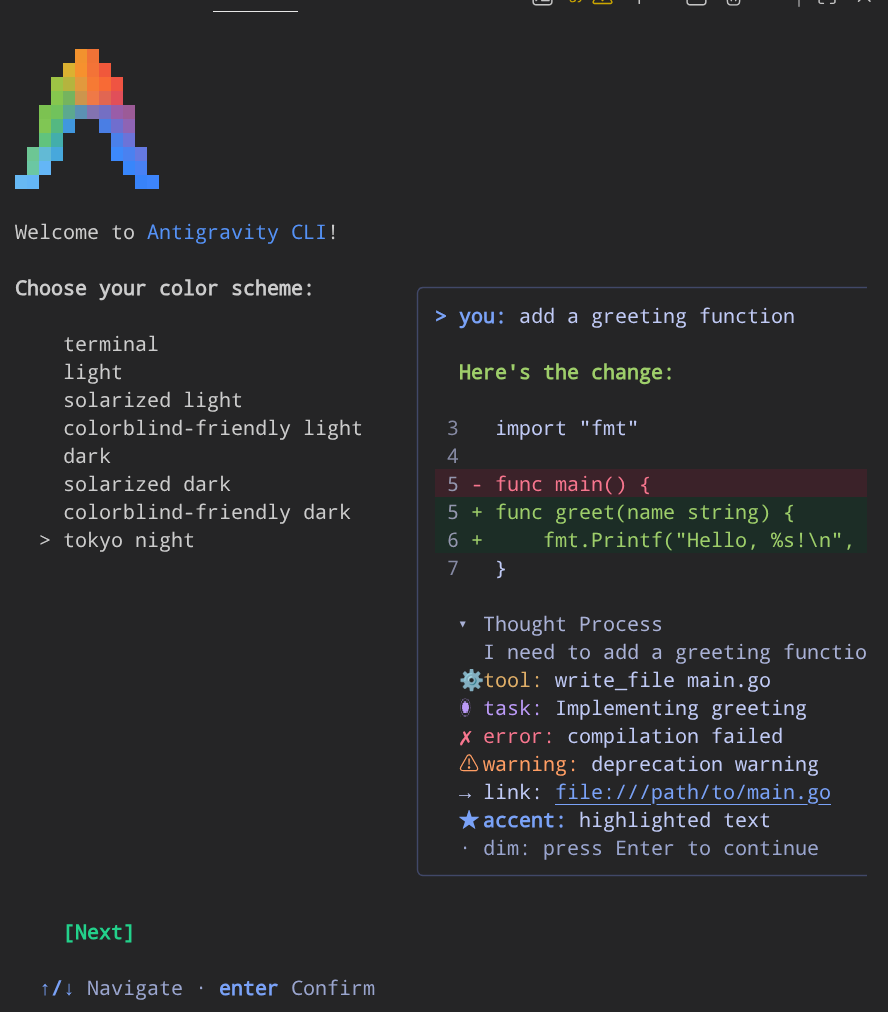
After that, you will be asked to select some color theme and agreement for term of use
You will also be asked to trust the current workspace directory, Just accept it and we're ready to continue. This will be the main entry for our interaction with Antigravity CLI in terminal
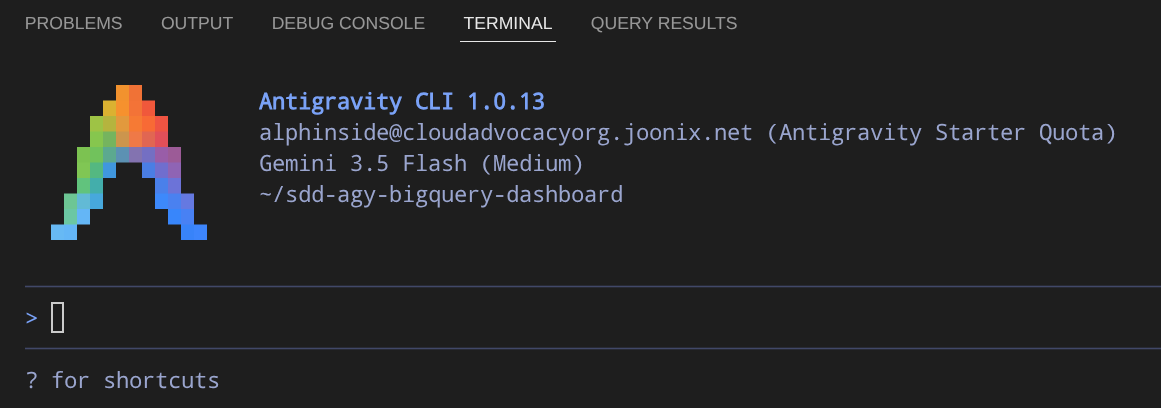
For now, let's exit the Antigravity CLI and continue to the next section
6. Customization - Agent Skills
Out of the box, Antigravity CLI can read your codebase, run shell commands, and edit files — it has a limited built-in spec-driven development workflow, and its knowledge of specific APIs is limited to what was in its training data. For a task like integrating BigQuery into an existing app, two gaps appear:
- Process gap — without structure, Antigravity CLI might jump straight to writing code. For small fixes that's fine. For a feature that touches multiple files and endpoints, you end up with inconsistent implementations, missing edge cases, and no documentation of what was decided or why.
- Knowledge gap — The model training data may include outdated BigQuery client library patterns, deprecated API calls, or incorrect table schemas. It has no way to check what the actual dataset looks like right now.
Skills close the process gap. A development methodology skill like superpowers enforces a specify-plan-implement cycle — the agent won't write code until you approve a spec. A domain skill like bigquery-basics provides current, Google-maintained API documentation so the agent uses correct client library patterns.
MCP servers close the knowledge gap at runtime. BigQuery MCP gives the agent a live connection to your actual dataset — it can list tables, inspect column types, and run sample queries. The agent works from real schema data, not guesses.
Let's understand more in depth about these two
Agent Skills
Agent Skills are a lightweight, open format for extending AI agent capabilities with specialized knowledge and workflows.. Each skill is a portable, version-controlled directory with a SKILL.md file — a machine-readable contract that defines how the agent handles a specific task.
A skill directory looks like this:
skills/<skill-name>/
├── SKILL.md          # Required: YAML frontmatter + workflow instructions
├── scripts/          # Optional: helper scripts
├── references/       # Optional: reference implementations
├── assets/           # Optional: templates or assets
└── ...                # Any additional files or directories
At its core, a skill is a folder containing a SKILL.md file. This file includes metadata (name and description, at minimum) and instructions that tell an agent how to perform a specific task. Skills can also bundle scripts, reference materials, templates, and other resources.
Here is the SKILL.md for the bigquery-basics skill you use later in this codelab:
---
name: bigquery-basics
metadata:
  category: BigDataAndAnalytics
description: >-
  Manages datasets, tables, and jobs in BigQuery. Use when you need to interact
  with BigQuery, run SQL queries, manage BigQuery resources (datasets, tables,
  views), or perform basic data ingestion and analysis.
---

# BigQuery Basics

[Detailed instructions about BigQuery APIs, SQL patterns,
 client library usage, data ingestion patterns, etc.]
The YAML frontmatter (name + description + metadata) is what Antigravity CLI loads at startup — lightweight metadata. The markdown body below the --- is the full instruction set, loaded only when Antigravity detects a BigQuery-related task.
Progressive disclosure
Skills use a three-layer progressive disclosure pattern that prevents context window saturation:
- Layer 1 (Discovery): At startup, Antigravity reads only the YAML metadata for every installed skill. It knows the skill exists — nothing more.
- Layer 2 (Activation): When your task matches a skill's description, AGY reads the full
SKILL.mdinto its active context. It now knows what to do. - Layer 3 (Execution): As needed, Antigravity accesses the skill's scripts, examples, or resources. It now knows how to do it.
Only relevant knowledge is loaded at the right time. A skill for Cloud Run deployment doesn't consume context when you're working on a BigQuery query for example.
Three categories of skills
There are many different types of agents skills. In this codelab, we will use three skills, each representing a different category of skill:
Category | Skills | Purpose |
Domain Knowledge | google/skills | What the agent knows about specific technologies |
Methodology | obra/superpowers | How to develop — enforces Spec-Driven Development, planning, testing |
Efficiency | JuliusBrussee/caveman | How efficiently to use tokens |
google/skills provides first-party agent skills maintained by Google for Google products. For example, it gives the agent accurate, up-to-date knowledge about BigQuery APIs, Cloud Run deployment patterns, and other services. Without domain skills, the agent relies on training data that may be outdated or incomplete — domain skills replace guessing with current documentation.
obra/superpowers is one opinionated implementation of a spec-driven development (SDD) workflow. Without an SDD framework, agents jump straight to code when you describe a feature — which works for small fixes but produces inconsistent, hard-to-maintain results for anything larger. SDD forces a structured cycle: clarify requirements → write a specification → generate a plan → implement against the spec. Each stage produces a reviewable artifact. The agent won't start coding until you approve the spec. Other SDD frameworks exist — spec-kit, agent-skills, and others — each with different opinions on the specify-plan-implement cycle. This codelab uses superpowers as a concrete example; the underlying discipline (specify and plan before you code) applies regardless of which framework you choose.
JuliusBrussee/caveman compresses agent output by up to 75%. It strips filler words, pleasantries, and verbose explanations while keeping all technical substance intact. Fewer tokens per response means more productive exchanges per session and faster responses. Activate it with /caveman or by instructing the agent to talk efficiently. It auto-disables for security warnings and irreversible actions.
Agent Skills Installation
Official Google Skills Installation
First, let's install the necessary Google skills that we will interact with. In this tutorial the main technology stack that we will touch is Bigquery and Cloud Run. So let's install these skills. We will use npx skills command to install this
npx skills add google/skills
This will open an interactive terminal UI, there are many skills. Use the arrow keys and space bar to select the skills you need for this codelab
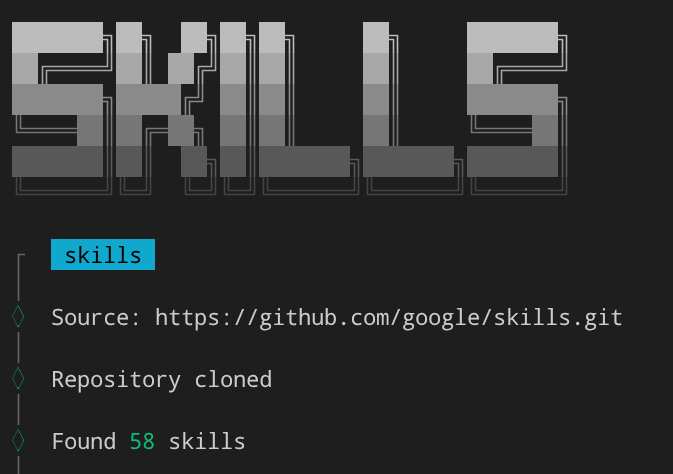
Find bigquery-basics and cloud-run-basics and click Space to select them. The box should be dark-greyed out like shown below

Then, on the select agents, just click Enter to skip selection as Antigravity CLI by default is already included
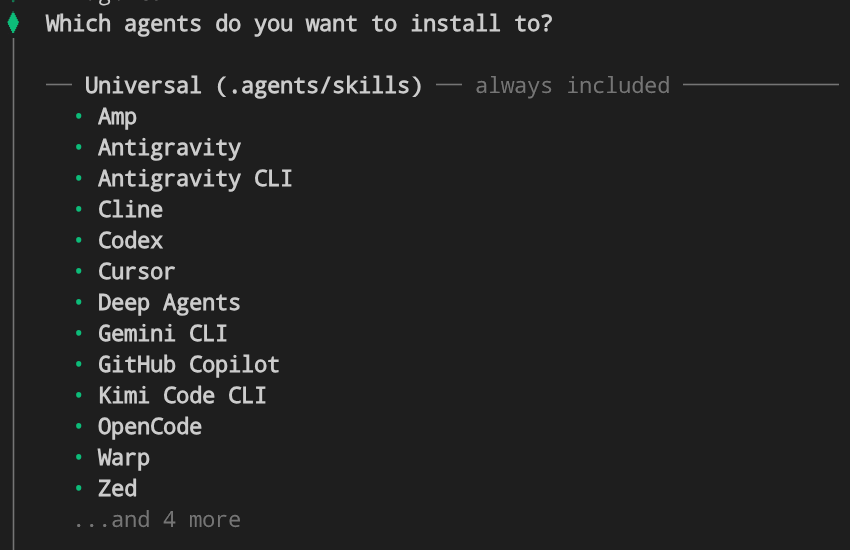
And let's select Project installation scope, this will install the skills under the .agents directory in our working dir

Finally click Enter to answer with Yes to finish the installation. Optionally you can also answer Yes to install the find-skills skill if you have many skills configured
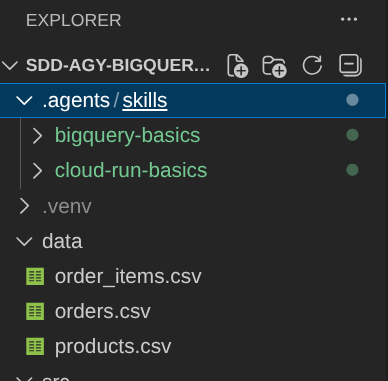
3rd-party Skills Installation as Plugins
Next, we will install obra/superpowers and JuliusBrussee/caveman skills. These skills are supported to be installed as Antigravity CLI plugins, hence we can install them using these command
agy plugin install https://github.com/obra/superpowers
agy plugin install https://github.com/JuliusBrussee/caveman
Then, we can verify the installation using the following command
agy plugin list
It will show these output
{
  "imports": [
    {
      "name": "superpowers",
      "source": "gemini-cli",
      "importedAt": "2026-07-06T01:50:36Z",
      "components": [
        "skills",
        "hooks"
      ]
    },
    {
      "name": "caveman",
      "source": "gemini-cli",
      "importedAt": "2026-07-06T01:50:37Z",
      "components": [
        "skills",
        "agents",
        "commands"
      ]
    }
  ]
}
These finalized our skills setup. Let's move on to the next one
7. Customization - MCP Tools
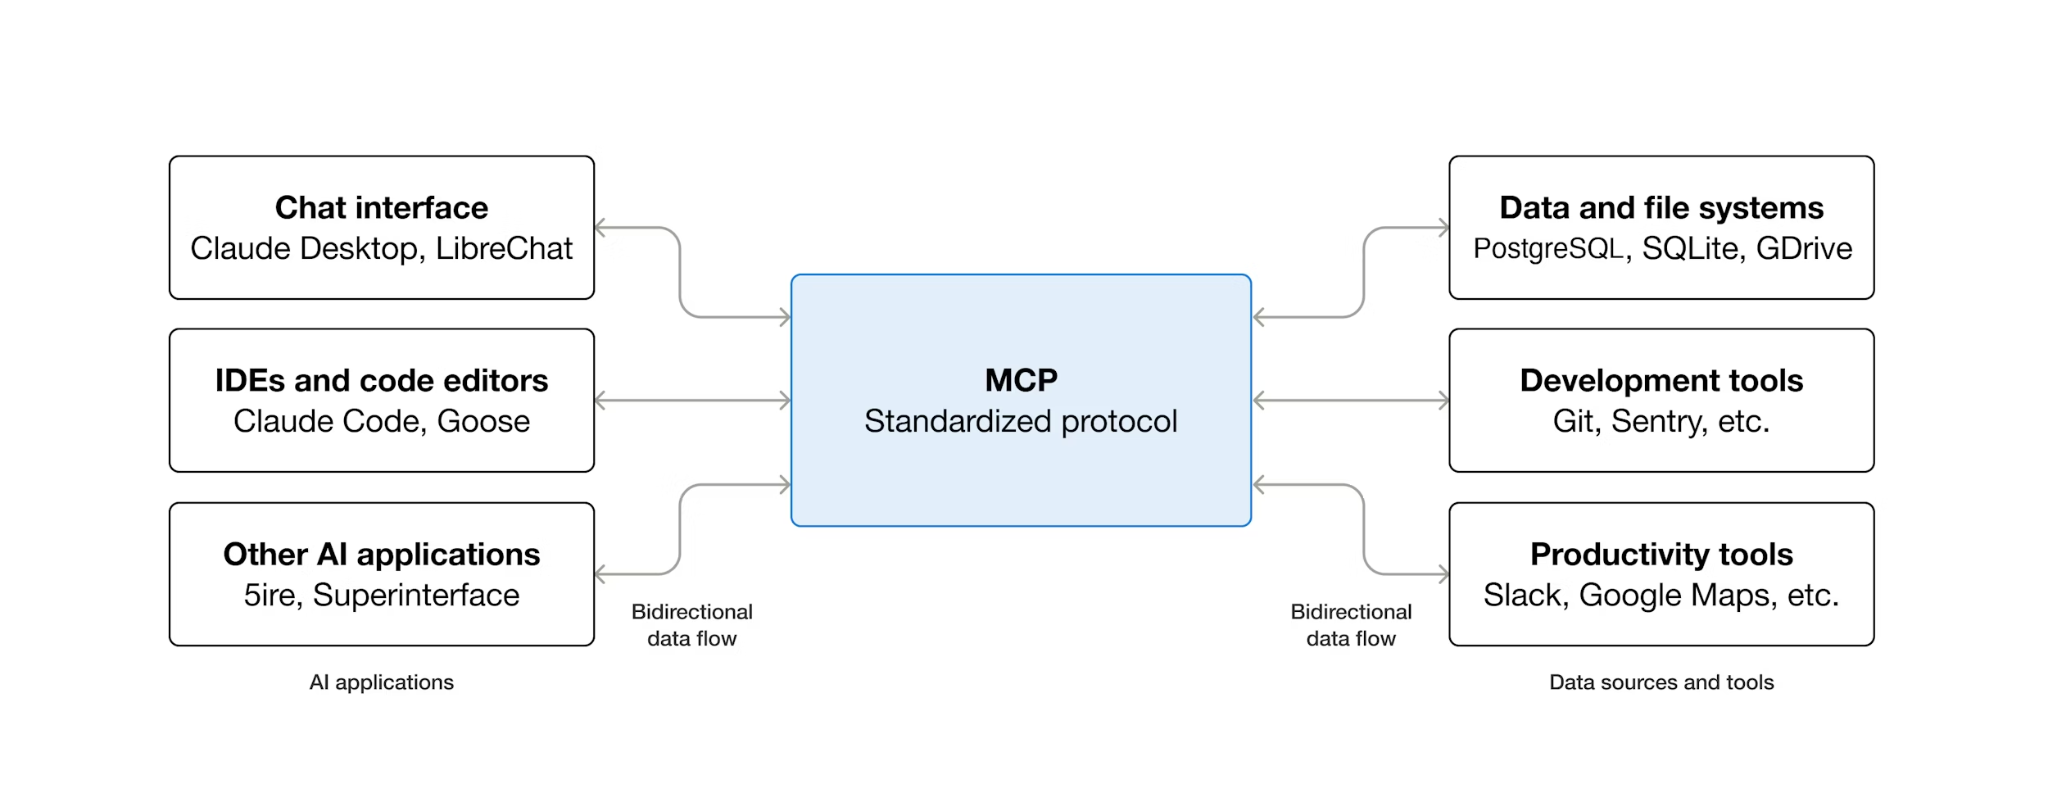
MCP (Model Context Protocol) is an open protocol that standardizes how AI agents discover and interact with external tools. It defines a client-server model: the agent hosts an MCP client, and tools are exposed by MCP servers. Any MCP-compatible client can use any MCP-compatible server — the agent doesn't need custom integration code for each tool.
MCP uses a client-server architecture:
- Host — the application where the AI model lives (Antigravity CLI in this case)
- Client — a component within the host that handles MCP communication (built into Antigravity CLI)
- Server — a lightweight program that exposes capabilities to the AI ( In our case, we will utilize Google Cloud Managed BigQuery MCP Server )
When Antigravity CLI runs the SDD workflow later in this codelab, it needs accurate knowledge of the BigQuery dataset schema — table names, column types, relationships. BigQuery MCP lets Antigravity CLI inspect the live schema directly. This produces specifications and code that reference real tables and columns, not hallucinated ones.
BigQuery Managed MCP Configuration
Google hosts a managed BigQuery MCP server on Google Cloud infrastructure — no local setup required ( you can check others Google Cloud products that are supported in this documentation). Configure Antigravity CLI to connect to it by creating the MCP configuration file in your project directory:
mkdir -p .agents
cat > .agents/mcp_config.json << EOF
{
  "mcpServers": {
    "bigquery": {
      "serverUrl": "https://bigquery.googleapis.com/mcp",
      "transport": "http",
      "authProviderType": "google_credentials"
    }
  }
}
EOF
This configuration tells AGY:
- Where to find the BigQuery MCP server (
serverUrl) - To use Google credentials for authentication (
authProviderType)
The configuration lives at the workspace level (.agents/mcp_config.json)
We can verify the configuration from inside Antigravity CLI, let's run it first
agy
Then, verify the config by running slash command /mcp
/mcp
It will show something like this

Then, press Esc to quit the slash command interaction
Exit Antigravity CLI (press Ctrl+D twice) for now
8. Feature Development with Spec-Driven Development
With skills/plugins installed and BigQuery MCP connected, you now can use the spec-driven development workflow to formally specify the BigQuery integration feature. This is the step where "specify before you code" becomes concrete.
Ensure you enter Antigravity CLI and for this demo we will allow all tool execution with this flag
agy --dangerously-skip-permissions
Activate caveman mode
Before starting the SDD cycle, activate caveman mode to keep token usage efficient throughout the multi-step workflow:
/caveman:caveman
Antigravity CLI's responses become terse — dropping filler words and pleasantries while keeping all technical substance. Fewer tokens per exchange means more productive conversations within the same quota.

Start the SDD specification
Prompt Antigravity CLI with the feature request:
I want to add a BigQuery integration feature to this e-commerce dashboard app. Currently it reads
from CSV files in the data/ directory. I want to replace the CSV reads with live queries
against the thelook_ecommerce dataset in my BigQuery project using the
google-cloud-bigquery Python client library.

The dashboard should show the same panels (revenue trend, top products, order status,
category performance) but with the full dataset instead of the 500-row CSV subset.

Follow spec-driven-development for development workflow, ensure spec and plan docs created following the superpowers standard in current working directory; also use Bigquery MCP to figure out the data schema.
The superpowers skill activates automatically when it detects a feature-level request. AGY enters the SDD cycle instead of jumping straight to code.
Antigravity CLI will initiate the process to understand current project and gather required context. You will see it execute command like ListDir and Read like shown below

And it also will utilize the BigQuery MCP connection that we previously setup to find the schema of the dataset
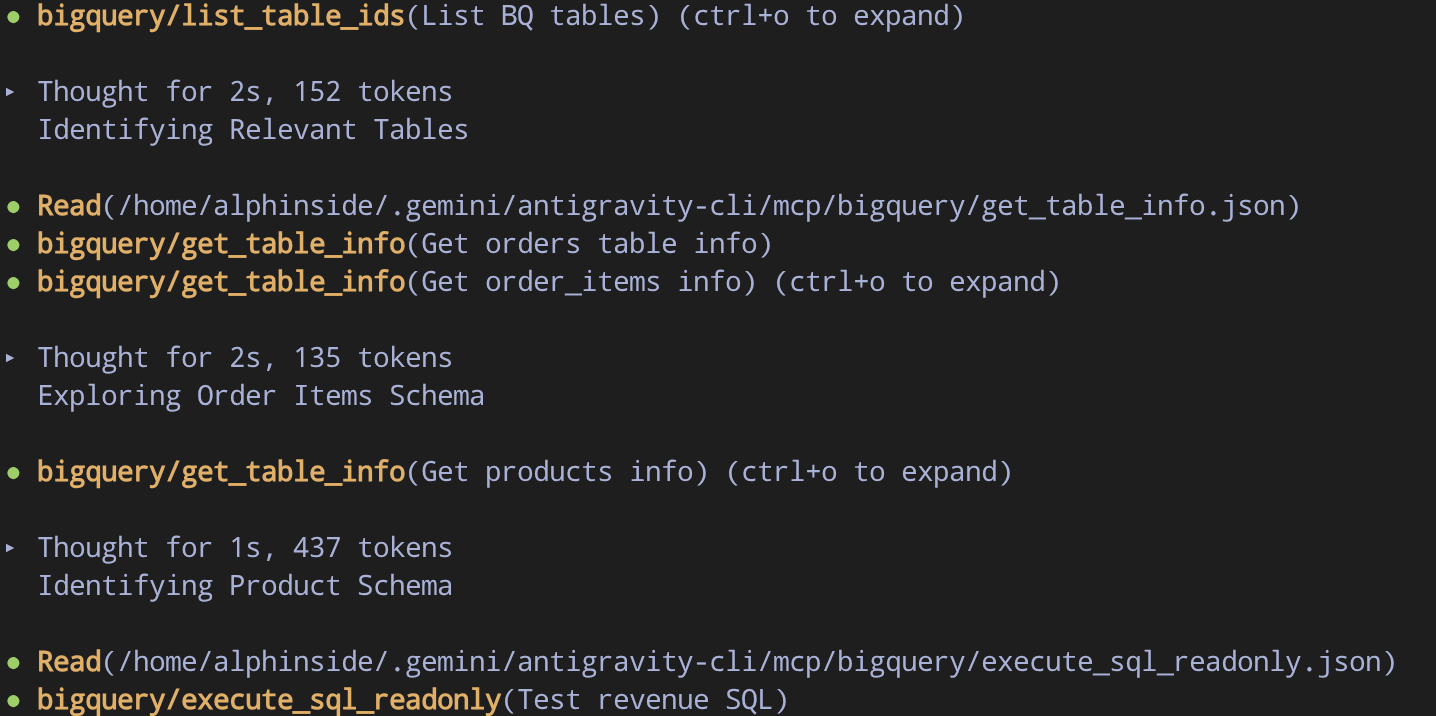
This will ensure that the Antigravity CLI has correct context before starting development
Requirement clarification
Antigravity CLI might ask focused questions about the feature scope. Typical questions include:
- How should the project ID be configured?
- How should the Revenue Trend chart be aggregated and displayed?
- How should integration be approached? Direct SQL vs Local Pandas
You can answer these questions following the agent recommendation

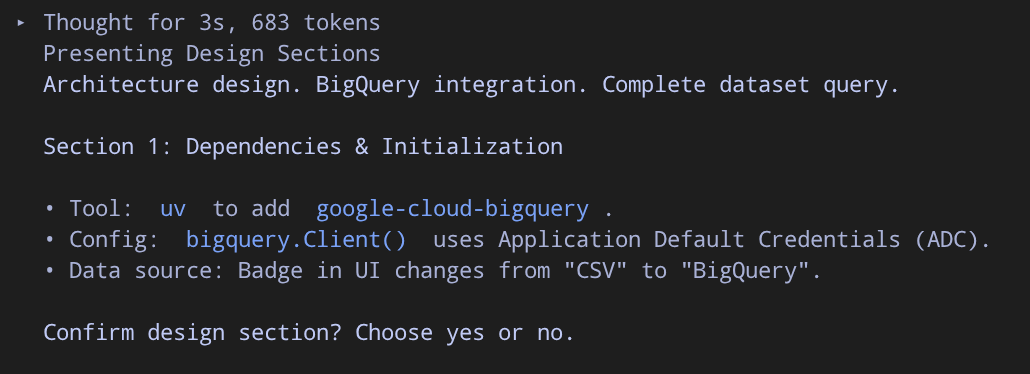
Review the specification
After clarification, it will produce a formal specification document. If it follow instructions correctly, it will follow obra/superpowers skill convention in which it will create specification document under directory docs/superpowers/specs like shown below
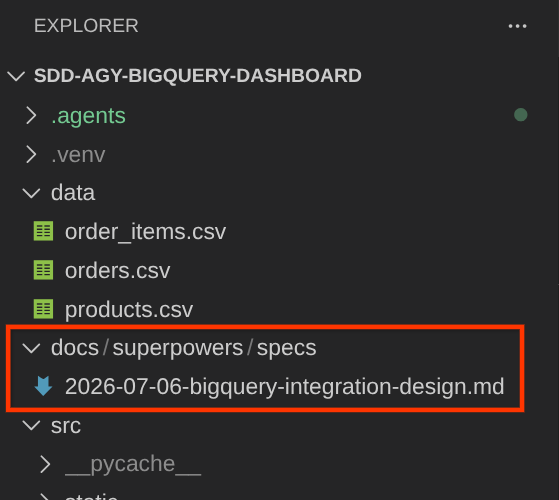
The specification document will look similar to this
# BigQuery Integration Design Specification

## Overview

This document specifies ...

## Architecture

The application currently reads ...

## Data Schema & Sources

All tables reside in the BigQuery ...

...
After reviewing this, we need to confirm the specs so that it move to the planning phase

proceed with the specs
Planning Phase and Sub-agents Execution
After you approve the specification, Antigravity CLI will decompose it into an implementation plan which will be written to directory docs/superpowers/plans
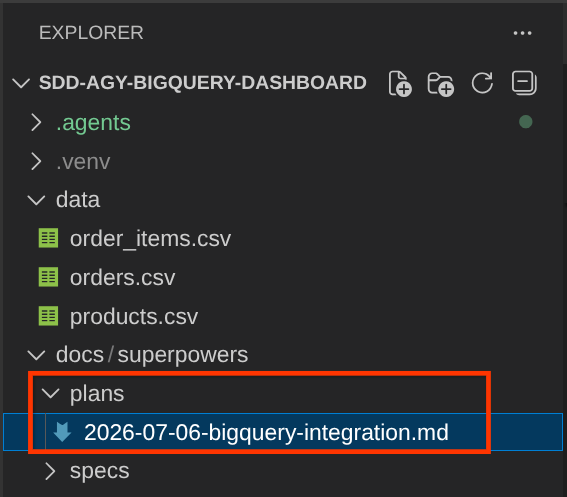
The plan documents will lists several things like below example:
- Files to modify
- Files to create/update
- Dependency changes
- Task breakdown
It will also recommend using subagent driven development which is supported by Antigravity CLI — instead of a single agent doing everything sequentially, Antiravity CLI can delegate tasks to specialized subagents. During implementation, you may see subagents like:
- Task Implementer — writes the code for a specific task from the plan
- Task Reviewer — reviews the implemented code against the spec
- Final Code Reviewer — performs a holistic review across all changes before completion
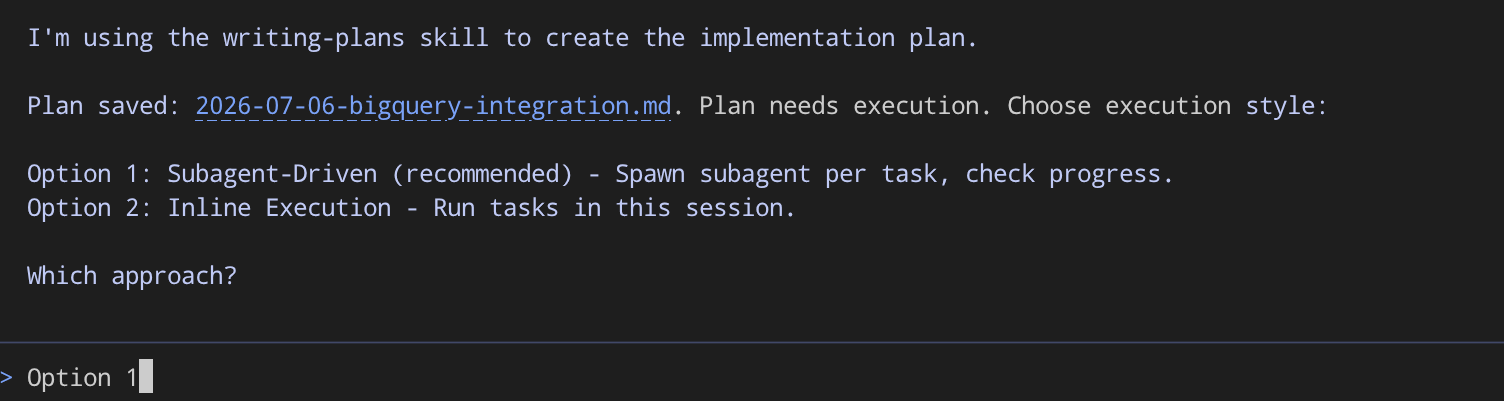
If you are prompted like this, response with this
Use subagent driven development
We will see later on the subagents is delegated in picking up tasks one by one


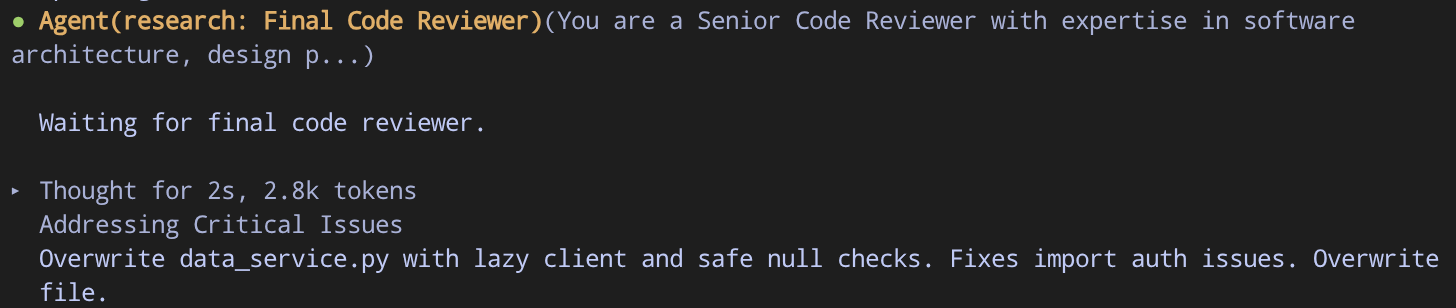
After a while development will all be finished ( probably after spawning Final Code Reviewer agent ). Next we can inspect the result
Updated App Manual Review
After all tasks are finished, we can check the updated application. Exit the Antigravity CLI by pressing Ctrl+D twice, then run the following command
bash configure_terminal.sh && uv run uvicorn src.main:app --host 0.0.0.0 --port 8080
You should see now, the Total Orders displayed > 120K orders and integrated with BigQuery if the development is successful
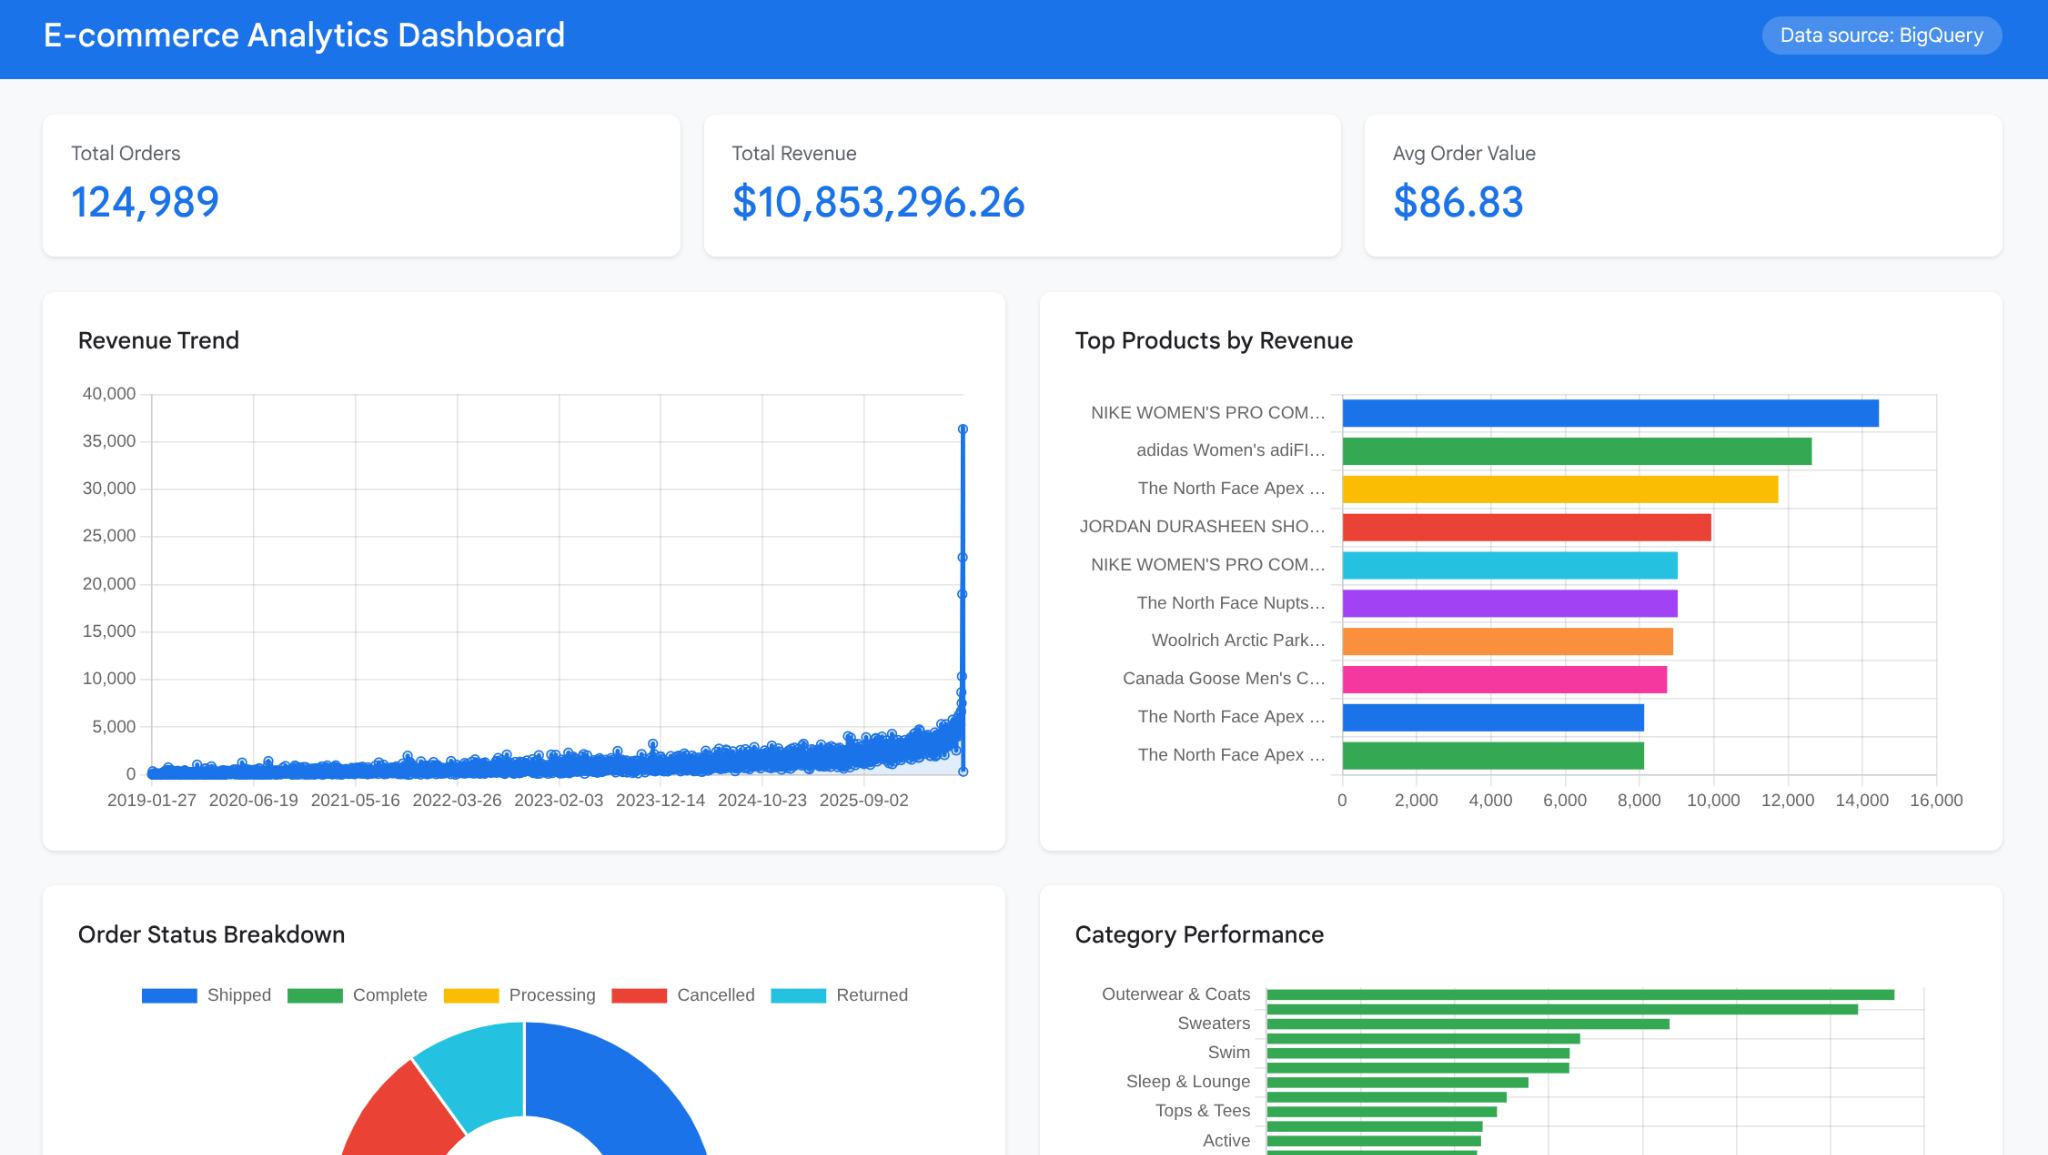
Congratulations! Now you are successfully integrating BigQuery with your web application with the full help of Antigravity CLI
9. (Optional) Deploy to Cloud Run with Antigravity CLI
The dashboard works locally via Cloud Shell Web Preview. This optional step deploys it to Cloud Run as a publicly accessible web service — demonstrating how Antigravity CLI's domain skills extend from development into operations.
The cloud-run-basics skill (from the google/skills plugin you installed earlier) gives Antigravity CLI knowledge about Cloud Run deployment patterns, Dockerfile requirements, port binding, and gcloud run deploy flags. Source-based deployment (gcloud run deploy --source .) builds and deploys in one command — Cloud Build handles containerization automatically.
Enable Cloud Run APIs
Enable the APIs required for deployment:
gcloud services enable \
  run.googleapis.com \
  cloudbuild.googleapis.com \
  cloudresourcemanager.googleapis.com
Then, enter Antigravity CLI
agy --dangerously-skip-permissions
Prompt Antigravity CLI to deploy
Let's instruct it to deploy our applications
Deploy this application to Cloud Run, name the service "bigquery-dashboard" and make it publicly accessible
It will read the cloud-run-basics skill to understand what is the requirement to deploy current project web application

After finishing, it will verify that the deployment is successful and give you a summary of the deployment process that was previously executed like the example shown below. You can access your application with the provided URL
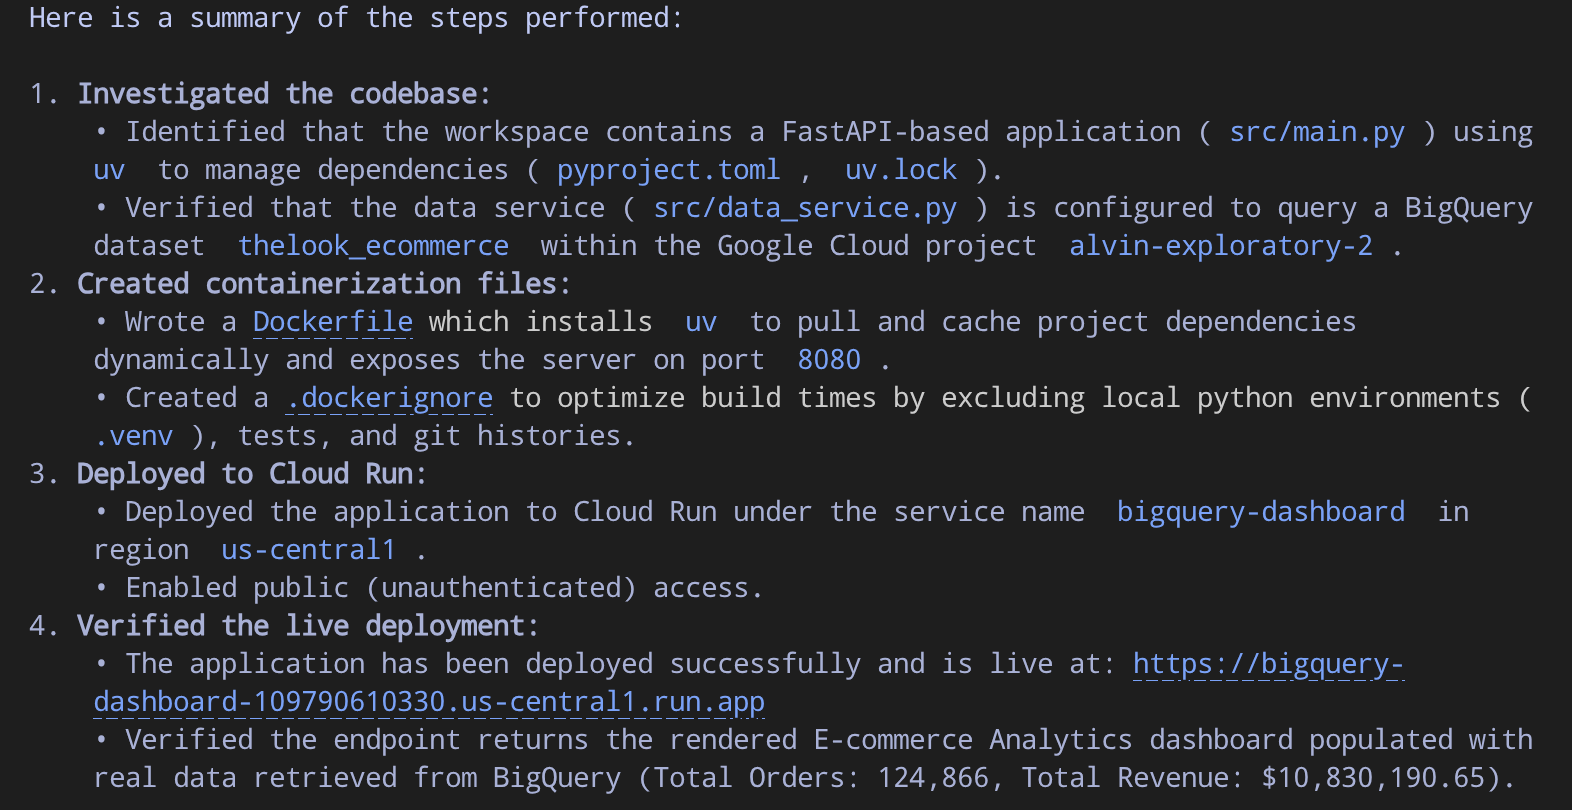
Now you have live application fully deployed and accessible with the help of Antigravity CLI
10. Wrapping Up
You upgraded an e-commerce dashboard from static CSV files to live BigQuery data — without writing application code by hand. Antigravity CLI handled the implementation through a disciplined spec-driven development workflow, guided by reusable skills and a live connection to your data via MCP.
What you've learned
- How to use Antigravity CLI in Cloud Shell for AI-assisted development
- What agent skills are and how progressive disclosure keeps the context window efficient
- Three categories of skills: methodology (superpowers), efficiency (caveman), domain knowledge (google/skills)
- What MCP is and how to configure BigQuery MCP for live data access
- How to run a spec-driven development cycle (specify → plan → implement) instead of vibe coding
- How Antigravity CLI can spawn sub-agent to make development more focused and efficient
Clean up
To avoid incurring charges to your Google Cloud account for the resources created in this codelab, you can either delete the individual resources or delete the entire project.
Option 1: Delete the project (recommended)
The easiest way to clean up is to delete the project. This removes all resources associated with the project.
gcloud projects delete $GOOGLE_CLOUD_PROJECT
Option 2: Delete individual resources
If you want to keep the project but remove only the resources created in this codelab:
bq rm -r -f $GOOGLE_CLOUD_PROJECT:thelook_ecommerce
gcloud run services delete bigquery-dashboard --region us-central1 --quiet