
1. Overview
Do your users access your service across both websites and Android apps? Forcing them to sign in separately on each platform creates unnecessary friction and can lead to drop-offs.
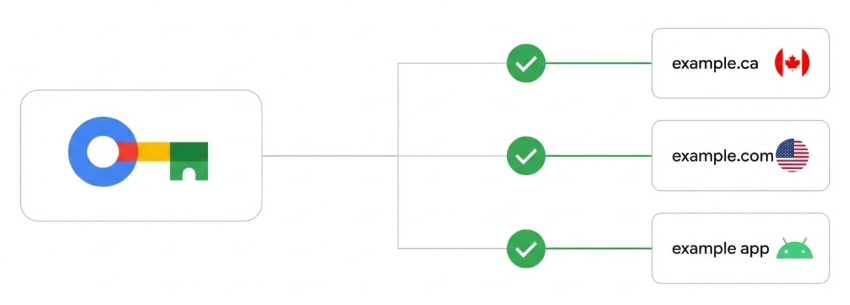
Digital Asset Links (DAL) solves this by allowing you to declare associations between your websites and apps. This lets password managers, like Google Password Manager, share saved passwords and passkeys between them.
Specifically, configuring your Digital Asset Links file requires different relations depending on what you want to share:
- For Passwords: Including
delegate_permission/common.get_login_credsallows password managers to share saved passwords between your website and app. - For Passkeys: Because passkeys are strictly bound to a specific web domain, Android requires proof of domain ownership. Therefore, you must include
delegate_permission/common.handle_all_urls. While you may recognize this as the permission used for Android App Links (deep linking), it is also the strict requirement to allow passkeys created on one platform to be used on the other.
The result? Users can sign in seamlessly across your affiliated platforms using the passwords or passkeys saved for just one of them.
Implementing seamless credential sharing can significantly improve user experience. For example, eBay saw a 10% increase in sign-in success after implementing DAL for credential sharing.
In this codelab, you'll learn how to use Digital Asset Links to enable credential sharing between your website and Android app.
Prerequisites
- Basic knowledge of JSON and Android development.
- Familiarity with the Android Credential Manager prerequisites.
What you'll learn
- How to set up credential sharing using Google Play Console (Recommended).
- How to manually create an
assetlinks.jsonfile. - How to configure an Android app for manual association.
- How to enable passkeys on an Android app by associating it with a website domain.
- How to use tools to generate and validate your setup.
What you'll need
- A website: The ability to host a JSON file at
https://{your-domain}/.well-known/assetlinks.json. - An Android app:
- For the Play Console method: An app published on Google Play.
- For the manual method: An Android project you can modify and build. Note that for credential sharing with Google Password Manager to work, the app must be published on Google Play.
How it works
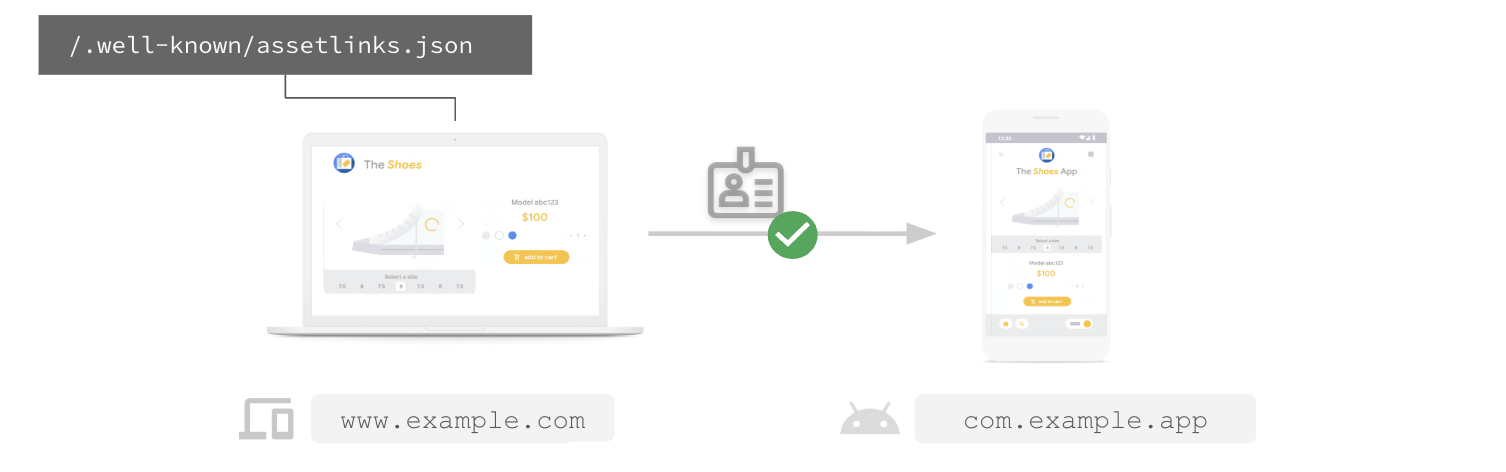
For credential sharing to work, you need to establish a two-way trust:
- Web -> App: Your website must host an
assetlinks.jsonfile declaring that it trusts your Android app. - App -> Web: Your Android app must be configured to trust your website.
We'll cover two ways to do this: the automatic way using Google Play Console (recommended), and the manual way using Digital Asset Links directly.
2. Set up using Google Play Console (Recommended)
The easiest way to enable credential sharing between your website and Android app is through the Google Play Console. This method allows you to associate your app with your website without needing to modify your app's manifest or publish a new version of your app. Google Play manages the app-side association for you.
Prerequisites
- Play Console permissions to access the Deep links page.
- Ability to publish a
/.well-known/assetlinks.jsonfile on your domain.
For more information about deep links, see Android App Links.
Steps
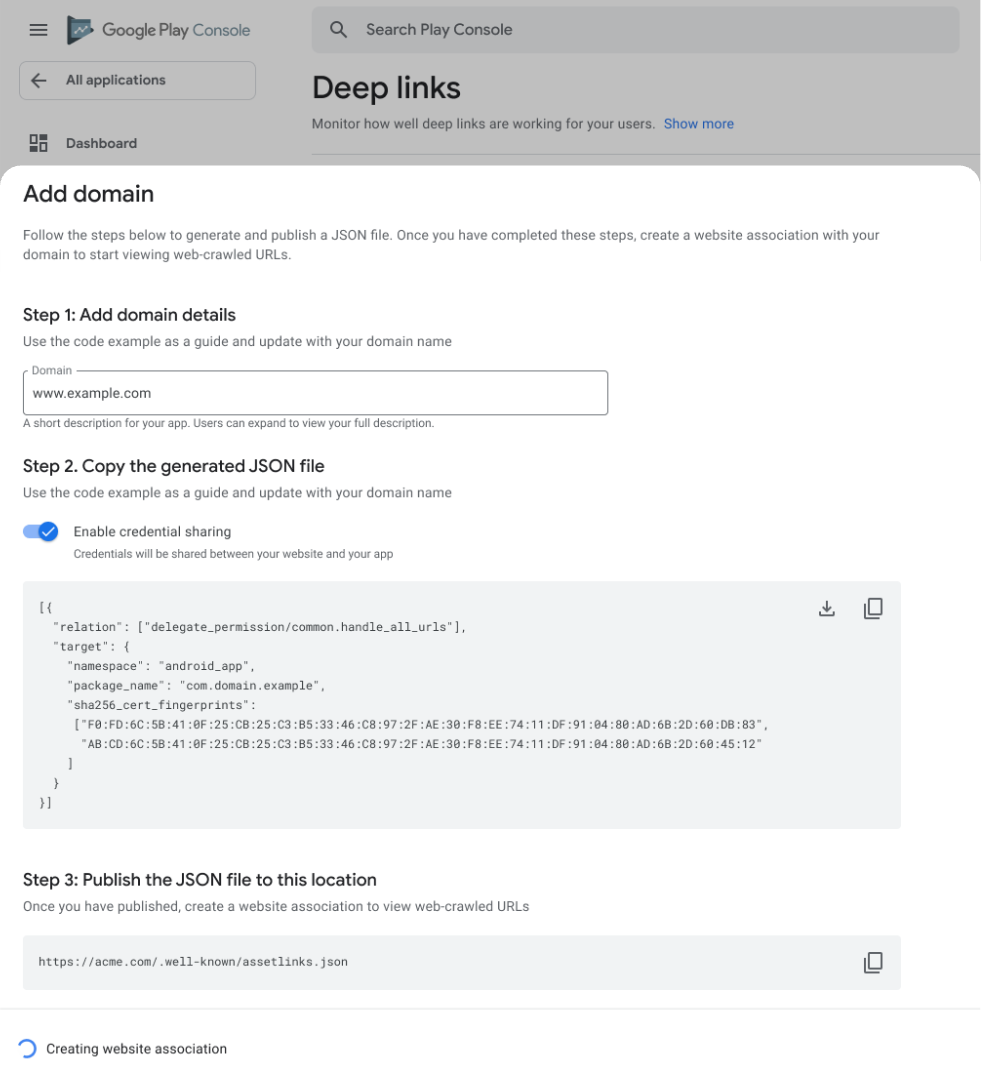
- In Play Console, navigate to Grow > Deep links.
- If your domain isn't listed, click Add domain under App configuration.
- Find your domain and locate the Credential sharing column. Click Turn on (or ensure Enable credential sharing is toggled on for new domains).
- Copy the JSON snippet generated by Play Console.
- Publish this JSON content to
https://{your-domain}/.well-known/assetlinks.json. (If you already have this file, append the new statement to it). - Back in Play Console, click Create website association or Turn on credential sharing.
Play Console will now verify your hosting setup.
For credential sharing to work, your website host must meet the following requirements:
- URL is accessible over HTTPS.
- Server responds with
Content-Type: application/json. - URL is accessible without redirects.
Once verified, credential sharing is active! It may take 1-2 weeks for configuration changes to propagate.
3. Set up manually using Digital Asset Links
Need more control? Or don't have access to the Play Console? You can configure credential sharing between your website and Android app manually. This involves two main tasks: hosting the JSON file on your site and updating your Android app manifest.
1. Get your app's digital fingerprint
Before setting up seamless credential sharing, ensure you have the following for each platform:
For each Android app:
- The Android application ID, as declared in the app's
build.gradlefile. - The SHA256 fingerprints of the signing certificate.
- (Recommended) User sign-in implemented with the Credential Manager API.
2. Create the association file
You need to create an assetlinks.json file that declares relationships between your website and app. Use delegate_permission/common.get_login_creds to grant permission to share passwords, and delegate_permission/common.handle_all_urls to enable deep linking and to share passkeys.
Create a file named assetlinks.json with the following content. Replace the example values with your own site URL, package name, and fingerprint:
[{
  "relation": [
    "delegate_permission/common.handle_all_urls",
    "delegate_permission/common.get_login_creds"
    ],
  "target": {
    "namespace": "android_app",
    "package_name": "com.example.app",
    "sha256_cert_fingerprints":
    ["14:6D:E9:83:C5:73:06:50:D8:EE:B9:95:2F:34:FC:64:16:A0:83:42:E6:1D:BE:A8:8A:04:96:B2:3F:CF:44:E5"]
  }
}]
3. Host the file
Upload your assetlinks.json file to the .well-known directory at the root of your domain.
Location: https://{your-domain}/.well-known/assetlinks.json
For credential sharing to work, your website host must meet the following requirements:
- URL is accessible over HTTPS.
- Server responds with
Content-Type: application/json. - URL is accessible without redirects.
4. Configure your Android app
Now, tell your Android app to trust the website. You'll add a reference in the manifest that points to a resource file containing your assetlinks.json URL.
1. Add a string resource
In res/values/strings.xml, add a new string asset_statements. Note the escaped quotes!
<resources>
    <string name="asset_statements" translatable="false">
      [{
        \"include\": \"https://www.example.com/.well-known/assetlinks.json\"
      }]
    </string>
</resources>
2. Add metadata to the manifest
In AndroidManifest.xml, add a <meta-data> tag within the <application> element that references this string resource:
<manifest xmlns:android="http://schemas.android.com/apk/res/android"
    package="com.example.app">

    <application
        android:allowBackup="true"
        android:icon="@mipmap/ic_launcher"
        android:label="@string/app_name"
        android:theme="@style/AppTheme">

        <meta-data
            android:name="asset_statements"
            android:resource="@string/asset_statements" />

        <activity android:name=".MainActivity">
                <intent-filter>
                    <action android:name="android.intent.action.MAIN" />
                    <category android:name="android.intent.category.LAUNCHER" />
                </intent-filter>
            </activity>
        </application>
    </manifest>
After completing these steps and publishing a new version of your Android app, password managers that support Digital Asset Links (like Google Password Manager) will be able to suggest credentials saved for www.example.com when the user tries to sign in to com.example.app, and vice-versa.
4. Verify your setup
Before you ship, it's critical to verify your Digital Asset Links configuration. Incorrect JSON or unreachable files will silently fail.
Use the official Statement Generator and Validator tool.
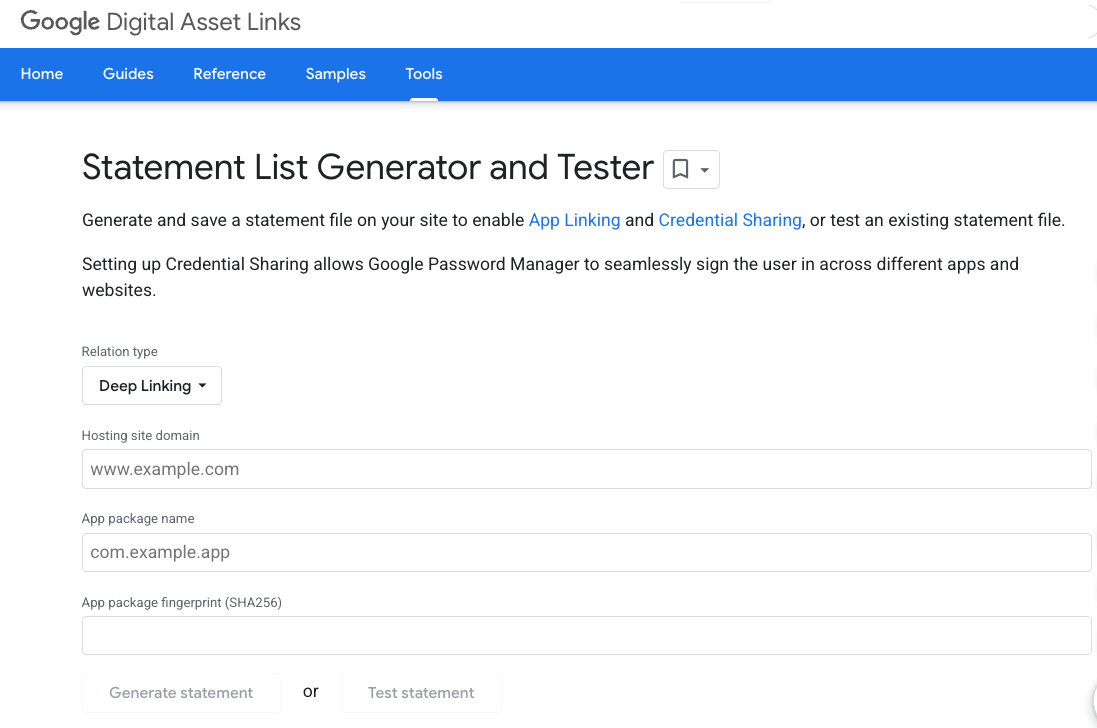
- Enter your site domain and app package name.
- Click Test Statement.
- The tool will check whether the
assetlinks.jsonfile is hosted correctly and contains the valid association.
5. Sharing credentials between multiple websites
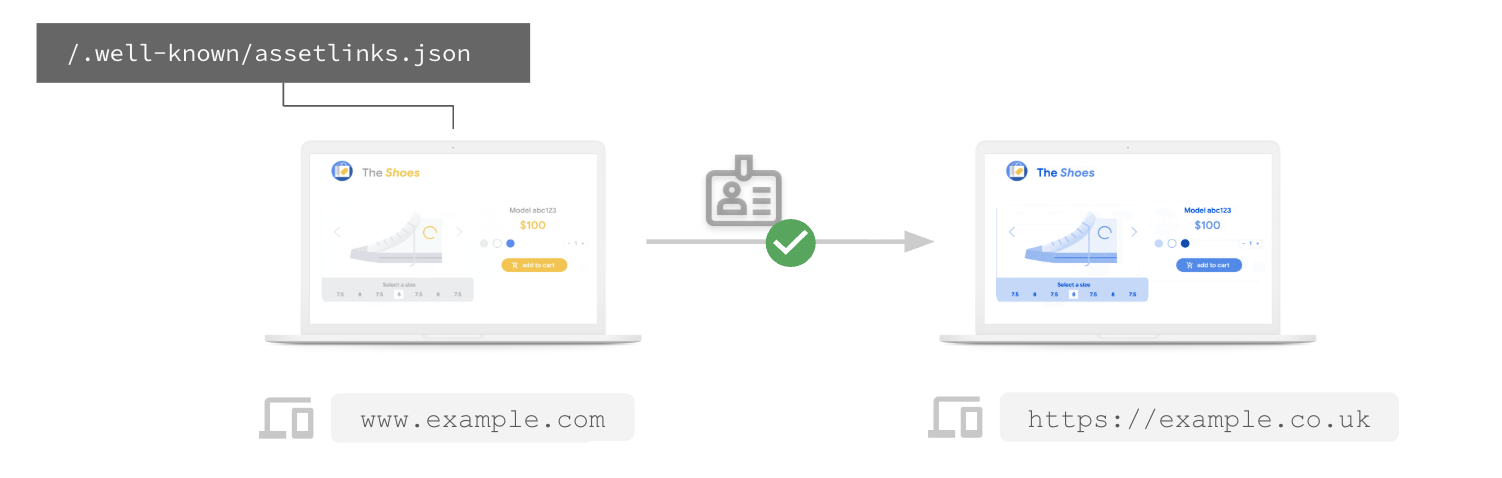
If you have multiple websites sharing the same login system (for example, example.com and example.co.uk), you can declare them as affiliated so that credentials can be shared between them.
Share passwords between multiple websites
To share passwords between websites, you can declare a web-to-web association using delegate_permission/common.get_login_creds.
For example, for example.com to share passwords with example.co.uk, the assetlinks.json file hosted on https://example.com/.well-known/assetlinks.json must include a statement targeting example.co.uk:
[{
  "relation": ["delegate_permission/common.get_login_creds"],
  "target": {
    "namespace": "web",
    "site": "https://example.co.uk"
  }
}]
Similarly, https://example.co.uk/.well-known/assetlinks.json must include a statement targeting example.com.
Share passkeys between multiple websites
To allow multiple websites to share the same passkeys, they must use the same Relying Party ID (RP ID). In WebAuthn and passkeys, the RP ID specifies the scope of a credential by domain name. When you create a passkey, it's tied to a specific RP ID, and can only be used on domains that fall within the scope of that ID. Defining your RP ID correctly ensures a seamless passkey experience across subdomains, cross-site origins, and first-party mobile apps. You can learn more about setting the RP ID in Understanding Relying Party ID (RP ID). With Related Origin Requests, one website can specify other origins that are allowed to use its RP ID, allowing users to reuse the same passkey across multiple sites you operate. Note that this is different from sharing passkeys between a website and an Android app, which uses delegate_permission/common.handle_all_urls in Digital Asset Links.
For example, if you want example.com and example.co.uk to share passkeys, you can decide that example.com will be the canonical RP ID. For this to work, example.co.uk must use rpId: 'example.com' in its WebAuthn API calls, and example.com must host a file at https://example.com/.well-known/webauthn to allowlist example.co.uk:
{
  "origins": [
    "https://example.co.uk"
  ]
}
This allows example.co.uk to create and use passkeys associated with example.com.
6. Conclusion
Congratulations! You've successfully set up seamless credential sharing.
Your users can now save a password and passkey on your website and use it to sign in to your Android app with a single tap (and vice-versa). This simple change can significantly boost your sign-in conversion rates and user satisfaction.
What's next?
- Check out the Digital Asset Links Official Documentation.
- Learn more about Credential Sharing Fundamentals.
- Read the eBay Case Study to see the impact.