1. Before you begin
This codelab is designed to build upon the end result of the prior codelab in this series for comment spam detection using TensorFlow.js.
In the last codelab you created a fully functioning webpage for a fictional video blog. You were able to filter comments for spam before they were sent to the server for storage, or to other connected clients, using a pre-trained comment spam detection model powered by TensorFlow.js in the browser.
The end result of that codelab is shown below:

While this worked very nicely, there are edge cases to explore that it was unable to detect. You can retrain the model to account for the situations it was unable to handle.
This codelab focuses on using natural language processing (the art of understanding human language with a computer) and shows you how to modify an existing web app you created (it is highly advised for you to take the codelabs in order), to tackle the very real problem of comment spam, which many web developers will surely encounter as they work on one of the ever growing number of popular web apps that exist today.
In this codelab you'll go one step further by retraining your ML model to account for changes in spam message content that may evolve over time, based on current trends or popular topics of discussion allowing you to keep the model up to date and account for such changes.
Prerequisites
- Completed the first codelab in this series.
- Basic knowledge of web technologies including HTML, CSS and JavaScript.
What you'll build
You will reuse the previously built website for a fictitious video blog with a real time comment section and upgrade it to load a custom trained version of the spam detection model using TensorFlow.js, so it performs better on edge cases it previously would have failed on. Of course as web developers and engineers you could change this hypothetical UX for reuse on any website you may be working on in your day to day roles and adapt the solution to fit any client use case - maybe it is a blog, forum, or some form of CMS, such as Drupal for example.
Let's get hacking...
What you'll learn
You will:
- Identify edge cases the pre-trained model was failing on
- Retrain the Spam Classification Model that was created using Model Maker.
- Export this Python based model to the TensorFlow.js format for use in browsers.
- Update the hosted model and its dictionary with the newly trained one and check the results
Familiarity with HTML5, CSS, and JavaScript is assumed for this lab. You will also run some Python code via a "co lab" notebook to retrain the model that was created using Model Maker, but no familiarity with Python is required to do this.
2. Get set up to code
Once again you will be using Glitch.com to host and modify the web application. If you did not already complete the prerequisite codelab, you can clone the end result here as your starting point. If you have questions about how the code works then it is strongly encouraged that you complete the prior codelab that walked through how to make this working web app before continuing.
On Glitch, simply click the remix this button to fork it and make a new set of files you can edit.
3. Discover edge cases in the prior solution
If you open up the completed website that you just cloned and try typing some comments you will notice that much of the time it works as intended, blocking comments that sound like spam as expected, and allowing through legitimate responses.
However, if you get crafty and try and phrase things to break the model, you will probably succeed at some point. With a bit of trial and error you can manually create examples like the ones shown below. Try pasting these into the existing web app, check the console, and see the probabilities that come back for if the comment is spam:
Legitimate comments posted without issue (true negatives):
- "Wow, I love that video, amazing work." Probability Spam: 47.91854%
- "Totally loved these demos! Got any more details?" Probability Spam: 47.15898%
- "What website can I go to learn more?" Probability Spam: 15.32495%
This is great, probabilities for all of the above are pretty low and successfully make it through the default SPAM_THRESHOLD of a 75% minimum probability before action is taken (defined in script.js code from the prior codelab).
Now let's try and write some more edgy comments that get marked as spam even though they are not...
Legitimate comments marked as spam (false positives):
- "Can someone link the website for the mask he is wearing?" Probability Spam: 98.46466%
- "Can I buy this song on Spotify? Someone please let me know!" Probability Spam: 94.40953%
- "Can someone contact me with details on how to download TensorFlow.js?" Probability Spam: 83.20084%
Oh no! It seems these legitimate comments are being marked as spam when they should be allowed. How can you fix that?
One simple option is to increase the SPAM_THRESHOLD to be over 98.5% confident. In that case these misclassified comments would then be posted. With that in mind, let's continue with the other possible outcomes below...
Spam comments marked as spam (true positives):
- "This is cool but check out the download links on my website that are better!" Probability Spam: 99.77873%
- "I know some people who can get you some medicines just see my pr0file for details" Probability Spam: 98.46955%
- "See my profile to download even more amazing video that are even better! http://example.com" Probability Spam: 96.26383%
OK, so this is working as expected with our original 75% threshold, but given that in the previous step you changed SPAM_THRESHOLD to be over 98.5% confident, this would mean 2 examples here would be let through, so maybe the threshold is too high. Maybe 96% is better? But if you do that, then one of the comments in the previous section (false positives) would be marked as spam when they were legitimate as it was rated at 98.46466%.
In this case it is probably best to capture all these real spam comments and simply retrain for the failures above. By setting the threshold to 96% all true positives are still captured and you eliminate 2 of the false positives above. Not too bad for just changing a single number.
Let's continue...
Spam comments that were allowed to be posted (false negatives):
- "See my profile to download even more amazing video that are even better!" Probability Spam: 7.54926%
- "Get a discount on our gym training classes see pr0file!" Probability Spam: 17.49849%
- "omg GOOG stock just shot right up! Get before too late!" Probability Spam: 20.42894%
For these comments there is nothing you can do by simply changing the SPAM_THRESHOLD value further. Decreasing the threshold for spam from 96% to ~9% will lead to genuine comments being marked as spam - one of them has a 58% rating even though it is legitimate. The only way to deal with comments like these would be to retrain the model with such edge cases included in the training data so it learns to adjust its view of the world for what is spam or not.
While the only option left right now is to retrain the model, you also saw how you can refine the threshold of when you decide to call something spam to also improve performance. As a human, 75% seems pretty confident, but for this model you needed to increase closer to 81.5% to be more effective with example inputs.
There is no one magical value that works well across different models, and this threshold value needs to be set on a per model basis after experimenting with real world data for what works well.
There may be some situations where having a false positive (or negative) could have serious consequences (e.g. in the medical industry) so you may adjust your threshold to be very high and request more manual reviews for those that do not meet the threshold. This is your choice as a developer and requires some experimentation.
4. Retrain the comment spam detection model
In the prior section you identified a number of edge cases that were failing for the model where the only option was to retrain the model to account for these situations. In a production system you could find these over time as people flag a comment to be spam manually that got let through or moderators reviewing flagged comments realise some are not actually spam and could mark such comments for retraining. Assuming you have gathered a bunch of new data for these edge cases (for best results you should have some variations of these new sentences if you can), we will now proceed in showing you how to retrain the model with those edge cases in mind.
Pre-made model recap
The pre-made model you used was a model that was created by a third party via Model Maker that uses an "average word embedding" model to function.
As the model was built with Model Maker you will need to briefly switch to Python to retrain the model, and then export the created model to the TensorFlow.js format so you can use it in the browser. Thankfully Model Maker makes it super simple to use their models so this should be pretty easy to follow along with and we will guide you through the process so don't worry if you have never used Python before!
Colabs
As you are not too concerned in this codelab with wanting to set up a Linux server with all the various Python utilities installed, you can simply execute code via the web browser using a "Colab Notebook". These notebooks can connect to a "backend" - which is simply a server with some stuff preinstalled, from which you can then execute arbitrary code within the web browser and see the results. This is very useful for quick prototyping or for use in tutorials like this.
Simply head over to colab.research.google.com and you will be presented with a welcome screen as shown:
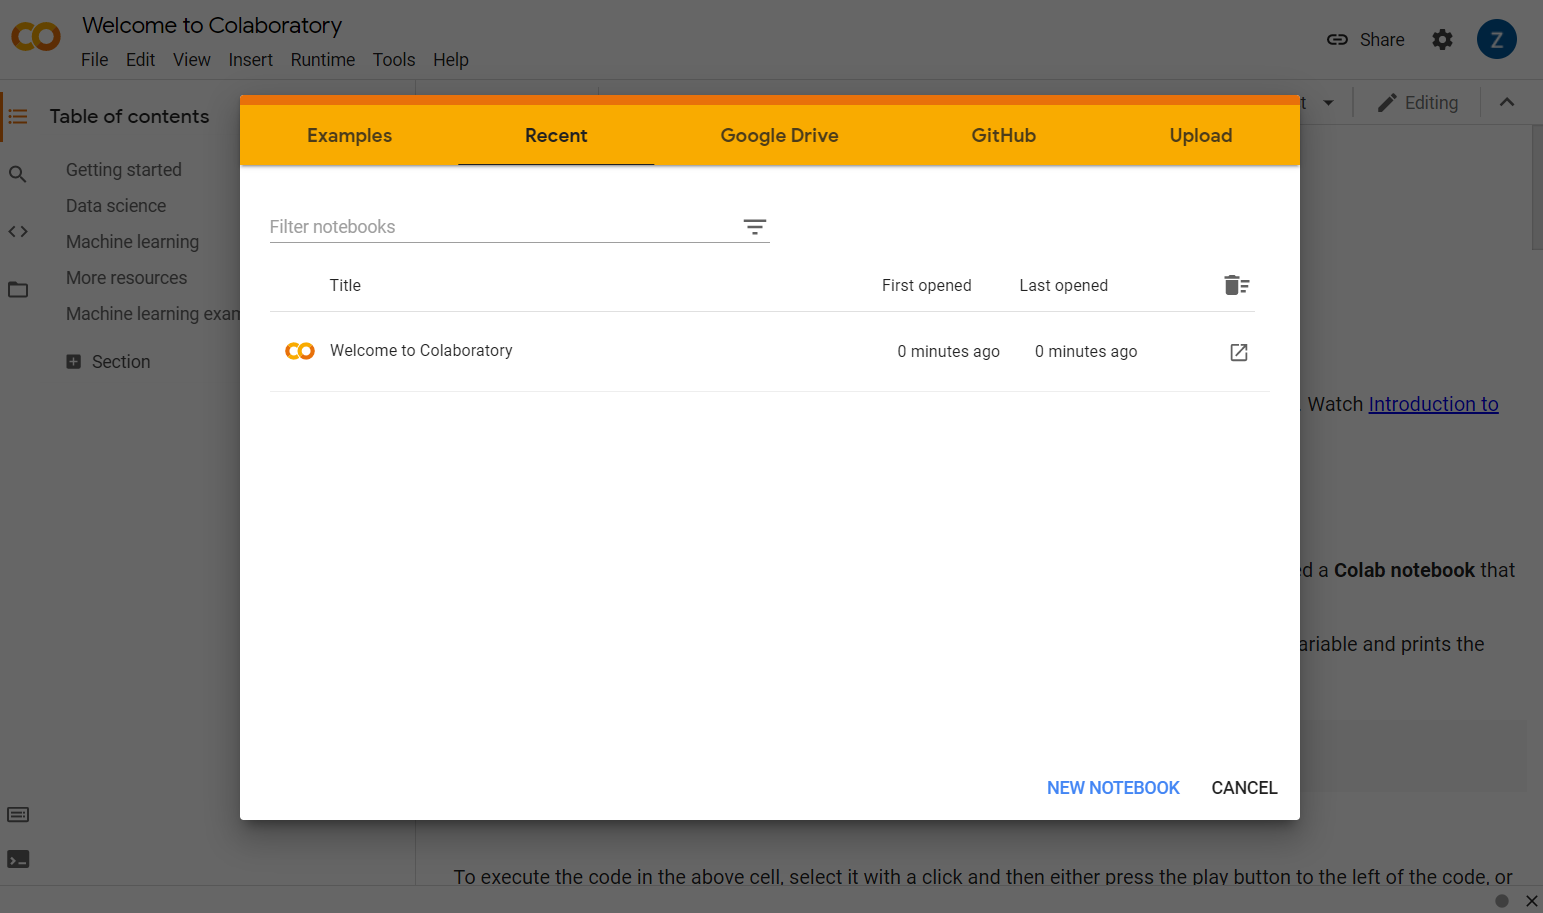
Now click the New Notebook button at the bottom right of the pop up window and you should see a blank colab like this:
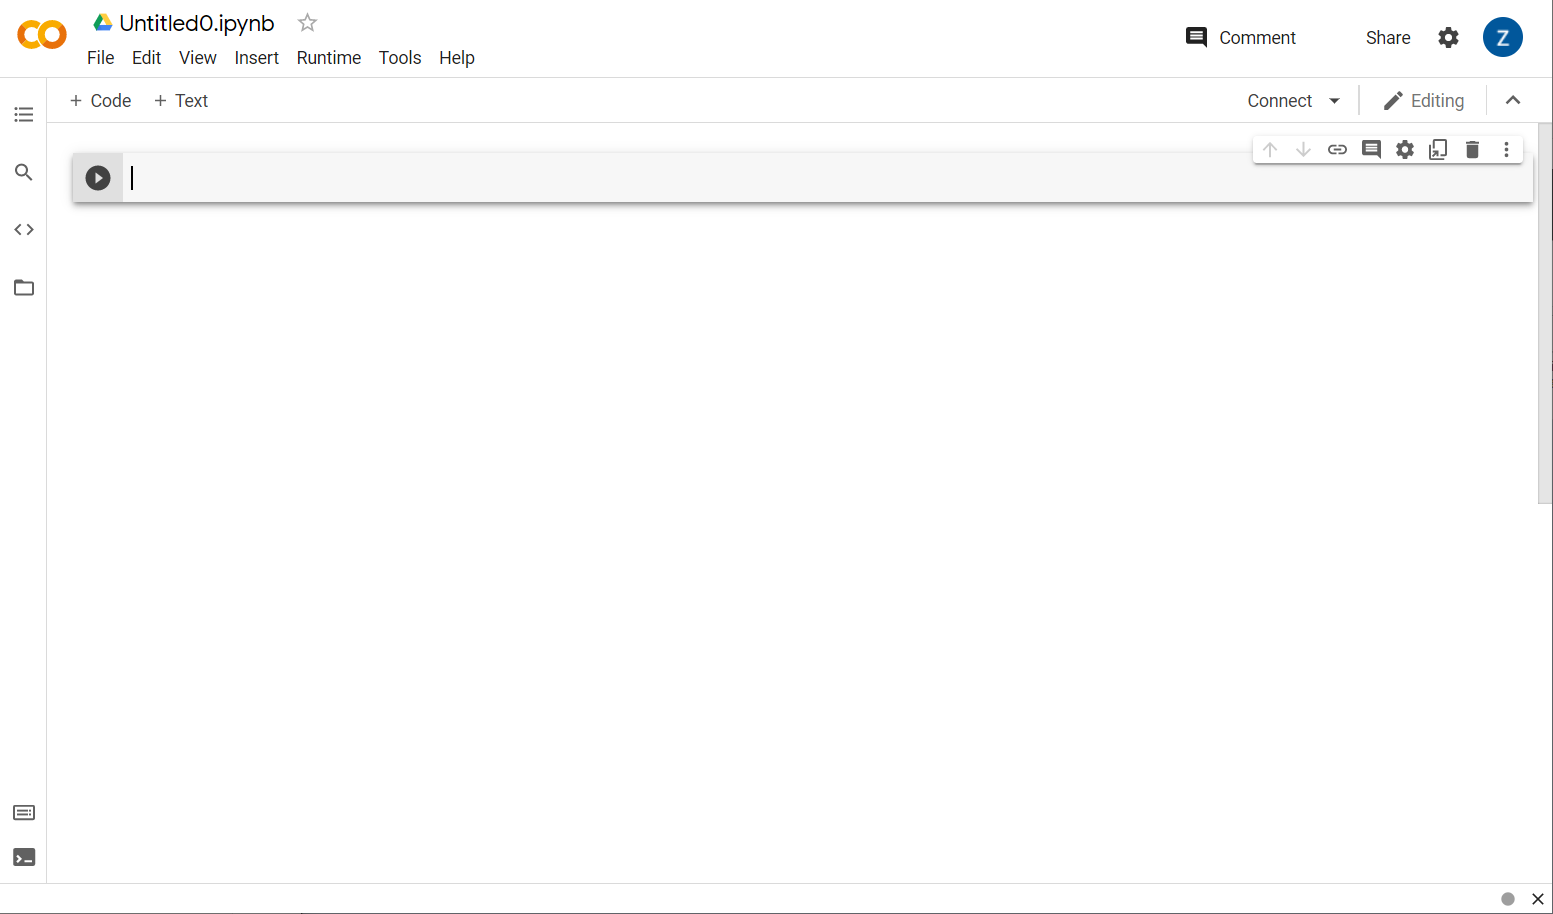
Great! The next step is to connect the frontend colab to some backend server so you can execute the Python code you will write. Do that by clicking Connect at the top right and selecting Connect to hosted runtime.
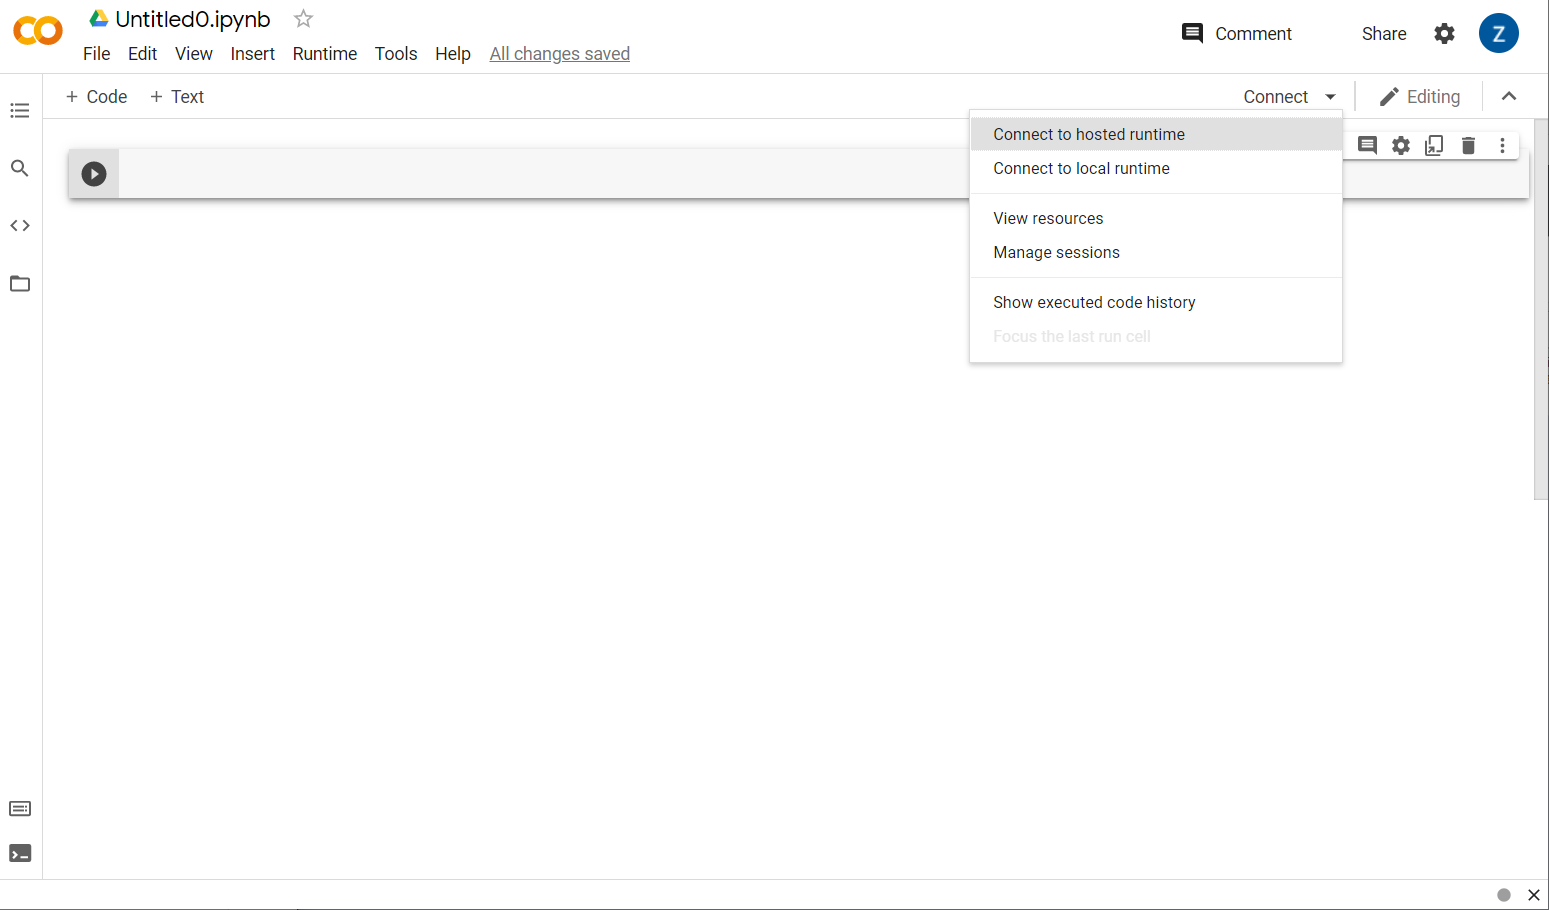
Once connected you should see RAM and Disk icons appear in its place, like this:

Good job! You can now start coding in Python to retrain the Model Maker model. Simply follow the steps below.
Step 1
In the first cell that is currently empty, copy the below code. It will install TensorFlow Lite Model Maker for you using Python's package manager called "pip" (it is similar to npm which most readers of this code lab may be more familiar with from the JS ecosystem):
!apt-get install libasound-dev portaudio19-dev libportaudio2 libportaudiocpp0
!pip install -q tflite-model-maker
Pasting code into the cell however will not execute it. Next, hover your mouse over the grey cell you pasted the above code into, and a small "play" icon will appear in the left of the cell as highlighted below:
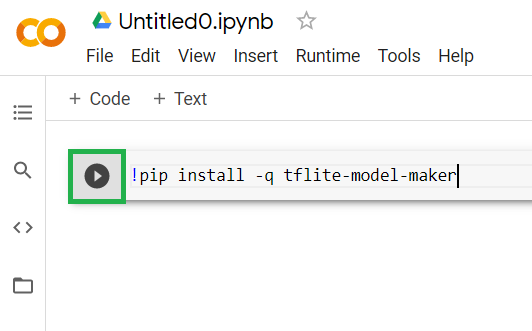 Click the play button to execute the code just typed in the cell.
You will now see model maker being installed:
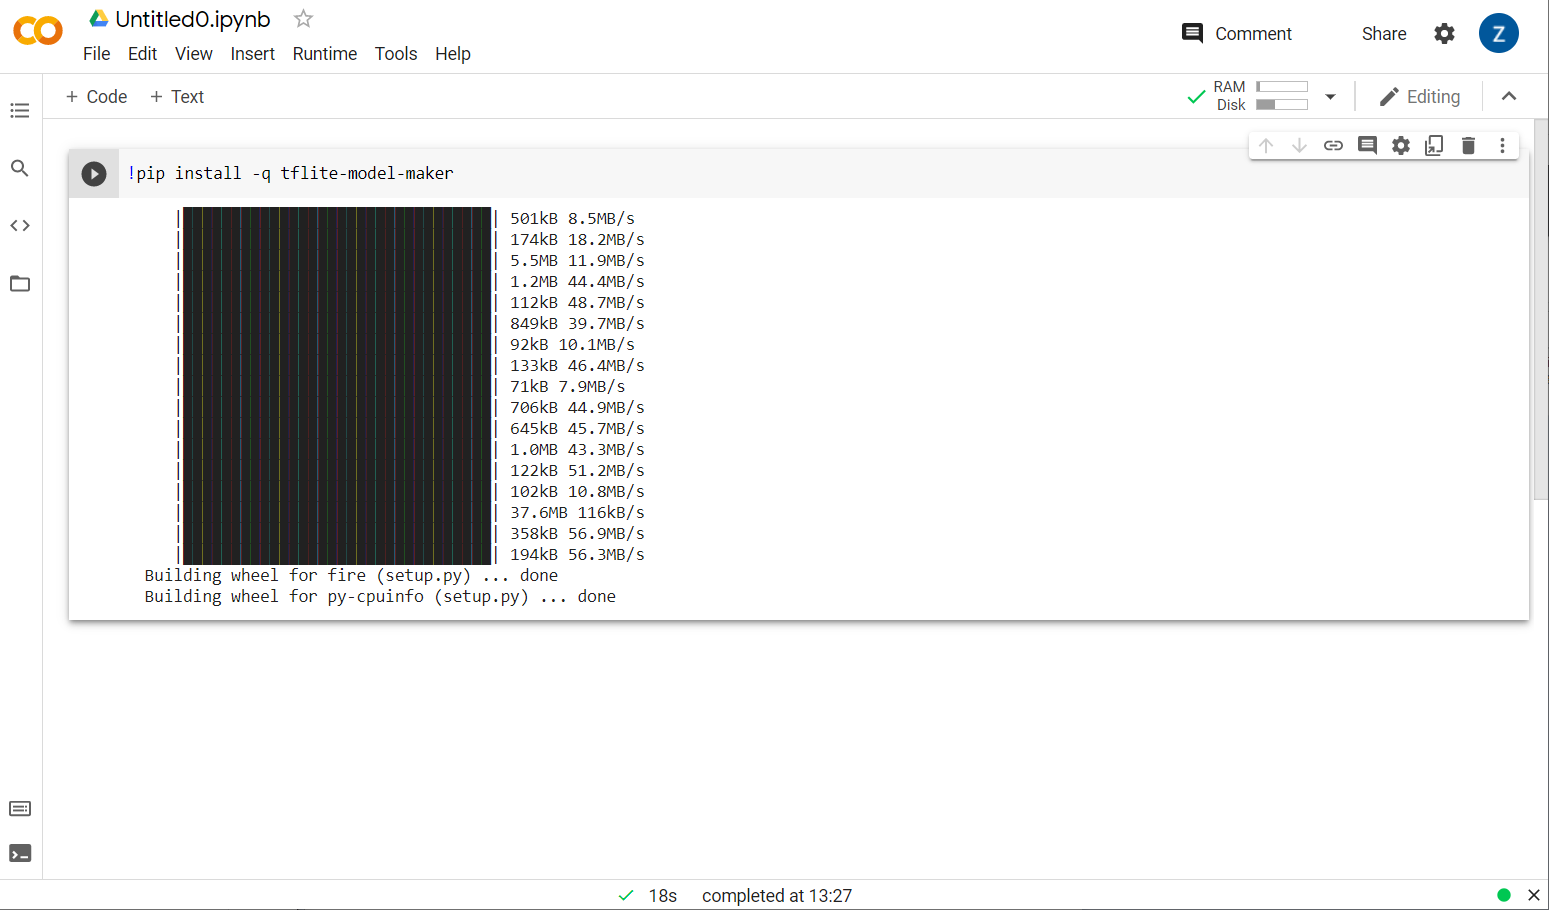
Once execution of this cell is complete as shown, move on to the next step below.
Step 2
Next, add a new code cell as shown so you can paste in some more code after the first cell and execute it separately:
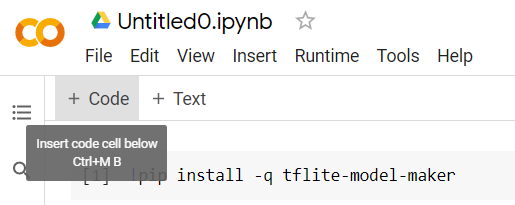
The next cell executed will have a number of imports that the code in the rest of the notebook will need to use. Copy and paste the below in the new cell created:
import numpy as np
import os

from tflite_model_maker import configs
from tflite_model_maker import ExportFormat
from tflite_model_maker import model_spec
from tflite_model_maker import text_classifier
from tflite_model_maker.text_classifier import DataLoader

import tensorflow as tf
assert tf.__version__.startswith('2')
tf.get_logger().setLevel('ERROR')
Pretty standard stuff, even if you are not familiar with Python. You are just importing some utilities and the Model Maker functions needed for the spam classifier. This will also check to see if you are running TensorFlow 2.x which is a requirement to use Model Maker.
Finally, just like before, execute the cell by pressing the "play" icon when you hover over the cell, and then add a new code cell for the next step.
Step 3
Next you'll download the data from a remote server to your device, and set the training_data variable to be the path of the resulting local file downloaded:
data_file = tf.keras.utils.get_file(fname='comment-spam-extras.csv', origin='https://storage.googleapis.com/jmstore/TensorFlowJS/EdX/code/6.5/jm_blog_comments_extras.csv', extract=False)
Model Maker can train models from simple CSV files like the one downloaded. You just need to specify which columns hold the text and which hold the labels. You'll see how to do that in Step 5. Feel free to directly download the CSV file yourself to see what it contains if you wish.
The keen eyed amongst you will notice the name of this file is jm_blog_comments_extras.csv - this file is simply the original training data we used to generate the first comment spam model combined with the new edge case data you discovered so it is all in one file. You need the original training data used to train the model too in addition to the new sentences you want to learn from.
Optional: If you download this CSV file and check the last few lines you will see examples for edge cases that were not working correctly before. They have just been added to the end of the existing training data the pre-made model used to train itself.
Execute this cell, then once it has finished executing, add a new cell, and head to step 4.
Step 4
When using Model Maker, you don't build models from scratch. You generally use existing models that you will then customize to your needs.
Model Maker provides several pre-learnt model embeddings you can use, but the simplest and quickest to begin with is average_word_vec which is what you used in the earlier codelab to build your website. Here's the code:
spec = model_spec.get('average_word_vec')
spec.num_words = 2000
spec.seq_len = 20
spec.wordvec_dim = 7
Go ahead and run that once you pasted it into the new cell.
Understanding the
num_words
parameter
This is the number of words you want the model to use. You might think that the more the better, but there's generally a sweet spot based on the frequency each word is used. If you use every word in the entire corpus, you could end up with the model trying to learn and balance out the weights of words that are only used once - this is not very useful. You'll find in any text corpus that many words are only ever used once or twice, and it's generally not worth having them used in your model as they have negligible impact on the overall sentiment. So you can tune your model on the number of words you want by using the num_words parameter. A smaller number here will have a smaller and quicker model, but it could be less accurate, as it recognizes less words. A larger number here will have a larger and potentially slower model. Finding the sweet spot is key and is up to you as a machine learning engineer to figure out what works best for your use case.
Understanding the
wordvec_dim
parameter
The wordvec_dim parameter is the number of dimensions you want to use for the vector of each word. These dimensions are essentially the different characteristics (created by the machine learning algorithm when training) that any given word can be measured by which the program will use to try and best associate words that are similar in some meaningful way.
For example, if you had a dimension for how "medical" a word was, a word like "pills" may score high here in this dimension, and be associated with other high scoring words like "xray", but "cat" would score low on this dimension. It may turn out that a "medical dimension" is useful to determine spam when combined with other potential dimensions it may decide to use that are significant.
In the case of words that score highly in the "medical dimension" it may figure that a 2nd dimension that correlates words to the human body may be useful. Words like "leg", "arm", "neck" may score high here and also fairly high in the medical dimension too.
The model can use these dimensions to then enable it to detect words that are more likely associated with spam. Maybe spam emails are more likely to contain words that are both medical and human body parts.
The rule of thumb determined from research is that the fourth root of the number of words works well for this parameter. So if I'm using 2000 words, a good starting point for this is 7 dimensions. If you change the number of words used, you can also change this.
Understanding the
seq_len
parameter
Models are generally very rigid when it comes to input values. For a language model, this means that the language model can classify sentences of a particular, static, length. That's determined by the seq_len parameter, where this stands for ‘sequence length'. When you convert words into numbers (or tokens), a sentence then becomes a sequence of these tokens. So your model will be trained (in this case) to classify and recognize sentences that have 20 tokens. If the sentence is longer than this, it will be truncated. If it's shorter, it will be padded - just like in the first codelab in this series.
Step 5 - load the training data
Earlier you downloaded the CSV file. Now it's time to use a data loader to turn this into training data that the model can recognize.
data = DataLoader.from_csv(
      filename=data_file,
      text_column='commenttext',
      label_column='spam',
      model_spec=spec,
      delimiter=',',
      shuffle=True,
      is_training=True)

train_data, test_data = data.split(0.9)
If you open the CSV file in an editor, you'll see that each line just has two values, and these are described with text in the first line of the file. Typically each entry is then deemed to be a ‘column'. You'll see that the descriptor for the first column is commenttext, and that the first entry on each line is the text of the comment.
Similarly, the descriptor for the second column is spam, and you'll see that the second entry on each line is TRUE or FALSE to denote if that text is considered comment spam or not. The other properties set the model spec that you created in step 4, along with a delimiter character, which in this case is a comma as the file is comma separated. You also set a shuffle parameter to randomly rearrange the training data so things that may have been similar or collected together are spread out randomly throughout the data set.
You will then use data.split() to split the data into training and test data. The .9 indicates that 90% of the dataset will be used for training, the rest for testing.
Step 6 - Build the model
Add another cell where we will add code to build the model:
model = text_classifier.create(train_data, model_spec=spec, epochs=50)
This creates a text classifier model with Model Maker, and you specify the training data you want to use (which was defined in step 4), the model specification (which was also set up in step 4), and a number of epochs, in this case 50.
The basic principle of Machine Learning is that it is a form of pattern matching. Initially, it will load the pre-trained weights for the words, and attempt to group them together with a ‘prediction' of which ones when grouped together indicate spam, and which ones don't. The first time around, it's likely to be close to 50:50, as the model is only getting started as shown below:

It will then measure the results of this, and change the weights of the model to tweak its prediction, and it will try again. This is an epoch. So, by specifying epochs=50, it will go through that ‘loop' 50 times as shown:

So by the time you reach the 50th epoch, the model will report a much higher level of accuracy. In this case showing 99.1%!
Step 7 - Export the Model
Once your training is done, you can then export the model. TensorFlow trains a model in its own format, and this needs to be converted to the TensorFlow.js format for use on a web page. Simply paste the following in a new cell and execute it:
model.export(export_dir="/js_export/", export_format=[ExportFormat.TFJS, ExportFormat.LABEL, ExportFormat.VOCAB])
!zip -r /js_export/ModelFiles.zip /js_export/
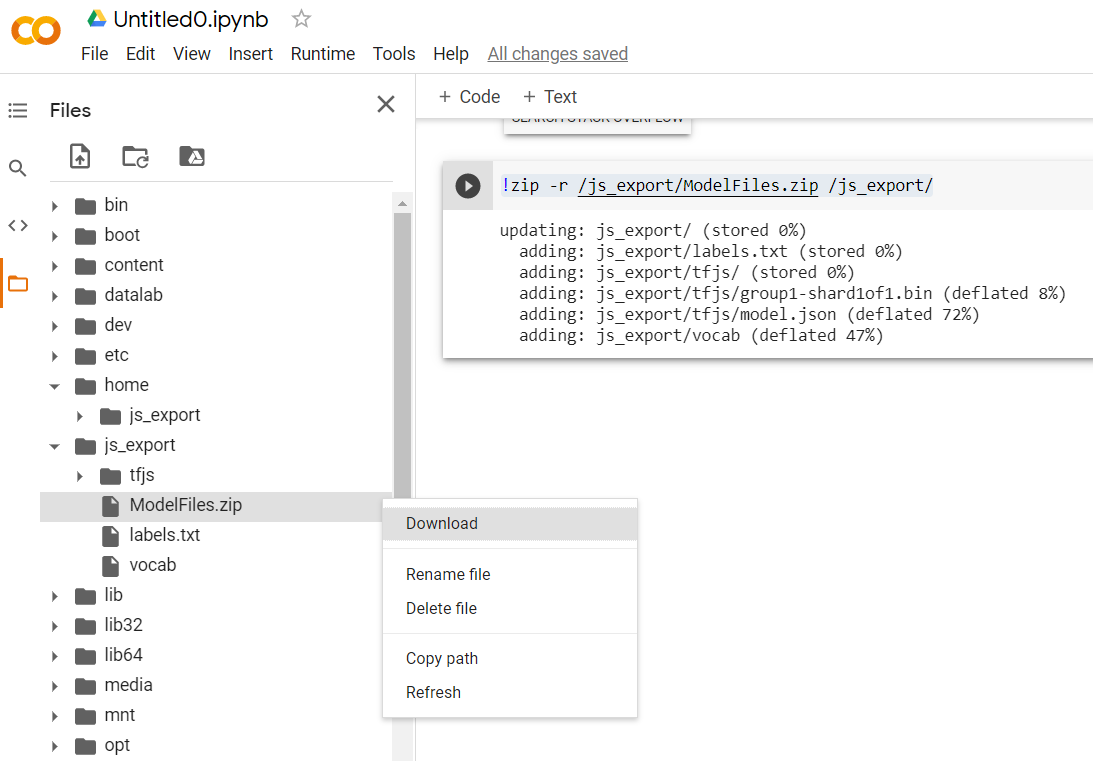
After executing this code, if you click the small folder icon on the left of the Colab you can navigate to the folder you exported to above (in the root directory - you may need to go up a level) and find the zip bundle of the files exported contained in ModelFiles.zip.
Download this zip file to your computer now as you will use those files just like in the first codelab:
Great! The Python part is over, you can now return to JavaScript land which you know and love. Phew!
5. Serving the new machine learning model
You are now almost ready to load the model. Before you can do that though you must upload the new model files downloaded earlier in the codelab so it is hosted and usable within your code.
First, if you have not done so already, unzip the files for the model just downloaded from the Model Maker Colab notebook you just ran. You should see the following files contained within its various folders:

What do you have here?
model.json- This is one of the files that make up the trained TensorFlow.js model. You will reference this specific file in the JS code.group1-shard1of1.bin- This is a binary file containing much of the saved data for the exported TensorFlow.js model and will need to be hosted somewhere on your server for download in the same directory asmodel.jsonabove.vocab- This strange file with no extension is something from Model Maker that shows us how to encode words in the sentences so the model understands how to use them. You will dive more into this in the next section.labels.txt- This simply contains the resulting classnames that the model will predict. For this model if you open this file in your text editor it simply has "false" and "true" listed indicating "not spam" or "spam" as its prediction output.
Host the TensorFlow.js model files
First place the model.json and *.bin files that were generated on a web server so you can access them via your web page.
Delete existing model files
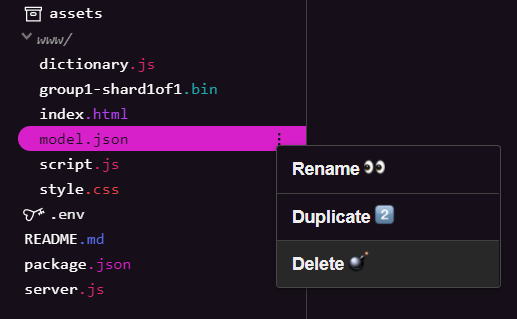
As you are building upon the end result of the first codelab in this series, you must first delete the existing model files uploaded. If you are using Glitch.com, simply check the files panel on the left for model.json and group1-shard1of1.bin, click the 3 dot menu dropdown for each file and select delete as shown:
Uploading new files to Glitch
Great! Now upload the new ones:
- Open the assets folder in the left hand panel of your Glitch project and delete any old assets uploaded if they have the same names.
- Click upload an asset and select
group1-shard1of1.binto be uploaded into this folder. It should now look like this once uploaded:
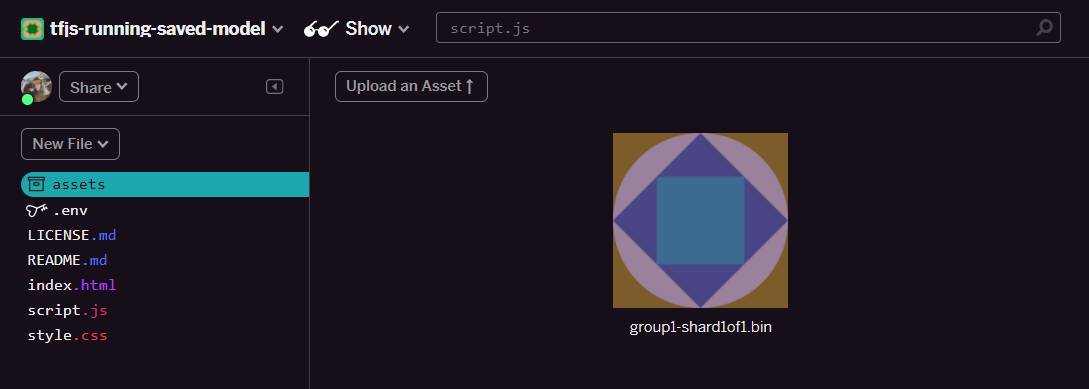
- Great! Now do the same for the model.json file too so 2 files should be in your assets folder like this:
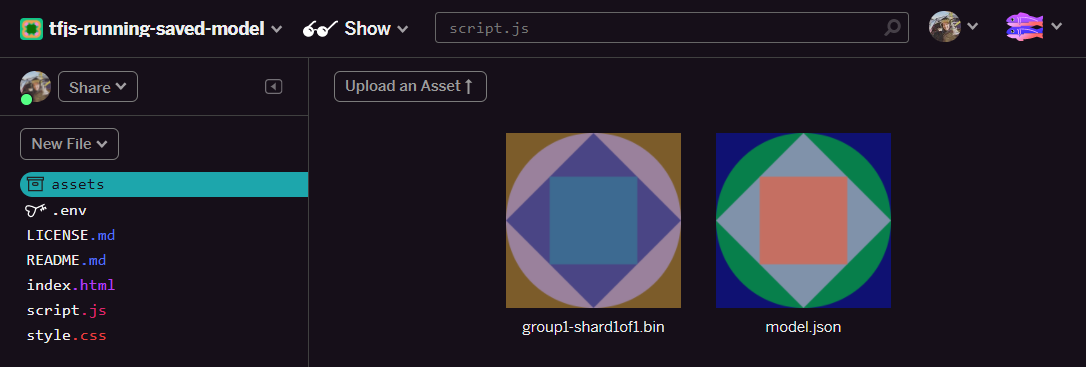
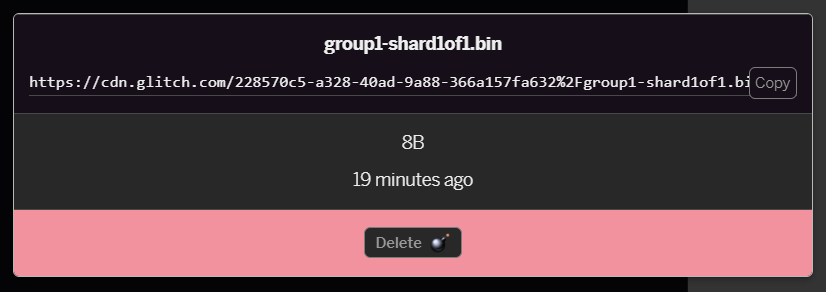
- If you click on the
group1-shard1of1.binfile you just uploaded you will be able to copy the URL to its location. Copy this path now as shown:
- Now at the bottom left of the screen, click Tools > Terminal. Wait for the terminal window to load.
- Once loaded type the following and then press enter to change directory to the
wwwfolder:
terminal:
cd www
- Next, use
wgetto download the 2 files just uploaded by replacing the URLs below with the URLs you generated for the files in the assets folder on Glitch (check the assets folder for each file's custom URL).
Note the space between the two URLs and that the URLs you will need to use will be different to the ones shown but will look similar:
terminal
wget https://cdn.glitch.com/1cb82939-a5dd-42a2-9db9-0c42cab7e407%2Fmodel.json?v=1616111344958 https://cdn.glitch.com/1cb82939-a5dd-42a2-9db9-0c42cab7e407%2Fgroup1-shard1of1.bin?v=1616017964562
Super! You now have made a copy of the files uploaded to the www folder.
However, right now they will be downloaded with strange names. If you type ls in the terminal and press enter you will see something like this:

- Using the
mvcommand rename the files. Type the following into the console and press enter after each line:
terminal:
mv *group1-shard1of1.bin* group1-shard1of1.bin
mv *model.json* model.json
- Finally, refresh the Glitch project by typing
refreshin the terminal and press enter:
terminal:
refresh
Upon refreshing you should now see model.json and group1-shard1of1.bin in the www folder of the user interface:
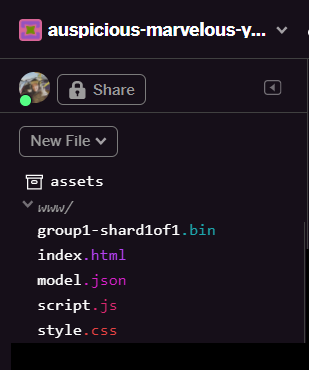
Great! The last step is to update the dictionary.js file.
- Convert your new downloaded vocab file to the correct JS format either manually yourself via your text editor or using this tool and save the resulting output as
dictionary.jswithin yourwwwfolder. If you already have adictionary.jsfile you can simply copy and paste the new contents over it and save the file.
Woohoo! You have successfully updated all the changed files and if you now try and use the website you will notice how the retrained model should be able to account for the edge cases discovered and learned from as shown:
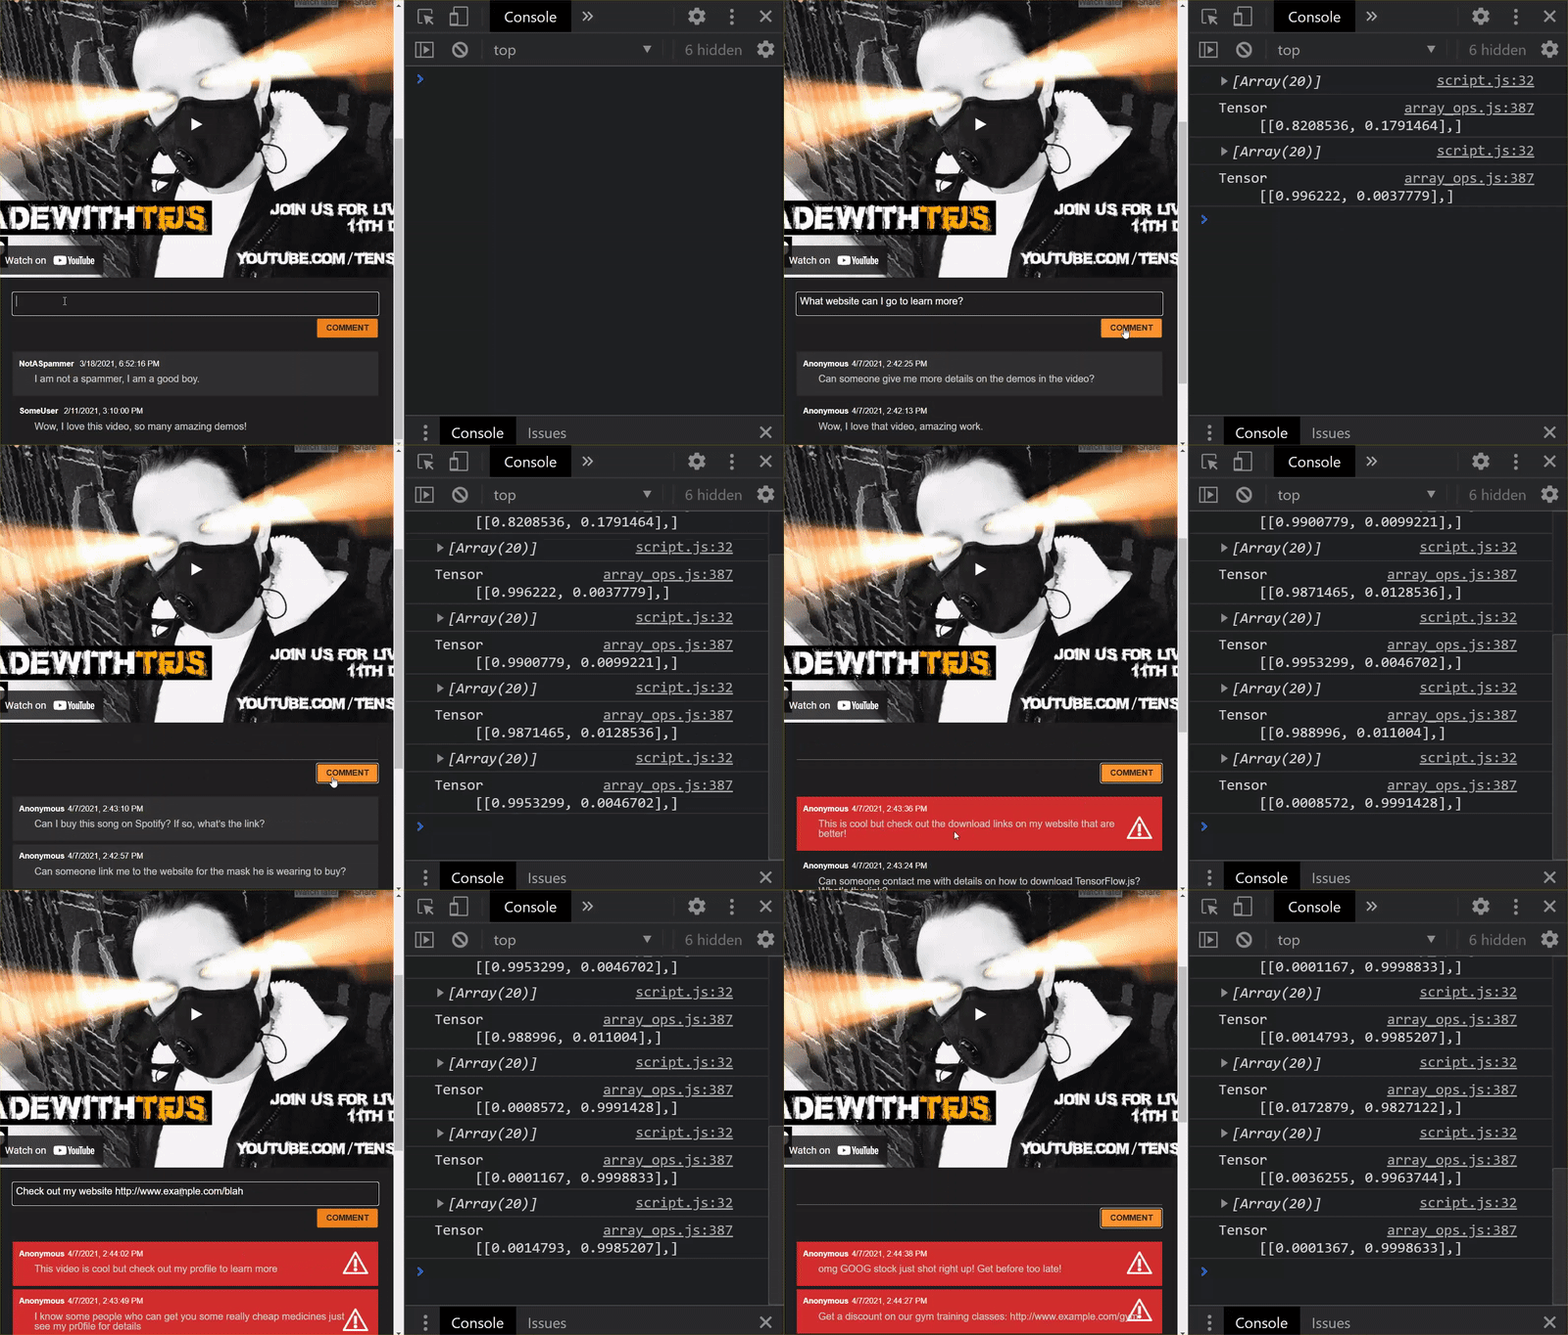
As you can see, the first 6 now correctly classify as not spam, and the 2nd batch of 6 are all identified as spam. Perfect!
Lets try some variations too to see if it generalized well. Originally there was a failing sentence such as:
"omg GOOG stock just shot right up! Get before too late!"
This is now correctly classified as spam, but what happens if you change it to:
"So XYZ stock just increased in value! Buy some right before it's too late!"
Here you get a prediction of 98% likely to be spam which is correct even though you changed the stock symbol and the wording slightly.
Of course if you really try to break this new model, you will be able to, and it will come down to gathering even more training data to have the best chance of capturing more unique variations for the common situations you are likely to encounter online. In a future codelab we will show you how to continuously improve your model with live data as it is flagged.
6. Congratulations!
Congratulations, you have managed to retrain an existing machine learning model to update itself to work for the edge cases you found and deployed those changes to the browser with TensorFlow.js for a real world application.
Recap
In this codelab you:
- Discovered edge cases that were not working when using the pre-made comment spam model
- Retrained the Model Maker model to take into account the edge cases you discovered
- Exported the new trained model to TensorFlow.js format
- Updated your web app to use the new files
What's next?
So this update works great, but as with any web app, changes will happen over time. It would be much better if the app continuously improved itself over time instead of us having to do this manually each time. Can you think how you may have automated these steps to automatically retrain a model after you have, for example, 100 new comments marked as incorrectly classified? Put your regular web engineering hat on and you can probably figure out how to create a pipeline to do this automatically. If not, no worries, look out for the next codelab in the series that will show you how.
Share what you make with us
You can easily extend what you made today for other creative use cases too and we encourage you to think outside the box and keep hacking.
Remember to tag us on social media using the #MadeWithTFJS hashtag for a chance for your project to be featured on the TensorFlow blog or even future events. We would love to see what you make.
More TensorFlow.js codelabs to go deeper
- Use Firebase hosting to deploy and host a TensorFlow.js model at scale.
- Make a smart webcam using a pre-made object detection model with TensorFlow.js
Websites to check out
- TensorFlow.js official website
- TensorFlow.js pre-made models
- TensorFlow.js API
- TensorFlow.js Show & Tell - get inspired and see what others have made.
