
1. Before you begin
In this codelab, you will install the Google Cloud Developer plugin for the Antigravity CLI and deploy an application to Google Cloud.
What you will learn
- (Optional) Claim Google Cloud credits through the Google Developer Program or connect an existing Cloud Billing account.
- Create a Google Cloud project, enable the Agent Platform API, and configure your Cloud Shell workspace.
- Authenticate the Antigravity CLI using Application Default Credentials (ADC).
- Install the Google Cloud Developer plugin in the Antigravity CLI.
- Test the plugin by deploying a sample web application to Google Cloud.
Prerequisites
- A Google account (a personal Gmail account is required to claim Google Developer Program credits).
- A Cloud Billing account (claiming credits will create a temporary one automatically).
2. Claim Google Developer Program credits (Optional)
All Google Cloud projects need an active Cloud Billing account. If you are participating in a Google-supported workshop or event, you can claim Google Developer Program credits to receive a temporary, pre-funded billing account.
Steps
- Locate your credit redemption link in your event materials (for example,
https://me.developers.google.com/benefits/claim/XXXXorhttps://g.dev/credits/XXXX). - Open the link, log in with your personal Gmail account, and select Claim Credit.
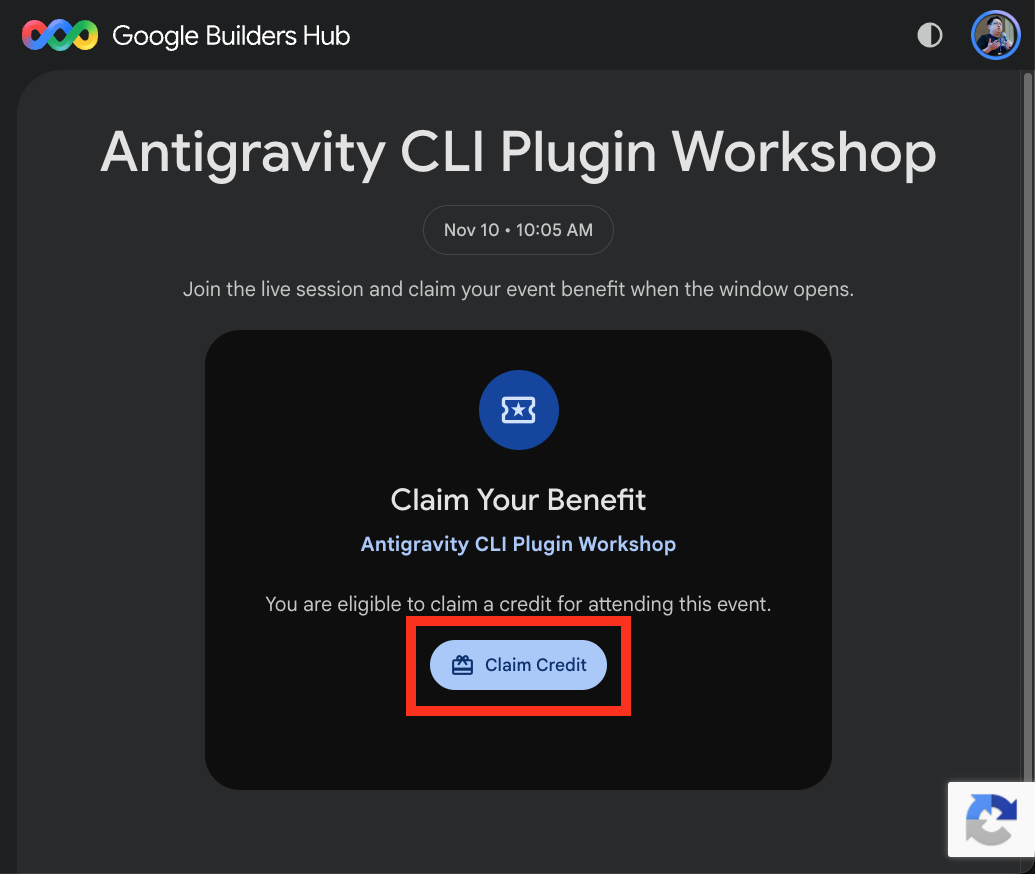
- If prompted, complete the form to set up your Google Developer Program profile.
- Complete the Scan to Verify You're Human check by scanning the QR code with your mobile device.
- After verification, a confirmation screen will appear:
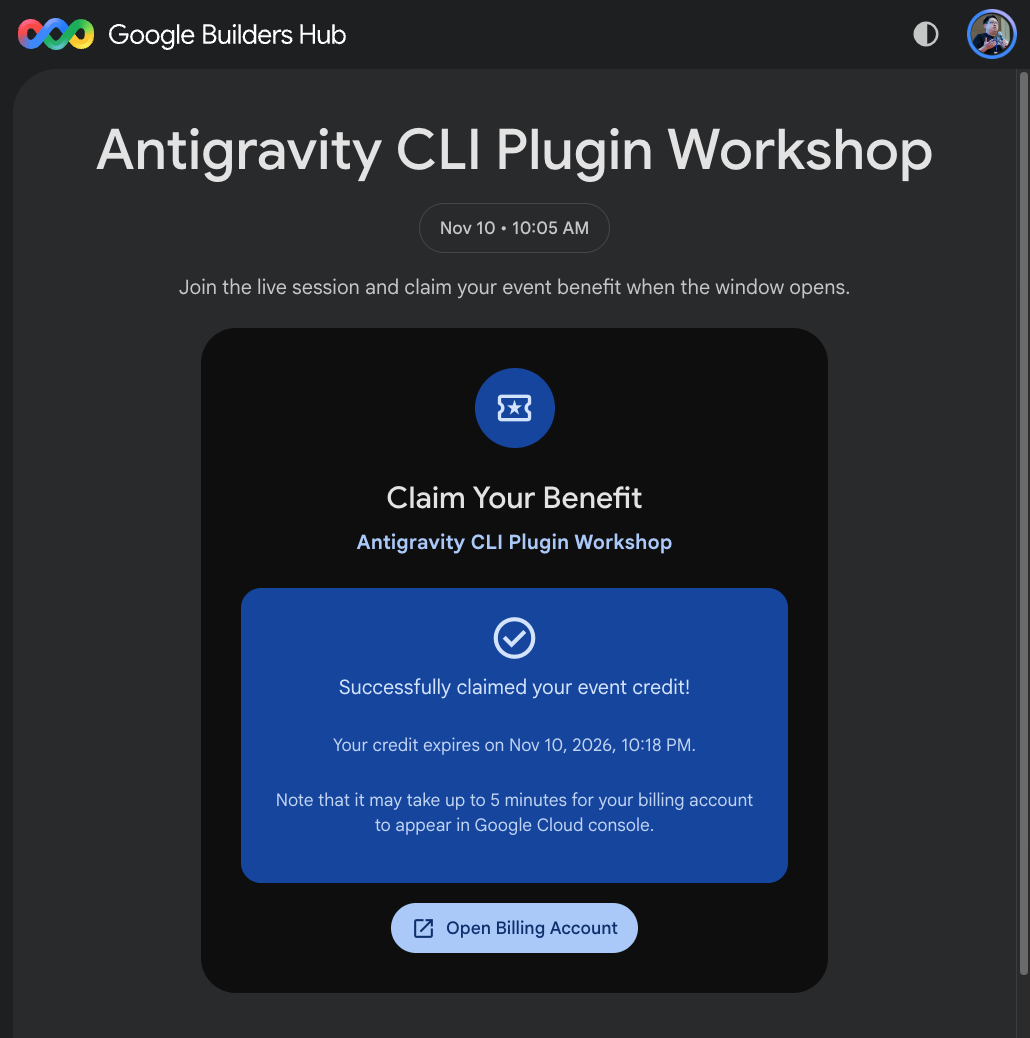
(Optional) 🔍 Check your claimed credits
- Click the Open Billing Account button or visit Cloud Billing to view your billing accounts in the Google Cloud console. Your new account will be listed under Your billing accounts:
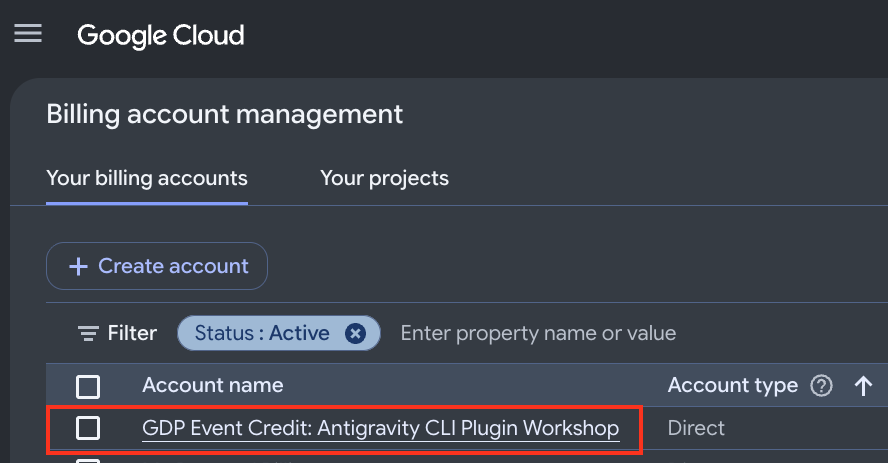
- Select your billing account, then click Credits in the left navigation menu to confirm your active credits, remaining balance, and expiration dates.
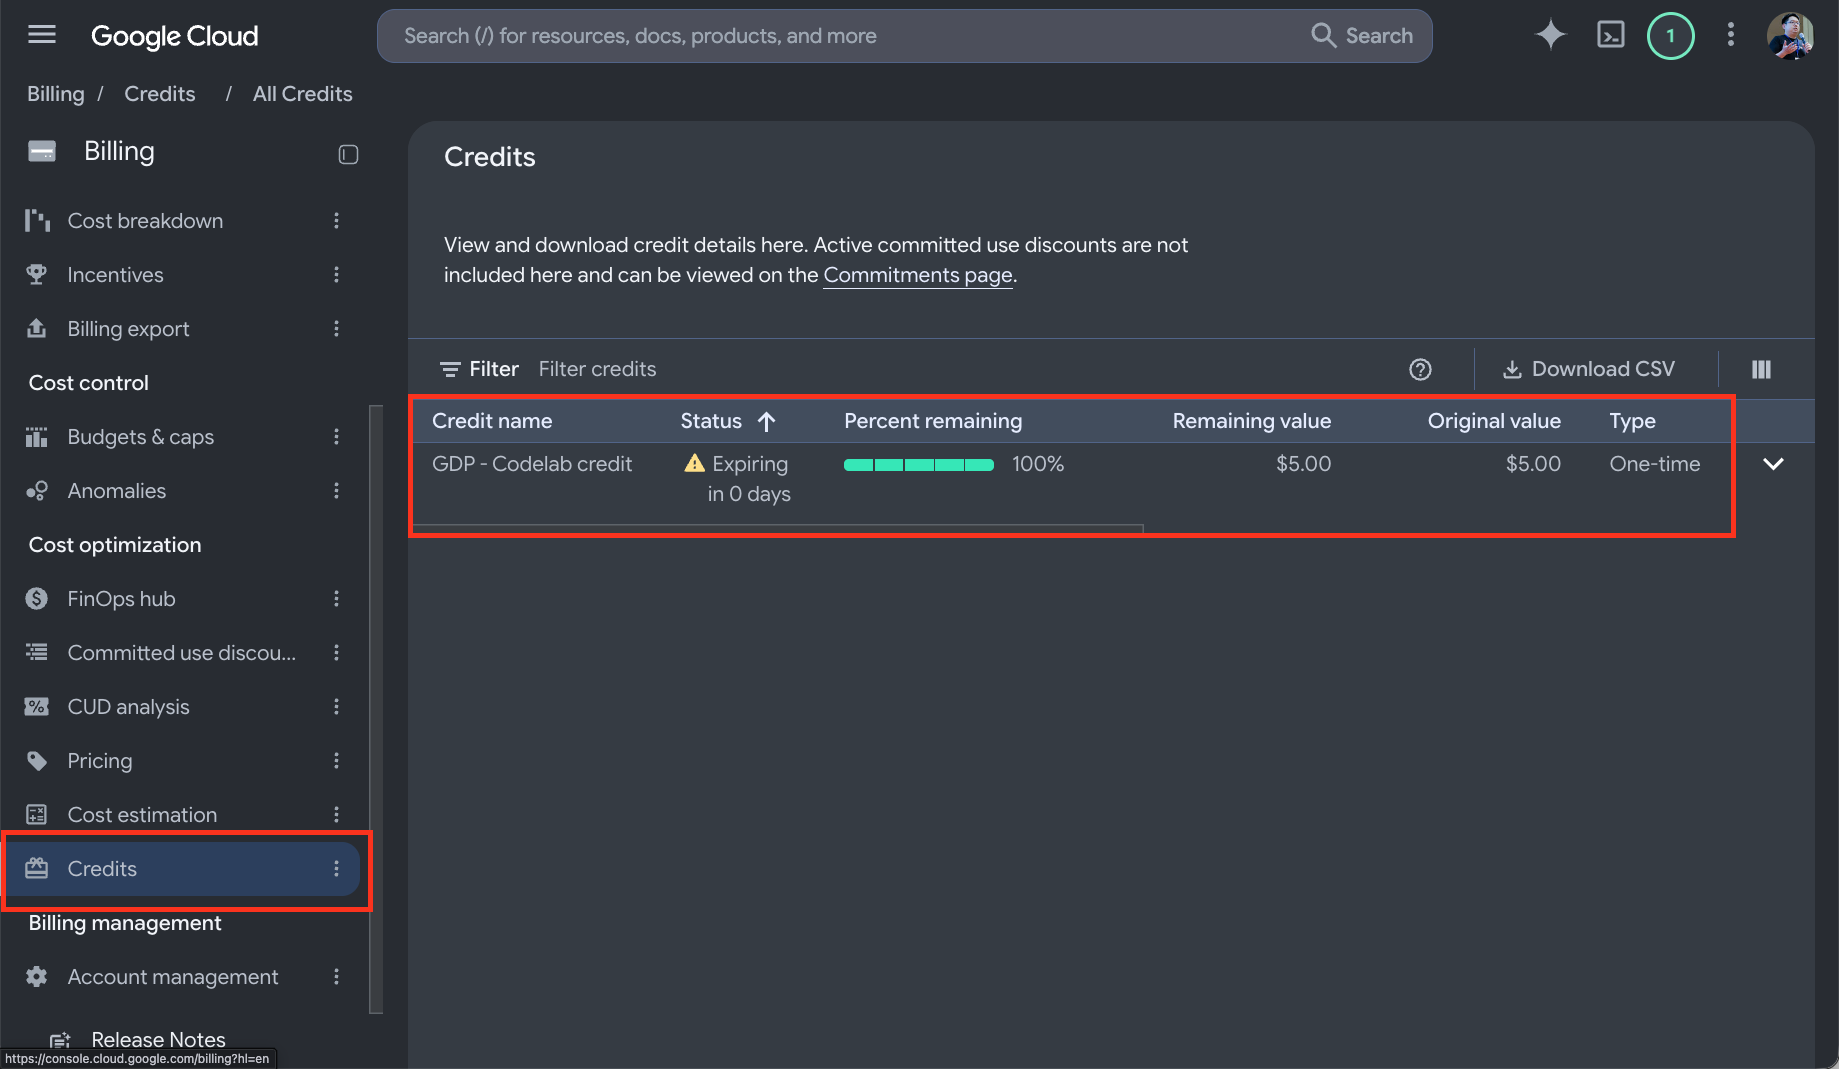
3. Create a Google Cloud project and set up environment
To use Google Cloud services, create a project and link it to an active billing account.
Create a Google Cloud project
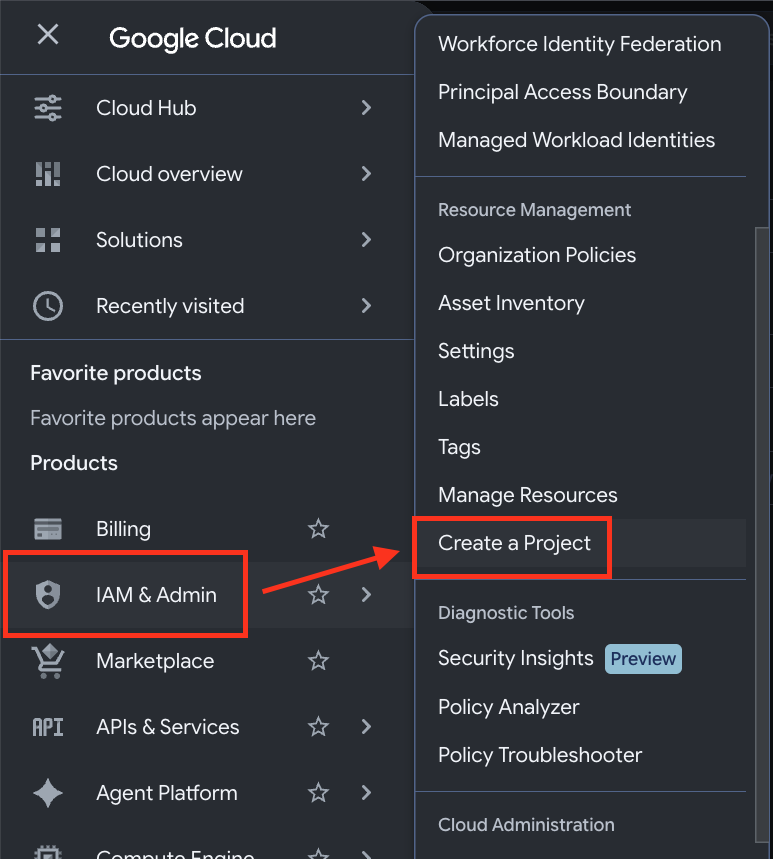
- Open the Google Cloud console. From the navigation menu (☰), go to IAM & Admin > Create Project.
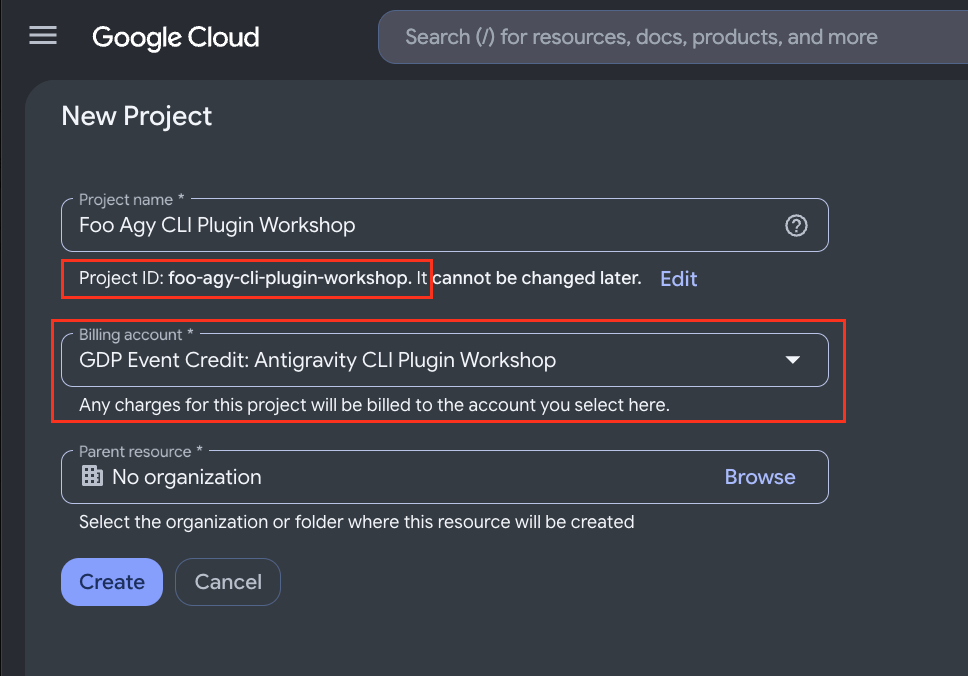
- Complete the project configuration:
- Project name: Enter a name and record the generated Project ID for future steps.
- Billing account: Select your billing account (such as your Google Developer Program credits account). Note: If you have only one billing account, Google Cloud links it automatically and hides this field.
- Parent resource: Select No organization (or choose your organization if applicable).
- Click Create and wait for provisioning to finish.
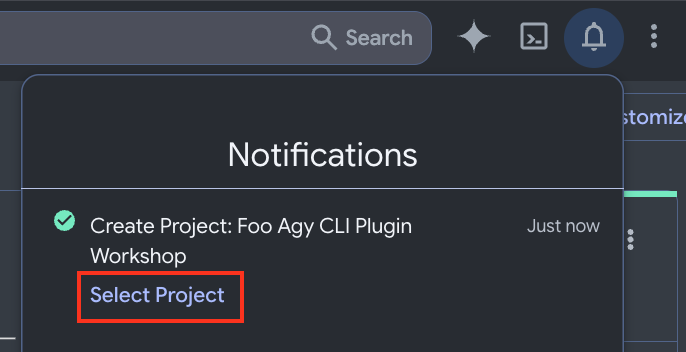
- When the notification appears, click the Notifications icon in the upper-right corner and choose Select Project.
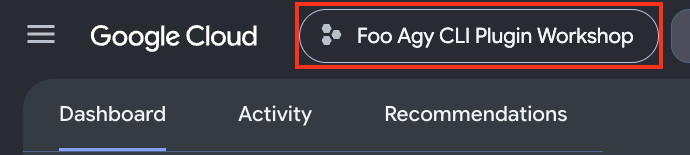
- Verify that your new project appears in the project selector at the top of the console. If not, open the selector and switch to it.
Activate the Cloud Shell
We will use Cloud Shell to run the Antigravity CLI and complete the codelab.
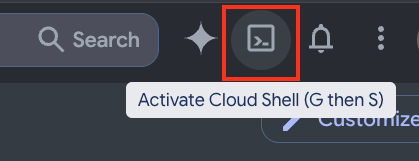
- Click the Activate Cloud Shell icon in the top-right toolbar.
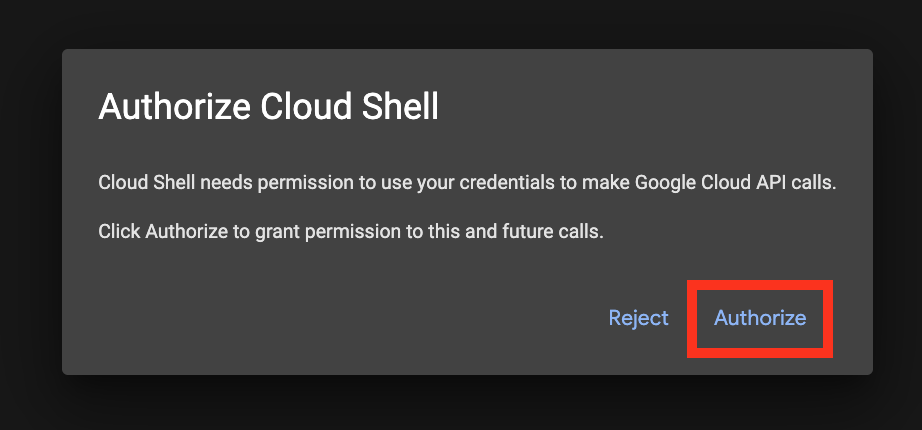
- If prompted, click Authorize to grant Cloud Shell access to Google Cloud APIs.
- Verify your active project in the terminal prompt.
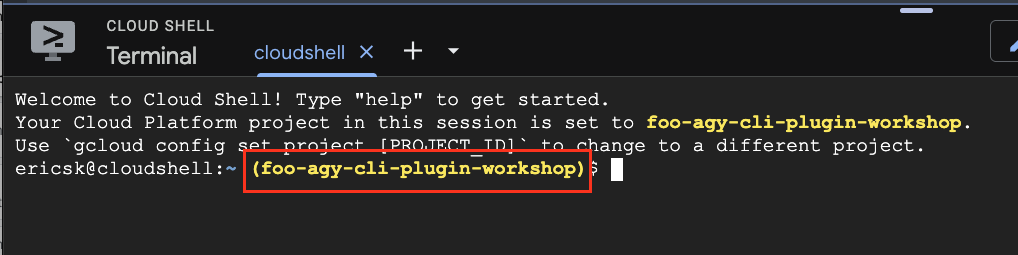
If the correct project is not set, run this command:
gcloud config set project YOUR_PROJECT_ID

Enable the Agent Platform API
The Antigravity CLI requires the Agent Platform API to access AI models. Enable the API by running the command in the Cloud Shell:
gcloud services enable aiplatform.googleapis.com

What we have done
- Created and configured a Google Cloud project with billing.
- Launched and authorized Cloud Shell.
- Set the active project and enabled the Agent Platform API.
4. Launch Antigravity CLI
Download the sample app
We will use a sample app to test the deployment to Google Cloud. Please use the command in the Cloud Shell to download the sample app and enter the directory.
git clone https://github.com/ericsk/luckydraw.git
cd luckydraw/
Launch Antigravity
The Antigravity CLI (agy) is pre-installed in Cloud Shell. In this section, you will configure and launch the CLI.
To authorize the Antigravity CLI using Application Default Credentials (ADC), follow these steps:
- Set the required environment variables (
AGY_ADC_AUTH,CLOUDSDK_CORE_PROJECT, andGOOGLE_CLOUD_QUOTA_PROJECT) so that Antigravity CLI uses your project's quota, then launch the CLI:
export AGY_ADC_AUTH=true
export CLOUDSDK_CORE_PROJECT=$(gcloud config get project)
export GOOGLE_CLOUD_QUOTA_PROJECT=$(gcloud config get project)
agy
- On first launch, you will be prompted to select a theme:
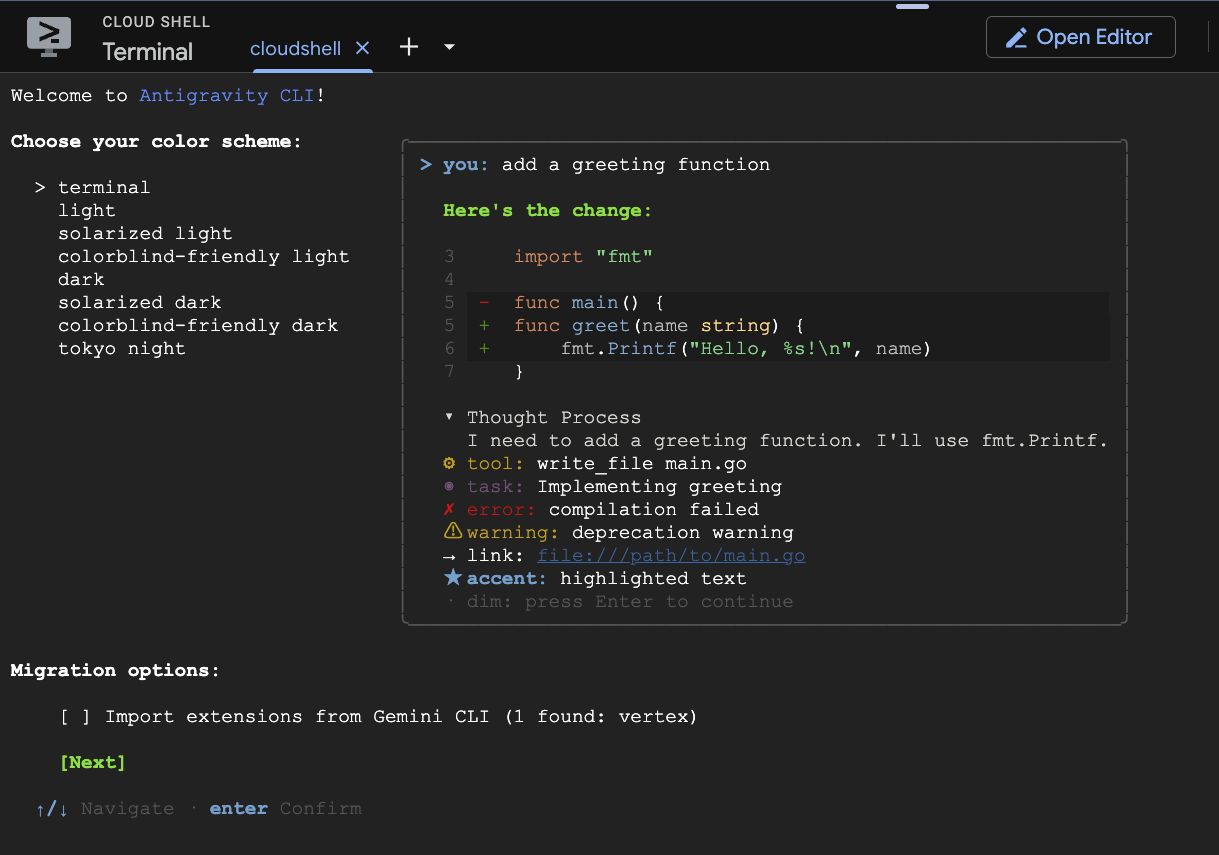
and accept the terms of service:
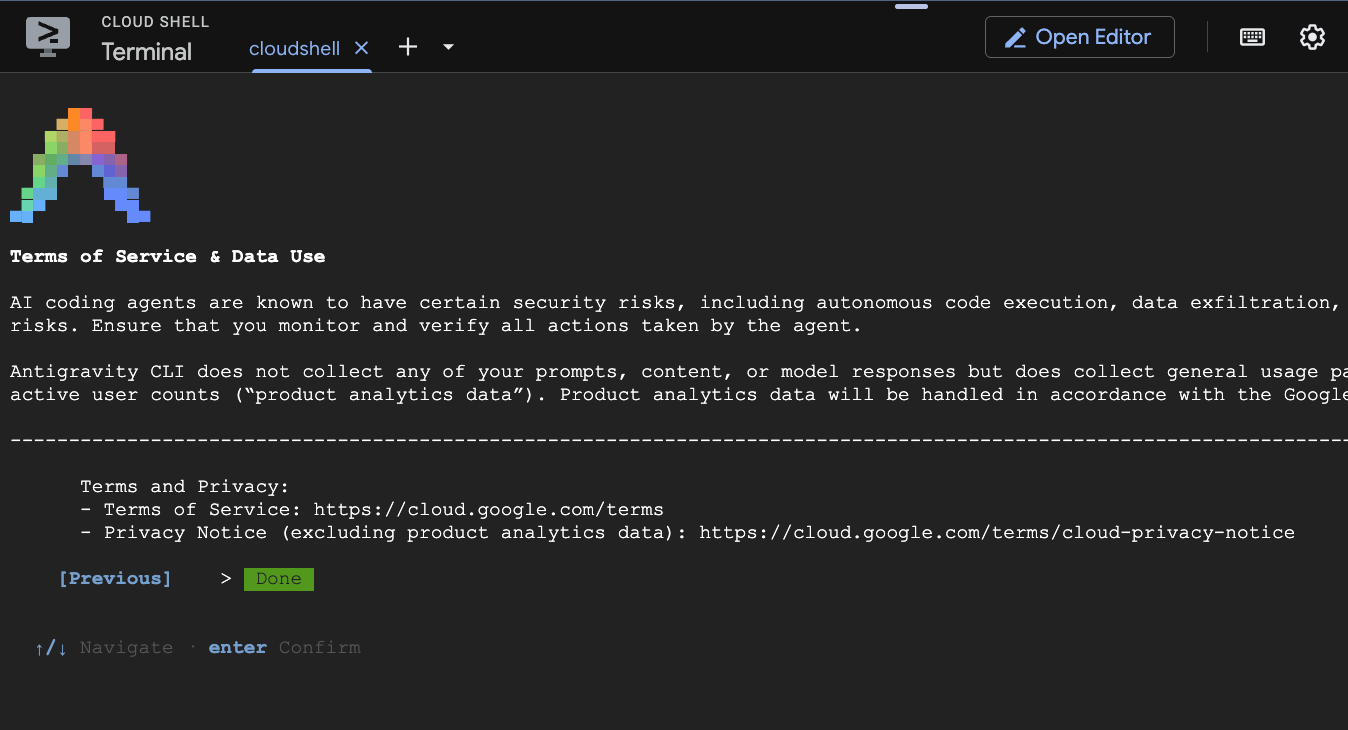
Use the arrow keys to navigate and press Enter to proceed.
- Because this is your first time running the CLI in this directory, you will be asked to trust it. Select Yes, I trust this folder and press Enter.
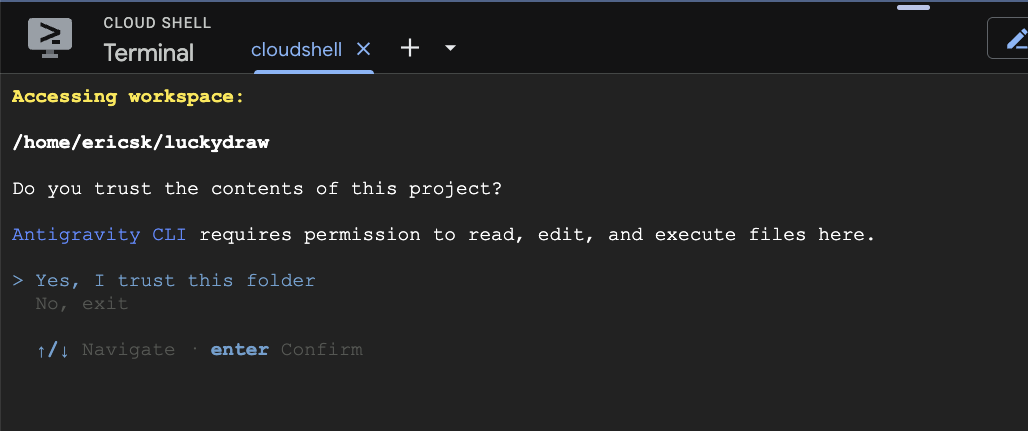
- The Antigravity CLI is now running. Confirm that it points to your target project and current working directory (
luckydraw).
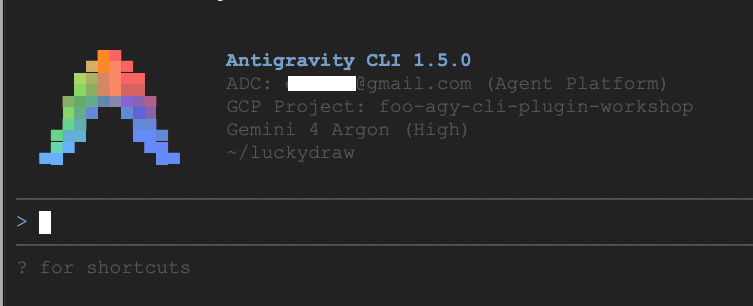
- Run the
/quitcommand to exit Antigravity CLI and return to Cloud Shell. You will install the required plugin in the next section.
What we have done
- Download the sample app for testing
- Launch the Antigravity CLI in Cloud Shell with Google Cloud authentication.
5. Install and test the Google Cloud Developer plugin
To equip the Antigravity CLI with the tools and best practices required to work with Google Cloud Platform, install the Google Cloud Developer plugin.
Install the Google Cloud Developer plugin
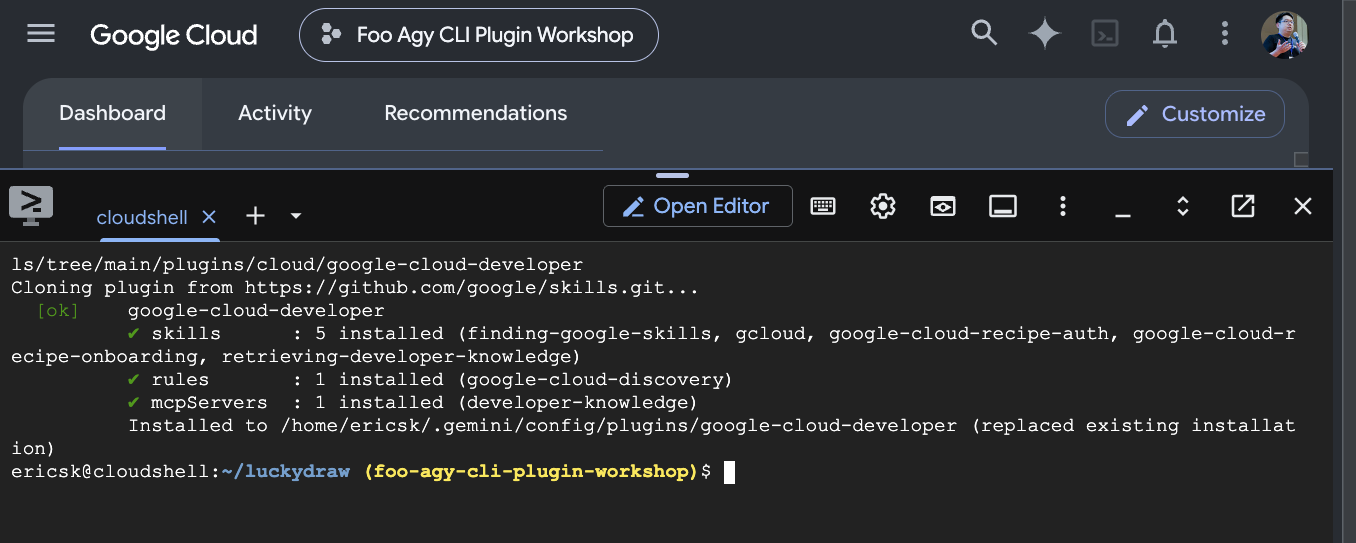
In Cloud Shell (outside the Antigravity CLI), run the following command to install the Google Cloud Developer plugin:
agy plugin install https://github.com/google/skills/tree/main/plugins/cloud/google-cloud-developer
Deploy your app from the Antigravity CLI
- Launch the Antigravity CLI:
agy
- Inside the CLI, prompt the agent to deploy your application and include any configuration preferences, such as the deployment region:
Please deploy this web app to Google Cloud. I'd like to publish it to the region in Taiwan
- The CLI might prompt you to approve commands as it executes tasks. Press Enter to confirm and continue.
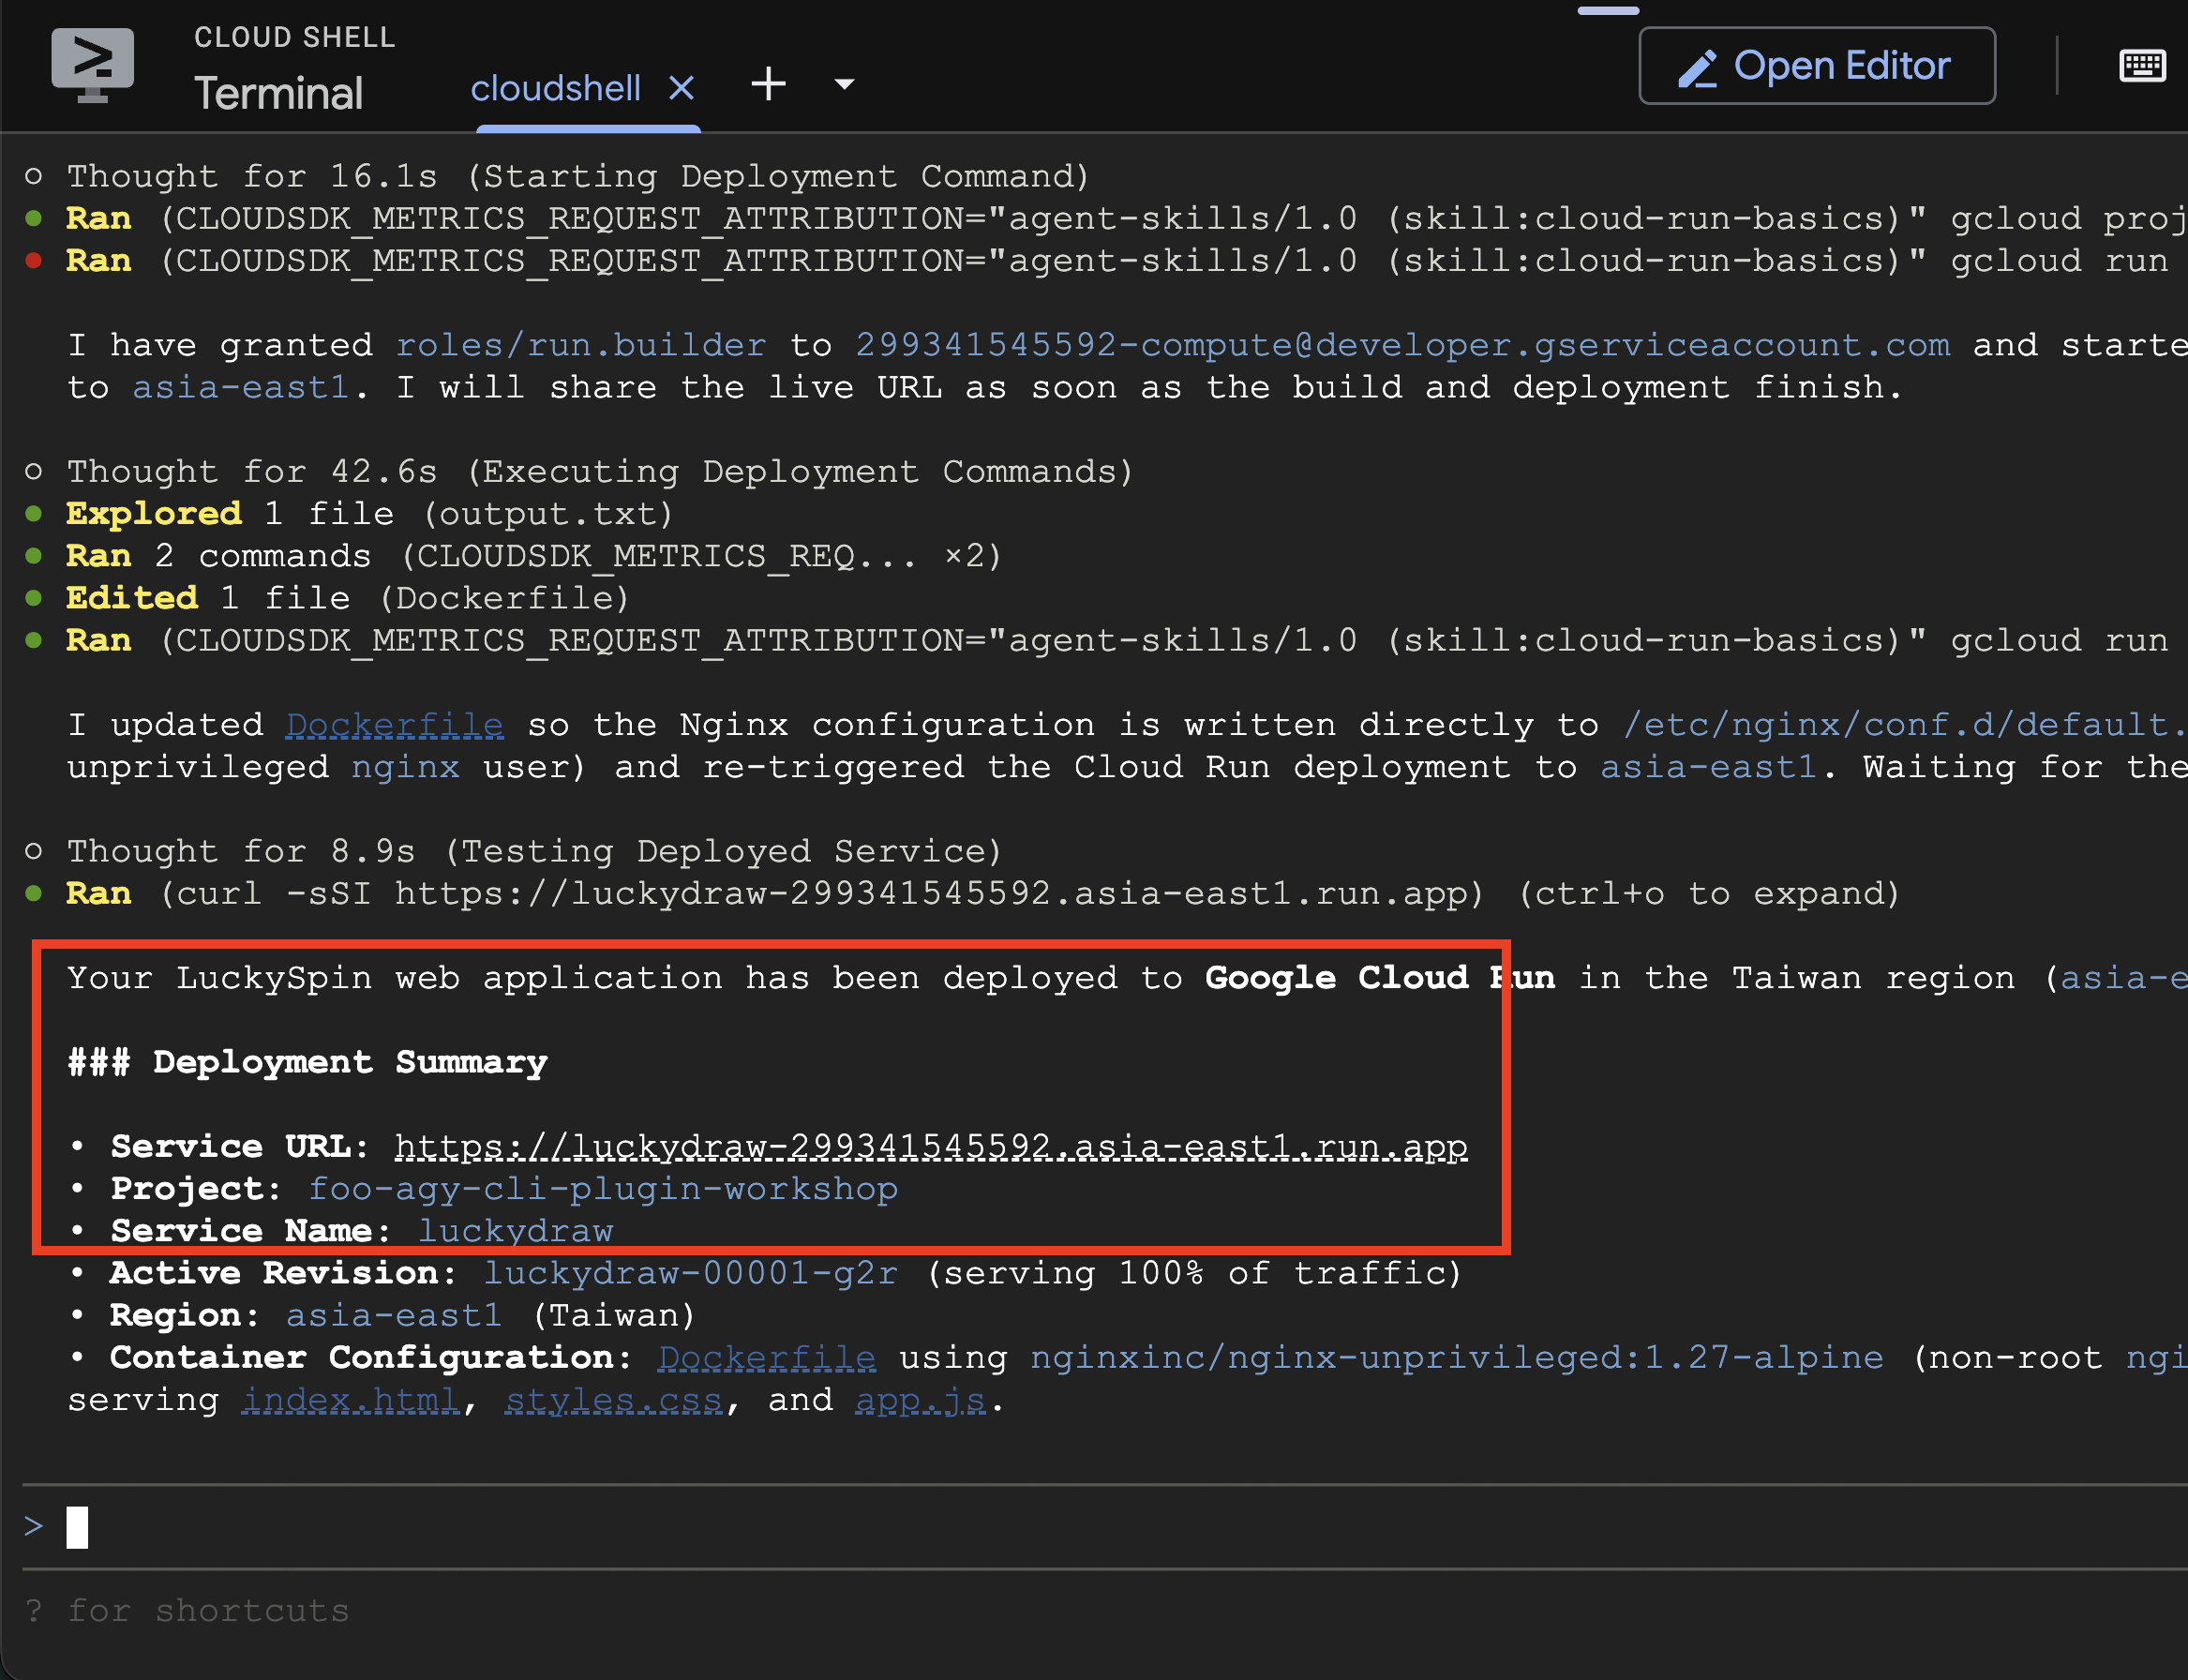
Once the deployment completes, the agent returns the public URL for your application.
Clean up resources
To remove all created resources and avoid ongoing charges, ask the agent to tear down the environment:
Please clean up all stuff in this project
What you have done
- Install the Google Cloud Developer plugin for the Antigravity CLI.
- Deploy an application to Google Cloud using the Antigravity agent.
6. Congratulations
You have learned how to configure a project, billing account, and Cloud Shell on Google Cloud. You also used the Antigravity CLI and saw how the Google Cloud Developer plugin streamlines deploying and undeploying applications.
What you accomplished
- (Optional) Claimed Google Developer Program credits and set up an active Cloud Billing account.
- Created a Google Cloud project and linked it to an active Cloud Billing account.
- Launched the Antigravity CLI using Google Cloud authentication.
- Installed the Google Cloud Developer plugin for the Antigravity CLI.
- Deployed and undeployed an application on Google Cloud.