1. Overview
In this lab, you'll use Vertex AI to build a pipeline that trains a custom Keras Model in TensorFlow. We will then use the new functionality available in Vertex AI Experiments to track and compare model runs in order to identify which combination of hyperparameters results in the best performance.
What you learn
You'll learn how to:
- Train a custom Keras Model to predict player ratings (e.g., regression)
- Use the Kubeflow Pipelines SDK to build scalable ML pipelines
- Create and run a 5-step pipeline that ingests data from Cloud Storage, scales the data, trains the model, evaluates it, and saves the resulting model back into Cloud Storage
- Leverage Vertex ML Metadata to save model artifacts such as Models and Model Metrics
- Utilize Vertex AI Experiments to compare results of the various pipeline runs
The total cost to run this lab on Google Cloud is about $1.
2. Intro to Vertex AI
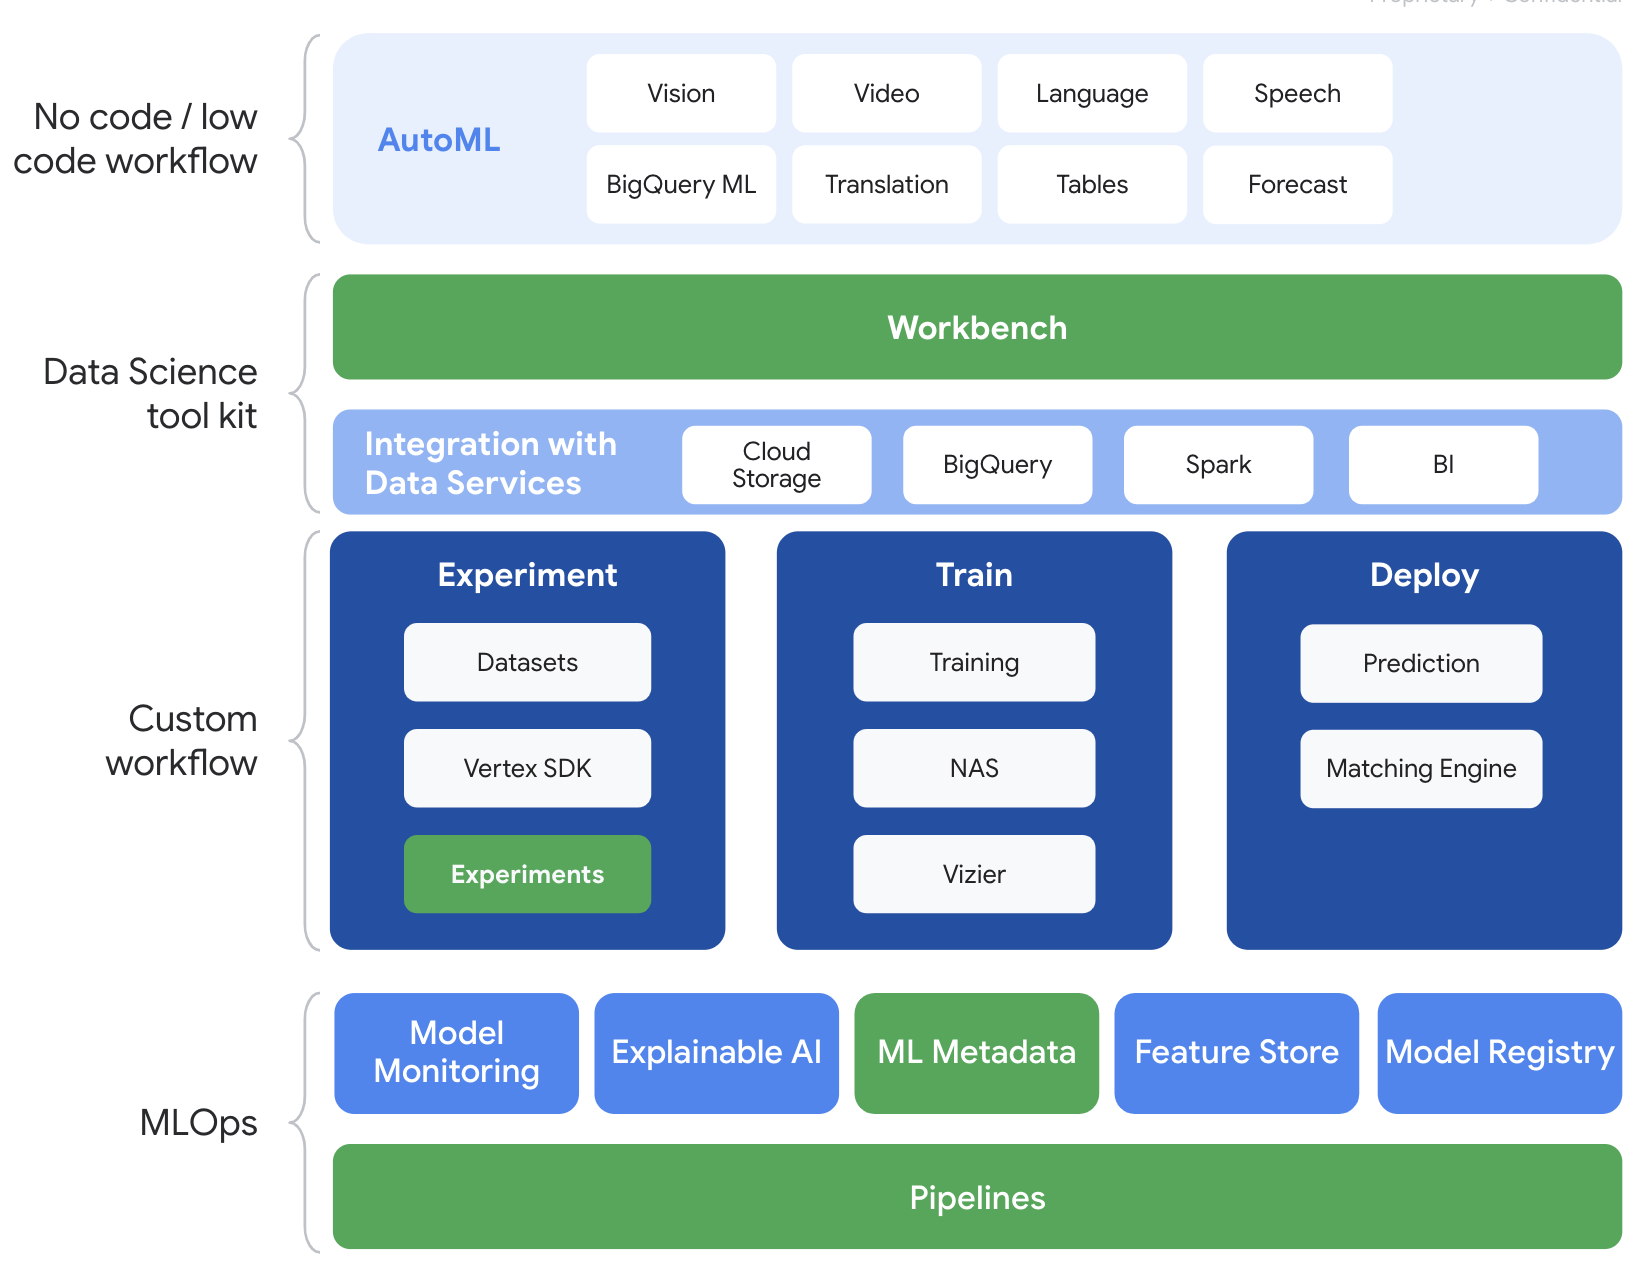
This lab uses the newest AI product offering available on Google Cloud. Vertex AI integrates the ML offerings across Google Cloud into a seamless development experience. Previously, models trained with AutoML and custom models were accessible via separate services. The new offering combines both into a single API, along with other new products. You can also migrate existing projects to Vertex AI.
Vertex AI includes many different products to support end-to-end ML workflows. This lab will focus on the products highlighted below: Experiments, Pipelines, ML Metadata, and Workbench
3. Use Case Overview
We will use a popular soccer dataset sourced from EA Sports' FIFA video game series. It includes over 25,000 soccer matches and 10,000+ players for seasons 2008-2016. The data has been preprocessed in advance so you can more easily hit the ground running. You will be using this dataset throughout the lab which can now be found in a public Cloud Storage bucket. We will provide more details later in the codelab on how to access the dataset. Our end goal is to predict a player's overall rating based on various in game actions such as interceptions and penalties.
Why is Vertex AI Experiments useful for Data Science?
Data science is experimental in nature - they are called scientists after all. Good data scientists are hypothesis driven, using trial-and-error to test out various hypotheses with the hope that successive iterations will result in a more performant model.
While data science teams have embraced experimentation, they often struggle to keep track of their work and the "secret sauce" that was uncovered through their experimentation efforts. This happens for a few reasons:
- Tracking training jobs can become cumbersome, making it easy to lose sight of what's working versus what's not
- This issue compounds when you look across a data science team as not all members may be tracking experiments or even sharing their results with others
- Data capture is time consuming and most teams leverage manual methods (e.g., sheets or docs) that result in inconsistent and incomplete information to learn from
The tl;dr: Vertex AI Experiments does the work for you, helping you to more easily track and compare your experiments
Why Vertex AI Experiments for Gaming?
Gaming historically has been a playground for machine learning and ML experiments. Not only do games produce billions of real time events per day but they make use of all of that data by leveraging ML and ML experiments to improve in-game experiences, to retain players, and evaluate the different players on their platform. Hence we thought a gaming dataset fit well with our overall experiments exercise.
4. Set up your environment
You'll need a Google Cloud Platform project with billing enabled to run this codelab. To create a project, follow the instructions here.
Step 1: Enable the Compute Engine API
Navigate to Compute Engine and select Enable if it isn't already enabled.
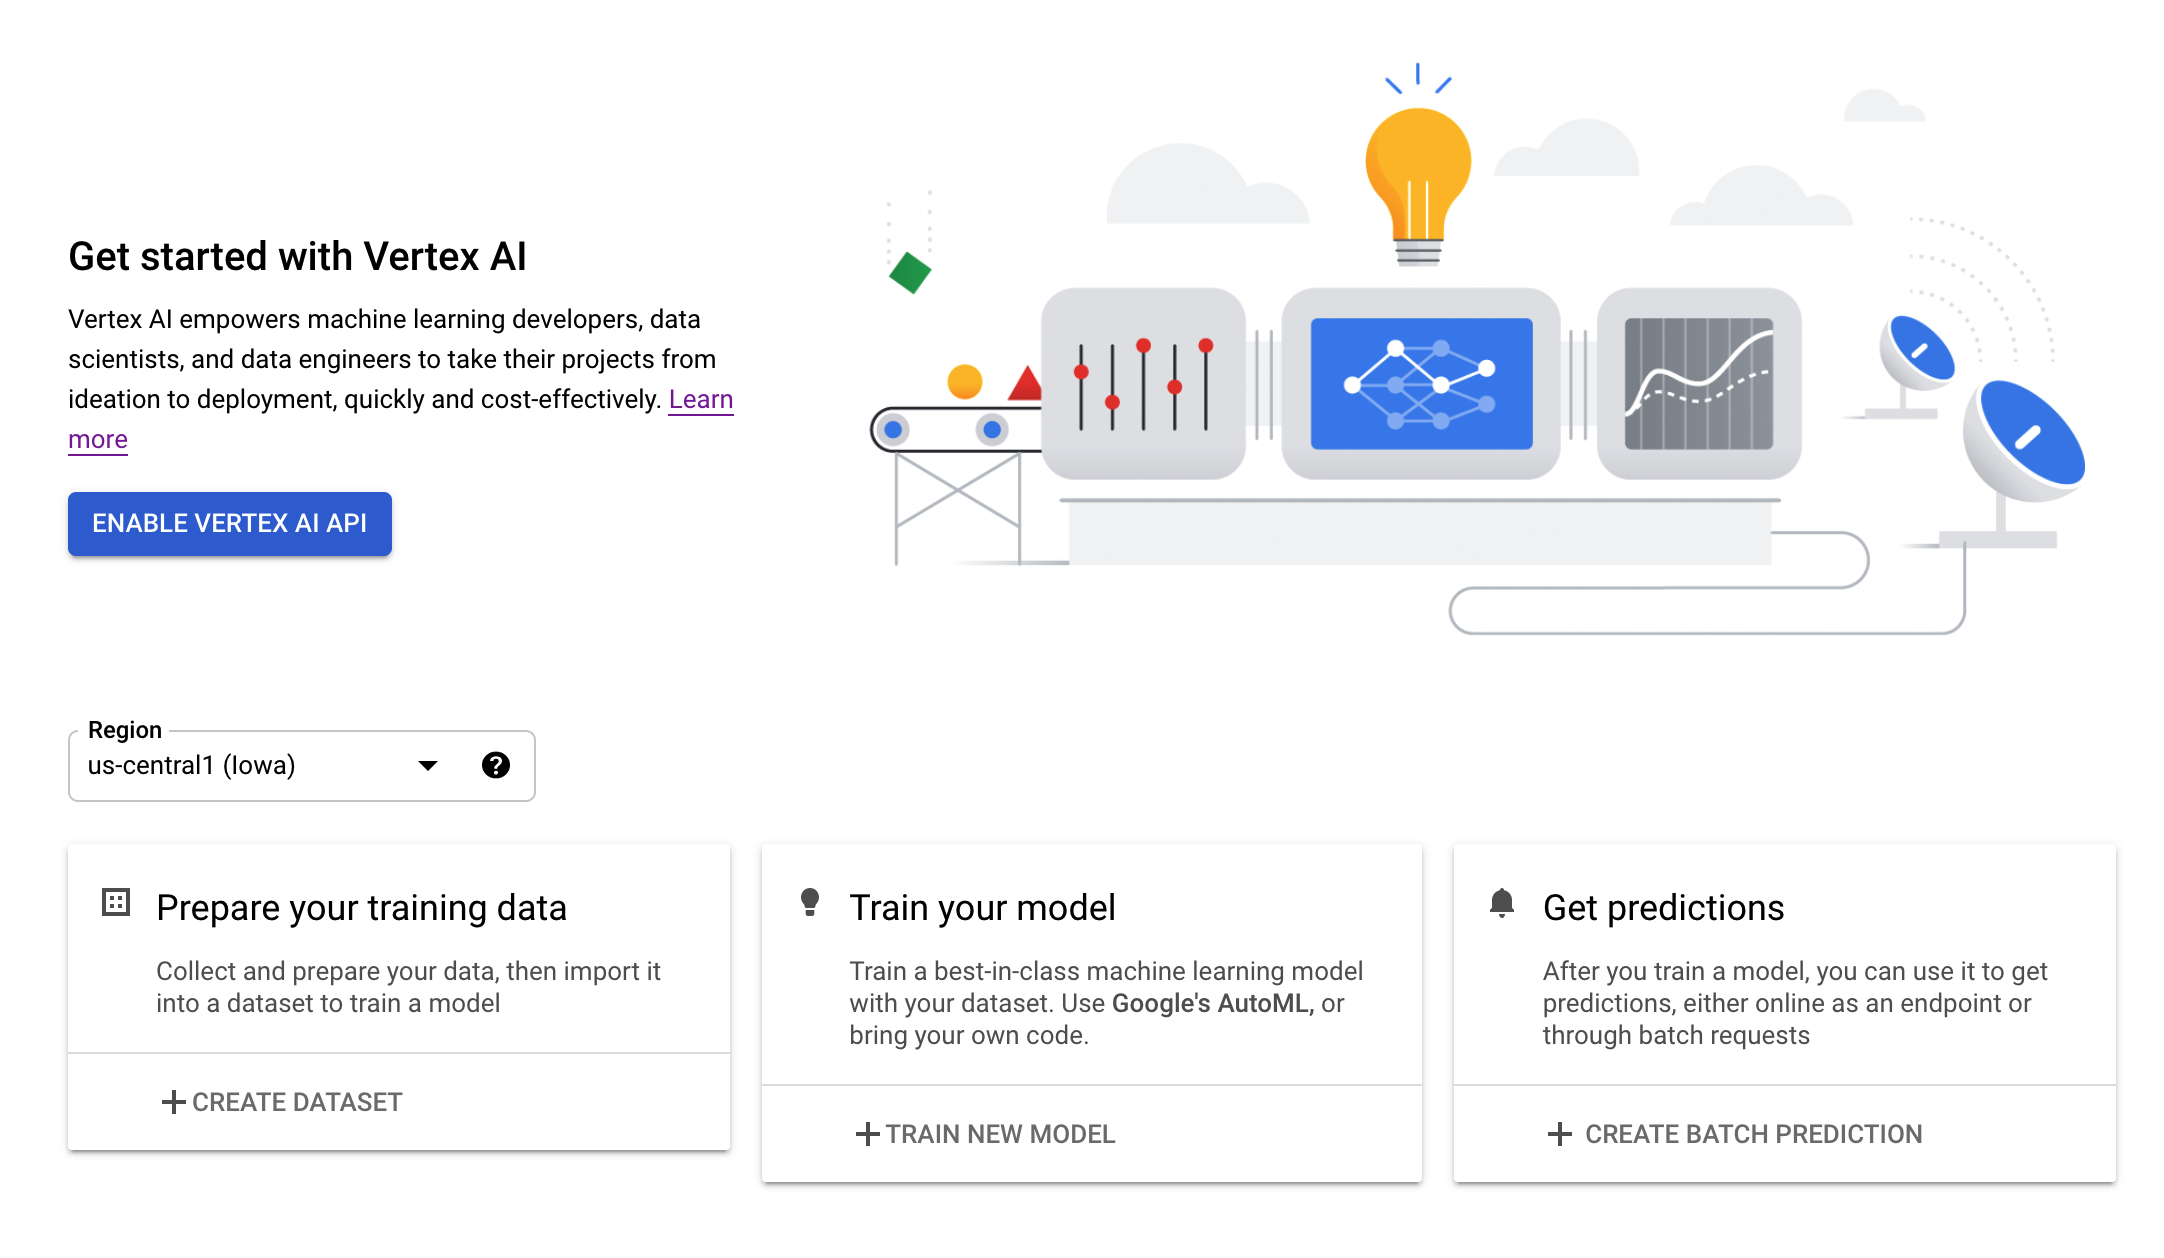
Step 2: Enable the Vertex AI API
Navigate to the Vertex AI section of your Cloud Console and click Enable Vertex AI API.
Step 3: Create a Vertex AI Workbench instance
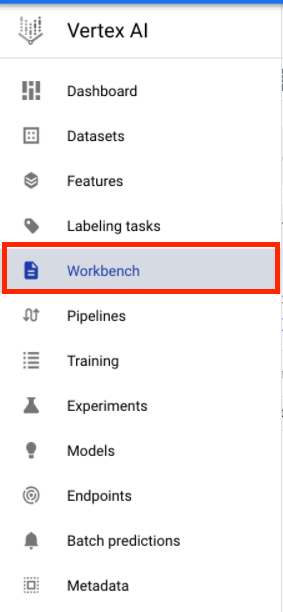
From the Vertex AI section of your Cloud Console, click on Workbench:
Enable the Notebooks API if it isn't already.
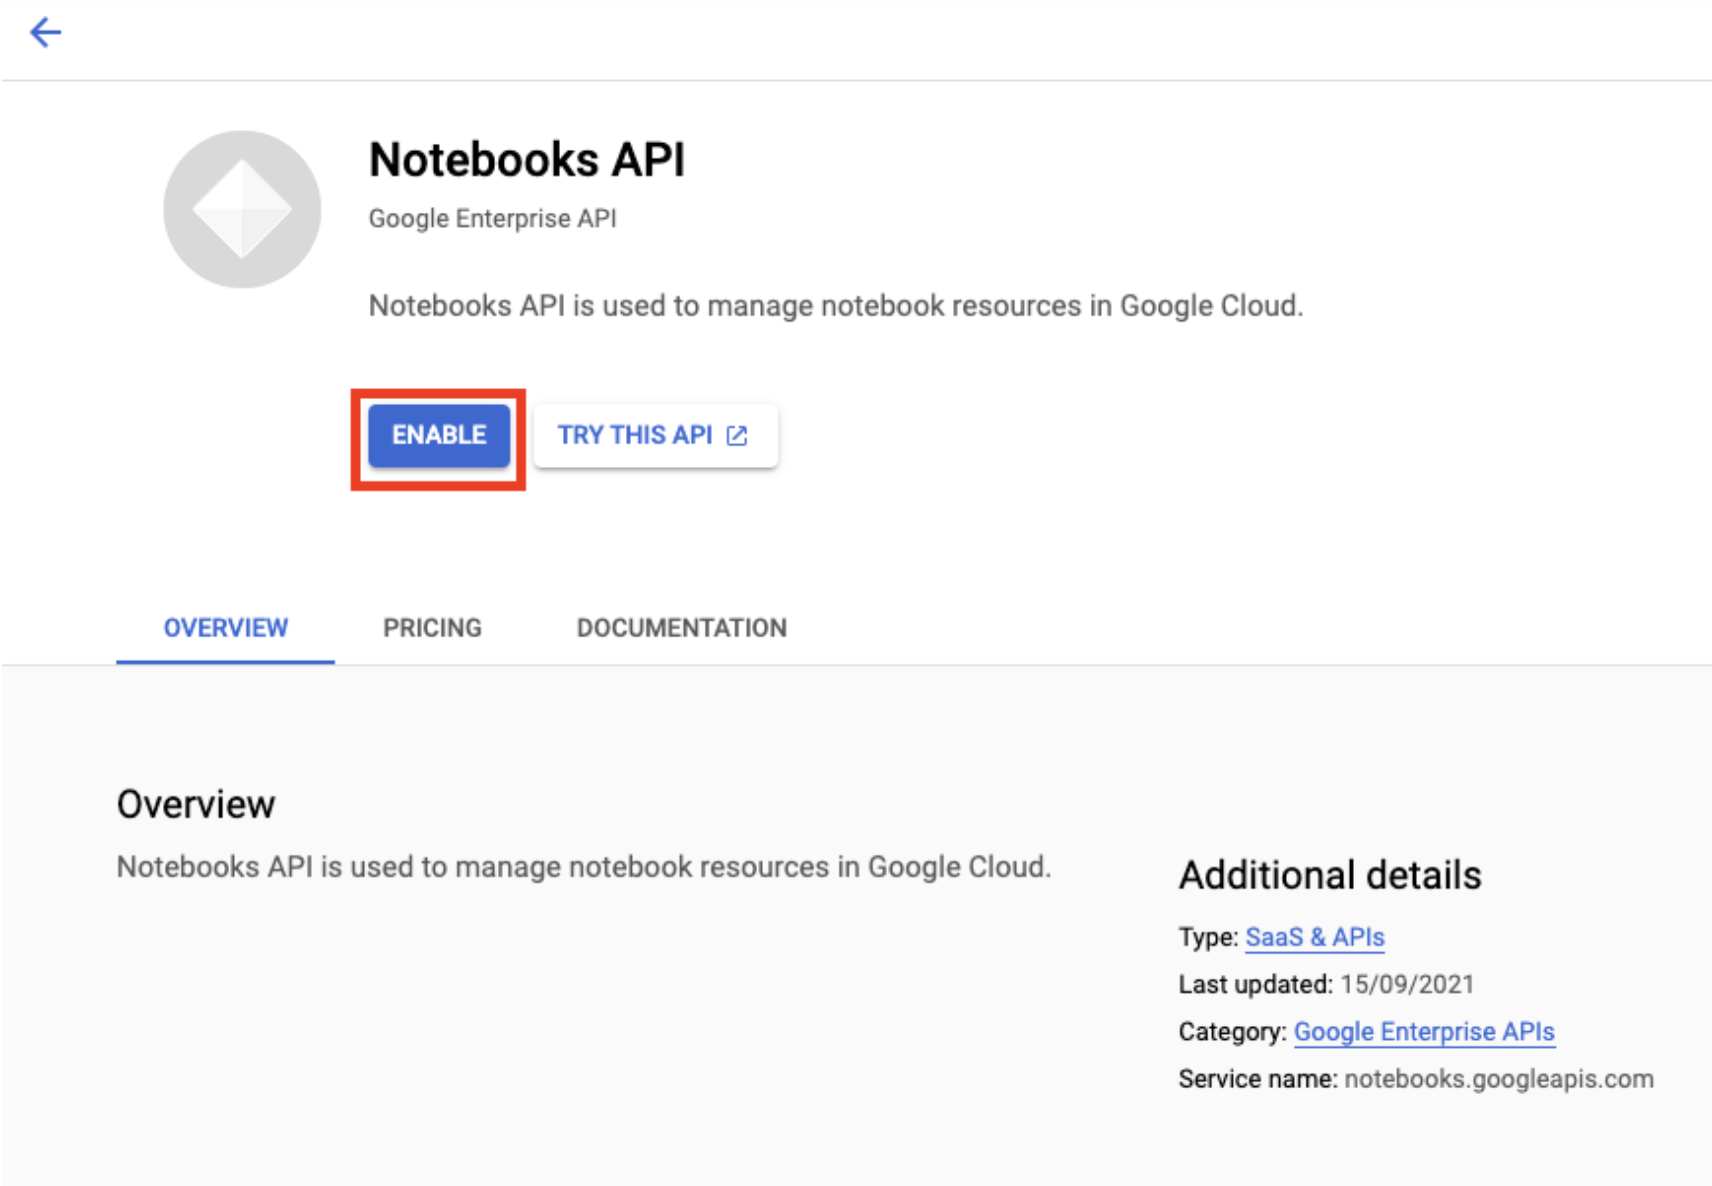
Once enabled, click MANAGED NOTEBOOKS:

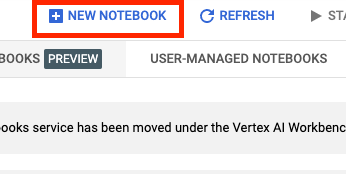
Then select NEW NOTEBOOK.
Give your notebook a name, and then click Advanced Settings.
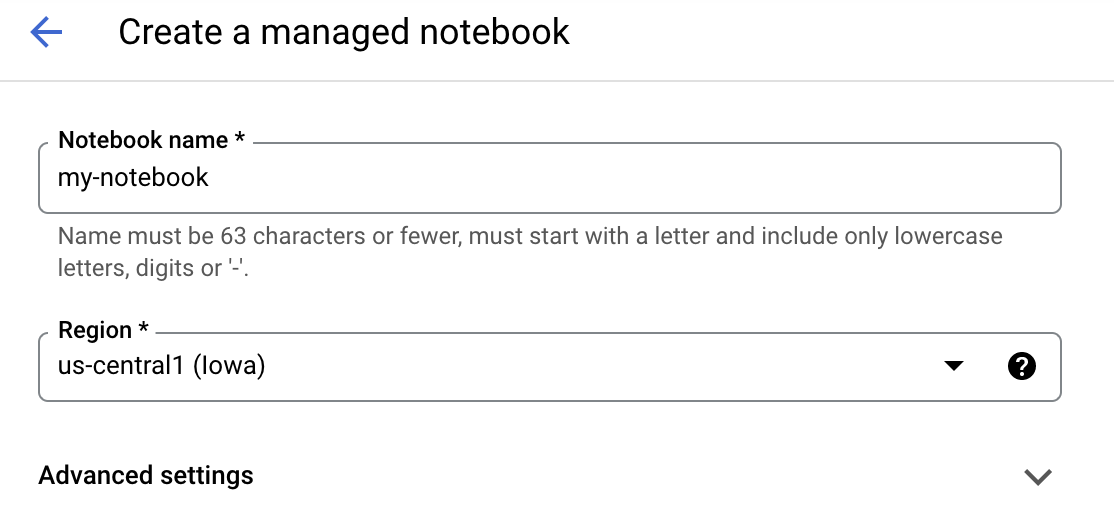
Under Advanced Settings, enable idle shutdown and set the number of minutes to 60. This means your notebook will shutdown automatically when not in use so you don't incur unnecessary costs.

Step 4: Open your Notebook
Once the instance has been created, select Open JupyterLab.

Step 5: Authenticate (first time only)
The first time you use a new instance, you'll be asked to authenticate. Follow the steps in the UI to do so.
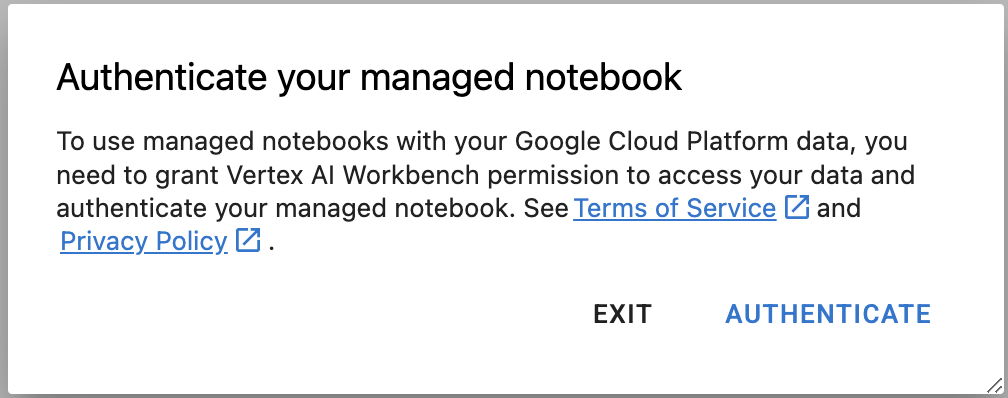
Step 6: Select the appropriate Kernel
Managed-notebooks provides multiple kernels in a single UI. Select the kernel for Tensorflow 2 (local).
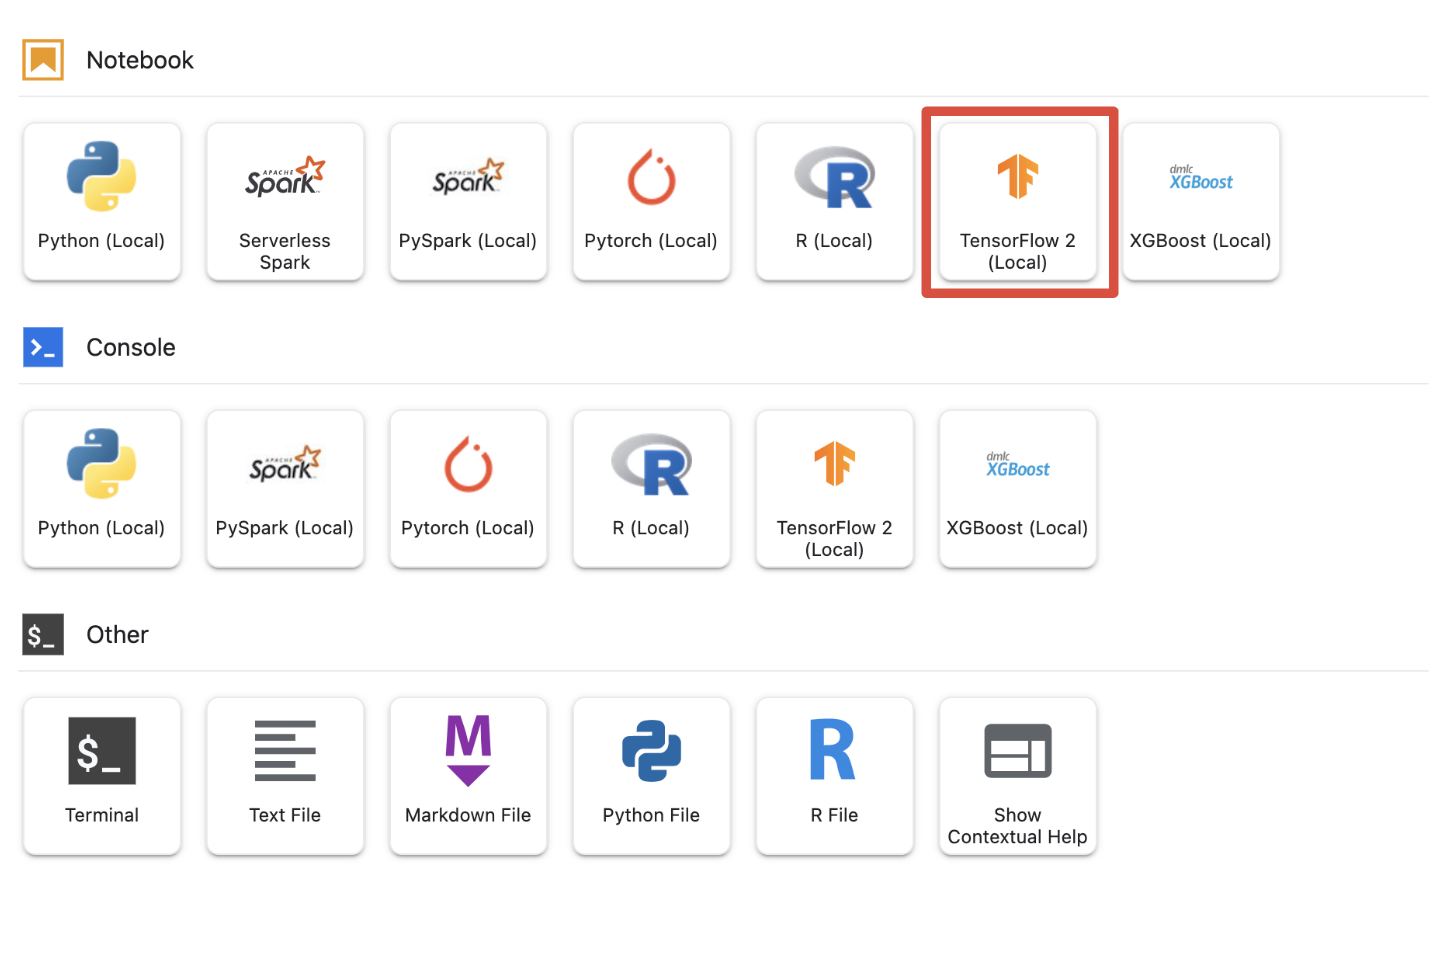
5. Initial Setup Steps in Your Notebook
You will need to take a series of additional steps to setup your environment within your notebook prior to building out your pipeline. These steps include: installing any additional packages, setting variables, creating your cloud storage bucket, copying the gaming dataset from a public storage bucket, and importing libraries and defining additional constants.
Step 1: Install Additional Packages
We will need to install additional package dependencies not currently installed in your notebook environment. An example includes the KFP SDK.
!pip3 install --user --force-reinstall 'google-cloud-aiplatform>=1.15' -q --no-warn-conflicts
!pip3 install --user kfp -q --no-warn-conflicts
You will then want to restart the Notebook Kernel so you can use the downloaded packages within your notebook.
# Automatically restart kernel after installs
import os

if not os.getenv("IS_TESTING"):
    # Automatically restart kernel after installs
    import IPython

    app = IPython.Application.instance()
    app.kernel.do_shutdown(True)
Step 2: Set Variables
We want to define our PROJECT_ID. If you don't know your Project_ID, you may be able to get your PROJECT_ID using gcloud.
import os

PROJECT_ID = ""

# Get your Google Cloud project ID from gcloud
if not os.getenv("IS_TESTING"):
    shell_output = !gcloud config list --format 'value(core.project)' 2>/dev/null
    PROJECT_ID = shell_output[0]
    print("Project ID: ", PROJECT_ID)
Otherwise, set your PROJECT_ID here.
if PROJECT_ID == "" or PROJECT_ID is None:
    PROJECT_ID = "[your-project-id]"  # @param {type:"string"}
We will also want to set the REGION variable, which is used throughout the rest of this notebook. Below are regions supported for Vertex AI. We recommend that you choose the region closest to you.
- Americas: us-central1
- Europe: europe-west4
- Asia Pacific: asia-east1
Please do not use a multi-regional bucket for training with Vertex AI. Not all regions provide support for all Vertex AI services. Learn more about Vertex AI regions.
#set your region
REGION = "us-central1"  # @param {type: "string"}
Finally we will set a TIMESTAMP variable. This variables is used to avoid name conflicts between users on resources created, you create a TIMESTAMP for each instance session, and append it onto the name of resources you create in this tutorial.
#set timestamp to avoid collisions between multiple users

from datetime import datetime

TIMESTAMP = datetime.now().strftime("%Y%m%d%H%M%S")
Step 3: Create a Cloud Storage bucket
You will need to specify and leverage a Cloud Storage staging bucket. The staging bucket is where all the data associated with your dataset and model resources are retained across sessions.
Set the name of your Cloud Storage bucket below. Bucket names must be globally unique across all Google Cloud projects, including those outside of your organization.
#set cloud storage bucket
BUCKET_NAME = "[insert bucket name here]"  # @param {type:"string"}
BUCKET_URI = f"gs://{BUCKET_NAME}"
If your bucket DOES NOT already exist you can run the following cell to create your Cloud Storage bucket.
! gsutil mb -l $REGION -p $PROJECT_ID $BUCKET_URI
You can then verify access to your Cloud Storage bucket by running the following cell.
#verify access
! gsutil ls -al $BUCKET_URI
Step 4: Copy our Gaming Dataset
As mentioned earlier, you will be leveraging a popular gaming dataset from EA Sports hit video games, FIFA. We have done the pre-processing work for you so you will just need to copy the dataset from the public storage bucket and move it over to the one you have created.
# copy the data over to your cloud storage bucket
DATASET_URI = "gs://cloud-samples-data/vertex-ai/structured_data/player_data"

!gsutil cp -r $DATASET_URI $BUCKET_URI
Step 5: Import Libraries and Define Additional Constants
Next we will want to import our libraries for Vertex AI, KFP, and so on.
import logging
import os
import time

logger = logging.getLogger("logger")
logging.basicConfig(level=logging.INFO)

import kfp.v2.compiler as compiler
# Pipeline Experiments
import kfp.v2.dsl as dsl
# Vertex AI
from google.cloud import aiplatform as vertex_ai
from kfp.v2.dsl import Artifact, Input, Metrics, Model, Output, component
from typing import NamedTuple
We will also define additional constants that we will refer back to throughout the rest of the notebook such as the file path(s) to our training data.
#import libraries and define constants
# Experiments

TASK = "regression"
MODEL_TYPE = "tensorflow"
EXPERIMENT_NAME = f"{PROJECT_ID}-{TASK}-{MODEL_TYPE}-{TIMESTAMP}"

# Pipeline
PIPELINE_URI = f"{BUCKET_URI}/pipelines"
TRAIN_URI = f"{BUCKET_URI}/player_data/data.csv"
LABEL_URI = f"{BUCKET_URI}/player_data/labels.csv"
MODEL_URI = f"{BUCKET_URI}/model"
DISPLAY_NAME = "experiments-demo-gaming-data"
BQ_DATASET = "player_data"
BQ_LOCATION = "US"
VIEW_NAME = 'dataset_test'
PIPELINE_JSON_PKG_PATH = "experiments_demo_gaming_data.json"
PIPELINE_ROOT = f"gs://{BUCKET_URI}/pipeline_root"
6. Let's Build our Pipeline
Now the fun can begin and we can start leveraging Vertex AI to build our training pipeline. We will initialize the Vertex AI SDK, setup our training job as a pipeline component, build our pipeline, submit our pipeline run(s), and leverage the Vertex AI SDK to view experiments and monitor their status.
Step 1: Initialize the Vertex AI SDK
Initialize the Vertex AI SDK, setting your PROJECT_ID and BUCKET_URI.
#initialize vertex AI SDK
vertex_ai.init(project=PROJECT_ID, staging_bucket=BUCKET_URI)
Step 2: Setup our Training Job as a Pipeline Component
In order to begin running our experiments, we will need to specify our training job by defining it as a pipeline component. Our pipeline will take in training data and hyperparameters (e.g., DROPOUT_RATE, LEARNING_RATE, EPOCHS) as inputs and output model metrics (e.g., MAE and RMSE) and a model artifact.
@component(
    packages_to_install=[
        "numpy==1.21.0",
        "pandas==1.3.5",
        "scikit-learn==1.0.2",
        "tensorflow==2.9.0",
    ]
)
def custom_trainer(
    train_uri: str,
    label_uri: str,
    dropout_rate: float,
    learning_rate: float,
    epochs: int,
    model_uri: str,
    metrics: Output[Metrics],
    model_metadata: Output[Model],


):

    # import libraries
    import logging
    import uuid
    from pathlib import Path as path

    import pandas as pd
    import tensorflow as tf
    from tensorflow import keras
    from tensorflow.keras.models import Sequential
    from tensorflow.keras.layers import Dense
    from tensorflow.keras.layers import Dropout
    from tensorflow.keras.metrics import Metric
    from sklearn.metrics import accuracy_score
    from sklearn.model_selection import train_test_split
    from sklearn.preprocessing import StandardScaler
    from sklearn.metrics import mean_absolute_error
    import numpy as np
    from math import sqrt
    import os
    import tempfile

    # set variables and use gcsfuse to update prefixes
    gs_prefix = "gs://"
    gcsfuse_prefix = "/gcs/"
    train_path = train_uri.replace(gs_prefix, gcsfuse_prefix)
    label_path = label_uri.replace(gs_prefix, gcsfuse_prefix)
    model_path = model_uri.replace(gs_prefix, gcsfuse_prefix)

    def get_logger():

        logger = logging.getLogger(__name__)
        logger.setLevel(logging.INFO)
        handler = logging.StreamHandler()
        handler.setFormatter(
            logging.Formatter("%(asctime)s - %(name)s - %(levelname)s - %(message)s")
        )
        logger.addHandler(handler)
        return logger

    def get_data(
        train_path: str,
        label_path: str
    ) -> (pd.DataFrame):


        #load data into pandas dataframe
        data_0 = pd.read_csv(train_path)
        labels_0 = pd.read_csv(label_path)

        #drop unnecessary leading columns

        data = data_0.drop('Unnamed: 0', axis=1)
        labels = labels_0.drop('Unnamed: 0', axis=1)

        #save as numpy array for reshaping of data

        labels = labels.values
        data = data.values

        # Split the data
        labels = labels.reshape((labels.size,))
        train_data, test_data, train_labels, test_labels = train_test_split(data, labels, test_size=0.2, shuffle=True, random_state=7)

        #Convert data back to pandas dataframe for scaling

        train_data = pd.DataFrame(train_data)
        test_data = pd.DataFrame(test_data)
        train_labels = pd.DataFrame(train_labels)
        test_labels = pd.DataFrame(test_labels)

        #Scale and normalize the training dataset

        scaler = StandardScaler()
        scaler.fit(train_data)
        train_data = pd.DataFrame(scaler.transform(train_data), index=train_data.index, columns=train_data.columns)
        test_data = pd.DataFrame(scaler.transform(test_data), index=test_data.index, columns=test_data.columns)

        return train_data,train_labels, test_data, test_labels

        """ Train your Keras model passing in the training data and values for learning rate, dropout rate,and the number of epochs """

    def train_model(
        learning_rate: float,
        dropout_rate: float,
        epochs: float,
        train_data: pd.DataFrame,
        train_labels: pd.DataFrame):

        # Train tensorflow model
        param = {"learning_rate": learning_rate, "dropout_rate": dropout_rate, "epochs": epochs}
        model = Sequential()
        model.add(Dense(500, input_dim=train_data.shape[1], activation= "relu"))
        model.add(Dropout(param['dropout_rate']))
        model.add(Dense(100, activation= "relu"))
        model.add(Dense(50, activation= "relu"))
        model.add(Dense(1))

        model.compile(
        tf.keras.optimizers.Adam(learning_rate= param['learning_rate']),
        loss='mse',
        metrics=[tf.keras.metrics.RootMeanSquaredError(),tf.keras.metrics.MeanAbsoluteError()])

        model.fit(train_data, train_labels, epochs= param['epochs'])

        return model

    # Get Predictions
    def get_predictions(model, test_data):

        dtest = pd.DataFrame(test_data)
        pred = model.predict(dtest)
        return pred

    # Evaluate predictions with MAE
    def evaluate_model_mae(pred, test_labels):

        mae = mean_absolute_error(test_labels, pred)
        return mae

    # Evaluate predictions with RMSE
    def evaluate_model_rmse(pred, test_labels):

        rmse = np.sqrt(np.mean((test_labels - pred)**2))
        return rmse


    #Save your trained model in GCS
    def save_model(model, model_path):

        model_id = str(uuid.uuid1())
        model_path = f"{model_path}/{model_id}"
        path(model_path).parent.mkdir(parents=True, exist_ok=True)
        model.save(model_path + '/model_tensorflow')


    # Main ----------------------------------------------

    train_data, train_labels, test_data, test_labels = get_data(train_path, label_path)
    model = train_model(learning_rate, dropout_rate, epochs, train_data,train_labels )
    pred = get_predictions(model, test_data)
    mae = evaluate_model_mae(pred, test_labels)
    rmse = evaluate_model_rmse(pred, test_labels)
    save_model(model, model_path)

    # Metadata ------------------------------------------

    #convert numpy array to pandas series
    mae = pd.Series(mae)
    rmse = pd.Series(rmse)

    #log metrics and model artifacts with ML Metadata. Save metrics as a list.
    metrics.log_metric("mae", mae.to_list())
    metrics.log_metric("rmse", rmse.to_list())
    model_metadata.uri = model_uri
Step 3: Build Our Pipeline
Now we will setup our workflow using Domain Specific Language (DSL) available in KFP and compile our pipeline into a JSON file.
# define our workflow

@dsl.pipeline(name="gaming-custom-training-pipeline")
def pipeline(
    train_uri: str,
    label_uri: str,
    dropout_rate: float,
    learning_rate: float,
    epochs: int,
    model_uri: str,
):

    custom_trainer(
        train_uri,label_uri, dropout_rate,learning_rate,epochs, model_uri
    )
#compile our pipeline
compiler.Compiler().compile(pipeline_func=pipeline, package_path="gaming_pipeline.json")
Step 4: Submit our Pipeline Run(s)
The hard work is done setting up our component and defining our pipeline. We are ready to submit various runs of the pipeline that we specified above. In order to do this, we will need to define the values for our different hyperparameters as follows:
runs = [
    {"dropout_rate": 0.001, "learning_rate": 0.001,"epochs": 20},
    {"dropout_rate": 0.002, "learning_rate": 0.002,"epochs": 25},
    {"dropout_rate": 0.003, "learning_rate": 0.003,"epochs": 30},
    {"dropout_rate": 0.004, "learning_rate": 0.004,"epochs": 35},
    {"dropout_rate": 0.005, "learning_rate": 0.005,"epochs": 40},
]
With the hyperparameters defined, we can then leverage a for loop to successfully feed in the different runs of the pipeline:
for i, run in enumerate(runs):

    job = vertex_ai.PipelineJob(
        display_name=f"{EXPERIMENT_NAME}-pipeline-run-{i}",
        template_path="gaming_pipeline.json",
        pipeline_root=PIPELINE_URI,
        parameter_values={
            "train_uri": TRAIN_URI,
            "label_uri": LABEL_URI,
            "model_uri": MODEL_URI,
            **run,
        },
    )
    job.submit(experiment=EXPERIMENT_NAME)
Step 5: Leverage the Vertex AI SDK to View Experiments
The Vertex AI SDK allows you to monitor the status of pipeline runs. You can also use it to return parameters and metrics of the Pipeline Runs in the Vertex AI Experiment. Use the following code to see the parameters associated with your runs and its current state.
# see state/status of all the pipeline runs

vertex_ai.get_experiment_df(EXPERIMENT_NAME)
You can leverage the below code to get updates on the status of your pipeline runs.
#check on current status
while True:
    pipeline_experiments_df = vertex_ai.get_experiment_df(EXPERIMENT_NAME)
    if all(
        pipeline_state != "COMPLETE" for pipeline_state in pipeline_experiments_df.state
    ):
        print("Pipeline runs are still running...")
        if any(
            pipeline_state == "FAILED"
            for pipeline_state in pipeline_experiments_df.state
        ):
            print("At least one Pipeline run failed")
            break
    else:
        print("Pipeline experiment runs have completed")
        break
    time.sleep(60)
You can also call specific pipeline jobs using the run_name.
# Call the pipeline runs based on the experiment run name
pipeline_experiments_df = vertex_ai.get_experiment_df(EXPERIMENT_NAME)
job = vertex_ai.PipelineJob.get(pipeline_experiments_df.run_name[0])
print(job.resource_name)
print(job._dashboard_uri())
Finally, you can refresh the state of your runs at set intervals (such as every 60 seconds) to see the states change from RUNNING to FAILED or COMPLETE.
# wait 60 seconds and view state again
import time
time.sleep(60)
vertex_ai.get_experiment_df(EXPERIMENT_NAME)
7. Identify the Best Performing Run
Great, we now have the results of our pipeline runs. You might be asking, what can I learn from the results? The output from your experiments should contain five rows, one for each run of the pipeline. It will look something like the following:
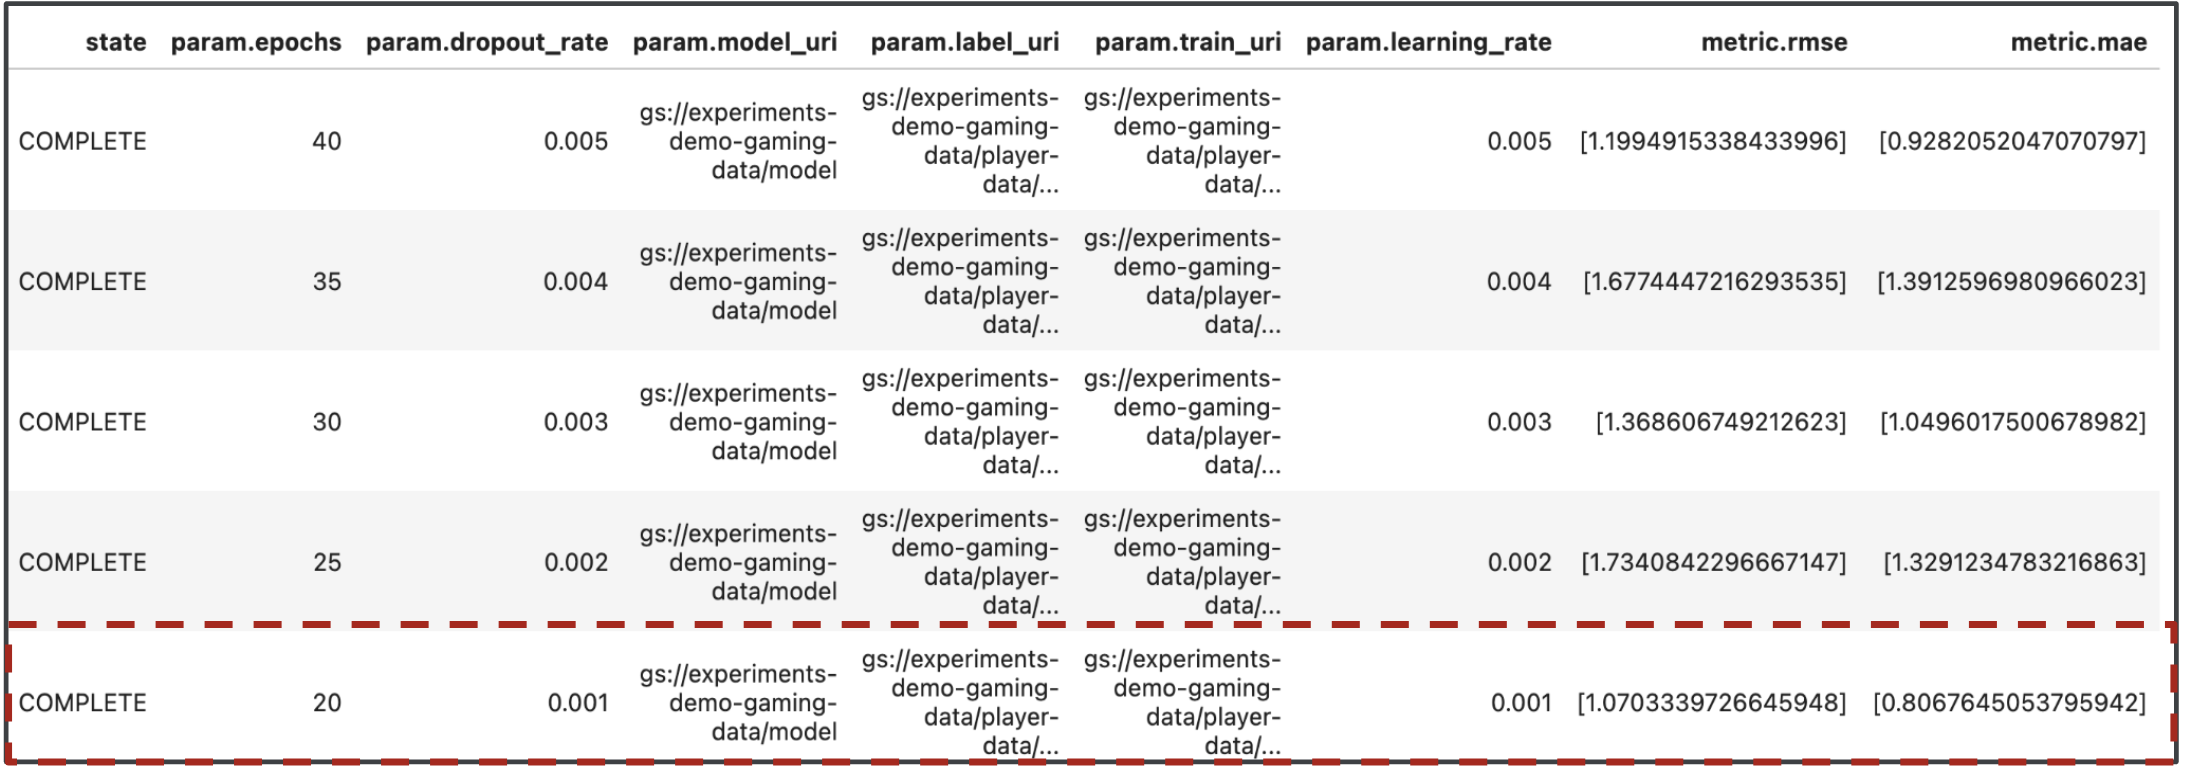
Both MAE and RMSE are measures of the average model prediction error so a lower value for both metrics is desirable in most cases. We can see based on the output from Vertex AI Experiments that our most successful run across both metrics was the final run with a dropout_rate of 0.001, a learning_rate if 0.001, and the total number of epochs being 20. Based on this experiment, these model parameters would ultimately be used in production as it results in the best model performance.
With that, you've finished the lab!
🎉 Congratulations! 🎉
You've learned how to use Vertex AI to:
- Train a custom Keras Model to predict player ratings (e.g., regression)
- Use the Kubeflow Pipelines SDK to build scalable ML pipelines
- Create and run a 5-step pipeline that ingests data from GCS, scales the data, trains the model, evaluates it, and saves the resulting model back into GCS
- Leverage Vertex ML Metadata to save model artifacts such as Models and Model Metrics
- Utilize Vertex AI Experiments to compare results of the various pipeline runs
To learn more about different parts of Vertex, check out the documentation.
8. Cleanup
So that you're not charged, it is recommended that you delete the resources created throughout this lab.
Step 1: Stop or delete your Notebooks instance
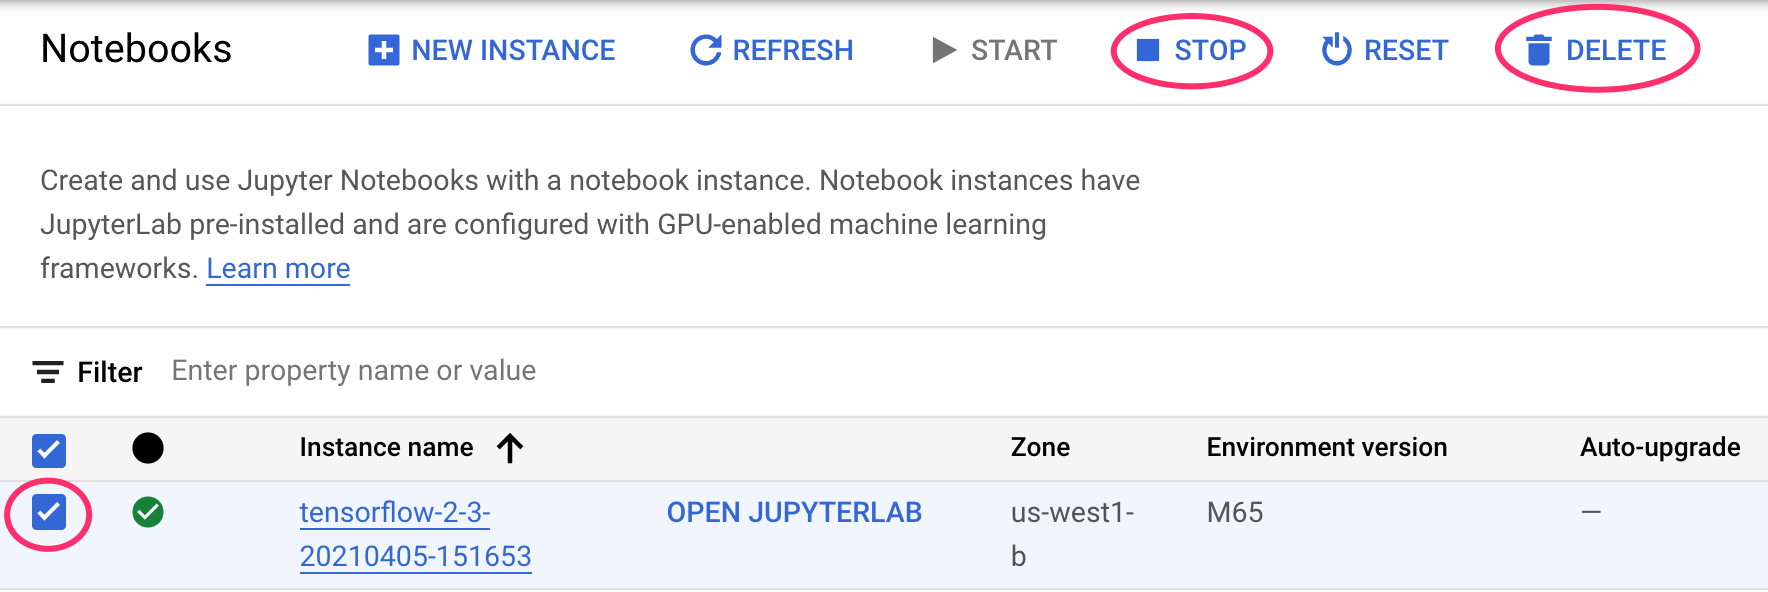
If you'd like to continue using the notebook you created in this lab, it is recommended that you turn it off when not in use. From the Notebooks UI in your Cloud Console, select the notebook and then select Stop. If you'd like to delete the instance entirely, select Delete:
Step 2: Delete your Cloud Storage bucket
To delete the Storage Bucket, using the Navigation menu in your Cloud Console, browse to Storage, select your bucket, and click Delete:

