
1. Overview
In this codelab, you will build a "Snake & Beats" web application, a retro Snake game with an integrated music player. You will use Gemini to generate a single-file React application with a neon aesthetic, then version control and deploy it to Cloud Run.
What you'll do
- Build & Prompt: Use Google AI Studio's "Build" mode to generate a working game from a single prompt.
- Refine with System Instructions: "Vibe Check" your AI by setting a persistent persona for future edits.
- Save to GitHub: Bootstrap a new repository directly from AI Studio.
- Deploy to Cloud Run: Ship your game to Google Cloud Run with one click.
What you'll learn
- How to use Build Mode in Google AI Studio to rapid-prototype apps.
- How to use System Instructions to maintain a consistent "coding vibe" during iteration.
- How to connect Google AI Studio to GitHub and Cloud Run.
What you'll need
- Chrome web browser
- A Gmail account
- A Cloud Project with billing enabled
- A Gemini API Key
- A GitHub Account
2. Before you begin
- In the Google Cloud Console, on the project selector page, select or create a Google Cloud project.
- Make sure that billing is enabled for your Cloud project. Learn how to check if billing is enabled on a project .
3. Build & Prompt (The Core)
We are going to start by building the entire application in one go. Login to Google AI Studio and ensure you are in the Build interface.
- Enter the Build Prompt: Paste the following detailed prompt into the chat box:
Build a React web app that is a Music Player and a Snake Game combined. Use Tailwind CSS with a dark neon aesthetic. I want to be able to play Snake in the center window while the demo music plays in the background. Add 3 dummy ai generated music. Include controls for the music (play/pause/skip) and a score counter for the game.
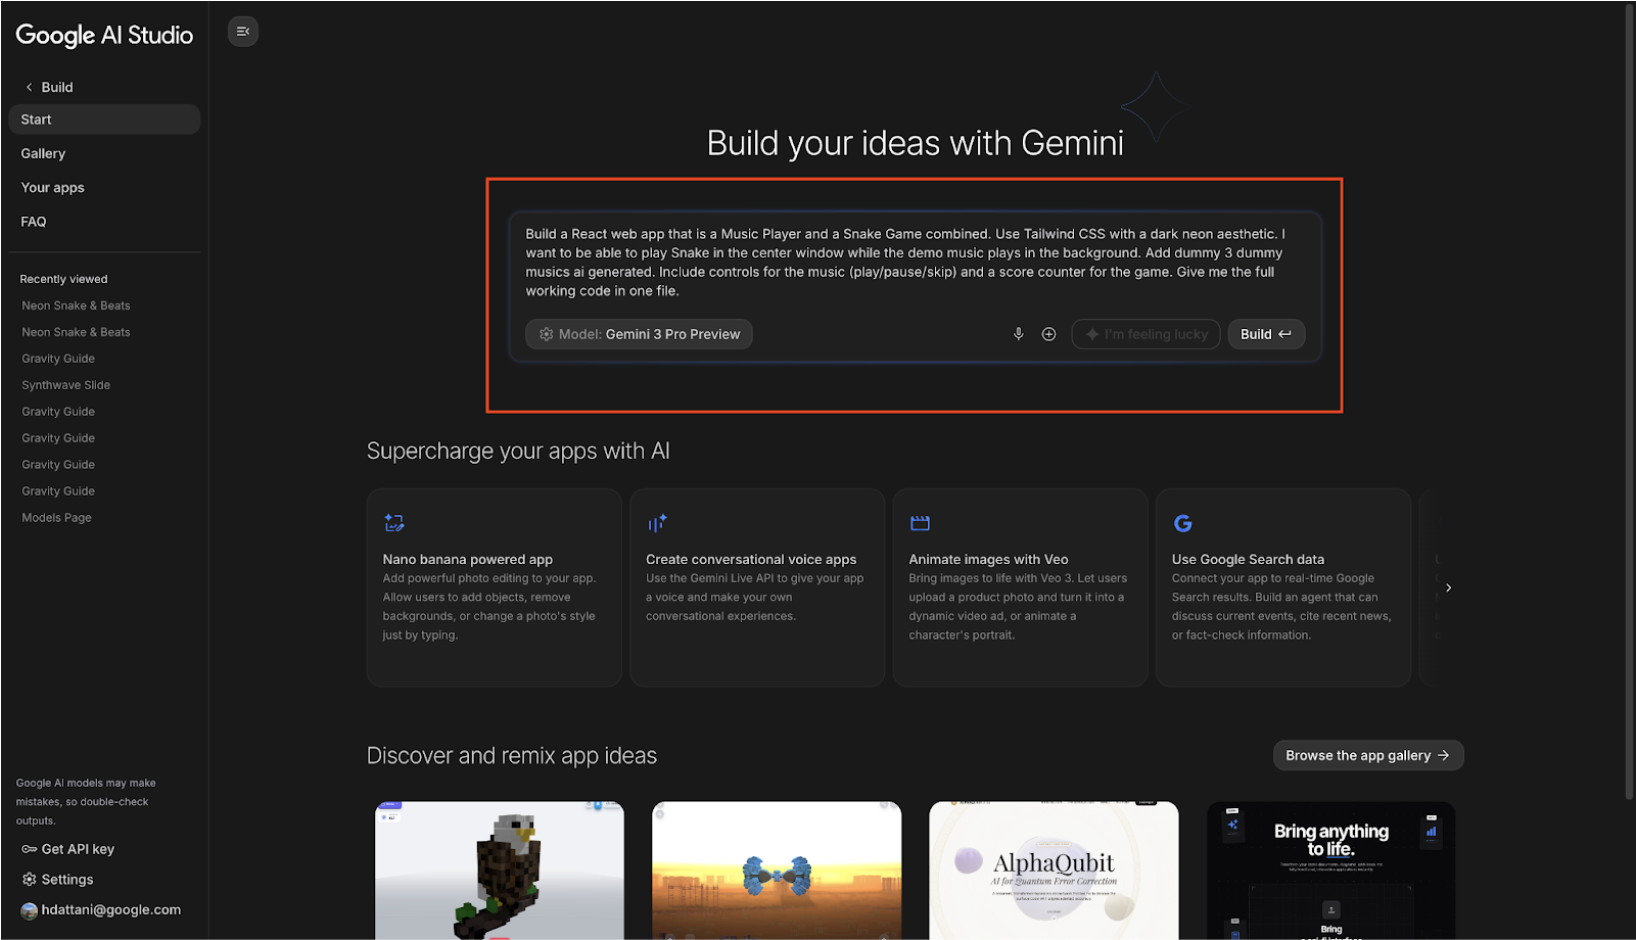
- Select Your Model: In the right-hand settings panel, ensure Gemini 3.0 Pro (or the latest preview model) is selected for the fastest code generation.
- Run: Hit Build (or press Cmd + Enter).
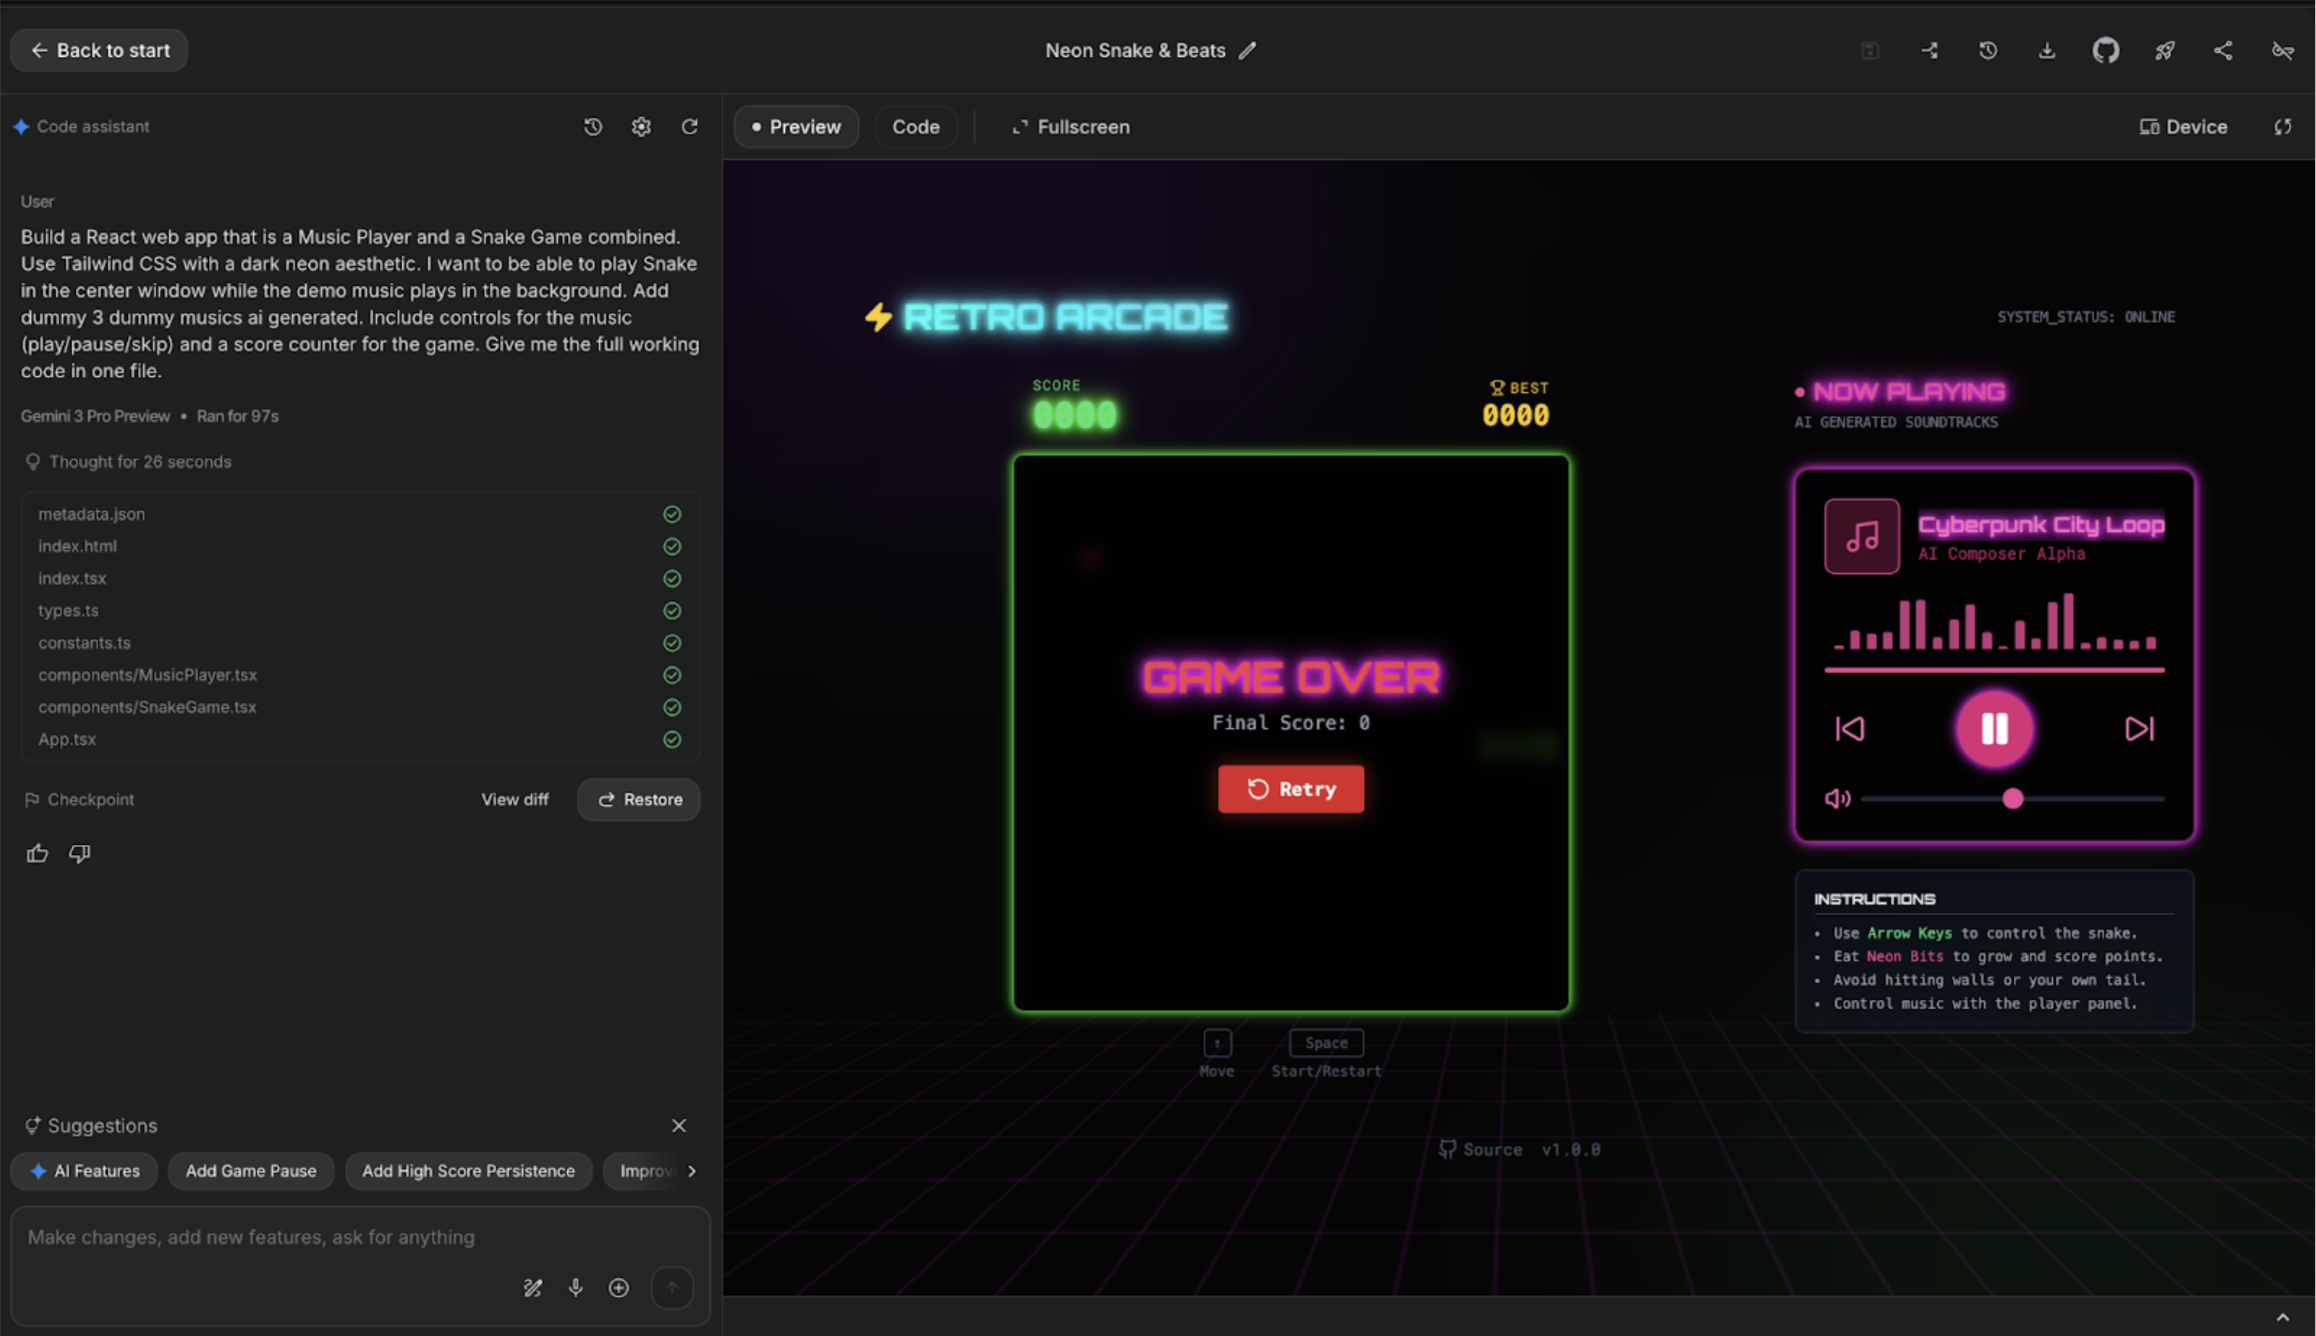
- Preview: Gemini will generate the code and typically render a Live Preview on the right side (as shown below):
4. Refine with Annotation, Images & Voice
Sometimes, it is hard to describe a visual change in words. Annotation Mode allows you to draw on your app preview to communicate your vision instantly.
Use Annotation Mode
- Activate Annotation Mode: In the AI Studio interface (check the left side panel or the bottom toolbar of the preview window), select the Annotation or Refine tool.
- Mark Up Your App:
- Draw: Use the box tool to draw a rectangle around the Score Counter.
- Comment: Type a prompt attached to that box: "Make this font larger, digital, and glitchy."
- Sketch: Use the arrow tool to point to the Play/Pause buttons.
- Comment: Type: "Change these to glowing neon icons."

- Iterate: Click "Add to chat", and then hit Send prompt. Gemini will interpret your visual markings and the text commands to update the code.
- Verify: Watch the preview update live. Your visual feedback should now be reflected in the code!
Voice Input (The Spoken Vibe)
Sometimes the "vibe" is easier to say than to write.
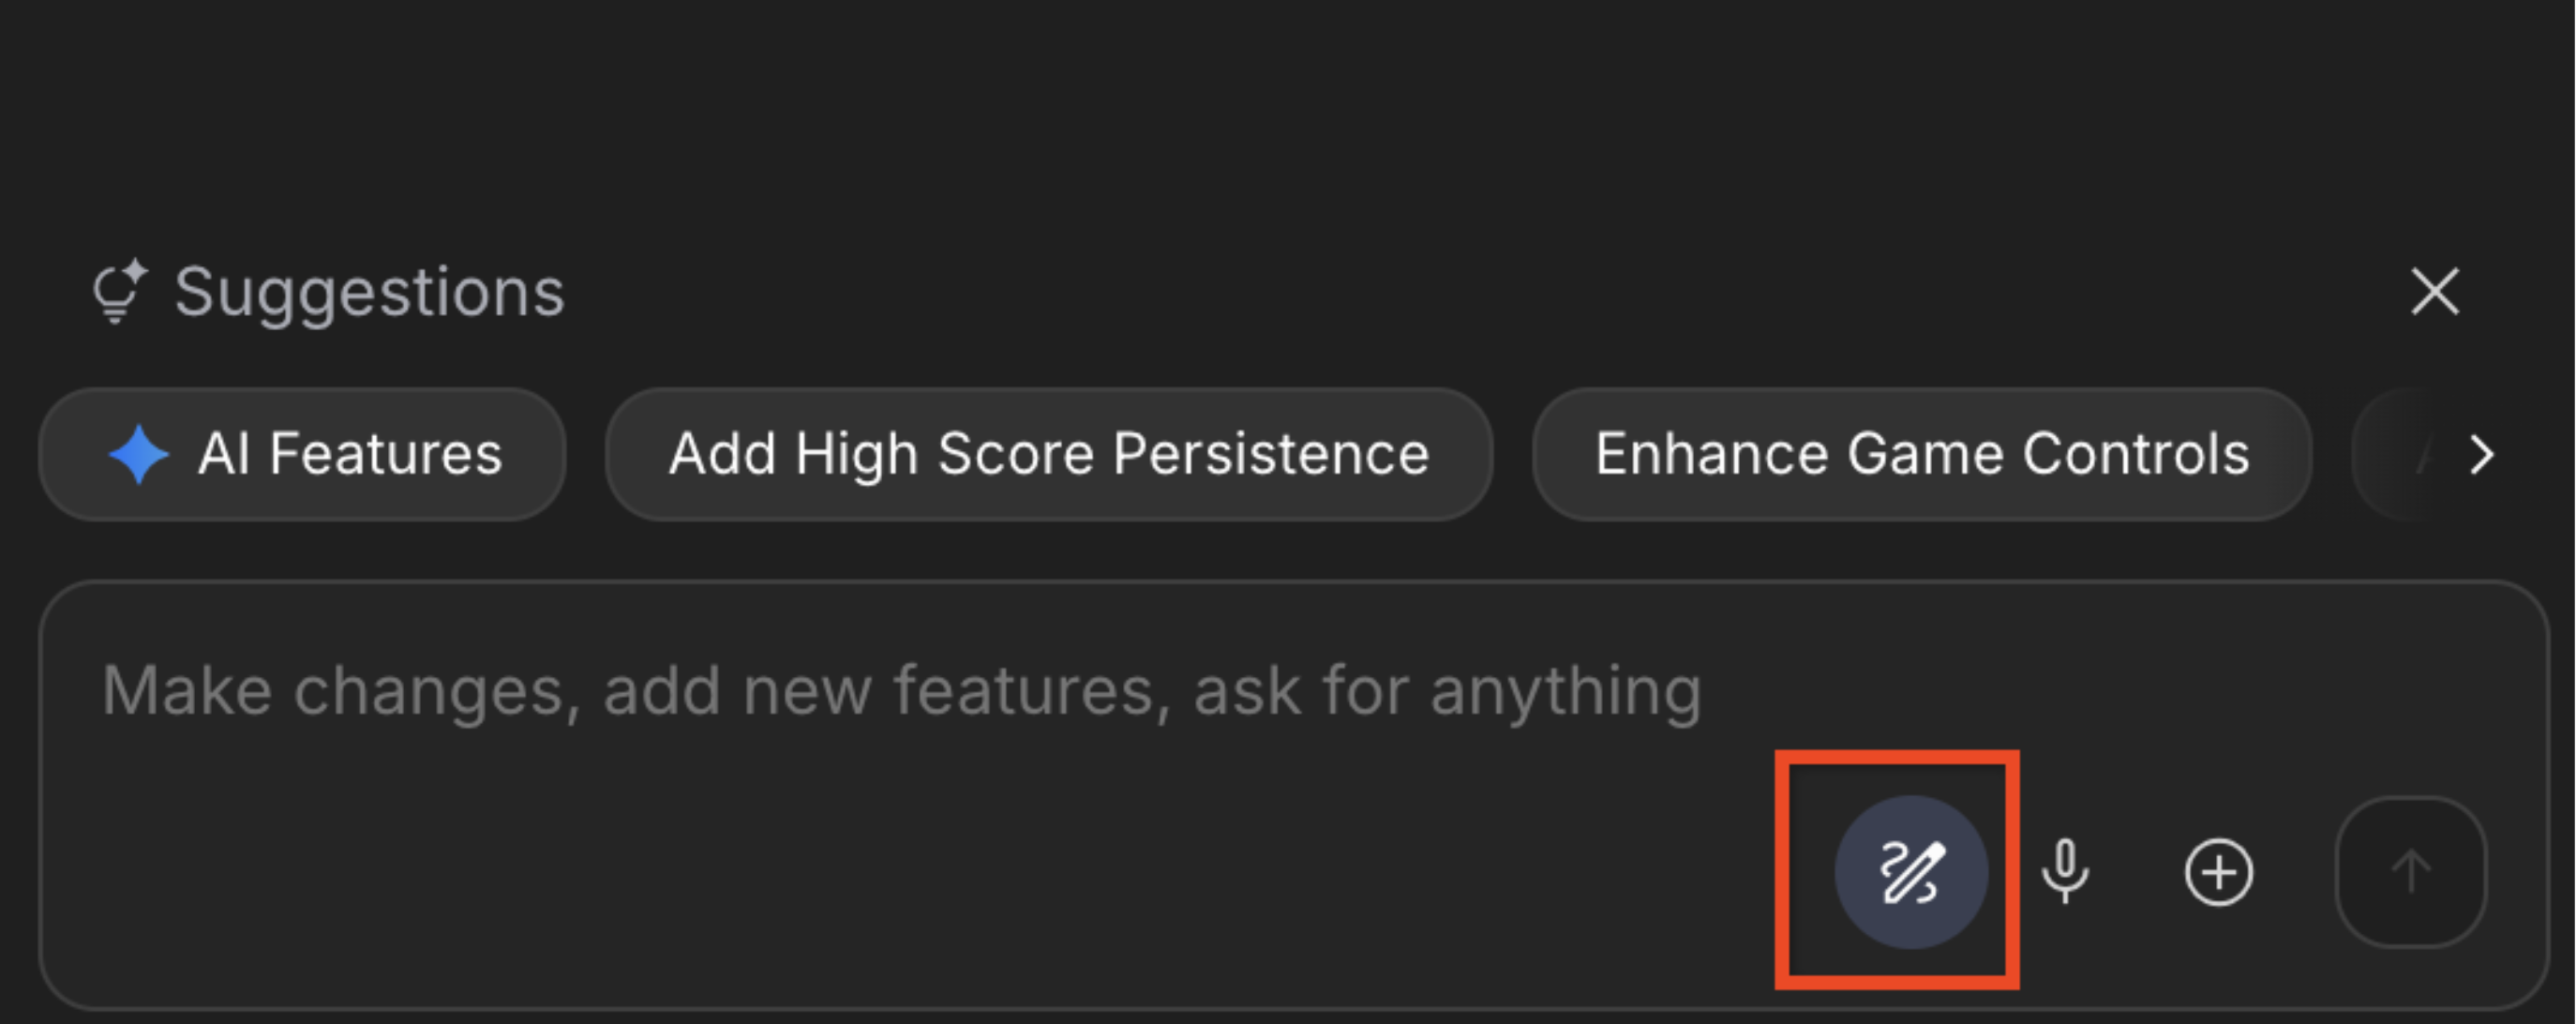
- Action: Click the Microphone icon in the input bar (next to the + button).

- Speak: "Hey, the animation on the snake is too slow. Speed it up and make the tail leave a glowing trail."
- Send: Gemini converts your speech to text and applies the changes.
5. Set System Instructions & Rebuild
Unlike a normal prompt, system instruction persists throughout the entire session. It is the best place to define your coding standards, naming conventions, or a specific visual persona that shouldn't change.
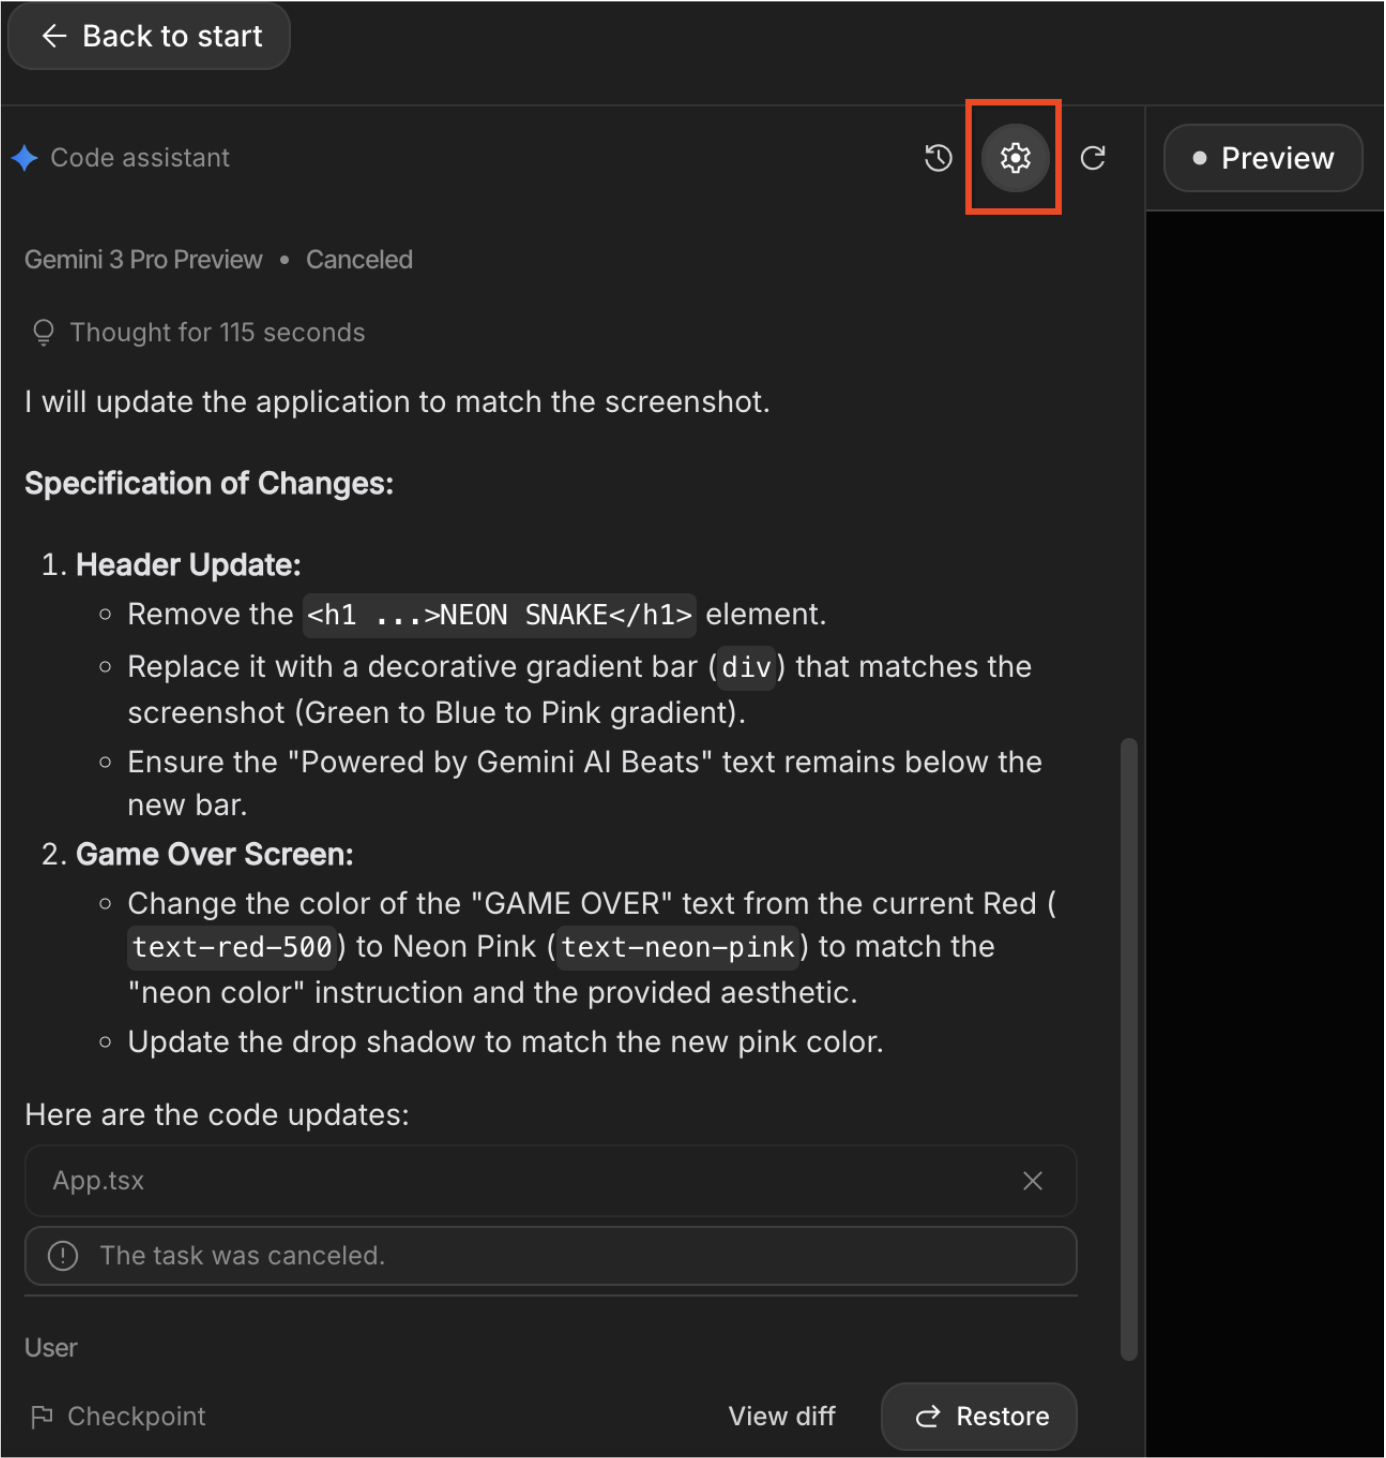
- Open Advanced Settings: In the Google AI Studio interface (Build Mode), look for the System Instructions box. If it's not visible, click the Settings (gear icon) or Advanced settings at the top or side of the chat panel.
- Add the "Vibe" Instruction: Paste the following instruction into the text box. This defines a "Glitch Art" persona for our game:
You are a Retro-Futurist UI Designer and Senior React Engineer. Visual Style: 'Glitch Art'. Use raw, pixelated fonts, jarring color contrasts (Cyan vs. Magenta), and CSS animations that simulate screen tearing or static noise. Tone: Cryptic and machine-like.
- Triggering the Change: Changing the System Instruction doesn't automatically rewrite the code. You must tell Gemini to apply these new rules.
- Close the settings panel.
- In the Chat/Prompt input, type: "Rebuild the application UI to strictly follow the new System Instructions."
- Click Run / Send.
- Observe the Update: Gemini will acknowledge the change.
6. Save to GitHub
Instead of downloading files and fighting with the command line, we will use the built-in GitHub integration to bootstrap a repository instantly.
- Locate the Integration: In the top toolbar of the Google AI Studio interface, look for the GitHub icon located between the Download and Deploy icons.

- Connect Your Account: Click the icon. If this is your first time, you will be prompted to authorize Google AI Studio to access your GitHub account.
- Create the Repository: A dialog box will appear titled "Fill out the information below to create your repo".
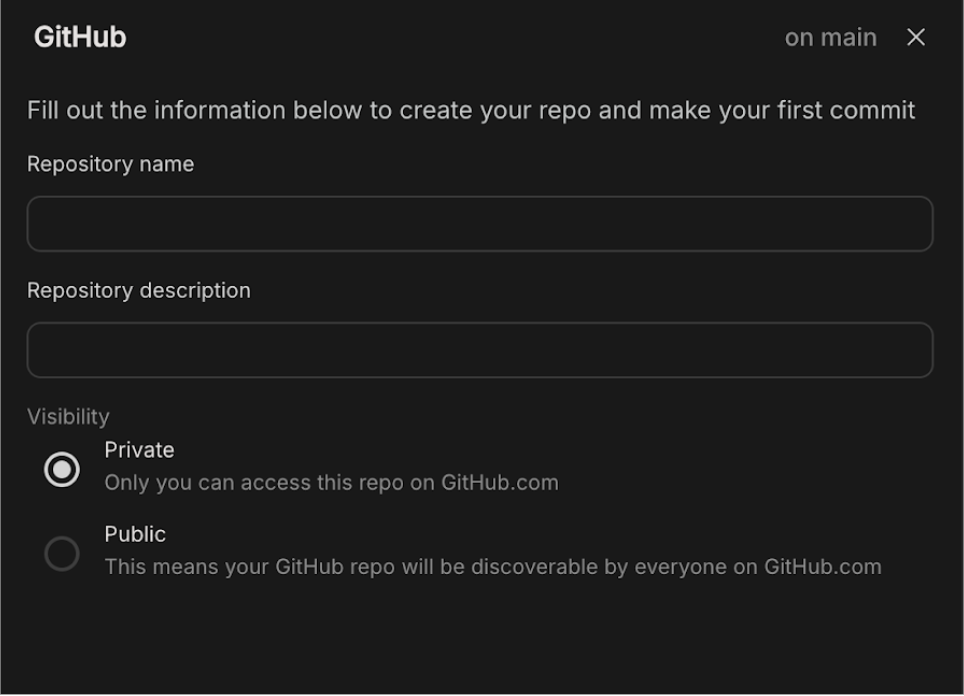
- Repository name: Enter a name, e.g., "AI-generated Snake game with React."
- Repository Description: Enter repository description.
- Visibility: Select Public (so you can share it easily) or Private.
- Push to GitHub: Click the "Create Git repo" button.
7. Deploy to Cloud Run
Now that the application is ready and saved to GitHub, let us deploy it to Cloud Run.
- Initiate Deployment: Click on the button highlighted below. It is located on the top right corner of the AI Studio page.

- Select Project: Click the Select a Cloud Project dropdown and Select your project from the dropdown.
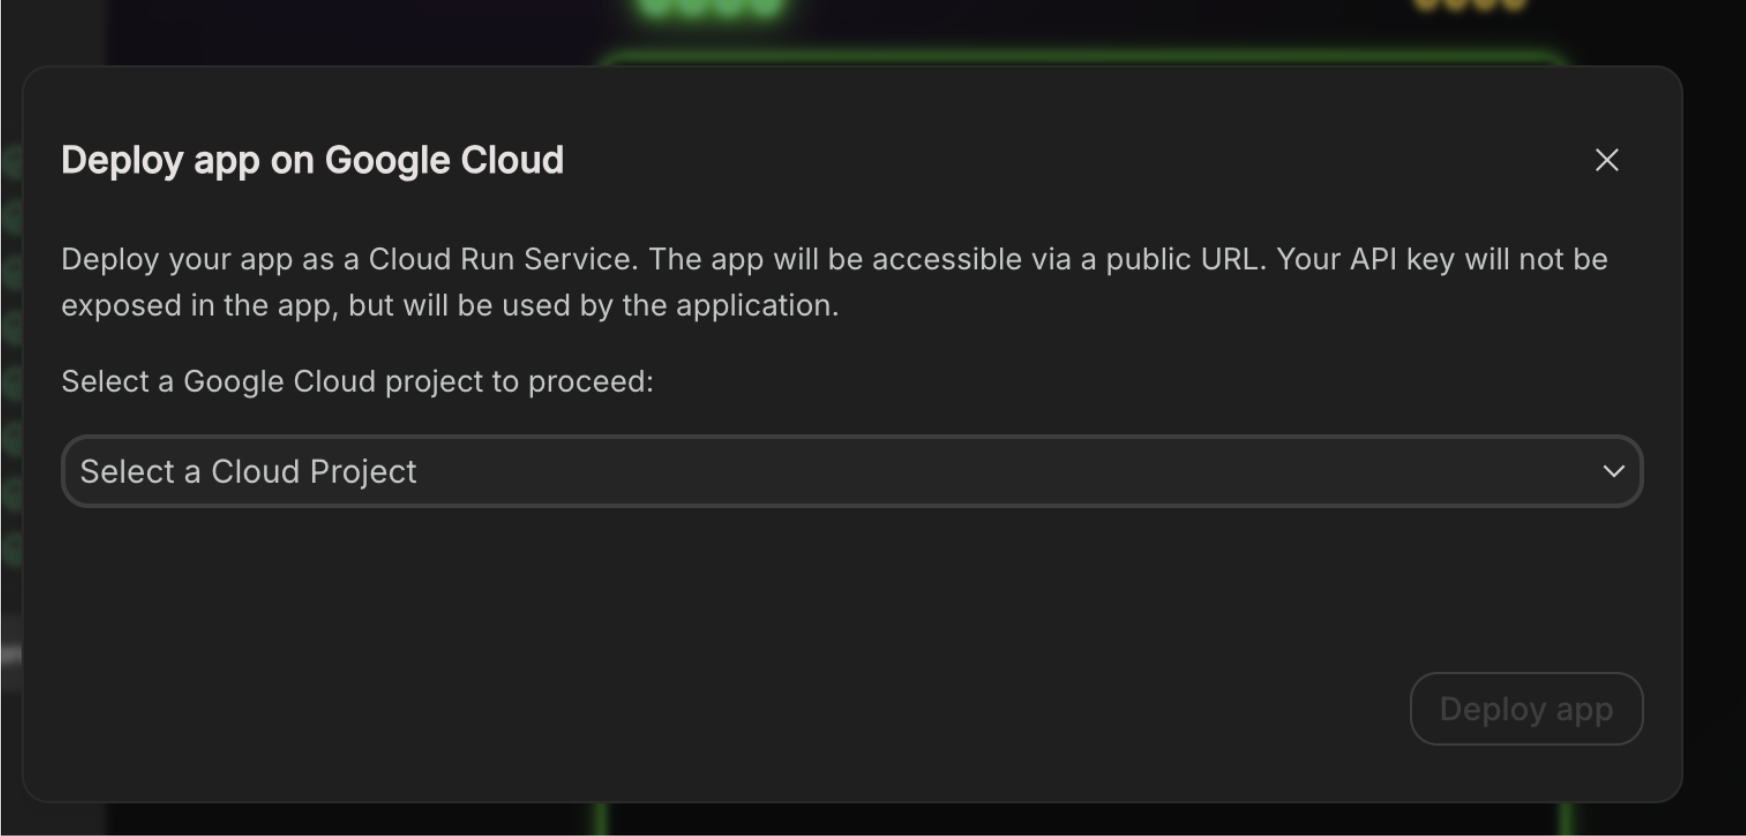
- Troubleshooting: In case you are not able to find your project in the dropdown, click on Import project, and select your project from the Import project pane.
- Billing Verification: Once you select the project, the project is verified to have billing enabled. This verification will pass automatically as we attached the billing account to the project in the "Before you begin" section.
- Deploy: Click the Deploy app button, and wait for the application to be deployed on Cloud Run. Note: The Cloud Run service name will be auto-generated.
- The deployment should complete in a couple of minutes, and you will get the App URL. Clicking on the URL, you get to see your deployed web application live on the internet!
8. Clean up
To avoid incurring charges to your Google Cloud account for the resources used in this post, follow these steps:
- In the Google Cloud console, go to the Manage resources page.
- In the project list, select the project that you want to delete, and then click Delete.
- In the dialog, type the project ID, and then click Shut down to delete the project.
9. Congratulations
Congratulations! You have successfully completed vibe-coding an application on AI Studio, and deployed it to Cloud Run!!
AI Studio is an ideal, go-to platform for developing and testing applications, allowing users to immediately visualize their designs in action.
The seamless integration of AI Studio with Cloud Run enables users to effortlessly deploy their applications directly onto Google Cloud. Utilizing Cloud Run grants all the inherent benefits of a serverless environment, abstracting away the complexities and overhead of infrastructure management.