
1. Overview
In the rush to build GenAI applications, we often forget the most critical component: Safety.
Imagine building an HR Chatbot. You want it to answer questions like "What is my salary?" or "How is my team performing?"
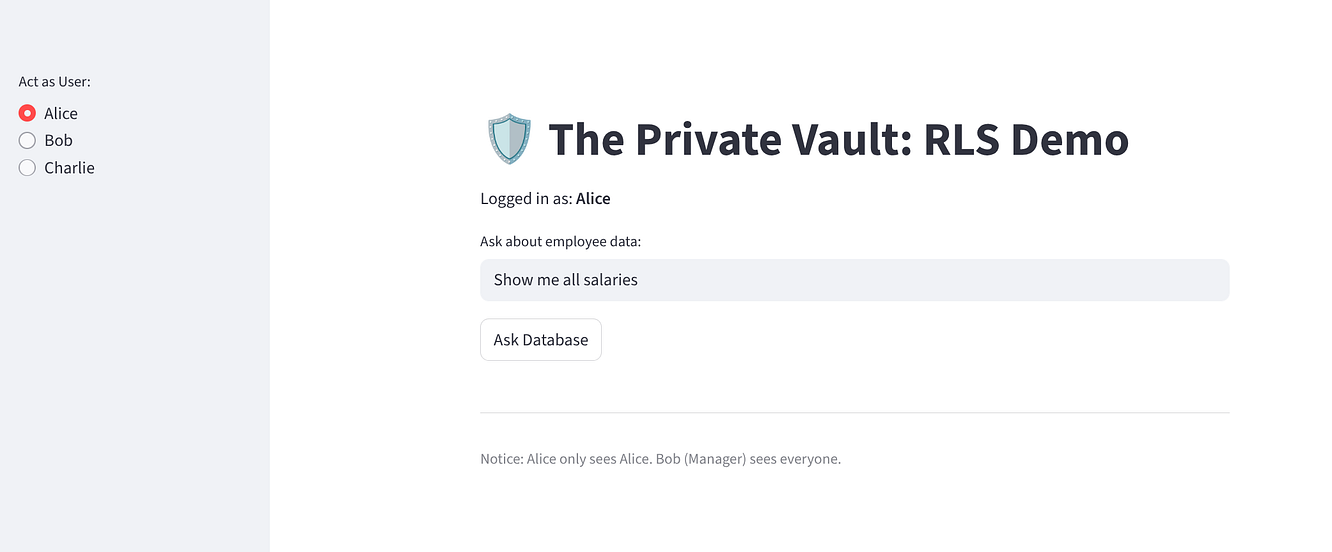
- If Alice (a regular employee) asks, she should only see her data.
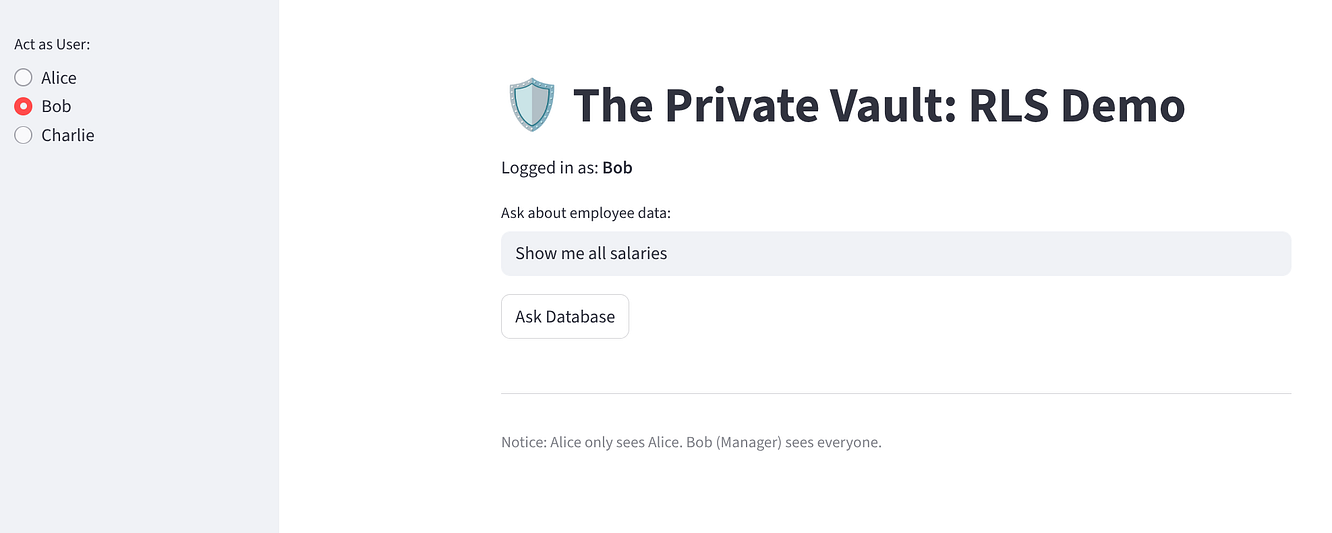
- If Bob (a manager) asks, he should see his team's data.
The Problem
Most RAG (Retrieval Augmented Generation) architectures try to handle this in the Application Layer. They filter chunks after retrieving them, or they rely on the LLM to "behave." This is fragile. If the app logic fails, data leaks.
The Solution
Push security down to the Database Layer. By using PostgreSQL Row-Level Security (RLS) in AlloyDB, we ensure that the database physically refuses to return data the user isn't allowed to see — no matter what the AI asks for.
In this guide, we will build "The Private Vault": A Secure HR Assistant that dynamically changes its answers based on who is logged in.
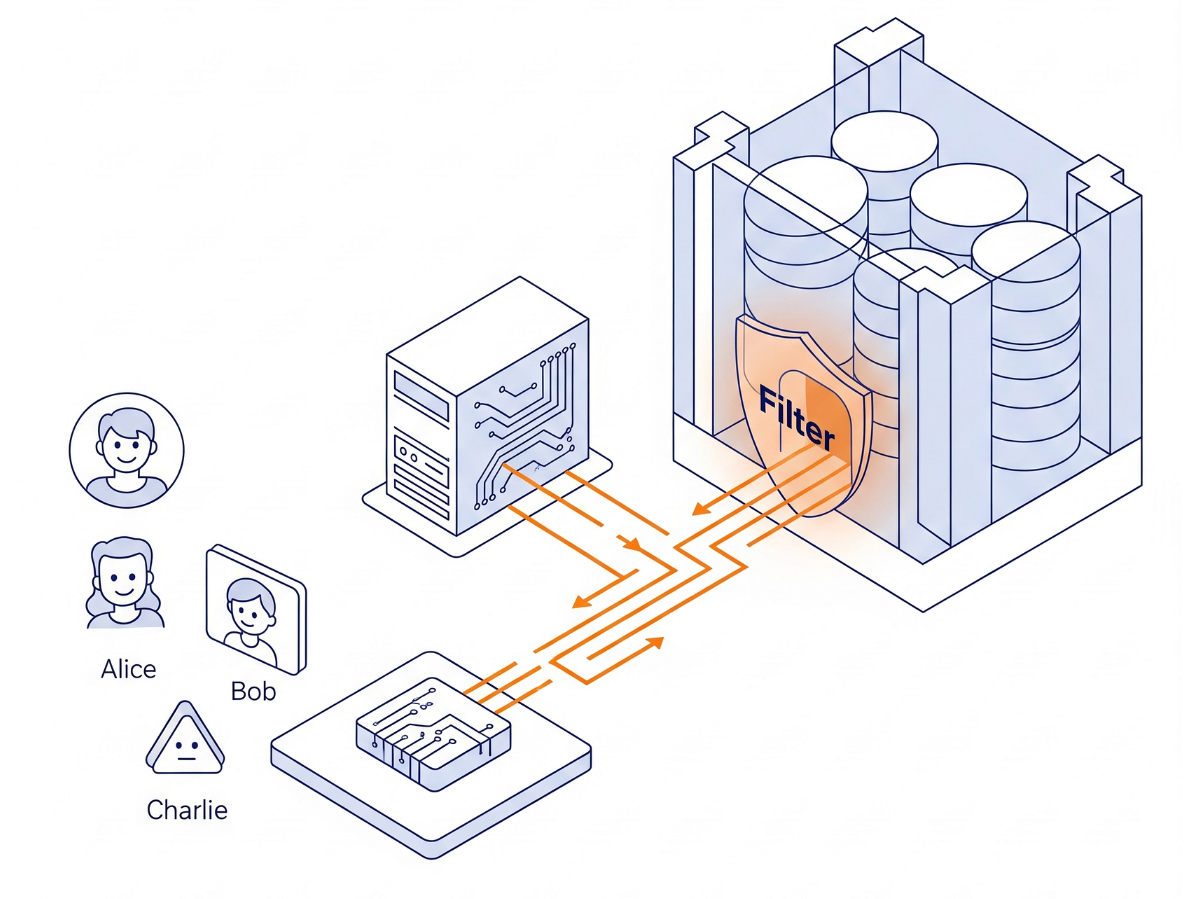
The Architecture
We aren't building complex permission logic in Python. We are using the database engine itself.
- The Interface: A simple Streamlit app simulating a login.
- The Brain: AlloyDB AI (PostgreSQL compatible).
- The Mechanism: We set a session variable (
app.active_user) at the start of every transaction. The database policies automatically check auser_rolestable (acting as our Identity Provider) to filter the rows.
What you'll build
A secure HR Assistant application. Instead of relying on application logic to filter sensitive data, you will implement Row-Level Security (RLS) directly in the AlloyDB database engine. This ensures that even if your AI model "hallucinates" or tries to access unauthorized data, the database will physically refuse to return it.
What you'll learn
You will learn:
- How to design a schema for RLS (separating Data vs. Identity).
- How to write PostgreSQL Policies (
CREATE POLICY). - How to bypass the "Table Owner" exemption using
FORCE ROW LEVEL SECURITY. - How to build a Python app that performs "Context Switching" for users.
Requirements
2. Before you begin
Create a project
- In the Google Cloud Console, on the project selector page, select or create a Google Cloud project.
- Make sure that billing is enabled for your Cloud project. Learn how to check if billing is enabled on a project.
- You'll use Cloud Shell, a command-line environment running in Google Cloud. Click Activate Cloud Shell at the top of the Google Cloud console.

- Once connected to Cloud Shell, you check that you're already authenticated and that the project is set to your project ID using the following command:
gcloud auth list
- Run the following command in Cloud Shell to confirm that the gcloud command knows about your project.
gcloud config list project
- If your project is not set, use the following command to set it:
gcloud config set project <YOUR_PROJECT_ID>
- Enable the required APIs: Follow the link and enable the APIs.
Alternatively you can use the gcloud command for this. Refer documentation for gcloud commands and usage.
gcloud services enable \
  alloydb.googleapis.com \
  compute.googleapis.com \
  cloudresourcemanager.googleapis.com \
  servicenetworking.googleapis.com \
  aiplatform.googleapis.com
Gotchas & Troubleshooting
The "Ghost Project" Syndrome | You ran |
The Billing Barricade | You enabled the project, but forgot the billing account. AlloyDB is a high-performance engine; it won't start if the "gas tank" (billing) is empty. |
API Propagation Lag | You clicked "Enable APIs," but the command line still says |
Quota Quags | If you're using a brand-new trial account, you might hit a regional quota for AlloyDB instances. If |
3. Database setup
In this lab we'll use AlloyDB as the database for the test data. It uses clusters to hold all of the resources, such as databases and logs. Each cluster has a primary instance that provides an access point to the data. Tables will hold the actual data.
Let's create an AlloyDB cluster, instance and table where the test dataset will be loaded.
- Click the button or Copy the link below to your browser where you have the Google Cloud Console user logged in.
- Once this step is complete the repo will be cloned to your local cloud shell editor and you will be able to run the command below from with the project folder (important to make sure you are in the project directory):
sh run.sh
- Now use the UI (clicking the link in the terminal or clicking the "preview on web" link in the terminal.
- Enter your details for project id, cluster and instance names to get started.
- Go grab a coffee while the logs scroll & you can read about how it's doing this behind the scenes here. It may take about 10-15 minutes.
Gotchas & Troubleshooting
The "Patience" Problem | Database clusters are heavy infrastructure. If you refresh the page or kill the Cloud Shell session because it "looks stuck," you might end up with a "ghost" instance that is partially provisioned and impossible to delete without manual intervention. |
Region Mismatch | If you enabled your APIs in |
Zombie Clusters | If you previously used the same name for a cluster and didn't delete it, the script might say the cluster name already exists. Cluster names must be unique within a project. |
Cloud Shell Timeout | If your coffee break takes 30 minutes, Cloud Shell might go to sleep and disconnect the |
4. Schema Provisioning
In this step, we'll cover the following:

Here are the detailed step-by-step actions:
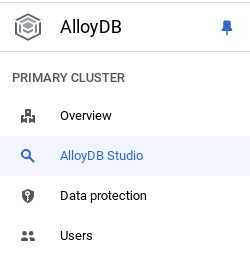
Once you have your AlloyDB cluster and instance running, head over to the AlloyDB Studio SQL editor to enable the AI extensions and provision the schema.
You may need to wait for your instance to finish being created. Once it is, sign into AlloyDB using the credentials you created when you created the cluster. Use the following data for authenticating to PostgreSQL:
- Username : "
postgres" - Database : "
postgres" - Password : "
alloydb" (or whatever you set at the time of creation)
Once you have authenticated successfully into AlloyDB Studio, SQL commands are entered in the Editor. You can add multiple Editor windows using the plus to the right of the last window.
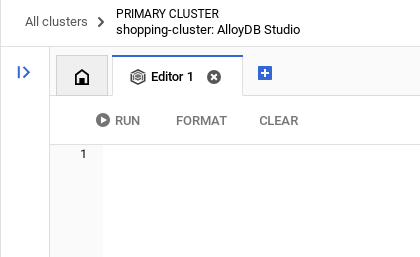
You'll enter commands for AlloyDB in editor windows, using the Run, Format, and Clear options as necessary.
Create a table
We need two tables: one for the sensitive data (employees) and one for the identity rules (user_roles). Separating them is crucial to avoid "Infinite Recursion" errors in policies.
You can create a table using the DDL statement below in the AlloyDB Studio:
-- 1. Create User Roles (The Identity Provider)
CREATE TABLE user_roles (
    username TEXT PRIMARY KEY,
    role TEXT -- 'employee', 'manager', 'admin'
);

INSERT INTO user_roles (username, role) VALUES
('Alice', 'employee'),
('Bob', 'manager'),
('Charlie', 'employee');

-- 2. Create the Data Table
CREATE TABLE employees (
    id SERIAL PRIMARY KEY,
    name TEXT,
    salary INTEGER,
    performance_review TEXT
);

INSERT INTO employees (name, salary, performance_review) VALUES
('Alice', 80000, 'Alice meets expectations but needs to improve punctuality.'),
('Bob', 120000, 'Bob is a strong leader. Team morale is high.'),
('Charlie', 85000, 'Charlie exceeds expectations. Ready for promotion.');
Gotchas & Troubleshooting
Infinite recursion detected while defining roles inside the employee table | Why it fails: If your policy says "Check the employee table to see if I'm a manager," the database has to query the table to check the policy, which triggers the policy again.Result: Infinite recursion detected.Fix: Always keep a separate lookup table (user_roles) or use actual Database Users for roles. |
Verify the data:
SELECT count(*) FROM employees;
-- Output: 3
5. Enable & Enforce Security
Now we turn on the shields. We will also create a generic "App User" that our Python code will use to connect.
Run the below SQL statement from the AlloyDB Query Editor:
-- 1. Activate RLS
ALTER TABLE employees ENABLE ROW LEVEL SECURITY;


-- 2. CRITICAL: Force RLS for Table Owners
ALTER TABLE employees FORCE ROW LEVEL SECURITY;


-- 3. Create the Application User
DO
$do$
BEGIN
   IF NOT EXISTS (SELECT FROM pg_catalog.pg_roles WHERE rolname = 'app_user') THEN
      CREATE ROLE app_user LOGIN PASSWORD 'password';
   END IF;
END
$do$;


-- 4. Grant Access
GRANT SELECT ON employees TO app_user;
GRANT SELECT ON user_roles TO app_user;
Gotchas & Troubleshooting
Testing as postgres (Superuser) and seeing all data. | Why it fails: By default, RLS does not apply to the table owner or superusers. They bypass all policies.Troubleshoot: If your policies seem "broken" (allowing everything), check if you are logged in as |
6. Create the Access Policies
We will define two rules using a Session Variable (app.active_user) that we will set from our application code later.
Run the below SQL statement from the AlloyDB Query Editor:
-- Policy 1: Self-View
-- Users can see rows where their name matches the session variable
CREATE POLICY "view_own_data" ON employees
FOR SELECT
USING (name = current_setting('app.active_user', true));

-- Policy 2: Manager-View
-- Managers can see ALL rows.
CREATE POLICY "manager_view_all" ON employees
FOR SELECT
USING (
    EXISTS (
        SELECT 1 FROM user_roles
        WHERE username = current_setting('app.active_user', true)
        AND role = 'manager'
    )
);
Gotchas & Troubleshooting
Using current_user instead of app.active_user. | Issue: Current_user is a reserved SQL keyword returning the database role (e.g., app_user). We need the application user (e.g., Alice).Fix: Always use a custom namespace like app.variable_name. |
Forgetting the | Issue: If the variable isn't set, the query crashes with an error.Fix: current_setting('...', true) returns NULL instead of crashing, which safely results in 0 rows returned. |
7. Build the "Chameleon" App
We will use Python and Streamlit to simulate the application logic.
Open Cloud Shell Terminal in Editor mode, navigate to your root folder or to the directory where you want to create this application. Create a new folder.
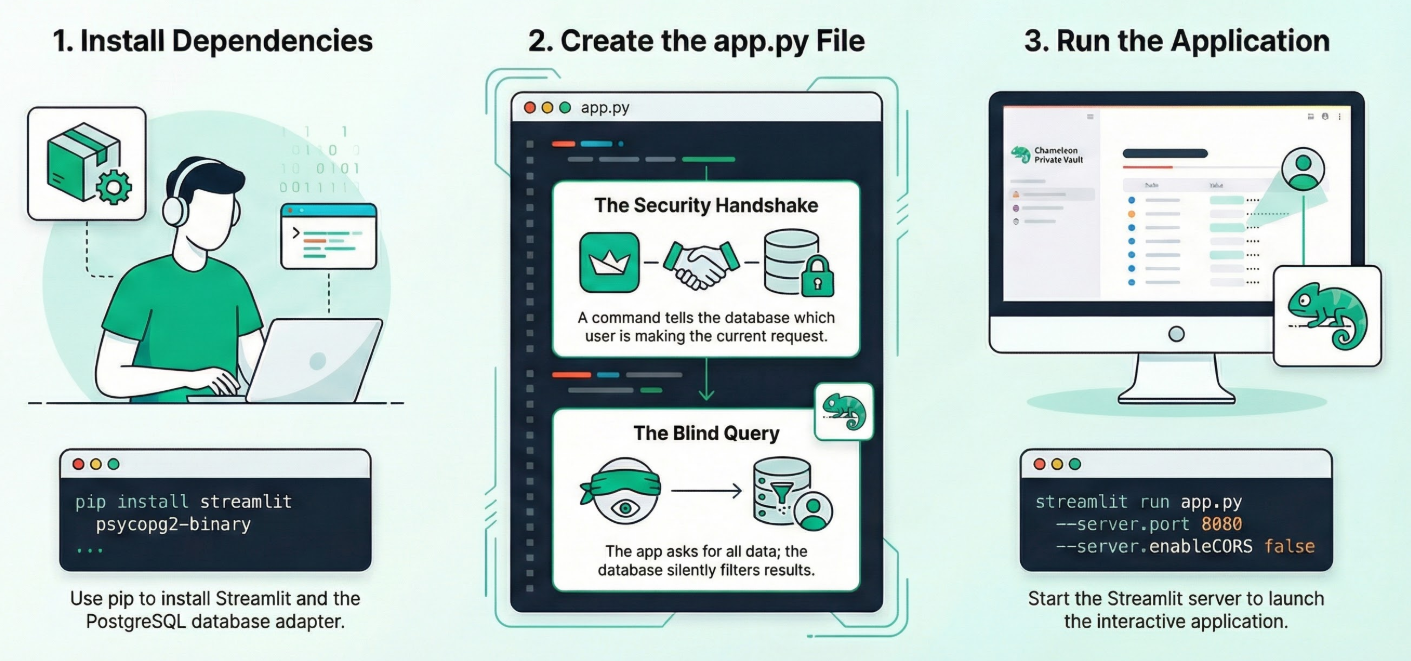
1. Install Dependencies:
Run the following command in the Cloud Shell Terminal from within your new project directory:
pip install streamlit psycopg2-binary
2. Create app.py:
Create a new file named app.py and copy the content from the repo file.
import streamlit as st
import psycopg2

# CONFIGURATION (Replace with your IP)
DB_HOST = "10.x.x.x"
DB_NAME = "postgres"
DB_USER = "postgres"
DB_PASS = "alloydb"

def get_db_connection():
    return psycopg2.connect(
        host=DB_HOST, database=DB_NAME, user=DB_USER, password=DB_PASS
    )

def query_database(user_name):
    conn = get_db_connection()
    try:
        with conn.cursor() as cur:
            # THE SECURITY HANDSHAKE
            # We tell the database: "For this transaction, I am acting as..."
            cur.execute(f"SET app.active_user = '{user_name}';")

            # THE BLIND QUERY
            # We ask for EVERYTHING. The database silently filters it.
            cur.execute("SELECT name, role, salary, performance_review FROM employees;")
            return cur.fetchall()
    finally:
        conn.close()

# UI
st.title("🛡️ The Private Vault")
user = st.sidebar.radio("Act as User:", ["Alice", "Bob", "Charlie", "Eve"])

if st.button("Access Data"):
    results = query_database(user)
    if not results:
        st.error("🚫 Access Denied.")
    else:
        st.success(f"Viewing data as {user}")
        for row in results:
            st.write(row)
3. Run the app:
Run the following command in the Cloud Shell Terminal from within your new project directory:
streamlit run app.py --server.port 8080 --server.enableCORS false
Gotchas & Troubleshooting
Connection Pooling. | Risk: If you use a connection pool, the session variable SET app.active_user might persist on the connection and "leak" to the next user who grabs that connection.Fix:In production, always use RESET app.active_user or DISCARD ALL when returning a connection to the pool. |
Blank Screen in Cloud Shell. | Fix: Use the "Web Preview" button on port 8080. Do not click the localhost link in the terminal. |
8. Verify Zero Trust
Try the app to ensure Zero Trust implementation:
Select "Alice": She should see 1 row (Herself).
Select "Bob": He should see 3 rows (Everyone).
Why this matters for AI Agents
Imagine connecting your model to this database. If a user asks your model: "Summarize all performance reviews", it will generate SELECT performance_review FROM employees.
- Without RLS: Your model retrieves everyone's private reviews and leaks them to Alice.
- With RLS: Your model runs the exact same query, but the database only returns Alice's review.
This is Zero-Trust AI. You don't trust the model to filter data; you force the database to hide it.
Taking this to Production
The architecture demonstrated here is production-grade, but the specific implementation is simplified for learning. To deploy this securely in a real-world enterprise environment, you should implement the following enhancements:
- Real Authentication: Replace the "Identity Switcher" dropdown with a robust Identity Provider (IDP) like Google Identity Platform, Okta, or Auth0. Your application should verify the user's token and extract their identity securely before setting the database session variable, ensuring users cannot spoof their identity.
- Connection Pooling Safety: When using connection pools, session variables can sometimes persist across different user requests if not handled correctly. Ensure your application resets the session variable (e.g., RESET app.active_user) or clears the connection state when returning a connection to the pool to prevent data leakage between users.
- Secret Management: Hardcoding database credentials is a security risk. Use a dedicated secret management service like Google Secret Manager to store and retrieve your database passwords and connection strings securely at runtime.
9. Clean up
Once this lab is done, do not forget to delete alloyDB cluster and instance.
It should clean up the cluster along with its instance(s).
10. Congratulations
Congratulations! You have successfully pushed security down to the data layer. Even if your Python code had a bug that tried to print(all_salaries), the database would return nothing to Alice.
Next Steps
- Try this with your own dataset.
- Explore AlloyDB AI Documentation.
- Check out the Code Vipassana website for more workshops.