
1. Introduction
Create seamless, interactive Agentic AI experiences that your customers can engage with directly from the messaging application that they have already used. Discover how to develop and deploy intelligent applications that run smoothly across web interfaces and modern messaging channels.
What you'll build
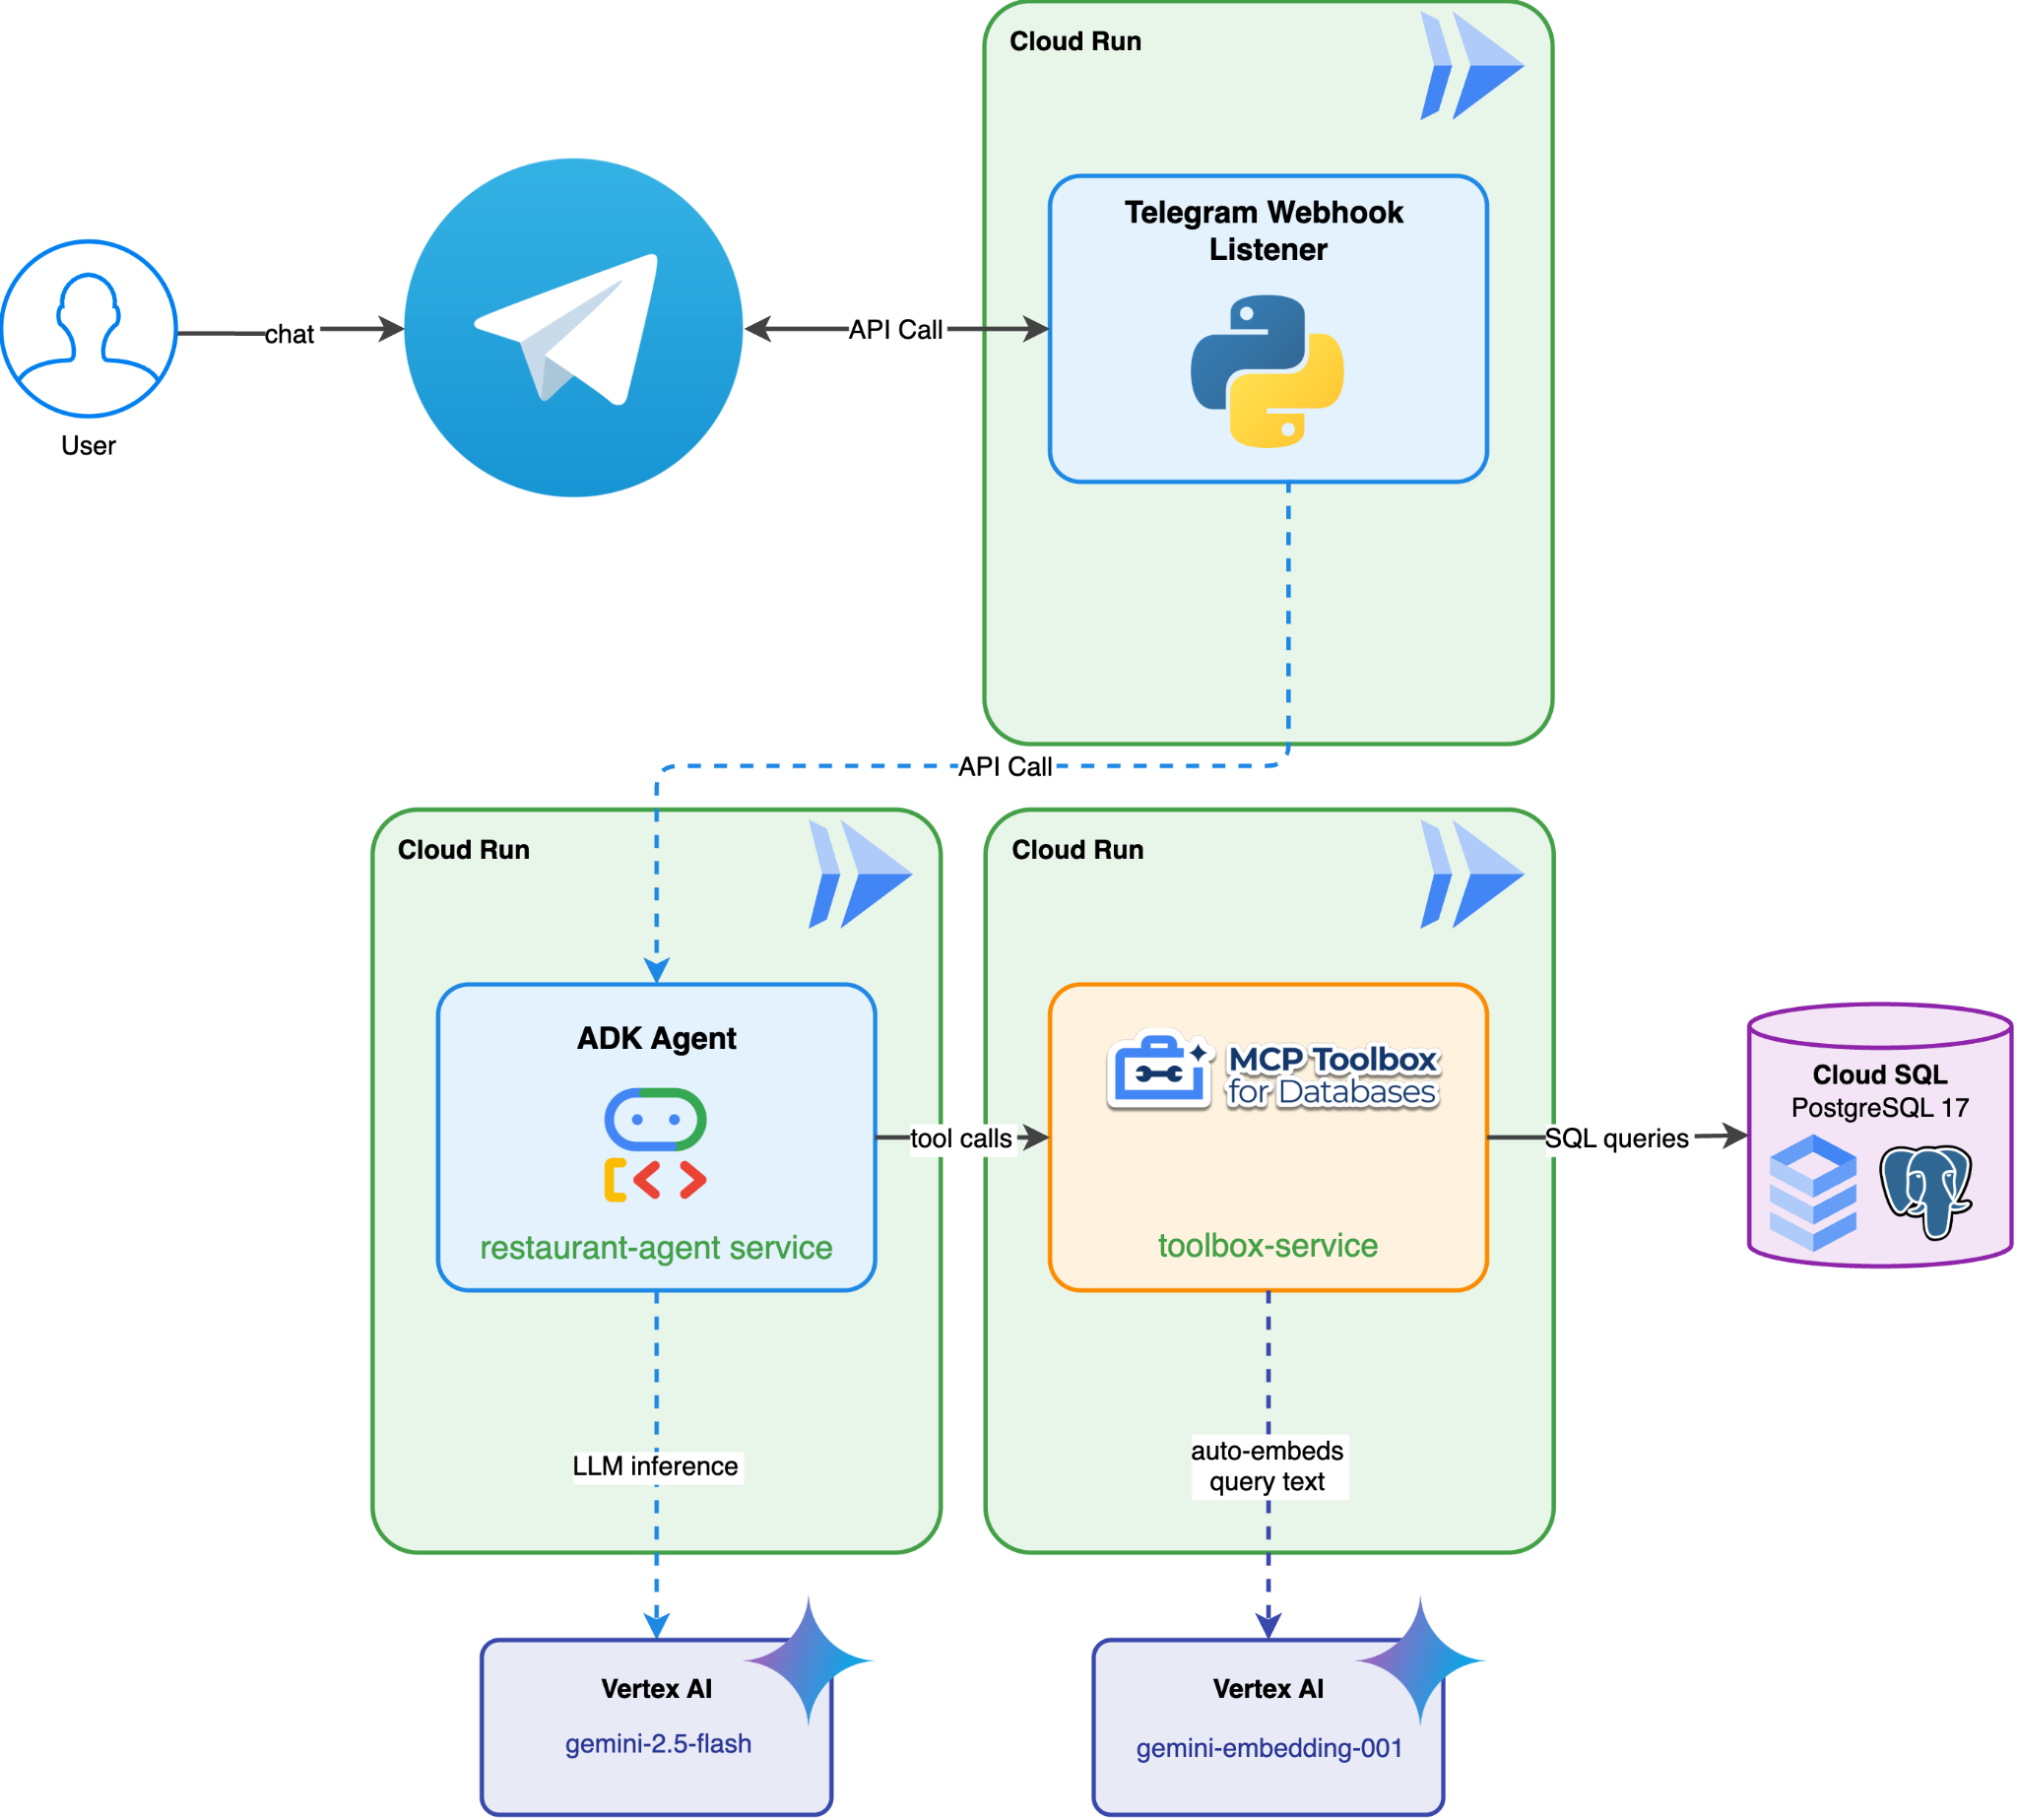
Integration between a full fledged "Restaurant Concierge" an ADK based application powered by Gemini that helps diners browse a restaurant's menu and book reservations, and Telegram chat app. You can interact with Telegram bot and ask for natural language descriptions like "I want something spicy and vegetarian." The bot will then connect to the ADK agent which reads from and writes to a Cloud SQL PostgreSQL database entirely through MCP Toolbox for Databases, which handles all database access — including automatic embedding generation for vector search, meanwhile the user will be able to see the bot is acknowledging the message and typing ... typing for response while waiting for return from the ADK agent.
What you'll learn
- Deploy a working "Restaurant Concierge" an ADK based application powered by Gemini
- Setup Telegram chat bot using BotFather
- Write a Python applications to listen to the bot web hook
- Send chat action to provide
... typingnotification in Telegram on user message, and do polling to send... typingperiodically while waiting for the real response - Call
Restaurant Conciergecloud run endpoint to process user's inquiry - Handle return from ADK agent, and send message to Telegram and close the buffer
- Deploy the Python application to cloud run
- Interact with your Telegram bot
Prerequisites
- A Google Cloud account with a trial billing account
- Basic familiarity with Python
- Prior experience with ADK and Cloud Run deployment will be helpful
- Telegram account
- (Recommended) Completed the following codelabs :
- Agentic RAG with ADK, MCP Toolbox, and Cloud SQL -> you can continue building your agent from this codelab, the provided starter code is identical
- (OR) Agents at Scale: Multi-Agent Architecture with A2A Protocol on Agent Runtime and ADK Integration -> if you want to enrich the agent further using multi-agent architecture
2. Environment Setup - Continuing from the previous codelab
The narratives that we provide in this codelab are actually the continuation from this prerequisite codelab: Agentic RAG with ADK, MCP Toolbox, and Cloud SQL or Agents at Scale: Multi-Agent Architecture with A2A Protocol on Agent Runtime and ADK Integration. You can continue your work from the previous codelab
We can start building in the previous codelab working directory ( the working directory should be build-agent-adk-toolbox-cloudsql or adk-a2a-agent-runtime-starter). To avoid confusion, let's rename the directory with the same directory name we use when we start fresh
If you are continuing from lab Agentic RAG with ADK, MCP Toolbox, and Cloud SQL :
mv ~/build-agent-adk-toolbox-cloudsql ~/build-agent-adk-telegram
Else if you are continuing from lab Agents at Scale: Multi-Agent Architecture with A2A Protocol on Agent Runtime and ADK Integration
mv ~/adk-a2a-agent-runtime-starter ~/build-agent-adk-telegram
Then, change our working directory to it
cloudshell workspace ~/build-agent-adk-telegram && cd ~/build-agent-adk-telegram
source .env
After that, verify that your restaurant-agent is already deployed and have public URL to be accessed
AGENT_URL=$(gcloud run services describe restaurant-agent \
    --region="$REGION" \
    --format='value(status.url)')

echo "      ✓ Agent service deployed"
echo "      Agent URL: $AGENT_URL"
echo ""
If you can access the URL, you are good to go the next section: Create Telegram Bot
3. Environment Setup - Fresh start with the starter repo
This step prepares your Cloud Shell environment, configures your Google Cloud project, and clones the starter repository.
Open Cloud Shell
Open Cloud Shell in your browser. Cloud Shell provides a pre-configured environment with all the tools you need for this codelab. Click Authorize when prompted to
Then click "View" -> "Terminal" to open the terminal.Your interface should look similar to this
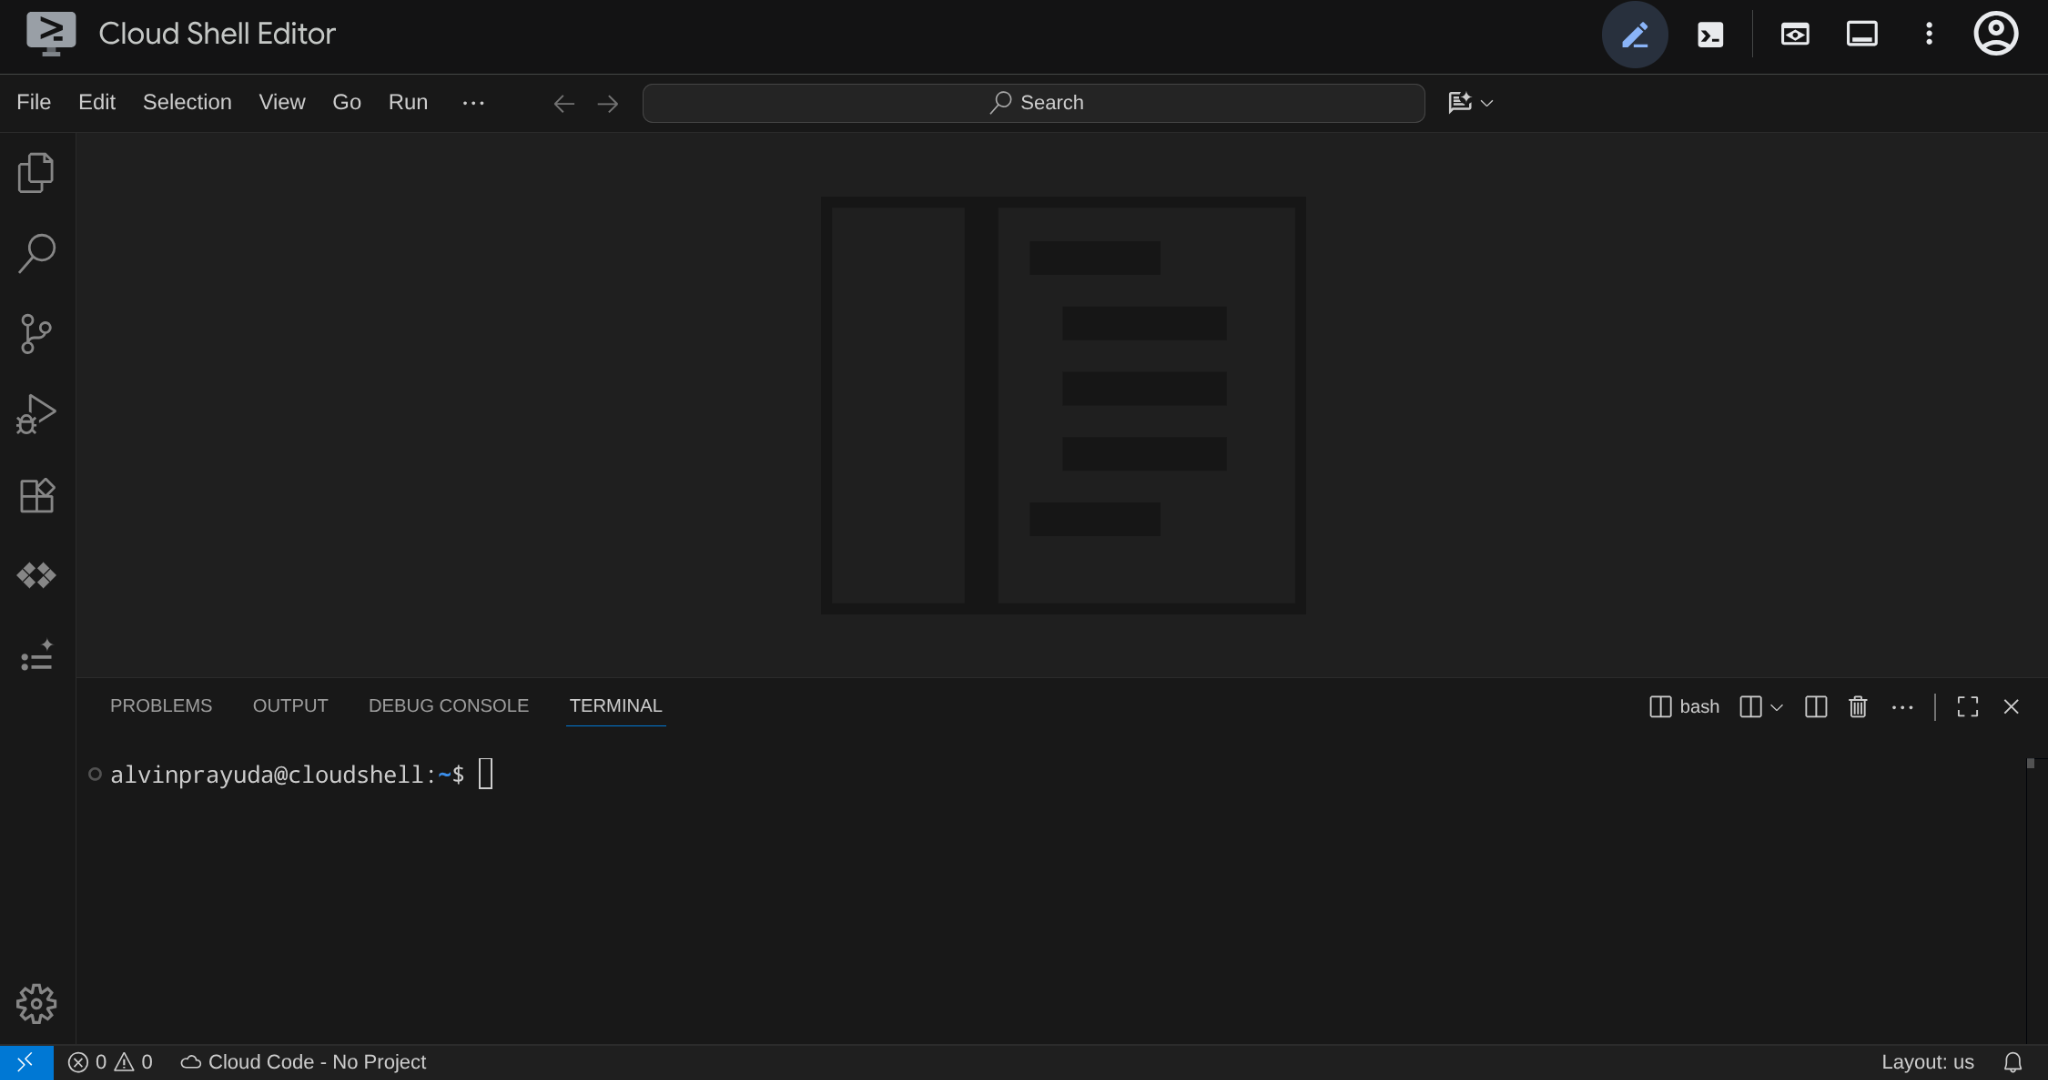
This will be our main interface, IDE on top, terminal on the bottom
Set up your working directory
Clone the starter repository, all code you write in this codelab lives here:
rm -rf ~/build-agent-adk-telegram
git clone https://github.com/alphinside/adk-a2a-agent-runtime-starter.git build-agent-adk-telegram
cloudshell workspace ~/build-agent-adk-telegram && cd ~/build-agent-adk-telegram
Create the .env file from the provided template:
cp .env.example .env
To simplify project setup in your terminal, download this project setup script into your working directory:
curl -sL https://raw.githubusercontent.com/alphinside/cloud-trial-project-setup/main/setup_verify_trial_project.sh -o setup_verify_trial_project.sh
Run the script. It verifies your trial billing account, creates a new project (or validates an existing one), saves your project ID to a .env file in the current directory, and sets the active project in gcloud.
bash setup_verify_trial_project.sh && source .env
The script will:
- Verify you have an active trial billing account
- Check for an existing project in
.env(if any) - Create a new project or reuse the existing one
- Link the trial billing account to your project
- Save the project ID to
.env - Set the project as the active
gcloudproject
Verify the project is set correctly by checking the yellow text next to your working directory in the Cloud Shell terminal prompt. It should display your project ID.

Starter Infrastructure Setup
First, we will need to install Python dependencies using uv, it is a fast Python package and project manager written in Rust ( uv documentations ). This codelab uses it for speed and simplicity in maintaining the Python project
uv sync
Then, run the full setup script, which creates the Cloud SQL instance, seeds data, and deploys the Toolbox service which will act as initial state of our restaurant agent
bash scripts/full_setup.sh > logs/full_setup.log 2>&1 &
This will:
- Create a Cloud SQL instance and seed the database (Phase 1)
- Generate agent environment config and start the local Toolbox service (Phase 2)
- Deploy Toolbox and Agent services to Cloud Run (Phase 3)
After this deployment finished, you can access the ADK Dev UI on the Cloud Run URL
source .env
AGENT_URL=$(gcloud run services describe restaurant-agent \
    --region="$REGION" \
    --format='value(status.url)')

echo "      ✓ Agent service deployed"
echo "      Agent URL: $AGENT_URL"
echo ""
Open the ADK dev UI, select restaurant_agent, and test with queries like the following example:
What Italian dishes do you have?
Or,
I want something spicy and creamy
Now, the next action is how can we move from only web development interface to Telegram messaging channel
4. Create Telegram Bot
Telegram is a well known free messaging platform that is vastly being used for community based engagement, one of the reasons is, it offers many ways to integrate with ease, as such, people can easily create their own bot with a lot of different variety of functions.
In our case we will be using BotFather to create our own bot for the first time. Keep in mind that though we are using Telegram for this session, the same method can be used for whatsapp or other messaging platforms of choice.
Use BotFather to Create Your Own Bot
Point your web browser and visit https://telegram.me/BotFather to start creating your own telegram bot.
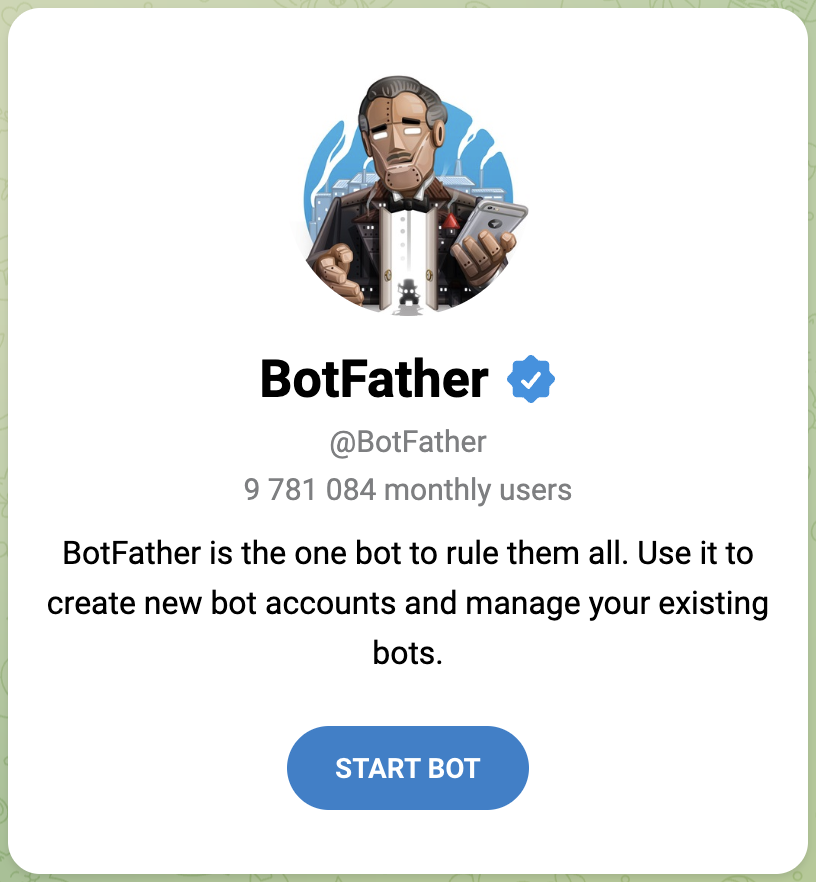
Start Interacting with The BotFather
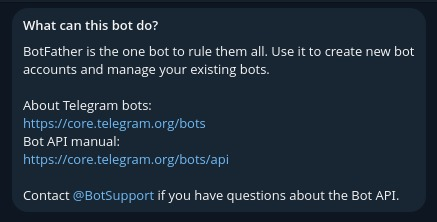
Send the /start Command
To get started with the BotFather and start creating your first bot, you need to invoke the /start message to the BotFather, it will then be sharing all the commands that it has for you to interact with it further.
/start
Initiate Bot Creation with The /newbot Command
Lets create our new bot by sending /newbot command to BotFather. It will ask you to name your bot, and then it will ask you to give the bot username which always requires it to end in a bot . For example TetrisBot or tetris_bot. This needs to be unique.
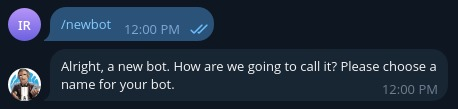
Upon successful bot creation, you will receive the following message from the BotFather
Done! Congratulations on your new bot. You will find it at t.me/AdkTelegramTest_bot. You can now add a description, about section and profile picture for your bot, see /help for a list of commands. By the way, when you've finished creating your cool bot, ping our Bot Support if you want a better username for it. Just make sure the bot is fully operational before you do this.

Use this token to access the HTTP API:
<YOUR_TELEGRAM_API_KEY>
Keep your token secure and store it safely, it can be used by anyone to control your bot.

For a description of the Bot API, see this page: https://core.telegram.org/bots/api
Take note of YOUR_TELEGRAM_API_KEY we will use it in the subsequent section.
5. Develop the Telegram Webhook Application
Let's prepare the working directory to start developing your telegram webhook application
mkdir ~/build-agent-adk-telegram/telegram-integration
cd ~/build-agent-adk-telegram
Add required Dependencies
Create requirements.txt script with the following content to provide adequate dependencies for the telegram webhook listener script.
cloudshell edit ./telegram-integration/requirements.txt
Then add the following dependencies
python-telegram-bot[webhooks]
httpx
Create script for Telegram Webhook Listener
Once we have the dependency installed. Now we can create a Python script main.py script for the integration application
cloudshell edit ~/build-agent-adk-telegram/telegram-integration/main.py
Then, copy the following code into it
# ./telegram-integration/main.py

import asyncio
import os
import sys
from telegram import Update
from telegram.ext import Application, CommandHandler, MessageHandler, filters, CallbackContext
from telegram.constants import ChatAction
import httpx

# Read token from environment variable
TOKEN = os.environ.get("TELEGRAM_BOT_TOKEN")
ADK_SERVER_URL = os.environ.get("ADK_SERVER_URL", "http://localhost:8000")
ADK_APP_NAME = os.environ.get("ADK_APP_NAME", "restaurant_agent")

# Parse base URL out of ADK_SERVER_URL
BASE_URL = ADK_SERVER_URL.rstrip('/')
if BASE_URL.endswith('/run'):
    BASE_URL = BASE_URL[:-4]
elif BASE_URL.endswith('/query'):
    BASE_URL = BASE_URL[:-6]

if not TOKEN:
    print("Error: TELEGRAM_BOT_TOKEN environment variable not set.")
    print("Please set it before running the application.")
    sys.exit(1)

async def start(update: Update, context: CallbackContext) -> None:
    """Send a message when the command /start is issued."""
    await update.message.reply_text('Hi! I am your ADK Integration Bot. Send me a message and I will forward it to the ADK server.')

async def send_typing_loop(chat_id: int, bot, stop_event: asyncio.Event):
    """Send typing action periodically until the stop event is set."""
    while not stop_event.is_set():
        try:
            await bot.send_chat_action(chat_id=chat_id, action=ChatAction.TYPING)
            # The research suggested repeating every 4 seconds
            await asyncio.sleep(4)
        except Exception as e:
            print(f"Error sending chat action: {e}")
            await asyncio.sleep(1) # Wait a bit before retrying if error

async def handle_message(update: Update, context: CallbackContext) -> None:
    """Handle incoming user messages."""
    user_message = update.message.text
    chat_id = update.message.chat_id
    raw_user_id = str(update.message.from_user.id)

    # Derive unique user_id and session_id for this user
    user_id = f"tg_{raw_user_id}"
    session_id = f"tg_sess_{raw_user_id}"

    print(f"Received message from {user_id}: {user_message}")

    # Create a stop event for the typing loop
    stop_event = asyncio.Event()

    # Start the typing loop as a background task
    typing_task = asyncio.create_task(send_typing_loop(chat_id, context.bot, stop_event))

    try:
        async with httpx.AsyncClient() as client:
            # 1. Check if the session exists
            session_url = f"{BASE_URL}/apps/{ADK_APP_NAME}/users/{user_id}/sessions/{session_id}"
            session_check = await client.get(session_url, timeout=10.0)

            if session_check.status_code == 404:
                # 2. If session doesn't exist, create it
                print(f"Session {session_id} not found. Creating session...")
                session_create = await client.post(session_url, json={}, timeout=10.0)
                if session_create.status_code != 200:
                    raise Exception(f"Failed to create session: {session_create.status_code} {session_create.text}")
            elif session_check.status_code != 200:
                raise Exception(f"Error checking session: {session_check.status_code} {session_check.text}")

            # 3. Run the ADK agent
            run_url = f"{BASE_URL}/run"
            payload = {
                "appName": ADK_APP_NAME,
                "userId": user_id,
                "sessionId": session_id,
                "newMessage": {
                    "role": "user",
                    "parts": [{"text": user_message}]
                }
            }
            response = await client.post(run_url, json=payload, timeout=60.0)

        if response.status_code == 200:
            events = response.json()
            if isinstance(events, list) and len(events) > 0:
                # The last event contains the final text response
                last_event = events[-1]
                content = last_event.get("content", {})
                parts = content.get("parts", [])
                if parts and "text" in parts[0]:
                    reply_text = parts[0]["text"]
                else:
                    reply_text = "ADK agent returned an empty or non-text response."
            else:
                reply_text = "No events returned from ADK agent."
        else:
            reply_text = f"Error communicating with ADK server (Status: {response.status_code})."

    except Exception as e:
        reply_text = f"Failed to connect to ADK server: {e}"
    finally:
        # Stop the typing loop
        stop_event.set()
        await typing_task

    # Send the final response back to the user
    await update.message.reply_text(reply_text)

def main() -> None:
    """Start the bot."""
    # Create the Application and pass it your bot's token.
    application = Application.builder().token(TOKEN).build()

    # on different commands - answer in Telegram
    application.add_handler(CommandHandler("start", start))

    # on non command i.e message - echo the message on Telegram
    application.add_handler(MessageHandler(filters.TEXT & ~filters.COMMAND, handle_message))

    # Check if running in webhook mode (e.g., on Cloud Run)
    port = os.environ.get("PORT")
    service_url = os.environ.get("SERVICE_URL")

    if port and service_url:
        if not service_url.startswith("http"):
            service_url = f"https://{service_url}"

        print(f"Starting bot in WEBHOOK mode on port {port} with url {service_url}")

        application.run_webhook(
            listen="0.0.0.0",
            port=int(port),
            url_path=TOKEN,
            webhook_url=f"{service_url}/{TOKEN}",
            allowed_updates=Update.ALL_TYPES
        )
    else:
        print("Starting bot in POLLING mode")
        # Run the bot until the user presses Ctrl-C
        application.run_polling(allowed_updates=Update.ALL_TYPES)


if __name__ == "__main__":
    main()
Understanding the Telegram Bot Integration code
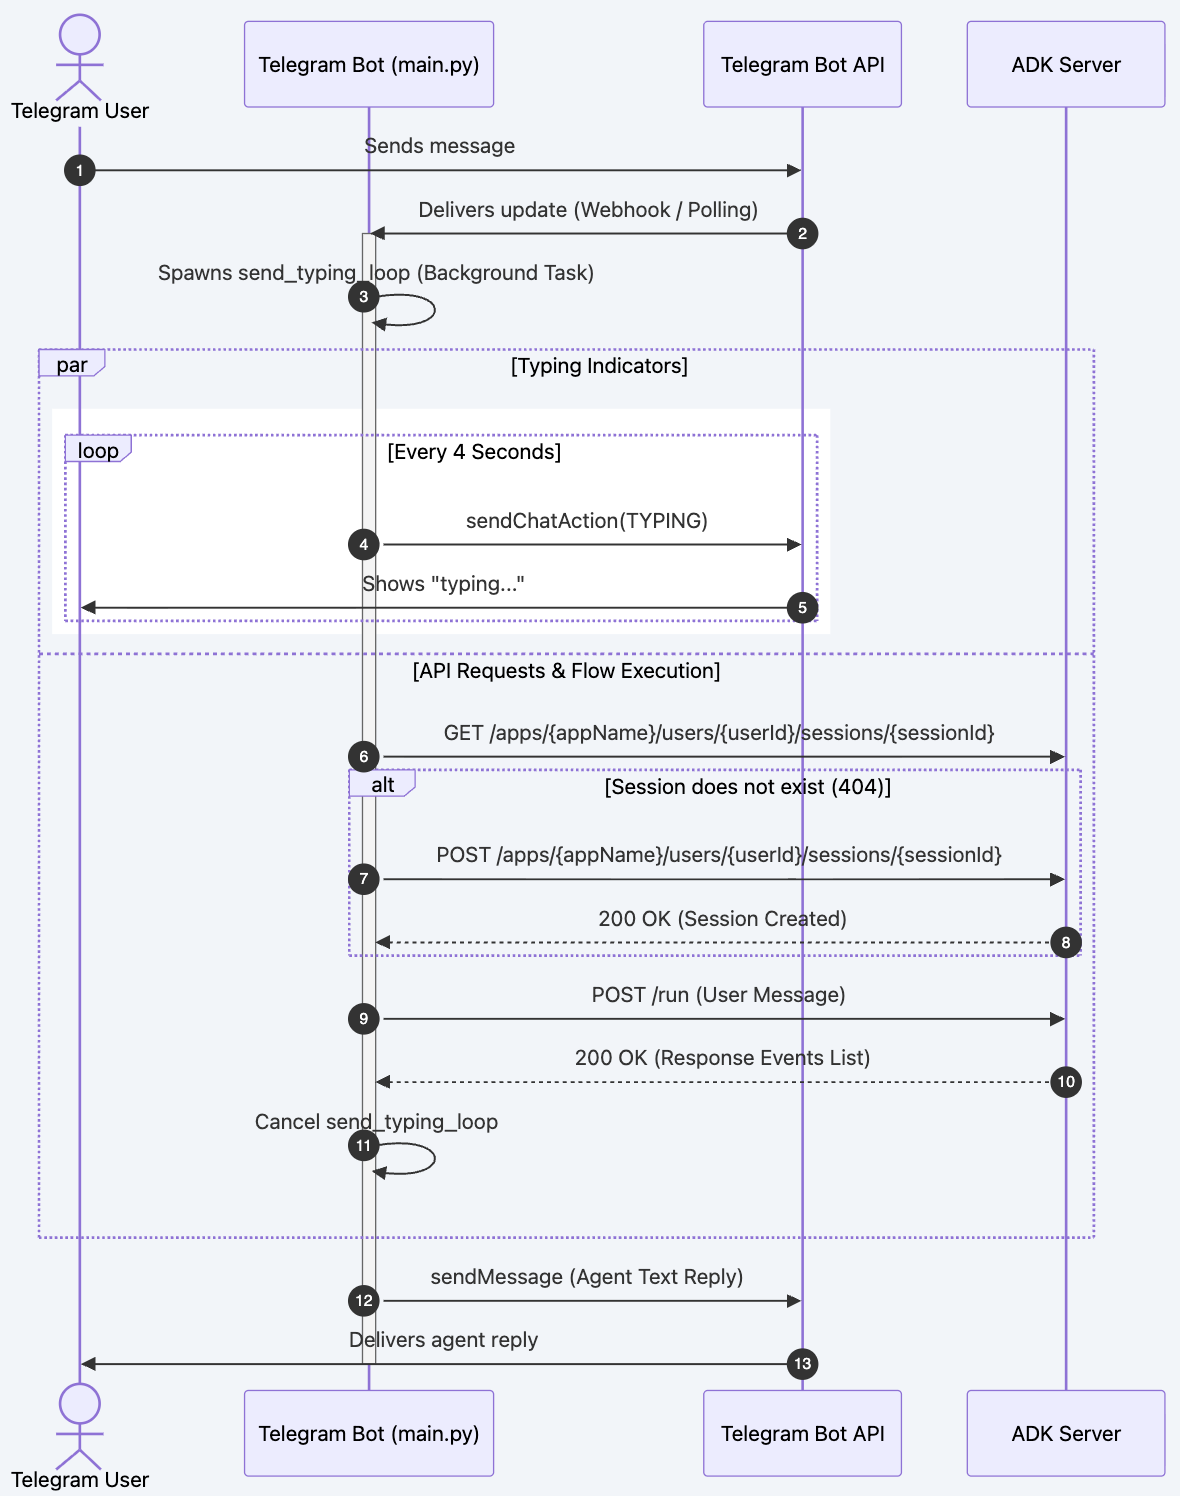
When a user sends a message, the following pipeline runs under handle_message()
Step 1: Identity & Session Derivation
The bot maps the Telegram User ID to unique ADK identifiers to keep user sessions distinct:
user_id = f"tg_{raw_user_id}"
session_id = f"tg_sess_{raw_user_id}"
Step 2: Asynchronous "Typing" Status (Lines 53–58)
To ensure a highly responsive user experience while the ADK agent processes the prompt (which can take several seconds), the bot starts an asynchronous background loop:
asyncio.Eventis instantiated asstop_event.asyncio.create_taskspawnssend_typing_loop(...)in the background.- The loop sends a
ChatAction.TYPINGaction to Telegram every 4 seconds untilstop_eventis set.
Step 3: ADK Session Verification & Creation (Lines 61–72)
Before executing the agent, the bot checks if a session already exists:
- Sends a
GETrequest to/apps/{appName}/users/{userId}/sessions/{sessionId}. - If the response is
404 Not Found, it creates the session via aPOSTrequest to the same URL with an empty JSON body. - If a status other than
200or404is returned, an exception is raised.
Step 4: Sending Request to the Agent (Lines 74–85)
The message payload is forwarded to the ADK /run endpoint:
- Endpoint:
POST /run - The request timeout is set to
60.0seconds to allow for complex reasoning or upstream latency. - Payload Structure:
{
  "appName": "restaurant_agent",
  "userId": "tg_<user_id>",
  "sessionId": "tg_sess_<user_id>",
  "newMessage": {
    "role": "user",
    "parts": [{"text": "<user_message>"}]
  }
}
Step 5: Parsing the Response (Lines 87–101)
The ADK server returns a list of message events. The bot inspects the returned array:
- It retrieves the final event in the list (
events[-1]). - It navigates to the text content via
event["content"]["parts"][0]["text"]. - If no events are returned or text structure is missing, a descriptive placeholder text is set.
Step 6: Teardown & Response Dispatch (Lines 103–111)
- In the
finallyblock, thestop_eventis set, stopping the typing action loop. - The bot awaits the completion of the
typing_taskto ensure clean resources. - Finally, the bot replies to the Telegram chat with the parsed response text.
6. Deploy the Telegram Webhook Application to Cloud Run
Next, we will deploy the Telegram Webhook Listener to the Cloud Run, so that our bot can communicate with it
Create the Dockerfile
First, we need to create the Dockerfile.
cloudshell edit ~/build-agent-adk-telegram/telegram-integration/Dockerfile
Then, copy the following code into it
# Use an official Python runtime as a parent image
FROM python:3.11-slim

# Prevent Python from writing pyc files to disc and buffering stdout/stderr
ENV PYTHONDONTWRITEBYTECODE=1
ENV PYTHONUNBUFFERED=1

# Set the working directory in the container
WORKDIR /app

# Install system dependencies if needed
RUN apt-get update && apt-get install -y --no-install-recommends \
    build-essential \
    && rm -rf /var/lib/apt/lists/*

# Copy the dependencies file to the working directory
COPY requirements.txt .

# Install any needed packages specified in requirements.txt
RUN pip install --no-cache-dir -r requirements.txt

# Copy the rest of the application code
COPY main.py .

# Expose the port that Cloud Run will provide via environment variable
EXPOSE 8080

# Run main.py when the container launches
CMD ["python", "main.py"]
The service is containerized using python:3.11-slim to keep the image footprint small:
- Installs dependencies from
requirements.txt(python-telegram-bot[webhooks]andhttpx). - Exposes standard port
8080. - Launches
python main.py.
Prepare the Environment Variables
After that, let's re-check whether our agent successfully deployed
AGENT_URL=$(gcloud run services describe restaurant-agent \
    --region="$REGION" \
    --format='value(status.url)')

echo "      ✓ Agent service deployed"
echo "      Agent URL: $AGENT_URL"
echo ""
Next, let's put the TELEGRAM_BOT_TOKEN we previously obtained to the .env
echo "TELEGRAM_BOT_TOKEN=YOUR_TELEGRAM_API_KEY" >> .env
Then, let's populate the .env data with other values that we need.
echo "ADK_SERVER_URL=$AGENT_URL" >> .env
echo "ADK_APP_NAME=restaurant_agent" >> .env
echo "SERVICE_NAME=telegram-integration" >> .env
source .env
Create Deployment Script
Let's create deployment script which will provide complete checks and deploy the app to Cloud Run
cloudshell edit ~/build-agent-adk-telegram/telegram-integration/deploy.sh
And copy the following code to the file
#!/usr/bin/env bash
# ./telegram-integration/deploy.sh

# Exit immediately if a command exits with a non-zero status
set -euo pipefail

# Color codes for neat terminal output
RED='\033[0;31m'
GREEN='\033[0;32m'
YELLOW='\033[1;33m'
BLUE='\033[0;34m'
NC='\033[0;37m' # No Color
# Load environment variables from .env if it exists
if [ -f .env ]; then
    echo -e "${GREEN}✔ Loading environment variables from .env...${NC}"
    export $(grep -v '^#' .env | xargs)
fi

echo -e "${BLUE}====================================================${NC}"
echo -e "${BLUE}   Google Cloud Run Deployment: Telegram Bot        ${NC}"
echo -e "${BLUE}====================================================${NC}"

# 1. Check for gcloud CLI
if ! command -v gcloud &> /dev/null; then
    echo -e "${RED}Error: 'gcloud' CLI is not installed.${NC}"
    echo "Please install the Google Cloud SDK and try again."
    echo "See: https://cloud.google.com/sdk/docs/install"
    exit 1
fi

# 2. Check active gcloud account/auth
ACTIVE_ACCOUNT=$(gcloud auth list --filter=status:ACTIVE --format="value(account)" 2>/dev/null || true)
if [ -z "$ACTIVE_ACCOUNT" ]; then
    echo -e "${RED}Error: No active Google Cloud account found.${NC}"
    echo "Please run: gcloud auth login"
    exit 1
fi

# 3. Detect / Prompt for GCP Project
DEFAULT_PROJECT=${GCP_PROJECT_ID:-$(gcloud config get-value project 2>/dev/null || true)}
if [ -n "${DEFAULT_PROJECT}" ]; then
    echo -e "${GREEN}✔ Using GCP Project: $DEFAULT_PROJECT${NC}"
    GCP_PROJECT="$DEFAULT_PROJECT"
else
    echo -n "Enter GCP Project ID: "
    read -r GCP_PROJECT
fi

if [ -z "$GCP_PROJECT" ]; then
    echo -e "${RED}Error: GCP Project ID is required.${NC}"
    exit 1
fi

# Set active project
gcloud config set project "$GCP_PROJECT" &> /dev/null

# 4. Configure Service Parameters
DEFAULT_SERVICE=${SERVICE_NAME:-"telegram-integration"}
if [ -n "${SERVICE_NAME:-}" ]; then
    echo -e "${GREEN}✔ Using Cloud Run Service Name: $SERVICE_NAME${NC}"
else
    echo -n "Enter Cloud Run Service Name [Default: $DEFAULT_SERVICE]: "
    read -r SERVICE_NAME
    SERVICE_NAME=${SERVICE_NAME:-$DEFAULT_SERVICE}
fi

DEFAULT_REGION=${REGION:-"us-central1"}
if [ -n "${REGION:-}" ]; then
    echo -e "${GREEN}✔ Using Cloud Run Region: $REGION${NC}"
else
    echo -n "Enter Cloud Run Region [Default: $DEFAULT_REGION]: "
    read -r REGION
    REGION=${REGION:-$DEFAULT_REGION}
fi

DEFAULT_ADK_APP=${ADK_APP_NAME:-"restaurant_agent"}
if [ -n "${ADK_APP_NAME:-}" ]; then
    echo -e "${GREEN}✔ Using ADK App Name: $ADK_APP_NAME${NC}"
    ADK_APP="$ADK_APP_NAME"
else
    echo -n "Enter ADK App Name [Default: $DEFAULT_ADK_APP]: "
    read -r ADK_APP
    ADK_APP=${ADK_APP:-$DEFAULT_ADK_APP}
fi

# 5. Retrieve/Prompt for Telegram Bot Token
if [ -n "${TELEGRAM_BOT_TOKEN:-}" ]; then
    echo -e "${GREEN}✔ Found TELEGRAM_BOT_TOKEN in environment.${NC}"
    BOT_TOKEN="$TELEGRAM_BOT_TOKEN"
else
    echo -e "${YELLOW}TELEGRAM_BOT_TOKEN is not set in your environment.${NC}"
    echo -n "Enter your Telegram Bot Token (input will be hidden): "
    read -s -r BOT_TOKEN
    echo ""
fi

if [ -z "$BOT_TOKEN" ]; then
    echo -e "${RED}Error: Telegram Bot Token is required.${NC}"
    exit 1
fi

# 6. Retrieve/Prompt for ADK Server URL
DEFAULT_ADK_URL="http://localhost:8000"
if [ -n "${ADK_SERVER_URL:-}" ]; then
    echo -e "${GREEN}✔ Found ADK_SERVER_URL in environment: $ADK_SERVER_URL${NC}"
    ADK_URL="$ADK_SERVER_URL"
else
    echo -n "Enter your ADK Server URL [Default: $DEFAULT_ADK_URL]: "
    read -r ADK_URL
    ADK_URL=${ADK_URL:-$DEFAULT_ADK_URL}
fi

# Enable required GCP services
echo -e "\n${YELLOW}Checking and enabling required GCP services...${NC}"
gcloud services enable run.googleapis.com cloudbuild.googleapis.com artifactregistry.googleapis.com --project "$GCP_PROJECT"

# Determine source directory dynamically
SOURCE_DIR="."
if [ -d "telegram-integration" ]; then
    SOURCE_DIR="telegram-integration"
    echo -e "${GREEN}✔ Found source directory: telegram-integration${NC}"
elif [ -f "Dockerfile" ]; then
    SOURCE_DIR="."
    echo -e "${GREEN}✔ Dockerfile found in current directory. Using current directory as source.${NC}"
else
    echo -e "${RED}Error: Could not find source directory 'telegram-integration' or Dockerfile in current directory.${NC}"
    exit 1
fi

# 7. First-pass Deployment with placeholder SERVICE_URL
# This boots the container in Webhook mode (so health check binds to port)
# but uses a high-reliability placeholder URL (google.com) to pass DNS verification checks.
echo -e "\n${YELLOW}Deploying to Cloud Run (Step 1/2: Initial Deploy)...${NC}"
gcloud run deploy "$SERVICE_NAME" \
  --source "$SOURCE_DIR" \
  --region "$REGION" \
  --allow-unauthenticated \
  --set-env-vars "TELEGRAM_BOT_TOKEN=$BOT_TOKEN,ADK_SERVER_URL=$ADK_URL,ADK_APP_NAME=$ADK_APP,SERVICE_URL=https://google.com" \
  --project "$GCP_PROJECT"

# 8. Retrieve the actual service URL
echo -e "\n${YELLOW}Retrieving service URL...${NC}"
SERVICE_URL=$(gcloud run services describe "$SERVICE_NAME" --region "$REGION" --project "$GCP_PROJECT" --format 'value(status.url)')
echo -e "${GREEN}✔ Service URL is: $SERVICE_URL${NC}"

# 9. Update service environment variables with the real SERVICE_URL
# This triggers a rolling update and registers the correct webhook with Telegram automatically!
echo -e "\n${YELLOW}Updating configuration with final Webhook URL (Step 2/2)...${NC}"
gcloud run services update "$SERVICE_NAME" \
  --region "$REGION" \
  --set-env-vars "TELEGRAM_BOT_TOKEN=$BOT_TOKEN,ADK_SERVER_URL=$ADK_URL,ADK_APP_NAME=$ADK_APP,SERVICE_URL=$SERVICE_URL" \
  --project "$GCP_PROJECT"

echo -e "\n${GREEN}====================================================${NC}"
echo -e "${GREEN}   Deployment Completed Successfully! 🎉            ${NC}"
echo -e "${GREEN}====================================================${NC}"
echo -e "Service Name:   ${BLUE}$SERVICE_NAME${NC}"
echo -e "Region:         ${BLUE}$REGION${NC}"
echo -e "Active URL:     ${BLUE}$SERVICE_URL${NC}"
echo -e "Webhook Path:   ${BLUE}$SERVICE_URL/<bot-token>${NC}"
echo -e "ADK Backend:    ${BLUE}$ADK_URL${NC}"
echo -e "ADK App Name:   ${BLUE}$ADK_APP${NC}"
echo -e "${GREEN}====================================================${NC}"
echo "Your Telegram Bot has been configured to use webhooks."
echo "Any message sent to your bot will now trigger this Cloud Run instance."
Double-Deploy Script (deploy.sh)
When deploying to Google Cloud Run, the bot needs to specify its own URL (SERVICE_URL) in its environment so it can register it as the webhook target with Telegram. To resolve this circular dependency (the URL is unknown until deployment, but the service requires the URL to boot up without health check failures), deploy.sh performs a two-stage deployment:
- Step 1: Initial Deploy: Boots the container with a placeholder DNS (
https://google.com) so the service starts up successfully, binds to the local port, and passes initial Cloud Run health checks. - Step 2: Fetch URL: Programmatically extracts the newly created Cloud Run endpoint using
gcloud run services describe. - Step 3: Update Configuration: Updates the environment variables with the actual live service URL. This triggers a clean rolling update in Cloud Run and safely registers the correct webhook target with the Telegram API.
Deploy to Cloud Run
The deployment script prints the Agent URL. Open it in your browser to access the same ADK dev UI running on Cloud Run.
cd ~/build-agent-adk-telegram
bash ./telegram-integration/deploy.sh
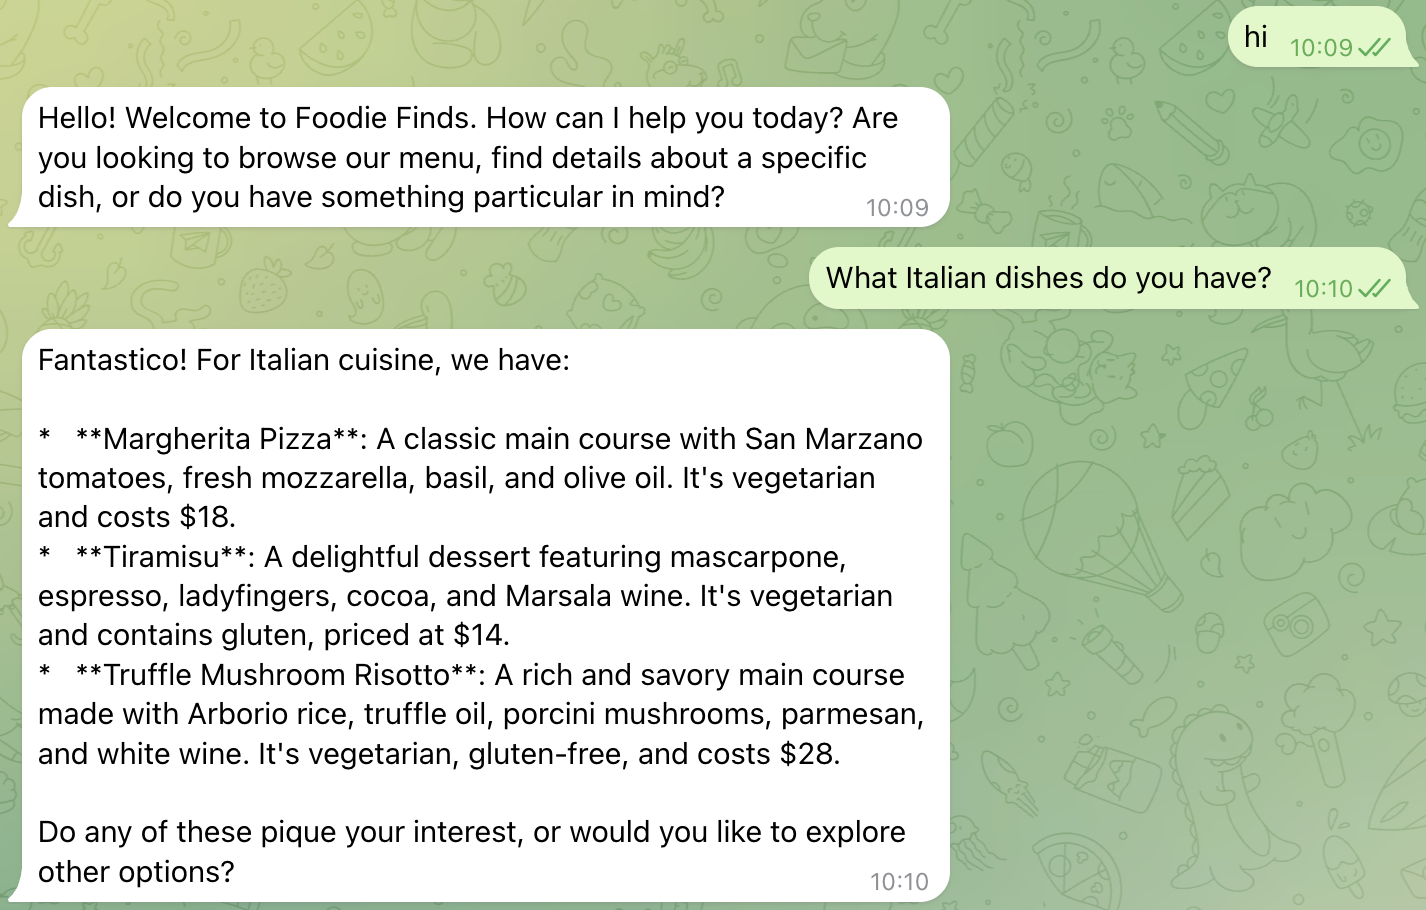
If all goes well, this is the time where you can start chatting to you bot directly from Telegram chat application, find the bot you have just created and start interacting with it:
What Italian dishes do you have?
Or,
I want something spicy and creamy
Watch the bot sending status "...is typing" and then soon, it will return the message from the ADK you created earlier!
7. Congratulations!
You've built, deployed and completely integrated our smart restaurant menu assistant ADK based AI agent with telegram, through HTTP client server communication, and allow people to query their favorite menu and book the restaurant.
What you've learned
- Deploy and configure Restaurant Concierge, ADK based agent and MCP Toolbox to Cloud Run
- How to setup Telegram bot using BotFather
- How to write Python scripts to listen to Telegram webhook and interact with ADK agent to pass on the users query and response accordingly
- How to implement
"... typing"in Telegram to signal messages are being processed as a realtime feedback to the users while waiting for the ADK agent to respond. - How to Deploy the Python script to cloud run and be able to interact with it
Clean up
To avoid incurring charges to your Google Cloud account, delete the resources created in this codelab.
Option 1: Delete the project (recommended)
gcloud projects delete $GOOGLE_CLOUD_PROJECT
Option 2: Delete individual resources
# If you follow from previous A2A Agent Runtime codelab
# Delete the Agent Runtime deployment (skip if not found)
uv run python -c "
import vertexai
from google.genai import types
vertexai.init(project='$GOOGLE_CLOUD_PROJECT', location='$REGION')
client = vertexai.Client(
    project='$GOOGLE_CLOUD_PROJECT', location='$REGION',
    http_options=types.HttpOptions(api_version='v1beta1'),
)
try:
    agent = client.agent_engines.get(name='$RESERVATION_AGENT_RESOURCE_NAME')
    agent.delete(force=True)
    print('Agent Runtime deployment deleted.')
except Exception as e:
    print(f'No agent deployment found or already deleted, skipping. ({e})')
"

# Delete GCS staging bucket (skip if STAGING_BUCKET is not set)
if [ -n "$STAGING_BUCKET" ]; then
  gsutil rm -r gs://$STAGING_BUCKET
else
  echo "STAGING_BUCKET not set, skipping bucket deletion."
fi

# Delete Cloud Run services
gcloud run services delete restaurant-agent --region=$REGION --quiet
gcloud run services delete toolbox-service --region=$REGION --quiet
gcloud run services delete telegram-integration --region=$REGION --quiet

# Delete Cloud SQL instance
gcloud sql instances delete $DB_INSTANCE --quiet