
1. 📖 简介
在上一个 Codelab 中,您学习了如何在 ADK 中设计多模态数据交互。现在,我们将进一步学习如何使用 MCP 工具集设计与 MCP 服务器的多模态数据交互。我们将使用 Veo MCP 服务器,利用 Veo 模型扩展之前开发的产品照片编辑器智能体的功能,使其能够生成短视频
通过此 Codelab,您将采用以下分步方法:
- 准备 Google Cloud 云项目和基本智能体目录
- 配置需要文件数据作为输入的 MCP 服务器
- 为 ADK 智能体配备与 MCP 服务器连接的功能
- 设计提示策略和回调函数,以修改对 MCP 工具集的函数调用请求
- 设计回调函数,以处理来自 MCP 工具集的多模态数据响应
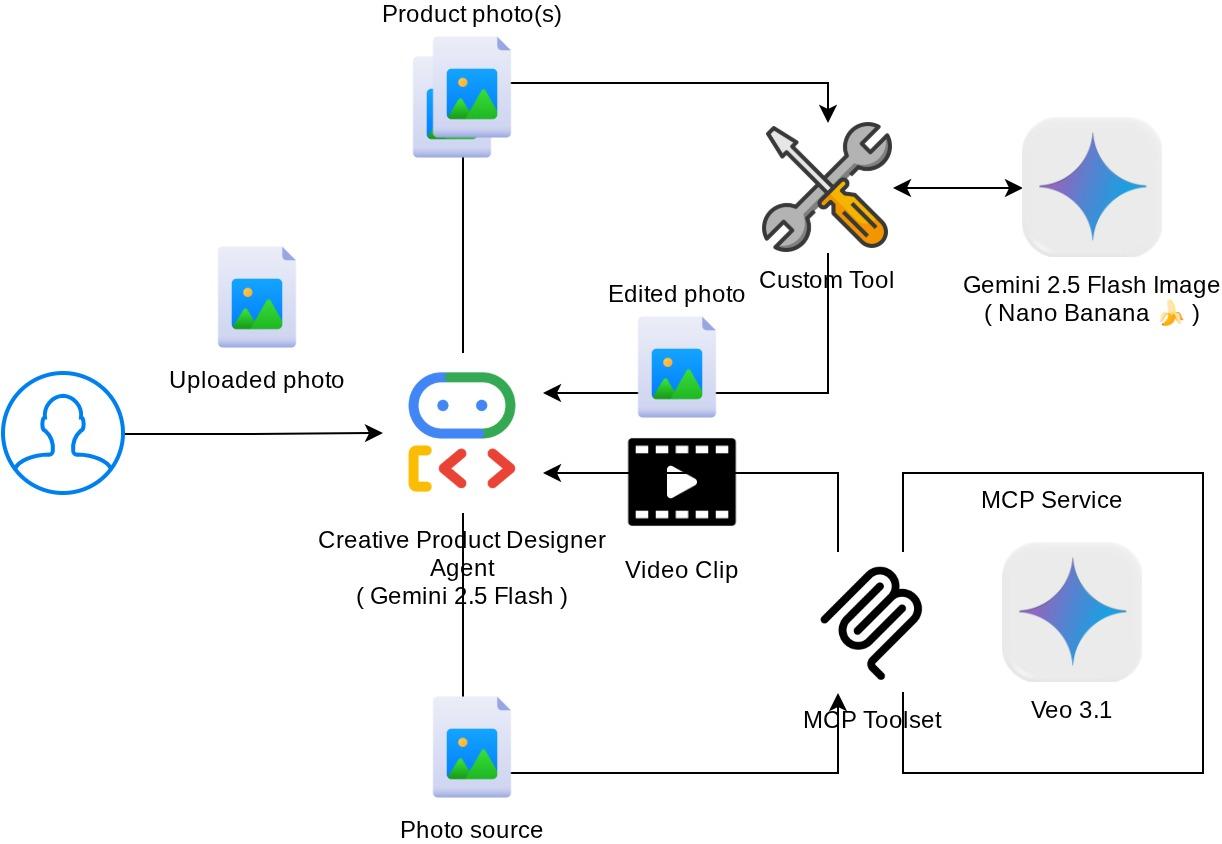
架构概览
下图展示了此 Codelab 中的整体交互
前提条件
- 能够熟练使用 Python
- (可选)有关智能体开发套件 (ADK) 的基础 Codelab
- (可选)ADK 多模态工具第 1 部分 Codelab:goo.gle/adk-multimodal-tool-1
学习内容
- 如何使用 Veo 3.1 通过提示和图片启动器创建短视频
- 如何使用 FastMCP 开发多模态 MCP 服务器
- 如何设置 ADK 以使用 MCP 工具集
- 如何通过工具回调修改对 MCP 工具集的工具调用
- 如何通过工具回调修改来自 MCP 工具集的工具响应
所需条件
- Chrome 网络浏览器
- Gmail 账号
- 启用了结算账号的 Cloud 项目
此 Codelab 专为各种水平的开发者(包括新手)设计,其示例应用使用 Python。不过,您无需具备 Python 知识即可理解所介绍的概念。
2. 🚀 (可选)准备研讨会开发设置
第 1 步:在 Cloud 控制台中选择有效项目
在 Google Cloud 控制台的项目选择器页面上,选择或创建一个 Google Cloud 项目(请参阅控制台的左上角部分)

点击该项目,您将看到所有项目的列表,如以下示例所示:

红色框中指示的值是项目 ID ,本教程中将使用此值。
确保您的云项目已启用结算功能。如需进行检查,请点击左上角栏中的汉堡菜单图标 ☰,该图标会显示导航菜单,然后找到“结算”菜单

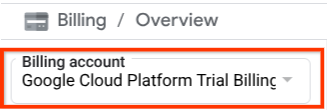
如果您在结算 / 概览 标题(Cloud 控制台的左上角部分 )下看到 “Google Cloud Platform 试用结算账号”,则表示您的项目已准备好用于本教程。如果不是,请返回本教程的开头并兑换试用结算账号
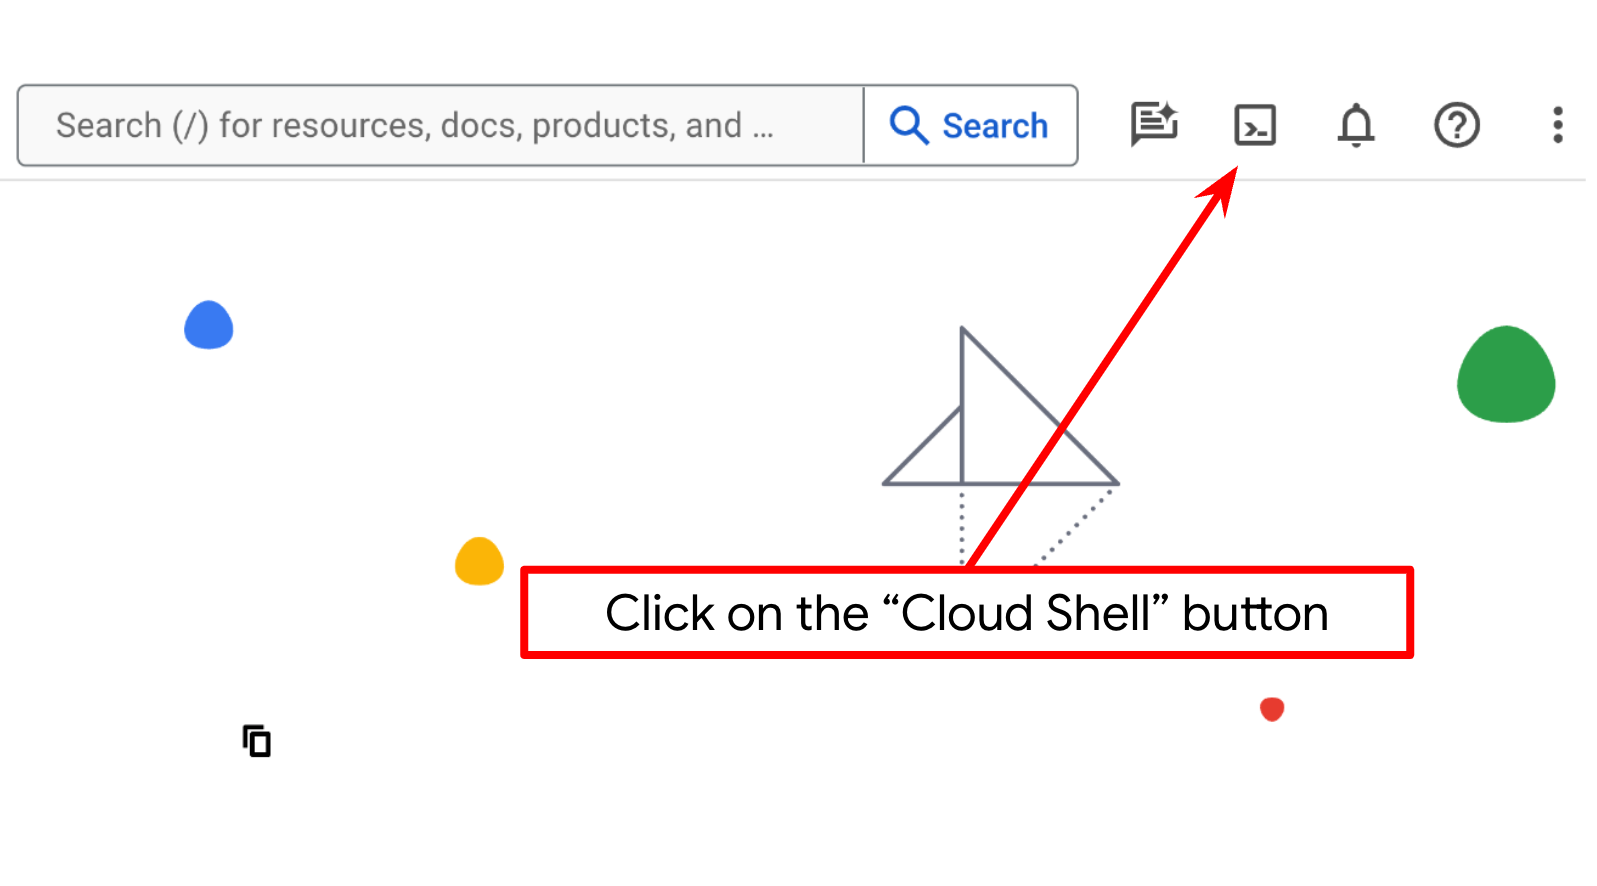
第 2 步:熟悉 Cloud Shell
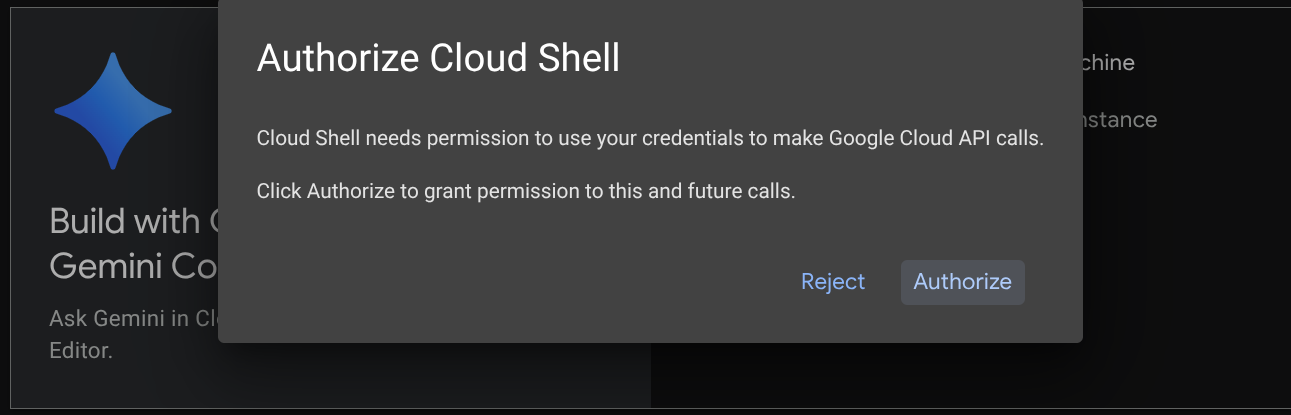
您将在教程的大部分内容中使用 Cloud Shell,点击 Google Cloud 控制台顶部的“激活 Cloud Shell”如果系统提示您授权,请点击授权
连接到 Cloud Shell 后,我们需要检查 Shell(或终端)是否已通过我们的账号进行身份验证
gcloud auth list
如果您看到个人 Gmail(如以下示例输出所示),则一切正常
Credentialed Accounts

ACTIVE: *
ACCOUNT: alvinprayuda@gmail.com

To set the active account, run:
    $ gcloud config set account `ACCOUNT`
如果不是,请尝试刷新浏览器,并确保在系统提示时点击授权 (可能会因连接问题而中断)
接下来,我们还需要检查 Shell 是否已配置为正确的项目 ID。如果您在终端中看到 $图标之前的 ( ) 内有值(在下面的屏幕截图中,该值为“adk-multimodal-tool”),则表示此值显示了为有效 Shell 会话配置的项目。

如果显示的值 已经正确 ,您可以跳过 下一个命令 。但是,如果该值不正确或缺失,请运行以下命令
gcloud config set project <YOUR_PROJECT_ID>
然后,从 GitHub 克隆此 Codelab 的模板工作目录,运行以下命令。它将在 adk-multimodal-tool 目录中创建工作目录
git clone https://github.com/alphinside/adk-mcp-multimodal.git adk-multimodal-tool
第 3 步:熟悉 Cloud Shell 编辑器并设置应用工作目录
现在,我们可以设置代码编辑器来执行一些编码操作。我们将使用 Cloud Shell 编辑器
点击打开编辑器 按钮,系统将打开 Cloud Shell 编辑器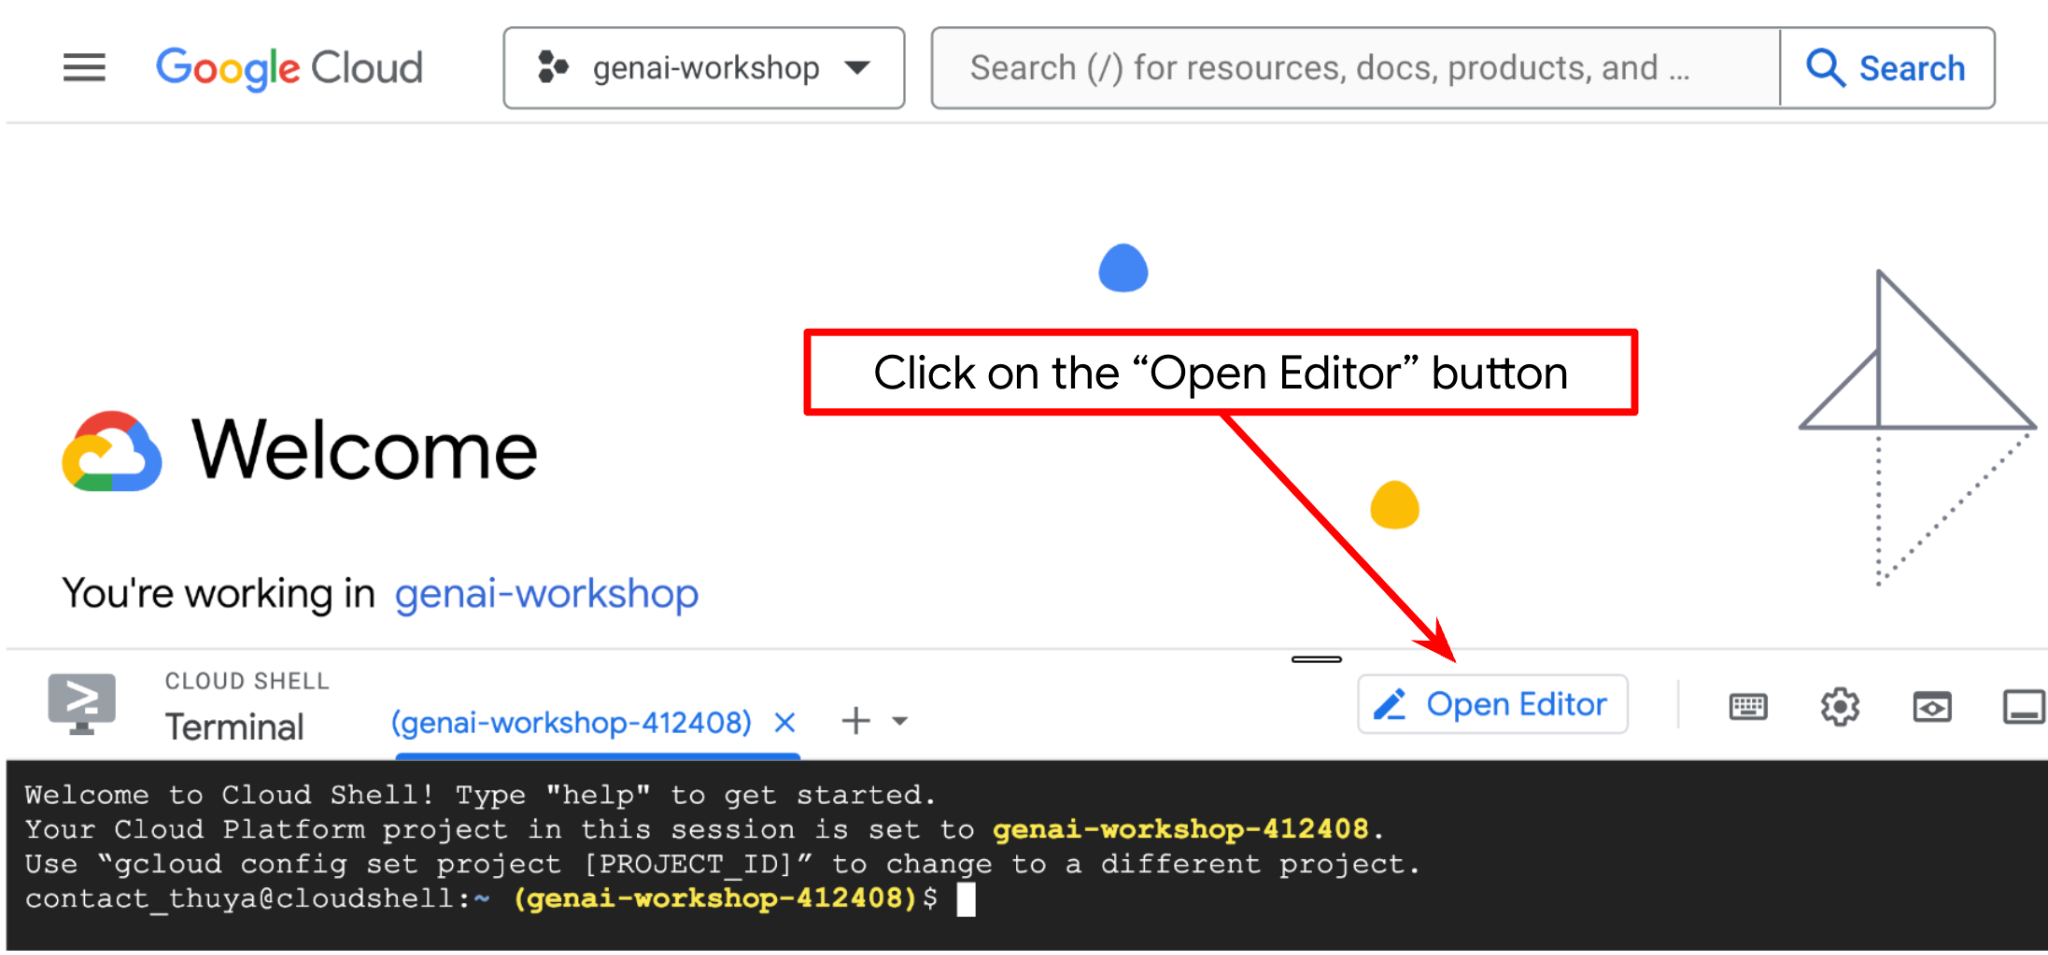
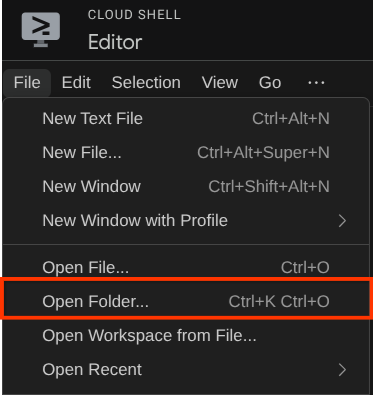
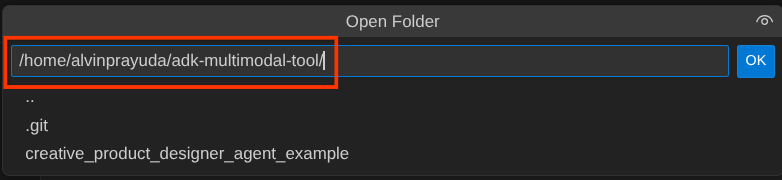
之后,前往 Cloud Shell 编辑器的顶部部分,依次点击文件 -> 打开文件夹,找到您的用户名目录,然后找到adk-multimodal-tool目录,再点击“确定”按钮。这会将所选目录设为主工作目录。在此示例中,用户名是alvinprayuda,因此目录路径如下所示
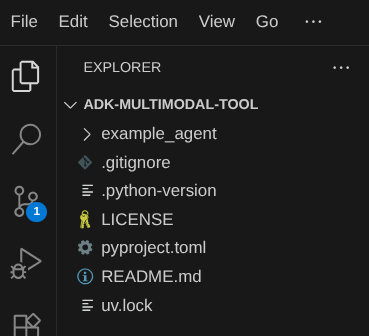
现在,您的 Cloud Shell 编辑器工作目录应如下所示(在 adk-multimodal-tool 内)
现在,打开编辑器的终端。您可以在菜单栏中依次点击终端 -> 新终端 ,或使用 Ctrl + Shift + C,这将在浏览器的底部打开一个终端窗口

您当前有效的终端应位于 adk-multimodal-tool 工作目录中。在此 Codelab 中,我们将使用 Python 3.12,并使用 uv Python 项目管理器 来简化创建和管理 Python 版本和虚拟环境的需求。此 uv 软件包已预安装在 Cloud Shell 上。
运行此命令,将所需的依赖项安装到 .venv 目录中的虚拟环境
uv sync --frozen
检查 pyproject.toml 以查看本教程的声明依赖项,即 google-adk, and python-dotenv。
现在,我们需要通过以下命令启用所需的 API。这可能需要一段时间。
gcloud services enable aiplatform.googleapis.com
成功执行该命令后,您应该会看到类似于以下消息的消息:
Operation "operations/..." finished successfully.
在克隆的代码库的 part2_starter_agent 目录中,系统已为您提供智能体模板结构。现在,我们需要先对其进行重命名,以便为本教程做好准备
mv part1_ckpt_agent product_photo_editor
之后,将 product_photo_editor/.env.example 复制到 product_photo_editor/.env
cp product_photo_editor/.env.example product_photo_editor/.env
打开 product_photo_editor/.env 文件后,您将看到如下所示的内容
GOOGLE_GENAI_USE_VERTEXAI=1
GOOGLE_CLOUD_PROJECT=your-project-id
GOOGLE_CLOUD_LOCATION=global
然后,您需要使用正确的项目 ID 更新 your-project-id 值。现在,我们已准备好进行下一步
3. 🚀 初始化 Veo MCP 服务器
首先,我们使用以下命令创建 MCP 服务目录
mkdir veo_mcp
然后,使用以下命令创建 veo_mcp/main.py
touch veo_mcp/main.py
之后,将以下代码复制到 veo_mcp/main.py
from fastmcp import FastMCP
from typing import Annotated
from pydantic import Field
import base64
import asyncio
import os
from google import genai
from google.genai import types
from dotenv import load_dotenv
import logging

# Load environment variables from .env file
load_dotenv()

mcp = FastMCP("Veo MCP Server")


@mcp.tool
async def generate_video_with_image(
    prompt: Annotated[
        str, Field(description="Text description of the video to generate")
    ],
    image_data: Annotated[
        str, Field(description="Base64-encoded image data to use as starting frame")
    ],
    negative_prompt: Annotated[
        str | None,
        Field(description="Things to avoid in the generated video"),
    ] = None,
) -> dict:
    """Generates a professional product marketing video from text prompt and starting image using Google's Veo API.

    This function uses an image as the first frame of the generated video and automatically
    enriches your prompt with professional video production quality guidelines to create
    high-quality marketing assets suitable for commercial use.

    AUTOMATIC ENHANCEMENTS APPLIED:
    - 4K cinematic quality with professional color grading
    - Smooth, stabilized camera movements
    - Professional studio lighting setup
    - Shallow depth of field for product focus
    - Commercial-grade production quality
    - Marketing-focused visual style

    PROMPT WRITING TIPS:
    Describe what you want to see in the video. Focus on:
    - Product actions/movements (e.g., "rotating slowly", "zooming into details")
    - Desired camera angles (e.g., "close-up of the product", "wide shot")
    - Background/environment (e.g., "minimalist white backdrop", "lifestyle setting")
    - Any specific details about the product presentation

    The system will automatically enhance your prompt with professional production quality.

    Args:
        prompt: Description of the video to generate. Focus on the core product presentation
                you want. The system will automatically add professional quality enhancements.
        image_data: Base64-encoded image data to use as the starting frame
        negative_prompt: Optional prompt describing what to avoid in the video

    Returns:
        dict: A dictionary containing:
            - status: 'success' or 'error'
            - message: Description of the result
            - video_data: Base64-encoded video data (on success only)
    """
    try:
        # Initialize the Gemini client
        client = genai.Client(
            vertexai=True,
            project=os.getenv("GOOGLE_CLOUD_PROJECT"),
            location=os.getenv("GOOGLE_CLOUD_LOCATION"),
        )

        # Decode the image
        image_bytes = base64.b64decode(image_data)
        print(f"Successfully decoded image data: {len(image_bytes)} bytes")

        # Create image object
        image = types.Image(image_bytes=image_bytes, mime_type="image/png")

        # Prepare the config
        config = types.GenerateVideosConfig(
            duration_seconds=8,
            number_of_videos=1,
        )

        if negative_prompt:
            config.negative_prompt = negative_prompt

        # Enrich the prompt for professional marketing quality
        enriched_prompt = enrich_prompt_for_marketing(prompt)

        # Generate the video (async operation)
        operation = client.models.generate_videos(
            model="veo-3.1-generate-preview",
            prompt=enriched_prompt,
            image=image,
            config=config,
        )

        # Poll until the operation is complete
        poll_count = 0
        while not operation.done:
            poll_count += 1
            print(f"Waiting for video generation to complete... (poll {poll_count})")
            await asyncio.sleep(5)
            operation = client.operations.get(operation)

        # Download the video and convert to base64
        video = operation.response.generated_videos[0]

        # Get video bytes and encode to base64
        video_bytes = video.video.video_bytes
        video_base64 = base64.b64encode(video_bytes).decode("utf-8")

        print(f"Video generated successfully: {len(video_bytes)} bytes")

        return {
            "status": "success",
            "message": f"Video with image generated successfully after {poll_count * 5} seconds",
            "complete_prompt": enriched_prompt,
            "video_data": video_base64,
        }
    except Exception as e:
        logging.error(e)
        return {
            "status": "error",
            "message": f"Error generating video with image: {str(e)}",
        }


def enrich_prompt_for_marketing(user_prompt: str) -> str:
    """Enriches user prompt with professional video production quality enhancements.

    Adds cinematic quality, professional lighting, smooth camera work, and marketing-focused
    elements to ensure high-quality product marketing videos.
    """
    enhancement_prefix = """Create a high-quality, professional product marketing video with the following characteristics:

TECHNICAL SPECIFICATIONS:
- 4K cinematic quality with professional color grading
- Smooth, stabilized camera movements
- Professional studio lighting setup with soft, even illumination
- Shallow depth of field for product focus
- High dynamic range (HDR) for vibrant colors

VISUAL STYLE:
- Clean, minimalist aesthetic suitable for premium brand marketing
- Elegant and sophisticated presentation
- Commercial-grade production quality
- Attention to detail in product showcase

USER'S SPECIFIC REQUIREMENTS:
"""

    enhancement_suffix = """

ADDITIONAL QUALITY GUIDELINES:
- Ensure smooth transitions and natural motion
- Maintain consistent lighting throughout
- Keep the product as the clear focal point
- Use professional camera techniques (slow pans, tracking shots, or dolly movements)
- Apply subtle motion blur for cinematic feel
- Ensure brand-appropriate tone and style"""

    return f"{enhancement_prefix}{user_prompt}{enhancement_suffix}"


if __name__ == "__main__":
    mcp.run()
以下代码执行以下操作:
- 创建一个 FastMCP 服务器,该服务器向 ADK 智能体公开 Veo 3.1 视频生成工具
- 接受 base64 编码的图片、文本提示和负面提示作为输入
- 通过向 Veo 3.1 API 提交请求并每 5 秒轮询一次(直到完成)来异步生成 8 秒视频
- 返回 base64 编码的视频数据以及经过丰富处理的提示
此 Veo MCP 工具将需要与我们的智能体相同的环境变量,因此我们可以直接复制粘贴 .env 文件。运行以下命令即可执行此操作
cp product_photo_editor/.env veo_mcp/
现在,我们可以运行以下命令来测试 MCP 服务器是否正常运行
uv run veo_mcp/main.py
它将显示如下所示的控制台日志
╭────────────────────────────────────────────────────────────────────────────╮
│                                                                            │
│        _ __ ___  _____           __  __  _____________    ____    ____     │
│       _ __ ___ .'____/___ ______/ /_/  |/  / ____/ __ \  |___ \  / __ \    │
│      _ __ ___ / /_  / __ `/ ___/ __/ /|_/ / /   / /_/ /  ___/ / / / / /    │
│     _ __ ___ / __/ / /_/ (__  ) /_/ /  / / /___/ ____/  /  __/_/ /_/ /     │
│    _ __ ___ /_/    \____/____/\__/_/  /_/\____/_/      /_____(*)____/      │
│                                                                            │
│                                                                            │
│                                FastMCP  2.0                                │
│                                                                            │
│                                                                            │
│                 🖥️  Server name:     Veo MCP Server                         │
│                 📦 Transport:       STDIO                                  │
│                                                                            │
│                 🏎️  FastMCP version: 2.12.5                                 │
│                 🤝 MCP SDK version: 1.16.0                                 │
│                                                                            │
│                 📚 Docs:            https://gofastmcp.com                  │
│                 🚀 Deploy:          https://fastmcp.cloud                  │
│                                                                            │
╰────────────────────────────────────────────────────────────────────────────╯


[10/22/25 08:28:53] INFO     Starting MCP server 'Veo MCP Server' with          server.py:1502
                             transport 'stdio'
现在,使用 CTRL+C 终止 MCP 服务进程。此命令稍后将从 ADK MCP 工具集中调用。我们可以进入下一步,让智能体能够使用此 MCP 工具
4. 🚀 将 Veo MCP 服务器连接到 ADK 智能体
现在,我们来连接 Veo MCP 服务器,以便我们的智能体可以使用它。首先,我们来创建一个不同的脚本来包含工具集,运行以下命令
touch product_photo_editor/mcp_tools.py
然后,将以下代码复制到 product_photo_editor/mcp_tools.py
from google.adk.tools.mcp_tool.mcp_toolset import MCPToolset
from google.adk.tools.mcp_tool.mcp_session_manager import StdioConnectionParams
from mcp import StdioServerParameters


mcp_toolset = MCPToolset(
    connection_params=StdioConnectionParams(
        server_params=StdioServerParameters(
            command="uv",
            args=[
                "run",
                "veo_mcp/main.py",
            ],
        ),
        timeout=120, # seconds
    ),
)

# Option to connect to remote MCP server

# from google.adk.tools.mcp_tool.mcp_session_manager import StreamableHTTPConnectionParams

# mcp_toolset = MCPToolset(
#     connection_params=StreamableHTTPConnectionParams(
#         url="http://localhost:8000/mcp",
#         timeout=120,
#     ),
# )
上面的代码展示了如何使用 ADK MCPToolset 连接到 MCP 服务器。在此示例中,我们使用 STDIO 通信渠道连接到 MCP 服务器。在该命令中,我们指定了如何运行 MCP 服务器并设置了超时参数。
5. 🚀 修改工具调用参数
在 MCP 服务器工具声明中,我们设计了工具 generate_video_with_image,该工具将 base64
字符串指定为工具参数。我们无法要求 LLM 为我们执行此操作,因此我们需要设计一种特定的策略来处理此问题。
在之前的实验中,我们在 before_model_callback 中处理用户上传的图片和工具响应图片,以将其保存为制品,这也会反映在之前准备的智能体模板中。我们将利用此功能并执行以下策略:
- 如果特定工具参数需要发送 base64 字符串数据,则指示 LLM 始终发送 artifact_id 值
- 在
before_tool_callback中拦截工具调用调用,并通过加载制品将参数从 artifact_id 转换为其字节内容,并覆盖工具参数
请参阅下图,了解我们将拦截的部分的可视化效果

首先,我们来准备 before_tool_callback 函数,运行以下命令创建一个新文件 product_photo_editor/tool_callbacks.py
touch product_photo_editor/tool_callbacks.py
然后,将以下代码复制到该文件
# product_photo_editor/tool_callbacks.py

from google.genai.types import Part
from typing import Any
from google.adk.tools.tool_context import ToolContext
from google.adk.tools.base_tool import BaseTool
from google.adk.tools.mcp_tool.mcp_tool import McpTool
import base64
import logging
import json
from mcp.types import CallToolResult


async def before_tool_modifier(
    tool: BaseTool, args: dict[str, Any], tool_context: ToolContext
):
    # Identify which tool input should be modified
    if isinstance(tool, McpTool) and tool.name == "generate_video_with_image":
        logging.info("Modify tool args for artifact: %s", args["image_data"])
        # Get the artifact filename from the tool input argument
        artifact_filename = args["image_data"]
        artifact = await tool_context.load_artifact(filename=artifact_filename)
        file_data = artifact.inline_data.data

        # Convert byte data to base64 string
        base64_data = base64.b64encode(file_data).decode("utf-8")

        # Then modify the tool input argument
        args["image_data"] = base64_data
上面的代码展示了以下步骤:
- 检查调用的工具是否为 McpTool 对象,以及它是否是我们想要修改的目标工具调用
- 获取
image_data参数的值,其中是请求采用 base64 格式的参数,但我们请求 LLM 返回 artifact_id - 通过利用
tool_context上的制品服务加载制品 - 使用 base64 数据覆盖
image_data参数
现在,我们需要将此回调添加到智能体,并稍微修改说明,以便智能体始终使用制品 ID 填充 base64 工具参数。
打开 product_photo_editor/agent.py 并使用以下代码修改内容
# product_photo_editor/agent.py

from google.adk.agents.llm_agent import Agent
from product_photo_editor.custom_tools import edit_product_asset
from product_photo_editor.mcp_tools import mcp_toolset
from product_photo_editor.model_callbacks import before_model_modifier
from product_photo_editor.tool_callbacks import before_tool_modifier
from product_photo_editor.prompt import AGENT_INSTRUCTION

root_agent = Agent(
    model="gemini-2.5-flash",
    name="product_photo_editor",
    description="""A friendly product photo editor assistant that helps small business
owners edit and enhance their product photos. Perfect for improving photos of handmade
goods, food products, crafts, and small retail items""",
    instruction=AGENT_INSTRUCTION
    + """
**IMPORTANT: Base64 Argument Rule on Tool Call**

If you found any tool call arguments that requires base64 data,
ALWAYS provide the artifact_id of the referenced file to
the tool call. NEVER ask user to provide base64 data.
Base64 data encoding process is out of your
responsibility and will be handled in another part of the system.
""",
    tools=[
        edit_product_asset,
        mcp_toolset,
    ],
    before_model_callback=before_model_modifier,
    before_tool_callback=before_tool_modifier,
)
好了,现在我们来尝试与智能体互动,以测试此修改。运行以下命令以运行 Web 开发界面
uv run adk web --port 8080
它将生成类似于以下示例的输出,这意味着我们已经可以访问 Web 界面
INFO:     Started server process [xxxx]
INFO:     Waiting for application startup.

+-----------------------------------------------------------------------------+
| ADK Web Server started                                                      |
|                                                                             |
| For local testing, access at http://127.0.0.1:8080.                         |
+-----------------------------------------------------------------------------+

INFO:     Application startup complete.
INFO:     Uvicorn running on http://127.0.0.1:8080 (Press CTRL+C to quit)
现在,如需进行检查,您可以 Ctrl + 点击 网址,或点击 Cloud Shell 编辑器顶部区域的网页预览 按钮,然后选择在端口 8080 上预览

您将看到以下网页,您可以在左上角的下拉按钮中选择可用的智能体(在我们的示例中,它应该是 product_photo_editor ),并与机器人互动。
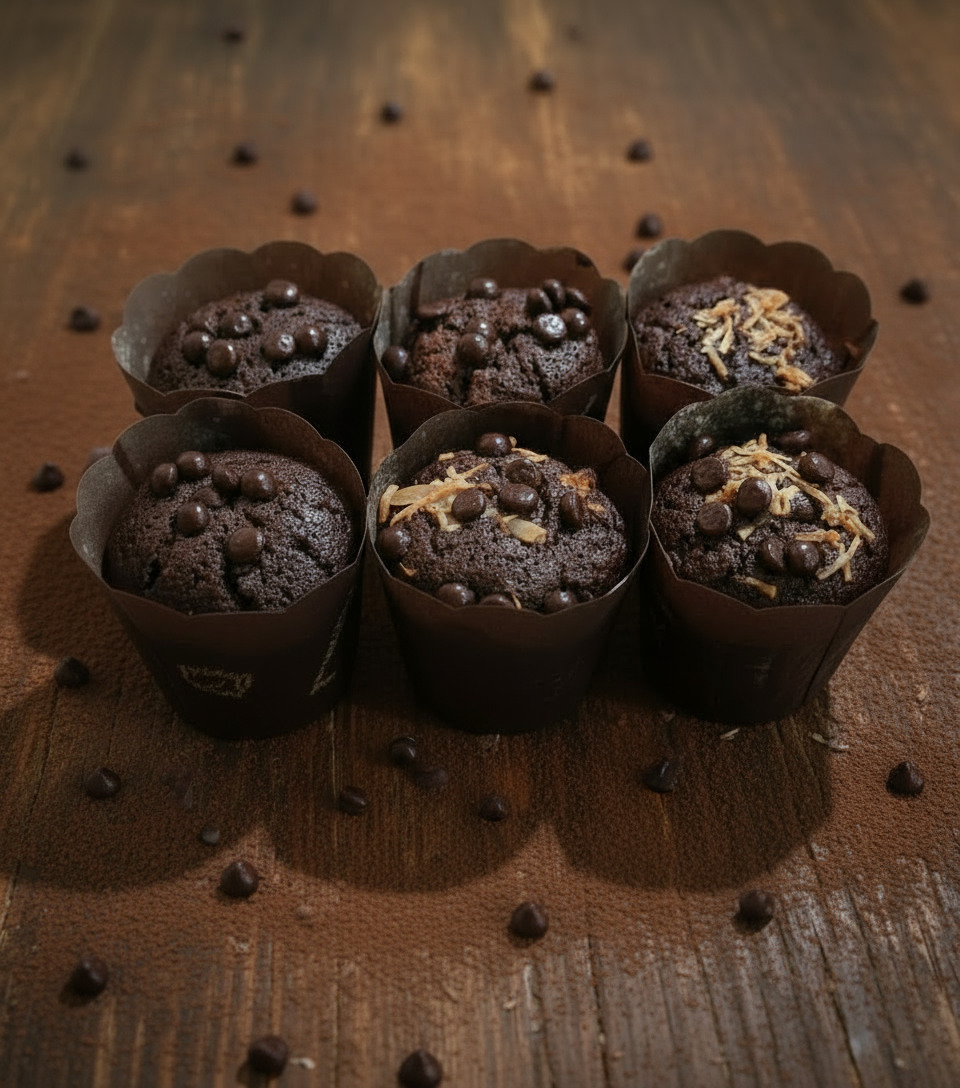
然后,上传以下图片并要求智能体从中生成宣传片
Generate a slow zoom in and moving from left and right animation
您将遇到以下错误
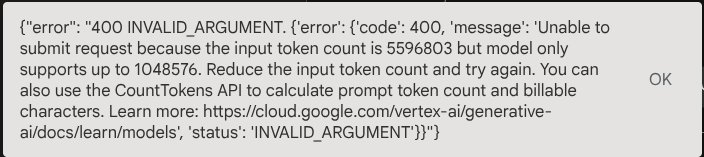
为什么?因为该工具也以 base64 字符串的形式直接返回结果,这将超出令牌上限。现在,我们将在下一部分中处理此错误。
6. 🚀 修改工具响应
在本部分中,我们将处理来自 MCP 响应的工具响应。我们将执行以下操作:
- 将工具的视频回应存储在制品服务中
- 改为向智能体返回制品标识符
谨此提醒您,我们将在以下智能体运行时中点击
首先,我们来实现回调函数,打开 product_photo_editor/tool_callbacks.py 并对其进行修改以实现
after_tool_modifier
# product_photo_editor/tool_callbacks.py

from google.genai.types import Part
from typing import Any
from google.adk.tools.tool_context import ToolContext
from google.adk.tools.base_tool import BaseTool
from google.adk.tools.mcp_tool.mcp_tool import McpTool
import base64
import logging
import json
from mcp.types import CallToolResult


async def before_tool_modifier(
    tool: BaseTool, args: dict[str, Any], tool_context: ToolContext
):
    # Identify which tool input should be modified
    if isinstance(tool, McpTool) and tool.name == "generate_video_with_image":
        logging.info("Modify tool args for artifact: %s", args["image_data"])
        # Get the artifact filename from the tool input argument
        artifact_filename = args["image_data"]
        artifact = await tool_context.load_artifact(filename=artifact_filename)
        file_data = artifact.inline_data.data

        # Convert byte data to base64 string
        base64_data = base64.b64encode(file_data).decode("utf-8")

        # Then modify the tool input argument
        args["image_data"] = base64_data


async def after_tool_modifier(
    tool: BaseTool,
    args: dict[str, Any],
    tool_context: ToolContext,
    tool_response: dict | CallToolResult,
):
    if isinstance(tool, McpTool) and tool.name == "generate_video_with_image":
        tool_result = json.loads(tool_response.content[0].text)

        # Get the expected response field which contains the video data
        video_data = tool_result["video_data"]
        artifact_filename = f"video_{tool_context.function_call_id}.mp4"

        # Convert base64 string to byte data
        video_bytes = base64.b64decode(video_data)

        # Save the video as artifact
        await tool_context.save_artifact(
            filename=artifact_filename,
            artifact=Part(inline_data={"mime_type": "video/mp4", "data": video_bytes}),
        )

        # Remove the video data from the tool response
        tool_result.pop("video_data")

        # Then modify the tool response to include the artifact filename and remove the base64 string
        tool_result["video_artifact_id"] = artifact_filename
        logging.info(
            "Modify tool response for artifact: %s", tool_result["video_artifact_id"]
        )

        return tool_result
之后,我们需要为智能体配备此函数。打开 product_photo_editor/agent.py 并将其修改为以下代码
# product_photo_editor/agent.py

from google.adk.agents.llm_agent import Agent
from product_photo_editor.custom_tools import edit_product_asset
from product_photo_editor.mcp_tools import mcp_toolset
from product_photo_editor.model_callbacks import before_model_modifier
from product_photo_editor.tool_callbacks import (
    before_tool_modifier,
    after_tool_modifier,
)
from product_photo_editor.prompt import AGENT_INSTRUCTION

root_agent = Agent(
    model="gemini-2.5-flash",
    name="product_photo_editor",
    description="""A friendly product photo editor assistant that helps small business
owners edit and enhance their product photos. Perfect for improving photos of handmade
goods, food products, crafts, and small retail items""",
    instruction=AGENT_INSTRUCTION
    + """
**IMPORTANT: Base64 Argument Rule on Tool Call**

If you found any tool call arguments that requires base64 data,
ALWAYS provide the artifact_id of the referenced file to
the tool call. NEVER ask user to provide base64 data.
Base64 data encoding process is out of your
responsibility and will be handled in another part of the system.
""",
    tools=[
        edit_product_asset,
        mcp_toolset,
    ],
    before_model_callback=before_model_modifier,
    before_tool_callback=before_tool_modifier,
    after_tool_callback=after_tool_modifier,
)
完成!现在,您可以要求智能体不仅帮助您编辑照片,还为您生成视频!再次运行以下命令
uv run adk web --port 8080
然后,尝试使用此图片创建视频
Generate a slow zoom in and moving from left and right animation
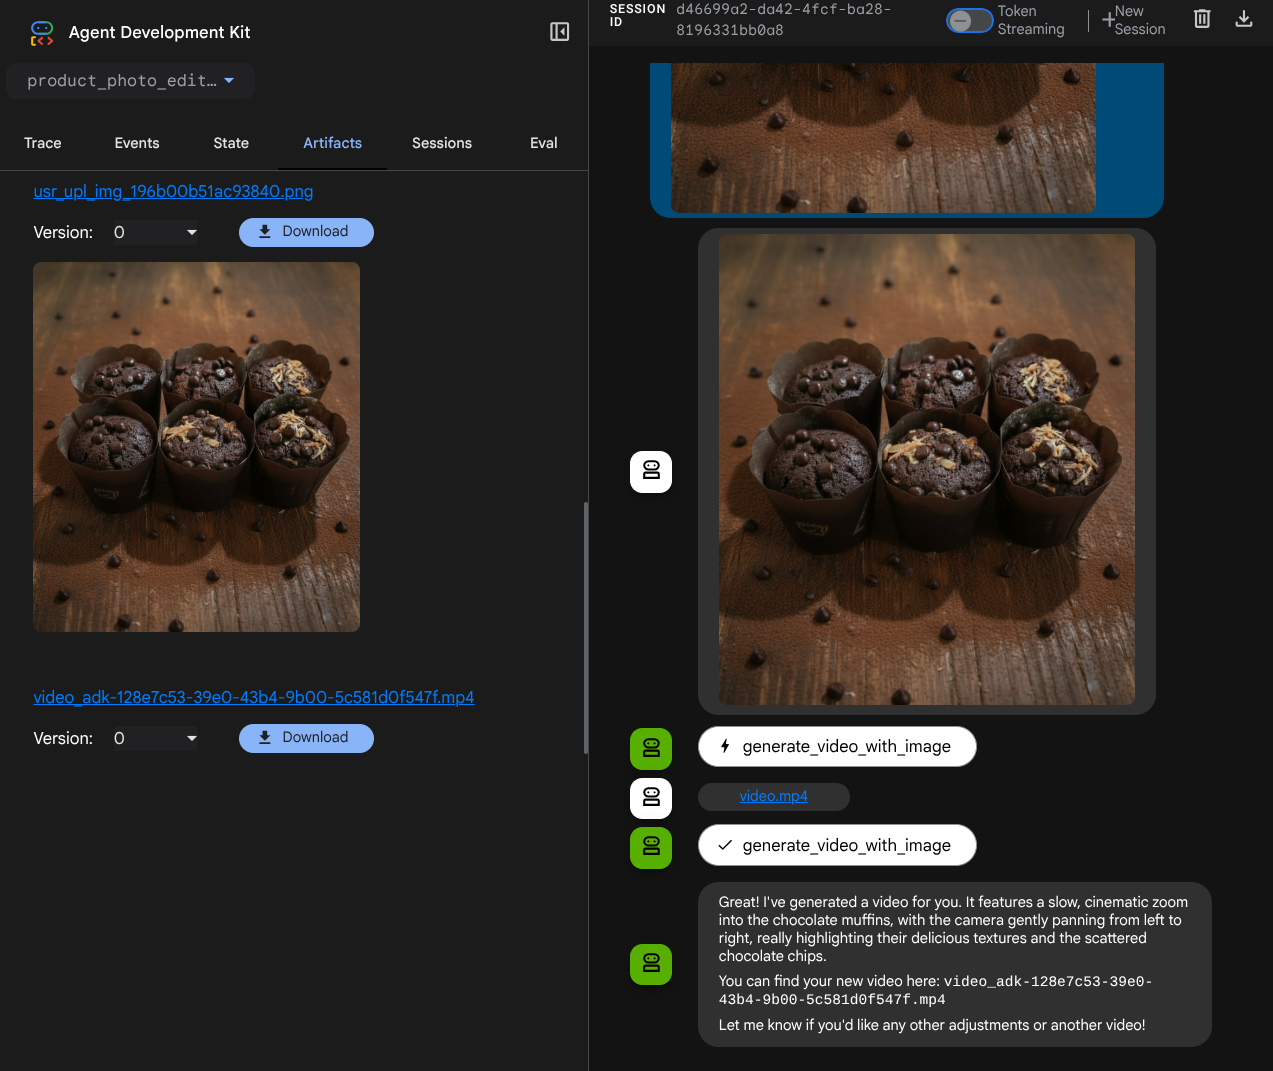
您将看到生成的视频(如以下示例所示),并且已保存为制品
7. ⭐ 总结
现在,我们来回顾一下在此 Codelab 中已完成的操作,以下是关键学习内容:
- 多模态数据处理(工具 I/O):强化了使用 ADK 的制品服务和专用回调(而不是直接传递原始字节数据)来管理工具输入和输出的多模态数据(如图片和视频)的策略。
- MCP 工具集集成:使用 FastMCP 通过 ADK MCP 工具集开发和集成了外部 Veo MCP 服务器,以向智能体添加视频生成功能。
- 修改工具输入 (before_tool_callback):实现了一个回调来拦截 generate_video_with_image 工具调用,将文件的 artifact_id(由 LLM 选择)转换为 MCP 服务器输入所需的 base64 编码图片数据。
- 修改工具输出 (after_tool_callback):实现了一个回调来拦截来自 MCP 服务器的大型 base64 编码视频响应,将视频另存为新制品,并向 LLM 返回干净的 video_artifact_id 引用。
8. 🧹 清理
为避免系统因本 Codelab 中使用的资源向您的 Google Cloud 账号收取费用,请按照以下步骤操作:
- 在 Google Cloud 控制台中,前往 管理资源 页面。
- 在项目列表中,选择要删除的项目,然后点击删除 。
- 在对话框中输入项目 ID,然后点击关停 以删除项目。