
1. Overview
Cloud Shell is an online development and operations environment accessible anywhere with your browser. You can manage your resources with its online terminal preloaded with utilities such as the gcloud command-line tool, kubectl, and more. You can also develop, build, debug, and deploy your cloud-based apps using the online Cloud Shell Editor
In this lab, you will work with Cloud Shell, Cloud Shell Editor, creating and deploying and testing container-based applications using Cloud Code on local emulators and on the real services.
What you will learn
- Navigate and get familiar with Cloud Shell main features
- Practice with different Cloud Shell usage patterns
- Customize your Cloud Shell environment for advanced use
- Get familiar with Cloud Code options and features
- Know the details of Cloud Code for Kubernetes applications
- Use local emulators like Minikube
Prerequisites
- You will need a GCP project with Editor permissions, a GCP account and access to Cloud Shell
- For the optional parts, you'll need a terminal emulator and the Google Cloud SDK installed.
2. Setup and Requirements
Self-paced environment setup
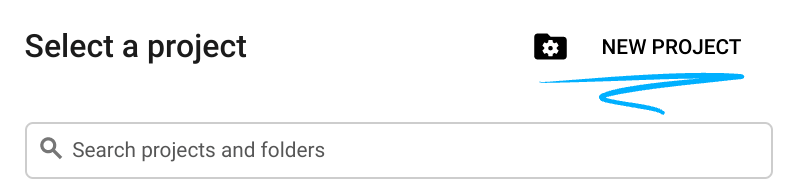
- Sign-in to the Google Cloud Console and create a new project or reuse an existing one. If you don't already have a Gmail or Google Workspace account, you must create one.

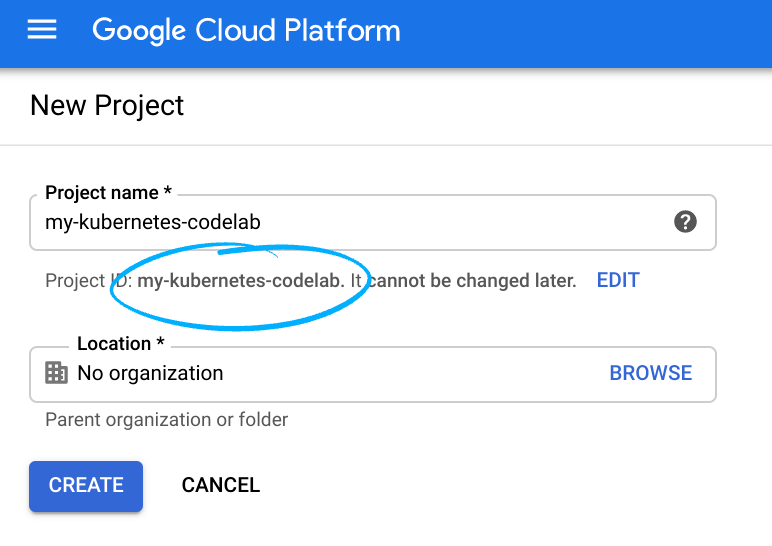
- The Project name is the display name for this project's participants. It is a character string not used by Google APIs. You can update it at any time.
- The Project ID is unique across all Google Cloud projects and is immutable (cannot be changed after it has been set). The Cloud Console auto-generates a unique string; usually you don't care what it is. In most codelabs, you'll need to reference the Project ID (it is typically identified as
PROJECT_ID). If you don't like the generated ID, you may generate another random one. Alternatively, you can try your own and see if it's available. It cannot be changed after this step and will remain for the duration of the project. - For your information, there is a third value, a Project Number which some APIs use. Learn more about all three of these values in the documentation.
- Next, you'll need to enable billing in the Cloud Console to use Cloud resources/APIs. Running through this codelab shouldn't cost much, if anything at all. To shut down resources so you don't incur billing beyond this tutorial, you can delete the resources you created or delete the whole project. New users of Google Cloud are eligible for the $300 USD Free Trial program.
3. Working with Cloud Shell Terminal
In this section, you will learn about the Cloud Shell Terminal, how to navigate the UI, use the features, and explore the configuration options and different ways to use it to help you boost your productivity.
Cloud Shell has two main tools, the Cloud Shell Terminal and the Cloud Shell Editor. In this lab the terms Cloud Shell Terminal and Cloud Shell will be used interchangeably, however the Editor will always be referred to as Cloud Shell Editor to make a clear distinction between the terminal emulator and the IDE.
Cloud Shell is a fully functional cloud-based Shell built on top of an ephemeral Google Compute Engine Debian-based Linux machine that's always available for you to use. It comes with Google Cloud SDK installed and several relevant tools like git, kubectl, kubectx, curl, python3, tmux...
Your $HOME directory is persisted in Cloud Storage by Google Cloud and mounted automatically each time the Cloud Shell machine starts, so you won't lose any information that you leave under it even if the Cloud Shell machine shuts down. That means if you enable Cloud Shell again, your $HOME directory and any customization you may have done to it will be there for you to use.
Launching Cloud Shell
- Go to
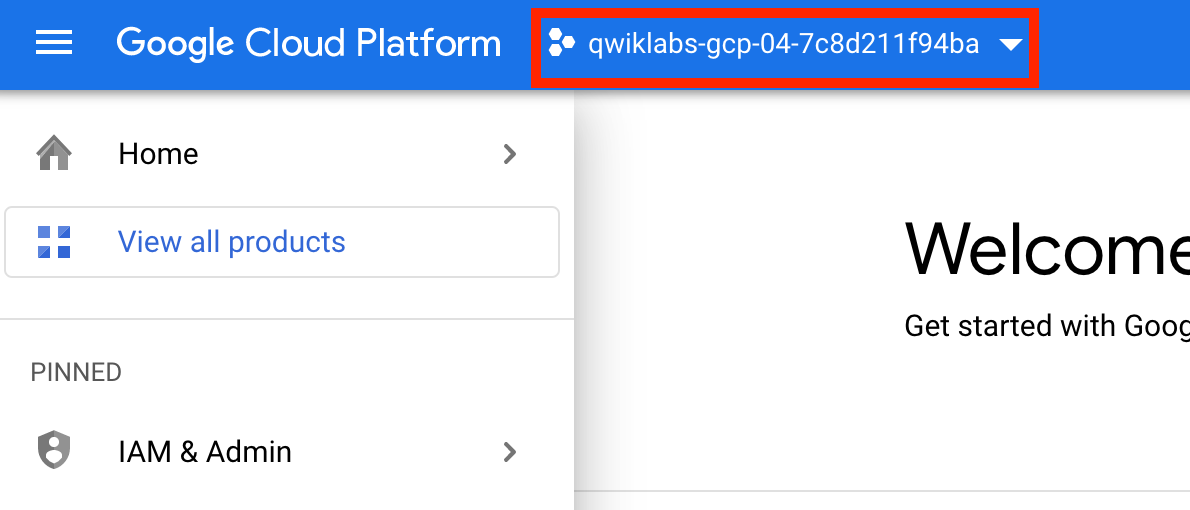
console.cloud.google.comand if not already logged in in the GCP console, enter your Google credentials. You will be presented with the Google Cloud Platform's Console main UI. - Select the GCP Project ID you'll be working with in the Cloud Console menu bar selector:
- Find the button to activate Cloud Shell in the right side of the menu bar, next to the avatar of your account:

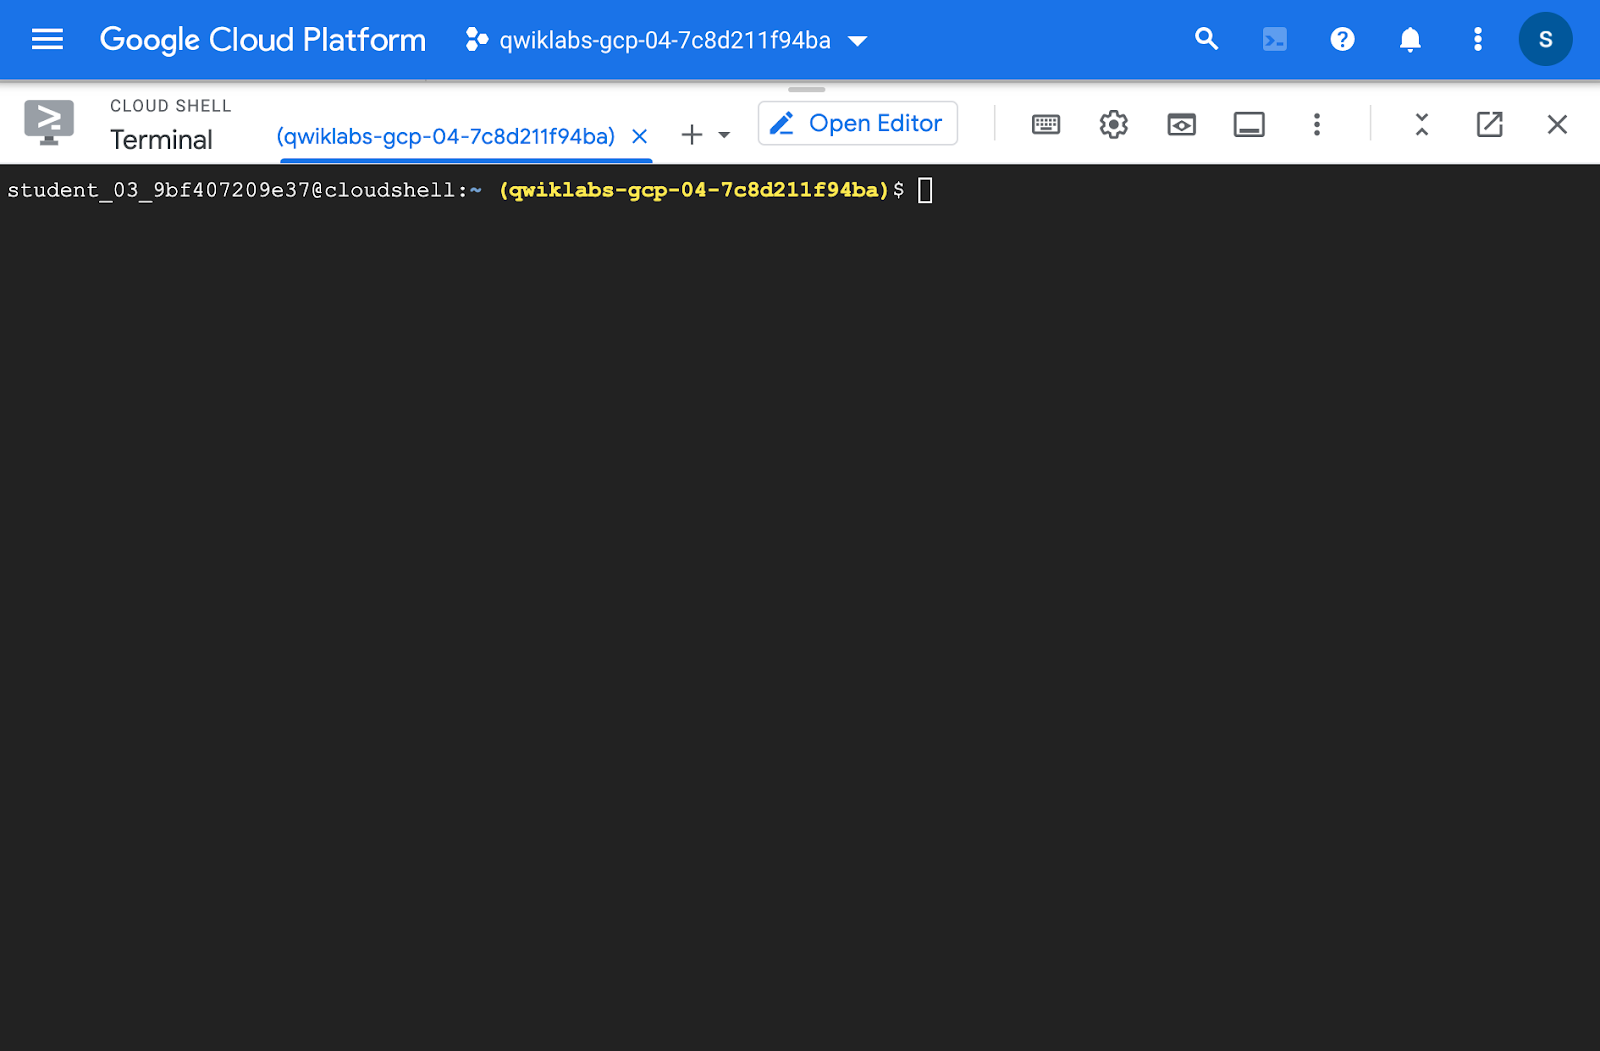
- Click the Cloud Shell icon and the Cloud Shell Terminal will open, revealing a new pane right under the GCP Console UI: UI:
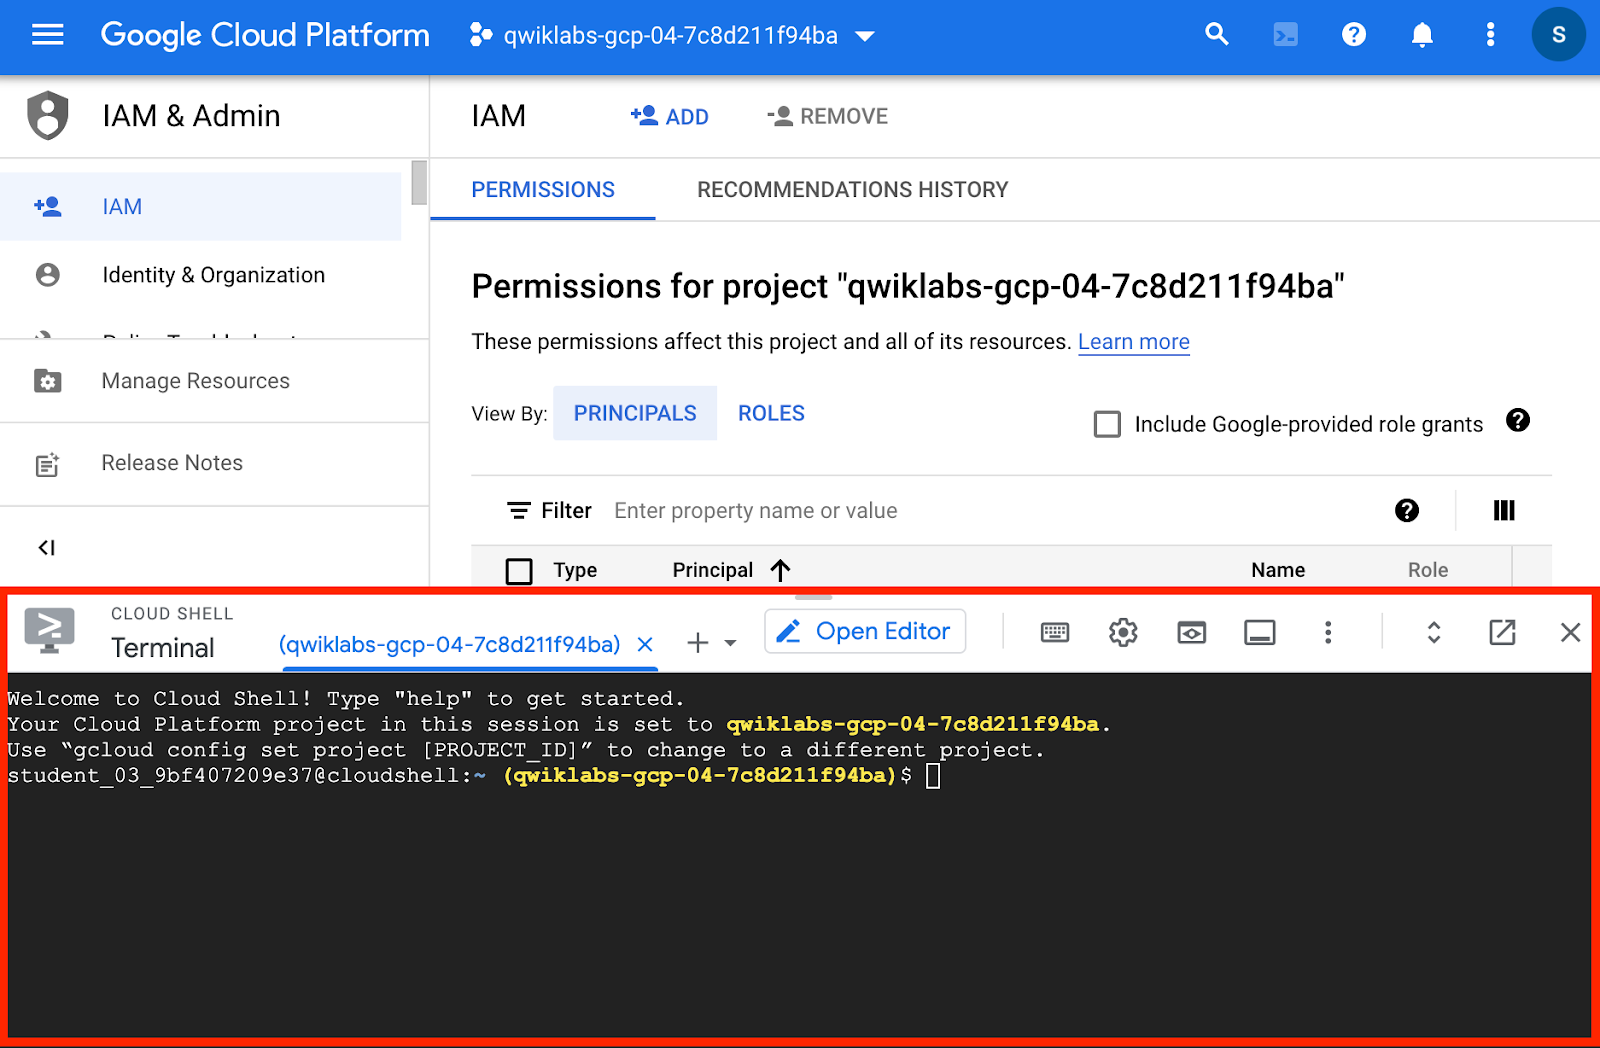
In this pane, you have what is called the Cloud Shell Terminal.
- Go to the Cloud Shell Terminal, and notice that as you selected the proper GCP Project ID from the GCP console, Cloud Shell knows about it so you don't have to specify it again:
echo $GOOGLE_CLOUD_PROJECT
This will output your GCP Project ID, which is also shown in the Cloud Shell prompt.
Switching between tools
Cloud Shell gives you several tools and configuration options. Review them through the options available in the Cloud Shell Menu:

- Click the button
 in the bar that will allow you to maximize Cloud Shell Terminal and occupy all your browser's tab real estate:

- Cloud Shell maximizes and occupies the full browser tab space:
- Click it again. The browser tab real estate will revert to being shared between the Cloud Console and Cloud Shell.
Opening new tabs
Cloud Shell Terminal allows you to open as many tabs as you need.
- Click the following button and open a new tab.

- Now close the new tab clicking on the x next to the tab name or typing
exitin the corresponding shell:

Opening a new window
Opening Cloud Shell in a new browser window allows you to have the Cloud Console in one window and Cloud Shell in another one.
- Click the following button and observer how Cloud Shell opens in a new browser tab:

- Notice that Cloud Shell now offers the same toolbar options, but with a slight different look:

- Stay in this new browser tab throughout the next sections.
Transferring sessions with Tmux
Cloud Shell comes with tmux included. Tmux is a very popular terminal multiplexer, similar to GNU Screen. The integration with tmux gives Cloud Shell the ability to preserve your session no matter where you are.
In the following steps you will practice with this concept to better understand the feature.
Moving the Cloud Shell Terminal around
- In the Cloud Shell tab that you just opened, type the command
top:
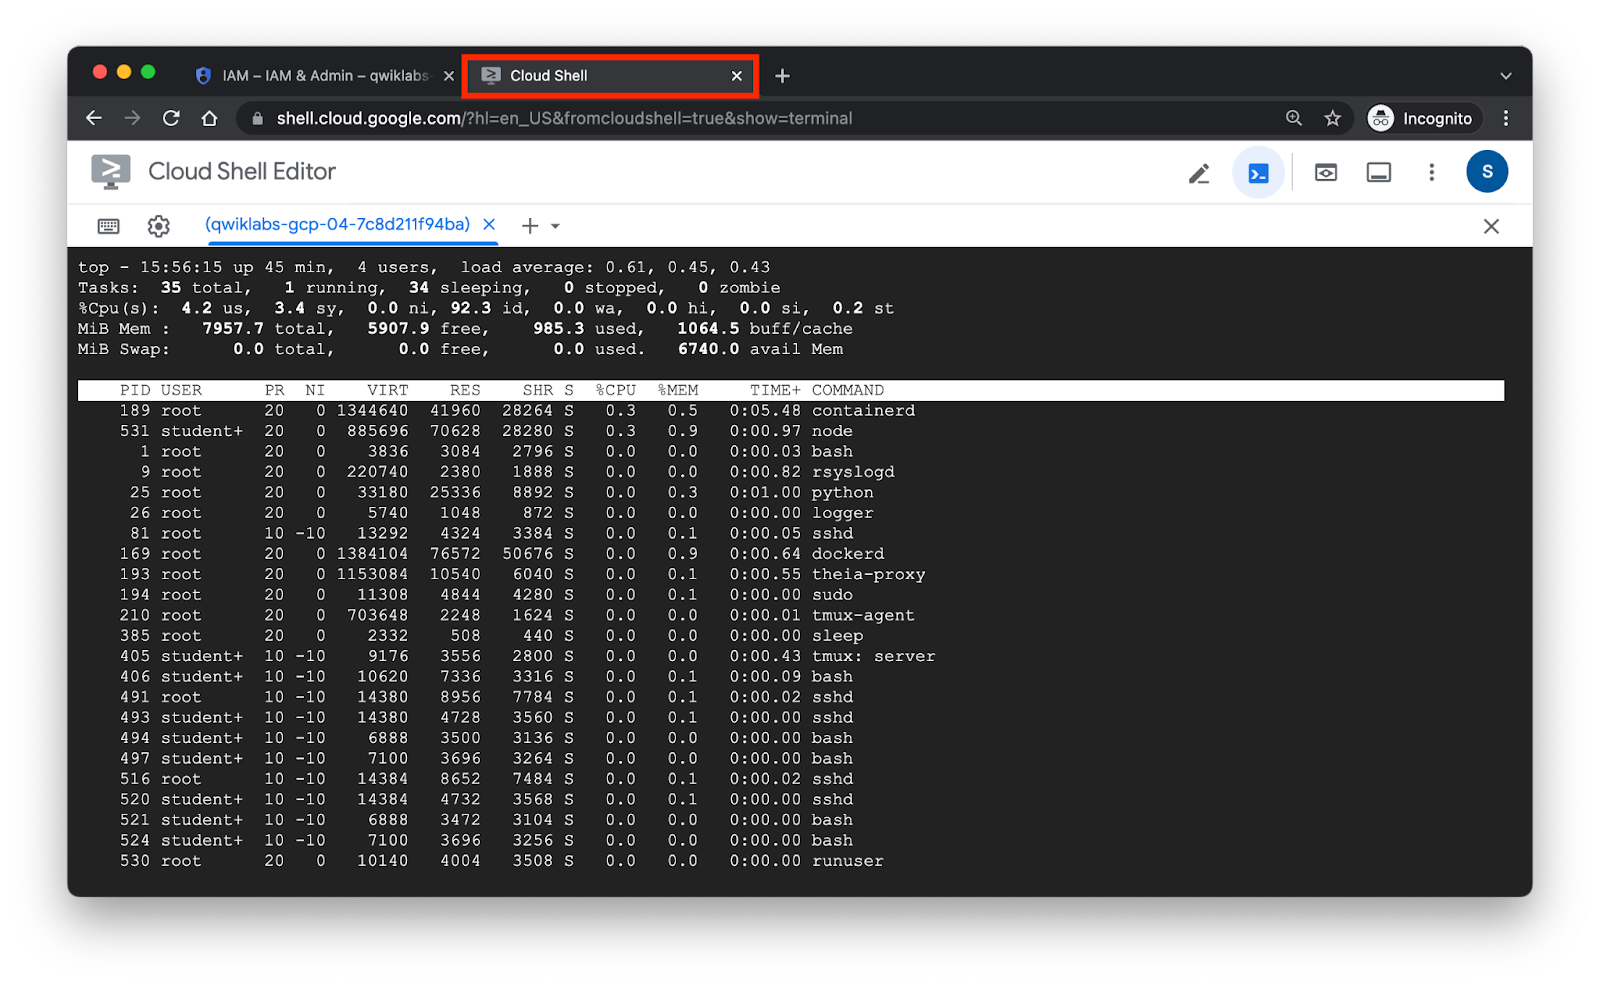
The top command provides a real time view of the processes running in your Cloud Shell Terminal. You will use it to visualize the session persistence in Cloud Shell provided by tmux.
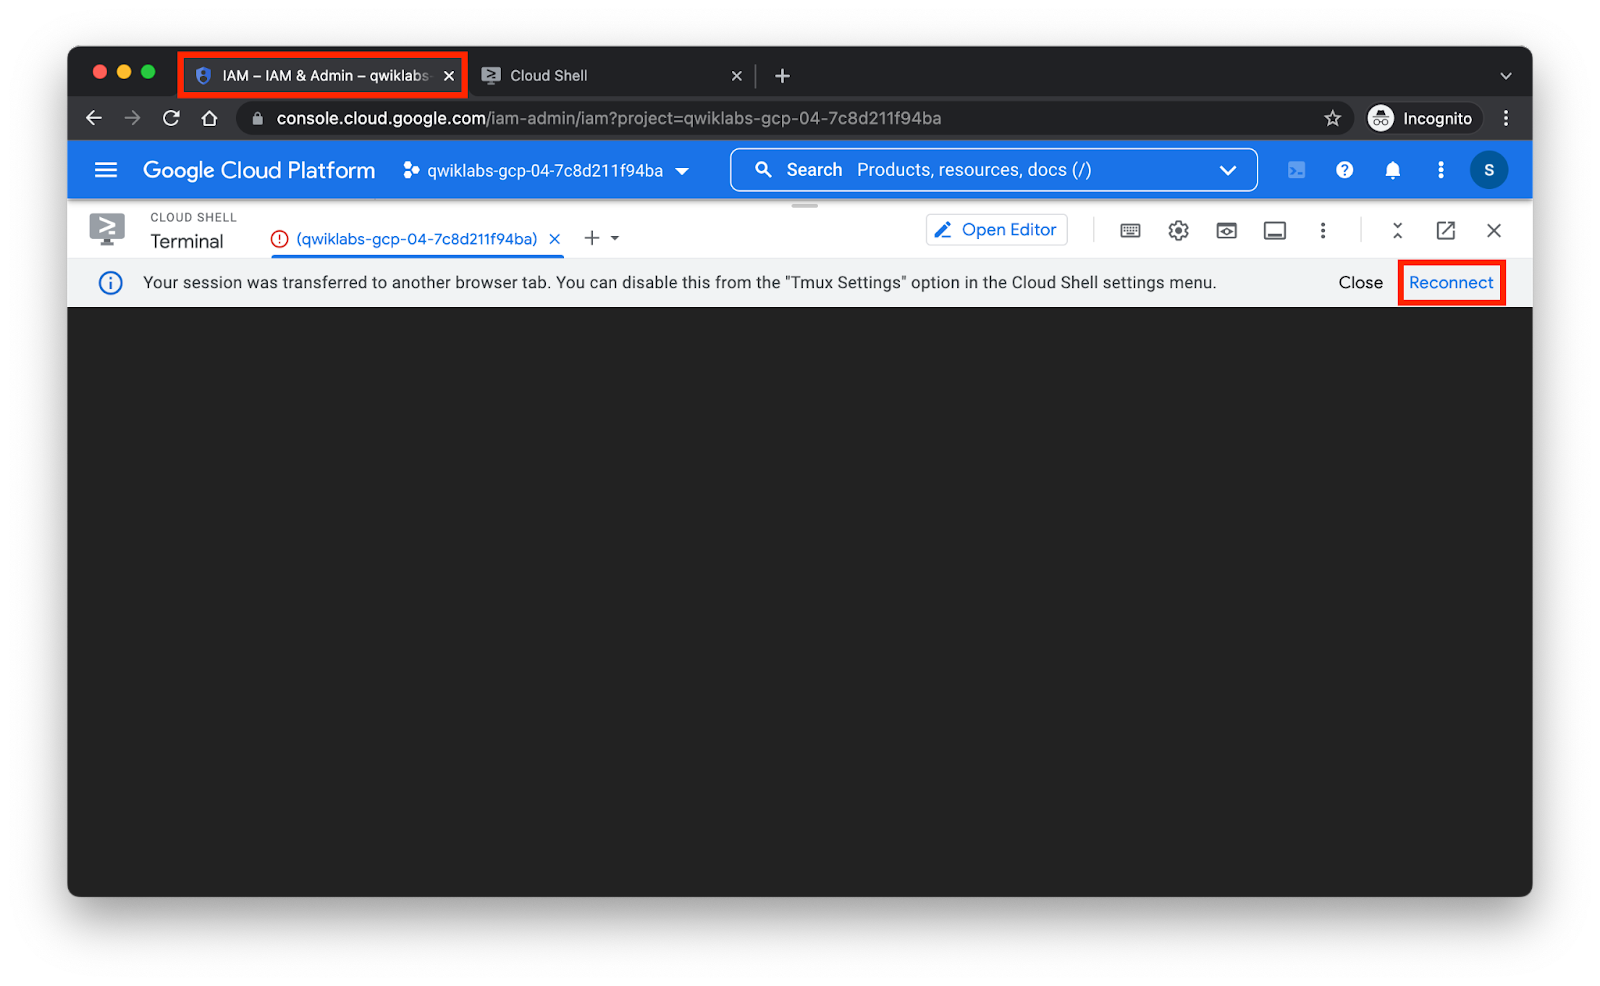
- Return to the first tab in your browser (the one where the Cloud Console is).
- Observe that, because you previously decided to open Cloud Shell in a new window, there's a message saying "
Your session was transferred to another browser tab. You can disable this from the "Tmux Settings" option in the Cloud Shell settings menu." - Click on the reconnect button:
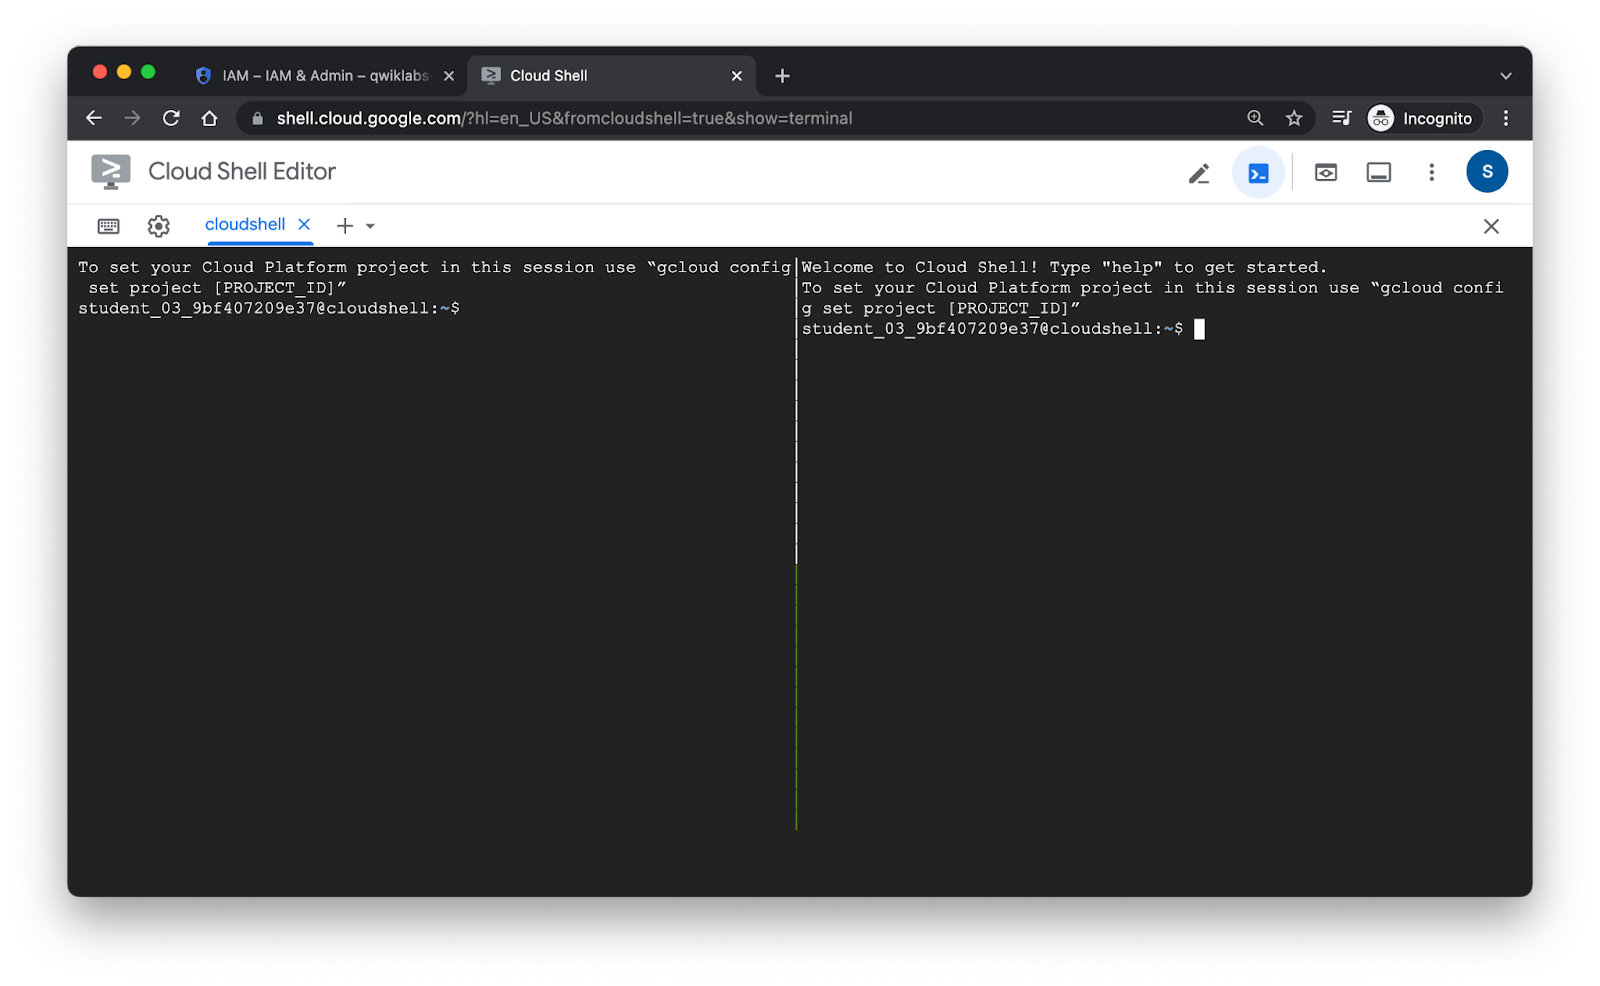
You will then have access to the shell that was running in the second tab, and top continues running here just as you just left it.
- Navigate to the second tab in your browser, where you opened Cloud Shell in a new window,
- Click Reconnect. You will recover the top process just as it was running before we closed the window.
Splitting Windows with Tmux
Tmux is far more useful than what you just used it for. A tmux tutorial is out of the scope of this lab, you can find more information about it in the official tmux getting started.
However, tmux gives Cloud Shell some additional features that are possible in local terminal emulators. To demonstrate one, you will do a side-by-side terminal split.
- Inside the Cloud Shell, press
Ctrl + b, and then% - Observe how tmux creates a new pane right to the original one:
- Click on the second pane and type
exit.
Utilize Web Preview
Cloud Shell can also establish automatic port forwarding from the Cloud Shell machine running in the cloud through your local browser running in your computer.
- Type in Cloud Shell:
python3 -m http.server 8080
- Go to the Web Preview option in the upper right corner and select Preview on port 8080:
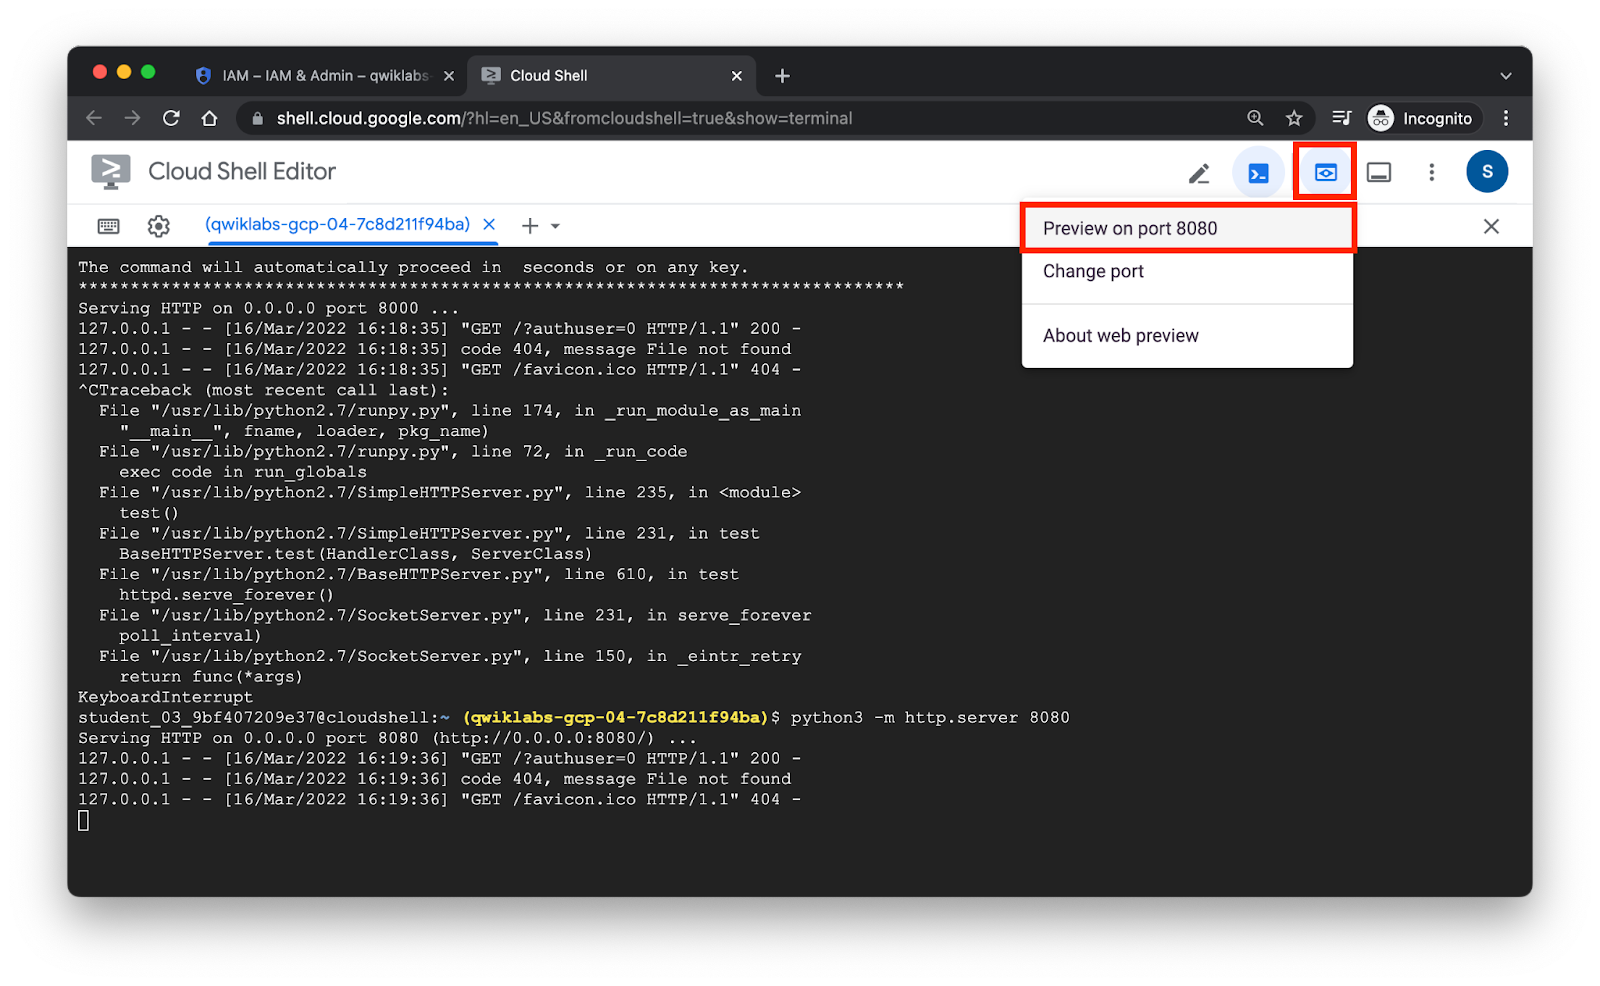
A new tab will open with the default page that's served in that port.
Note that you can change the port and do a preview for whatever port your application is exposing in Cloud Shell, not just port 8080.
Accessing Additional Cloud Shell options
There are additional settings and options available in Cloud Shell.
- Click the three dots in the Cloud Shell menu to access the options:
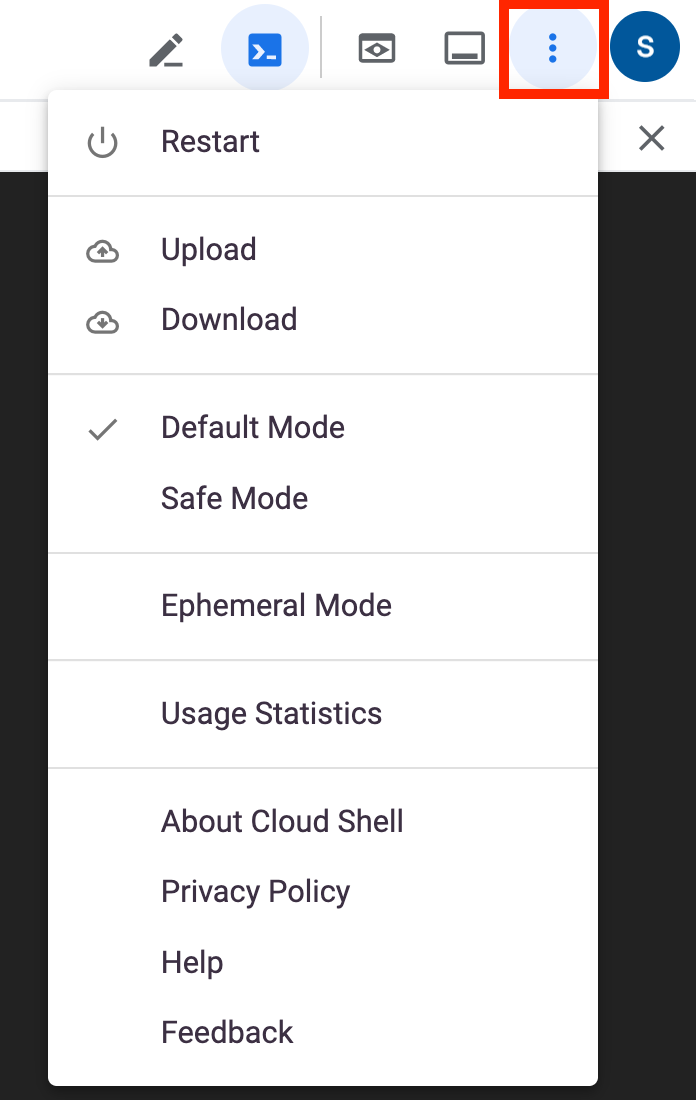
The most relevant options here are the possibility to upload or download files to Cloud Shell, and restart the Cloud Shell machine in case you experience any issues.
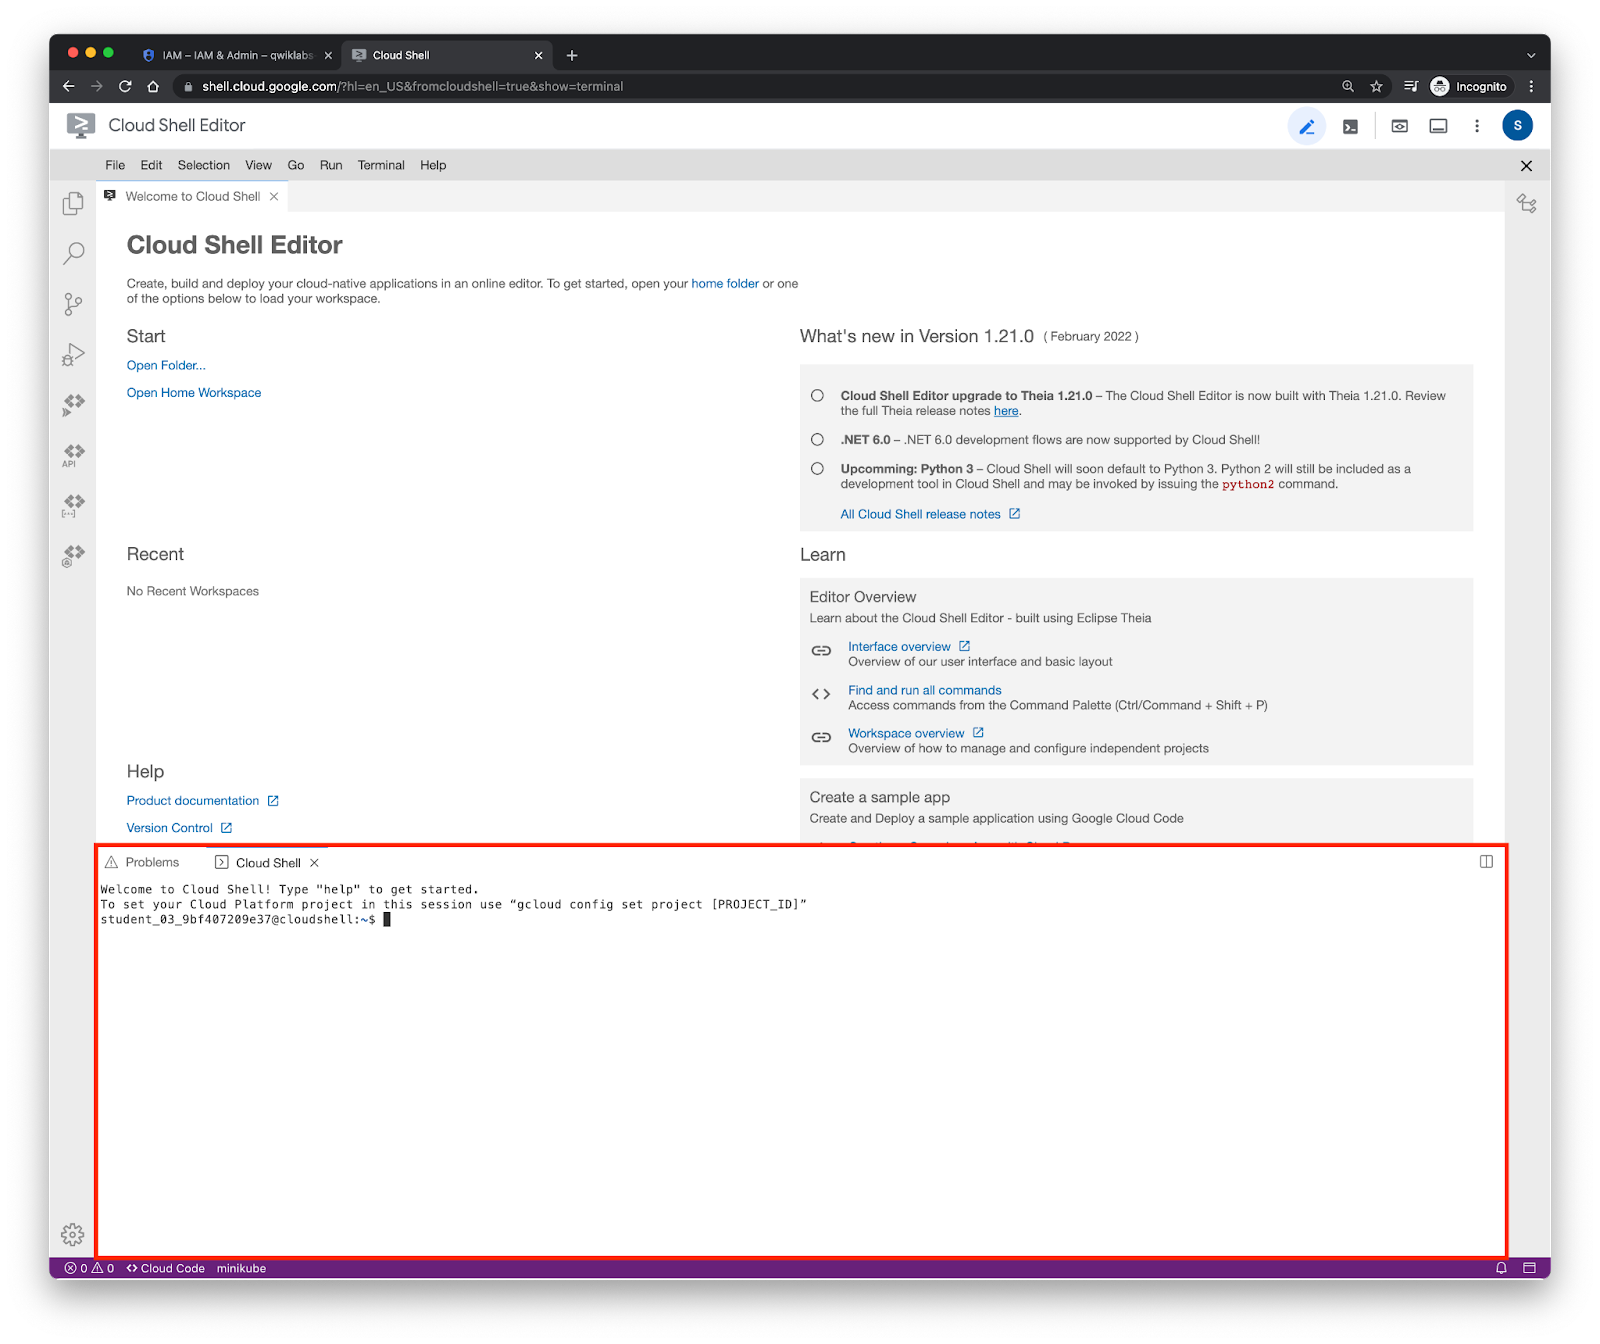
4. Working with Cloud Shell Editor
One of the most important features of Cloud Shell is the Cloud Shell Editor. This is a full fledged IDE based on the Open Source Project Eclipse Theia and contributed to by Google amongst others. The look and feel is very similar to VSCode as both use several common Open Source base components, such as the Monaco editor, the Extension model, the Language Server Protocol and the Debug Adapter Protocol.
As Theia/Cloud Shell Editor is a quite complex tool, describing all Cloud Shell Editor features is out of the scope of this lab. In this section you will walk through some core concepts and unique features available in this Google Cloud implementation.
Accessing Cloud Shell Editor
Cloud Shell Editor can be accessed in three different ways:
- Access from the command line
- Access through Cloud Shell menu
- Visiting a URL in your browser
Experience these methods through the following steps
- Open the .bashrc from the command line with the following command:
cloudshell edit $HOME/.bashrc
- Open Cloud Shell from the menu, by clicking on the Open Editor
 button:
  This opens the Cloud Shell Editor while keeping open the Cloud Shell Terminal. If you wish to have all the tab real estate for just Cloud Shell Editor, click on the button right to the Edit button to close the terminal. These two buttons (Open/Close Editor and Open/Close terminal) will determine which of the tools is present in the browser tab. Practice clicking on both to get the knack of it.
 - Invoke the Cloud Shell Editor from the URL bar in the browser, by typing
ide.cloud.google.com.
Using the command line from Cloud Shell Editor
Although you have Cloud Shell Terminal and Cloud Shell Editor coexisting in the same browser tab, you can dispense with Cloud Shell Terminal and use exclusively Cloud Shell Editor, and the terminal available from inside Cloud Shell Editor, for all your needs. This may make sense if you're used to living inside the IDE and know the different shortcuts and pane dynamics from VSCode.
Open the Cloud Shell Editor using any of the methods mentioned above. Then, go to the Editor menu and select Terminal > New Terminal (or press `Ctrl + `` in your keyboard). A new terminal pane will open in the lower part of Cloud Shell Editor that you can use for all your shell needs:
This will also give you the option to manage different terminal panes without the need to use tmux pane management as it was the case for Cloud Shell Terminal.
Customizing Cloud Shell Settings
Cloud Shell offers several customization options, from look & feel and basic behavior, to Cloud Shell Terminal startup configuration and detailed operation. You will review the different options in some detail in the following sections.
Go to the Cloud Shell Terminal menu and click on the cog icon. Several configuration options will appear:
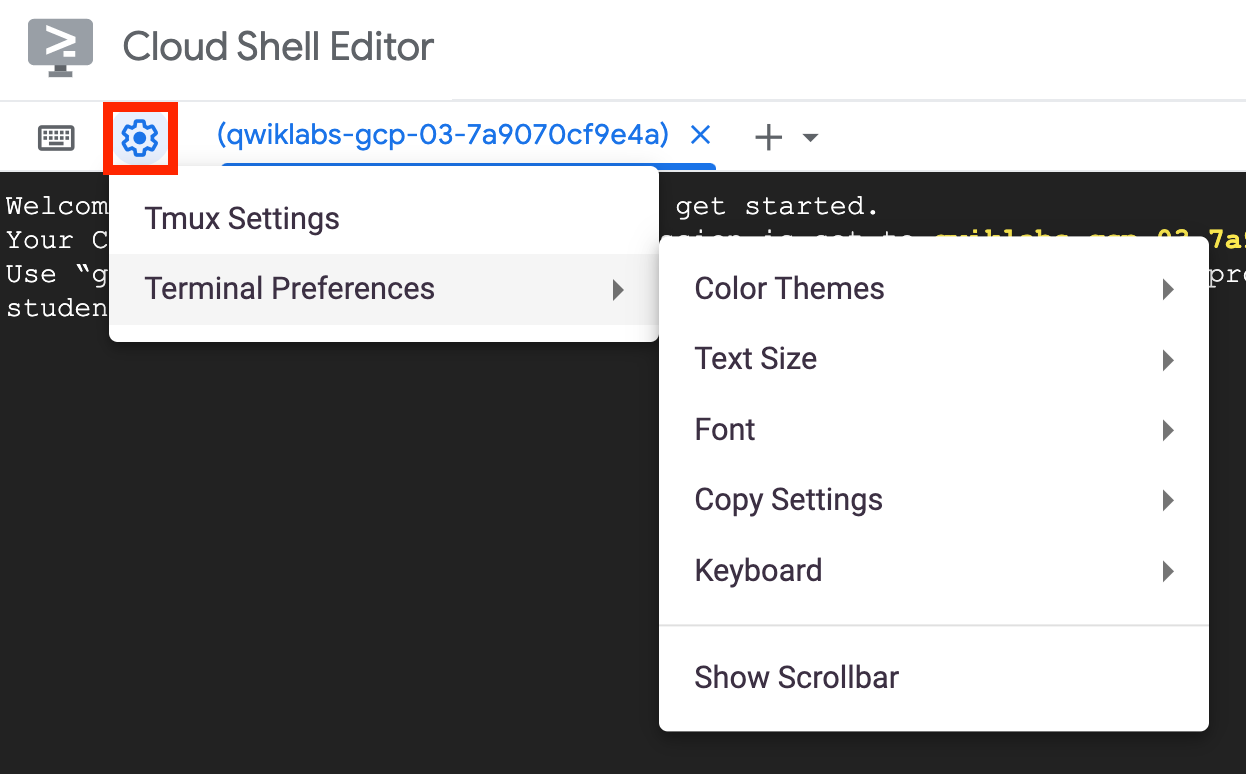
Review some of them:
- Color Themes: you can use Light, Dark , or use a set of custom colors (basic one, like font color and background color)
- Text size: 5 different font sizes to choose from
- Font: Courier new or Monospace
- Copy settings: here you can change the copy keyboard shortcut to resemble the shortcuts used in most popular Linux terminal emulators.
- Keyboard: mapping the Meta key to Alt (by default, Meta is ESC) and mapping of the Alt Gr Key in some OSs.
Configuring the Shell Environment
As a Terminal emulator running a shell in a Debian-based Linux machine, you can customize your shell environment the same way you do it in Linux. As such, any configuration files present in $HOME (like .bashrc) will be sourced each time a new login shell process is created.
Cloud Shell also gives you the ability to specify which actions you want to perform every time the Cloud Shell instance is started in a special configuration file called .customize_environment. You can read more about this in the Environment Customization documentation.
Practice adding some configuration to Cloud Shell Terminal. Go to the Cloud Shell terminal and clone the following sample code repo:
git clone https://gitlab.com/javiercanadillas/cloud-code-getting-started.git
This repo contains samples for the two main events where you may want to configure your Cloud Shell:
- Whenever the Cloud Shell instance starts: the file
$HOME/.customize_environmentwill be read. The execution log for this process can be found in/var/log/customize_environmentand a/google/devshell/customize_environment_donewill be created upon successful execution. - Whenever a new shell process is started (new window, new tab...); the regular bash shell configuration files will be read.
Practice with both by following these steps:
- Execute the following command to launch the customizations provided by the repo:
cd cloud-code-getting-started
source set_env_cust.sh
This sets up both customization options previously mentioned and enables them.
- Notice the new shell prompt. A bash script sourced in
.bash_profilefile has configured this new prompt that's shorter than the default one, and includes basic Git information like the checked out branch or git status. - There's now a new
codealias to thecloudshell editcommand that's shorter. Use it to see the contents of the.bash_profilefile:
code $HOME/.bash_profile
- Use the newly installed command
batto see the contents of the.customize_environmentfile:
bat $HOME/.customize_environment
bat is an enhanced version of the popular Unix tool cat. The bat output is showing here the apt install command used to reinstall hey, a load testing tool, each time a new Cloud Shell machine is spun up.
- Test that everything is working by clicking in the Cloud Shell menu (the three dots in the upper right corner) and selecting Restart.
This will allow you to simulate Cloud Shell timeout and instance recreation, making sure that everything is configured correctly.
Customizing the Cloud Shell Container Image
This customization option allows you to create a Docker image that functions as a custom Cloud Shell environment with additional packages and custom configurations. The image generated will spin up a fully ephemeral Cloud Shell instance, so neither the Cloud Shell VM nor the $HOME directory attached to it will persist. Doing this Image creation will however be useful for use cases where you need to deliver function-specific Cloud Shell instances to third parties so they can perform a specific task in the most efficient way.
Instead of customizing the environment as you did in the previous section, you will bake your changes in a new image that's used to spin up your Cloud Shell. This has obvious advantages as your custom Cloud Shell will start faster.
Creating a new Cloud Shell image
- Start the Cloud Shell container image creation by typing in Cloud Shell Terminal:
cloudshell env create-custom-image custom-cloud-shell
cd custom-cloud-shell
This creates a new directory in your Cloud Shell and a new Cloud Source Repositories repo with the same name to host your code. It also clones a sample Dockerfile in the $HOME/custom-cloud-shell/ directory.
- Add the line
RUN apt install -y heyto the last line of the Dockerfile:
echo "RUN apt install -y hey" >> $HOME/custom-cloud-shell/Dockerfile
This sets up the same customization you had in the .customize_environment, but baked in a container instead.
- Build the image locally:
cloudshell env build-local
- Test the new image by executing the following command:
cloudshell env run
You will now be in a shell inside the image.
- Test that the
heycommand is installed by running it:
hey
- When finished, type
exitto exit the container:
exit
- Push the changes to the Cloud Source Repository and the image to Container Registry:
git commit -a -m "Initial commit"
git push origin master
cloudshell env push
Testing the new image
- Make the image publicly available so you can consume it:
gsutil iam ch allUsers:objectViewer $(gsutil ls)
- Generate a URL that you can use to test your published Cloud Shell custom instance:
echo "https://ssh.cloud.google.com/cloudshell/editor?cloudshell_image=gcr.io/$GOOGLE_CLOUD_PROJECT/custom-cloud-shell"
- Copy the output URL and paste it in a new browser tab, and the Cloud Shell custom instance will open. Note how when you access the instance, there are banners indicating that you're running in full ephemeral mode:

- Test the image again running the hey command
hey
- Once done,
exitthe ephemeral Cloud Shell instance, go back to the tab where your regular Cloud Shell was opened, and click Reconnect.
Access Cloud Shell Remotely with SSH
You can also use Cloud Shell features remotely from your local computer. This typically involves two different use cases:
- SSH'ing to your Cloud Shell machine from your local terminal
- Mounting your Cloud Shell remote
$HOMEdirectory locally.
For this, you'll need to have the Google Cloud SDK locally installed. You will also need to configure it with your project ID and the specific credentials that you're using.
Do the following steps from a terminal emulator running in your local machine:
- Set up the GCP Project ID and log in with the credentials corresponding to the Cloud Organization where you have your Cloud Shell.
gcloud config set project <your project id>
gcloud auth login
- SSH to your remote Cloud Shell machine:
gcloud cloud-shell ssh --authorize-session
You will now be in your Cloud Shell, but using the features and configuration of your local Terminal emulator. If the one you use supports tmux, you may take advantage of further integrations to have a better remote experience.
Mount your Cloud Shell home directory from your local machine
Although being able to SSH to the remote Cloud Shell instance is nice, it's even better to be able to have your local IDE with access to your remote Cloud Shell $HOME directory. This way, you can combine the SSH access demonstrated previously with the ability to edit remote code locally.
To do this, from your local machine, first create a mount point:
mkdir $HOME/cloudshell
This is the directory where your Cloud Shell will be mounted. Now, to mount it, make sure your Cloud Shell instance is started and then type in your local terminal:
$(gcloud cloud-shell get-mount-command $HOME/cloudshell)
cd $HOME/cloudshell
This will get the mount command that you need to issue to mount Cloud Shell locally, and mount it. You will see the contents of your Cloud Shell home directory mounted in your local machine.
Now, you can open an IDE like VSCode locally and open a workspace that's remote in the Cloud. At the same time, by using the SSH access to Cloud Shell, you may open a Terminal pane inside the IDE to also have a remote terminal integrated in your local IDE.
5. Using Cloud Code
Cloud Code is a plugin developed by Google that allows developers to work more effectively with cloud based tools. It's available in multiple IDEs and code editors such as VSCode and Jetbrains products and it's integrated by default into the Cloud Shell Editor for your convenience. Cloud Code includes plenty of developer friendly features that you'll be practicing with in the next steps.
Locating Cloud Code in your Cloud Shell Editor
Using the Quick Access Buttons
Find the following four button exposed in the left pane of the editor:
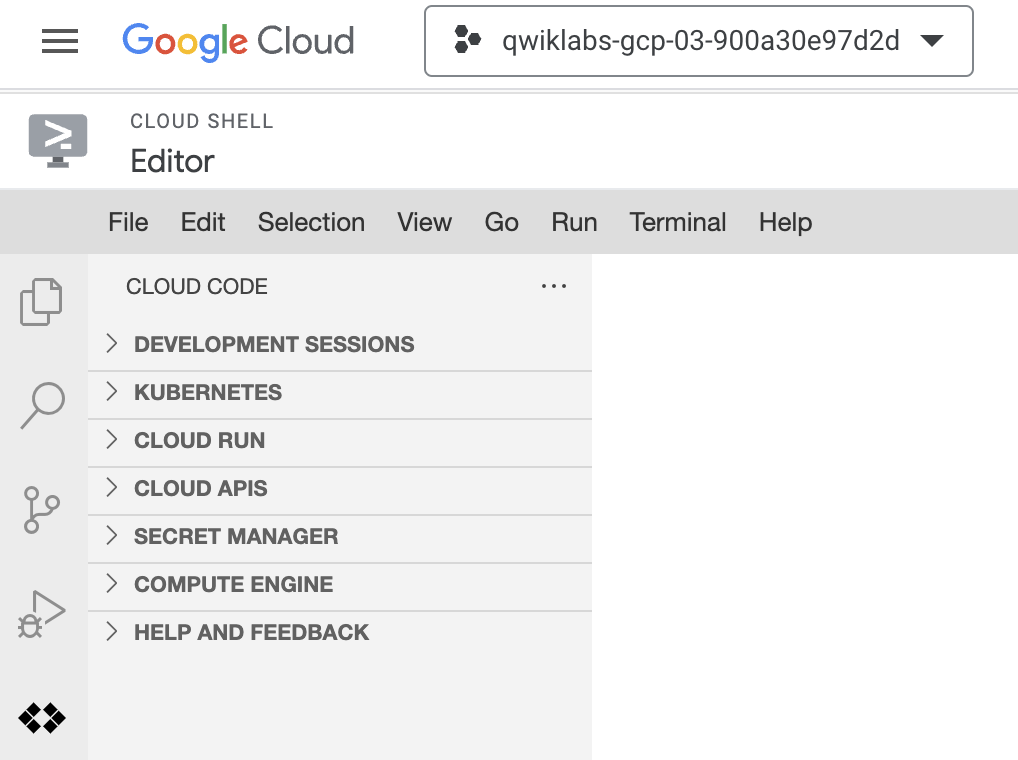
These menu items allow easy access and configuration to GCP services straight from the Cloud Shell Editor.
In this lab, you will be focusing on the Kubernetes Clusters.
Using the status bar
There are two additional parts of Cloud Cloud exposed through the Cloud Shell Editor UI that are relevant. You can see both in the lower bar in the Editor:

- <> Cloud Code: clicking here will expose a quick actions menu that you'll be using through this tutorial:

- Control minikube: this will let you control the local kubernetes emulator, minikube, with basic actions like starting or stopping the cluster.
Creating a Minikube instance
Create a Minikube instance now by clicking on the button.

Creating a GKE Cluster with Cloud Code
- Click the icon
Cloud Code - Kubernetes Clusters( ) on the left. You will see a new pane appearing on the left called CLOUD CODE - KUBERNETES: CLUSTERS.
 - Click on the + button next to CLOUD CODE - KUBERNETES: CLUSTERS and select Google Kubernetes Engine (note that you could also choose other options like the Minikube you spun up before):
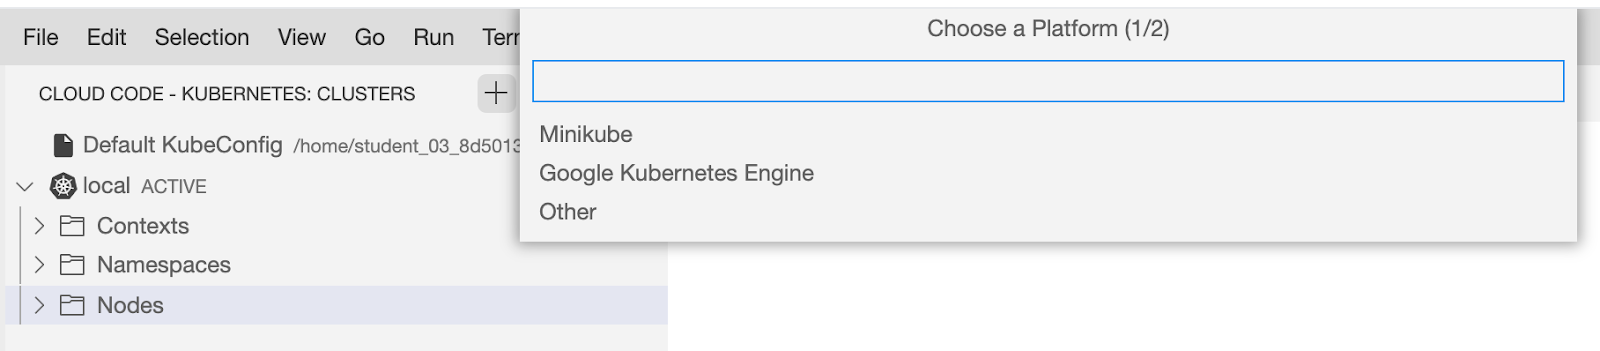
- Click on Create a New GKE Cluster. This option will load a new pane on the right where you can enter additional information to quickly create a Development Cluster. Follow the instructions in the panel and enter the following information:
- Choose Autopilot
- Select your region (europe-west-1)
- Give your cluster the name "dev"
- Click the Create Cluster button. This will create a new Autopilot cluster.
The cluster creation process cant take up 5 five minutes. So while the cluster is being created, go ahead and explore a bit more of the Cloud Code Kubernetes Pane.
Exploring the Cloud Code Kubernetes pane
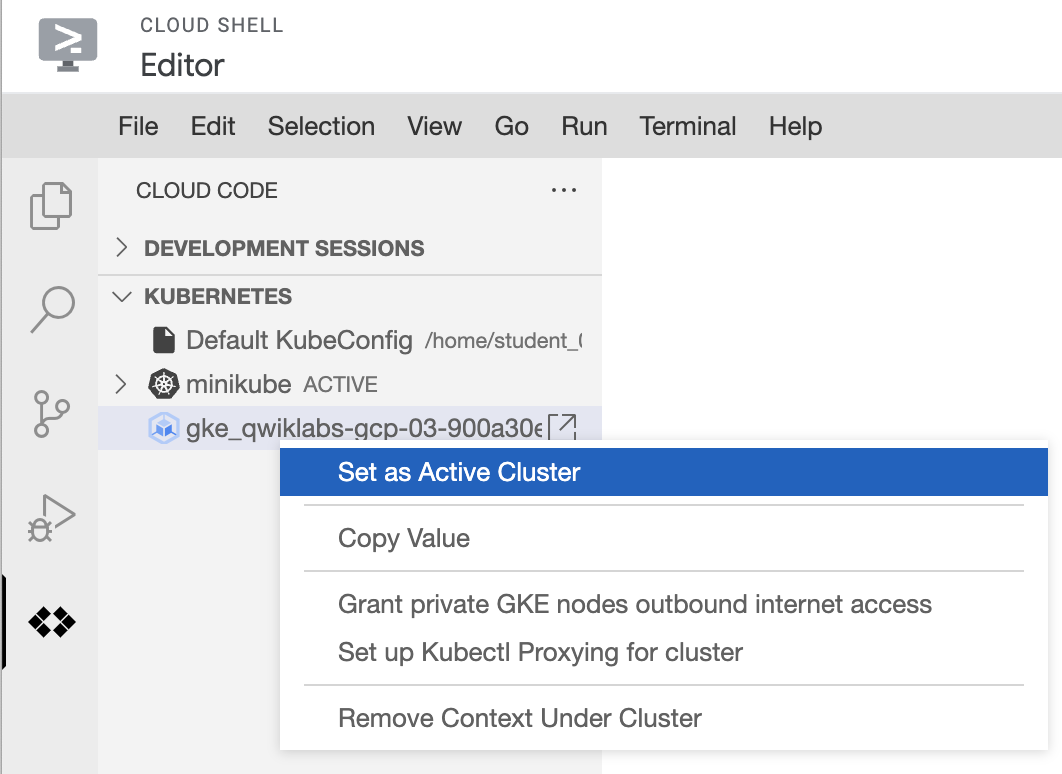
Earlier you created a Minikube cluster. When it's ready this cluster will appear in the Cloud Code Kubernetes pane with the name you gave it, minikube:

The cluster will appear as ACTIVE in the UI. This setting is in sync with the current kubernetes context in the command line. .
What you can see in the Cloud Code Kubernetes pane is the following:
- The default KubeConfig file: Cloud Code reads the ~/
.kube/configfile for you user and uses it to connect to the Kubernetes Clusters configured there so you can easily navigate them. You can edit the Kubeconfig file by hovering over theDefault Kubeconfigline and then clicking the square with the outgoing arrow next to it if you want. - A browsable renderization of the different objects of your registered clusters: in this case, you can see the
minikubeMinikube cluster that you created before, with its Contexts, Namespaces and Nodes. Go ahead and expand some of the nodes of the tree. There won't be any pods yet as you haven't deployed any application.
Once your new GKE cluster is up and running it will be shown in the left pane along with the minikube Minikube cluster. Note that you can right click on any of the clusters and make it "active" in the sense of selecting the cluster for any of the Cloud Code actions that you may launch:
6. Congratulations!
Congratulations, you finished the codelab!
What you've covered
- Navigated and got familiar with Cloud Shell main features
- Practiced with different Cloud Shell usage patterns
- Customized your Cloud Shell environment for advanced use
- Got familiar with Cloud Code options and features
- Reviewed the details of Cloud Code for Kubernetes applications
- Use local emulators like Minikube