
1. Introduction
Thank you for opening this codelab! Ready to crunch some numbers on Compute Engine?
In this codelab, we will walk through how to start a new virtual machine and run a program to calculate pi.
You'll create a Compute Engine instance, download, compile, and run a program to calculate pi. You can create a Compute Engine instance from either the Console or the command line. This lab will walk you through using the command line tools.

Compute Engine offers virtual machines running in various shapes, such as different numbers of cores, memory size, and storage. You can use a machine with more than 100 cores and several hundreds of GB of memory if necessary, but in this example we'll launch a predefined 2 vCPU, 8 GB memory virtual machine.
We'll use the N2 machine series in this codelab. It is a general-purpose machine family VM that targets most standard and cloud-native workloads. The N2 series has higher per-thread performance and all the flexibility that the general-purpose machine family offers.
Now, let's get started!
2. Setup and Requirements
Self-paced environment setup
- Sign-in to the Google Cloud Console and create a new project or reuse an existing one. If you don't already have a Gmail or Google Workspace account, you must create one.


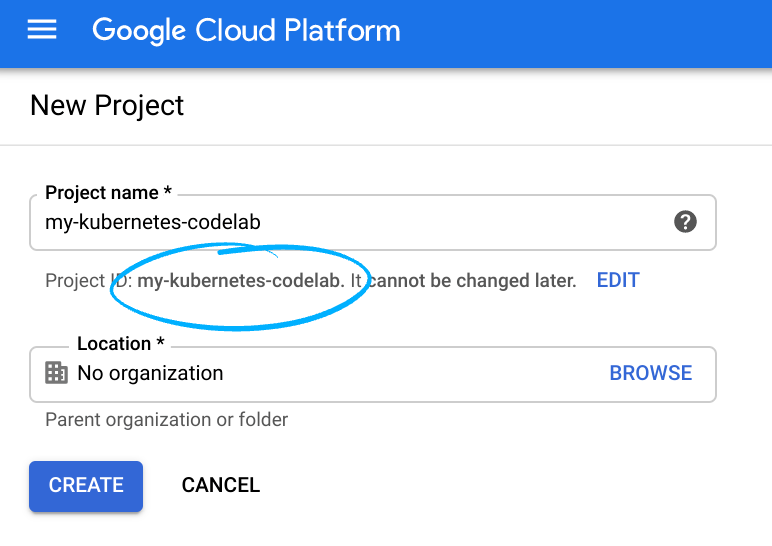
- The Project name is the display name for this project's participants. It is a character string not used by Google APIs. You can update it at any time.
- The Project ID is unique across all Google Cloud projects and is immutable (cannot be changed after it has been set). The Cloud Console auto-generates a unique string; usually you don't care what it is. In most codelabs, you'll need to reference the Project ID (it is typically identified as
PROJECT_ID). If you don't like the generated ID, you may generate another random one. Alternatively, you can try your own and see if it's available. It cannot be changed after this step and will remain for the duration of the project. - For your information, there is a third value, a Project Number which some APIs use. Learn more about all three of these values in the documentation.
- Next, you'll need to enable billing in the Cloud Console to use Cloud resources/APIs. Running through this codelab shouldn't cost much, if anything at all. To shut down resources so you don't incur billing beyond this tutorial, you can delete the resources you created or delete the whole project. New users of Google Cloud are eligible for the $300 USD Free Trial program.
Google Cloud Shell
While Google Cloud and Compute Engine can be operated remotely from your laptop, in this codelab we will be using Google Cloud Shell, a command line environment running in the Cloud.
This Debian-based virtual machine is loaded with all the development tools you'll need. It offers a persistent 5GB home directory and runs in Google Cloud, greatly enhancing network performance and authentication. This means that all you will need for this codelab is a browser (yes, it works on a Chromebook).
- To activate Cloud Shell from the Cloud Console, simply click Activate Cloud Shell
 (it should only take a few moments to provision and connect to the environment).

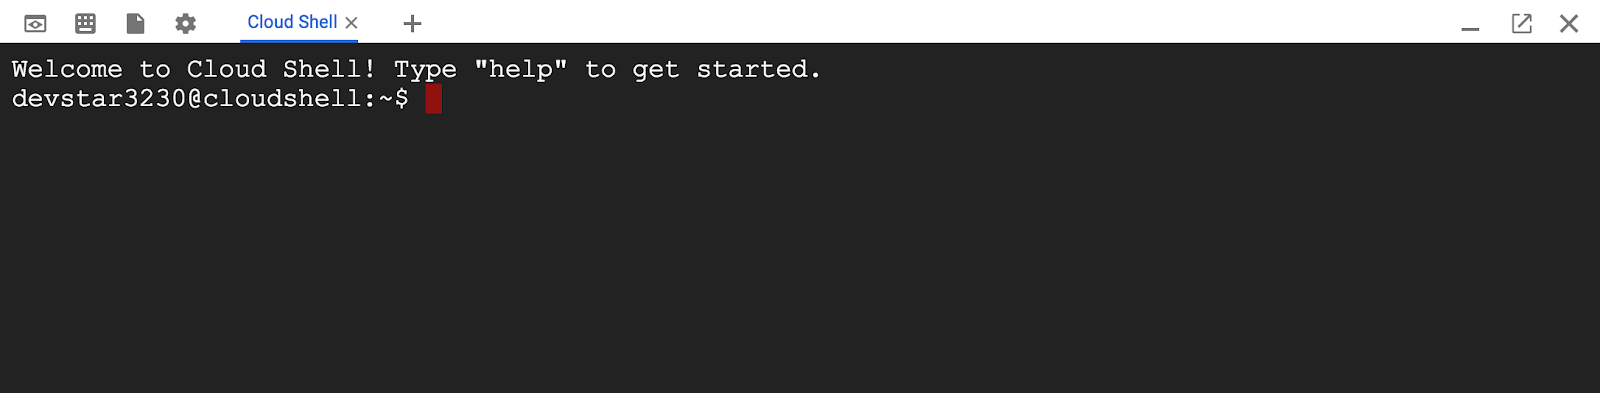
Once connected to Cloud Shell, you should see that you are already authenticated and that the project is already set to your PROJECT_ID.
gcloud auth list
Command output
Credentialed accounts:
 - <myaccount>@<mydomain>.com (active)
gcloud config list project
Command output
[core]
project = <PROJECT_ID>
If, for some reason, the project is not set, simply issue the following command:
gcloud config set project <PROJECT_ID>
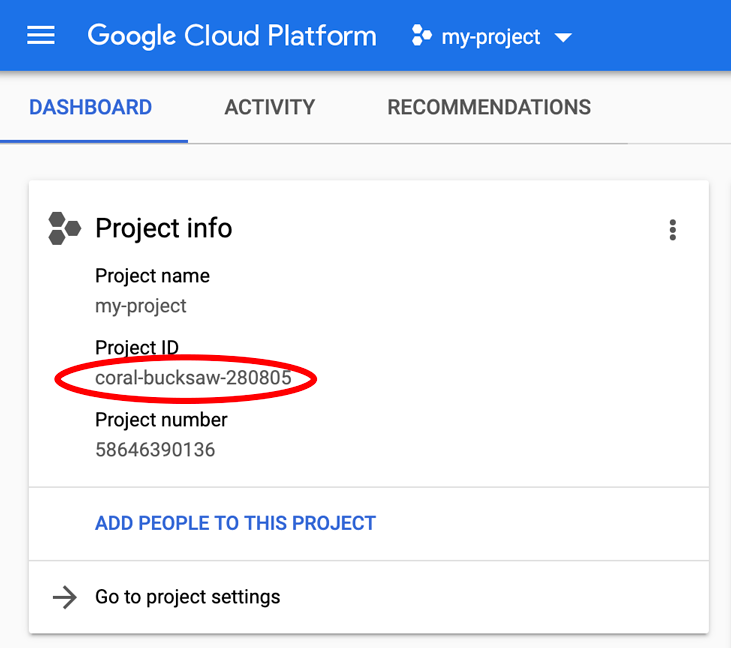
Looking for your PROJECT_ID? Check out what ID you used in the setup steps or look it up in the Cloud Console dashboard:
Cloud Shell also sets some environment variables by default, which may be useful as you run future commands.
echo $GOOGLE_CLOUD_PROJECT
Command output
<PROJECT_ID>
- Finally, set the default zone and project configuration.
gcloud config set compute/zone us-central1-f
You can choose a variety of different zones. For more information, see Regions & Zones.
3. Create a Compute Engine instance
First, we'll create a virtual machine with the gcloud command-line tool. You can also use the Console if you prefer, but the command line is easier to repeat and explain.
Let's first create an n2-standard-2 instance named pi-codelab with Debian 11 as the operating system. We'll also use the Balanced Persistent Disk (PD) for the boot volume. Balanced PDs are backed by solid-state drives (SSD) and balances performance and cost. It will ask which zone to use if you didn't select the default zone in the Setup and Requirements section.
gcloud compute instances create pi-codelab \
--machine-type=n2-standard-2 \
--image-project=debian-cloud \
--image-family=debian-11 \
--boot-disk-type=pd-balanced
The result of the command should look like this:
Created [https://www.googleapis.com/compute/v1/projects/xxx/zones/us-central1-f/instances/pi-codelab].
NAME: pi-codelab
ZONE: us-central1-f
MACHINE_TYPE: n2-standard-2
PREEMPTIBLE:
INTERNAL_IP: 10.128.X.XX
EXTERNAL_IP: XX.XX.XX.XX
STATUS: RUNNING
Please note the INTERNAL_IP and EXTERNAL_IP fields change every time you create a new VM.
If you want to learn more about the gcloud compute instances create command, please visit the reference page.
4. SSH into the Instance
To SSH into the instance from the command line, run the following command.
gcloud compute ssh pi-codelab
That's it! Now you're on the virtual machine. You can confirm your current host by running the hostname command.
hostname
The command will display the hostname of the current shell environment.
pi-codelab
5. Install Dependencies
Now we'll install dependencies needed to compile the program to calculate pi.
sudo apt update
sudo apt -y install build-essential libgmp-dev libmpfr-dev libfmt-dev
The process takes a few minutes to complete. Now let's check if you have a working C++ compiler.
c++ --version
This command will output version information of the compiler if installed correctly.
c++ (Debian 10.2.1-6) 10.2.1 20210110
Copyright (C) 2020 Free Software Foundation, Inc.
This is free software; see the source for copying conditions.  There is NO
warranty; not even for MERCHANTABILITY or FITNESS FOR A PARTICULAR PURPOSE.
6. Compile the Program
Now let's compile the C++ program to calculate pi. This is simpler than it sounds even if you haven't developed in C++ before. All prerequisites are installed in the previous step, so we just need to fetch and compile the source code.
First, fetch and save the source code. This step downloads a source file from GitHub and saves it as pi.cc in the current directory.
curl -OL https://raw.githubusercontent.com/GoogleCloudPlatform/pi-delivery/main/codelab/pi.cc
Next, run the C++ compiler to compile the saved source code.
c++ -opi pi.cc -std=c++17 -O3 -march=native -lgmp -lmpfr -lpthread -lfmt
The compiler doesn't output anything in the case of success. Let's check that you have the executable file:
ls pi
This ls command should output the filename of the program if it exists.
pi
7. Calculate Pi
The pi program takes one argument, the number of digits to calculate. For example, let's calculate the first 100 decimals of pi.
./pi 100
The program will finish in less than a second and outputs something like this:
Calculating 100 digits of pi...
Internal precision = 348 bits
Number of terms = 9, digits per term = 14.181647462725477
Summation series complete. Final steps...
3.1415926535897932384626433832795028841971693993751058209749445923078164062862089986280348253421170679
The last line is the first 100 decimals of pi. Congratulations, you just had the computer do the math for you!
The program can calculate more digits (currently capped at 100 billion digits). Now let's calculate 10 million digits and measure how long it takes. We redirect the output to a file as 10 million digits of pi is a bit too long to view in the command line console.
time ./pi 10000000 > pi10m.txt
The program outputs something like this:
Calculating 10000000 digits of pi...
Internal precision = 33219296 bits
Number of terms = 705138, digits per term = 14.181647462725477
Summation series complete. Final steps...

real    0m9.702s
user    0m14.839s
sys     0m0.364s
It doesn't include the digits this time as they are saved in file pi10m.txt. The last three lines describe how much time the program took to run and how much cpu it used.
- real: the actual time from start to end, which means it took 9.7 seconds to calculate 10 million digits of pi in the example above.
- user: how much CPU time it used, which is bigger than "real" because the machine has two CPU cores and each core counts towards the total.
- sys: the time the operating system needed to run the program to process system tasks such as network and I/O. This time it took about 0.4 seconds, which is mostly the time to write the result to the disk.
We can take a look at pi10m.txt and see the first and last 100 digits each.
Let's check the first digits. This command outputs the first 100 decimals (and the first 3 and decimal point).
head -c 102 pi10m.txt
The result should look like this.
3.1415926535897932384626433832795028841971693993751058209749445923078164062862089986280348253421170679
The next command outputs the last 100 decimals.
tail -c 100 pi10m.txt
The result should look like this.
610515549257985759204553246894468742702504639790565326553194060999469787333810631719481735348955897
8. Clean up the Cluster
Don't forget to shut down your Compute Engine instance, otherwise it'll keep running and accruing costs.
If you're on the VM (connected with SSH), log out first by running the exit command first.
exit
Then, run the following gcloud compute instances delete command to delete the instance and associated disks. It will ask you to confirm the deletion of the resource.
gcloud compute instances delete pi-codelab
9. What's next?
Congratulations, you've completed this Compute Engine codelab and calculated 10 million digits of pi!
We used the same infrastructure to calculate 100 trillion digits of pi in 2022. Read the announcement to see how we did. The entire results are available on our pi.delivery demo site.
Stay up to date with the latest news about Compute and High Performance Computing at the Google Cloud Blog!
More Compute Engine features
Compute Engine has a rich set of features. You may want to dive into some of these :
- Preemptible VMs - https://cloud.google.com/compute/docs/instances/create-start-preemptible-instance
- Sole-tenant nodes - https://cloud.google.com/compute/docs/nodes/create-nodes
- GPUs & TPUs - https://cloud.google.com/compute/docs/gpus/add-gpus
- Windows instances - https://cloud.google.com/compute/docs/instances/windows/creating-managing-windows-instances
- Labeling Resources - https://cloud.google.com/compute/docs/labeling-resources
- Migrating VMs to Compute Engine - https://cloud.google.com/compute/docs/vm-migration/
Give us your feedback
- Please take a moment to complete our very short survey