
1. 總覽
在實驗室的第一部分中,您建立了 ASP.NET Core 應用程式、容器化,並部署至 Google Kubernetes Engine (GKE),然後設定由 Istio 管理流量。
本實驗室的第二部分假設您已執行第一個實驗室的 Kubernetes 叢集和應用程式。您會瞭解如何透過 Istio 管理、監控及保護服務,而且不必大幅變更程式碼。具體來說,您會探索 Istio 的各項功能,例如指標、追蹤、服務視覺化、動態流量管理、錯誤植入等。
課程內容
- 如何使用 Prometheus 查詢指標。
- 如何使用 Grafana 視覺化指標。
- 如何建立新版服務。
- 如何將服務固定在特定版本。
- 如何拆分不同版本之間的流量。
- 如何在服務呼叫中注入錯誤。
軟硬體需求
您會如何使用本教學課程?
你對 Google Cloud Platform 的使用體驗滿意嗎?
2. 設定和需求
自修實驗室環境設定


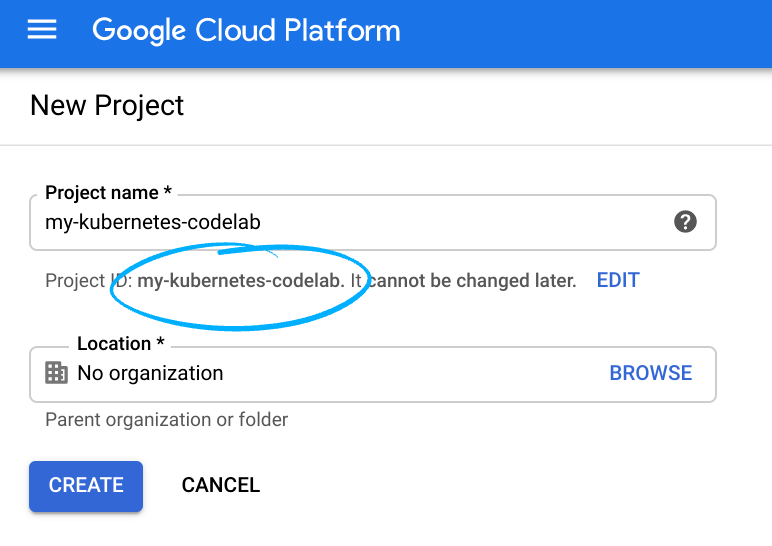
請記住專案 ID,這是所有 Google Cloud 專案中不重複的名稱 (上述名稱已遭占用,因此不適用於您,抱歉!)。本程式碼研究室稍後會將其稱為 PROJECT_ID。
- 接著,您必須在 Cloud 控制台中啟用帳單,才能使用 Google Cloud 資源。
完成本程式碼研究室的費用應該不高,甚至完全免費。請務必按照「清除」部分的指示操作,瞭解如何停用資源,避免在本教學課程結束後繼續產生帳單費用。Google Cloud 新使用者可參加價值$300 美元的免費試用計畫。
啟動 Cloud Shell
雖然您可以透過筆電遠端操作 Google Cloud,但在本程式碼研究室中,您會使用 Google Cloud Shell,這是 Google Cloud 中執行的指令列環境。
啟用 Cloud Shell
- 在 Cloud 控制台,點選「啟用 Cloud Shell」 圖示
。

如果您是首次啟動 Cloud Shell,系統會顯示中繼畫面 (摺疊式螢幕下方),說明這個指令列環境。點選「繼續」後,這則訊息日後就不會再出現。以下是這個初次畫面的樣子:

佈建並連至 Cloud Shell 預計只需要幾分鐘。

這部虛擬機器搭載各種您需要的開發工具,並提供永久的 5GB 主目錄,而且可在 Google Cloud 運作,大幅提升網路效能並強化驗證功能。本程式碼研究室幾乎所有工作都可在瀏覽器或 Chromebook 上完成。
連線至 Cloud Shell 後,您應會發現自己通過驗證,且專案已設為您的專案 ID。
- 在 Cloud Shell 中執行下列指令,確認您已通過驗證:
gcloud auth list
指令輸出
 Credentialed Accounts
ACTIVE  ACCOUNT
*       <my_account>@<my_domain.com>

To set the active account, run:
    $ gcloud config set account `ACCOUNT`
gcloud config list project
指令輸出
[core]
project = <PROJECT_ID>
如未設定,請輸入下列指令手動設定專案:
gcloud config set project <PROJECT_ID>
指令輸出
Updated property [core/project].
3. 測試應用程式
開始實驗室前,請確認應用程式仍可正常運作 (如上一個實驗室所示)。提醒您,閘道的外部 IP 和通訊埠會列在 EXTERNAL-IP 下方,如下所示:
kubectl get svc istio-ingressgateway -n istio-system
如要查看應用程式,請開啟瀏覽器並前往 http://<gatewayurl>:

如果沒有看到應用程式,請返回上一個實驗室,確認您已完成所有步驟,且應用程式和 Istio 都已安裝並正常運作。
此時,您可能會想問「Istio 有什麼好處?」。讓 Istio 管理應用程式流量,即可免費使用指標、追蹤、動態流量管理、服務視覺化、錯誤注入等功能。
您將在下一個步驟中開始探索指標。
4. 使用 Grafana 和 Prometheus 監控指標
根據預設,Istio 會產生部分指標。您可以使用外掛程式查詢及顯示這些預設指標。
Prometheus
Prometheus 是開放原始碼監控解決方案。您可以使用 Prometheus 查詢 Istio 產生的指標,但必須先安裝 Prometheus 外掛程式。
kubectl apply -f https://raw.githubusercontent.com/istio/istio/release-1.8/samples/addons/prometheus.yaml
確認 Prometheus 正在執行:
kubectl get svc prometheus -n istio-system

NAME         TYPE        CLUSTER-IP     EXTERNAL-IP   PORT(S)    AGE
prometheus   ClusterIP   10.31.243.62   <none>        9090/TCP   1d
多次造訪 http://<gatewayurl> 或執行 curl 指令,將部分流量傳送至應用程式。
設定 Prometheus UI 的通訊埠轉送:
kubectl -n istio-system port-forward $(kubectl -n istio-system get pod -l app=prometheus -o jsonpath='{.items[0].metadata.name}') 8080:9090
現在,您可以點選 Cloud Shell 右上角的「網頁預覽」按鈕,然後按一下「透過以下通訊埠預覽:8080」,執行查詢:

新分頁會顯示 Prometheus UI:

如要進一步瞭解 Prometheus,請參閱「使用 Prometheus 查詢指標」。
Grafana
Grafana 是另一個用於將指標視覺化的外掛程式。
安裝 Grafana。將 istio-version 替換為目前的 Istio 版本,例如 1.0.3-gke.3:
kubectl apply -f https://raw.githubusercontent.com/istio/istio/release-1.8/samples/addons/grafana.yaml
確認 Grafana 正在執行:
kubectl get svc grafana -n istio-system

NAME      TYPE        CLUSTER-IP      EXTERNAL-IP   PORT(S)    AGE
grafana   ClusterIP   10.31.248.230   <none>        3000/TCP   1d
多次造訪 http://<gatewayurl> 或執行 curl 指令,將部分流量傳送至應用程式。
設定 Grafana UI 的通訊埠轉送:
kubectl -n istio-system port-forward $(kubectl -n istio-system get pod -l app=grafana -o jsonpath='{.items[0].metadata.name}') 8080:3000
如要查看 Grafana 資訊主頁,請前往「網頁預覽」:


如要進一步瞭解 Grafana,請參閱「使用 Grafana 將指標視覺化」。
5. 建立新版應用程式
您部署到實際工作環境的應用程式,在某個時間點會需要修正錯誤或新增功能。讓我們看看這個流程。
首先,請修改應用程式。從 Cloud Shell 開啟程式碼編輯器。

前往「HelloWorldAspNetCore > Views > Home」下方的「Index.cshtml」,然後更新其中一則輪轉介面訊息。
找出以下程式碼:
Learn about <a href="https://docs.microsoft.com/aspnet/core">building Web apps with ASP.NET Core
並變更為以下程式碼:
Learn about <a href="https://docs.microsoft.com/aspnet/core">building Web apps with ASP.NET Core on Google Cloud
儲存變更,然後返回 Cloud Shell。在 HelloWorldAspNetCore, 內建構 Docker 映像檔:
docker build -t gcr.io/${GOOGLE_CLOUD_PROJECT}/hello-dotnet:v2 .
然後推送到 Container Registry:
docker push gcr.io/${GOOGLE_CLOUD_PROJECT}/hello-dotnet:v2
推送容器映像檔後,即可在下一個步驟中部署新版本。
6. 建立新的部署作業
如要部署新版本,您必須先在 Kubernetes 中為該版本建立新的部署作業。在 aspnetcore.yaml 檔案結尾處加入以下內容:
---
apiVersion: apps/v1
kind: Deployment
metadata:
  name: aspnetcore-v2
spec:
  replicas: 1
  selector:
    matchLabels:
      app: aspnetcore
      version: v2
  template:
    metadata:
      labels:
        app: aspnetcore
        version: v2
    spec:
      containers:
      - name: aspnetcore
        image: gcr.io/YOUR-PROJECT-ID/hello-dotnet:v2
        imagePullPolicy: IfNotPresent
        ports:
        - containerPort: 8080
使用 kubectl 將新版本部署至預設命名空間:
kubectl apply -f aspnetcore.yaml
service "aspnetcore" unchanged
deployment.extensions "aspnetcore-v1" unchanged
deployment.extensions "aspnetcore-v2" created
確認預期 Pod 正在執行:
kubectl get pods
NAME                          READY     STATUS    RESTARTS   AGE
aspnetcore-v1-6cf64748-mddb   2/2       Running   0          34s
aspnetcore-v2-5d765db-l9xmg   2/2       Running   0          1m
現在,請再次測試應用程式。取得閘道的外部 IP:
kubectl get svc istio-ingressgateway -n istio-system
這項資訊會列在「EXTERNAL-IP」下方。開啟無痕瀏覽器,然後前往 http://<replace-with-external-ip>
重新整理時,有時會看到「瞭解如何使用 ASP.NET Core 建構 Web 應用程式」訊息:

有時您會看到「瞭解如何使用 Google Cloud 上的 ASP.NET Core 建構網頁應用程式」訊息:

這是因為 v1 和 v2 部署作業都公開在同一個 Kubernetes 服務 (aspnetcore-service) 後方,而您在上一個實驗室中建立的 VirtualService (aspnetcore-virtualservice) 會將該服務做為主機。
在下一個步驟中,您將使用 DestinationRule 將服務固定至 v2 部署作業。
7. 將服務固定在新版本
在這個步驟中,您會將服務固定為使用 v2 部署作業,這項作業可透過 DestinationRule 執行。DestinationRule 會設定一組政策,在 VirtualService 路由作業發生後套用至要求。
DestinationRule 也會定義對應目的地主機的可定址子集,也就是具名版本。將流量傳送至特定服務版本時,VirtualService 路由規格會使用這些子集。
建立名為 aspnetcore-destinationrule.yaml 的新檔案:
apiVersion: networking.istio.io/v1alpha3
kind: DestinationRule
metadata:
  name: aspnetcore-destinationrule
spec:
  host: aspnetcore-service
  trafficPolicy:
    tls:
      mode: ISTIO_MUTUAL
  subsets:
  - name: v1
    labels:
      version: v1
  - name: v2
    labels:
      version: v2
接著,建立 DestinationRule。這會建立兩個子集 (v1 和 v2),您可從 VirtualService 使用:
kubectl apply -f aspnetcore-destinationrule.yaml
destinationrule.networking.istio.io "aspnetcore-destionationrule" created
現在請返回 aspnetcore-virtualservice.yaml 檔案,更新 VirtualService 以使用 v2 子集:
apiVersion: networking.istio.io/v1alpha3
kind: VirtualService
metadata:
  name: aspnetcore-virtualservice
spec:
  hosts:
  - "*"
  gateways:
  - aspnetcore-gateway
  http:
  - route:
    - destination:
        host: aspnetcore-service
        subset: v2
更新 VirtualService:
kubectl apply -f aspnetcore-virtualservice.yaml
開啟瀏覽器並前往 http://<replace-with-external-ip>. 即使多次重新整理,您也應該會看到「瞭解如何在 Google Cloud 上使用 ASP.NET Core 建構 Web 應用程式」訊息:
8. 在各版本之間拆分流量
有時,您可能想在不同版本之間拆分流量,以便進行測試。舉例來說,您可能想將 75% 的流量傳送至 v1 版服務,25% 的流量傳送至 v2 版服務。使用 Istio 即可輕鬆達成這個目標。建立新的 aspnetcore-virtualservice-weights.yaml 檔案,參照兩個不同權重的子集:
apiVersion: networking.istio.io/v1alpha3
kind: VirtualService
metadata:
  name: aspnetcore-virtualservice
spec:
  hosts:
  - "*"
  gateways:
  - aspnetcore-gateway
  http:
  - route:
    - destination:
        host: aspnetcore-service
        subset: v1
      weight: 75
    - destination:
        host: aspnetcore-service
        subset: v2
      weight: 25
更新 VirtualService:
kubectl apply -f aspnetcore-virtualservice-weights.yaml
現在重新整理瀏覽器時,您應該會看到系統放送 v1 和 v2 版本,比例約為 3:1。
詳情請參閱「Istio 中的流量分配」。
9. 注入錯誤
另一個有用的開發工作是將錯誤或延遲注入流量,並查看服務的因應方式。
舉例來說,您可能想針對傳送至 v1 版本的流量,有 50% 的機率傳回錯誤要求 (HTTP 400) 回應。建立符合下列條件的 aspnetcore-virtualservice-fault-abort.yaml 檔案:
apiVersion: networking.istio.io/v1alpha3
kind: VirtualService
metadata:
  name: aspnetcore-virtualservice
spec:
  hosts:
  - "*"
  gateways:
  - aspnetcore-gateway
  http:
  - fault:
      abort:
        percentage:
          value: 50
        httpStatus: 400
    route:
    - destination:
        host: aspnetcore-service
        subset: v1
更新 VirtualService:
kubectl apply -f aspnetcore-virtualservice-fault-abort.yaml
現在重新整理瀏覽器時,您應該會發現 v1 服務有一半的時間會傳回 HTTP 400s 回應代碼。
或者,您可能想在要求中加入 5 秒的延遲時間。建立符合下列條件的 aspnetcore-virtualservice-fault-delay.yaml 檔案:
apiVersion: networking.istio.io/v1alpha3
kind: VirtualService
metadata:
  name: aspnetcore-virtualservice
spec:
  hosts:
  - "*"
  gateways:
  - aspnetcore-gateway
  http:
  - fault:
      delay:
        fixedDelay: 5s
        percentage:
          value: 100
    route:
    - destination:
        host: aspnetcore-service
        subset: v1
更新 VirtualService:
kubectl apply -f aspnetcore-virtualservice-fault-delay.yaml
現在重新整理瀏覽器,您應該會看到要求延遲了 5 秒。
如要進一步瞭解 Istio 功能,例如逾時、重試、條件規則、斷路器等,請參閱流量管理功能。
10. 恭喜!
希望這個實驗室能讓您概略瞭解 Istio 可為服務提供的現成功能。進一步瞭解 Istio 和 GKE。
後續步驟
- 進一步瞭解 Istio。
- 進一步瞭解 Kubernetes。
- 進一步瞭解 Google Kubernetes Engine。
- 進一步瞭解 Google Cloud Platform 上的 .NET。
授權
這項內容採用的授權為 Creative Commons 姓名標示 2.0 通用授權。
11. 清除
您可以刪除應用程式並解除安裝 Istio,也可以直接刪除 Kubernetes 叢集。
刪除應用程式
如要刪除應用程式:
kubectl delete -f aspnetcore-gateway.yaml
kubectl delete -f aspnetcore-virtualservice.yaml
kubectl delete -f aspnetcore-destinationrule.yaml
kubectl delete -f aspnetcore.yaml
如要確認應用程式已移除,請按照下列步驟操作:
kubectl get gateway
kubectl get virtualservices
kubectl get destinationrule
kubectl get pods
解除安裝 Istio
如要刪除 Istio,請執行下列操作:
kubectl delete -f install/kubernetes/istio-demo-auth.yaml
確認 Istio 已移除:
kubectl get pods -n istio-system
刪除 Kubernetes 叢集
gcloud container clusters delete hello-dotnet-cluster