
1. Overview
About Micronaut
Micronaut is a modern, JVM-based, full-stack framework for building modular, easily testable microservice and serverless applications. Micronaut aims to deliver great startup time, fast throughput, with a minimal memory footprint. Developers can develop with Micronaut in Java, Groovy or Kotlin.
Micronaut provides:
- Fast startup time & low memory consumption — Reflection-based IoC frameworks load and cache reflection data for every single field, method, and constructor in your code, whereas with Micronaut, your application startup time and memory consumption are not bound to the size of your codebase.
- Declarative, reactive, compile-time HTTP client — Declaratively build reactive HTTP clients, which are implemented at compile-time, reducing memory consumption.
- Non-blocking HTTP server built on Netty — With a smooth learning curve, Micronaut's HTTP server makes it as easy as possible to expose APIs that can be consumed by HTTP clients.
- Fast and easy testing — Easily spin up servers and clients in your unit tests, and run them instantaneously.
- Efficient compile-time dependency injection and AOP — Micronaut provides a simple compile-time aspect-oriented programming API that does not use reflection.
- Build fully reactive and non-blocking apps — Micronaut supports any framework that implements Reactive Streams, including RxJava, and Reactor.
For more information, please visit the Micronaut website.
About Kubernetes
Kubernetes is an open source project which can run in many different environments, from laptops to high-availability multi-node clusters, from public clouds to on-premise deployments, from virtual machines to bare metal.
In this lab, you deploy a simple Groovy-based Micronaut microservice to Kubernetes running on Kubernetes Engine.
The goal of this codelab is for you to run your microservice as a replicated service running on Kubernetes. You take code that you have developed on your machine, turn it into a Docker container image, and then run that image on Kubernetes Engine.
Here's a diagram of the various parts in play in this codelab to help you understand how pieces fit together. Use this as a reference as you progress through the codelab; it should all make sense by the time you get to the end (but feel free to ignore this for now).

For the purpose of this codelab, using a managed environment such as Kubernetes Engine (a Google-hosted version of Kubernetes running on Compute Engine) allows you to focus more on experiencing Kubernetes rather than setting up the underlying infrastructure.
If you are interested in running Kubernetes on your local machine, such as a development laptop, you should probably look into Minikube. This offers a simple setup of a single node kubernetes cluster for development and testing purposes. You can use Minikube to go through this codelab if you wish.
About Jib
Jib is an open source tool that lets you build Docker and OCI images for your Java applications. It is available as plugins for Maven and Gradle, and as a Java library.
Jib aims to be:
- Fast — Deploy your changes fast. Jib separates your application into multiple layers, splitting dependencies from classes. Now you don't have to wait for Docker to rebuild your entire Java application - just deploy the layers that changed.
- Reproducible — Rebuilding your container image with the same contents always generates the same image. Never trigger an unnecessary update again.
- Daemonless — Reduce your CLI dependencies. Build your Docker image from within Maven or Gradle and push to any registry of your choice. No more writing Dockerfiles and calling docker build/push.
You can find more information about Jib on the Github project page.
About this tutorial
This tutorial uses the sample code from the Jib tool to build containers for Java applications.
The sample is a simple hello world service, using the Micronaut framework, and the Apache Groovy programming language.
What you'll learn
- How to package a simple Java application as a Docker container using Jib
- How to create your Kubernetes cluster on Kubernetes Engine.
- How to deploy your Micronaut service into Kubernetes on Kubernetes Engine
- How to scale up your service and roll out an upgrade.
- How to access Kubernetes Graphical dashboard.
What you'll need
- A Google Cloud Platform Project
- A Browser, such Chrome or Firefox
- Familiarity with standard Linux text editors such as Vim, EMACs or Nano
How will you use this tutorial?
How would you rate your experience with building HTML/CSS web apps?
How would you rate your experience with using Google Cloud Platform services?
2. Setup and Requirements
Self-paced environment setup
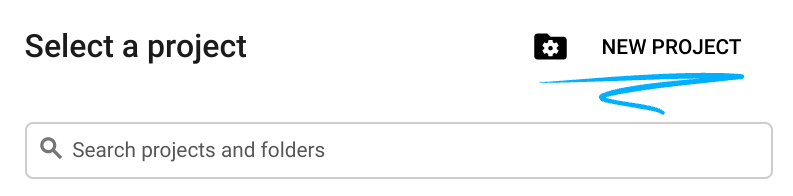
- Sign in to Cloud Console and create a new project or reuse an existing one. (If you don't already have a Gmail or G Suite account, you must create one.)

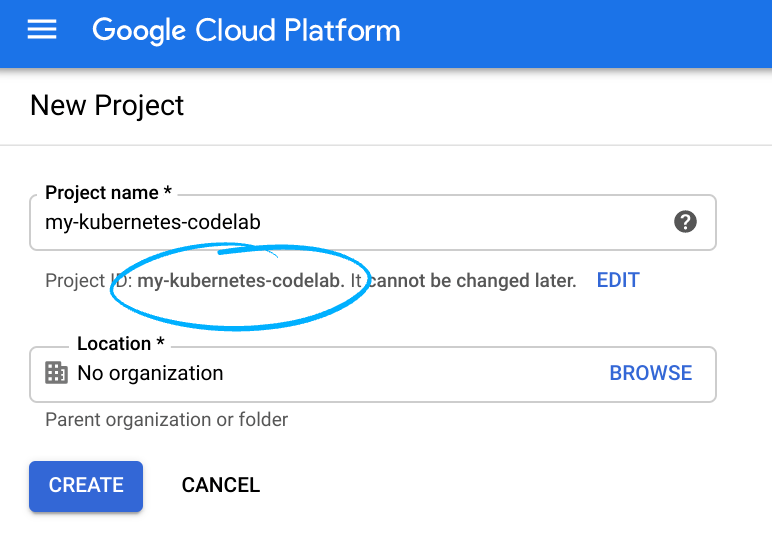
Remember the project ID, a unique name across all Google Cloud projects (the name above has already been taken and will not work for you, sorry!). It will be referred to later in this codelab as PROJECT_ID.
- Next, you'll need to enable billing in Cloud Console in order to use Google Cloud resources.
Running through this codelab shouldn't cost much, if anything at all. Be sure to to follow any instructions in the "Cleaning up" section which advises you how to shut down resources so you don't incur billing beyond this tutorial. New users of Google Cloud are eligible for the $300USD Free Trial program.
3. Get the Micronaut sample source code
After Cloud Shell launches, you can use the command line to clone the example source code in the home directory, and cd into the directory containing our sample service:
$ git clone https://github.com/GoogleContainerTools/jib.git
$ cd jib/examples/micronaut/
4. A quick look at the code
Our Micronaut simple service is made of a controller that outputs the infamous Hello World message:
@Controller("/hello")
class HelloController {
    @Get("/")
    String index() {
        "Hello World"
    }
}
The HelloController controller is responding to requests under the /hello path, and the index() method accepts the HTTP GET requests.
A Spock test class is also available to check that the correct message is given in output.
class HelloControllerSpec extends Specification {
    @Shared
    @AutoCleanup
    EmbeddedServer embeddedServer = ApplicationContext.run(EmbeddedServer)

    @Shared
    @AutoCleanup
    RxHttpClient client = embeddedServer.applicationContext.createBean(RxHttpClient, embeddedServer.getURL())

    void "test hello world response"() {
        when:
        HttpRequest request = HttpRequest.GET('/hello')
        String rsp  = client.toBlocking().retrieve(request)

        then:
        rsp == "Hello World"
    }
}
More than a simple unit test, this test actually runs the same Micronaut server stack (based on the Netty framework) that is run in production. So the behavior of your code will be just the same in product as in your tests.
To run the tests, you can run the following command to see that everything is fine:
./gradlew test
5. Run the Application Locally
You can start the Micronaut service normally with the following Gradle command:
$ ./gradlew run
Once the application started, you can open an extra Cloud Shell instance thanks to the little + icon, and then check with curl that you get the expected output:
$ curl localhost:8080/hello
And you should see a simple "Hello World" message appear.
6. Package the application as a Docker container with Jib
Next, prepare your app to run on Kubernetes. For that purpose, we will take advantage of Jib to do the hard work for us, as we won't have to touch a Dockerfile ourselves!
Let's run the command to build our container:
$ ./gradlew jibDockerBuild
Here's the output you should be seeing:
Tagging image with generated image reference micronaut-jib:0.1. If you'd like to specify a different tag, you can set the jib.to.image parameter in your build.gradle, or use the --im
age=<MY IMAGE> commandline flag.

Containerizing application to Docker daemon as micronaut-jib:0.1...
warning: Base image 'gcr.io/distroless/java' does not use a specific image digest - build may not be reproducible
Getting base image gcr.io/distroless/java...
Building dependencies layer...
Building resources layer...
Building classes layer...
Finalizing...

Container entrypoint set to [java, -cp, /app/resources:/app/classes:/app/libs/*, example.micronaut.Application]
Loading to Docker daemon...

Built image to Docker daemon as micronaut-jib:0.1
Now that our image is built, let's check if we can see our friendly hello message, by running our Docker image in the first tab of Cloud Shell:
$ docker run -it -p 8080:8080 micronaut-jib:0.1
16:57:20.255 [main] INFO  i.m.context.env.DefaultEnvironment - Established active environments: [cloud, gcp]
16:57:23.203 [main] INFO  io.micronaut.runtime.Micronaut - Startup completed in 2926ms. Server Running: http://97b7d76ccf3f:8080
Our service is running, so we can now launch our curl command, in our second Cloud Shell tab, to see if it's working as expected:
$ curl localhost:8080/hello
Hello World
You can stop the container by hitting Ctrl+C in Cloud Shell.
7. Pushing our containerized service to the registry
Now that the image works as intended you can push it to the Google Container Registry, a private repository for your Docker images accessible from every Google Cloud project (but also from outside Google Cloud Platform).
Before being able to push to the registry, let's ensure that the Container Registry is enabled for our project, by going to Tools > Container Registry. If it is not enabled, you should see the following dialog, then please click "Enable Container Registry API" to enable it:

Once the registry is ready, to push the image to the registry, launch the following commands:
$ gcloud auth configure-docker
$ docker tag micronaut-jib:0.1 \
         gcr.io/$GOOGLE_CLOUD_PROJECT/micronaut-jib:0.1
$ docker push gcr.io/$GOOGLE_CLOUD_PROJECT/micronaut-jib:0.1
The above commands let the gcloud SDK configure and authorize docker to push images to your instance of Container Registry, to tag the image to point at its location in the registry, and then push it to the registry.
If all goes well and after a little while you should be able to see the container image listed in the console: Tools > Container Registry. At this point you now have a project-wide Docker image available which Kubernetes can access and orchestrate as you'll see in a few minutes.

8. Create your cluster
Ok, you are now ready to create your Kubernetes Engine cluster but before that, navigate to the Google Kubernetes Engine section of the web console and wait for the system to initialize (it should only take a few seconds).

A cluster consists of a Kubernetes master API server managed by Google and a set of worker nodes. The worker nodes are Compute Engine virtual machines. Let's use the gcloud CLI from your CloudShell session to create a cluster with two n1-standard-1 nodes (this will take a few minutes to complete):
$ gcloud container clusters create hello-cluster \
  --num-nodes 2 \
  --machine-type n1-standard-1 \
  --zone us-central1-c
In the end, you should see the cluster created.
Creating cluster hello-cluster in us-central1-c...done.
Created [https://container.googleapis.com/v1/projects/mn-gke-test/zones/us-central1-c/clusters/hello-cluster].
To inspect the contents of your cluster, go to: https://console.cloud.google.com/kubernetes/workload_/gcloud/us-central1-c/hello-cluster?project=mn-gke-test
kubeconfig entry generated for hello-cluster.
NAME           LOCATION       MASTER_VERSION  MASTER_IP       MACHINE_TYPE   NODE_VERSION  NUM_NODES  STATUS
hello-cluster  us-central1-c  1.9.7-gke.7     35.239.224.115  n1-standard-1  1.9.7-gke.7   2          RUNNING
You should now have a fully-functioning Kubernetes cluster powered by Google Kubernetes Engine:

It's now time to deploy your own containerized application to the Kubernetes cluster! From now on you'll use the kubectl command line (already set up in your Cloud Shell environment). The rest of this codelab requires both the Kubernetes client and server version to be 1.2 or above. kubectl version will show you the current version of the command.
9. Deploy your application to Kubernetes
A Kubernetes deployment can create, manage, and scale multiple instances of your application using the container image you've just created. Let's create a deployment of your application into Kubernetes using the kubectl create deployment command:
$ kubectl create deployment hello-micronaut \
  --image=gcr.io/$GOOGLE_CLOUD_PROJECT/micronaut-jib:0.1
To view the deployment you just created, simply run:
$ kubectl get deployments
NAME              DESIRED   CURRENT   UP-TO-DATE   AVAILABLE   AGE
hello-micronaut   1         1         1            1           5m
To view the application instances created by the deployment, run this command:
$ kubectl get pods
NAME                               READY     STATUS    RESTARTS   AGE
hello-micronaut-5647fb98c5-lh5h7   1/1       Running   0          5m
At this point you should have your container running under the control of Kubernetes but you still have to make it accessible to the outside world.
10. Allow external traffic
By default, the pod is only accessible by its internal IP within the cluster. In order to make the hello-micronaut container accessible from outside the kubernetes virtual network, you have to expose the pod as a kubernetes service.
From Cloud Shell you can expose the pod to the public internet with the kubectl expose command combined with the --type=LoadBalancer flag. This flag is required for the creation of an externally accessible IP :
$ kubectl expose deployment hello-micronaut --type=LoadBalancer --port=8080
The flag used in this command specifies that you'll be using the load-balancer provided by the underlying infrastructure (in this case the Compute Engine Load Balancer). Note that you expose the deployment, and not the pod directly. This will cause the resulting service to load balance traffic across all pods managed by the deployment (in this case only 1 pod, but you will add more replicas later).
The Kubernetes master creates the load balancer and related Compute Engine forwarding rules, target pools, and firewall rules to make the service fully accessible from outside of Google Cloud Platform.
To find the publicly-accessible IP address of the service, simply request kubectl to list all the cluster services:
$ kubectl get services
NAME              TYPE           CLUSTER-IP      EXTERNAL-IP     PORT(S)          AGE
hello-micronaut   LoadBalancer   10.39.243.251   aaa.bbb.ccc.ddd 8080:30354/TCP   1m
kubernetes        ClusterIP      10.39.240.1     <none>          443/TCP          31m
Note there are 2 IP addresses listed for your service, both serving port 8080. One is the internal IP that is only visible inside your cloud virtual network; the other is the external load-balanced IP. In this example, the external IP address is aaa.bbb.ccc.ddd.
You should now be able to reach the service by pointing your browser to this address: http://<EXTERNAL_IP>:8080/hello
11. Scale up your service
One of the powerful features offered by Kubernetes is how easy it is to scale your application. Suppose you suddenly need more capacity for your application; you can simply tell the replication controller to manage a new number of replicas for your application instances:
$ kubectl scale deployment hello-micronaut --replicas=3
deployment.extensions "hello-micronaut" scaled

$ kubectl get deployment
NAME              DESIRED   CURRENT   UP-TO-DATE   AVAILABLE   AGE
hello-micronaut   3         3         3            3           16m
Note the declarative approach here — rather than starting or stopping new instances you declare how many instances should be running at all time. Kubernetes reconciliation loops simply make sure the reality matches what you requested and takes action if needed.
12. Roll out an upgrade to your service
At some point the application that you've deployed to production will require bug fixes or additional features. Kubernetes is here to help you deploy a new version to production without impacting your users.
First, let's modify the application. Open the code editor from Cloud Shell.

Navigate to /jib/examples/micronaut/src/main/groovy/example/micronaut/HelloController.groovy, and update the value of the response:
@Controller("/hello")
class HelloController {
    @Get("/")
    String index() {
        "Hello Kubernetes World"
    }
}
In /jib/examples/micronaut/build.gradle, we will upgrade the version of our image from 0.1 to 0.2 by updating this line:
version '0.2'
Then rebuild and package the application with the latest changes:
$ ./gradlew jibDockerBuild
And tag and push the image into the container image registry:
$ docker tag micronaut-jib:0.2 \
         gcr.io/$GOOGLE_CLOUD_PROJECT/micronaut-jib:0.2
$ docker push gcr.io/$GOOGLE_CLOUD_PROJECT/micronaut-jib:0.2
You're now ready for Kubernetes to smoothly update your replication controller to the new version of the application. In order to change the image label for your running container, you need to edit the existing hello-micronaut deployment and change the image from gcr.io/PROJECT_ID/micronaut-jib:0.1 to gcr.io/PROJECT_ID/micronaut-jib:0.2.
You can use kubectl set image command to ask Kubernetes to deploy the new version of your application across the entire cluster one instance at a time with rolling update:
$ kubectl set image deployment/hello-micronaut \
          micronaut-jib=gcr.io/$GOOGLE_CLOUD_PROJECT/micronaut-jib:0.2

deployment.apps "hello-micronaut" image updated
Check http://EXTERNAL_IP:8080 again to see that it's returning the new response.
13. Roll back
Oops — did you make a mistake with a new version of the application? Perhaps the new version contained an error and you need to rollback quickly. With Kubernetes, you can roll back to the previous state easily. Let's rollback the application by running:
$ kubectl rollout undo deployment/hello-micronaut
If you have a look at the output of the service, we'll be back to our initial "Hello World" message.
14. Summary
In this step, you set up a simple Apache Groovy-based Micronaut hello world service and ran it directly from within Cloud Shell, packaged it as a container with Jib, and deployed it to Google Kubernetes Engine.
15. Congratulations!
You learned how to build and deploy a new Apache Groovy / Micronaut web-based microservice to Kubernetes on Google Kubernetes Engine.
Learn More
- Jib documentation and samples: https://github.com/GoogleContainerTools/jib/
- Micronaut web site: http://micronaut.io/
- Java on Google Cloud Platform: https://cloud.google.com/java/
- For Java examples: https://cloud.google.com/java/samples
- For a longer and more complete tutorial of Kubernetes, see bit.ly/k8s-lab where it'll take you through deploying a full-stack application.
License
This work is licensed under a Creative Commons Attribution 2.0 Generic License.