
1. บทนำ
ภาพรวม
ในแล็บนี้ คุณจะได้สร้างและติดตั้งใช้งานเซิร์ฟเวอร์ Model Context Protocol (MCP) เซิร์ฟเวอร์ MCP มีประโยชน์ในการให้สิทธิ์ LLM เข้าถึงเครื่องมือและบริการภายนอก คุณจะกำหนดค่าให้เป็นบริการที่ปลอดภัยและพร้อมใช้งานจริงใน Cloud Run ซึ่งเข้าถึงได้จากไคลเอ็นต์หลายราย จากนั้นคุณจะเชื่อมต่อกับเซิร์ฟเวอร์ MCP ระยะไกลจาก Gemini CLI
สิ่งที่คุณจะได้ทำ
เราจะใช้ Genkit เพื่อสร้างเซิร์ฟเวอร์ MCP ของสวนสัตว์ ที่มีเครื่องมือ 2 รายการ ได้แก่ get_animals_by_species และ get_animal_details Genkit เป็นวิธีที่รวดเร็วในการสร้างเซิร์ฟเวอร์และไคลเอ็นต์ MCP ด้วย Node.js

สิ่งที่คุณจะได้เรียนรู้
- ติดตั้งใช้งานเซิร์ฟเวอร์ MCP ใน Cloud Run
- รักษาความปลอดภัยให้กับอุปกรณ์ปลายทางของเซิร์ฟเวอร์โดยกำหนดให้มีการตรวจสอบสิทธิ์สำหรับคำขอทั้งหมด เพื่อให้เฉพาะไคลเอ็นต์และ Agent ที่ได้รับอนุญาตเท่านั้นที่สื่อสารกับเซิร์ฟเวอร์ได้
- เชื่อมต่อกับอุปกรณ์ปลายทางของเซิร์ฟเวอร์ MCP ที่ปลอดภัยจาก Gemini CLI
2. การตั้งค่าโปรเจ็กต์
- หากยังไม่มีบัญชี Google คุณต้องสร้างบัญชี Google
- ใช้บัญชีส่วนตัวแทนบัญชีงานหรือบัญชีโรงเรียน บัญชีงานและบัญชีโรงเรียนอาจมีข้อจำกัดที่ป้องกันไม่ให้คุณเปิดใช้ API ที่จำเป็นสำหรับแล็บนี้
- ลงชื่อเข้าใช้ คอนโซล Google Cloud
- เปิดใช้การเรียกเก็บเงินใน Cloud Console
- การทำแล็บนี้ให้เสร็จสมบูรณ์ควรมีค่าใช้จ่ายไม่เกิน $1 USD ในทรัพยากรระบบคลาวด์
- คุณสามารถทำตามขั้นตอนที่ส่วนท้ายของแล็บนี้เพื่อลบทรัพยากรเพื่อหลีกเลี่ยงค่าใช้จ่ายเพิ่มเติม
- ผู้ใช้ใหม่มีสิทธิ์รับช่วงทดลองใช้ฟรีมูลค่า $300 USD
- สร้างโปรเจ็กต์ใหม่ หรือเลือกใช้โปรเจ็กต์ที่มีอยู่
- หากเห็นข้อผิดพลาดเกี่ยวกับโควต้าโปรเจ็กต์ ให้ใช้โปรเจ็กต์ที่มีอยู่ซ้ำหรือลบโปรเจ็กต์ที่มีอยู่เพื่อสร้างโปรเจ็กต์ใหม่
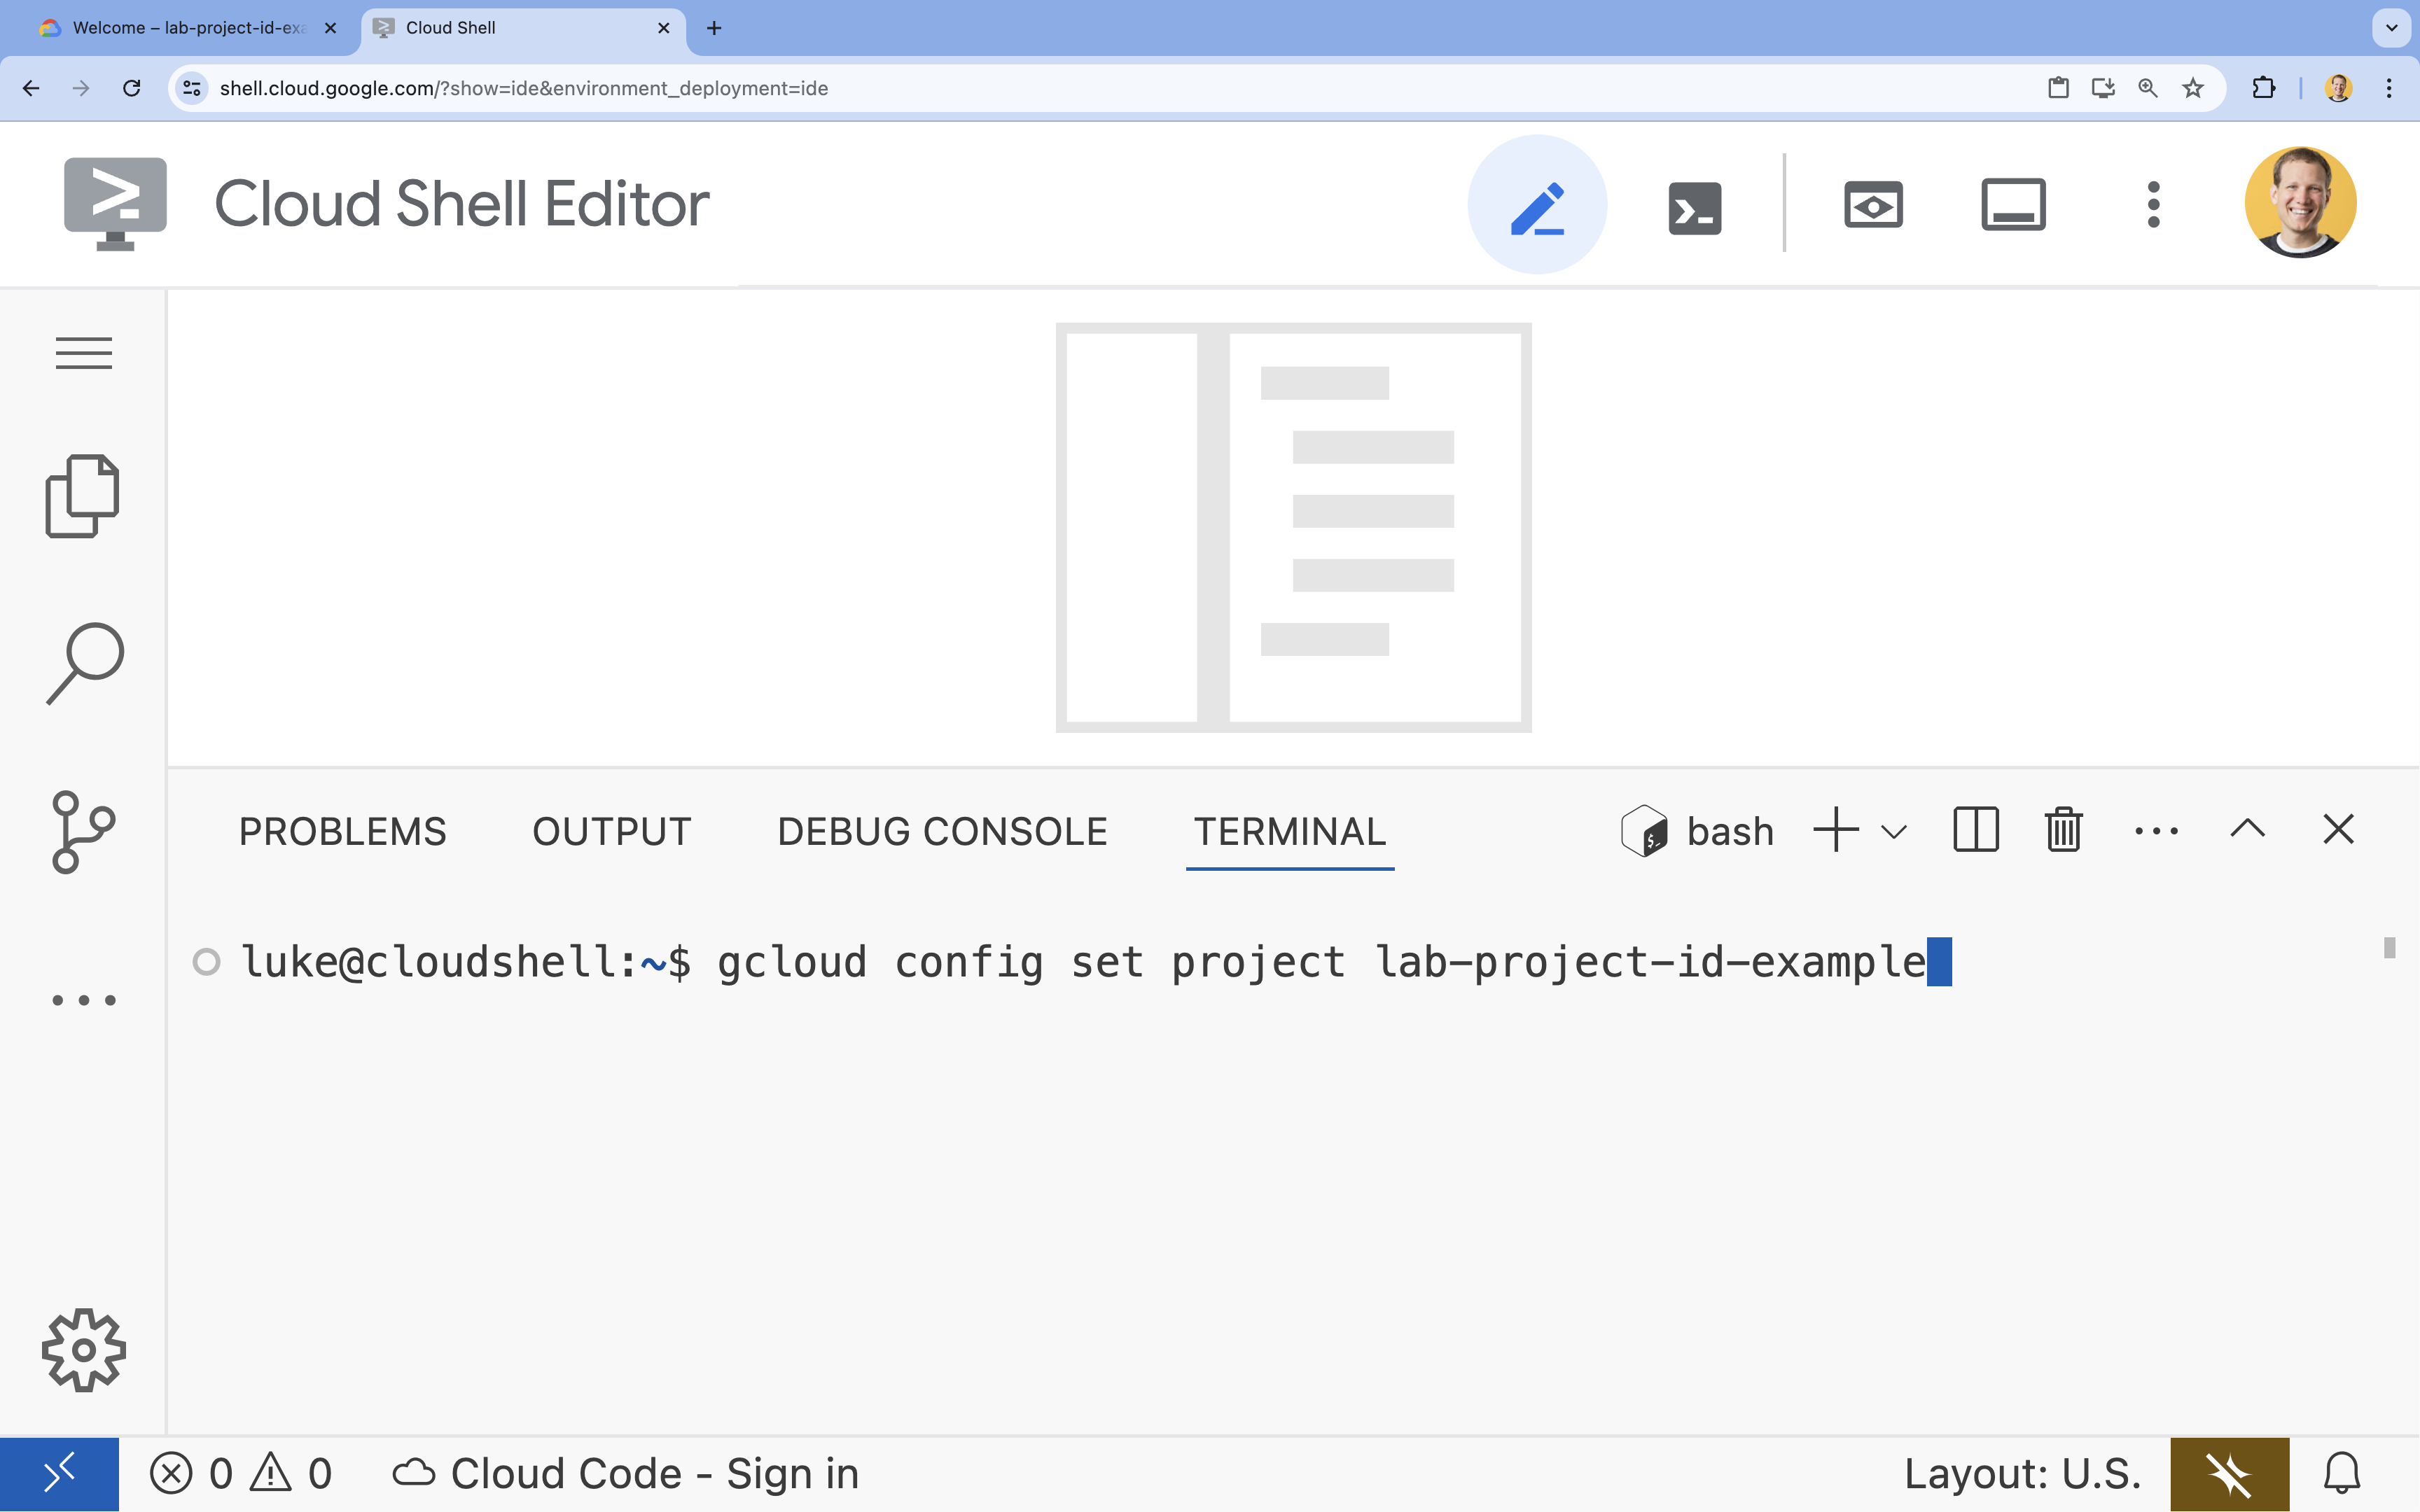
3. เปิด Cloud Shell Editor
- คลิกลิงก์นี้เพื่อไปยัง Cloud Shell Editor โดยตรง
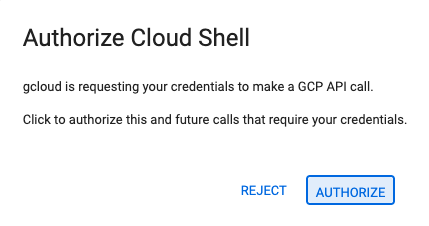
- หากระบบแจ้งให้คุณให้สิทธิ์ในวันนี้ ให้คลิกให้สิทธิ์ เพื่อดำเนินการต่อ
- หากเทอร์มินัลไม่ปรากฏที่ด้านล่างของหน้าจอ ให้เปิดโดยทำดังนี้
- คลิกมุมมอง
- คลิก Terminal

- ในเทอร์มินัล ให้ตั้งค่าโปรเจ็กต์ด้วยคำสั่งนี้
- รูปแบบ:
gcloud config set project [PROJECT_ID] - ตัวอย่าง:
gcloud config set project lab-project-id-example - หากจำรหัสโปรเจ็กต์ไม่ได้ ให้ทำดังนี้
- คุณสามารถแสดงรหัสโปรเจ็กต์ทั้งหมดได้ด้วยคำสั่งต่อไปนี้
gcloud projects list | awk '/PROJECT_ID/{print $2}'
- คุณสามารถแสดงรหัสโปรเจ็กต์ทั้งหมดได้ด้วยคำสั่งต่อไปนี้
- รูปแบบ:
- คุณควรเห็นข้อความต่อไปนี้
Updated property [core/project].
WARNINGและระบบถามว่าDo you want to continue (Y/n)?แสดงว่าคุณป้อนรหัสโปรเจ็กต์ไม่ถูกต้อง ให้กดnแล้วกดEnterจากนั้นลองเรียกใช้คำสั่งgcloud config set projectอีกครั้ง
4. เปิดใช้ API
เปิดใช้ API ในเทอร์มินัลโดยใช้คำสั่งต่อไปนี้
gcloud services enable \
  run.googleapis.com \
  artifactregistry.googleapis.com \
  cloudbuild.googleapis.com
หากระบบแจ้งให้ให้สิทธิ์ ให้คลิกให้สิทธิ์ เพื่อดำเนินการต่อ
คำสั่งนี้อาจใช้เวลา 2-3 นาทีจึงจะเสร็จสมบูรณ์ แต่ในที่สุดควรแสดงข้อความว่าสำเร็จคล้ายกับข้อความต่อไปนี้
Operation "operations/acf.p2-73d90d00-47ee-447a-b600" finished successfully.
5. เตรียมโปรเจ็กต์ JavaScript
- สร้างโฟลเดอร์ชื่อ
mcp-on-cloudrunเพื่อจัดเก็บซอร์สโค้ดสำหรับการติดตั้งใช้งานmkdir mcp-on-cloudrun && cd mcp-on-cloudrun - สร้างโปรเจ็กต์ Node.js ด้วยเครื่องมือ
npmเพื่อสร้างไฟล์package.jsonnpm init es6 -ynpm initจะสร้างไฟล์package.jsonสำหรับโปรเจ็กต์ - ติดตั้งการขึ้นต่อกัน
@modelcontextprotocol/sdk,expressและzodnpm install @modelcontextprotocol/sdk express zod
6. สร้างเซิร์ฟเวอร์ MCP ของสวนสัตว์
หากต้องการให้บริบทที่มีคุณค่าสำหรับการปรับปรุงการใช้ LLM กับ MCP ให้ตั้งค่าเซิร์ฟเวอร์ MCP ของสวนสัตว์ด้วย Genkit ซึ่งเป็นเฟรมเวิร์กมาตรฐานสำหรับการทำงานกับ Model Context Protocol Genkit เป็นวิธีที่รวดเร็วในการสร้างเซิร์ฟเวอร์และไคลเอ็นต์ MCP ด้วย Node.js เซิร์ฟเวอร์ MCP นี้ให้ข้อมูลเกี่ยวกับสัตว์ในสวนสัตว์สมมติ เราจะจัดเก็บข้อมูลไว้ในหน่วยความจำเพื่อให้ง่ายต่อการใช้งาน สำหรับเซิร์ฟเวอร์ MCP ที่พร้อมใช้งานจริง คุณอาจต้องการให้ข้อมูลจากแหล่งที่มาต่างๆ เช่น ฐานข้อมูลหรือ API
- เรียกใช้คำสั่งต่อไปนี้เพื่อเพิ่ม Genkit เป็นการขึ้นต่อกันในไฟล์
package.jsonnpm install genkitpackage-lock.jsonลงในโปรเจ็กต์ - เรียกใช้คำสั่งต่อไปนี้เพื่อเพิ่มไลบรารี Genkit AI MCP ในไฟล์
package.jsonnpm install @genkit-ai/mcp - สร้างและเปิดไฟล์
index.jsใหม่สำหรับซอร์สโค้ดของเซิร์ฟเวอร์ MCPcloudshell edit index.jscloudshell editจะเปิดไฟล์index.jsในเครื่องมือแก้ไขเหนือเทอร์มินัล - เพิ่มซอร์สโค้ดของเซิร์ฟเวอร์ MCP ของสวนสัตว์ต่อไปนี้ในไฟล์
index.jsimport express from 'express'; import { genkit, z } from 'genkit'; import { createMcpServer } from '@genkit-ai/mcp'; import { StreamableHTTPServerTransport } from '@modelcontextprotocol/sdk/server/streamableHttp.js'; // Dictionary of animals at the zoo const ZOO_ANIMALS = [ { "species": "lion", "name": "Leo", "age": 7, "enclosure": "The Big Cat Plains", "trail": "Savannah Heights" }, { "species": "lion", "name": "Nala", "age": 6, "enclosure": "The Big Cat Plains", "trail": "Savannah Heights" }, { "species": "lion", "name": "Simba", "age": 3, "enclosure": "The Big Cat Plains", "trail": "Savannah Heights" }, { "species": "lion", "name": "King", "age": 8, "enclosure": "The Big Cat Plains", "trail": "Savannah Heights" }, { "species": "penguin", "name": "Waddles", "age": 2, "enclosure": "The Arctic Exhibit", "trail": "Polar Path" }, { "species": "penguin", "name": "Pip", "age": 4, "enclosure": "The Arctic Exhibit", "trail": "Polar Path" }, { "species": "penguin", "name": "Skipper", "age": 5, "enclosure": "The Arctic Exhibit", "trail": "Polar Path" }, { "species": "penguin", "name": "Chilly", "age": 3, "enclosure": "The Arctic Exhibit", "trail": "Polar Path" }, { "species": "penguin", "name": "Pingu", "age": 6, "enclosure": "The Arctic Exhibit", "trail": "Polar Path" }, { "species": "penguin", "name": "Noot", "age": 1, "enclosure": "The Arctic Exhibit", "trail": "Polar Path" }, { "species": "elephant", "name": "Ellie", "age": 15, "enclosure": "The Pachyderm Sanctuary", "trail": "Savannah Heights" }, { "species": "elephant", "name": "Peanut", "age": 12, "enclosure": "The Pachyderm Sanctuary", "trail": "Savannah Heights" }, { "species": "elephant", "name": "Dumbo", "age": 5, "enclosure": "The Pachyderm Sanctuary", "trail": "Savannah Heights" }, { "species": "elephant", "name": "Trunkers", "age": 10, "enclosure": "The Pachyderm Sanctuary", "trail": "Savannah Heights" }, { "species": "bear", "name": "Smokey", "age": 10, "enclosure": "The Grizzly Gulch", "trail": "Polar Path" }, { "species": "bear", "name": "Grizzly", "age": 8, "enclosure": "The Grizzly Gulch", "trail": "Polar Path" }, { "species": "bear", "name": "Barnaby", "age": 6, "enclosure": "The Grizzly Gulch", "trail": "Polar Path" }, { "species": "bear", "name": "Bruin", "age": 12, "enclosure": "The Grizzly Gulch", "trail": "Polar Path" }, { "species": "giraffe", "name": "Gerald", "age": 4, "enclosure": "The Tall Grass Plains", "trail": "Savannah Heights" }, { "species": "giraffe", "name": "Longneck", "age": 5, "enclosure": "The Tall Grass Plains", "trail": "Savannah Heights" }, { "species": "giraffe", "name": "Patches", "age": 3, "enclosure": "The Tall Grass Plains", "trail": "Savannah Heights" }, { "species": "giraffe", "name": "Stretch", "age": 6, "enclosure": "The Tall Grass Plains", "trail": "Savannah Heights" }, { "species": "antelope", "name": "Speedy", "age": 2, "enclosure": "The Tall Grass Plains", "trail": "Savannah Heights" }, { "species": "antelope", "name": "Dash", "age": 3, "enclosure": "The Tall Grass Plains", "trail": "Savannah Heights" }, { "species": "antelope", "name": "Gazelle", "age": 4, "enclosure": "The Tall Grass Plains", "trail": "Savannah Heights" }, { "species": "antelope", "name": "Swift", "age": 5, "enclosure": "The Tall Grass Plains", "trail": "Savannah Heights" }, { "species": "polar bear", "name": "Snowflake", "age": 7, "enclosure": "The Arctic Exhibit", "trail": "Polar Path" }, { "species": "polar bear", "name": "Blizzard", "age": 5, "enclosure": "The Arctic Exhibit", "trail": "Polar Path" }, { "species": "polar bear", "name": "Iceberg", "age": 9, "enclosure": "The Arctic Exhibit", "trail": "Polar Path" }, { "species": "walrus", "name": "Wally", "age": 10, "enclosure": "The Walrus Cove", "trail": "Polar Path" }, { "species": "walrus", "name": "Tusker", "age": 12, "enclosure": "The Walrus Cove", "trail": "Polar Path" }, { "species": "walrus", "name": "Moby", "age": 8, "enclosure": "The Walrus Cove", "trail": "Polar Path" }, { "species": "walrus", "name": "Flippers", "age": 9, "enclosure": "The Walrus Cove", "trail": "Polar Path" } ]; // Initialize Genkit const ai = genkit({}); // Define tools using Genkit ai.defineTool( { name: 'get_animals_by_species', description: "Retrieves all animals of a specific species from the zoo. Can also be used to collect the base data for aggregate queries of animals of a specific species - like counting the number of penguins or finding the oldest lion.", inputSchema: z.object({ species: z.string() }), }, async ({ species }) => { console.log(`>>> 🛠️ Tool: 'get_animals_by_species' called for '${species}'`); const animals = ZOO_ANIMALS.filter(animal => animal.species.toLowerCase() === species.toLowerCase()); return animals; } ); ai.defineTool( { name: 'get_animal_details', description: "Retrieves the details of a specific animal by its name.", inputSchema: z.object({ name: z.string() }), }, async ({ name }) => { console.log(`>>> 🛠️ Tool: 'get_animal_details' called for '${name}'`); const animal = ZOO_ANIMALS.find(a => a.name.toLowerCase() === name.toLowerCase()); return animal; } ); // Create Genkit MCP server wrapper const mcpWrapper = createMcpServer(ai, { name: 'zoo-animal-server', version: '1.0.0', }); // HTTP server mode const app = express(); app.use(express.json()); // Initialize Genkit MCP server once const mcpServerPromise = mcpWrapper.setup().then(() => mcpWrapper.server); app.post('/mcp', async (req, res) => { console.log('/mcp Received:', req.body); console.log('Using HTTP transport mode.'); const server = await mcpServerPromise; const transport = new StreamableHTTPServerTransport({ sessionIdGenerator: undefined, }); if (!server) { console.error('MCP Server not initialized correctly.'); res.sendStatus(500); return; } await server.connect(transport); await transport.handleRequest(req, res, req.body); res.on('close', () => { console.log('Request closed'); transport.close(); }); }); app.get('/mcp', async (req, res) => { console.log('Received GET MCP request'); res.sendStatus(405); }); app.delete('/mcp', async (req, res) => { console.log('Received DELETE MCP request'); res.sendStatus(405); }); // Start the server const PORT = process.env.PORT || 8080; app.listen(PORT, () => { console.log(`Zoo Animal MCP server listening on port ${PORT}`); });
โค้ดของคุณเสร็จสมบูรณ์แล้ว ได้เวลาติดตั้งใช้งานเซิร์ฟเวอร์ MCP ใน Cloud Run แล้ว
7. กำลังทำให้ใช้งานได้กับ Cloud Run
ตอนนี้ให้ติดตั้งใช้งานเซิร์ฟเวอร์ MCP ใน Cloud Run โดยตรงจากซอร์สโค้ด
- สร้างบัญชีบริการชื่อ
mcp-server-sagcloud iam service-accounts create mcp-server-sa --display-name="MCP Server Service Account" - เรียกใช้คำสั่ง
gcloudเพื่อติดตั้งใช้งานแอปพลิเคชันใน Cloud Rungcloud run deploy zoo-mcp-server \ --service-account=mcp-server-sa@$GOOGLE_CLOUD_PROJECT.iam.gserviceaccount.com \ --no-allow-unauthenticated \ --region=europe-west4 \ --source=. \ --labels=dev-tutorial=codelab-mcp--no-allow-unauthenticatedเพื่อกำหนดให้มีการตรวจสอบสิทธิ์ ซึ่งมีความสำคัญด้วยเหตุผลด้านความปลอดภัย หากไม่กำหนดให้มีการตรวจสอบสิทธิ์ ทุกคนจะเรียกเซิร์ฟเวอร์ MCP ของคุณได้และอาจทำให้ระบบเสียหาย - ยืนยันการสร้างที่เก็บ Artifact Registry ใหม่ เนื่องจากเป็นการติดตั้งใช้งานใน Cloud Run จากซอร์สโค้ดเป็นครั้งแรก คุณจะเห็นข้อความต่อไปนี้
Deploying from source requires an Artifact Registry Docker repository to store built containers. A repository named [cloud-run-source-deploy] in region [europe-west4] will be created. Do you want to continue (Y/n)?
Yแล้วกดEnterเพื่อสร้างที่เก็บ Artifact Registry สำหรับการติดตั้งใช้งาน ซึ่งจำเป็นสำหรับการจัดเก็บคอนเทนเนอร์ Docker ของเซิร์ฟเวอร์ MCP สำหรับบริการ Cloud Run - หลังจากผ่านไป 2-3 นาที คุณจะเห็นข้อความต่อไปนี้
Service [zoo-mcp-server] revision [zoo-mcp-server-12345-abc] has been deployed and is serving 100 percent of traffic.
คุณได้ติดตั้งใช้งานเซิร์ฟเวอร์ MCP แล้ว ตอนนี้คุณสามารถใช้เซิร์ฟเวอร์ดังกล่าวได้
8. เพิ่มเซิร์ฟเวอร์ MCP ระยะไกลลงใน Gemini CLI
เมื่อติดตั้งใช้งานเซิร์ฟเวอร์ MCP ระยะไกลเรียบร้อยแล้ว คุณจะเชื่อมต่อกับเซิร์ฟเวอร์ดังกล่าวได้โดยใช้แอปพลิเคชันต่างๆ เช่น Google Code Assist หรือ Gemini CLI ในส่วนนี้ เราจะสร้างการเชื่อมต่อกับเซิร์ฟเวอร์ MCP ระยะไกลใหม่โดยใช้ Gemini CLI
- ให้สิทธิ์บัญชีผู้ใช้ในการเรียกเซิร์ฟเวอร์ MCP ระยะไกล
gcloud projects add-iam-policy-binding $GOOGLE_CLOUD_PROJECT \ --member=user:$(gcloud config get-value account) \ --role='roles/run.invoker' - บันทึกข้อมูลเข้าสู่ระบบ Google Cloud และหมายเลขโปรเจ็กต์ในตัวแปรสภาพแวดล้อมเพื่อใช้ในไฟล์การตั้งค่า Gemini
export PROJECT_NUMBER=$(gcloud projects describe $GOOGLE_CLOUD_PROJECT --format="value(projectNumber)") export ID_TOKEN=$(gcloud auth print-identity-token) - เปิดไฟล์การตั้งค่า Gemini CLI
cloudshell edit ~/.gemini/settings.json - แทนที่ไฟล์การตั้งค่า Gemini CLI เพื่อเพิ่มเซิร์ฟเวอร์ MCP ของ Cloud Run
{ "ide": { "hasSeenNudge": true }, "mcpServers": { "zoo-remote": { "httpUrl": "https://zoo-mcp-server-$PROJECT_NUMBER.europe-west4.run.app/mcp", "headers": { "Authorization": "Bearer $ID_TOKEN" } } }, "security": { "auth": { "selectedType": "cloud-shell" } } }
- เริ่ม Gemini CLI ใน Cloud Shell
geminiEnterเพื่อยอมรับการตั้งค่าเริ่มต้นบางอย่าง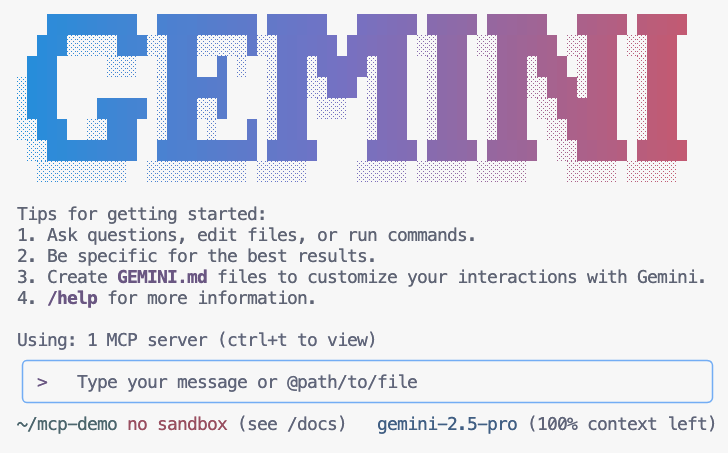
- ให้ Gemini แสดงรายการเครื่องมือ MCP ที่พร้อมใช้งานภายในบริบท
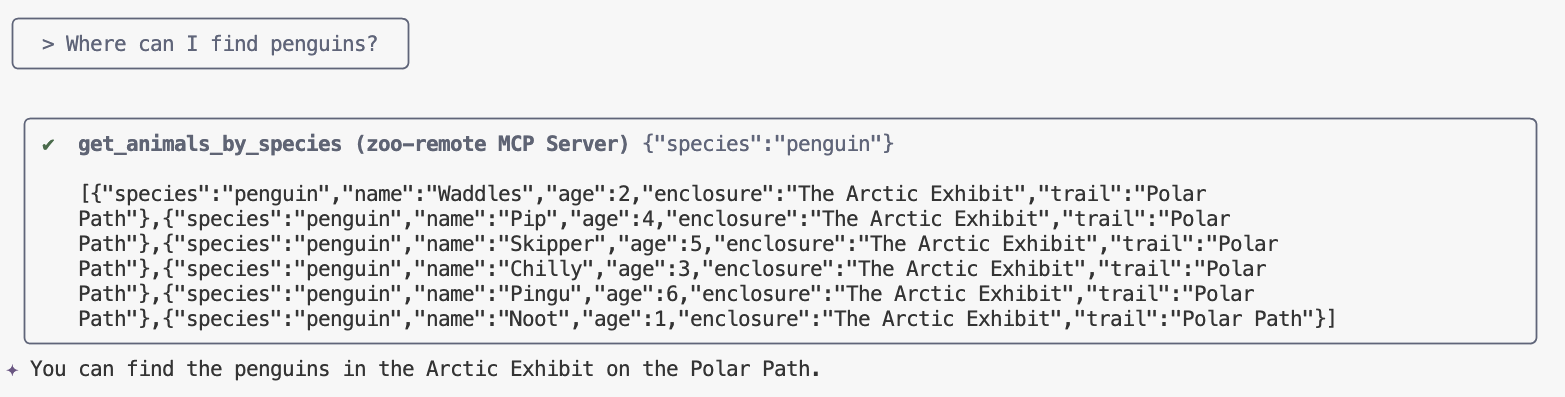
/mcp - ขอให้ Gemini ค้นหาสิ่งต่างๆ ในสวนสัตว์
Where can I find penguins?zoo-remoteและจะถามว่าคุณต้องการอนุญาตให้ดำเนินการ MCP หรือไม่ - ใช้ลูกศรลง แล้วกด
Enterเพื่อเลือกYes, always allow all tools from server "zoo-remote"
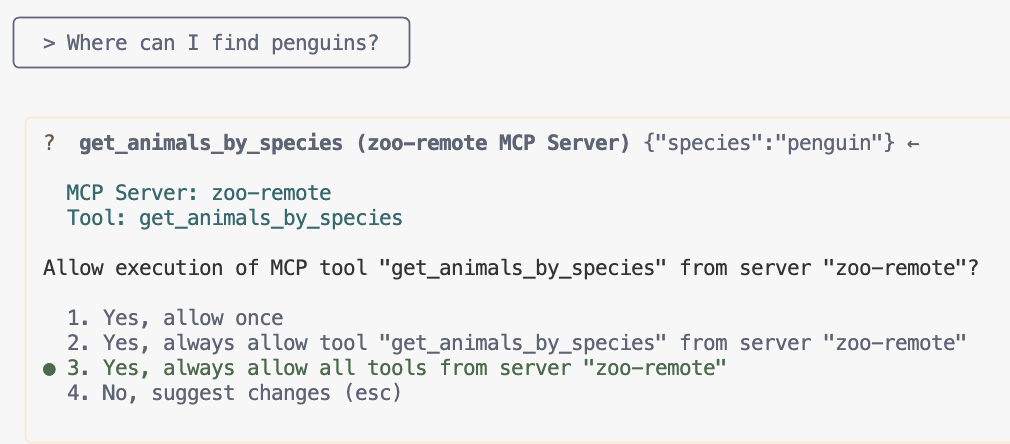
เอาต์พุตควรแสดงคำตอบที่ถูกต้องและกล่องแสดงว่ามีการใช้เซิร์ฟเวอร์ MCP
คุณทำได้แล้ว คุณได้ติดตั้งใช้งานเซิร์ฟเวอร์ MCP ระยะไกลใน Cloud Run และทดสอบโดยใช้ Gemini CLI เรียบร้อยแล้ว
เมื่อพร้อมที่จะสิ้นสุดเซสชัน ให้พิมพ์ /quit แล้วกด Enter เพื่อออกจาก Gemini CLI
การแก้ไขข้อบกพร่อง
หากเห็นข้อผิดพลาดต่อไปนี้
🔍 Attempting OAuth discovery for 'zoo-remote'... ❌ 'zoo-remote' requires authentication but no OAuth configuration found Error connecting to MCP server 'zoo-remote': MCP server 'zoo-remote' requires authentication. Please configure OAuth or check server settings.
เป็นไปได้ว่าโทเค็นรหัสหมดเวลาและต้องตั้งค่า ID_TOKEN อีกครั้ง
- พิมพ์
/quitแล้วกดEnterเพื่อออกจาก Gemini CLI - ตั้งค่าโปรเจ็กต์ในเทอร์มินัล
gcloud config set project [PROJECT_ID] - เรียกใช้คำสั่งข้อมูลเข้าสู่ระบบ Google Cloud อีกครั้งเพื่อรับ
ID_TOKENใหม่ เนื่องจากโทเค็นเดิมอาจหมดอายุแล้วexport PROJECT_NUMBER=$(gcloud projects describe $GOOGLE_CLOUD_PROJECT --format="value(projectNumber)") export ID_TOKEN=$(gcloud auth print-identity-token)
9. (ไม่บังคับ) ยืนยันการเรียกเครื่องมือในบันทึกของเซิร์ฟเวอร์
หากต้องการยืนยันว่ามีการเรียกเซิร์ฟเวอร์ MCP ของ Cloud Run ให้ตรวจสอบบันทึกของบริการ
gcloud run services logs read zoo-mcp-server --region europe-west4 --limit=5
คุณควรเห็นบันทึกเอาต์พุตที่ยืนยันว่ามีการเรียกเครื่องมือ 🛠️
2025-08-05 19:50:31 INFO: 169.254.169.126:39444 - "POST /mcp/ HTTP/1.1" 200 OK 2025-08-05 19:50:31 [INFO]: Processing request of type CallToolRequest 2025-08-05 19:50:31 [INFO]: >>> 🛠️ Tool: 'get_animals_by_species' called for 'penguin'
10. (ไม่บังคับ) เพิ่มพรอมต์ MCP ลงในเซิร์ฟเวอร์
พรอมต์ MCP สามารถเร่งเวิร์กโฟลว์สำหรับพรอมต์ที่คุณเรียกใช้บ่อยๆ ได้โดยการสร้างคำย่อสำหรับพรอมต์ที่ยาวขึ้น
Gemini CLI จะแปลงพรอมต์ MCP เป็นคำสั่ง Slash ที่กำหนดเองโดยอัตโนมัติเพื่อให้คุณเรียกใช้พรอมต์ MCP ได้โดยพิมพ์/prompt_nameโดยที่prompt_nameคือชื่อของพรอมต์ MCP
สร้างพรอมต์ MCP เพื่อให้คุณค้นหาสัตว์ในสวนสัตว์ได้อย่างรวดเร็วโดยพิมพ์ /find animal ลงใน Gemini CLI
- เพิ่มโค้ดนี้ลงในไฟล์
index.jsเหนือบรรทัด// Create Genkit MCP server wrapperai.definePrompt( { name: 'find', description: 'Find which exhibit and trail a specific animal is located.', inputSchema: z.object({ animal: z.string() }), }, async ({ animal }) => { console.log(`>>> 💬 Prompt: 'find' called'`); return { messages: [ { role: 'user', content: [ { text: `Please find the exhibit and trail information for ${animal} in the zoo. Respond with '[animal] can be found in the [exhibit] on the [trail].' Example: Penguins can be found in The Arctic Exhibit on the Polar Path.` } ] } ] }; } ); - ติดตั้งใช้งานแอปพลิเคชันใน Cloud Run อีกครั้ง
gcloud run deploy zoo-mcp-server \ --service-account=mcp-server-sa@$GOOGLE_CLOUD_PROJECT.iam.gserviceaccount.com \ --no-allow-unauthenticated \ --region=europe-west4 \ --source=. \ --labels=dev-tutorial=codelab-mcp - รีเฟรช ID_TOKEN สำหรับเซิร์ฟเวอร์ MCP ระยะไกล
export ID_TOKEN=$(gcloud auth print-identity-token) - หลังจากติดตั้งใช้งานแอปพลิเคชันเวอร์ชันใหม่แล้ว ให้เริ่ม Gemini CLI
gemini - ใช้คำสั่งที่กำหนดเองใหม่ที่คุณสร้างขึ้นในพรอมต์
/find --animal="lions"
คุณควรเห็นว่า Gemini CLI เรียกเครื่องมือ get_animals_by_species และจัดรูปแบบการตอบสนองตามที่พรอมต์ MCP สั่ง
╭───────────────────────────╮
│ > /find --animal="lion" │
╰───────────────────────────╯
╭───────────────────────────────────────────────────────────────────────────────────────────────────╮
│ ✔ get_animals_by_species (zoo-remote MCP Server) get_animals_by_species (zoo-remote MCP Server) │
│ │
│ [{"species":"lion","name":"Leo","age":7,"enclosure":"The Big Cat │
│ Plains","trail":"Savannah │
│ Heights"},{"species":"lion","name":"Nala","age":6,"enclosure":"The Big Cat │
│ Plains","trail":"Savannah │
│ Heights"},{"species":"lion","name":"Simba","age":3,"enclosure":"The Big Cat │
│ Plains","trail":"Savannah │
│ Heights"},{"species":"lion","name":"King","age":8,"enclosure":"The Big Cat │
│ Plains","trail":"Savannah Heights"}] │
╰───────────────────────────────────────────────────────────────────────────────────────────────────╯
✦ Lions can be found in The Big Cat Plains on the Savannah Heights.
11. (ไม่บังคับ) ใช้ Gemini Flash Lite เพื่อให้ได้การตอบสนองที่เร็วขึ้น
Gemini CLI ช่วยให้คุณเลือกโมเดลที่ต้องการใช้ได้
- Gemini 2.5 Pro เป็นโมเดลการคิดที่ล้ำสมัยที่สุดของ Google ซึ่งสามารถให้เหตุผลเกี่ยวกับปัญหาที่ซับซ้อนในโค้ด คณิตศาสตร์ และ STEM รวมถึงวิเคราะห์ชุดข้อมูล ฐานของโค้ด และเอกสารขนาดใหญ่โดยใช้บริบทที่ยาว
- Gemini 2.5 Flash เป็นโมเดลที่ดีที่สุดของ Google ในแง่ของประสิทธิภาพต่อราคา โดยมีความสามารถรอบด้าน 2.5 Flash เหมาะที่สุดสำหรับการประมวลผลขนาดใหญ่ งานที่มีความหน่วงต่ำและมีปริมาณมากซึ่งต้องใช้การคิด และกรณีการใช้งานแบบ Agentic
- Gemini 2.5 Flash Lite เป็นโมเดล Flash ที่เร็วที่สุดของ Google ซึ่งปรับให้เหมาะกับประสิทธิภาพด้านต้นทุนและการส่งข้อความปริมาณมาก
เนื่องจากคำขอที่เกี่ยวข้องกับการค้นหาสัตว์ในสวนสัตว์ไม่จำเป็นต้องใช้การคิดหรือการให้เหตุผล ให้ลองเร่งความเร็วโดยใช้โมเดลที่เร็วขึ้น
สร้างพรอมต์ MCP เพื่อให้คุณค้นหาสัตว์ในสวนสัตว์ได้อย่างรวดเร็วโดยพิมพ์ /find animal ลงใน Gemini CLI
- หลังจากติดตั้งใช้งานแอปพลิเคชันเวอร์ชันใหม่แล้ว ให้เริ่ม Gemini CLI
gemini --model=gemini-2.5-flash-lite - ใช้คำสั่งที่กำหนดเองใหม่ที่คุณสร้างขึ้นในพรอมต์
/find --animal="lions"
คุณควรเห็นว่า Gemini CLI ยังคงเรียกเครื่องมือ get_animals_by_species และจัดรูปแบบการตอบสนองตามที่พรอมต์ MCP สั่ง แต่คำตอบควรปรากฏเร็วขึ้นมาก
╭───────────────────────────╮
│ > /find --animal="lion" │
╰───────────────────────────╯
╭───────────────────────────────────────────────────────────────────────────────────────────────────╮
│ ✔ get_animals_by_species (zoo-remote MCP Server) get_animals_by_species (zoo-remote MCP Server) │
│ │
│ [{"species":"lion","name":"Leo","age":7,"enclosure":"The Big Cat │
│ Plains","trail":"Savannah │
│ Heights"},{"species":"lion","name":"Nala","age":6,"enclosure":"The Big Cat │
│ Plains","trail":"Savannah │
│ Heights"},{"species":"lion","name":"Simba","age":3,"enclosure":"The Big Cat │
│ Plains","trail":"Savannah │
│ Heights"},{"species":"lion","name":"King","age":8,"enclosure":"The Big Cat │
│ Plains","trail":"Savannah Heights"}] │
╰───────────────────────────────────────────────────────────────────────────────────────────────────╯
✦ Lions can be found in The Big Cat Plains on the Savannah Heights.
เป้าหมายที่ท้าทายเพื่อทดสอบตัวเอง
หากต้องการความท้าทายเพิ่มเติม ให้ลองทำตามขั้นตอนเดียวกันเพื่อสร้างพรอมต์สำหรับการแสดงข้อเท็จจริงที่น่าสนใจเกี่ยวกับสัตว์บางสายพันธุ์ในสวนสัตว์
หรือหากต้องการความท้าทายที่ใหญ่ขึ้นเพื่อทดสอบสิ่งที่คุณได้เรียนรู้ ให้คิดไอเดียสำหรับเครื่องมือที่คุณจะใช้บ่อยๆ และติดตั้งใช้งานเซิร์ฟเวอร์ MCP ระยะไกลที่ 2 จากนั้นเพิ่มลงในการตั้งค่า Gemini CLI เพื่อดูว่าใช้งานได้หรือไม่
การแก้ไขข้อบกพร่อง
หากเห็นข้อผิดพลาดต่อไปนี้
✕ Unknown command: /find --animal="lions"
ลองเรียกใช้ /mcp และหากแสดงผล zoo-remote - Disconnected คุณอาจต้องติดตั้งใช้งานอีกครั้งหรือเรียกใช้คำสั่งต่อไปนี้อีกครั้ง
gcloud projects add-iam-policy-binding $GOOGLE_CLOUD_PROJECT \
    --member=user:$(gcloud config get-value account) \
    --role='roles/run.invoker'
export PROJECT_NUMBER=$(gcloud projects describe $GOOGLE_CLOUD_PROJECT --format="value(projectNumber)")
export ID_TOKEN=$(gcloud auth print-identity-token)
12. บทสรุป
ยินดีด้วย คุณได้ติดตั้งใช้งานและเชื่อมต่อกับเซิร์ฟเวอร์ MCP ระยะไกลที่ปลอดภัยเรียบร้อยแล้ว
ทำแล็บถัดไป
แล็บนี้เป็นแล็บแรกในชุด 3 ส่วน ในแล็บที่ 2 คุณจะได้ใช้เซิร์ฟเวอร์ MCP ที่สร้างขึ้นกับ ADK Agent
ใช้เซิร์ฟเวอร์ MCP ใน Cloud Run กับ ADK Agent
(ไม่บังคับ) ล้างข้อมูล
หากคุณไม่ทำแล็บถัดไปและต้องการล้างข้อมูลสิ่งที่คุณสร้างขึ้น คุณสามารถลบโปรเจ็กต์ที่อยู่ในระบบคลาวด์เพื่อหลีกเลี่ยงค่าใช้จ่ายเพิ่มเติม
แม้ว่า Cloud Run จะไม่เรียกเก็บเงินเมื่อไม่ได้ใช้บริการ แต่คุณอาจยังคงถูกเรียกเก็บเงินสำหรับการจัดเก็บอิมเมจคอนเทนเนอร์ใน Artifact Registry การลบโปรเจ็กต์ที่อยู่ในระบบคลาวด์จะหยุดการเรียกเก็บเงินสำหรับทรัพยากรทั้งหมดที่ใช้ภายในโปรเจ็กต์นั้น
หากต้องการ ให้ลบโปรเจ็กต์โดยทำดังนี้
gcloud projects delete $GOOGLE_CLOUD_PROJECT
นอกจากนี้ คุณอาจต้องการลบทรัพยากรที่ไม่จำเป็นออกจากดิสก์ Cloud Shell โดยทำดังนี้
- ลบไดเรกทอรีโปรเจ็กต์ Codelab
rm -rf ~/mcp-on-cloudrun - คำเตือน! การดำเนินการถัดไปนี้ไม่สามารถยกเลิกได้ หากต้องการลบทุกอย่างใน Cloud Shell เพื่อเพิ่มพื้นที่ว่าง คุณสามารถลบไดเรกทอรีหน้าแรกทั้งหมด โปรดตรวจสอบว่าได้บันทึกทุกอย่างที่ต้องการเก็บไว้ที่อื่นแล้ว
sudo rm -rf $HOME