
1. परिचय
खास जानकारी
इस लैब में, आपको मॉडल कॉन्टेक्स्ट प्रोटोकॉल (एमसीपी) सर्वर बनाना और डिप्लॉय करना होगा. एमसीपी सर्वर, एलएलएम को बाहरी टूल और सेवाओं का ऐक्सेस देने के लिए फ़ायदेमंद होते हैं. आपको इसे Cloud Run पर एक सुरक्षित और प्रोडक्शन के लिए तैयार सेवा के तौर पर कॉन्फ़िगर करना होगा. इसे कई क्लाइंट ऐक्सेस कर सकते हैं. इसके बाद, Gemini सीएलआई से रिमोट एमसीपी सर्वर से कनेक्ट किया जाएगा.
आपको क्या करना होगा
हम FastMCP का इस्तेमाल करके, ज़ू एमसीपी सर्वर बनाएंगे. इसमें दो टूल होंगे: get_animals_by_species और get_animal_details. FastMCP, एमसीपी सर्वर और क्लाइंट बनाने का एक तेज़ और Pythonic तरीका है.

आपको क्या सीखने को मिलेगा
- एमसीपी सर्वर को Cloud Run पर डिप्लॉय करें.
- अपने सर्वर के एंडपॉइंट को सुरक्षित करें. इसके लिए, सभी अनुरोधों के लिए पुष्टि करने की ज़रूरत होती है. इससे यह पक्का किया जा सकता है कि सिर्फ़ अनुमति वाले क्लाइंट और एजेंट ही उससे कम्यूनिकेट कर सकें.
- Gemini CLI से, अपने सुरक्षित एमसीपी सर्वर एंडपॉइंट से कनेक्ट करना
2. प्रोजेक्ट सेटअप करना
- अगर आपके पास पहले से कोई Google खाता नहीं है, तो आपको Google खाता बनाना होगा.
- ऑफ़िस या स्कूल वाले खाते के बजाय, निजी खाते का इस्तेमाल करें. ऑफ़िस और स्कूल वाले खातों पर कुछ पाबंदियां हो सकती हैं. इनकी वजह से, इस लैब के लिए ज़रूरी एपीआई चालू नहीं किए जा सकते.
- Google Cloud Console में साइन इन करें.
- नया प्रोजेक्ट बनाएं या किसी मौजूदा प्रोजेक्ट का फिर से इस्तेमाल करें.
- अगर आपको प्रोजेक्ट के कोटे से जुड़ी कोई गड़बड़ी दिखती है, तो किसी मौजूदा प्रोजेक्ट का फिर से इस्तेमाल करें या नया प्रोजेक्ट बनाने के लिए किसी मौजूदा प्रोजेक्ट को मिटाएं.
3. Cloud Shell Editor खोलें
- सीधे Cloud Shell Editor पर जाने के लिए, इस लिंक पर क्लिक करें
- अगर आज किसी भी समय अनुमति देने के लिए कहा जाता है, तो जारी रखने के लिए अनुमति दें पर क्लिक करें.
- अगर टर्मिनल स्क्रीन पर सबसे नीचे नहीं दिखता है, तो इसे खोलें:
- देखें पर क्लिक करें
- टर्मिनल
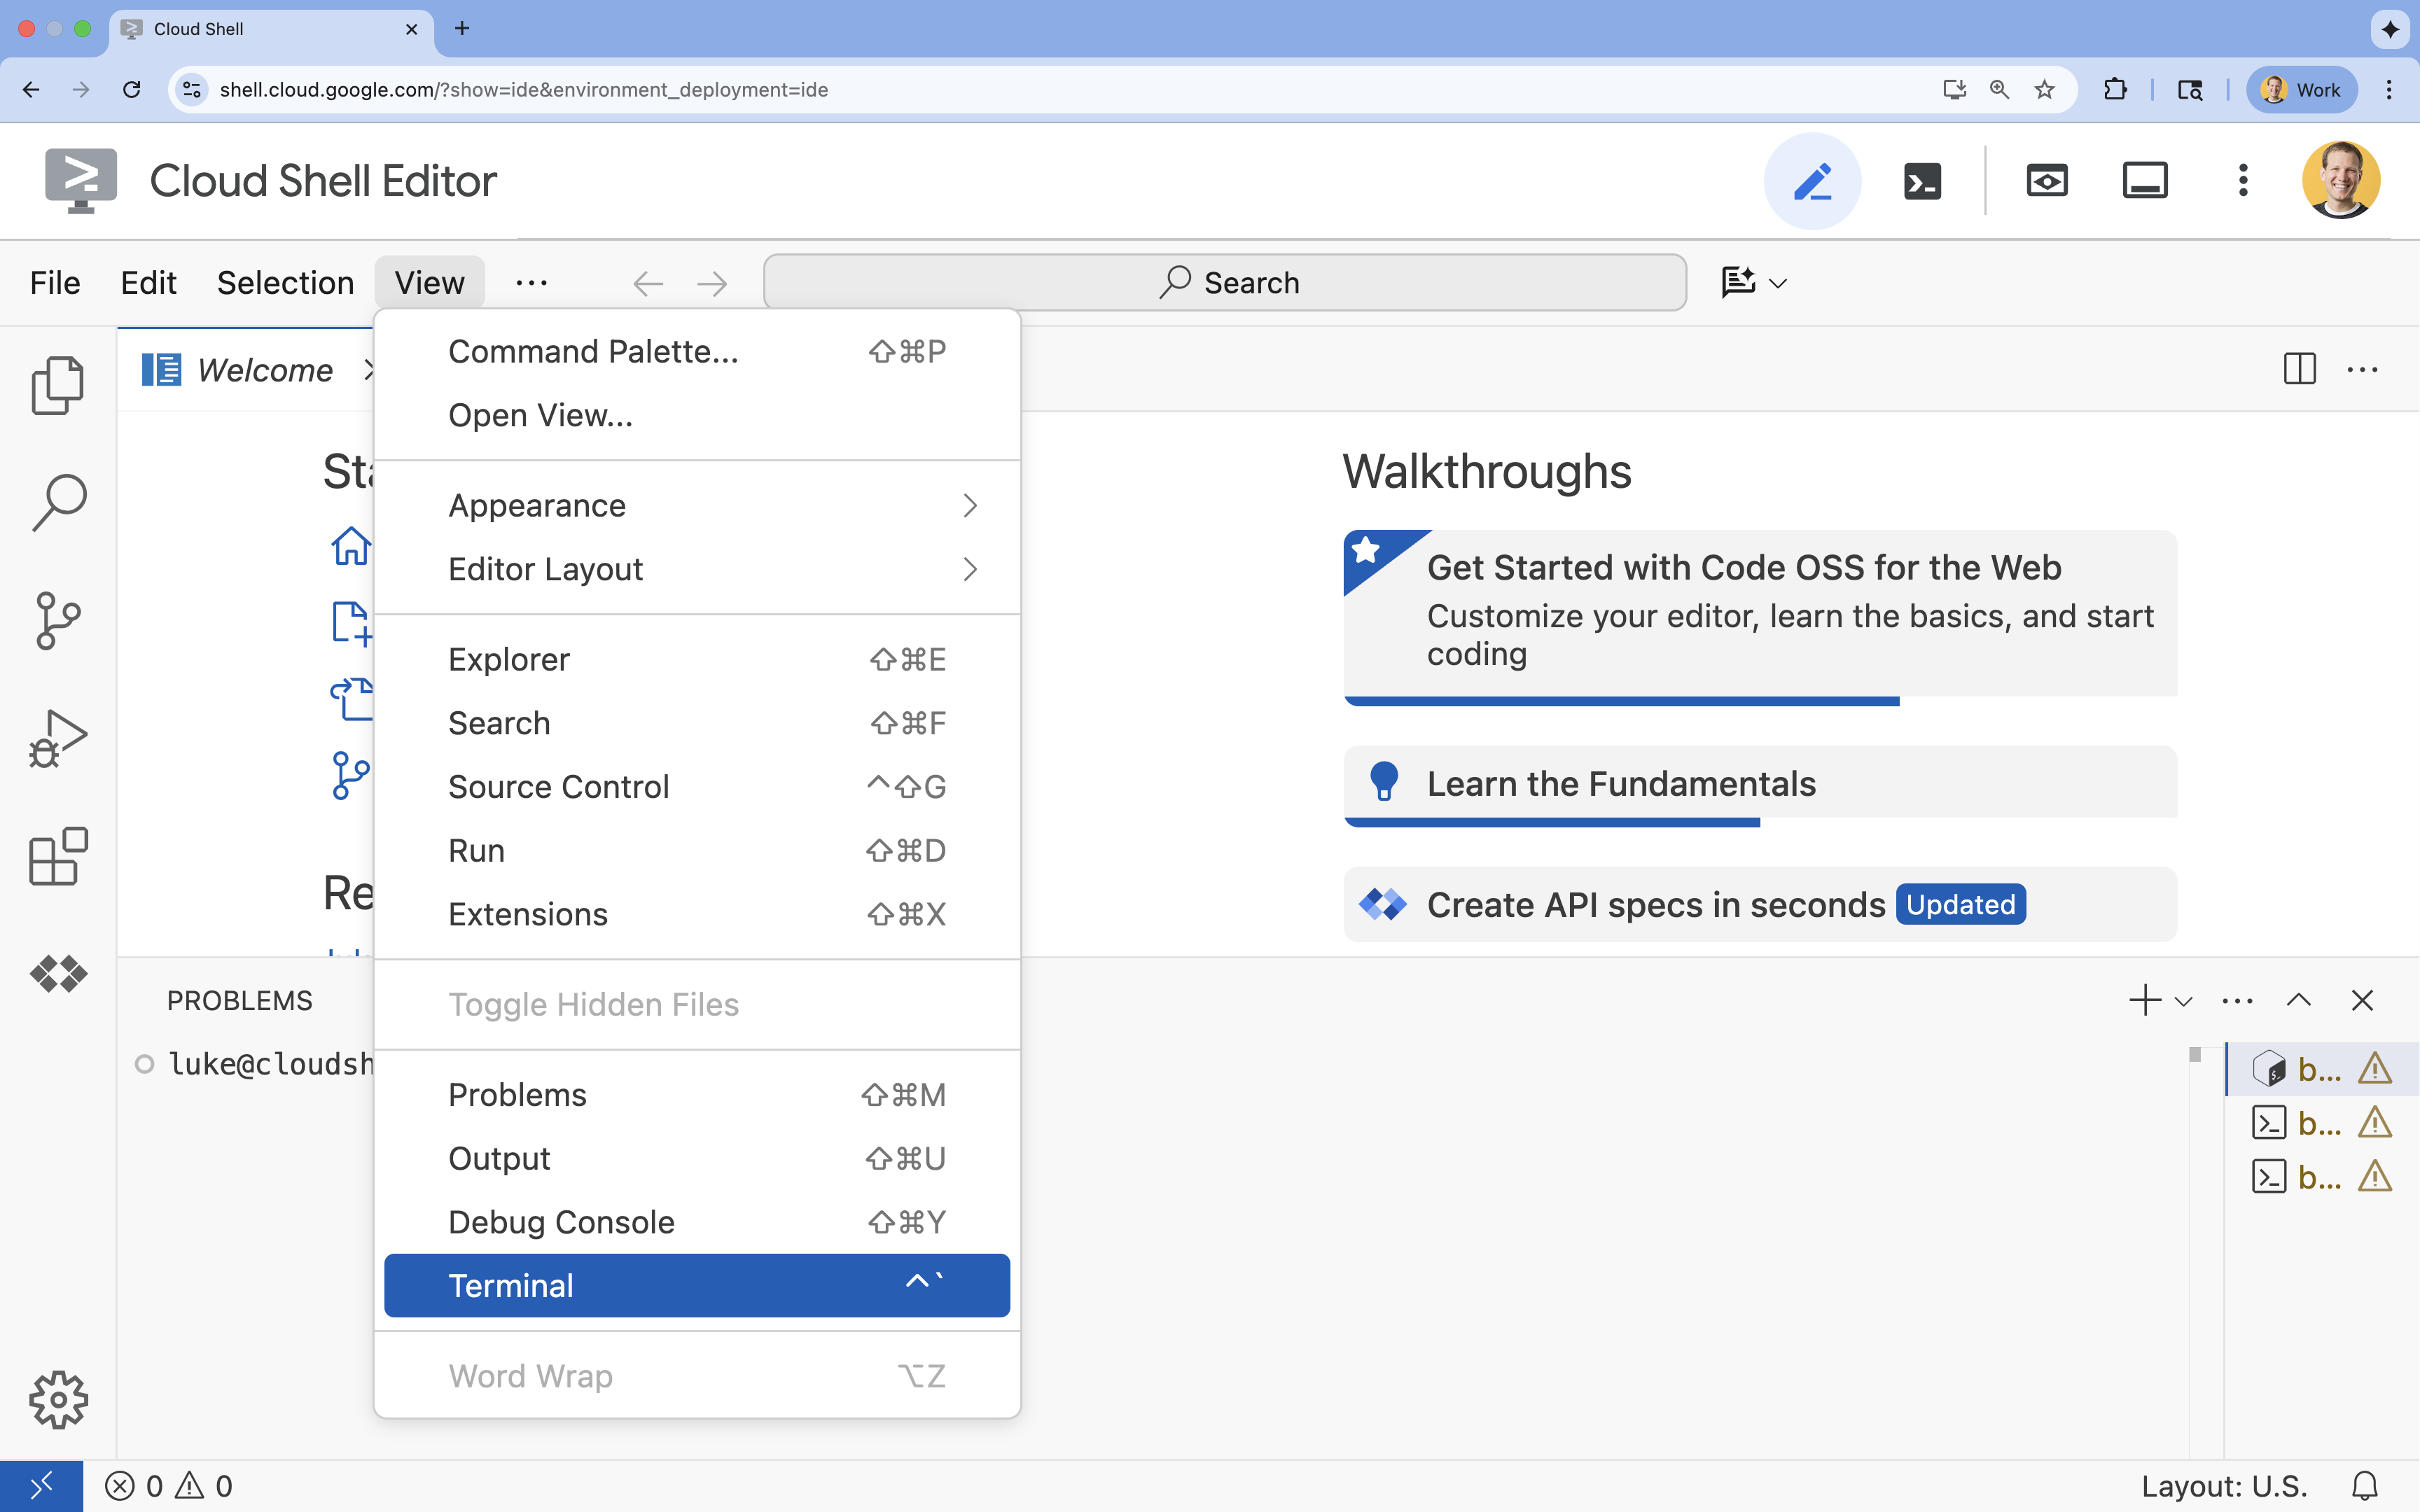 पर क्लिक करें
- टर्मिनल में, इस निर्देश का इस्तेमाल करके अपना प्रोजेक्ट सेट करें:
- फ़ॉर्मैट:
gcloud config set project [PROJECT_ID] - उदाहरण:
gcloud config set project lab-project-id-example - अगर आपको अपना प्रोजेक्ट आईडी याद नहीं है, तो:
- अपने सभी प्रोजेक्ट आईडी की सूची देखने के लिए, यह कमांड इस्तेमाल करें:
gcloud projects list | awk '/PROJECT_ID/{print $2}'

- अपने सभी प्रोजेक्ट आईडी की सूची देखने के लिए, यह कमांड इस्तेमाल करें:
- फ़ॉर्मैट:
- आपको यह मैसेज दिखेगा:
Updated property [core/project].
WARNINGदिखता है और आपसेDo you want to continue (Y/n)?पूछा जाता है, तो इसका मतलब है कि आपने प्रोजेक्ट आईडी गलत डाला है.nदबाएं,Enterदबाएं, औरgcloud config set projectनिर्देश को फिर से चलाने की कोशिश करें.
4. एपीआई चालू करें
टर्मिनल में, इन एपीआई को चालू करें:
gcloud services enable \
  run.googleapis.com \
  artifactregistry.googleapis.com \
  cloudbuild.googleapis.com
अगर अनुमति देने के लिए कहा जाए, तो जारी रखने के लिए अनुमति दें पर क्लिक करें.
इस कमांड को पूरा होने में कुछ मिनट लग सकते हैं. हालांकि, इसके बाद आपको इस तरह का मैसेज दिखेगा:
Operation "operations/acf.p2-73d90d00-47ee-447a-b600" finished successfully.
5. अपना Python प्रोजेक्ट तैयार करना
- डिप्लॉयमेंट के लिए सोर्स कोड सेव करने के लिए,
mcp-on-cloudrunनाम का फ़ोल्डर बनाएं:mkdir mcp-on-cloudrun && cd mcp-on-cloudrun pyproject.tomlफ़ाइल जनरेट करने के लिए,uvटूल का इस्तेमाल करके Python प्रोजेक्ट बनाएं:uv init --description "Example of deploying an MCP server on Cloud Run" --bare --python 3.13uv initकमांड, आपके प्रोजेक्ट के लिए एकpyproject.tomlफ़ाइल बनाती है.फ़ाइल का कॉन्टेंट देखने के लिए, यह कमांड चलाएं:cat pyproject.toml[project] name = "mcp-on-cloudrun" version = "0.1.0" description = "Example of deploying an MCP server on Cloud Run" requires-python = ">=3.13" dependencies = []
6. ज़ू एमसीपी सर्वर बनाना
एमसीपी के साथ एलएलएम के इस्तेमाल को बेहतर बनाने के लिए, ज़रूरी कॉन्टेक्स्ट उपलब्ध कराएं. इसके लिए, FastMCP के साथ एक ज़ू एमसीपी सर्वर सेट अप करें. यह मॉडल कॉन्टेक्स्ट प्रोटोकॉल के साथ काम करने के लिए एक स्टैंडर्ड फ़्रेमवर्क है. FastMCP, Python की मदद से एमसीपी सर्वर और क्लाइंट बनाने का एक तेज़ तरीका है. यह एमसीपी सर्वर, एक काल्पनिक चिड़ियाघर में मौजूद जानवरों के बारे में डेटा उपलब्ध कराता है. आसानी के लिए, हम डेटा को मेमोरी में सेव करते हैं. प्रोडक्शन एमसीपी सर्वर के लिए, आपको डेटाबेस या एपीआई जैसे सोर्स से डेटा देना होगा.
pyproject.tomlफ़ाइल में FastMCP को डिपेंडेंसी के तौर पर जोड़ने के लिए, यह कमांड चलाएं:uv add fastmcp==2.12.4 --no-syncuv.lockफ़ाइल जुड़ जाएगी.- एमसीपी सर्वर के सोर्स कोड के लिए, नई
server.pyफ़ाइल बनाएं और उसे खोलें:cloudshell edit ~/mcp-on-cloudrun/server.pycloudshell editकमांड, टर्मिनल के ऊपर मौजूद एडिटर मेंserver.pyफ़ाइल खोलेगी. server.pyफ़ाइल में, चिड़ियाघर के एमसीपी सर्वर का यह सोर्स कोड जोड़ें:import asyncio import logging import os from typing import List, Dict, Any from fastmcp import FastMCP logger = logging.getLogger(__name__) logging.basicConfig(format="[%(levelname)s]: %(message)s", level=logging.INFO) mcp = FastMCP("Zoo Animal MCP Server 🦁🐧🐻") # Dictionary of animals at the zoo ZOO_ANIMALS = [ { "species": "lion", "name": "Leo", "age": 7, "enclosure": "The Big Cat Plains", "trail": "Savannah Heights" }, { "species": "lion", "name": "Nala", "age": 6, "enclosure": "The Big Cat Plains", "trail": "Savannah Heights" }, { "species": "lion", "name": "Simba", "age": 3, "enclosure": "The Big Cat Plains", "trail": "Savannah Heights" }, { "species": "lion", "name": "King", "age": 8, "enclosure": "The Big Cat Plains", "trail": "Savannah Heights" }, { "species": "penguin", "name": "Waddles", "age": 2, "enclosure": "The Arctic Exhibit", "trail": "Polar Path" }, { "species": "penguin", "name": "Pip", "age": 4, "enclosure": "The Arctic Exhibit", "trail": "Polar Path" }, { "species": "penguin", "name": "Skipper", "age": 5, "enclosure": "The Arctic Exhibit", "trail": "Polar Path" }, { "species": "penguin", "name": "Chilly", "age": 3, "enclosure": "The Arctic Exhibit", "trail": "Polar Path" }, { "species": "penguin", "name": "Pingu", "age": 6, "enclosure": "The Arctic Exhibit", "trail": "Polar Path" }, { "species": "penguin", "name": "Noot", "age": 1, "enclosure": "The Arctic Exhibit", "trail": "Polar Path" }, { "species": "elephant", "name": "Ellie", "age": 15, "enclosure": "The Pachyderm Sanctuary", "trail": "Savannah Heights" }, { "species": "elephant", "name": "Peanut", "age": 12, "enclosure": "The Pachyderm Sanctuary", "trail": "Savannah Heights" }, { "species": "elephant", "name": "Dumbo", "age": 5, "enclosure": "The Pachyderm Sanctuary", "trail": "Savannah Heights" }, { "species": "elephant", "name": "Trunkers", "age": 10, "enclosure": "The Pachyderm Sanctuary", "trail": "Savannah Heights" }, { "species": "bear", "name": "Smokey", "age": 10, "enclosure": "The Grizzly Gulch", "trail": "Polar Path" }, { "species": "bear", "name": "Grizzly", "age": 8, "enclosure": "The Grizzly Gulch", "trail": "Polar Path" }, { "species": "bear", "name": "Barnaby", "age": 6, "enclosure": "The Grizzly Gulch", "trail": "Polar Path" }, { "species": "bear", "name": "Bruin", "age": 12, "enclosure": "The Grizzly Gulch", "trail": "Polar Path" }, { "species": "giraffe", "name": "Gerald", "age": 4, "enclosure": "The Tall Grass Plains", "trail": "Savannah Heights" }, { "species": "giraffe", "name": "Longneck", "age": 5, "enclosure": "The Tall Grass Plains", "trail": "Savannah Heights" }, { "species": "giraffe", "name": "Patches", "age": 3, "enclosure": "The Tall Grass Plains", "trail": "Savannah Heights" }, { "species": "giraffe", "name": "Stretch", "age": 6, "enclosure": "The Tall Grass Plains", "trail": "Savannah Heights" }, { "species": "antelope", "name": "Speedy", "age": 2, "enclosure": "The Tall Grass Plains", "trail": "Savannah Heights" }, { "species": "antelope", "name": "Dash", "age": 3, "enclosure": "The Tall Grass Plains", "trail": "Savannah Heights" }, { "species": "antelope", "name": "Gazelle", "age": 4, "enclosure": "The Tall Grass Plains", "trail": "Savannah Heights" }, { "species": "antelope", "name": "Swift", "age": 5, "enclosure": "The Tall Grass Plains", "trail": "Savannah Heights" }, { "species": "polar bear", "name": "Snowflake", "age": 7, "enclosure": "The Arctic Exhibit", "trail": "Polar Path" }, { "species": "polar bear", "name": "Blizzard", "age": 5, "enclosure": "The Arctic Exhibit", "trail": "Polar Path" }, { "species": "polar bear", "name": "Iceberg", "age": 9, "enclosure": "The Arctic Exhibit", "trail": "Polar Path" }, { "species": "walrus", "name": "Wally", "age": 10, "enclosure": "The Walrus Cove", "trail": "Polar Path" }, { "species": "walrus", "name": "Tusker", "age": 12, "enclosure": "The Walrus Cove", "trail": "Polar Path" }, { "species": "walrus", "name": "Moby", "age": 8, "enclosure": "The Walrus Cove", "trail": "Polar Path" }, { "species": "walrus", "name": "Flippers", "age": 9, "enclosure": "The Walrus Cove", "trail": "Polar Path" } ] @mcp.tool() def get_animals_by_species(species: str) -> List[Dict[str, Any]]: """ Retrieves all animals of a specific species from the zoo. Can also be used to collect the base data for aggregate queries of animals of a specific species - like counting the number of penguins or finding the oldest lion. Args: species: The species of the animal (e.g., 'lion', 'penguin'). Returns: A list of dictionaries, where each dictionary represents an animal and contains details like name, age, enclosure, and trail. """ logger.info(f">>> 🛠️ Tool: 'get_animals_by_species' called for '{species}'") return [animal for animal in ZOO_ANIMALS if animal["species"].lower() == species.lower()] @mcp.tool() def get_animal_details(name: str) -> Dict[str, Any]: """ Retrieves the details of a specific animal by its name. Args: name: The name of the animal. Returns: A dictionary with the animal's details (species, name, age, enclosure, trail) or an empty dictionary if the animal is not found. """ logger.info(f">>> 🛠️ Tool: 'get_animal_details' called for '{name}'") for animal in ZOO_ANIMALS: if animal["name"].lower() == name.lower(): return animal return {} if __name__ == "__main__": port = int(os.getenv("PORT", 8080)) logger.info(f"🚀 MCP server started on port {port}") asyncio.run( mcp.run_async( transport="http", host="0.0.0.0", port=port, ) )
आपका कोड पूरा हो गया है! अब एमसीपी सर्वर को Cloud Run पर डिप्लॉय करने का समय है.
7. Cloud Run पर डिप्लॉय करना
अब सोर्स कोड से सीधे Cloud Run पर एमसीपी सर्वर डिप्लॉय करें.
- Cloud Run पर डिप्लॉय करने के लिए, नया
Dockerfileबनाएं और उसे खोलें:cloudshell edit ~/mcp-on-cloudrun/Dockerfile server.pyफ़ाइल को चलाने के लिए,uvटूल का इस्तेमाल करने के लिए, Dockerfile में यह कोड शामिल करें:# Use the official Python image FROM python:3.13-slim # Install uv COPY --from=ghcr.io/astral-sh/uv:latest /uv /uvx /bin/ # Install the project into /app COPY . /app WORKDIR /app # Allow statements and log messages to immediately appear in the logs ENV PYTHONUNBUFFERED=1 # Install dependencies RUN uv sync EXPOSE $PORT # Run the FastMCP server CMD ["uv", "run", "server.py"]mcp-server-saनाम का सेवा खाता बनाएं:gcloud iam service-accounts create mcp-server-sa --display-name="MCP Server Service Account"- Cloud Run पर ऐप्लिकेशन डिप्लॉय करने के लिए,
gcloudकमांड चलाएंcd ~/mcp-on-cloudrun gcloud run deploy zoo-mcp-server \ --service-account=mcp-server-sa@$GOOGLE_CLOUD_PROJECT.iam.gserviceaccount.com \ --no-allow-unauthenticated \ --region=us-west1 \ --source=. \ --labels=dev-tutorial=codelab-mcp--no-allow-unauthenticatedफ़्लैग का इस्तेमाल करें. सुरक्षा की वजहों से ऐसा करना ज़रूरी है. अगर आपको पुष्टि करने की ज़रूरत नहीं है, तो कोई भी व्यक्ति आपके एमसीपी सर्वर को कॉल कर सकता है. इससे आपके सिस्टम को नुकसान पहुंच सकता है. - पुष्टि करें कि नई Artifact Registry रिपॉज़िटरी बन गई है. सोर्स कोड से Cloud Run पर पहली बार डिप्लॉय करने पर, आपको यह दिखेगा:
Deploying from source requires an Artifact Registry Docker repository to store built containers. A repository named
[cloud-run-source-deploy] in region [us-west1] will be created.

Do you want to continue (Y/n)?
Yटाइप करें औरEnterदबाएं. इससे आपके डिप्लॉयमेंट के लिए, Artifact Registry में डेटाबेस बन जाएगा. Cloud Run सेवा के लिए, MCP सर्वर के Docker कंटेनर को सेव करने के लिए इसकी ज़रूरत होती है. - कुछ मिनटों के बाद, आपको इस तरह का मैसेज दिखेगा:
Service [zoo-mcp-server] revision [zoo-mcp-server-12345-abc] has been deployed and is serving 100 percent of traffic.
आपने एमसीपी सर्वर डिप्लॉय किया हो. अब इसका इस्तेमाल किया जा सकता है.
8. Gemini CLI में रिमोट एमसीपी सर्वर जोड़ना
अब आपने रिमोट एमसीपी सर्वर को डिप्लॉय कर लिया है. इसलिए, Google Code Assist या Gemini सीएलआई जैसे अलग-अलग ऐप्लिकेशन का इस्तेमाल करके, इससे कनेक्ट किया जा सकता है. इस सेक्शन में, हम Gemini CLI का इस्तेमाल करके, आपके नए रिमोट एमसीपी सर्वर से कनेक्शन बनाएंगे.
- अपने उपयोगकर्ता खाते को रिमोट एमसीपी सर्वर को कॉल करने की अनुमति दें
gcloud projects add-iam-policy-binding $GOOGLE_CLOUD_PROJECT \ --member=user:$(gcloud config get-value account) \ --role='roles/run.invoker' - Gemini Settings फ़ाइल में इस्तेमाल करने के लिए, Google Cloud क्रेडेंशियल और प्रोजेक्ट नंबर को एनवायरमेंट वैरिएबल में सेव करें:
export PROJECT_NUMBER=$(gcloud projects describe $GOOGLE_CLOUD_PROJECT --format="value(projectNumber)") export ID_TOKEN=$(gcloud auth print-identity-token) - अगर
.geminiफ़ोल्डर पहले से नहीं बनाया गया है, तो उसे बनाएंmkdir -p ~/.gemini - Gemini के सीएलआई की सेटिंग वाली फ़ाइल खोलना
cloudshell edit ~/.gemini/settings.json - Cloud Run MCP सर्वर जोड़ने के लिए, Gemini CLI की सेटिंग वाली फ़ाइल बदलें
{ "ide": { "hasSeenNudge": true }, "mcpServers": { "zoo-remote": { "httpUrl": "https://zoo-mcp-server-$PROJECT_NUMBER.us-west1.run.app/mcp", "headers": { "Authorization": "Bearer $ID_TOKEN" } } }, "security": { "auth": { "selectedType": "cloud-shell" } } } - Cloud Shell में Gemini CLI शुरू करना
geminiEnterदबाना पड़ सकता है.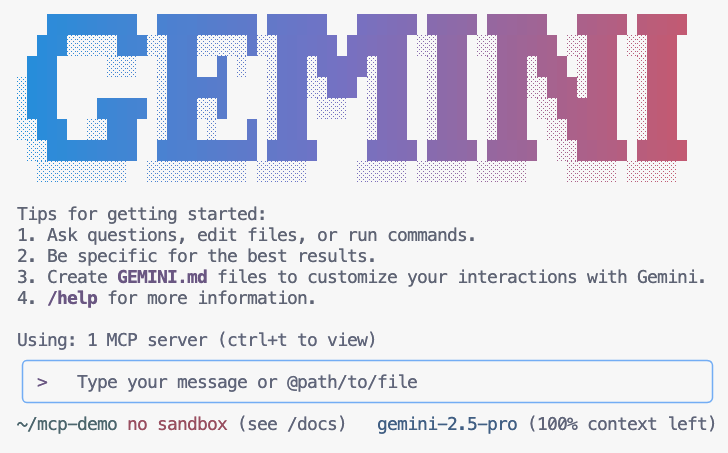
- Gemini से, एमसीपी टूल की सूची बनाने के लिए कहें. यह सूची, Gemini के कॉन्टेक्स्ट के हिसाब से होनी चाहिए
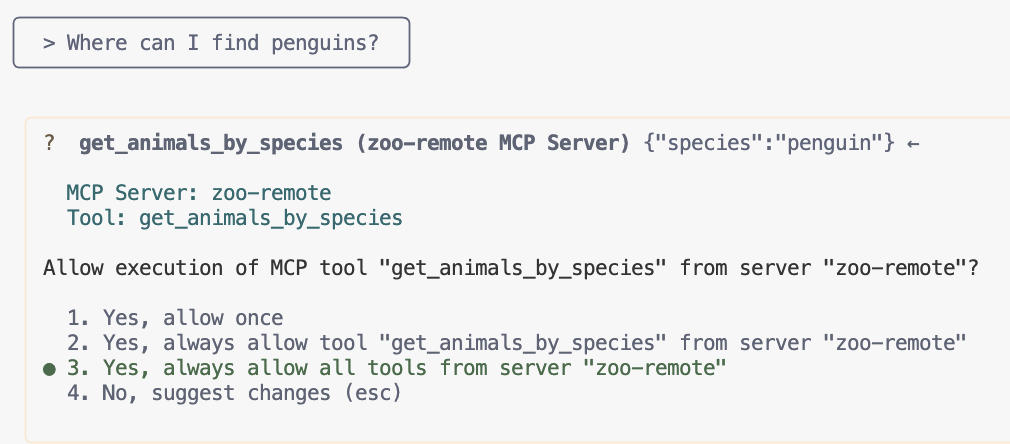
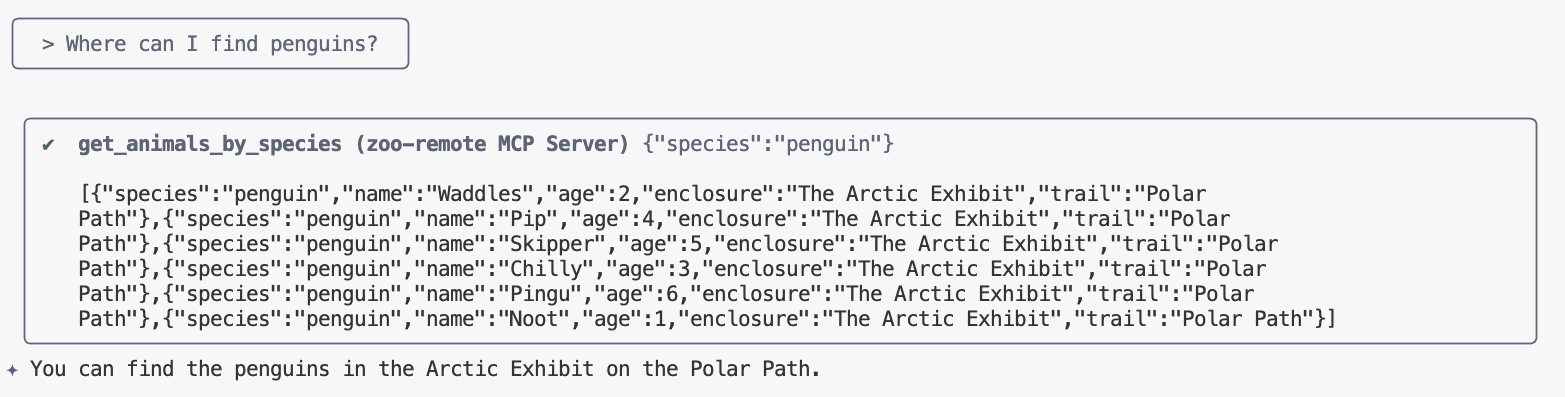
/mcp - Gemini से ज़ू में मौजूद किसी चीज़ को ढूंढने के लिए कहना
Where can I find penguins?zoo-remoteएमसीपी सर्वर का इस्तेमाल करना चाहिए. साथ ही, यह आपसे पूछेगा कि क्या आपको एमसीपी को एक्ज़ीक्यूट करने की अनुमति देनी है. - डाउन ऐरो का इस्तेमाल करें. इसके बाद, चुनने के लिए
EnterदबाएंYes, always allow all tools from server "zoo-remote"
आउटपुट में सही जवाब दिखना चाहिए. साथ ही, एक डिसप्ले बॉक्स दिखना चाहिए, जिसमें यह बताया गया हो कि एमसीपी सर्वर का इस्तेमाल किया गया है.
आपने कर दिखाया! आपने Cloud Run पर रिमोट एमसीपी सर्वर को डिप्लॉय कर दिया है. साथ ही, Gemini CLI का इस्तेमाल करके इसकी जांच कर ली है.
जब आपको सेशन खत्म करना हो, तो /quit टाइप करें. इसके बाद, Gemini CLI से बाहर निकलने के लिए Enter दबाएं.
डीबग करना
अगर आपको इस तरह की गड़बड़ी दिखती है:
🔍 Attempting OAuth discovery for 'zoo-remote'...
❌ 'zoo-remote' requires authentication but no OAuth configuration found
Error connecting to MCP server 'zoo-remote': MCP server 'zoo-remote' requires authentication. Please configure OAuth or check server settings.
ऐसा हो सकता है कि आईडी टोकन की समयसीमा खत्म हो गई हो. इसलिए, आपको ID_TOKEN को फिर से सेट करना होगा.
- Gemini CLI से बाहर निकलने के लिए,
/quitटाइप करें और फिरEnterदबाएं. - अपने टर्मिनल में प्रोजेक्ट सेट करना
gcloud config set project [PROJECT_ID] - Google Cloud क्रेडेंशियल कमांड को फिर से चलाएं, ताकि आपको नया
ID_TOKENमिल सके. ऐसा इसलिए, क्योंकि हो सकता है कि आपके क्रेडेंशियल की समयसीमा खत्म हो गई हो.export PROJECT_NUMBER=$(gcloud projects describe $GOOGLE_CLOUD_PROJECT --format="value(projectNumber)") export ID_TOKEN=$(gcloud auth print-identity-token)
9. (ज़रूरी नहीं) सर्वर लॉग में टूल कॉल की पुष्टि करना
यह पुष्टि करने के लिए कि आपके Cloud Run एमसीपी सर्वर को कॉल किया गया था, सेवा के लॉग देखें.
gcloud run services logs read zoo-mcp-server --region us-west1 --limit=5
आपको एक आउटपुट लॉग दिखेगा, जिसमें टूल कॉल किए जाने की पुष्टि की गई होगी. 🛠️
2025-08-05 19:50:31 INFO: 169.254.169.126:39444 - "POST /mcp HTTP/1.1" 200 OK 2025-08-05 19:50:31 [INFO]: Processing request of type CallToolRequest 2025-08-05 19:50:31 [INFO]: >>> 🛠️ Tool: 'get_animals_by_species' called for 'penguin'
10. (ज़रूरी नहीं) सर्वर में एमसीपी प्रॉम्प्ट जोड़ना
एमसीपी प्रॉम्प्ट की मदद से, उन प्रॉम्प्ट के लिए अपने वर्कफ़्लो को तेज़ किया जा सकता है जिन्हें अक्सर चलाया जाता है. इसके लिए, लंबे प्रॉम्प्ट के लिए शॉर्टहैंड बनाया जाता है.
Gemini CLI, एमसीपी प्रॉम्प्ट को अपने-आप कस्टम स्लैश कमांड में बदल देता है, ताकि /prompt_name टाइप करके एमसीपी प्रॉम्प्ट को चालू किया जा सके. यहाँ prompt_name, आपके एमसीपी प्रॉम्प्ट का नाम है.
एमसीपी प्रॉम्प्ट बनाएं, ताकि Gemini CLI में /find animal टाइप करके, चिड़ियाघर में मौजूद किसी जानवर को तुरंत ढूंढा जा सके.
- इस कोड को अपनी
server.pyफ़ाइल में, मुख्य गार्ड (if __name__ == "__main__":) से ऊपर जोड़ें@mcp.prompt() def find(animal: str) -> str: """ Find which exhibit and trail a specific animal might be located. """ return ( f"Please find the exhibit and trail information for {animal} in the zoo. " f"Respond with '[animal] can be found in the [exhibit] on the [trail].'" f"Example: Penguins can be found in The Arctic Exhibit on the Polar Path." ) - अपने ऐप्लिकेशन को Cloud Run पर फिर से डिप्लॉय करें
gcloud run deploy zoo-mcp-server \ --region=us-west1 \ --source=. \ --labels=dev-tutorial=codelab-mcp - अपने रिमोट एमसीपी सर्वर के लिए ID_TOKEN रीफ़्रेश करें
export ID_TOKEN=$(gcloud auth print-identity-token) - अपने ऐप्लिकेशन का नया वर्शन डिप्लॉय करने के बाद, Gemini CLI शुरू करें.
gemini - प्रॉम्प्ट में, बनाई गई नई कस्टम कमांड का इस्तेमाल करें:
/find lions
आपको दिखेगा कि Gemini सीएलआई, get_animals_by_species टूल को कॉल करता है और MCP प्रॉम्प्ट में दिए गए निर्देशों के मुताबिक जवाब को फ़ॉर्मैट करता है!
╭───────────────────────────╮
│ > /find lions │
╰───────────────────────────╯
╭───────────────────────────────────────────────────────────────────────────────────────────────────╮
│ ✔ get_animals_by_species (zoo-remote MCP Server) get_animals_by_species (zoo-remote MCP Server) │
│ │
│ [{"species":"lion","name":"Leo","age":7,"enclosure":"The Big Cat │
│ Plains","trail":"Savannah │
│ Heights"},{"species":"lion","name":"Nala","age":6,"enclosure":"The Big Cat │
│ Plains","trail":"Savannah │
│ Heights"},{"species":"lion","name":"Simba","age":3,"enclosure":"The Big Cat │
│ Plains","trail":"Savannah │
│ Heights"},{"species":"lion","name":"King","age":8,"enclosure":"The Big Cat │
│ Plains","trail":"Savannah Heights"}] │
╰───────────────────────────────────────────────────────────────────────────────────────────────────╯
✦ Lions can be found in The Big Cat Plains on the Savannah Heights.
11. (ज़रूरी नहीं) तेज़ी से जवाब पाने के लिए, Gemini Flash Lite का इस्तेमाल करना
Gemini CLI की मदद से, इस्तेमाल किया जा रहा मॉडल चुना जा सकता है.
- Gemini 2.5 Pro, Google का सबसे बेहतरीन मॉडल है. यह कोड, गणित, और विज्ञान, टेक्नोलॉजी, इंजीनियरिंग, और गणित (एसटीईएम) से जुड़ी मुश्किल समस्याओं को हल कर सकता है. साथ ही, लंबे कॉन्टेक्स्ट का इस्तेमाल करके, बड़े डेटासेट, कोडबेस, और दस्तावेज़ों का विश्लेषण कर सकता है.
- Gemini 2.5 Flash, Google का सबसे अच्छा मॉडल है. यह कम कीमत में बेहतर परफ़ॉर्मेंस देता है. इसमें कई तरह की सुविधाएँ मिलती हैं. 2.5 Flash, बड़े पैमाने पर प्रोसेसिंग, कम समय में जवाब देने, और ज़्यादा डेटा वाले ऐसे टास्क के लिए सबसे अच्छा है जिनमें सोच-विचार करने की ज़रूरत होती है. साथ ही, यह एजेंटिक इस्तेमाल के उदाहरणों के लिए भी सबसे अच्छा है.
- Gemini 2.5 Flash Lite, Google का सबसे तेज़ फ़्लैश मॉडल है. इसे कम लागत और ज़्यादा थ्रूपुट के लिए ऑप्टिमाइज़ किया गया है.
चिड़ियाघर के जानवरों के बारे में जानकारी पाने के लिए किए गए अनुरोधों में, सोचने-समझने की ज़रूरत नहीं होती. इसलिए, तेज़ मॉडल का इस्तेमाल करके, जवाब देने की प्रोसेस को तेज़ करें.
पिछले सेक्शन में, आपने एक एमसीपी प्रॉम्प्ट बनाया था, ताकि Gemini CLI में /find animal टाइप करके, चिड़ियाघर में मौजूद किसी जानवर को तुरंत ढूंढा जा सके.
- अपने ऐप्लिकेशन का नया वर्शन डिप्लॉय करने के बाद, Gemini CLI शुरू करें.
gemini --model=gemini-2.5-flash-lite - प्रॉम्प्ट में, बनाई गई नई कस्टम कमांड का इस्तेमाल करें:
/find lions
आपको अब भी दिखेगा कि Gemini सीएलआई, get_animals_by_species टूल को कॉल करता है और एमसीपी प्रॉम्प्ट में दिए गए निर्देशों के मुताबिक जवाब को फ़ॉर्मैट करता है. हालांकि, जवाब पहले से ज़्यादा तेज़ी से दिखेगा!
╭───────────────────────────╮
│ > /find lions │
╰───────────────────────────╯
╭───────────────────────────────────────────────────────────────────────────────────────────────────╮
│ ✔ get_animals_by_species (zoo-remote MCP Server) get_animals_by_species (zoo-remote MCP Server) │
│ │
│ [{"species":"lion","name":"Leo","age":7,"enclosure":"The Big Cat │
│ Plains","trail":"Savannah │
│ Heights"},{"species":"lion","name":"Nala","age":6,"enclosure":"The Big Cat │
│ Plains","trail":"Savannah │
│ Heights"},{"species":"lion","name":"Simba","age":3,"enclosure":"The Big Cat │
│ Plains","trail":"Savannah │
│ Heights"},{"species":"lion","name":"King","age":8,"enclosure":"The Big Cat │
│ Plains","trail":"Savannah Heights"}] │
╰───────────────────────────────────────────────────────────────────────────────────────────────────╯
✦ Lions can be found in The Big Cat Plains on the Savannah Heights.
डीबग करना
अगर आपको इस तरह की गड़बड़ी दिखती है:
✕ Unknown command: /find lions
/mcp को चलाने की कोशिश करें. अगर यह zoo-remote - Disconnected दिखाता है, तो आपको फिर से डिप्लॉय करना पड़ सकता है या इन कमांड को फिर से चलाना पड़ सकता है:
gcloud projects add-iam-policy-binding $GOOGLE_CLOUD_PROJECT \
--member=user:$(gcloud config get-value account) \
--role='roles/run.invoker'
export PROJECT_NUMBER=$(gcloud projects describe $GOOGLE_CLOUD_PROJECT --format="value(projectNumber)")
export ID_TOKEN=$(gcloud auth print-identity-token)
12. नतीजा
बधाई हो! आपने सुरक्षित रिमोट एमसीपी सर्वर को डिप्लॉय कर दिया है और उससे कनेक्ट कर लिया है.
अगली लैब पर जाएं
यह लैब, तीन हिस्सों वाली सीरीज़ की पहली लैब है. दूसरे लैब में, ADK एजेंट के साथ बनाए गए एमसीपी सर्वर का इस्तेमाल किया जाएगा.
ADK एजेंट के साथ Cloud Run पर एमसीपी सर्वर का इस्तेमाल करना
(ज़रूरी नहीं) जगह खाली करें
अगर आपको अगले लैब पर नहीं जाना है और आपने जो भी बनाया है उसे मिटाना है, तो अतिरिक्त शुल्क से बचने के लिए अपना Cloud प्रोजेक्ट मिटाया जा सकता है.
Cloud Run, सेवा का इस्तेमाल न किए जाने पर कोई शुल्क नहीं लेता. हालांकि, Artifact Registry में कंटेनर इमेज सेव करने के लिए आपसे शुल्क लिया जा सकता है. Cloud प्रोजेक्ट मिटाने पर, उस प्रोजेक्ट में इस्तेमाल किए गए सभी संसाधनों के लिए बिलिंग बंद हो जाती है.
अगर आपको प्रोजेक्ट मिटाना है, तो यह तरीका अपनाएं:
gcloud projects delete $GOOGLE_CLOUD_PROJECT
ऐसा भी हो सकता है कि आपको अपने Cloud Shell डिस्क से ग़ैर-ज़रूरी संसाधन मिटाने हों. ये काम किए जा सकते हैं:
- कोड लैब प्रोजेक्ट की डायरेक्ट्री मिटाएं:
rm -rf ~/mcp-on-cloudrun - चेतावनी! इस कार्रवाई को पहले जैसा नहीं किया जा सकता! अगर आपको Cloud Shell पर मौजूद सभी फ़ाइलें मिटाकर जगह खाली करनी है, तो अपनी पूरी होम डायरेक्ट्री मिटाएं. ध्यान रखें कि आपको जो भी डेटा रखना है वह किसी दूसरी जगह पर सेव हो.
sudo rm -rf $HOME