
1. Tổng quan
Hibernate đã trở thành giải pháp ORM tiêu chuẩn trên thực tế cho các dự án Java. Nó hỗ trợ tất cả các cơ sở dữ liệu quan hệ chính và cho phép các công cụ ORM mạnh mẽ hơn nữa như Spring Data JPA. Ngoài ra, còn có nhiều khung tương thích với Hibernate, chẳng hạn như Spring Boot, Microprofile và Quarkus.
Ngôn ngữ Cloud Spanner cho Hibernate ORM giúp bạn có thể sử dụng Hibernate với Cloud Spanner. Bạn sẽ nhận được các lợi ích của Cloud Spanner (khả năng mở rộng và ngữ nghĩa quan hệ) cùng với khả năng duy trì thành ngữ của Hibernate. Việc này có thể giúp bạn di chuyển các ứng dụng hiện có lên đám mây hoặc viết các ứng dụng mới tận dụng khả năng tăng năng suất của nhà phát triển do các công nghệ dựa trên Hibernate mang lại.
Kiến thức bạn sẽ học được
- Cách viết một ứng dụng Hibernate đơn giản kết nối với Cloud Spanner
- Cách tạo cơ sở dữ liệu Cloud Spanner
- Cách sử dụng Ngôn ngữ Cloud Spanner cho Hibernate ORM
- Cách triển khai các thao tác tạo-đọc-cập nhật-xoá (CRUD) bằng Hibernate
Bạn cần có
2. Thiết lập và yêu cầu
Thiết lập môi trường theo tốc độ của riêng bạn
- Đăng nhập vào Cloud Console rồi tạo một dự án mới hoặc sử dụng lại một dự án hiện có. (Nếu chưa có tài khoản Gmail hoặc G Suite, bạn phải tạo một tài khoản.)


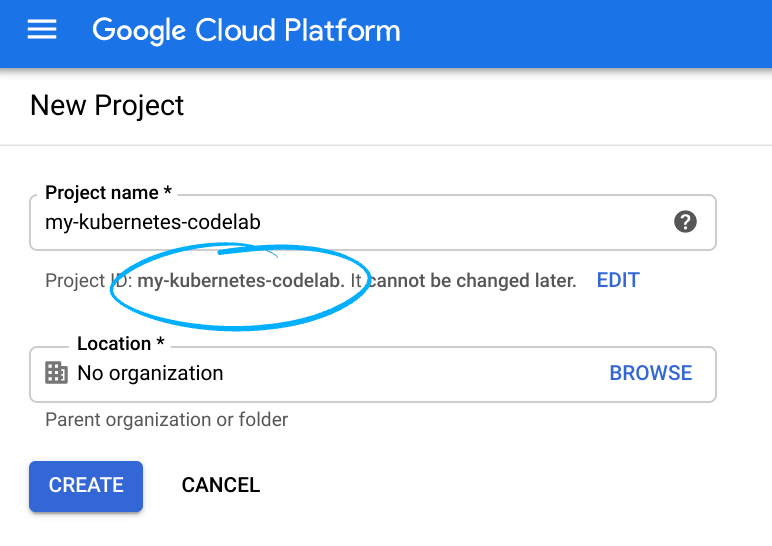
Hãy nhớ mã dự án, một tên duy nhất trên tất cả các dự án trên Google Cloud (tên ở trên đã được sử dụng và sẽ không hoạt động đối với bạn, xin lỗi!). Sau này trong lớp học lập trình này, chúng ta sẽ gọi nó là PROJECT_ID.
- Tiếp theo, bạn cần bật tính năng thanh toán trong Cloud Console để sử dụng các tài nguyên của Google Cloud.
Việc thực hiện lớp học lập trình này sẽ không tốn nhiều chi phí, nếu có. Hãy nhớ làm theo mọi hướng dẫn trong phần "Dọn dẹp" để biết cách tắt các tài nguyên nhằm tránh bị tính phí ngoài phạm vi hướng dẫn này. Người dùng mới của Google Cloud đủ điều kiện tham gia chương trình Dùng thử miễn phí trị giá 300 USD.
Kích hoạt Cloud Shell
- Trong Cloud Console, hãy nhấp vào Kích hoạt Cloud Shell
.

Nếu chưa từng khởi động Cloud Shell, bạn sẽ thấy một màn hình trung gian (bên dưới phần hiển thị đầu tiên) mô tả về Cloud Shell. Nếu vậy, hãy nhấp vào Tiếp tục (và bạn sẽ không bao giờ thấy màn hình này nữa). Sau đây là giao diện của màn hình xuất hiện một lần:

Quá trình cung cấp và kết nối với Cloud Shell chỉ mất vài giây.

Máy ảo này được trang bị tất cả các công cụ phát triển mà bạn cần. Nền tảng này cung cấp một thư mục chính có dung lượng 5 GB và chạy trong Google Cloud, giúp tăng cường đáng kể hiệu suất mạng và hoạt động xác thực. Bạn có thể thực hiện hầu hết, nếu không muốn nói là tất cả, công việc trong lớp học lập trình này chỉ bằng một trình duyệt hoặc Chromebook.
Sau khi kết nối với Cloud Shell, bạn sẽ thấy rằng mình đã được xác thực và dự án đã được đặt thành mã dự án của bạn.
- Chạy lệnh sau trong Cloud Shell để xác nhận rằng bạn đã được xác thực:
gcloud auth list
Đầu ra của lệnh
 Credentialed Accounts
ACTIVE  ACCOUNT
*       <my_account>@<my_domain.com>

To set the active account, run:
    $ gcloud config set account `ACCOUNT`
gcloud config list project
Đầu ra của lệnh
[core]
project = <PROJECT_ID>
Nếu không, bạn có thể đặt nó bằng lệnh sau:
gcloud config set project <PROJECT_ID>
Đầu ra của lệnh
Updated property [core/project].
3. Tạo cơ sở dữ liệu
Sau khi Cloud Shell khởi động, bạn có thể bắt đầu sử dụng gcloud để tương tác với dự án GCP của mình.
Trước tiên, hãy bật Cloud Spanner API.
gcloud services enable spanner.googleapis.com
Bây giờ, hãy tạo một phiên bản Cloud Spanner có tên là codelab-instance.
gcloud spanner instances create codelab-instance \
 --config=regional-us-central1 \
 --description="Codelab Instance" --nodes=1
Bây giờ, chúng ta cần thêm một cơ sở dữ liệu vào phiên bản này. Chúng ta sẽ gọi nó là codelab-db.
gcloud spanner databases create codelab-db --instance=codelab-instance
4. Tạo một ứng dụng trống
Chúng ta sẽ sử dụng Maven Quickstart Archetype để tạo một ứng dụng bảng điều khiển Java đơn giản.
mvn archetype:generate \
 -DgroupId=codelab \
 -DartifactId=spanner-hibernate-codelab \
 -DarchetypeArtifactId=maven-archetype-quickstart \
 -DarchetypeVersion=1.4 \
 -DinteractiveMode=false
Chuyển sang thư mục ứng dụng.
cd spanner-hibernate-codelab
Biên dịch và chạy ứng dụng bằng Maven.
mvn compile exec:java -Dexec.mainClass=codelab.App
Bạn sẽ thấy Hello World! được in trong bảng điều khiển.
5. Thêm phần phụ thuộc
Hãy khám phá mã nguồn bằng cách mở Cloud Shell Editor và duyệt xem bên trong thư mục spanner-hibernate-codelab.

Cho đến nay, chúng ta chỉ có một ứng dụng bảng điều khiển Java cơ bản in "Hello World!". Tuy nhiên, chúng tôi thực sự muốn viết một ứng dụng Java sử dụng Hibernate để giao tiếp với Cloud Spanner. Để làm việc đó, chúng ta sẽ cần Cloud Spanner Dialect cho Hibernate, trình điều khiển Cloud Spanner JDBC và lõi Hibernate. Vì vậy, hãy thêm các phần phụ thuộc sau vào khối <dependencies> bên trong tệp pom.xml.
pom.xml
    <!-- Spanner Dialect -->
    <dependency>
      <groupId>com.google.cloud</groupId>
      <artifactId>google-cloud-spanner-hibernate-dialect</artifactId>
      <version>1.5.0</version>
    </dependency>

    <!-- JDBC Driver -->
    <dependency>
      <groupId>com.google.cloud</groupId>
      <artifactId>google-cloud-spanner-jdbc</artifactId>
      <version>2.0.0</version>
    </dependency>

    <!-- Hibernate -->
    <dependency>
      <groupId>org.hibernate</groupId>
      <artifactId>hibernate-core</artifactId>
      <version>5.4.29.Final</version>
    </dependency>
6. Định cấu hình Hibernate ORM
Tiếp theo, chúng ta sẽ tạo các tệp cấu hình Hibernate hibernate.cfg.xml và hibernate.properties. Chạy lệnh sau để tạo các tệp trống, sau đó chỉnh sửa các tệp đó bằng Cloud Shell Editor.
mkdir src/main/resources \
 && touch src/main/resources/hibernate.cfg.xml \
 && touch src/main/resources/hibernate.properties
Vì vậy, hãy cho Hibernate biết về các lớp thực thể được chú thích mà chúng ta sẽ liên kết với cơ sở dữ liệu bằng cách điền vào hibernate.cfg.xml. (Chúng ta sẽ tạo các lớp thực thể sau.)
src/main/resources/hibernate.cfg.xml
<hibernate-configuration>
  <session-factory>
    <!-- Annotated entity classes -->
    <mapping class="codelab.Album"/>
    <mapping class="codelab.Singer"/>
  </session-factory>
</hibernate-configuration>
Hibernate cũng cần biết cách kết nối với phiên bản Cloud Spanner và phương ngữ cần sử dụng. Vì vậy, chúng ta sẽ yêu cầu công cụ này sử dụng SpannerDialect cho cú pháp SQL, trình điều khiển Spanner JDBC và chuỗi kết nối JDBC với các toạ độ cơ sở dữ liệu. Thao tác này sẽ chuyển vào tệp hibernate.properties.
src/main/resources/hibernate.properties
hibernate.dialect=com.google.cloud.spanner.hibernate.SpannerDialect
hibernate.connection.driver_class=com.google.cloud.spanner.jdbc.JdbcDriver
hibernate.connection.url=jdbc:cloudspanner:/projects/{PROJECT_ID}/instances/codelab-instance/databases/codelab-db
# auto-create or update DB schema
hibernate.hbm2ddl.auto=update
hibernate.show_sql=true
Nhớ thay thế {PROJECT_ID} bằng mã dự án của bạn. Bạn có thể lấy mã này bằng cách chạy lệnh sau:
gcloud config get-value project
Vì không có giản đồ cơ sở dữ liệu hiện có, nên chúng ta đã thêm thuộc tính hibernate.hbm2ddl.auto=update để cho phép Hibernate tạo 2 bảng trong Cloud Spanner khi chạy ứng dụng lần đầu tiên.
Thông thường, bạn cũng sẽ đảm bảo rằng thông tin xác thực đã được thiết lập, bằng cách sử dụng tệp JSON của tài khoản dịch vụ trong biến môi trường GOOGLE_APPLICATION_CREDENTIALS hoặc thông tin xác thực mặc định của ứng dụng được định cấu hình bằng lệnh gcloud auth application-default login. Tuy nhiên, vì chúng ta đang chạy trong Cloud Shell nên thông tin đăng nhập dự án mặc định đã được thiết lập.
7. Tạo các lớp thực thể được chú thích
Giờ thì chúng ta đã sẵn sàng viết một số mã.
Chúng ta sẽ xác định 2 đối tượng Java thuần tuý (POJO) sẽ liên kết đến các bảng trong Cloud Spanner – Singer và Album. Album sẽ có mối quan hệ @ManyToOne với Singer. Chúng ta cũng có thể ánh xạ Singer thành danh sách Album của chúng bằng chú thích @OneToMany, nhưng trong ví dụ này, chúng ta không thực sự muốn tải tất cả các album mỗi khi cần tìm nạp một ca sĩ từ cơ sở dữ liệu.
Thêm Singer và các lớp thực thể Album.
Tạo các tệp lớp.
touch src/main/java/codelab/Singer.java \
&& touch src/main/java/codelab/Album.java
Dán nội dung của các tệp.
src/main/java/codelab/Singer.java
package codelab;

import java.util.Date;
import java.util.UUID;
import javax.persistence.Entity;
import javax.persistence.GeneratedValue;
import javax.persistence.Id;
import javax.persistence.Temporal;
import javax.persistence.TemporalType;
import org.hibernate.annotations.Type;

@Entity
public class Singer {

  @Id
  @GeneratedValue
  @Type(type = "uuid-char")
  private UUID singerId;

  private String firstName;

  private String lastName;

  @Temporal(TemporalType.DATE)
  private Date birthDate;

  public Singer() {
  }

  public Singer(String firstName, String lastName, Date birthDate) {
    this.firstName = firstName;
    this.lastName = lastName;
    this.birthDate = birthDate;
  }

  public UUID getSingerId() {
    return singerId;
  }

  public void setSingerId(UUID singerId) {
    this.singerId = singerId;
  }

  public String getFirstName() {
    return firstName;
  }

  public void setFirstName(String firstName) {
    this.firstName = firstName;
  }

  public String getLastName() {
    return lastName;
  }

  public void setLastName(String lastName) {
    this.lastName = lastName;
  }

  public Date getBirthDate() {
    return birthDate;
  }

  public void setBirthDate(Date birthDate) {
    this.birthDate = birthDate;
  }

  @Override
  public boolean equals(Object o) {
    if (this == o) {
      return true;
    }
    if (!(o instanceof Singer)) {
      return false;
    }

    Singer singer = (Singer) o;

    if (!firstName.equals(singer.firstName)) {
      return false;
    }
    if (!lastName.equals(singer.lastName)) {
      return false;
    }
    return birthDate.equals(singer.birthDate);
  }

  @Override
  public int hashCode() {
    int result = firstName.hashCode();
    result = 31 * result + lastName.hashCode();
    result = 31 * result + birthDate.hashCode();
    return result;
  }
}
src/main/java/codelab/Album.java
package codelab;

import java.util.UUID;
import javax.persistence.Entity;
import javax.persistence.GeneratedValue;
import javax.persistence.Id;
import javax.persistence.ManyToOne;
import org.hibernate.annotations.Type;

@Entity
public class Album {

  @Id
  @GeneratedValue
  @Type(type = "uuid-char")
  UUID albumId;

  @ManyToOne
  Singer singer;

  String albumTitle;

  public Album() {
  }

  public Album(Singer singer, String albumTitle) {
    this.singer = singer;
    this.albumTitle = albumTitle;
  }

  public UUID getAlbumId() {
    return albumId;
  }

  public void setAlbumId(UUID albumId) {
    this.albumId = albumId;
  }

  public Singer getSinger() {
    return singer;
  }

  public void setSinger(Singer singer) {
    this.singer = singer;
  }

  public String getAlbumTitle() {
    return albumTitle;
  }

  public void setAlbumTitle(String albumTitle) {
    this.albumTitle = albumTitle;
  }

  @Override
  public boolean equals(Object o) {
    if (this == o) {
      return true;
    }
    if (!(o instanceof Album)) {
      return false;
    }

    Album album = (Album) o;

    if (!singer.equals(album.singer)) {
      return false;
    }
    return albumTitle.equals(album.albumTitle);
  }

  @Override
  public int hashCode() {
    int result = singer.hashCode();
    result = 31 * result + albumTitle.hashCode();
    return result;
  }
}
Xin lưu ý rằng trong ví dụ này, chúng ta đang sử dụng một mã nhận dạng duy nhất (UUID) được tạo tự động cho khoá chính. Đây là loại mã nhận dạng ưu tiên trong Cloud Spanner, vì loại mã nhận dạng này tránh các điểm truy cập khi hệ thống phân chia dữ liệu giữa các máy chủ theo dải khoá. Khoá số nguyên tăng đơn điệu cũng sẽ hoạt động, nhưng có thể kém hiệu quả hơn.
8. Lưu và truy vấn thực thể
Sau khi định cấu hình mọi thứ và xác định các đối tượng thực thể, chúng ta có thể bắt đầu ghi vào cơ sở dữ liệu và truy vấn cơ sở dữ liệu đó. Chúng ta sẽ mở một Session Hibernate, sau đó dùng nó để xoá tất cả các hàng trong bảng ở phương thức clearData(), lưu một số thực thể ở phương thức writeData() và chạy một số truy vấn bằng ngôn ngữ truy vấn Hibernate (HQL) ở phương thức readData().
Thay thế nội dung của App.java bằng nội dung sau:
src/main/java/codelab/App.java
package codelab;

import java.text.DateFormat;
import java.text.ParseException;
import java.text.SimpleDateFormat;
import java.util.Date;
import java.util.List;
import org.hibernate.Session;
import org.hibernate.SessionFactory;
import org.hibernate.boot.MetadataSources;
import org.hibernate.boot.registry.StandardServiceRegistry;
import org.hibernate.boot.registry.StandardServiceRegistryBuilder;

public class App {

  public final static DateFormat DATE_FORMAT = new SimpleDateFormat("yyyy-MM-dd");

  public static void main(String[] args) {
    // create a Hibernate sessionFactory and session
    StandardServiceRegistry registry = new StandardServiceRegistryBuilder().configure().build();
    SessionFactory sessionFactory = new MetadataSources(registry).buildMetadata()
        .buildSessionFactory();
    Session session = sessionFactory.openSession();

    clearData(session);

    writeData(session);

    readData(session);

    // close Hibernate session and sessionFactory
    session.close();
    sessionFactory.close();
  }

  private static void clearData(Session session) {
    session.beginTransaction();

    session.createQuery("delete from Album where 1=1").executeUpdate();
    session.createQuery("delete from Singer where 1=1").executeUpdate();

    session.getTransaction().commit();
  }

  private static void writeData(Session session) {
    session.beginTransaction();

    Singer singerMelissa = new Singer("Melissa", "Garcia", makeDate("1981-03-19"));
    Album albumGoGoGo = new Album(singerMelissa, "Go, Go, Go");
    session.save(singerMelissa);
    session.save(albumGoGoGo);

    session.save(new Singer("Russell", "Morales", makeDate("1978-12-02")));
    session.save(new Singer("Jacqueline", "Long", makeDate("1990-07-29")));
    session.save(new Singer("Dylan", "Shaw", makeDate("1998-05-02")));

    session.getTransaction().commit();
  }

  private static void readData(Session session) {
    List<Singer> singers = session.createQuery("from Singer where birthDate >= '1990-01-01' order by lastName")
        .list();
    List<Album> albums = session.createQuery("from Album").list();

    System.out.println("Singers who were born in 1990 or later:");
    for (Singer singer : singers) {
      System.out.println(singer.getFirstName() + " " + singer.getLastName() + " born on "
          + DATE_FORMAT.format(singer.getBirthDate()));
    }

    System.out.println("Albums: ");
    for (Album album : albums) {
      System.out
          .println("\"" + album.getAlbumTitle() + "\" by " + album.getSinger().getFirstName() + " "
              + album.getSinger().getLastName());
    }
  }

  private static Date makeDate(String dateString) {
    try {
      return DATE_FORMAT.parse(dateString);
    } catch (ParseException e) {
      e.printStackTrace();
      return null;
    }
  }
}
Bây giờ, hãy biên dịch và chạy mã. Chúng tôi sẽ thêm lựa chọn -Dexec.cleanupDaemonThreads=false để ngăn chặn các cảnh báo về việc dọn dẹp các luồng nền mà Maven sẽ cố gắng thực hiện.
mvn compile exec:java -Dexec.mainClass=codelab.App -Dexec.cleanupDaemonThreads=false
Trong đầu ra, bạn sẽ thấy nội dung như sau:
Singers who were born in 1990 or later:
Jacqueline Long born on 1990-07-29
Dylan Shaw born on 1998-05-02
Albums:
"Go, Go, Go" by Melissa Garcia
Tại thời điểm này, nếu chuyển đến bảng điều khiển Cloud Spanner và xem dữ liệu cho các bảng Singer và Album trong cơ sở dữ liệu, bạn sẽ thấy nội dung như sau:


9. Dọn dẹp
Hãy xoá phiên bản Cloud Spanner mà chúng ta đã tạo lúc đầu để đảm bảo rằng phiên bản đó không sử dụng tài nguyên một cách không cần thiết.
gcloud spanner instances delete codelab-instance
10. Xin chúc mừng
Xin chúc mừng! Bạn đã tạo thành công một ứng dụng Java sử dụng Hibernate để duy trì dữ liệu trong Cloud Spanner.
- Bạn đã tạo một phiên bản Cloud Spanner và một cơ sở dữ liệu
- Bạn đã định cấu hình ứng dụng để sử dụng Hibernate
- Bạn đã tạo 2 thực thể: Nghệ sĩ và Album
- Bạn đã tự động tạo giản đồ cơ sở dữ liệu cho ứng dụng của mình
- Bạn đã lưu thành công các thực thể vào Cloud Spanner và truy vấn chúng
Giờ đây, bạn đã biết các bước quan trọng cần thiết để viết một ứng dụng Hibernate bằng Cloud Spanner.