
1. Introduction
Document AI is a document understanding solution that takes unstructured data, such as documents, emails, and so on, and makes the data easier to understand, analyze, and consume.
By using uptraining through Document AI Workbench, you can achieve higher document processing accuracy by providing additional labeled examples for Specialized Document Types and creating a new model version.
In this lab, you will create an Invoice Parser processor, configure the processor for uptraining, label example documents, and uptrain the processor.
The document dataset used in this lab consists of randomly-generated invoices for a fictional piping company.
Prerequisites
This codelab builds upon content presented in other Document AI Codelabs.
It is recommended that you complete the following Codelabs before proceeding.
- Optical Character Recognition (OCR) with Document AI (Python)
- Form Parsing with Document AI (Python)
- Specialized Processors with Document AI (Python)
- Managing Document AI processors with Python
- Document AI: Human in the Loop
What you'll learn
- Configure Uptraining for an Invoice Parser processor.
- Label Document AI training data using the annotation tool.
- Train a new model version.
- Evaluate the accuracy of the new model version.
What you'll need
2. Getting set up
This codelab assumes you have completed the Document AI Setup steps listed in the Introductory Codelab.
Please complete the following steps before proceeding:
3. Create a Processor
You must first create an Invoice Parser processor to use for this lab.
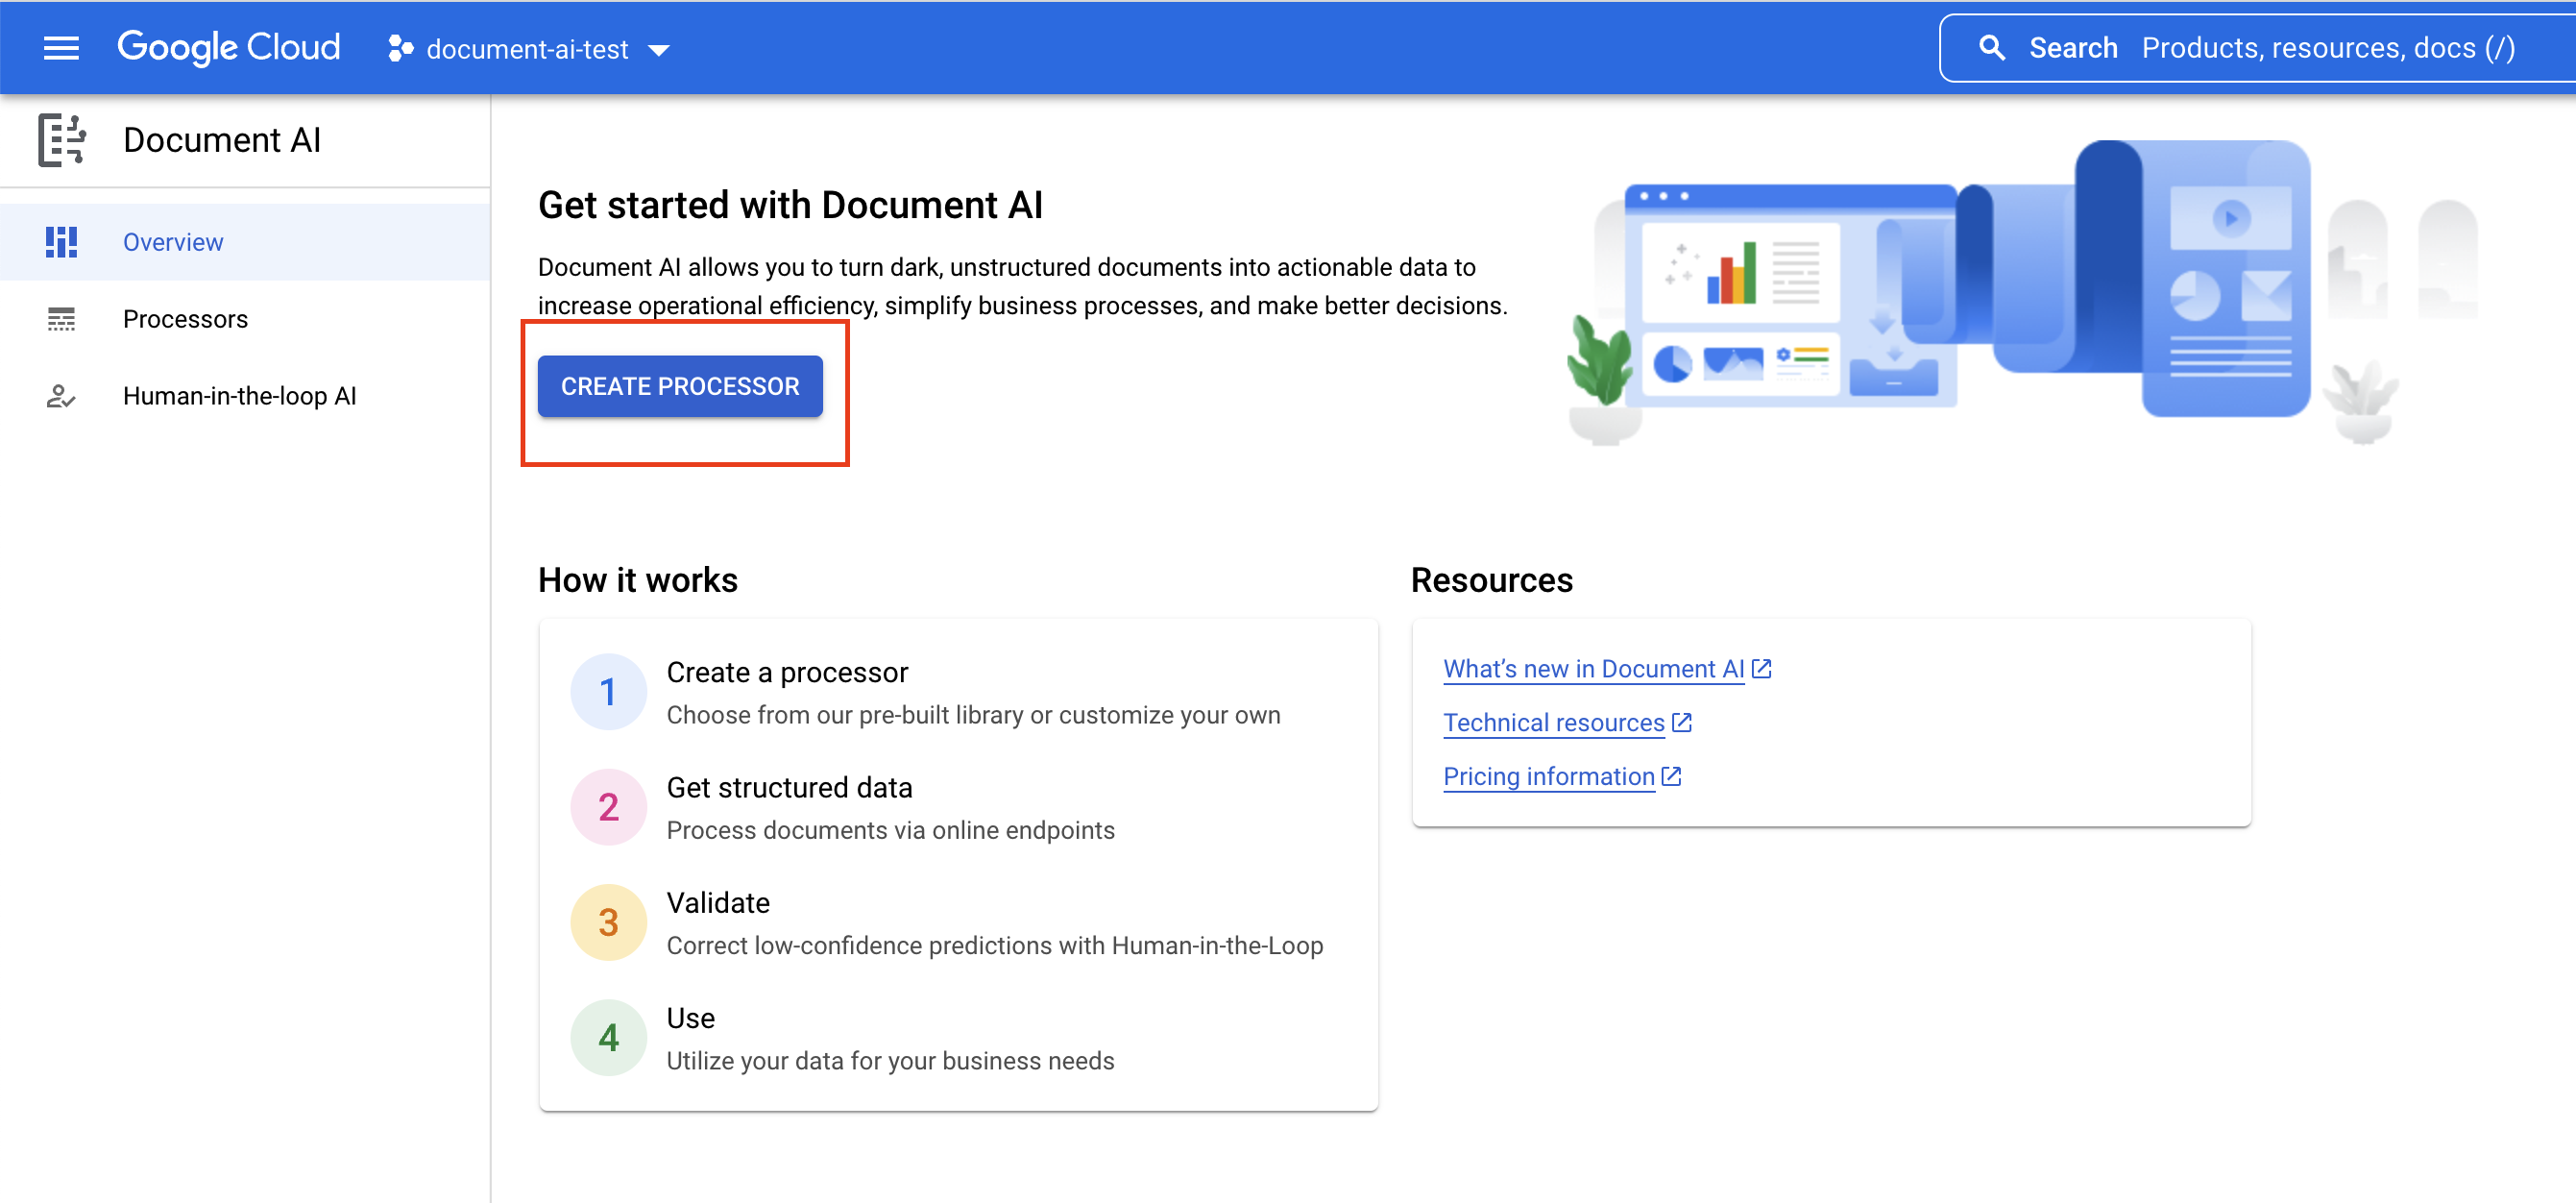
- In the console, navigate to the Document AI Overview page.
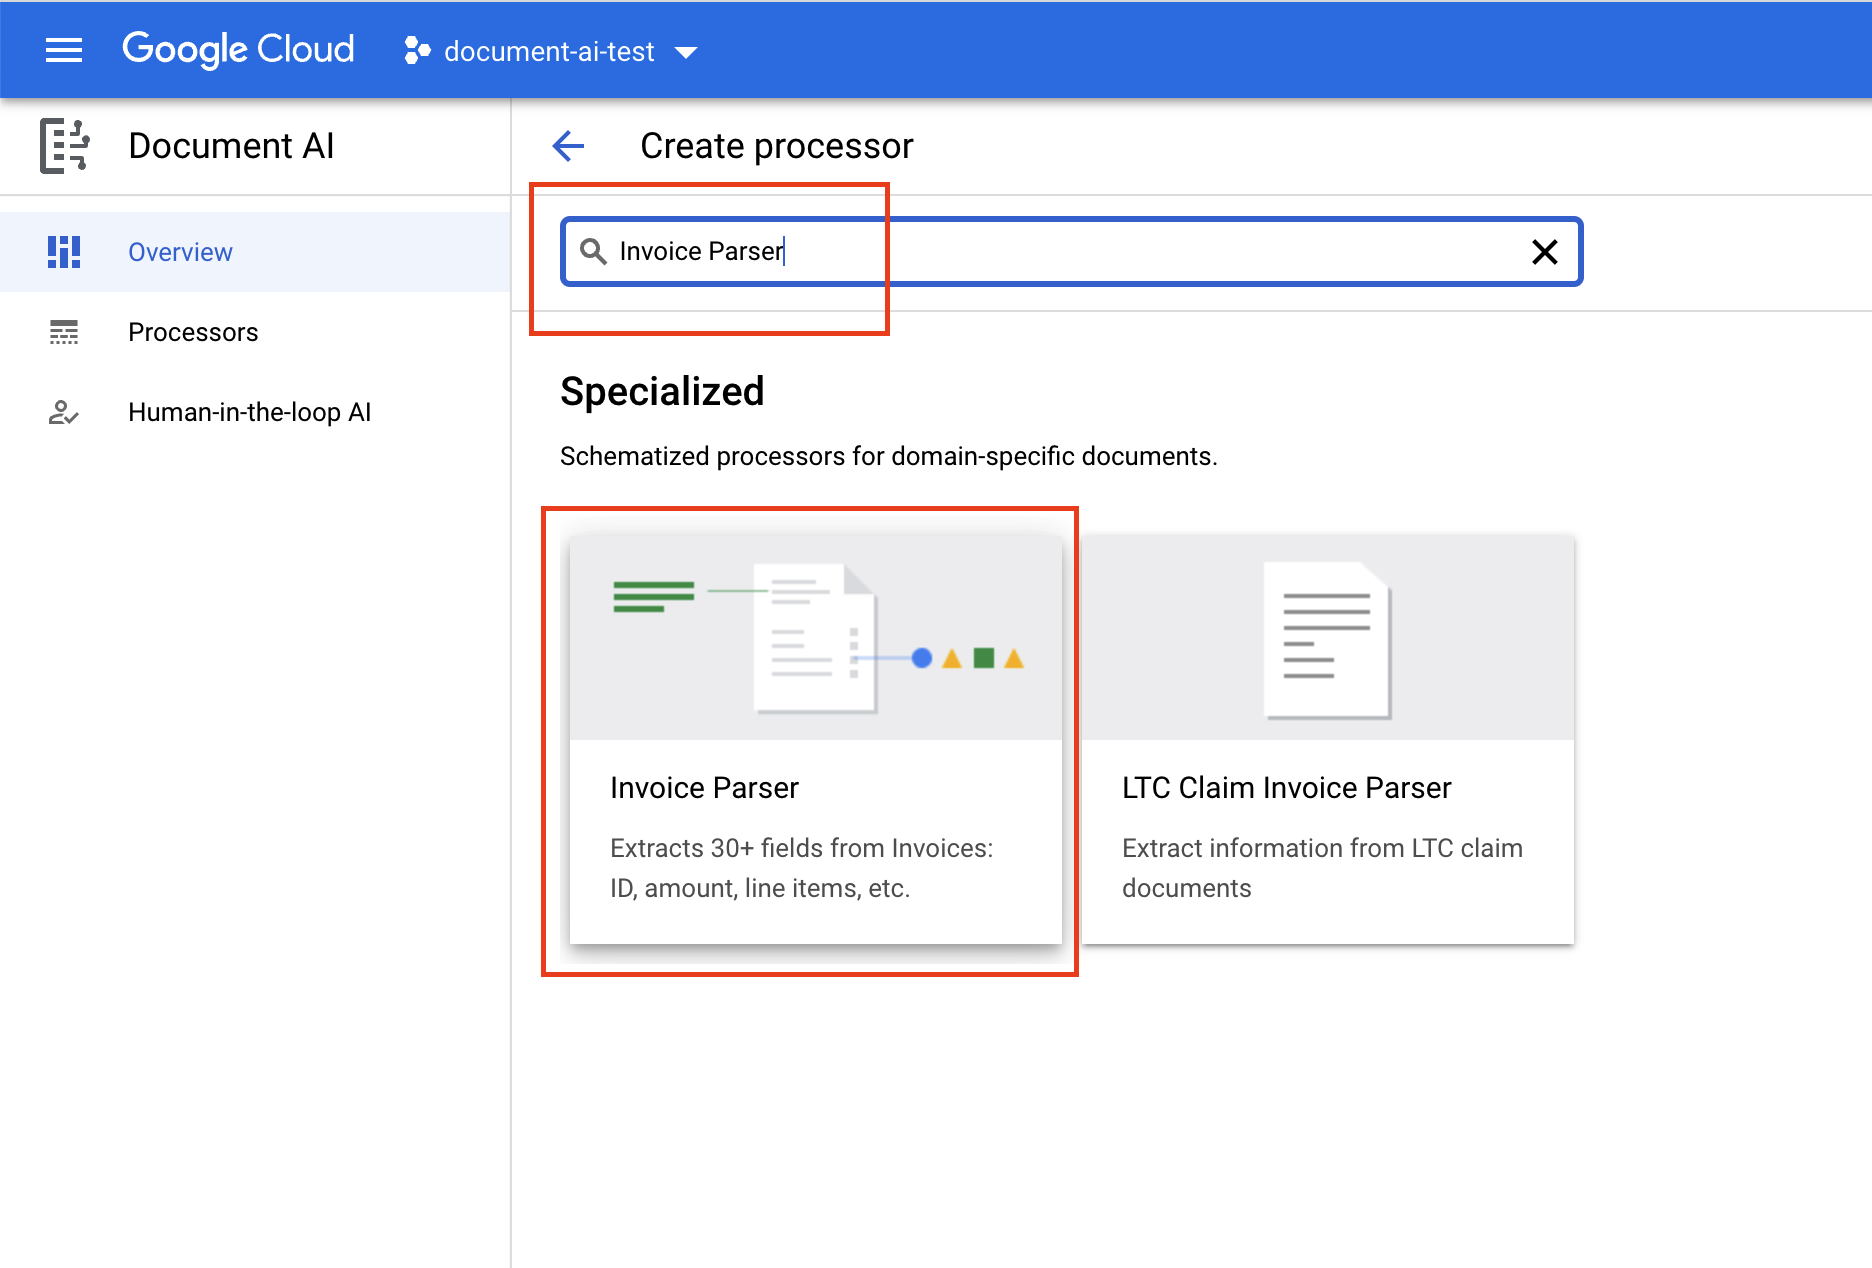
- Click Create Processor, scroll down to Specialized (or type "Invoice Parser" in the search bar) and select Invoice Parser.
- Give it the name
codelab-invoice-uptraining(Or something else you'll remember) and select the closest region on the list.
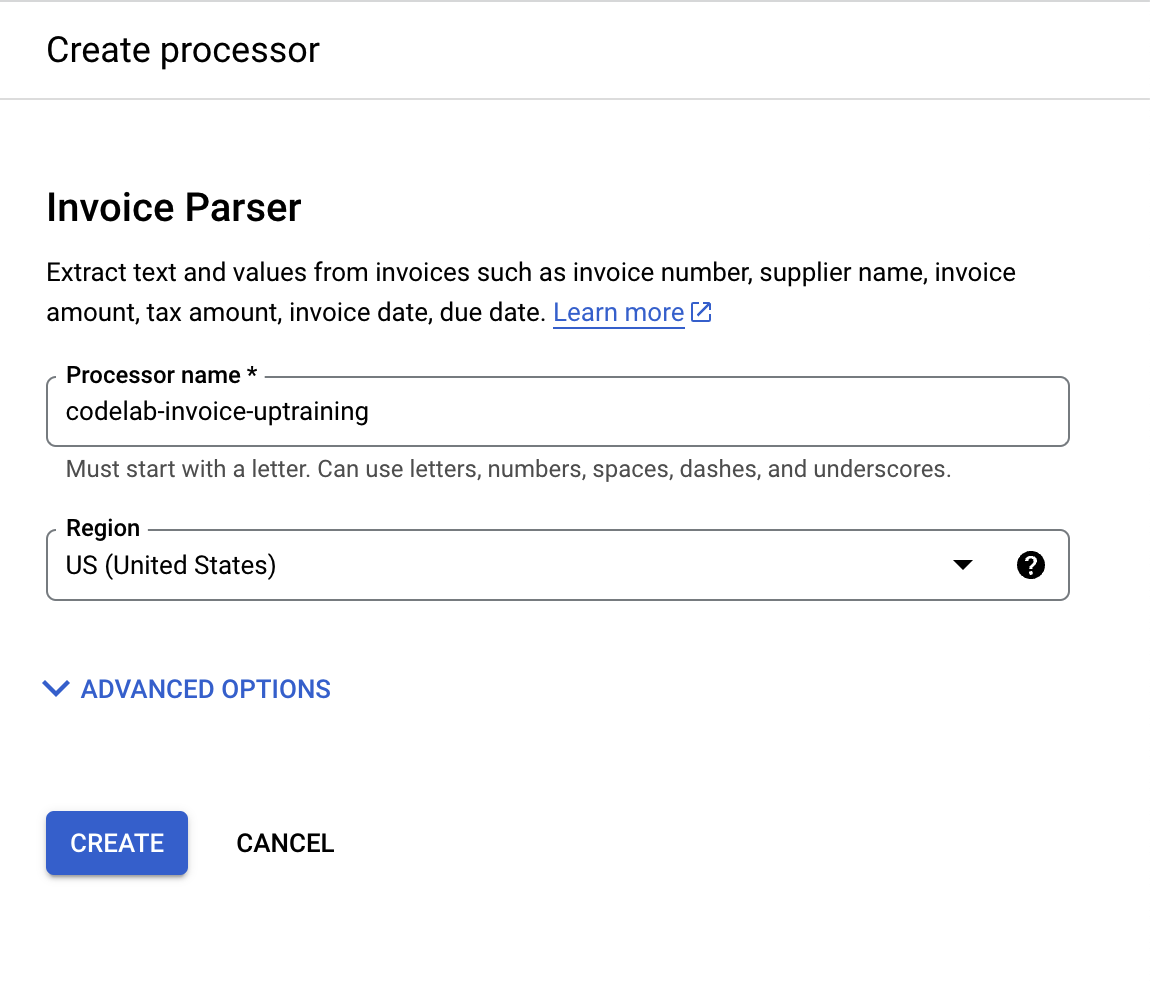
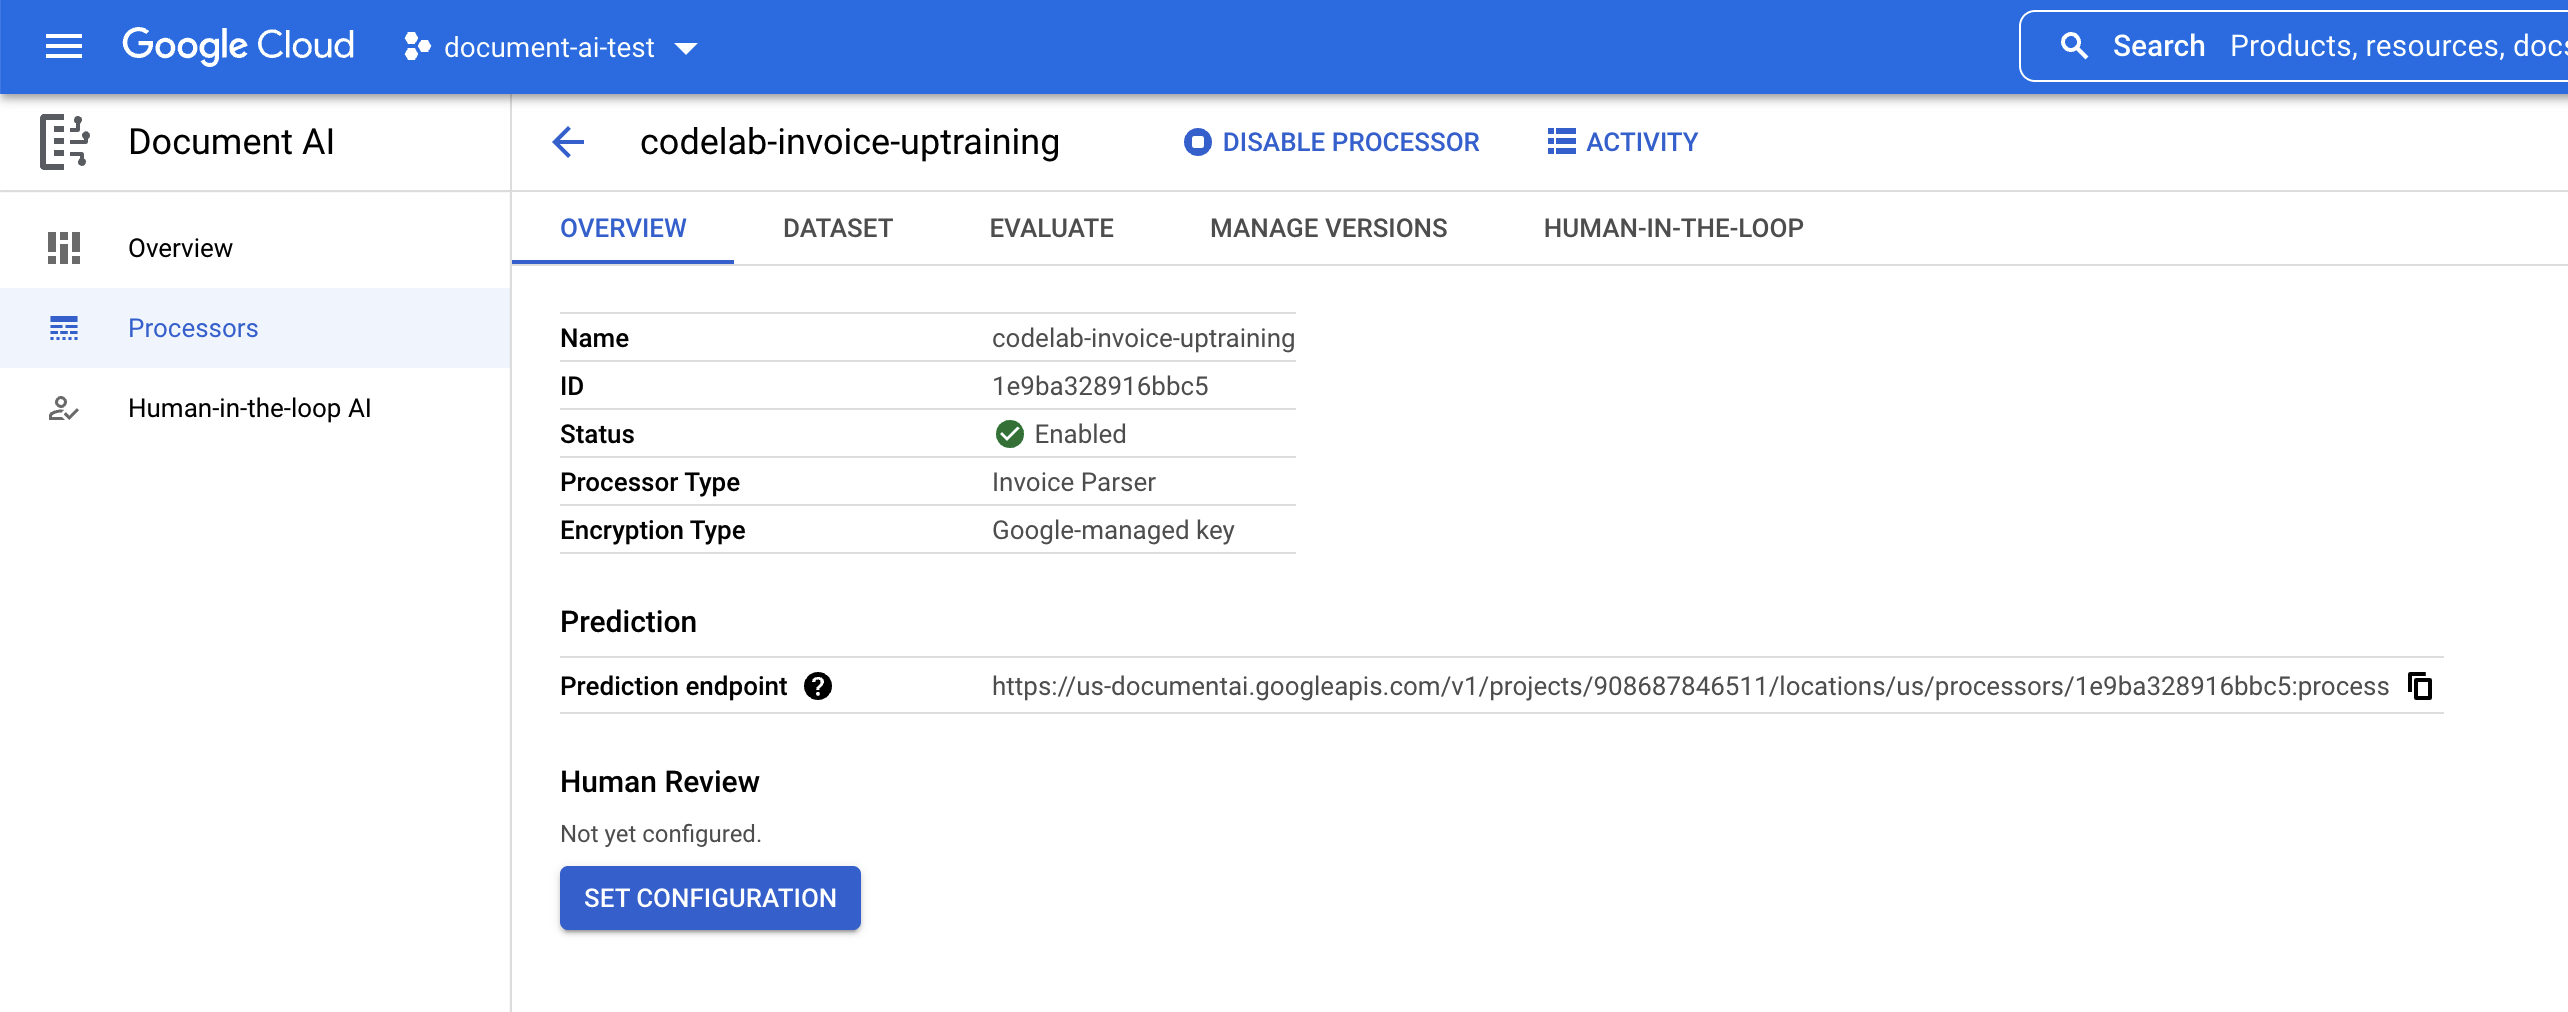
- Click Create to create your processor. You should then see the Processor Overview page.
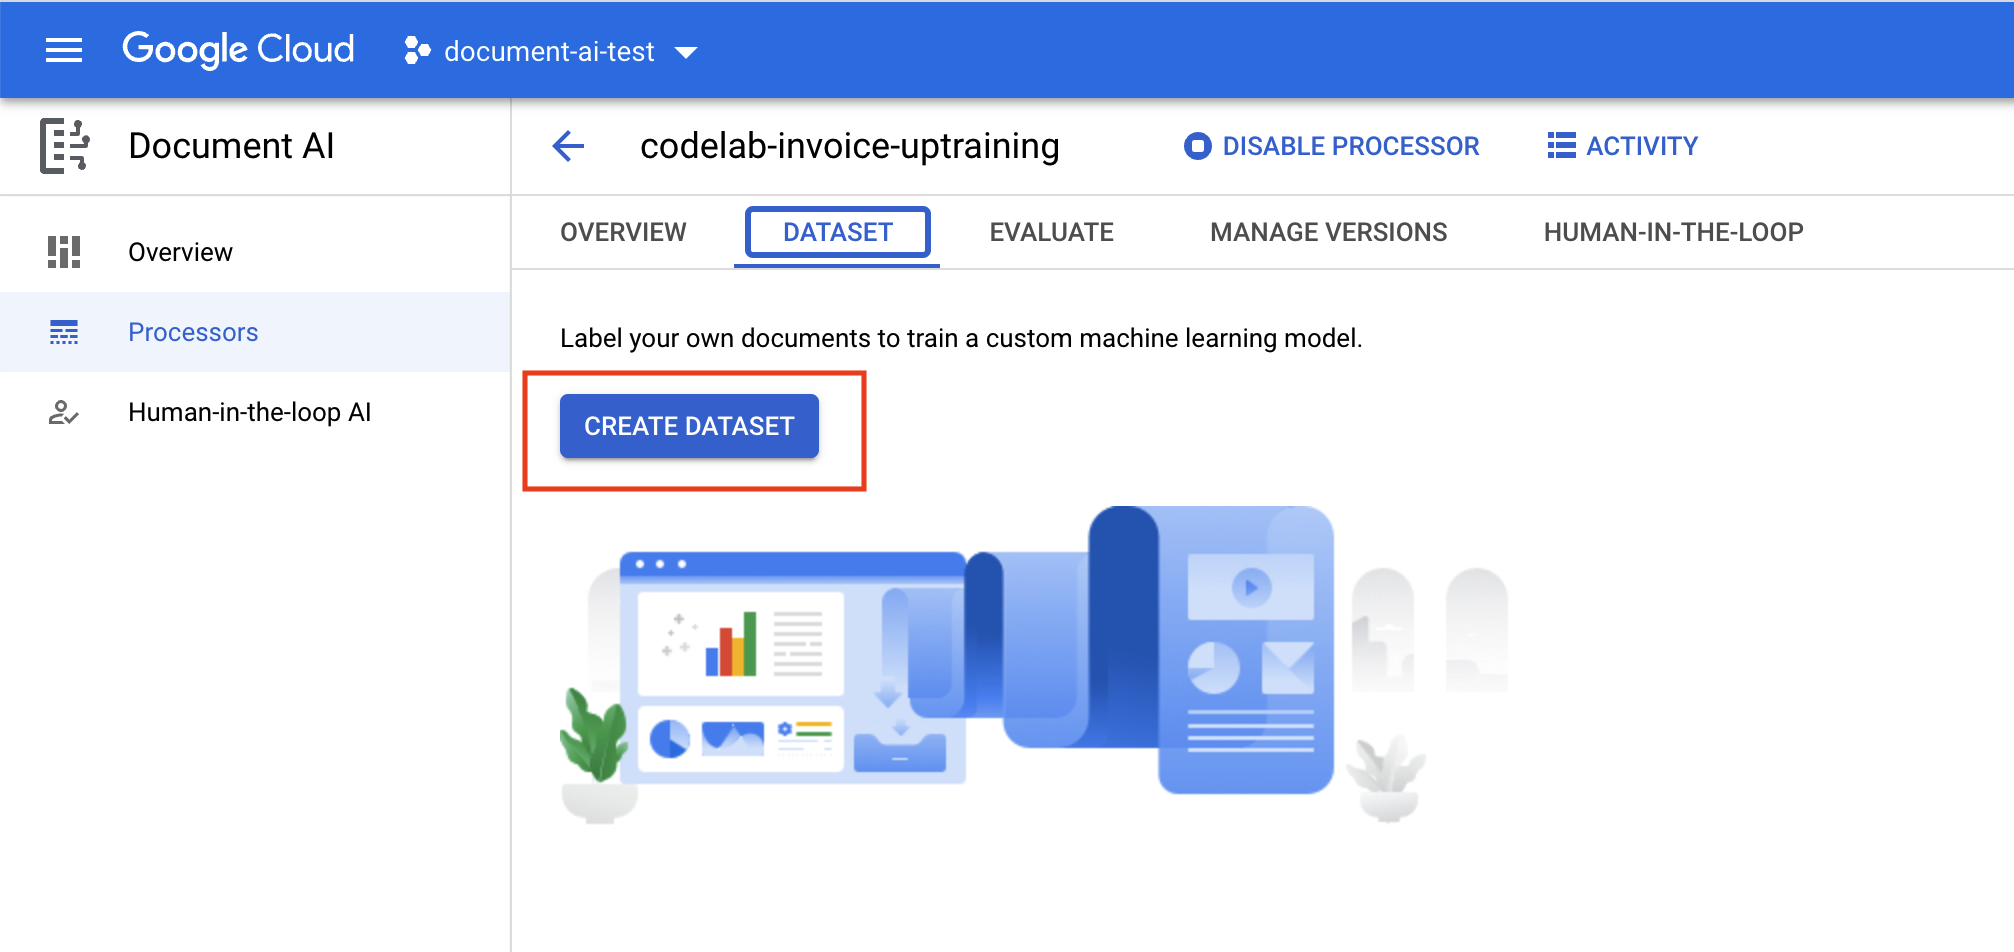
4. Create a Dataset
In order to train our processor, we will have to create a dataset with training and testing data to help the processor identify the entities we want to extract.
You will need to create a new bucket in Cloud Storage to store the dataset. Note: This should not be the same bucket where your documents are currently stored.
- Open Cloud Shell and run the following commands to create a bucket. Alternatively, create a new bucket in the Cloud Console. Save this bucket name, you will need it later.
export PROJECT_ID=$(gcloud config get-value project)

gsutil mb -p $PROJECT_ID "gs://${PROJECT_ID}-uptraining-codelab"
- Go to the Dataset tab, and click on Create Dataset
- Paste the bucket name from the bucket you created in step one into the Destination Path field. (Don't include
gs://)
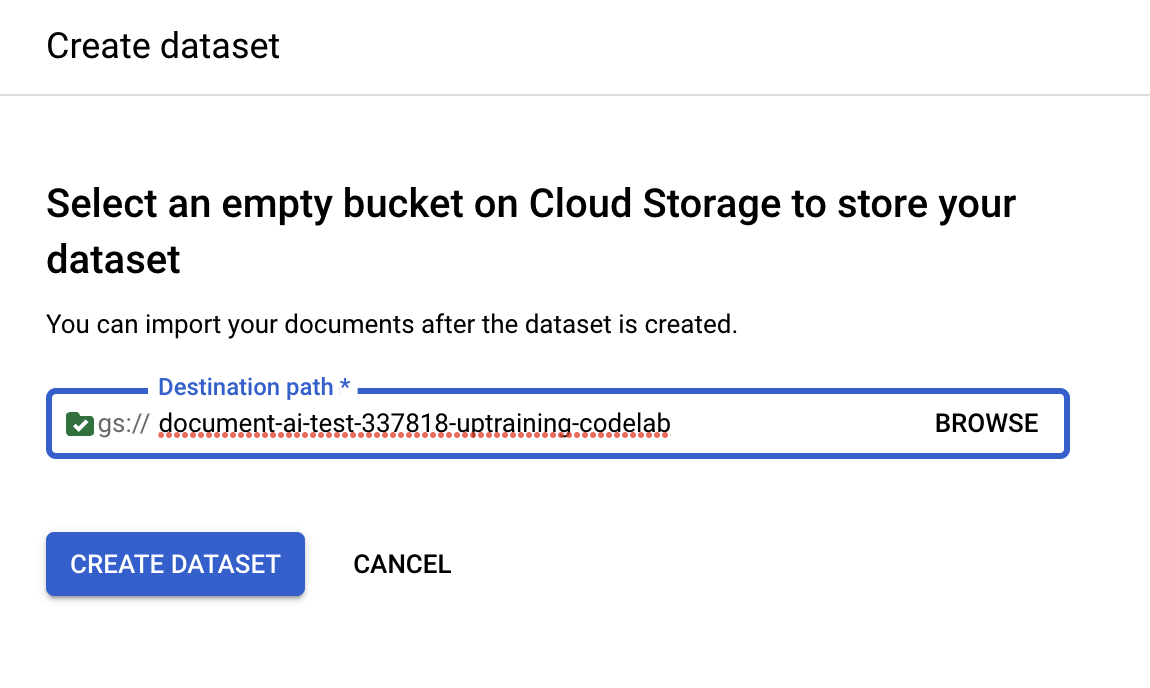
- Wait for the dataset to be created, then it should direct you to the Dataset management page.
5. Import a Test Document
Now, let's import a sample invoice pdf into our dataset.
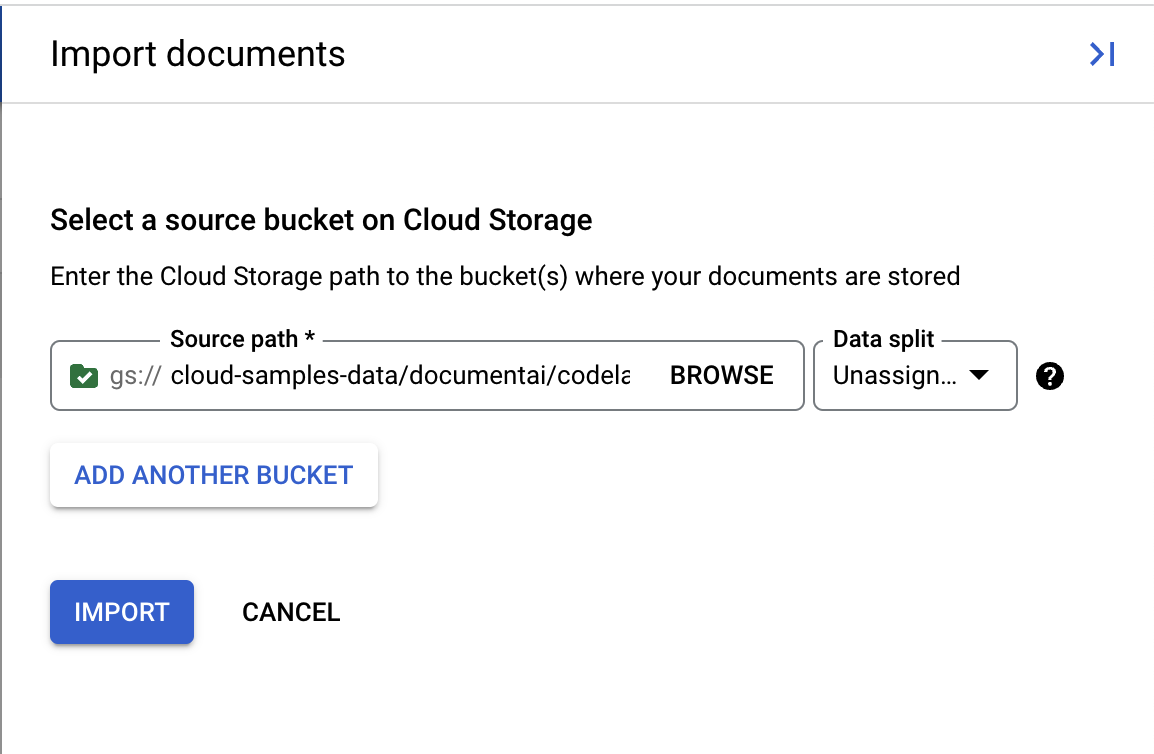
- Click on Import Documents
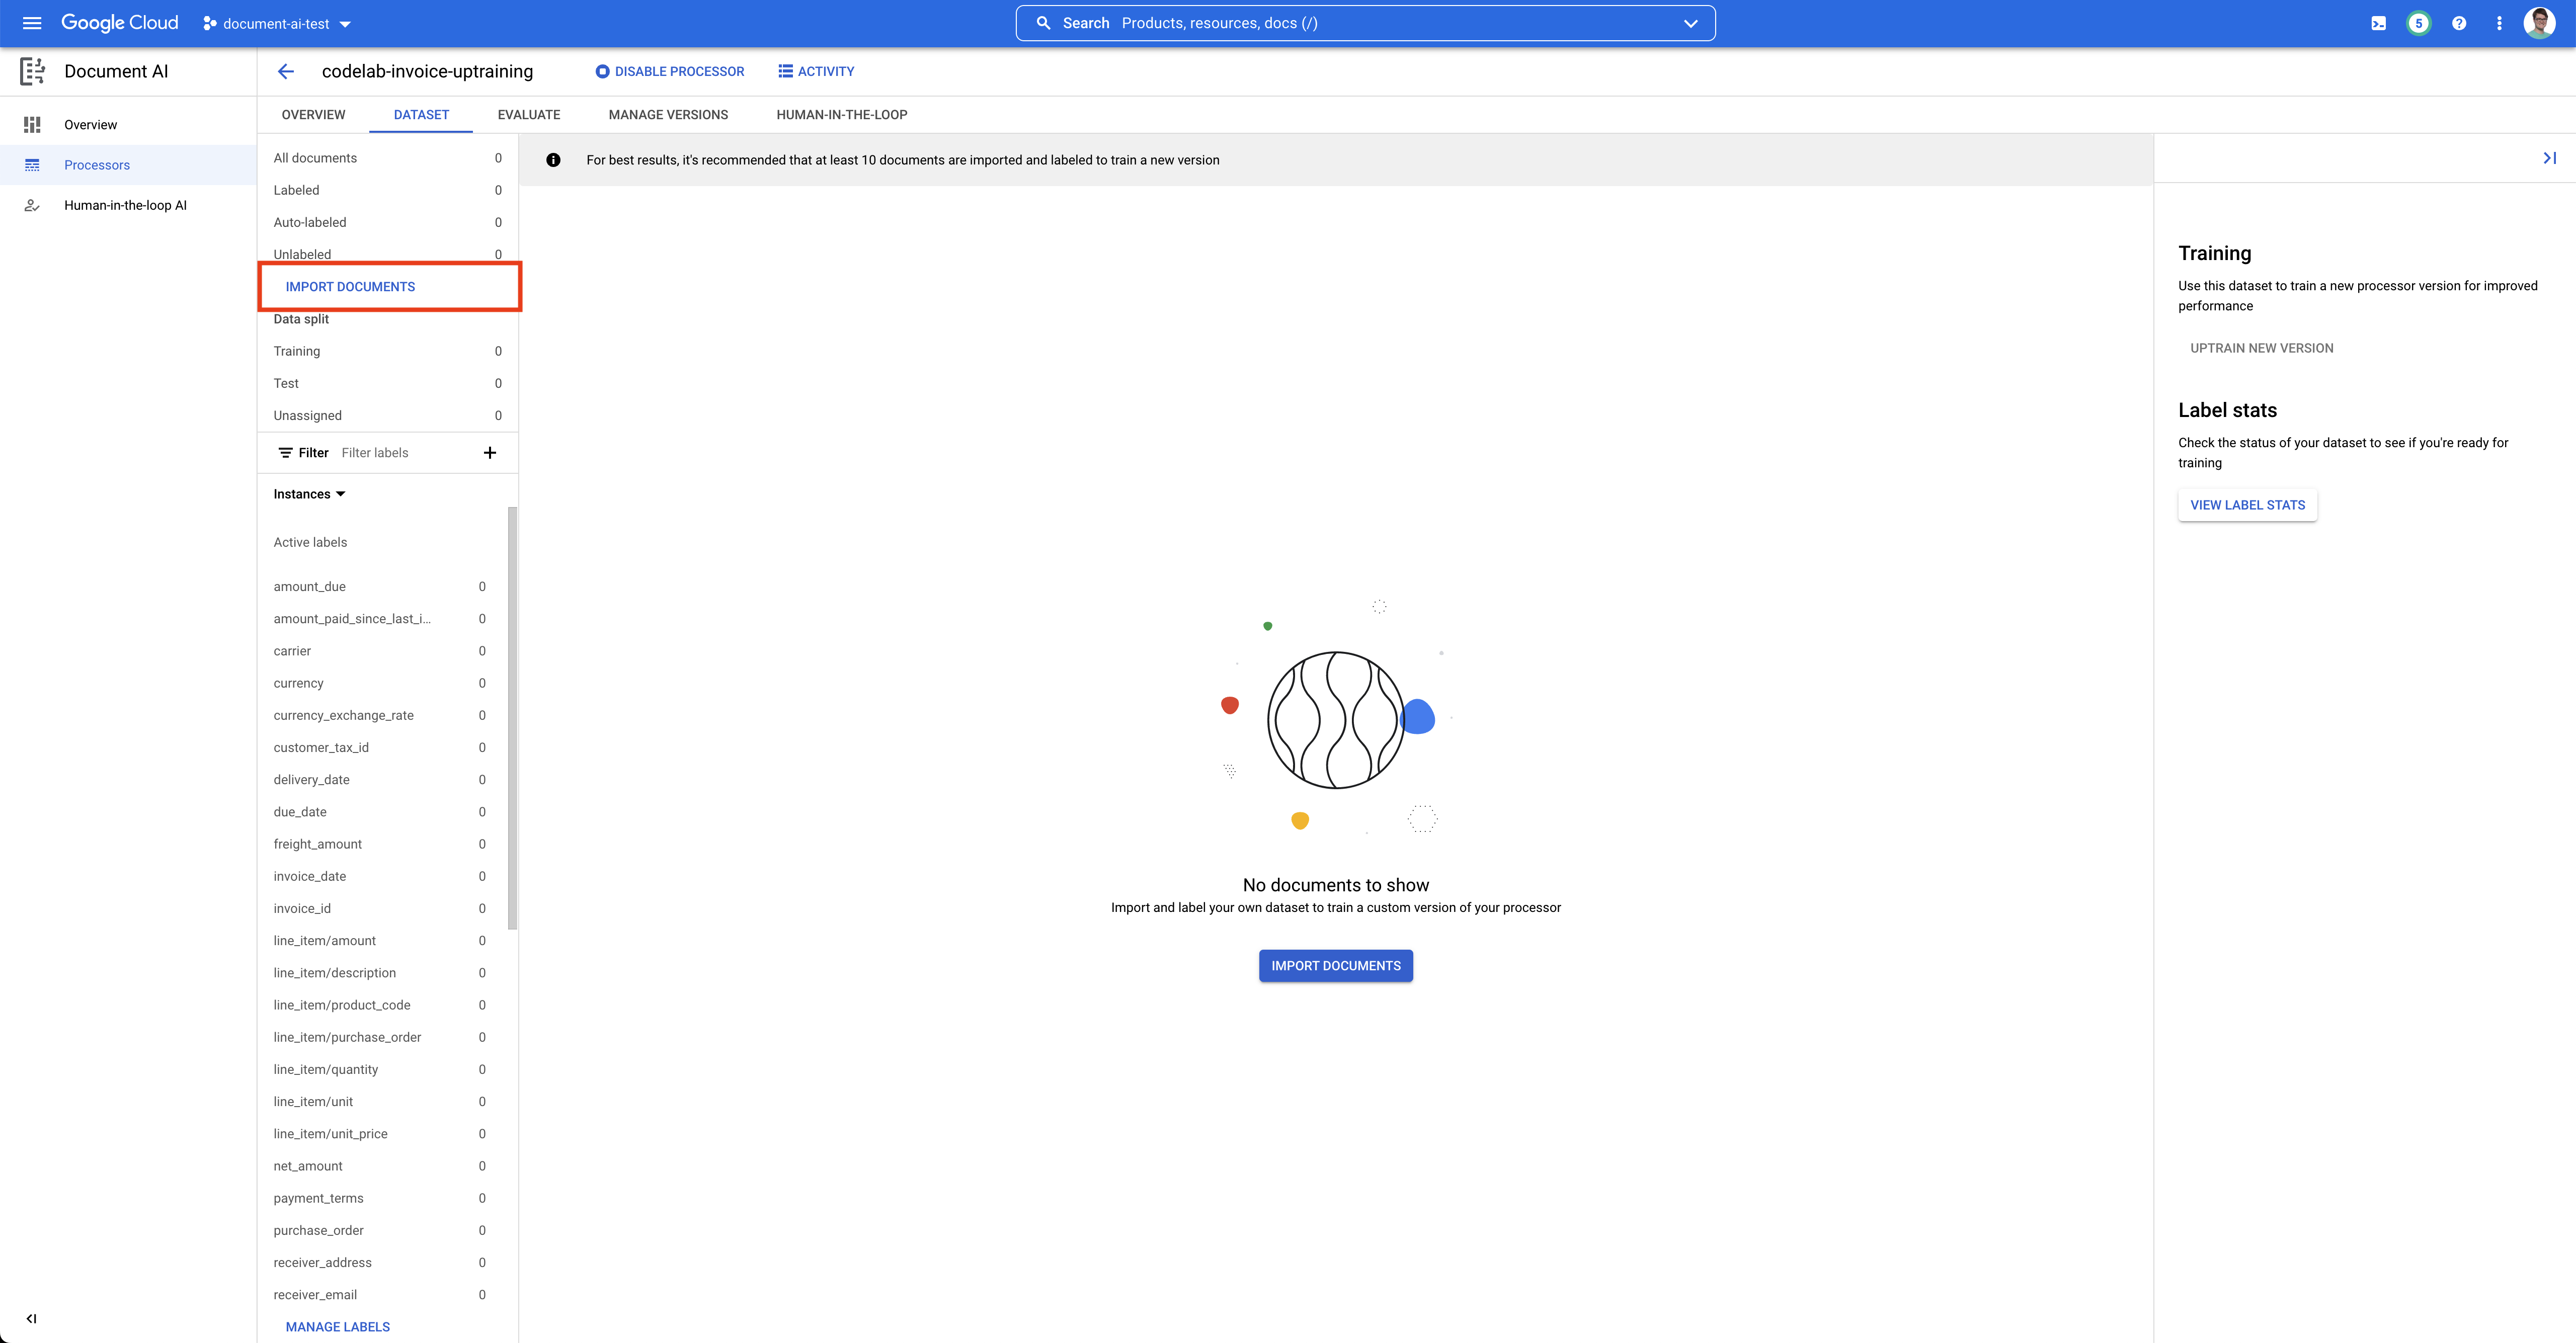
- We have a sample PDF for you to use in this lab. Copy and paste the following link into the Source Path box. Leave the "Data split" as "Unassigned" for now. Click Import.
cloud-samples-data/documentai/codelabs/uptraining/pdfs
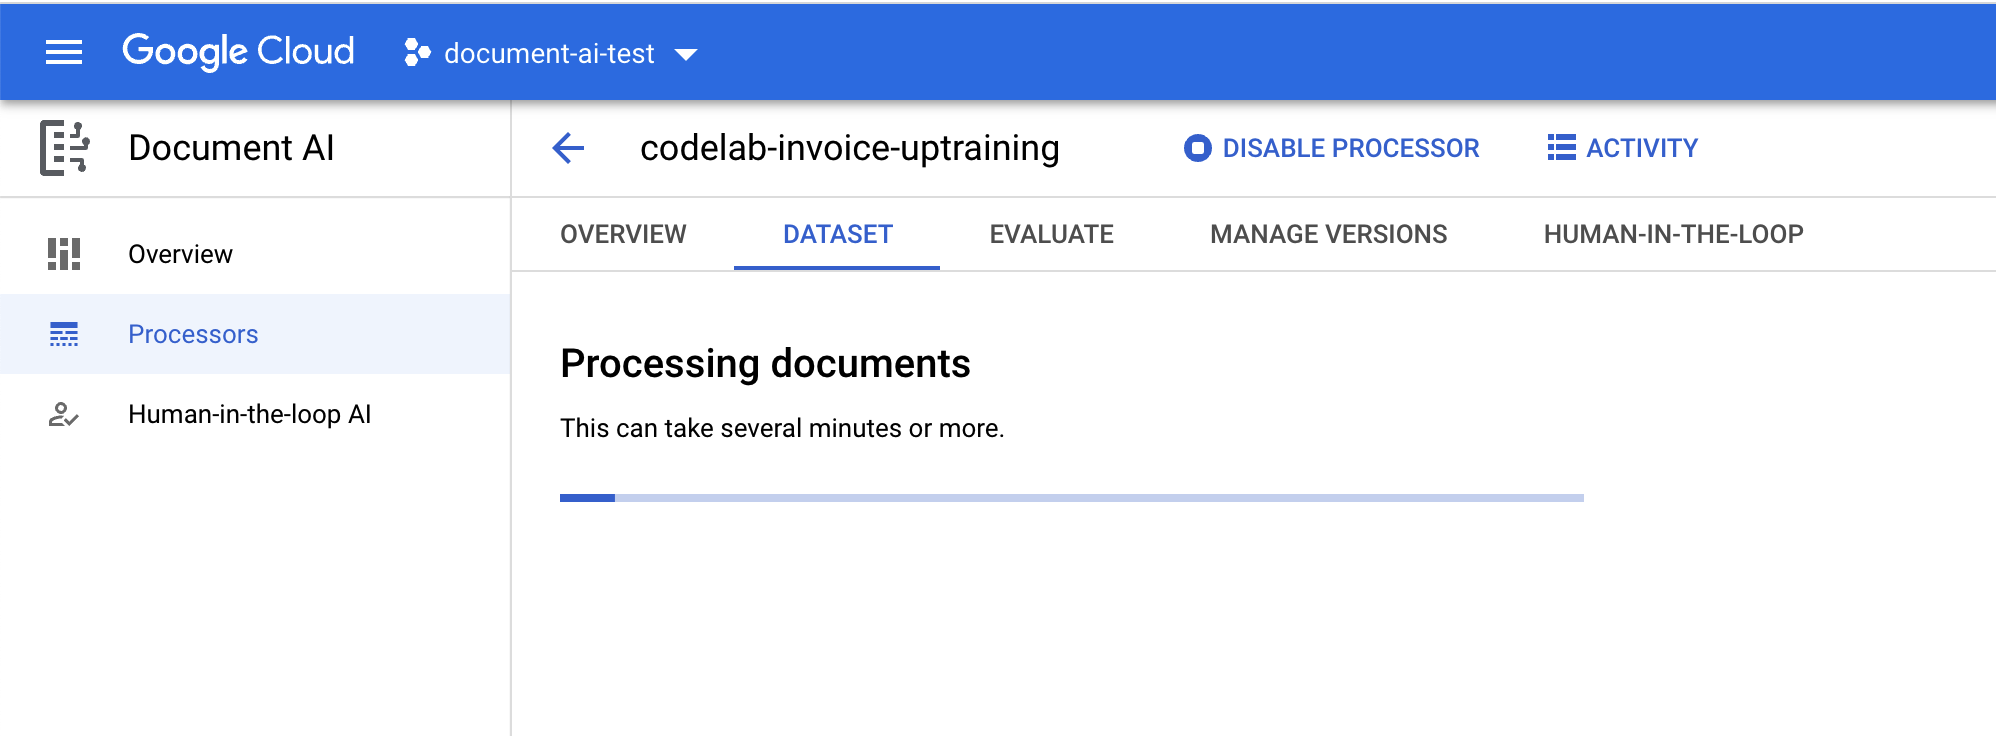
- Wait for the document to import. This took less than 1 minute in my tests.
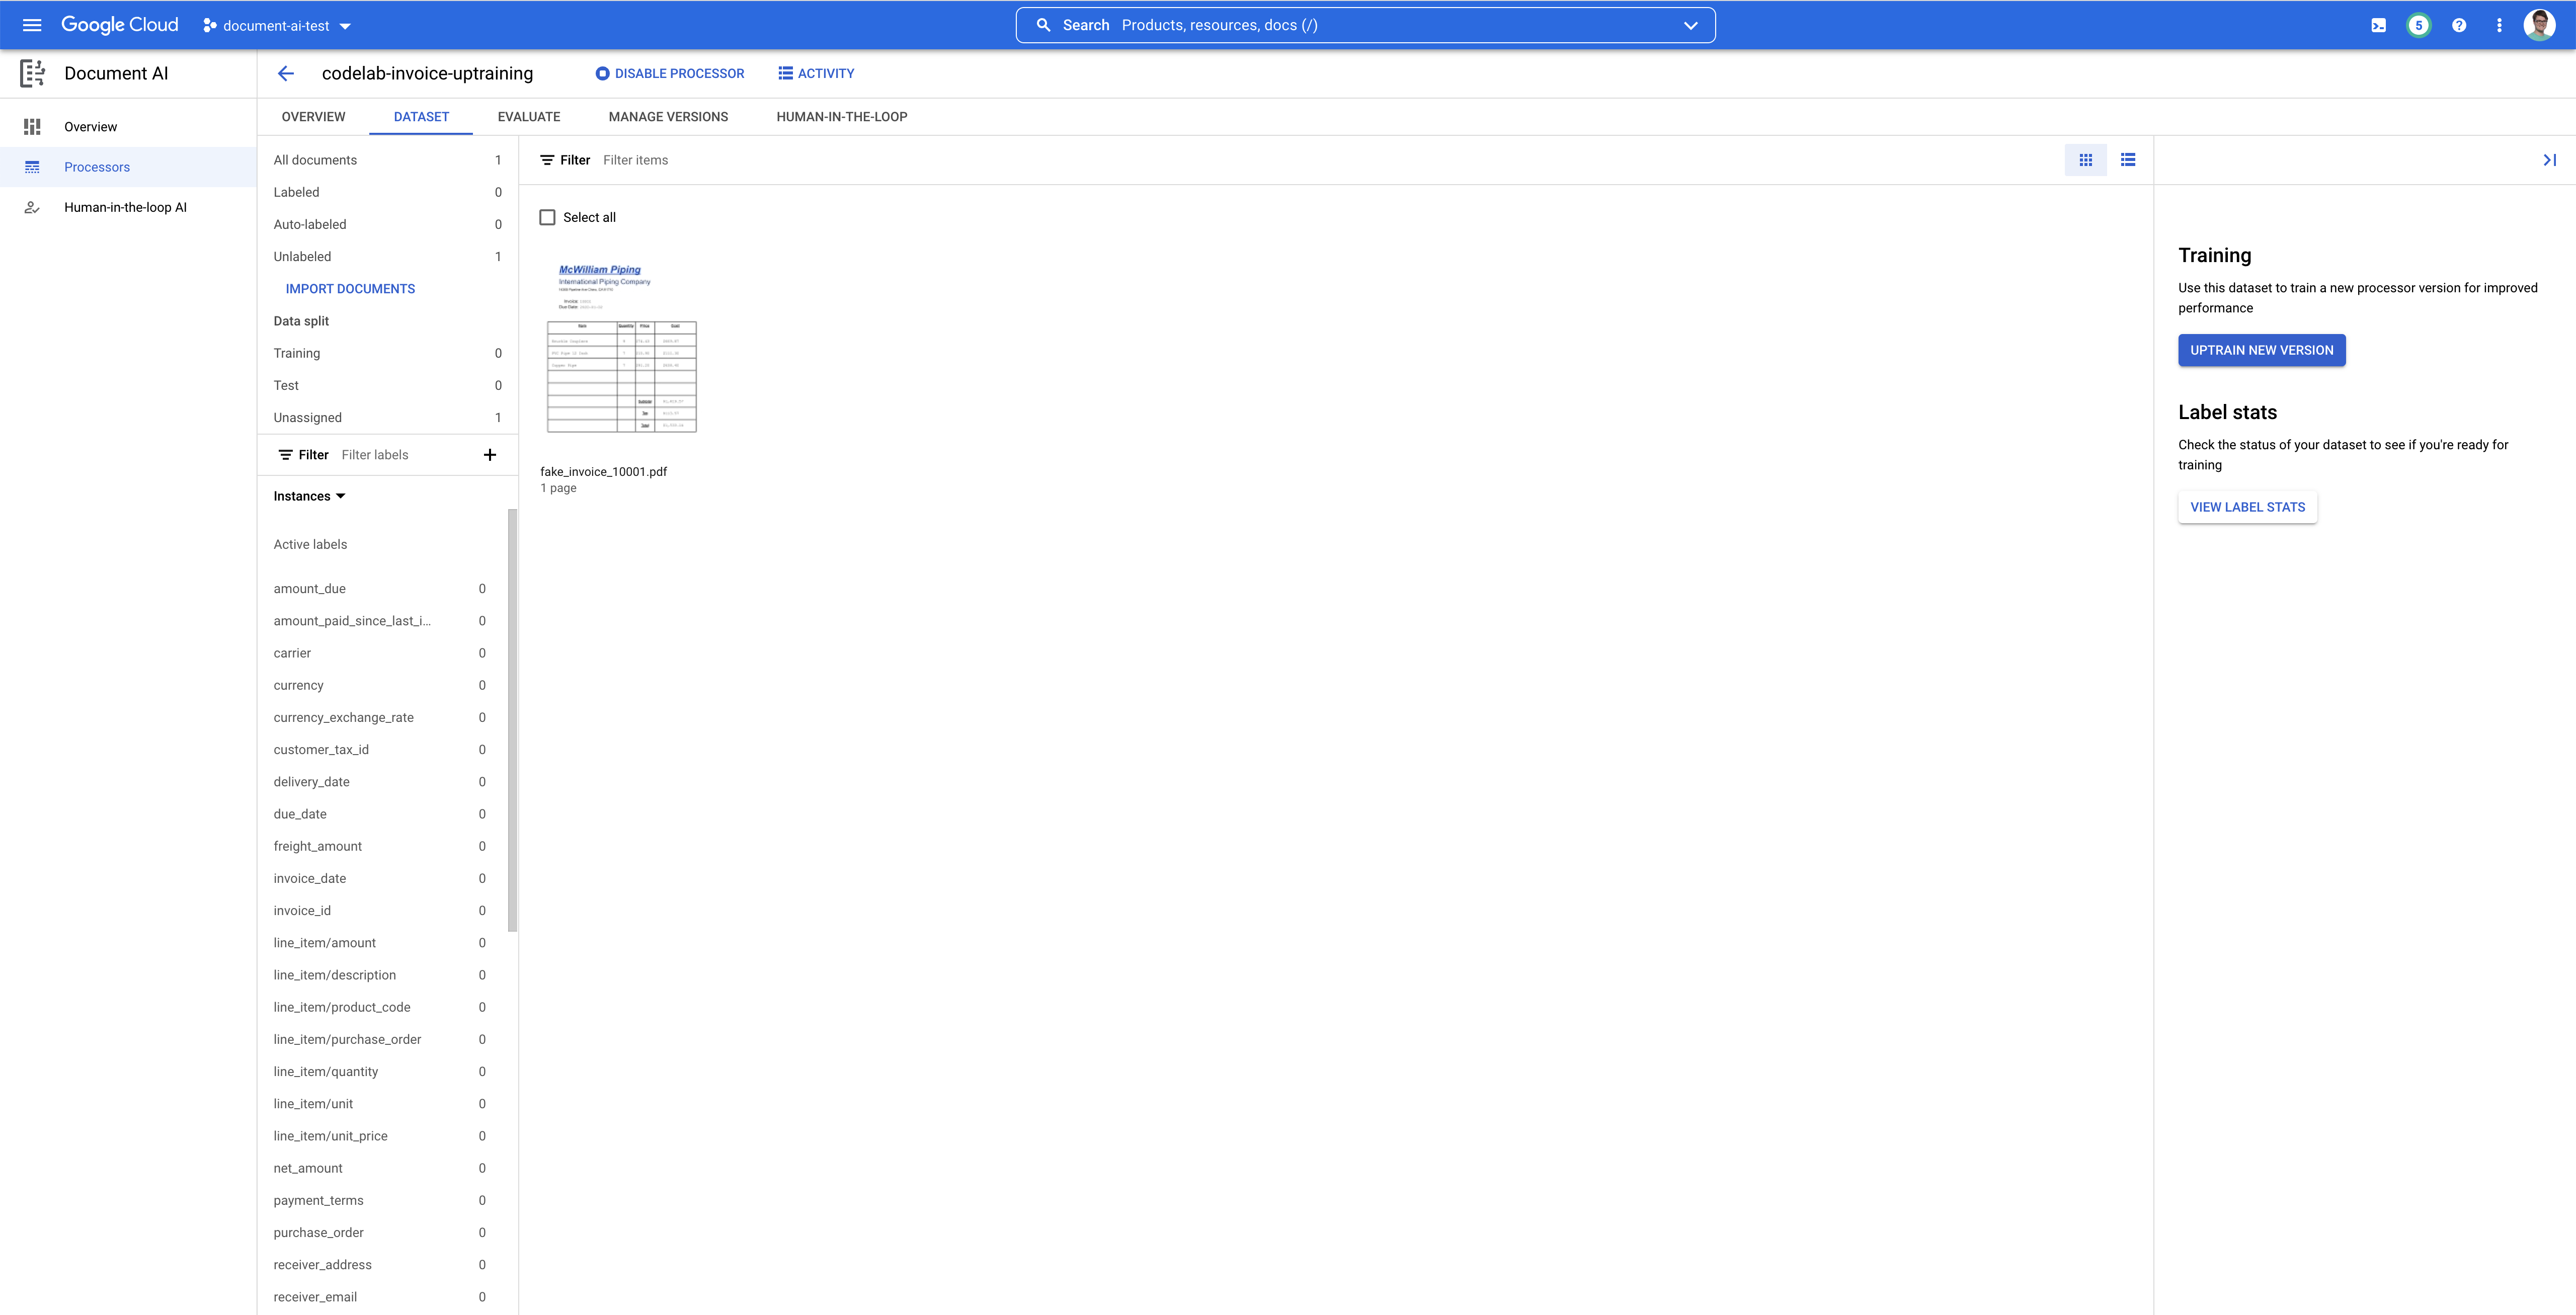
- When the import completes, you should see the document in the Dataset management UI. Click on it to enter the labeling console.
6. Label the Test Document
Next, we will identify text elements and labels for the entities we would like to extract. These labels will be used to train our model to parse this specific document structure and identify the correct types.
- You should now be in the labeling console, which will look something like this.
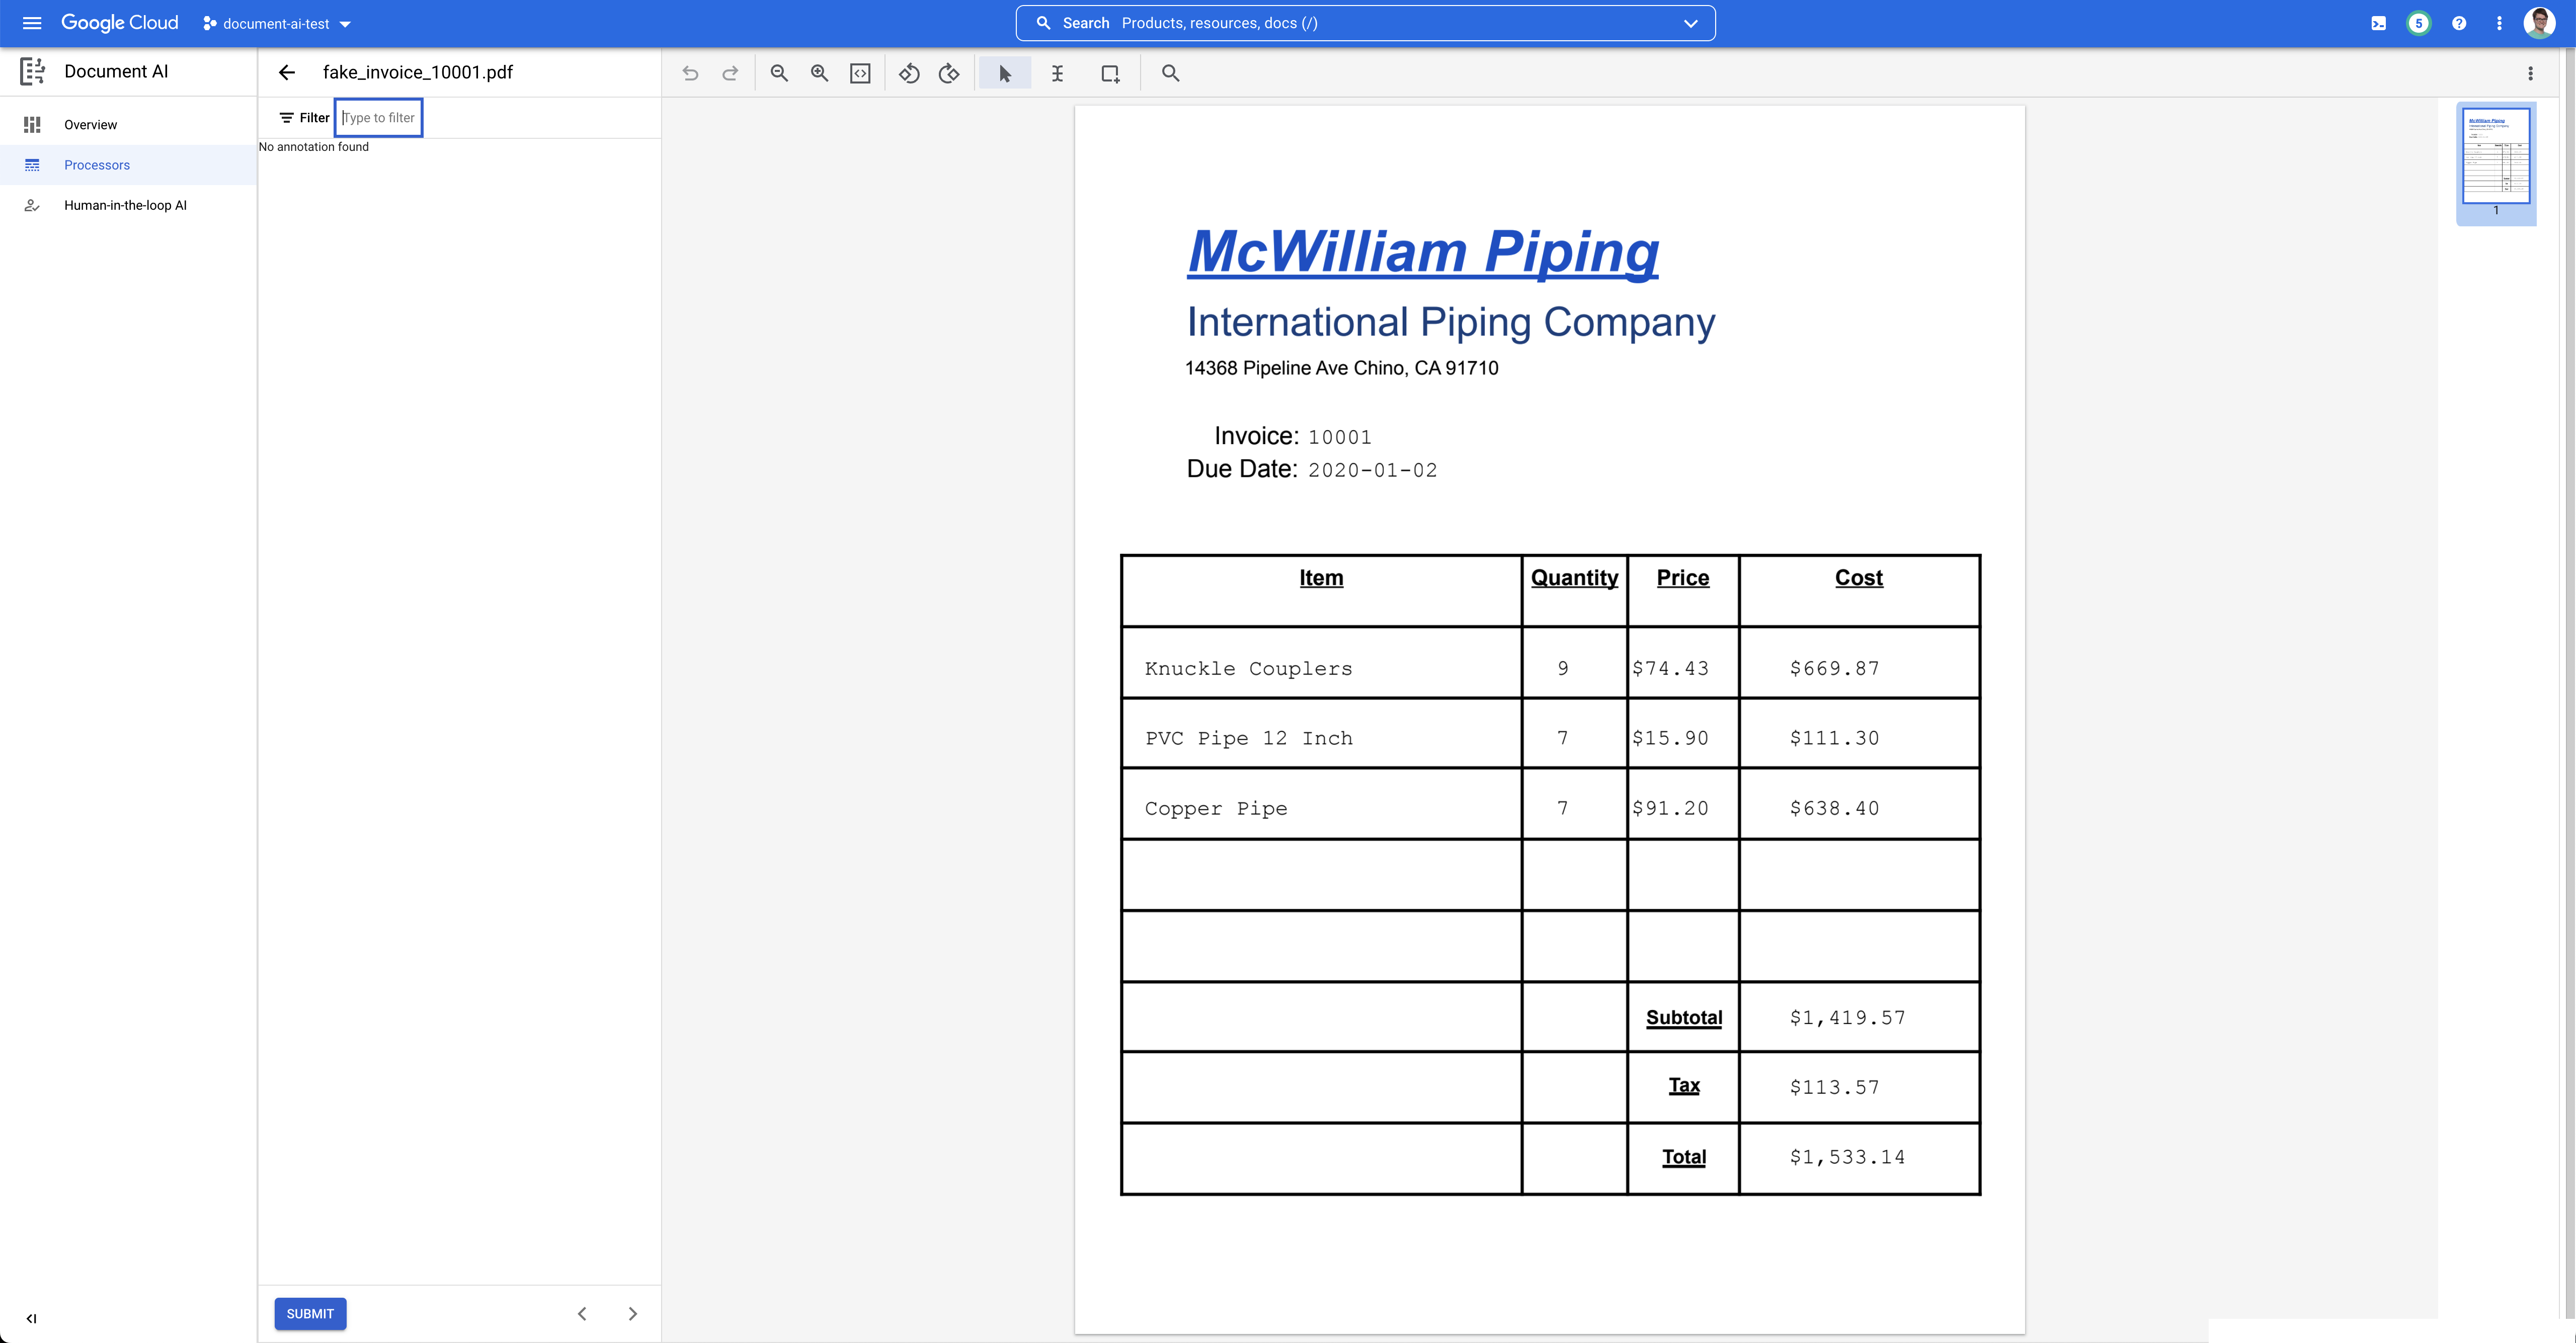
- Click on the "Select Text" Tool, then highlight the text "McWilliam Piping International Piping Company" and assign the label
supplier_name. You can use the text filter to search for label names.
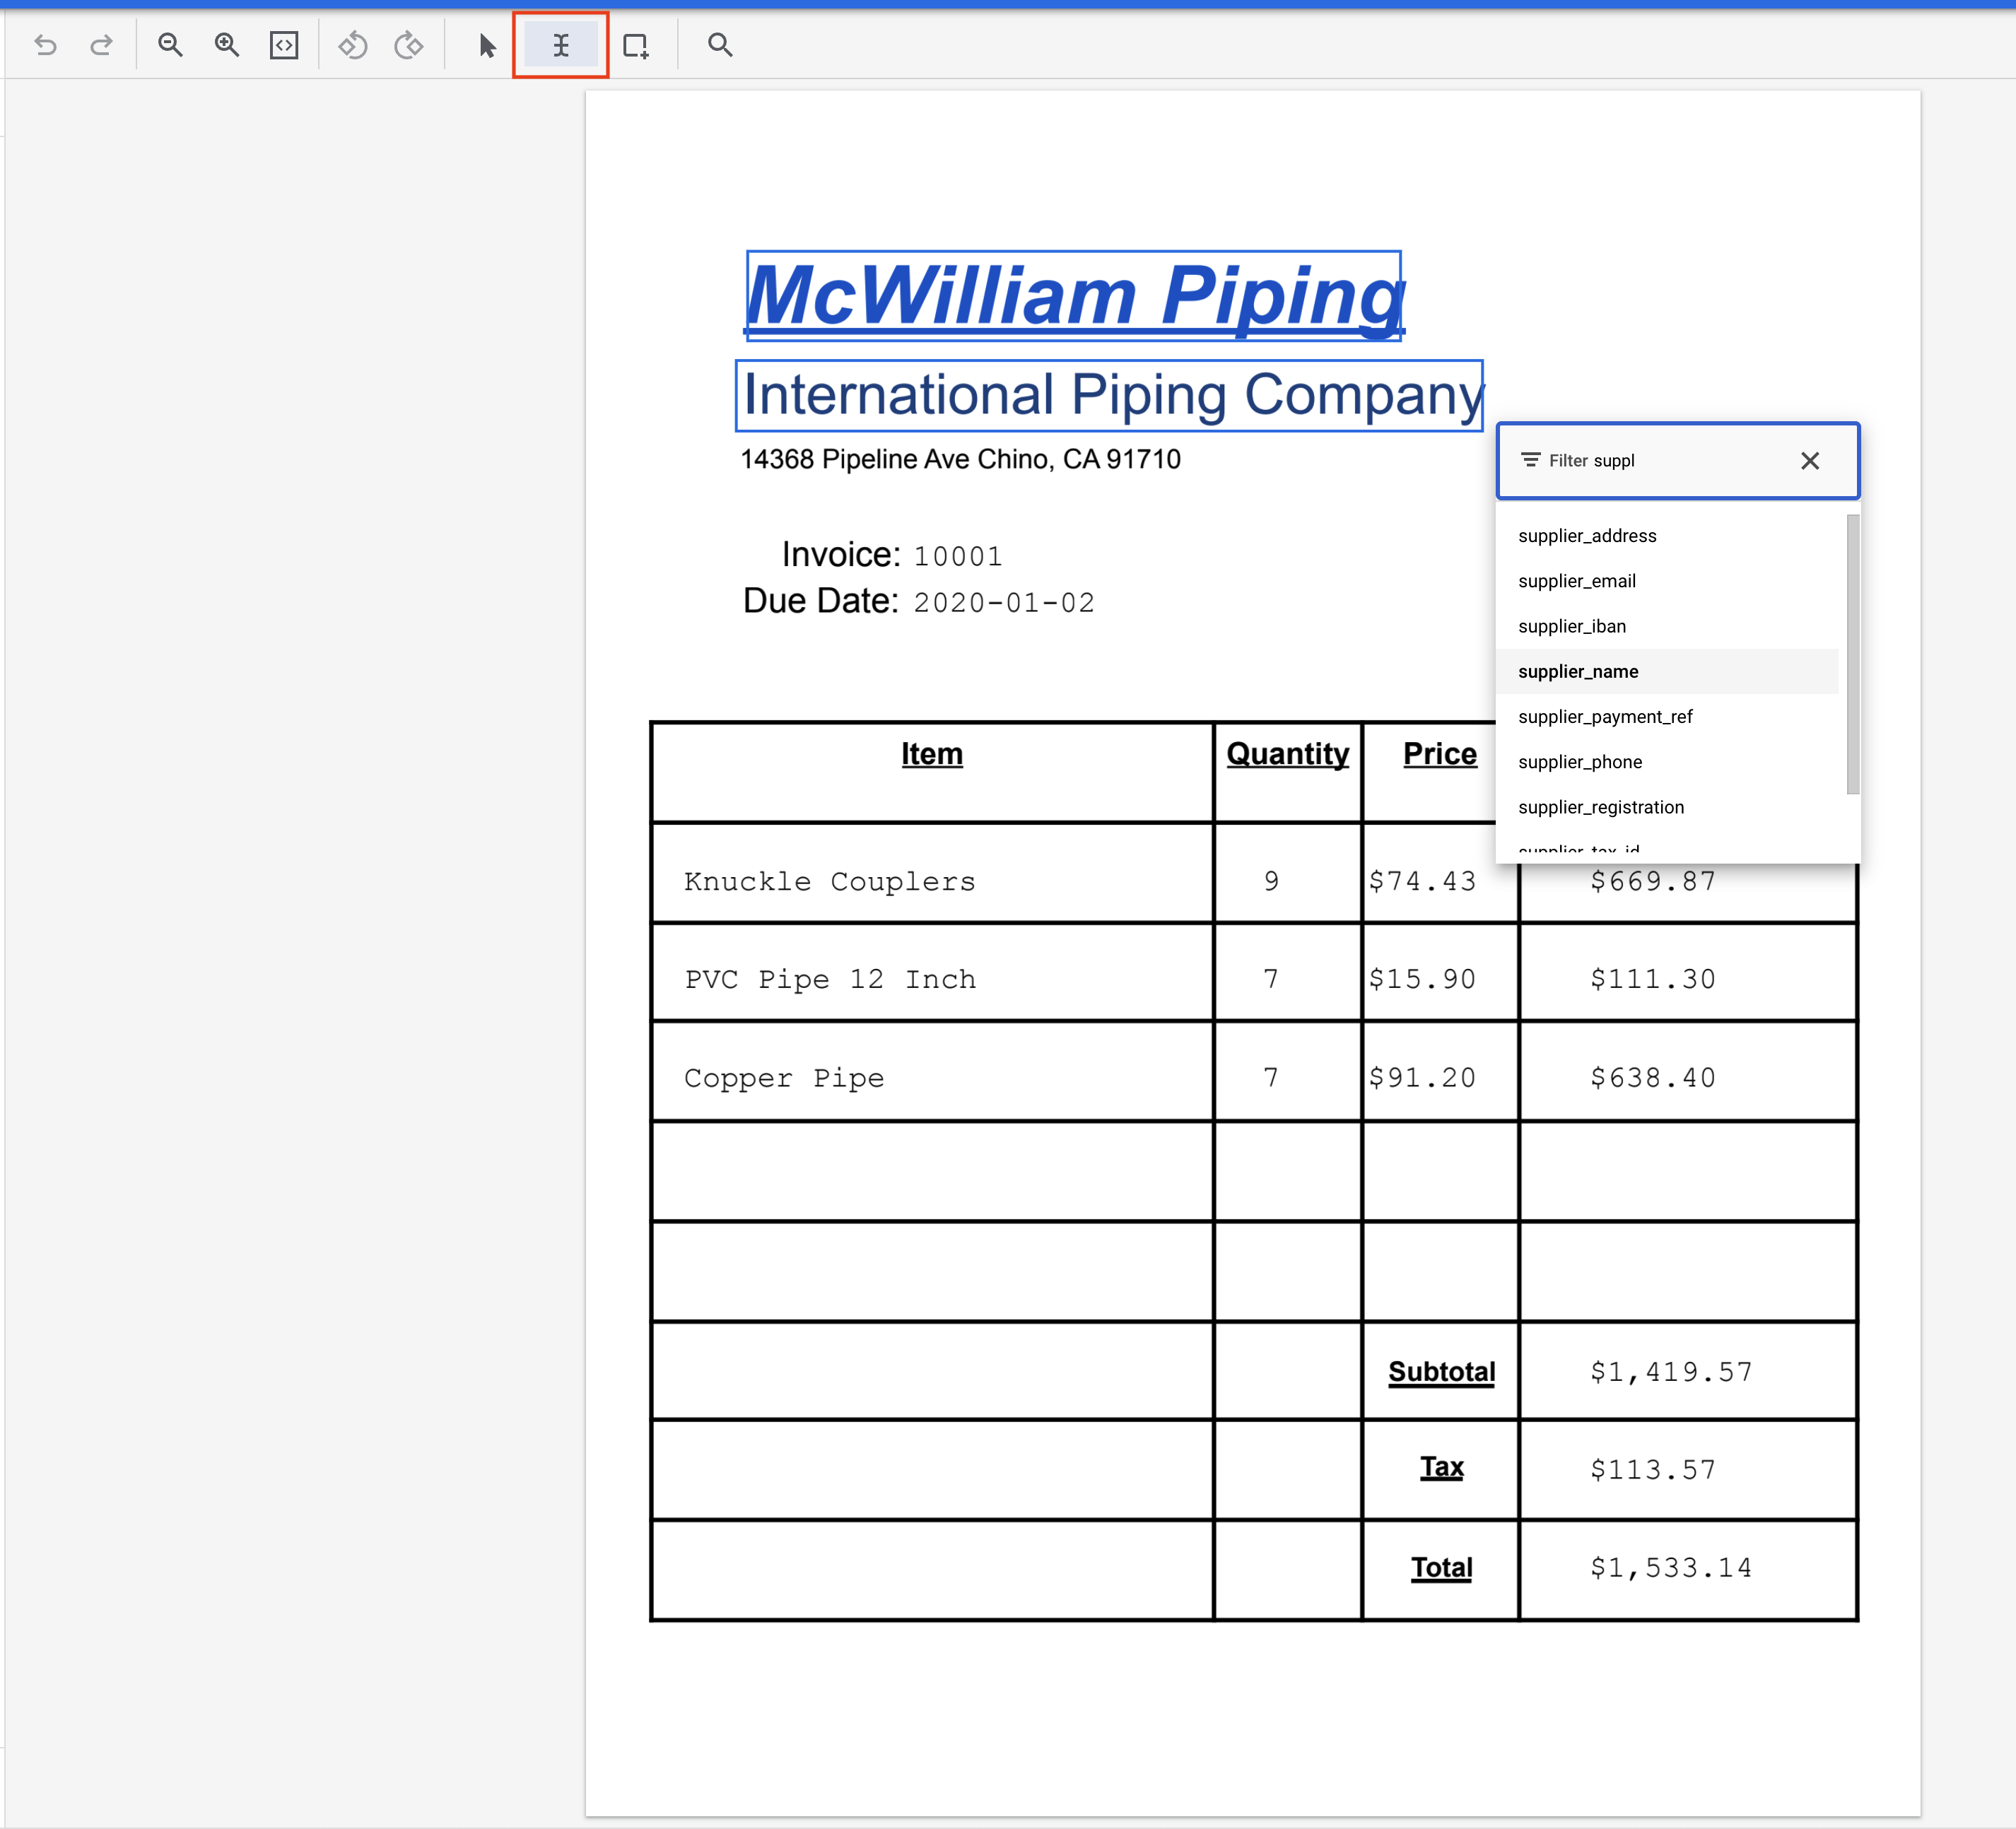
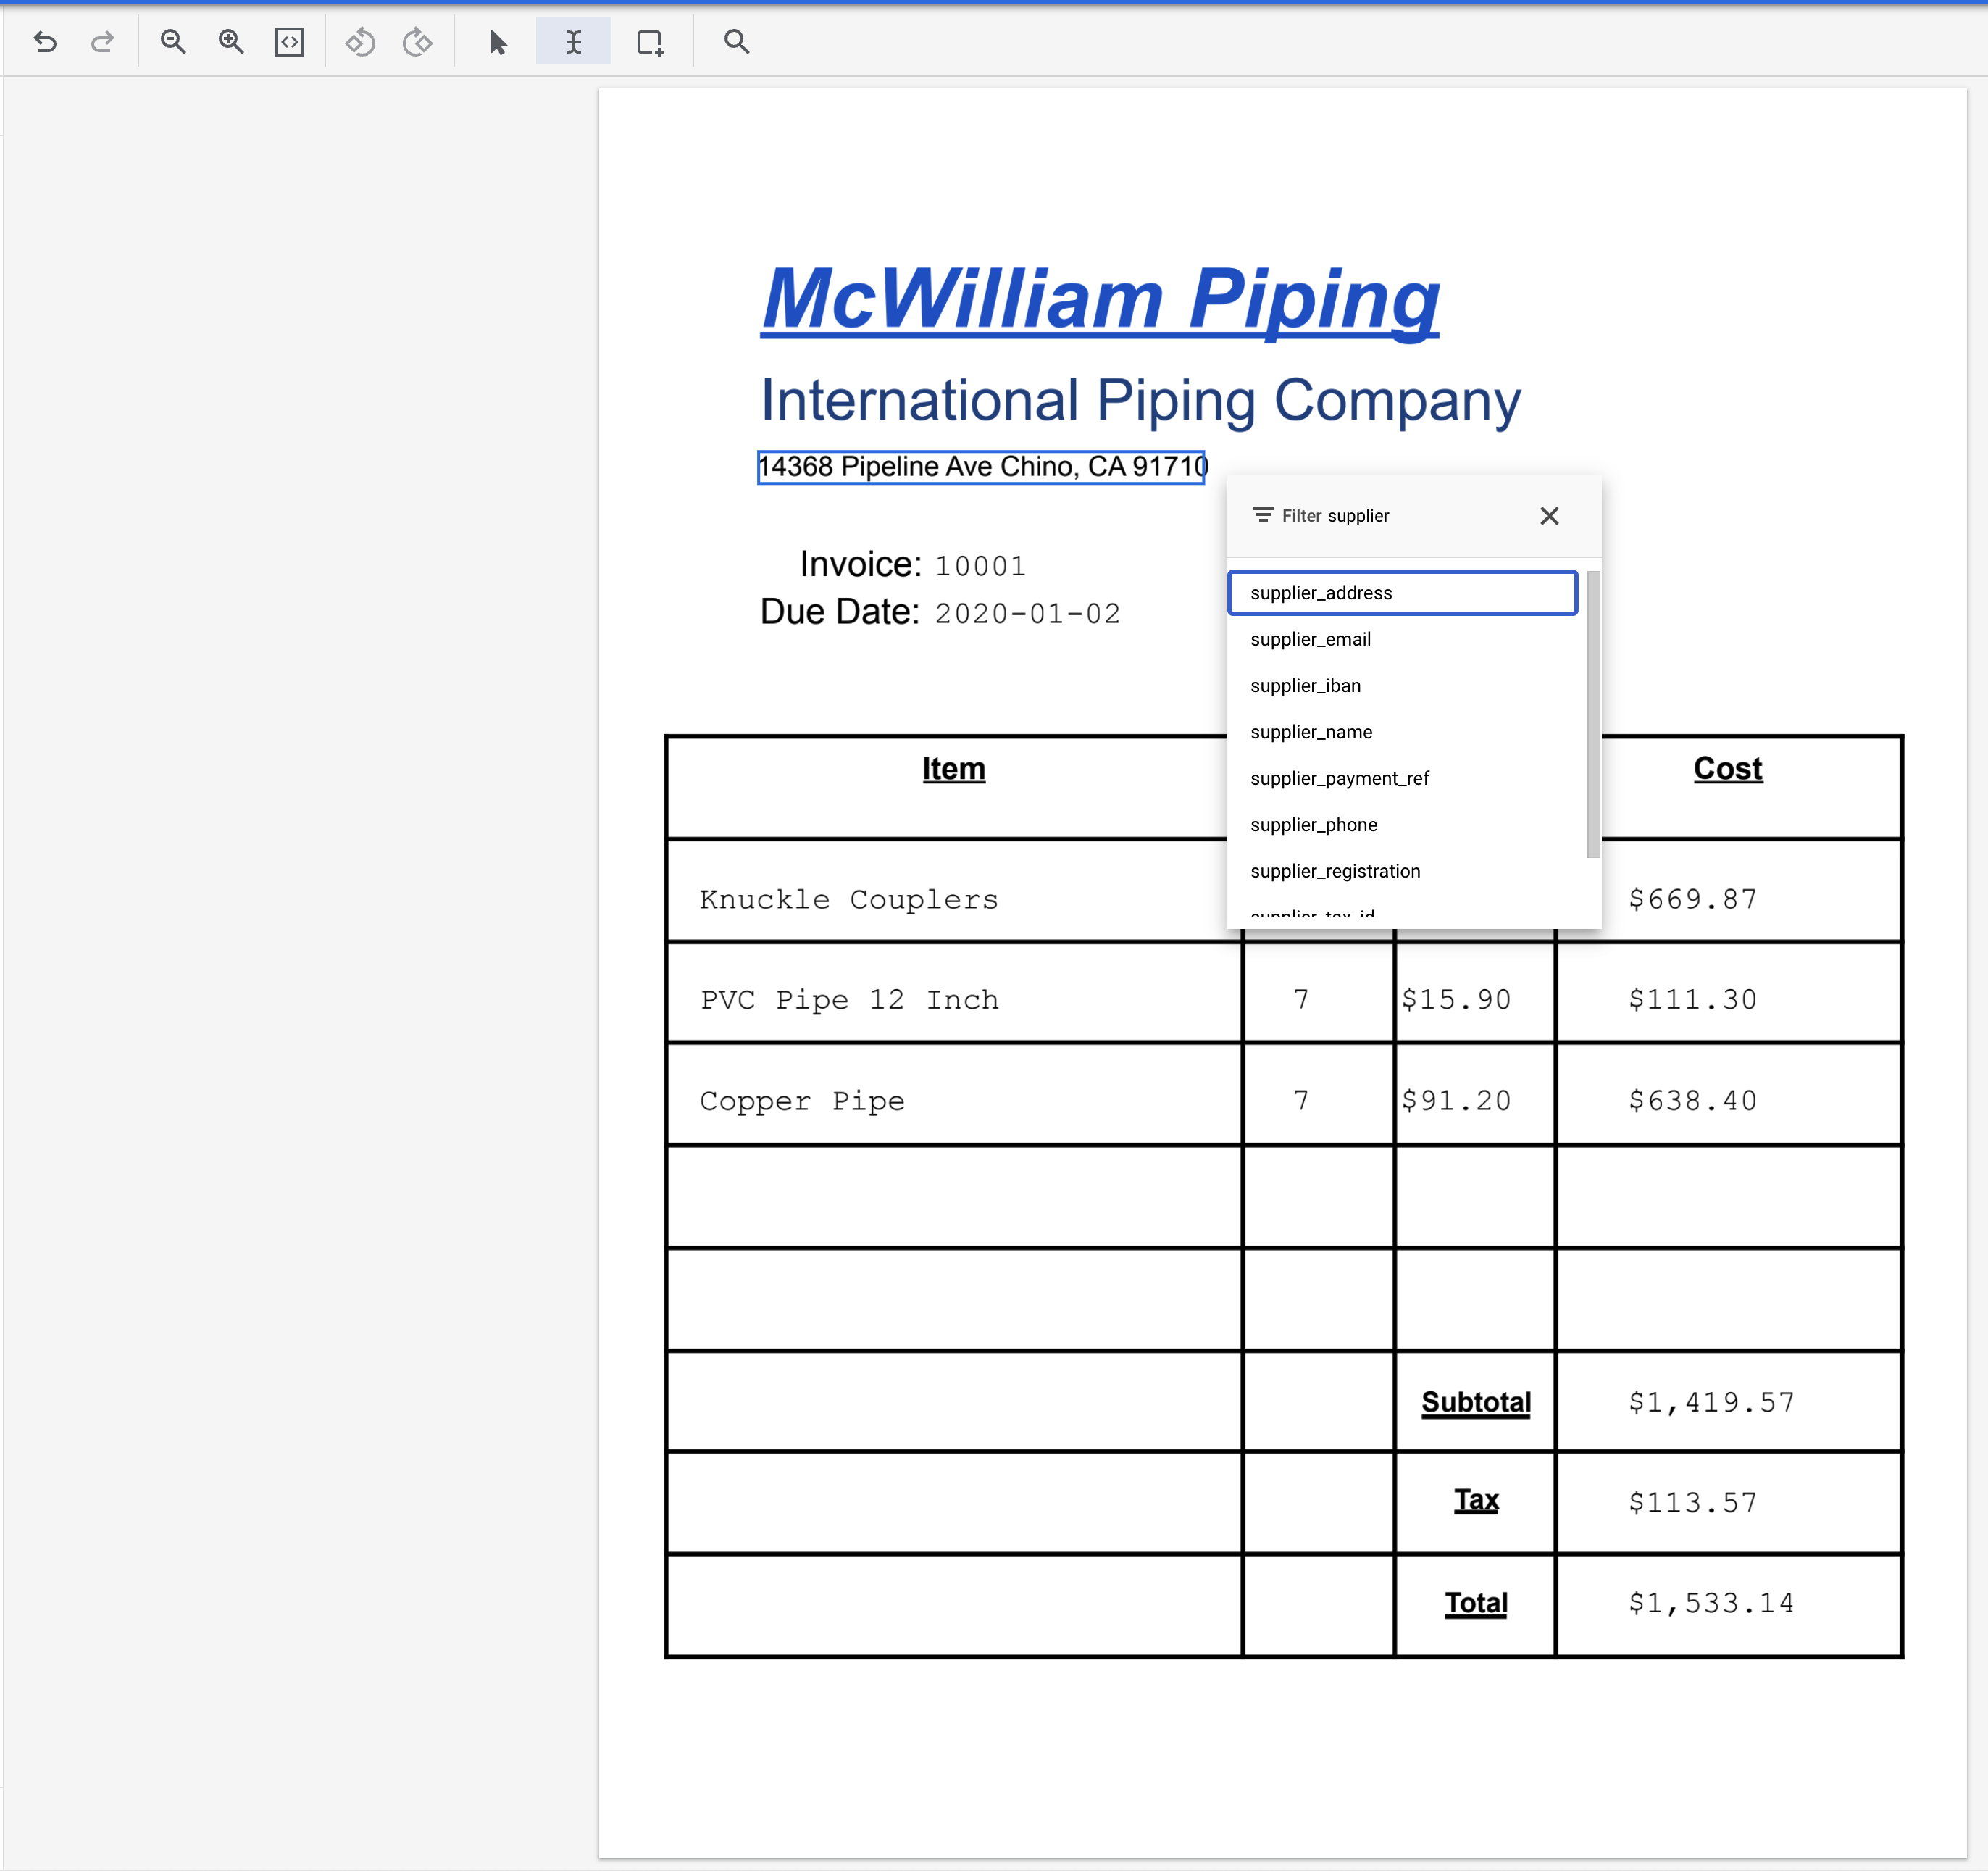
- Highlight the text "14368 Pipeline Ave Chino, CA 91710" and assign the label
supplier_address.
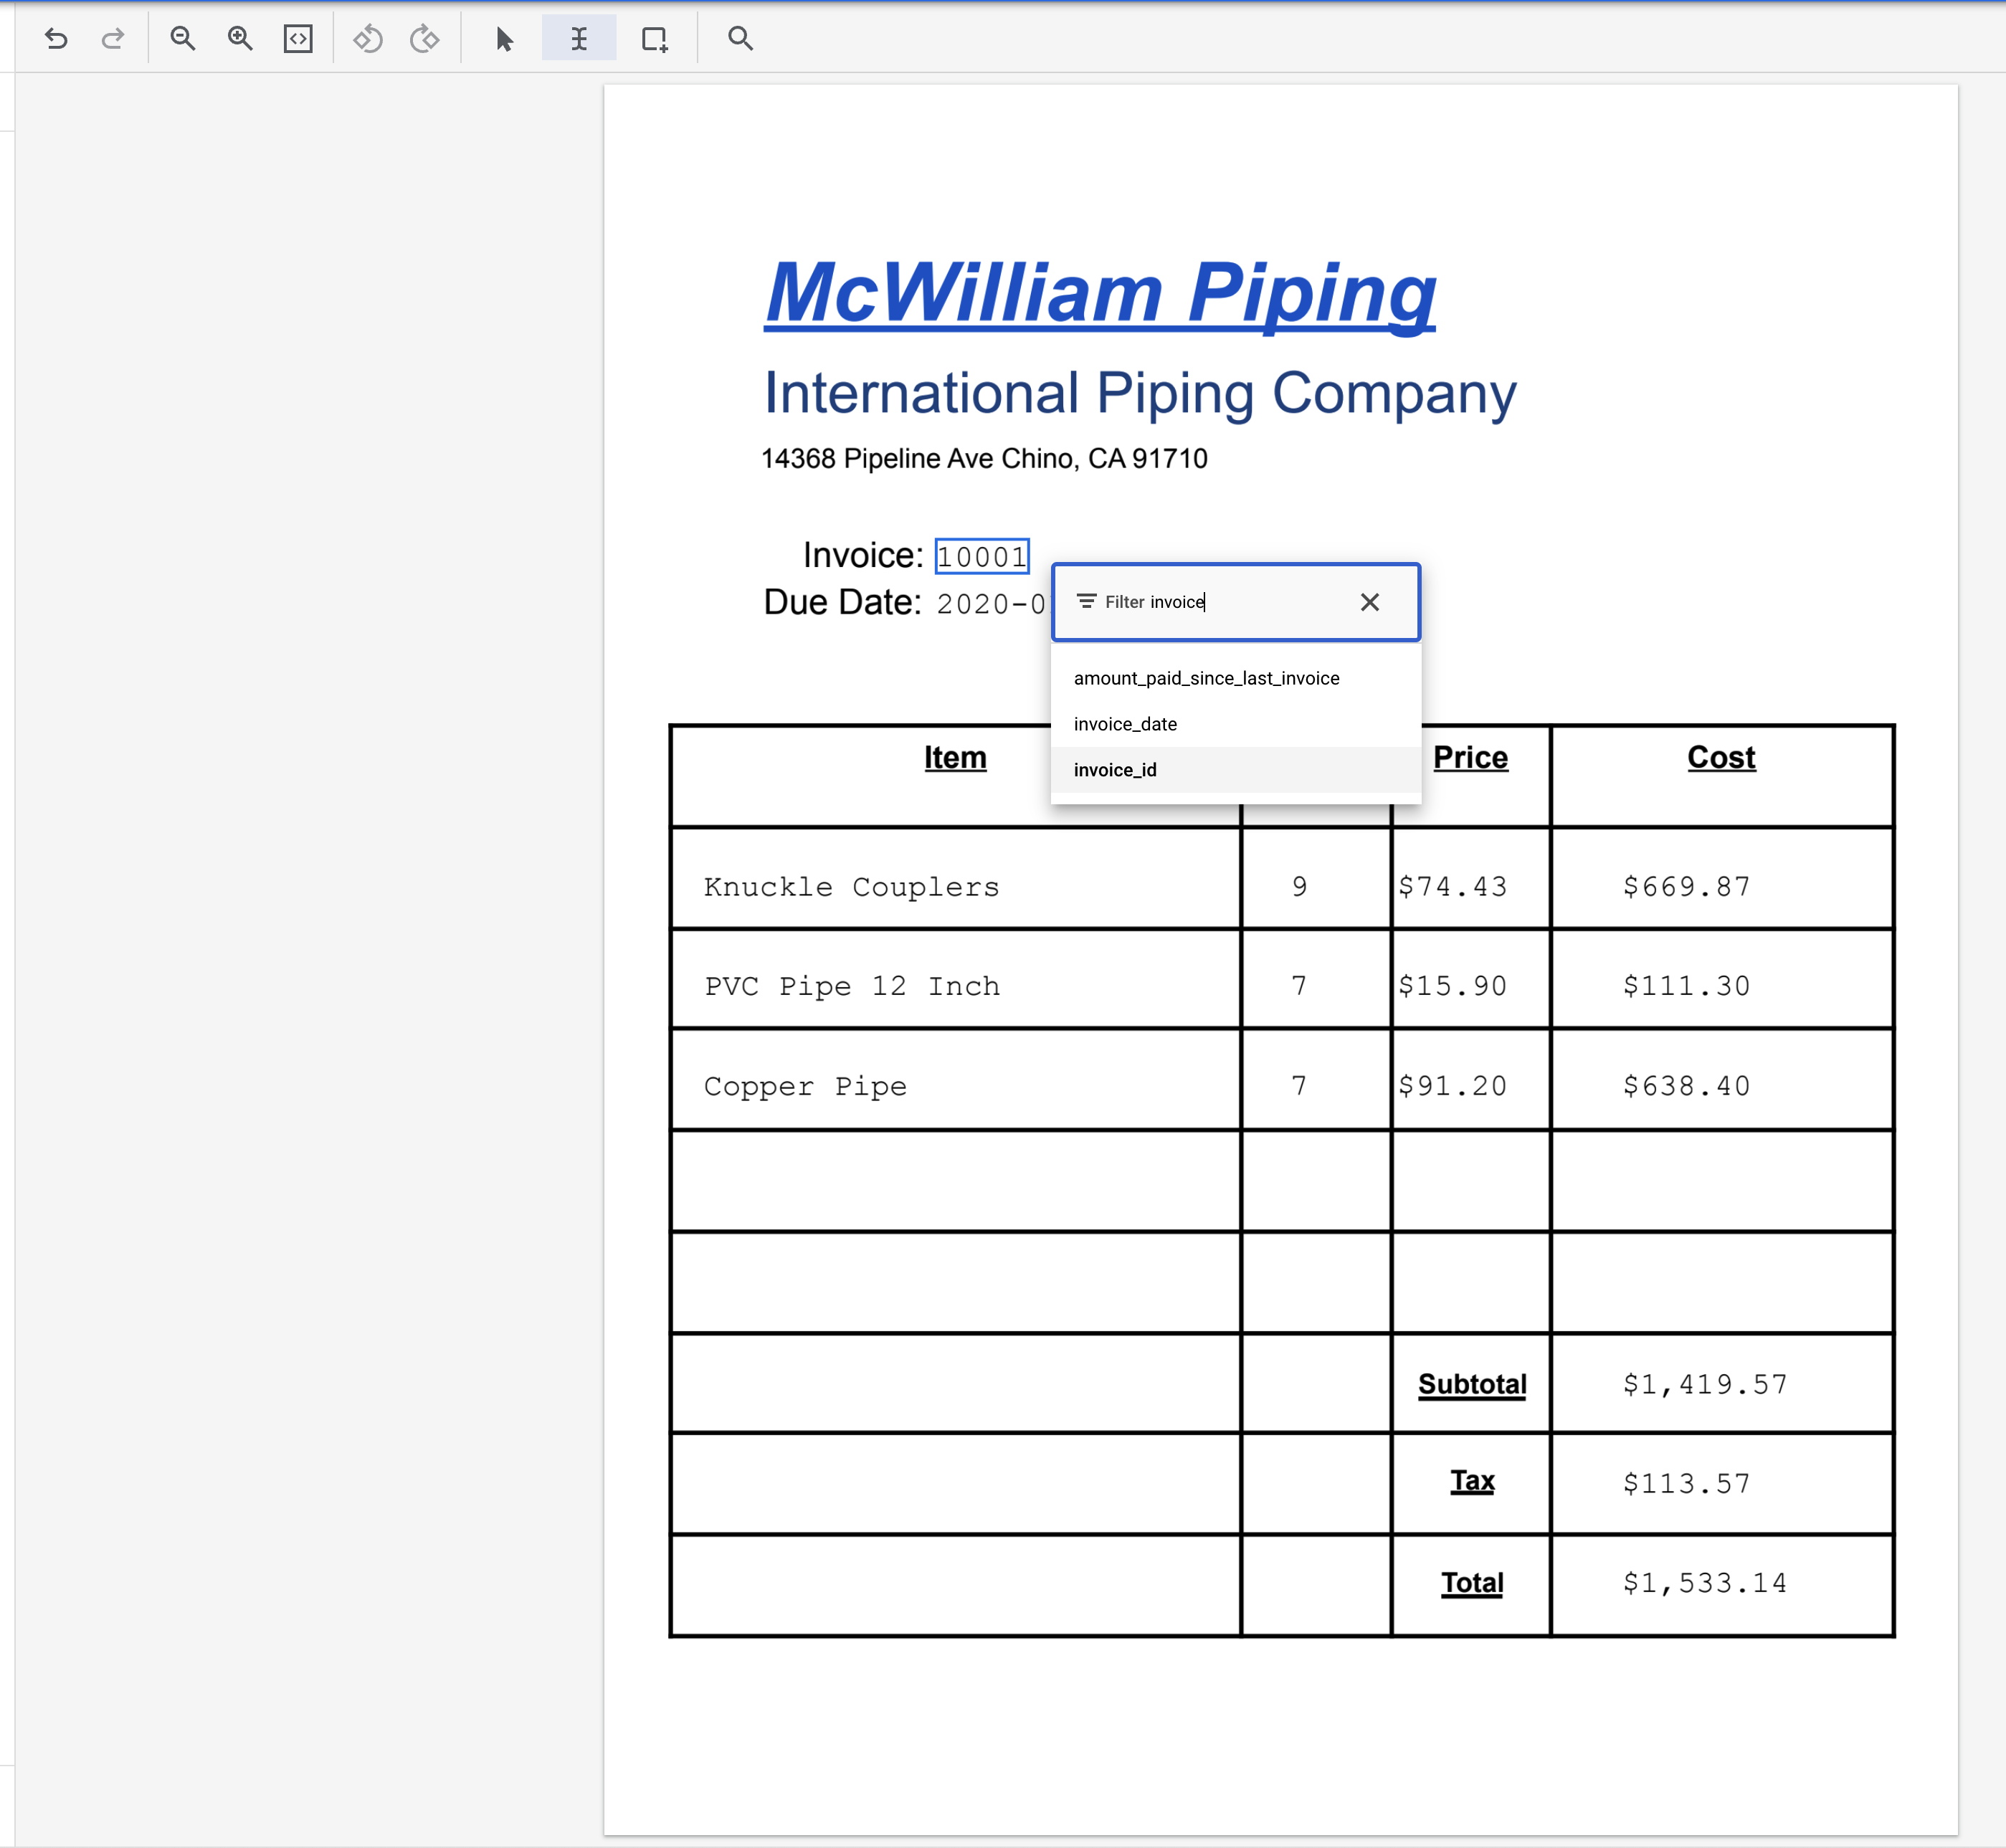
- Highlight the text "10001" and assign the label
invoice_id.
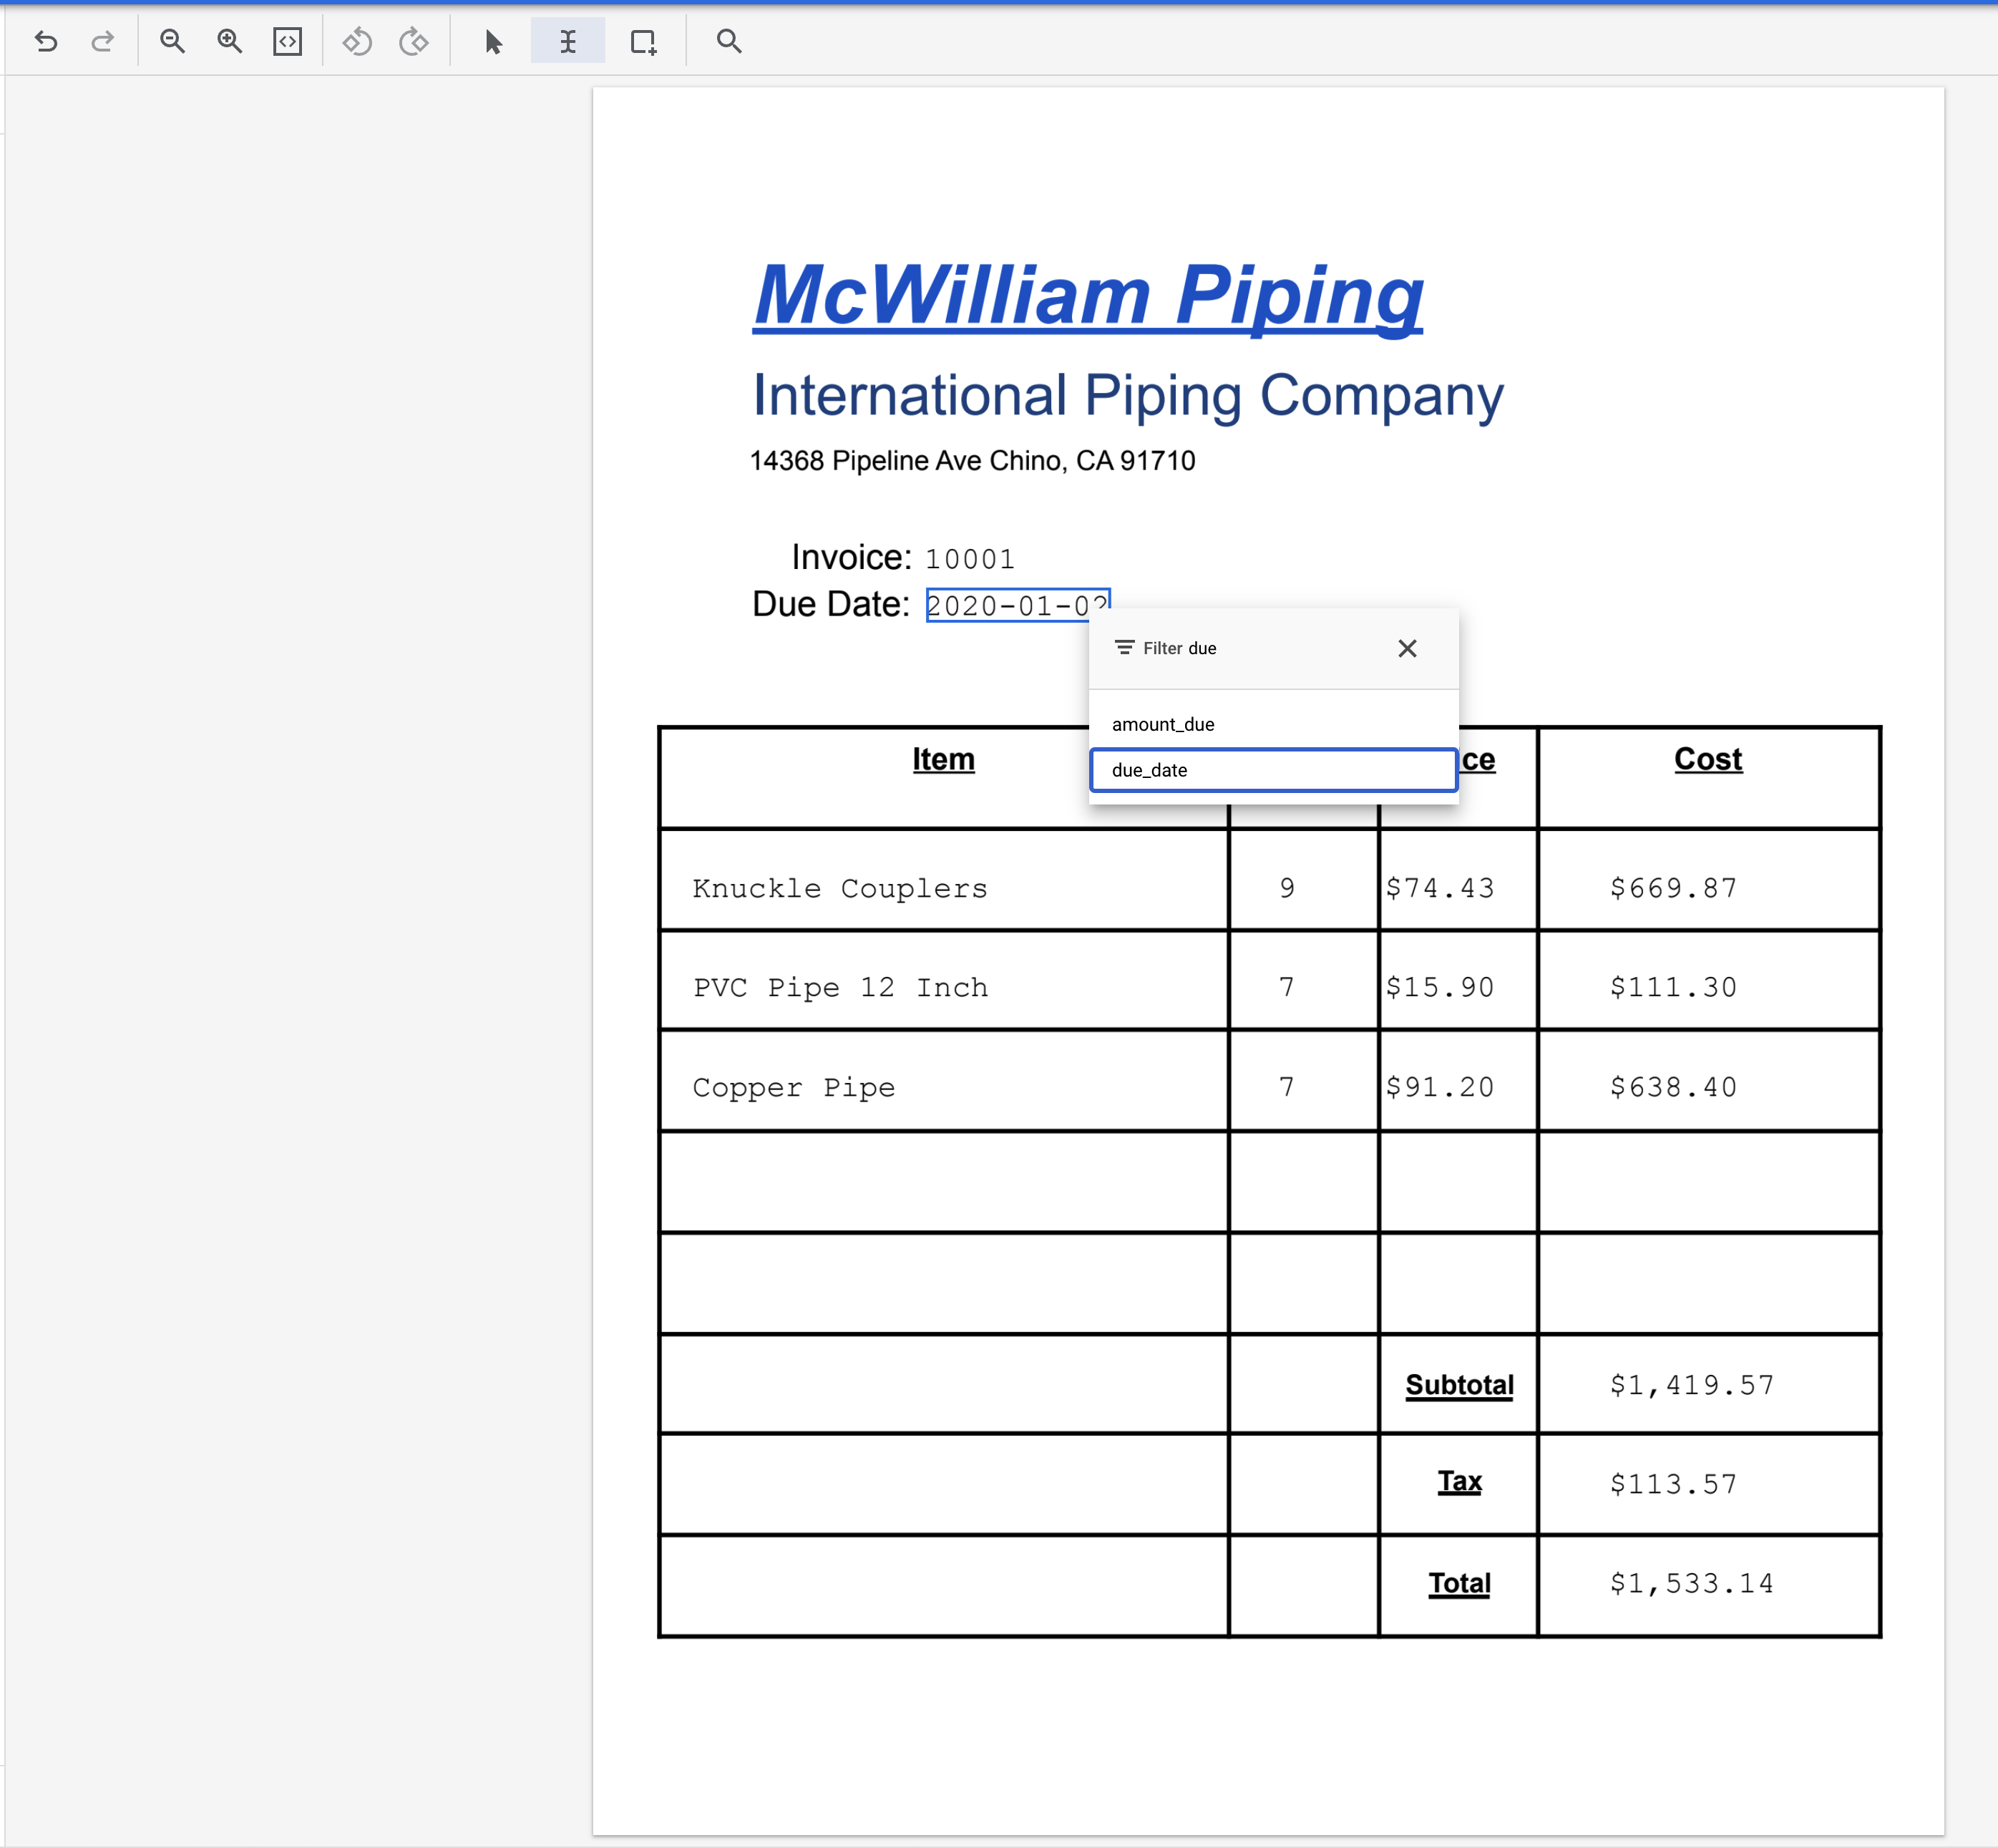
- Highlight the text "2020-01-02" and assign the label
due_date.
- Switch to the "Bounding Box" tool. Highlight the text "Knuckle Couplers" and assign the label
line_item/description.
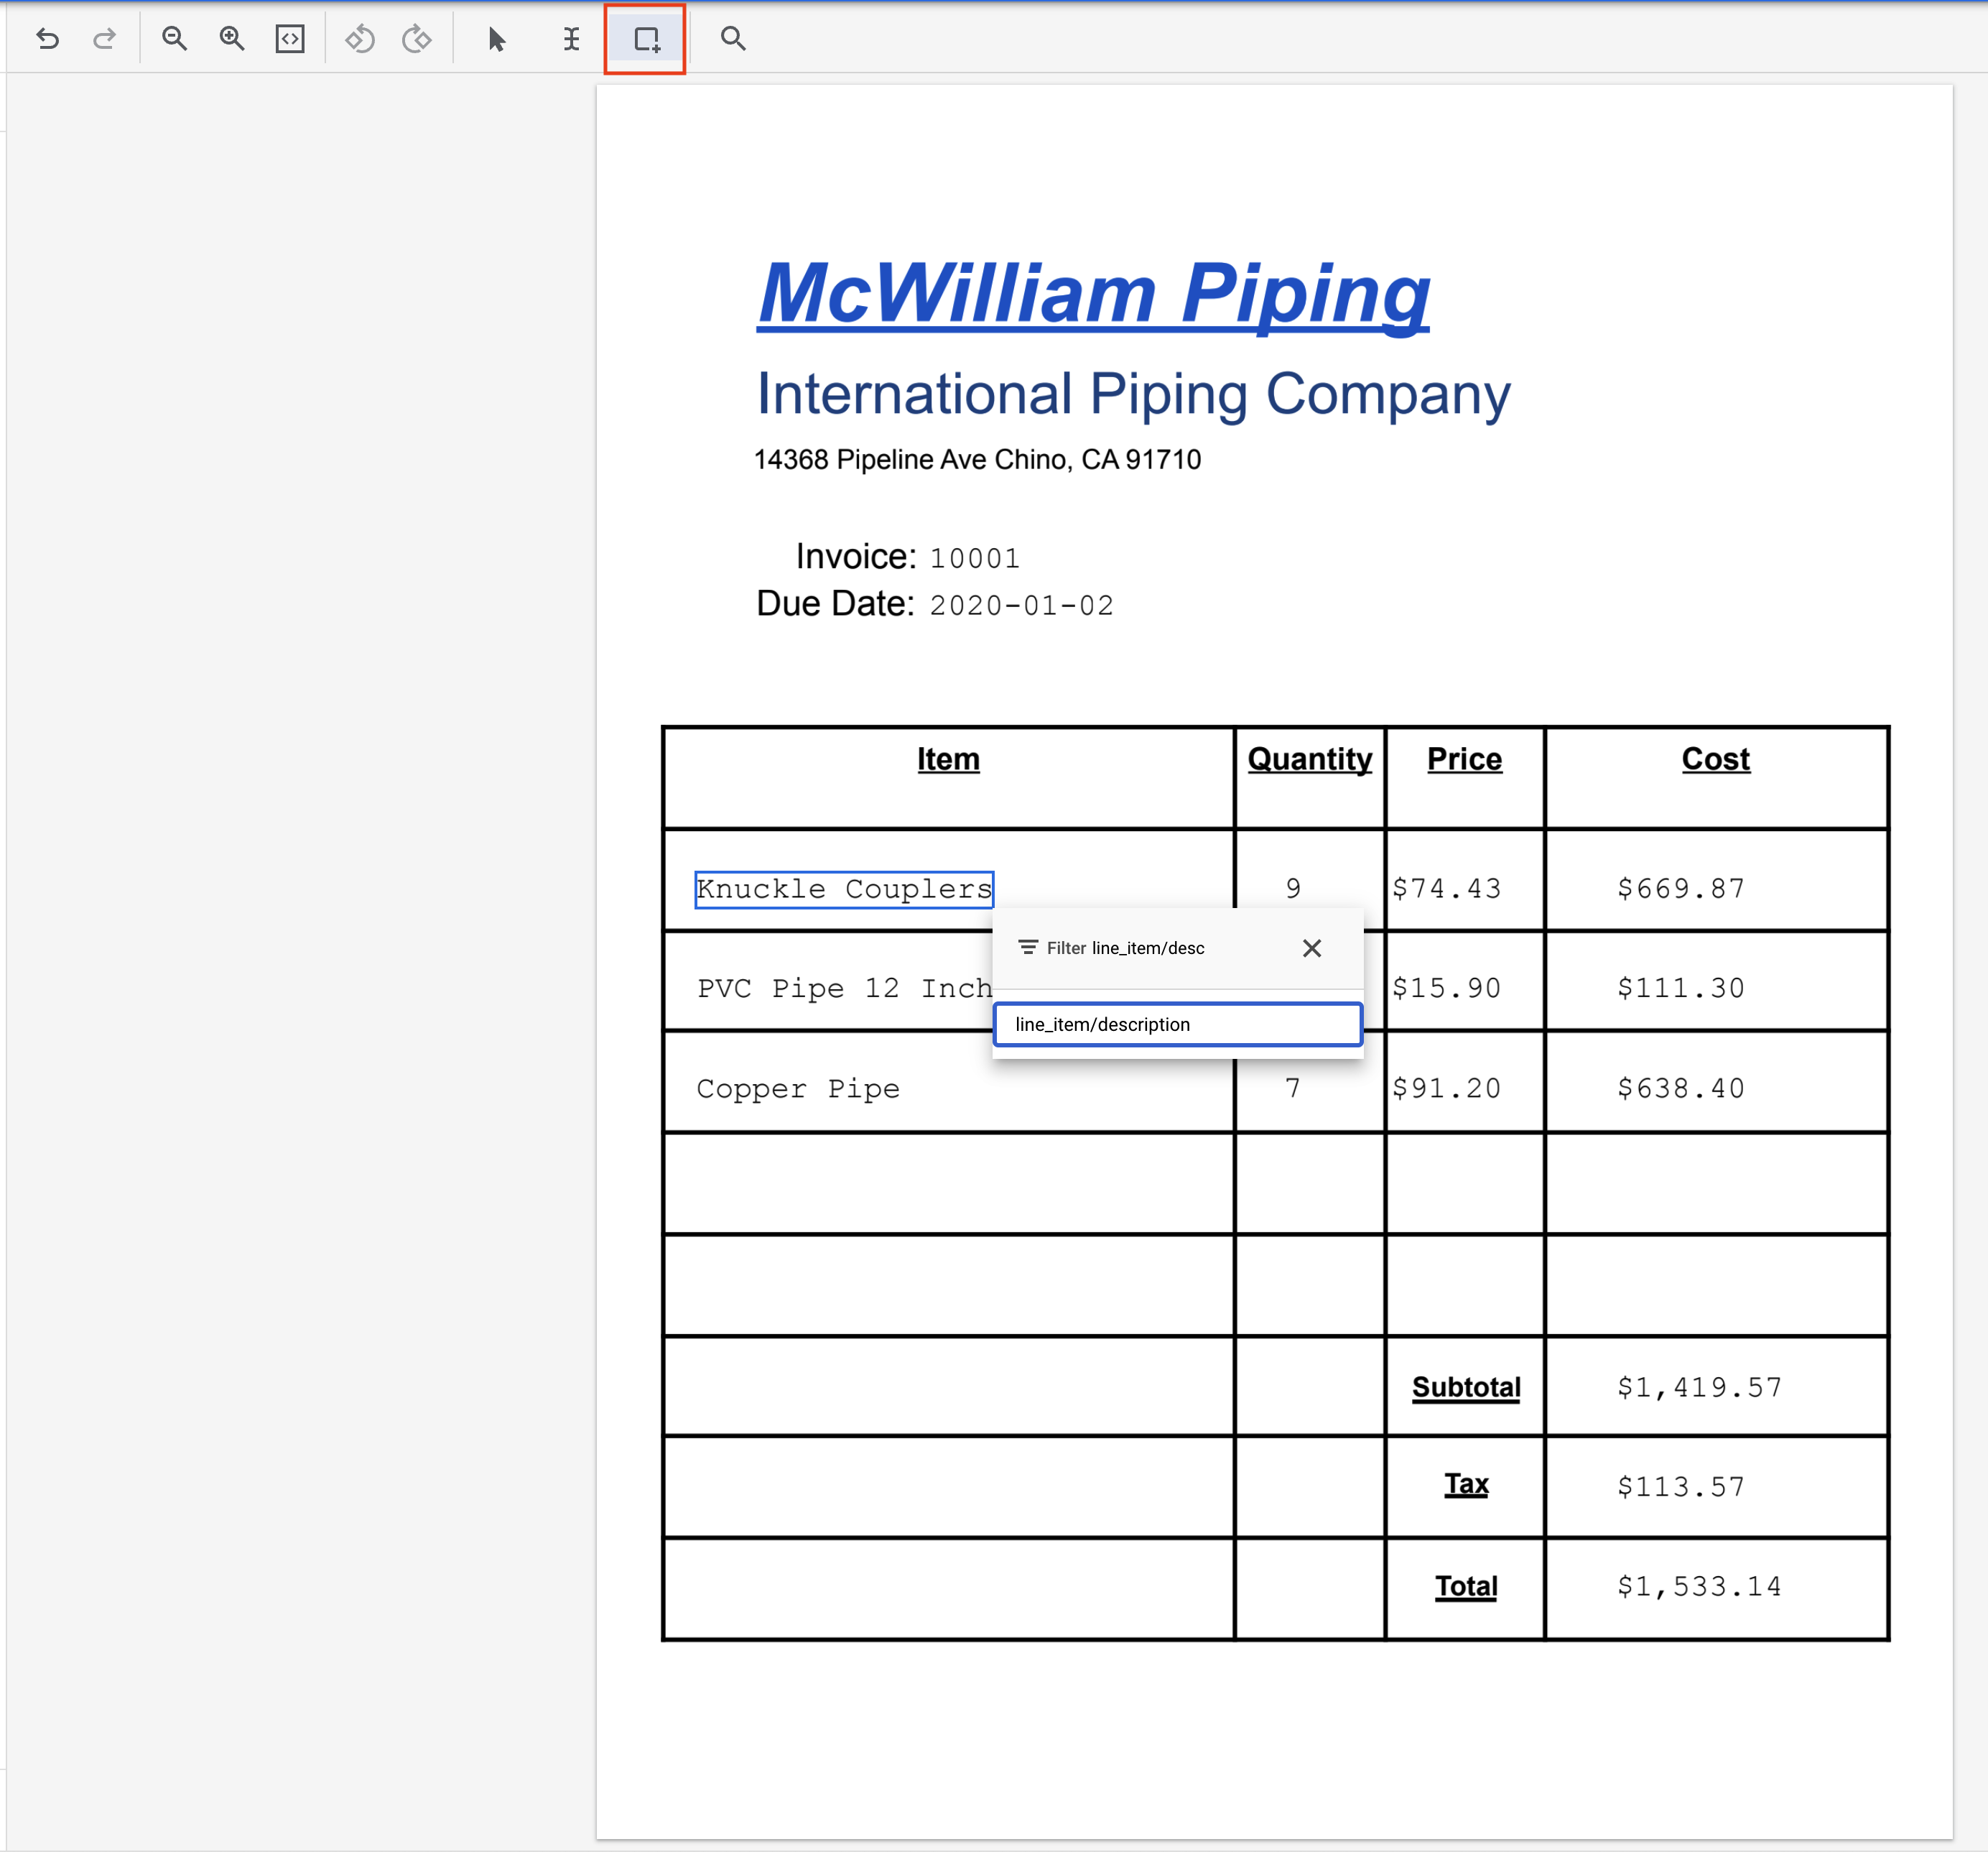
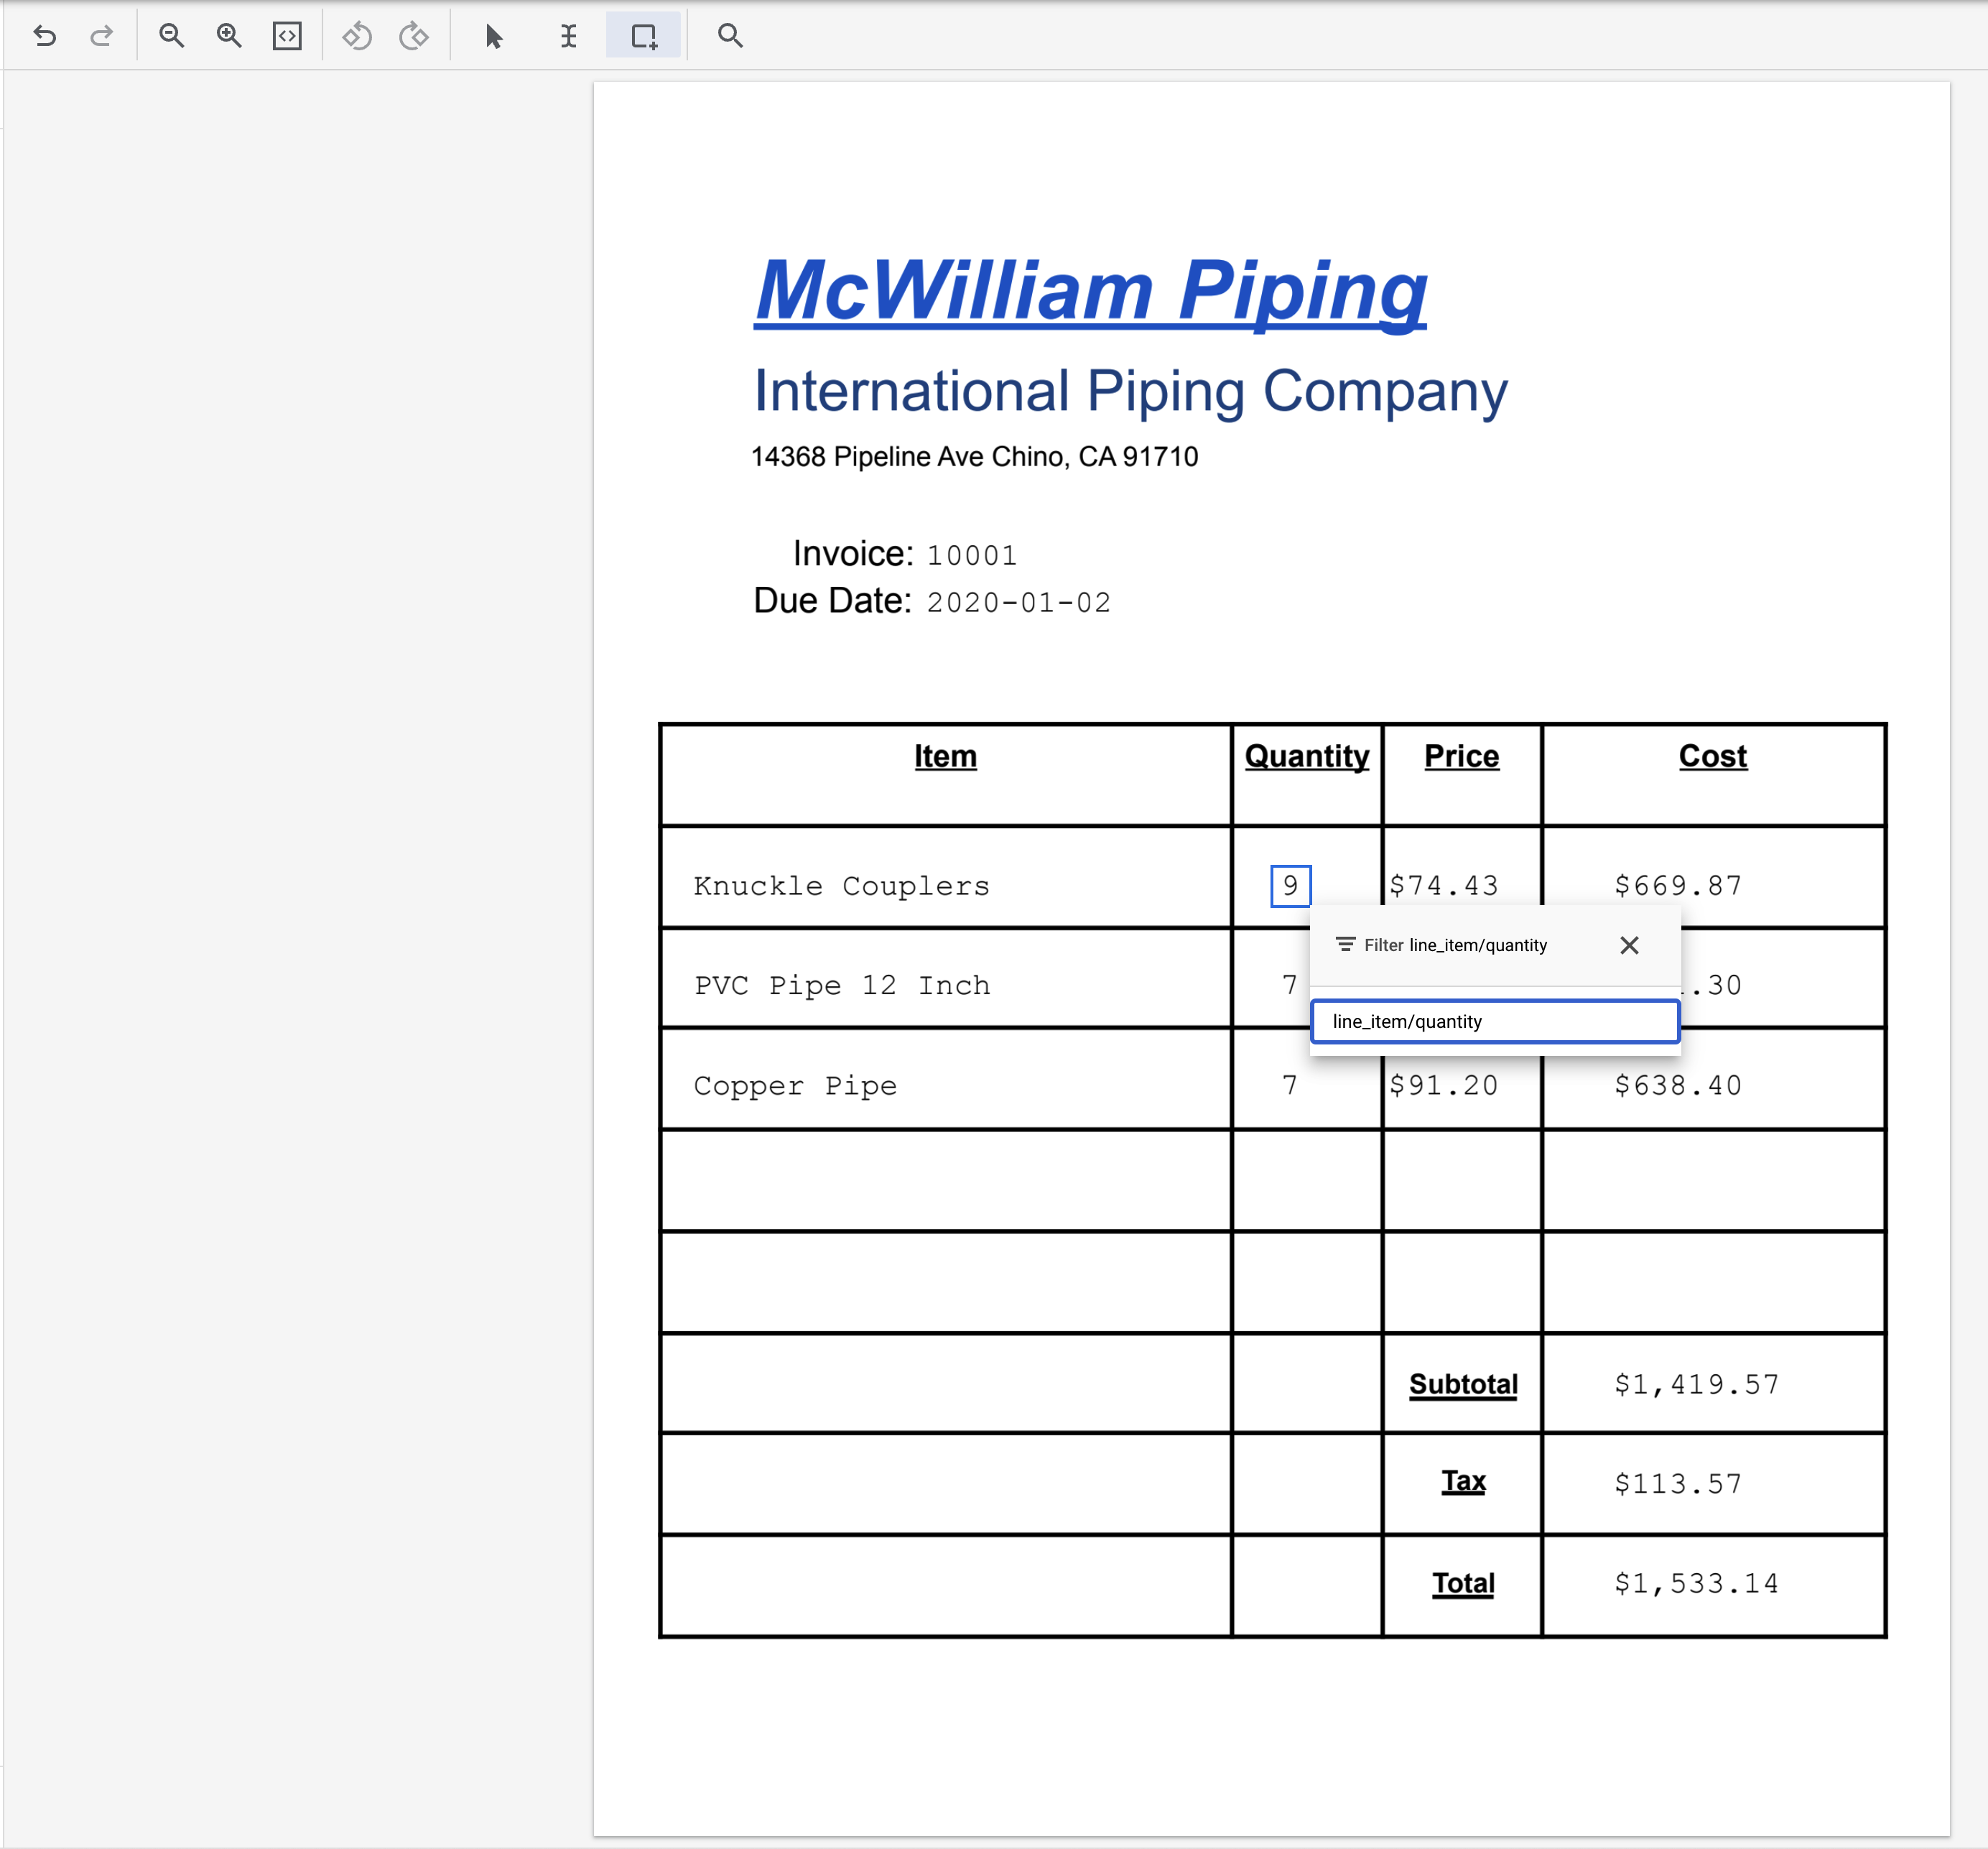
- Highlight the text "9" and assign the label
line_item/quantity.
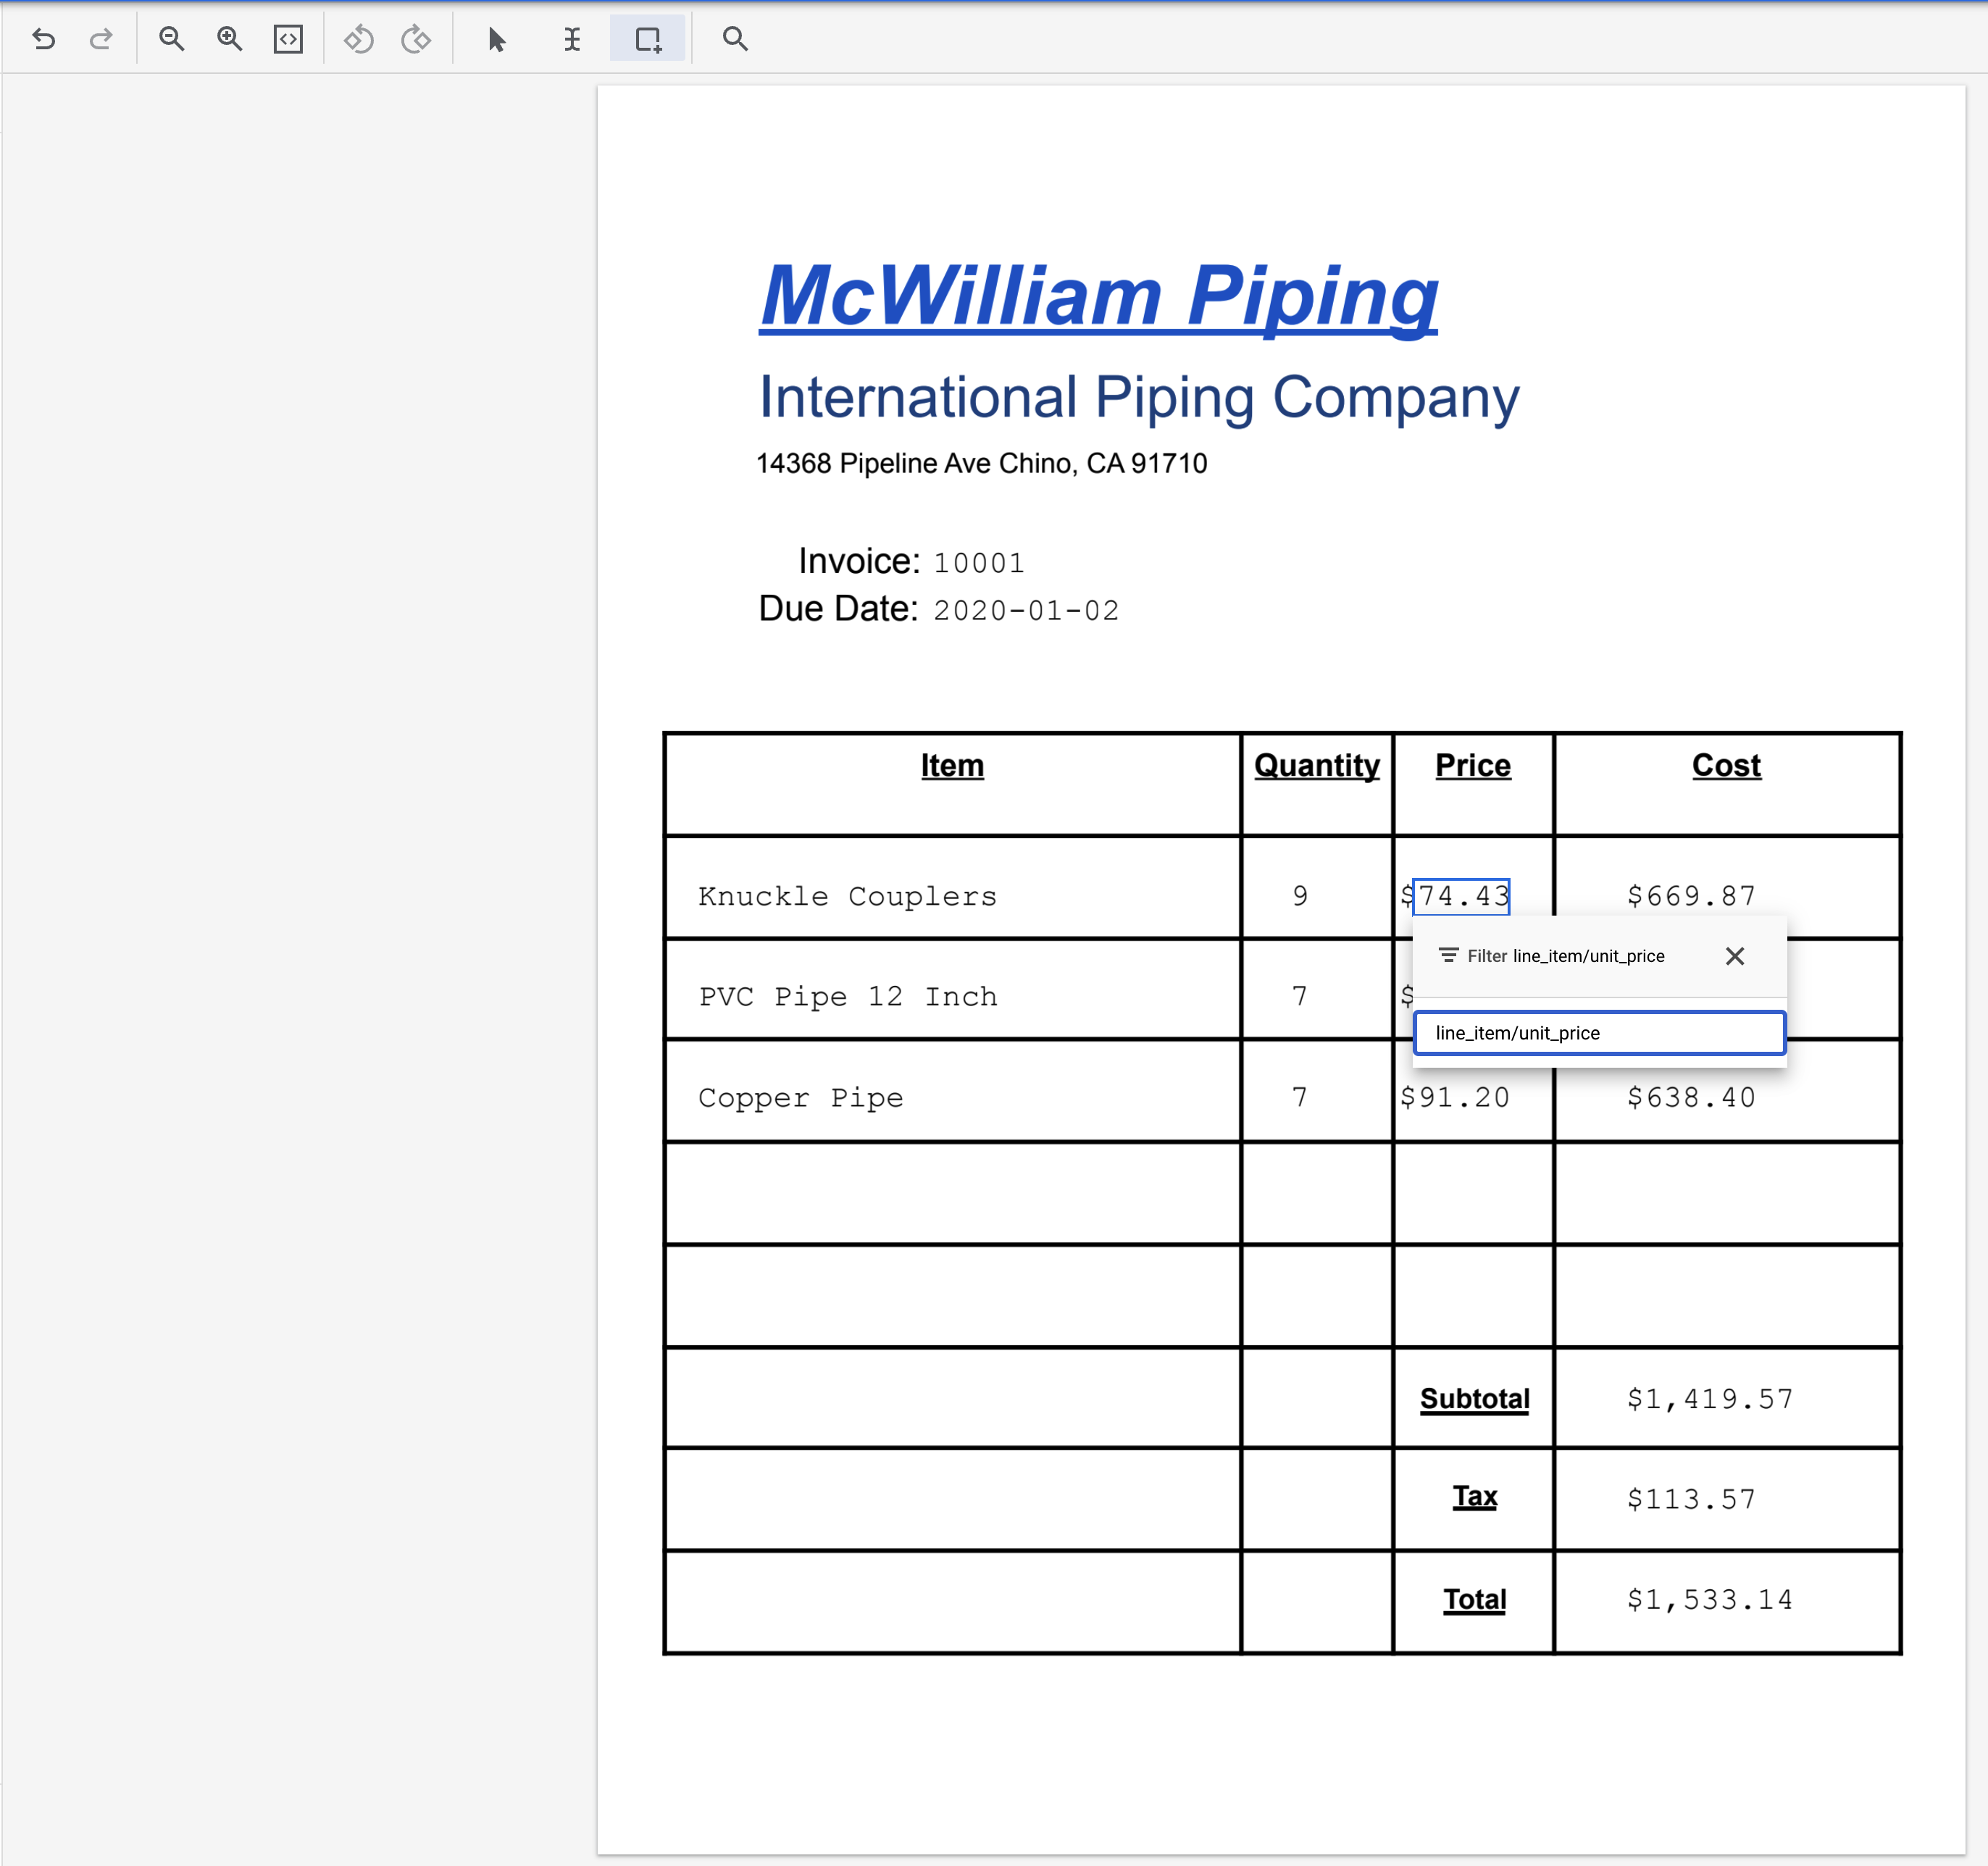
- Highlight the text "74.43" and assign the label
line_item/unit_price.
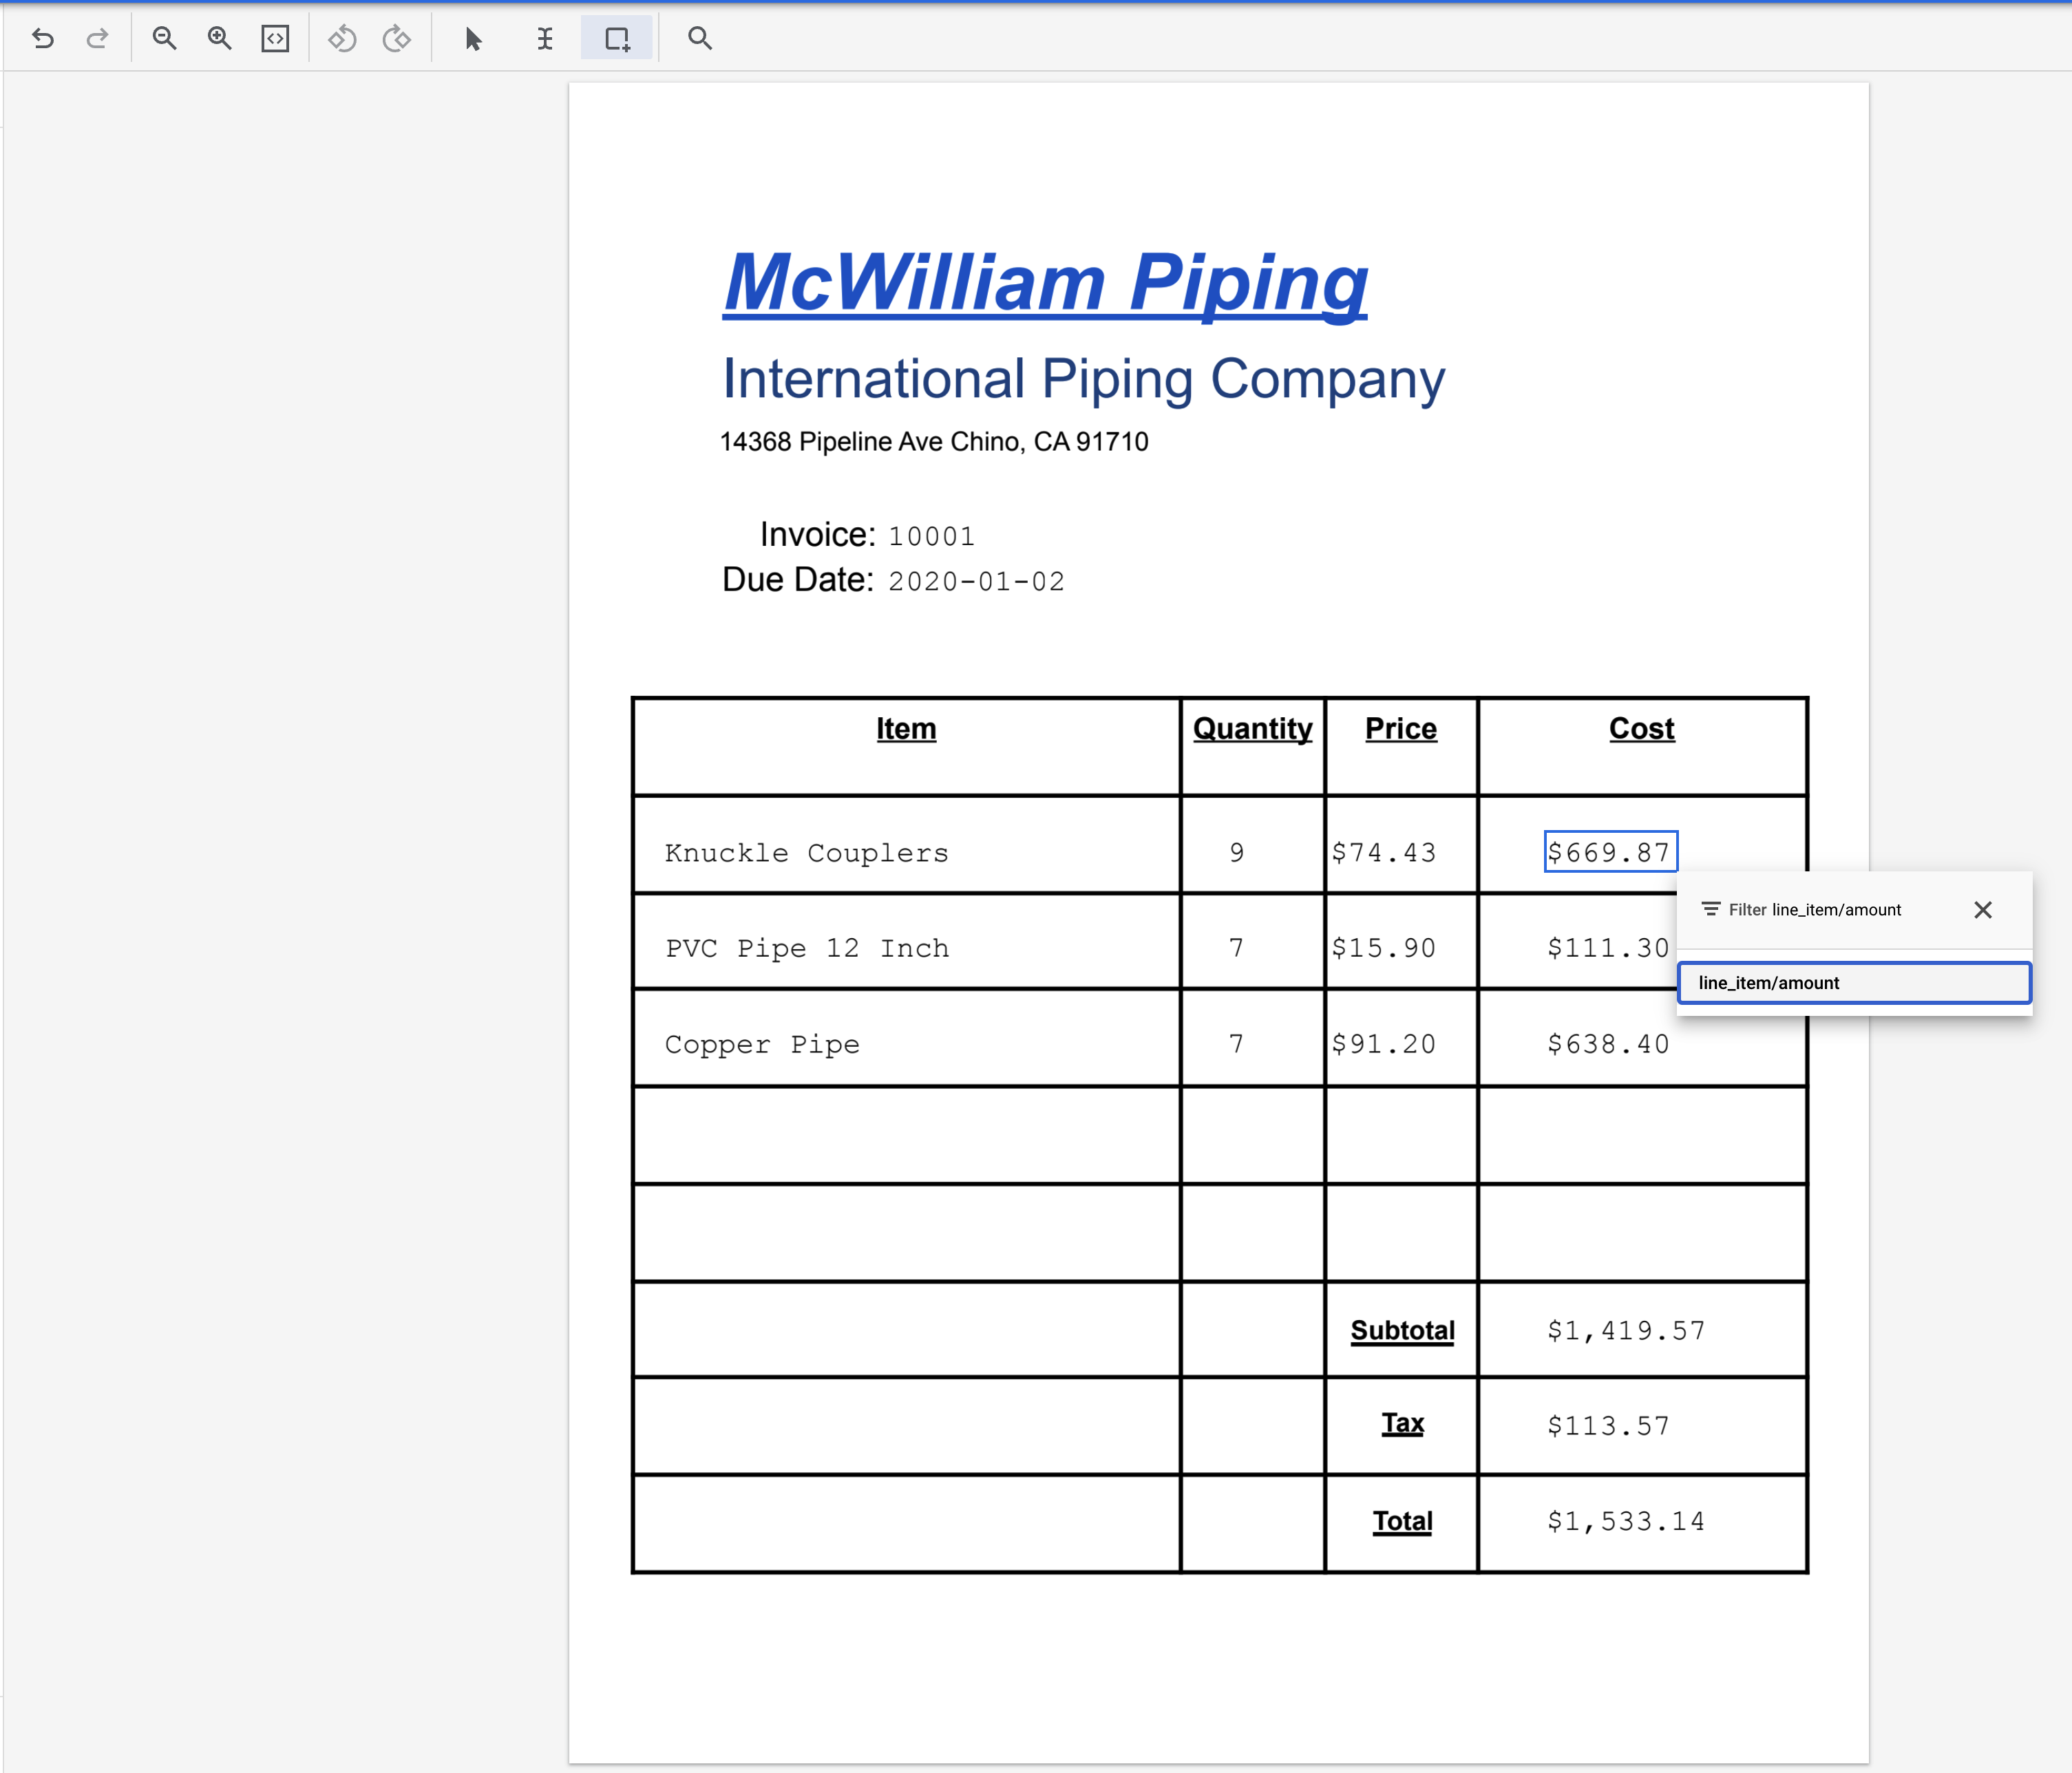
- Highlight the text "669.87" and assign the label
line_item/amount.
- Repeat the previous 4 steps for the next two line items. It should look like this when complete.
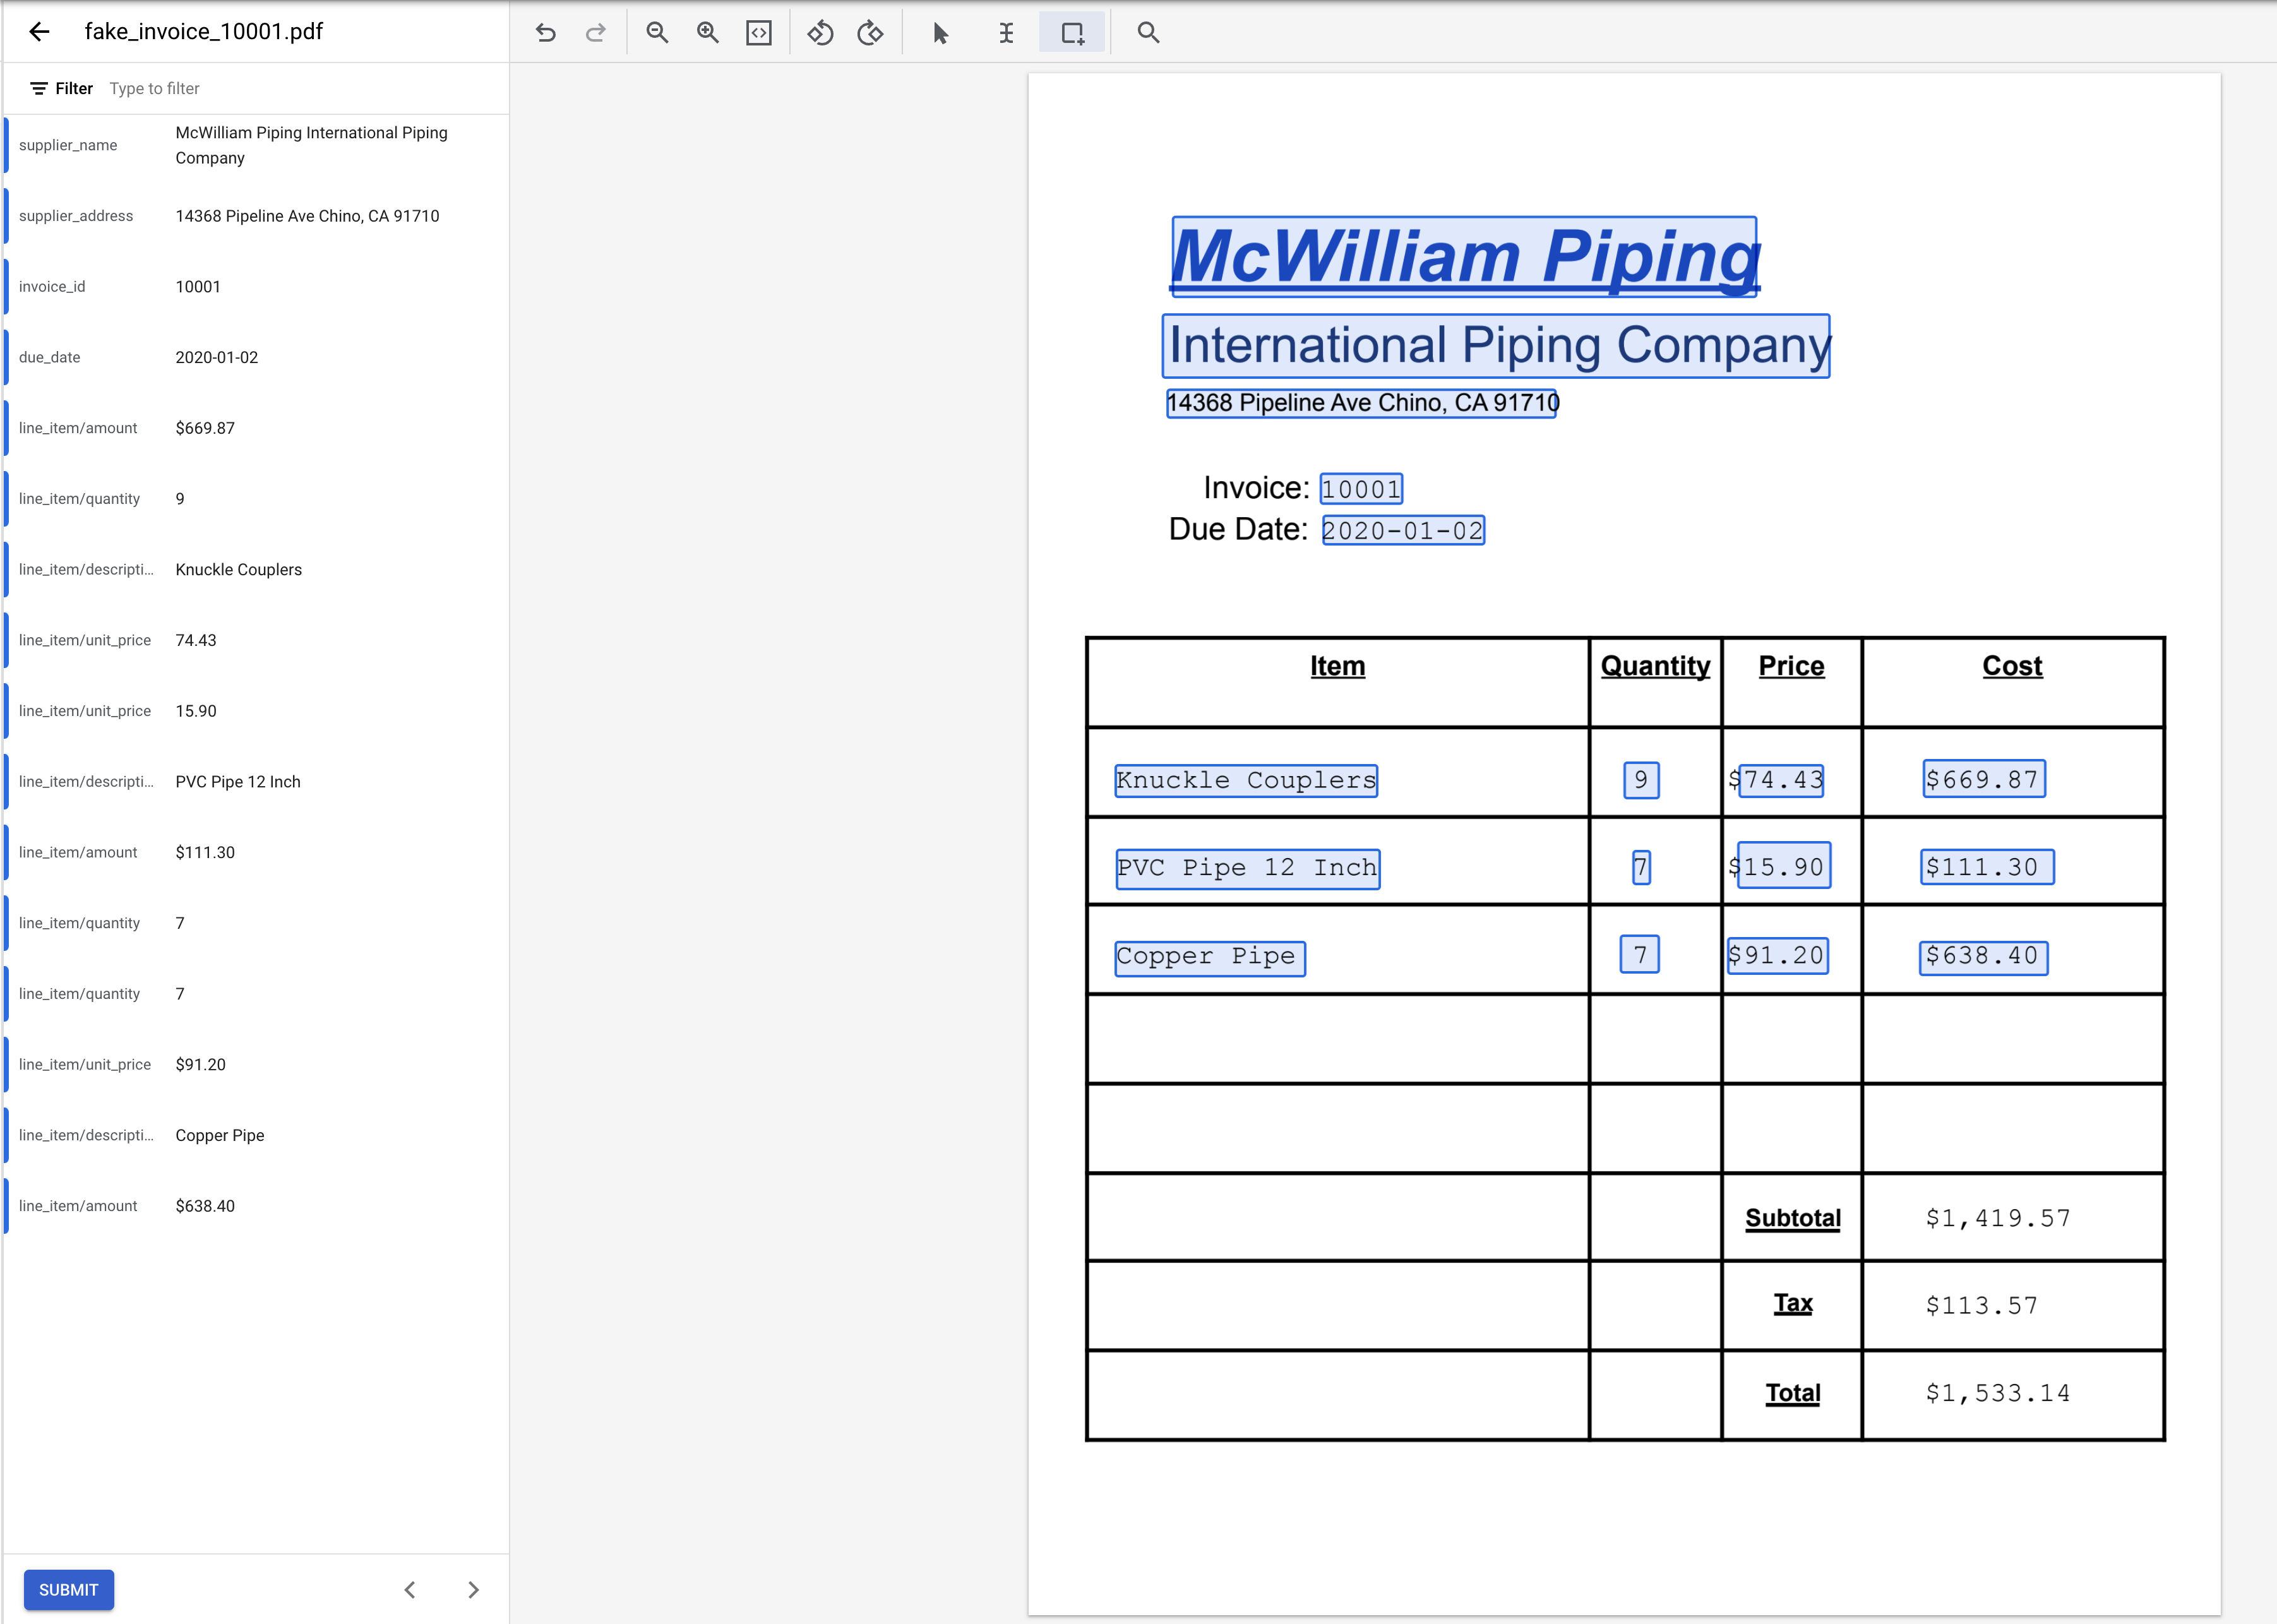
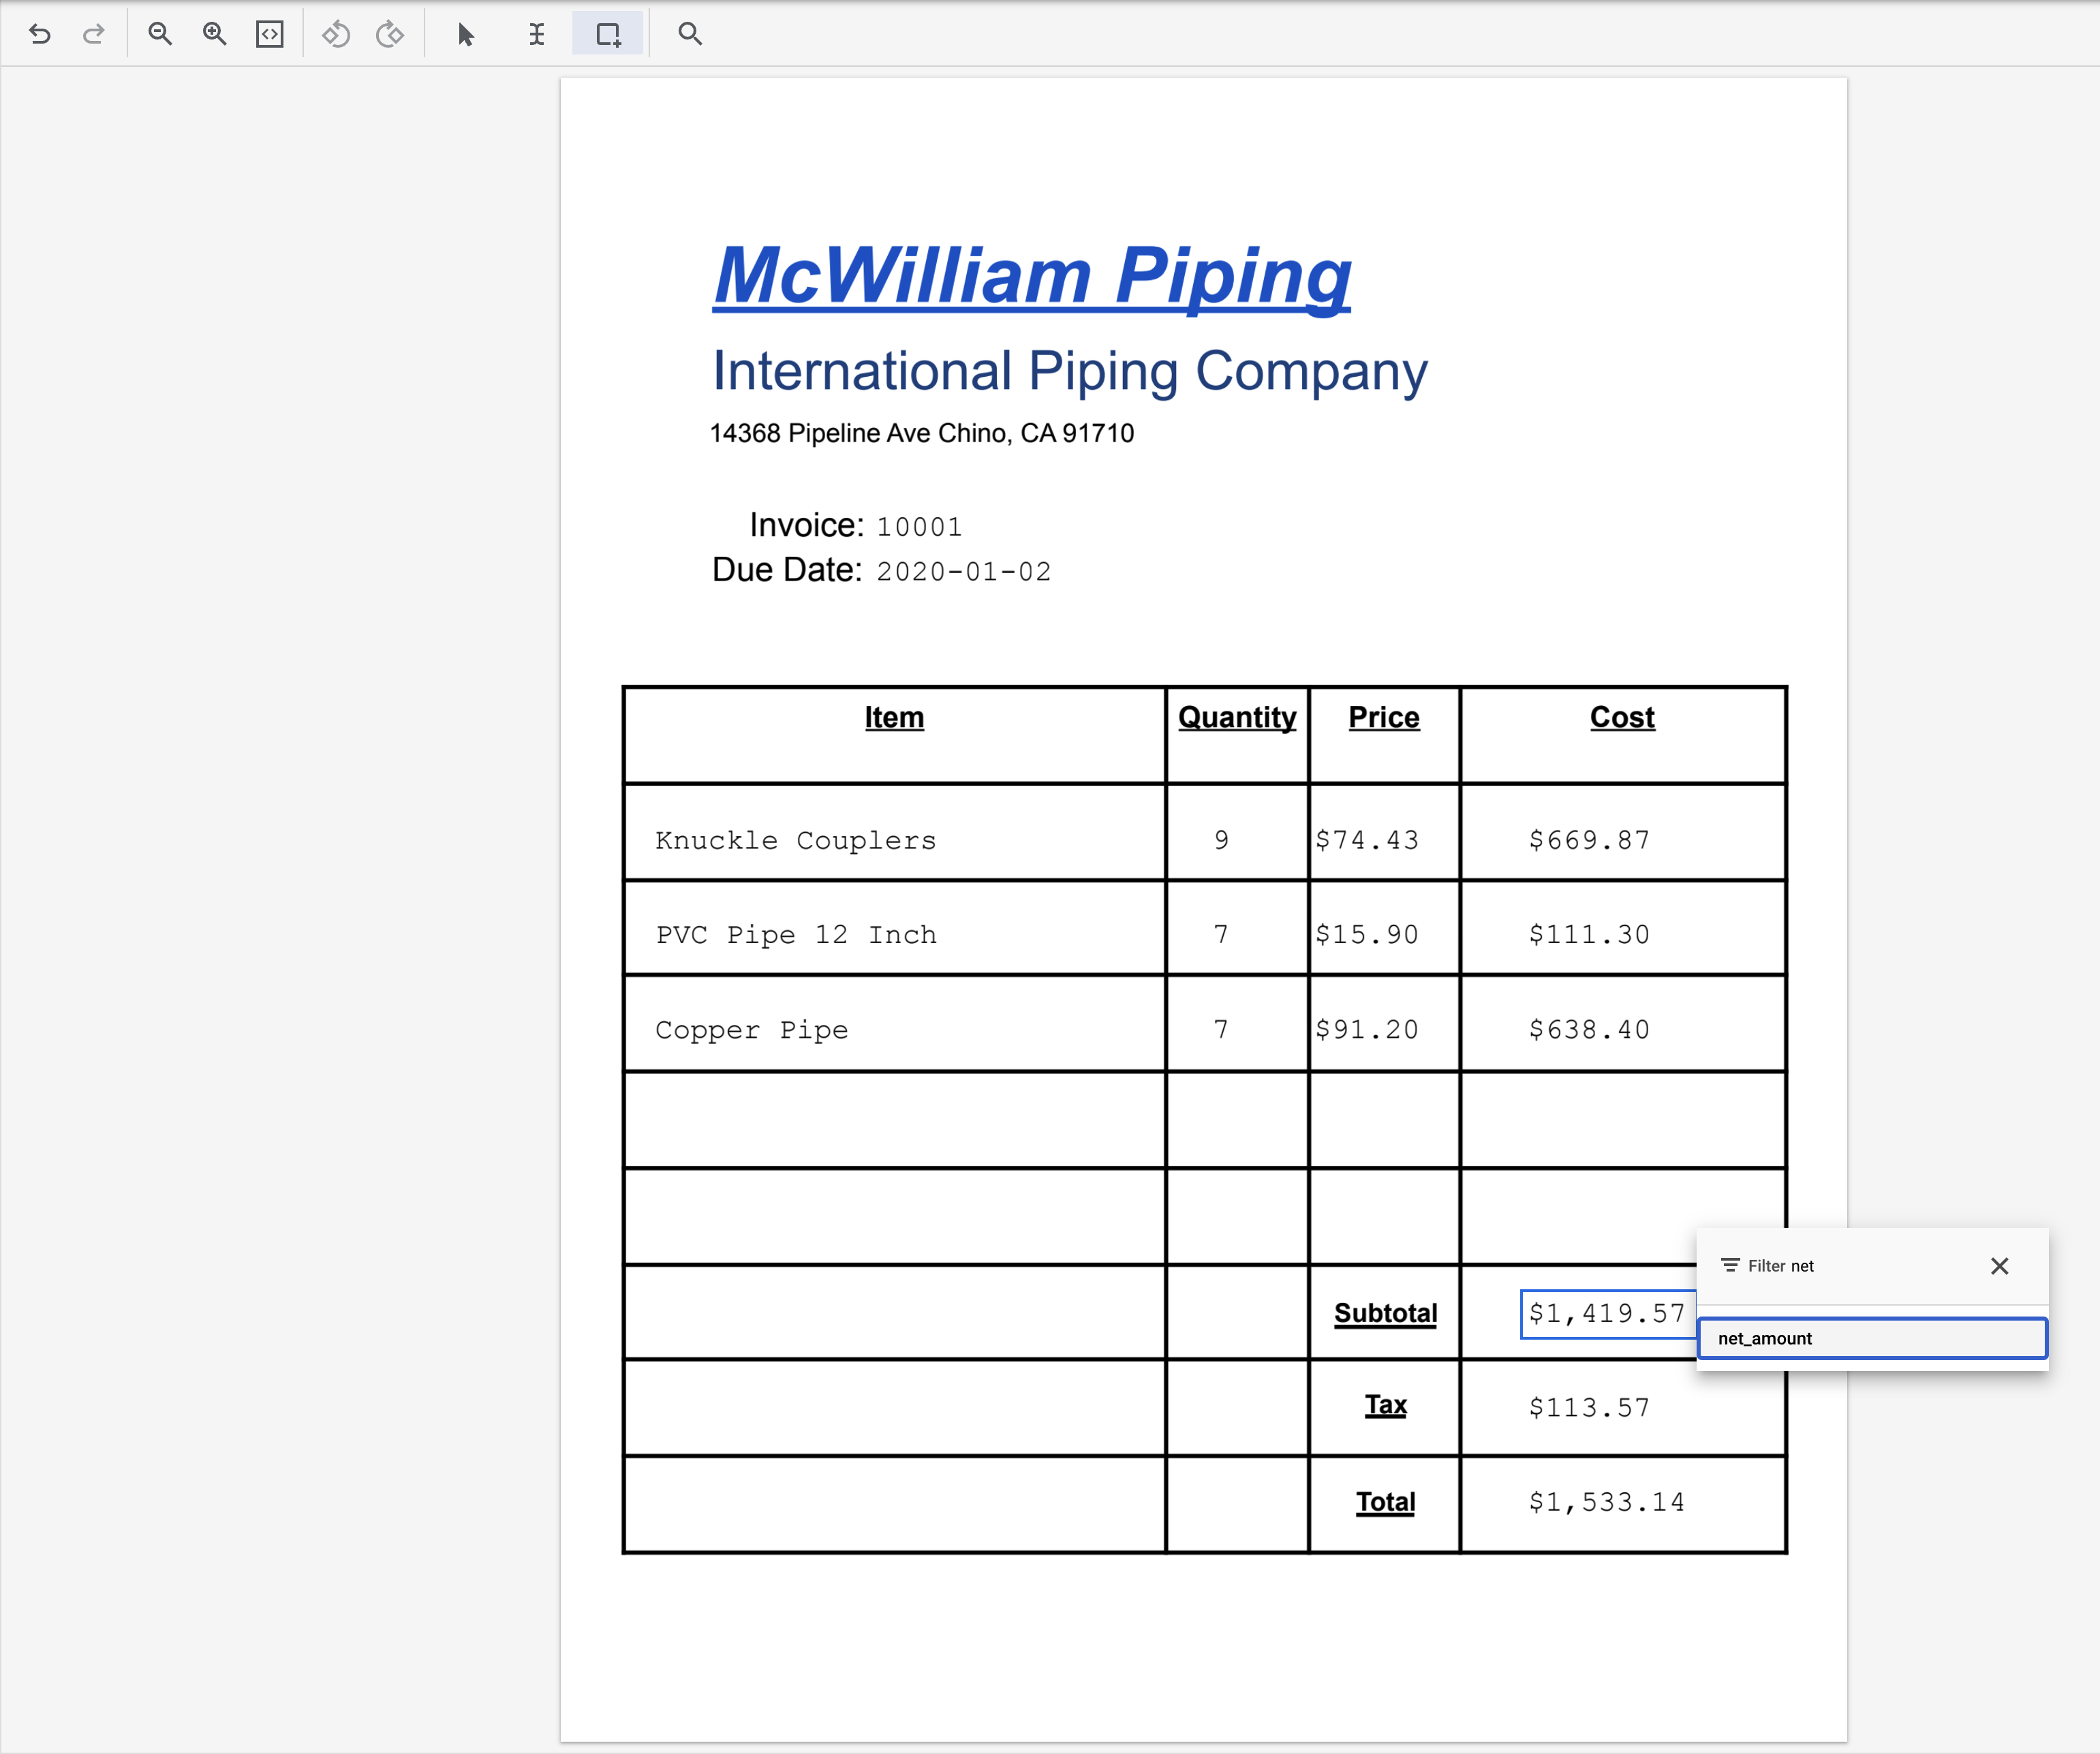
- Highlight the text "1,419.57" (next to Subtotal) and assign the label
net_amount.
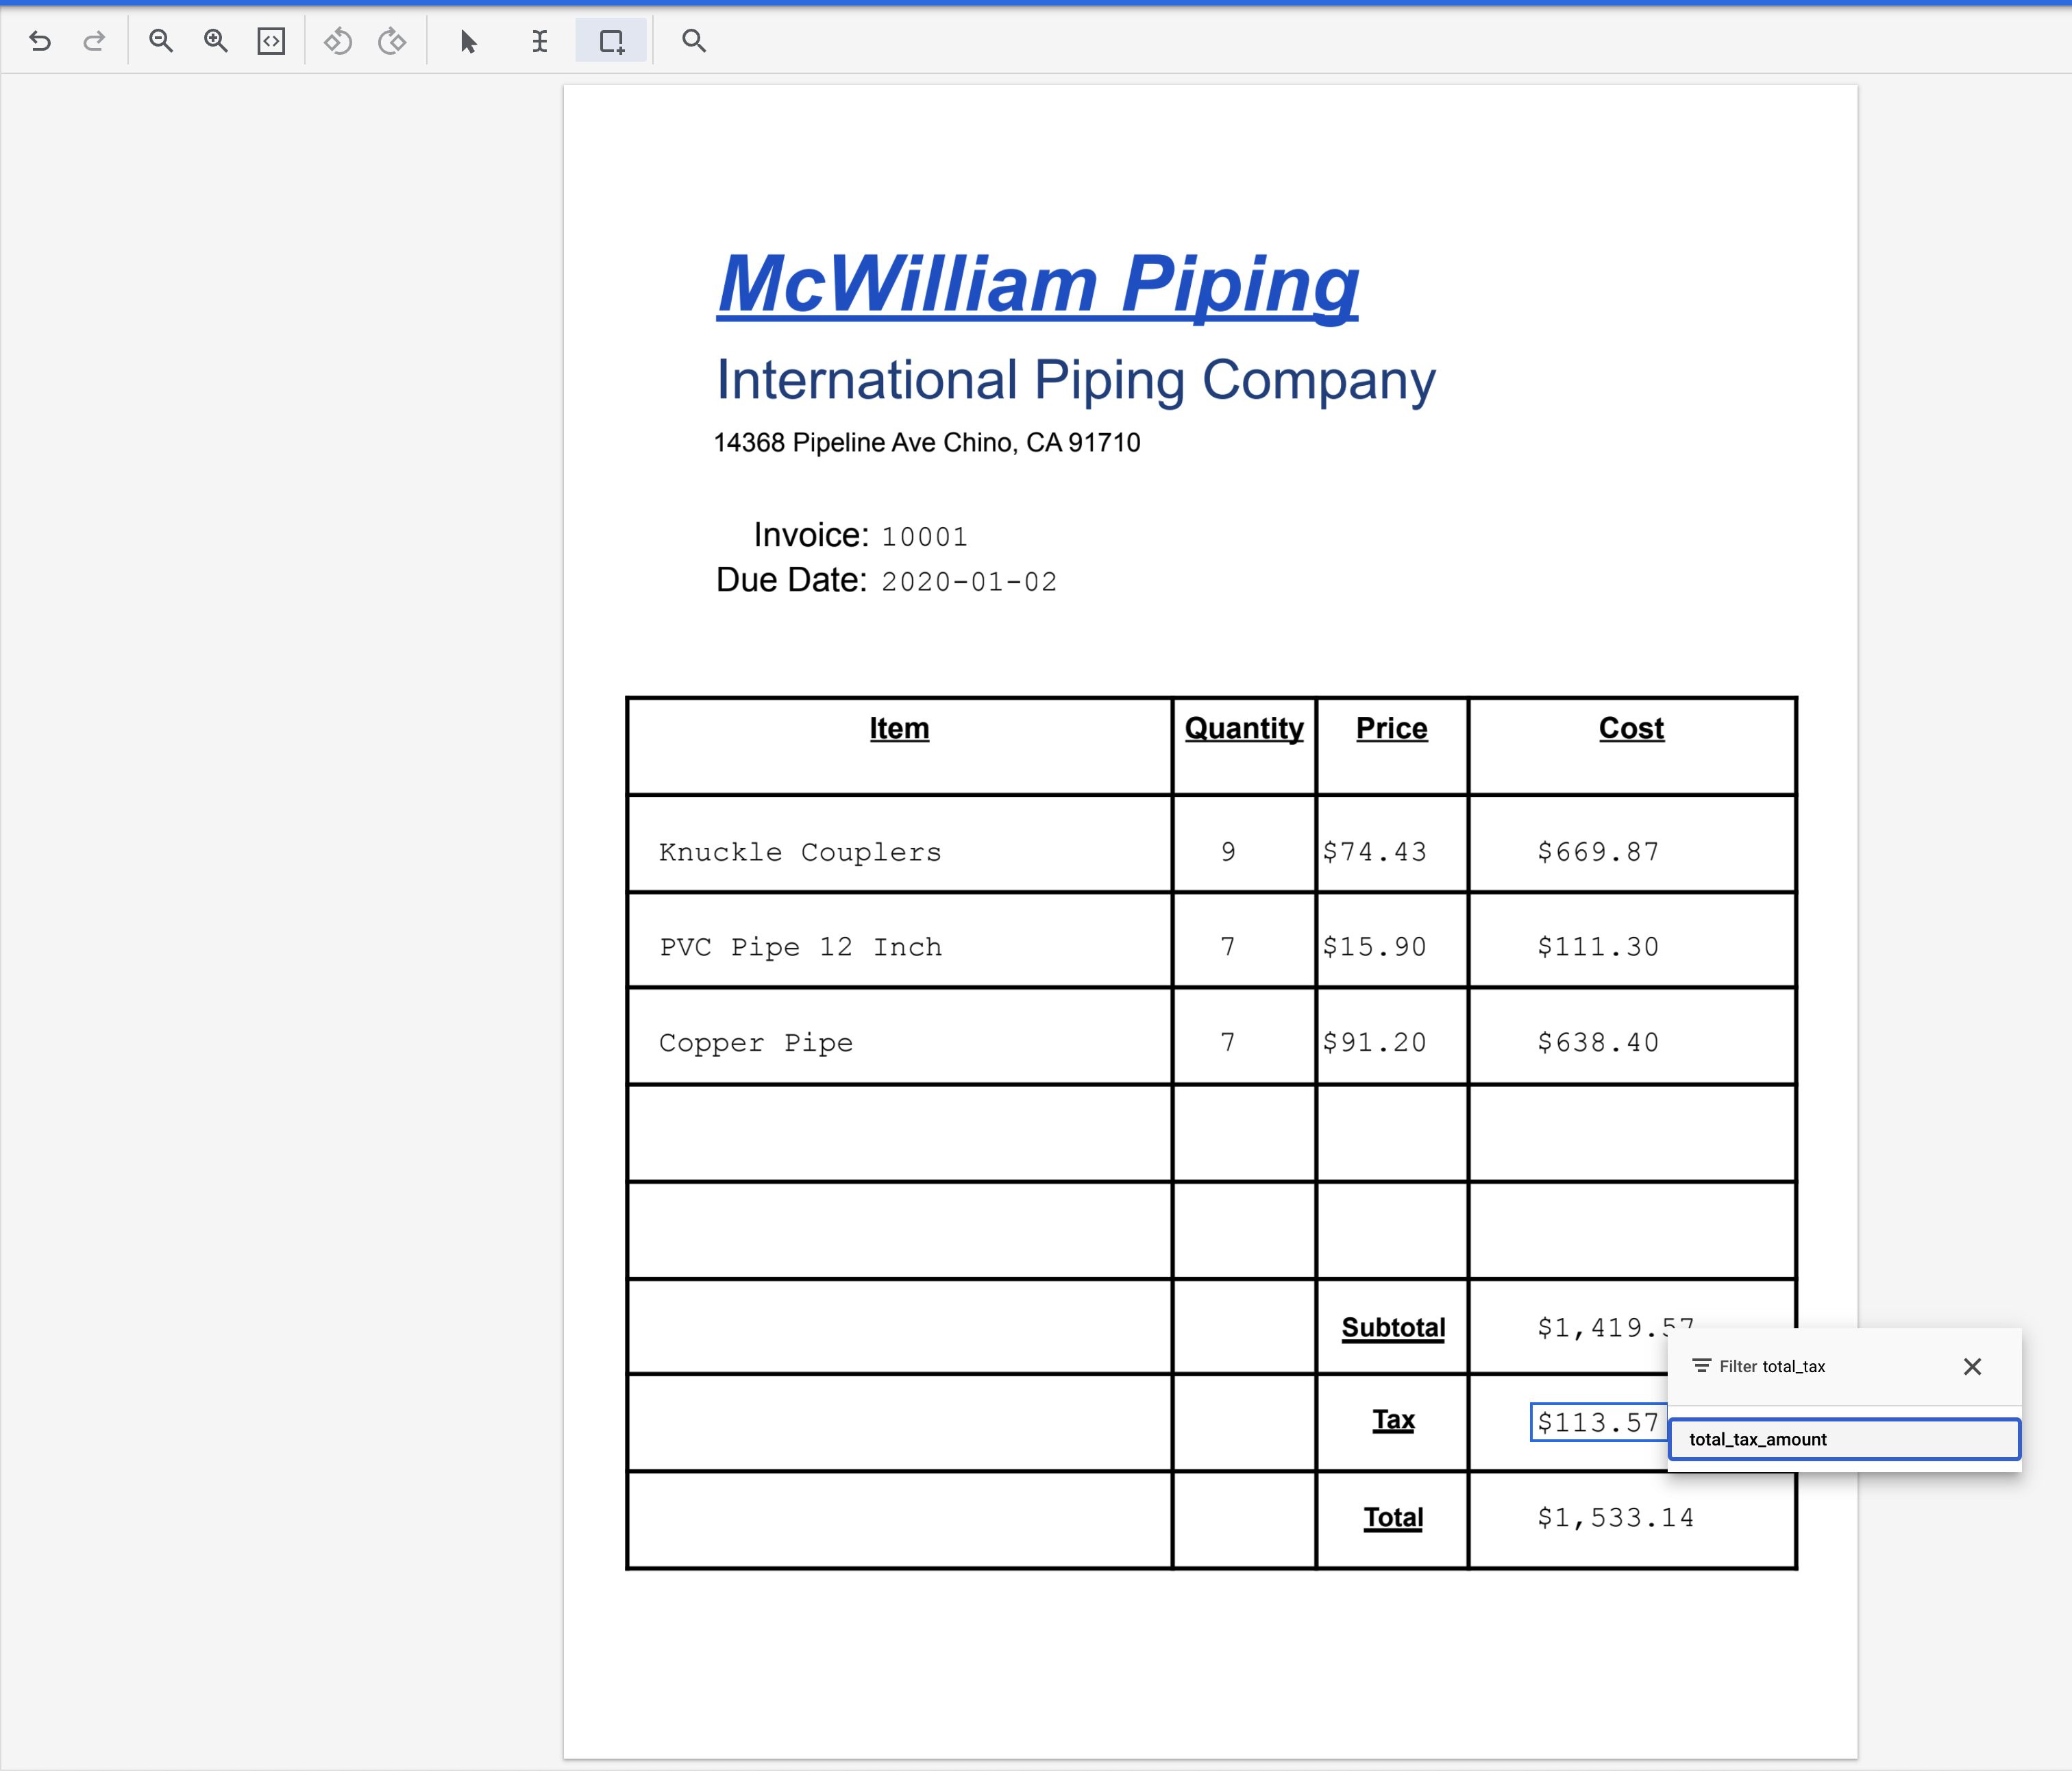
- Highlight the text "113.57" (next to Tax) and assign the label
total_tax_amount.
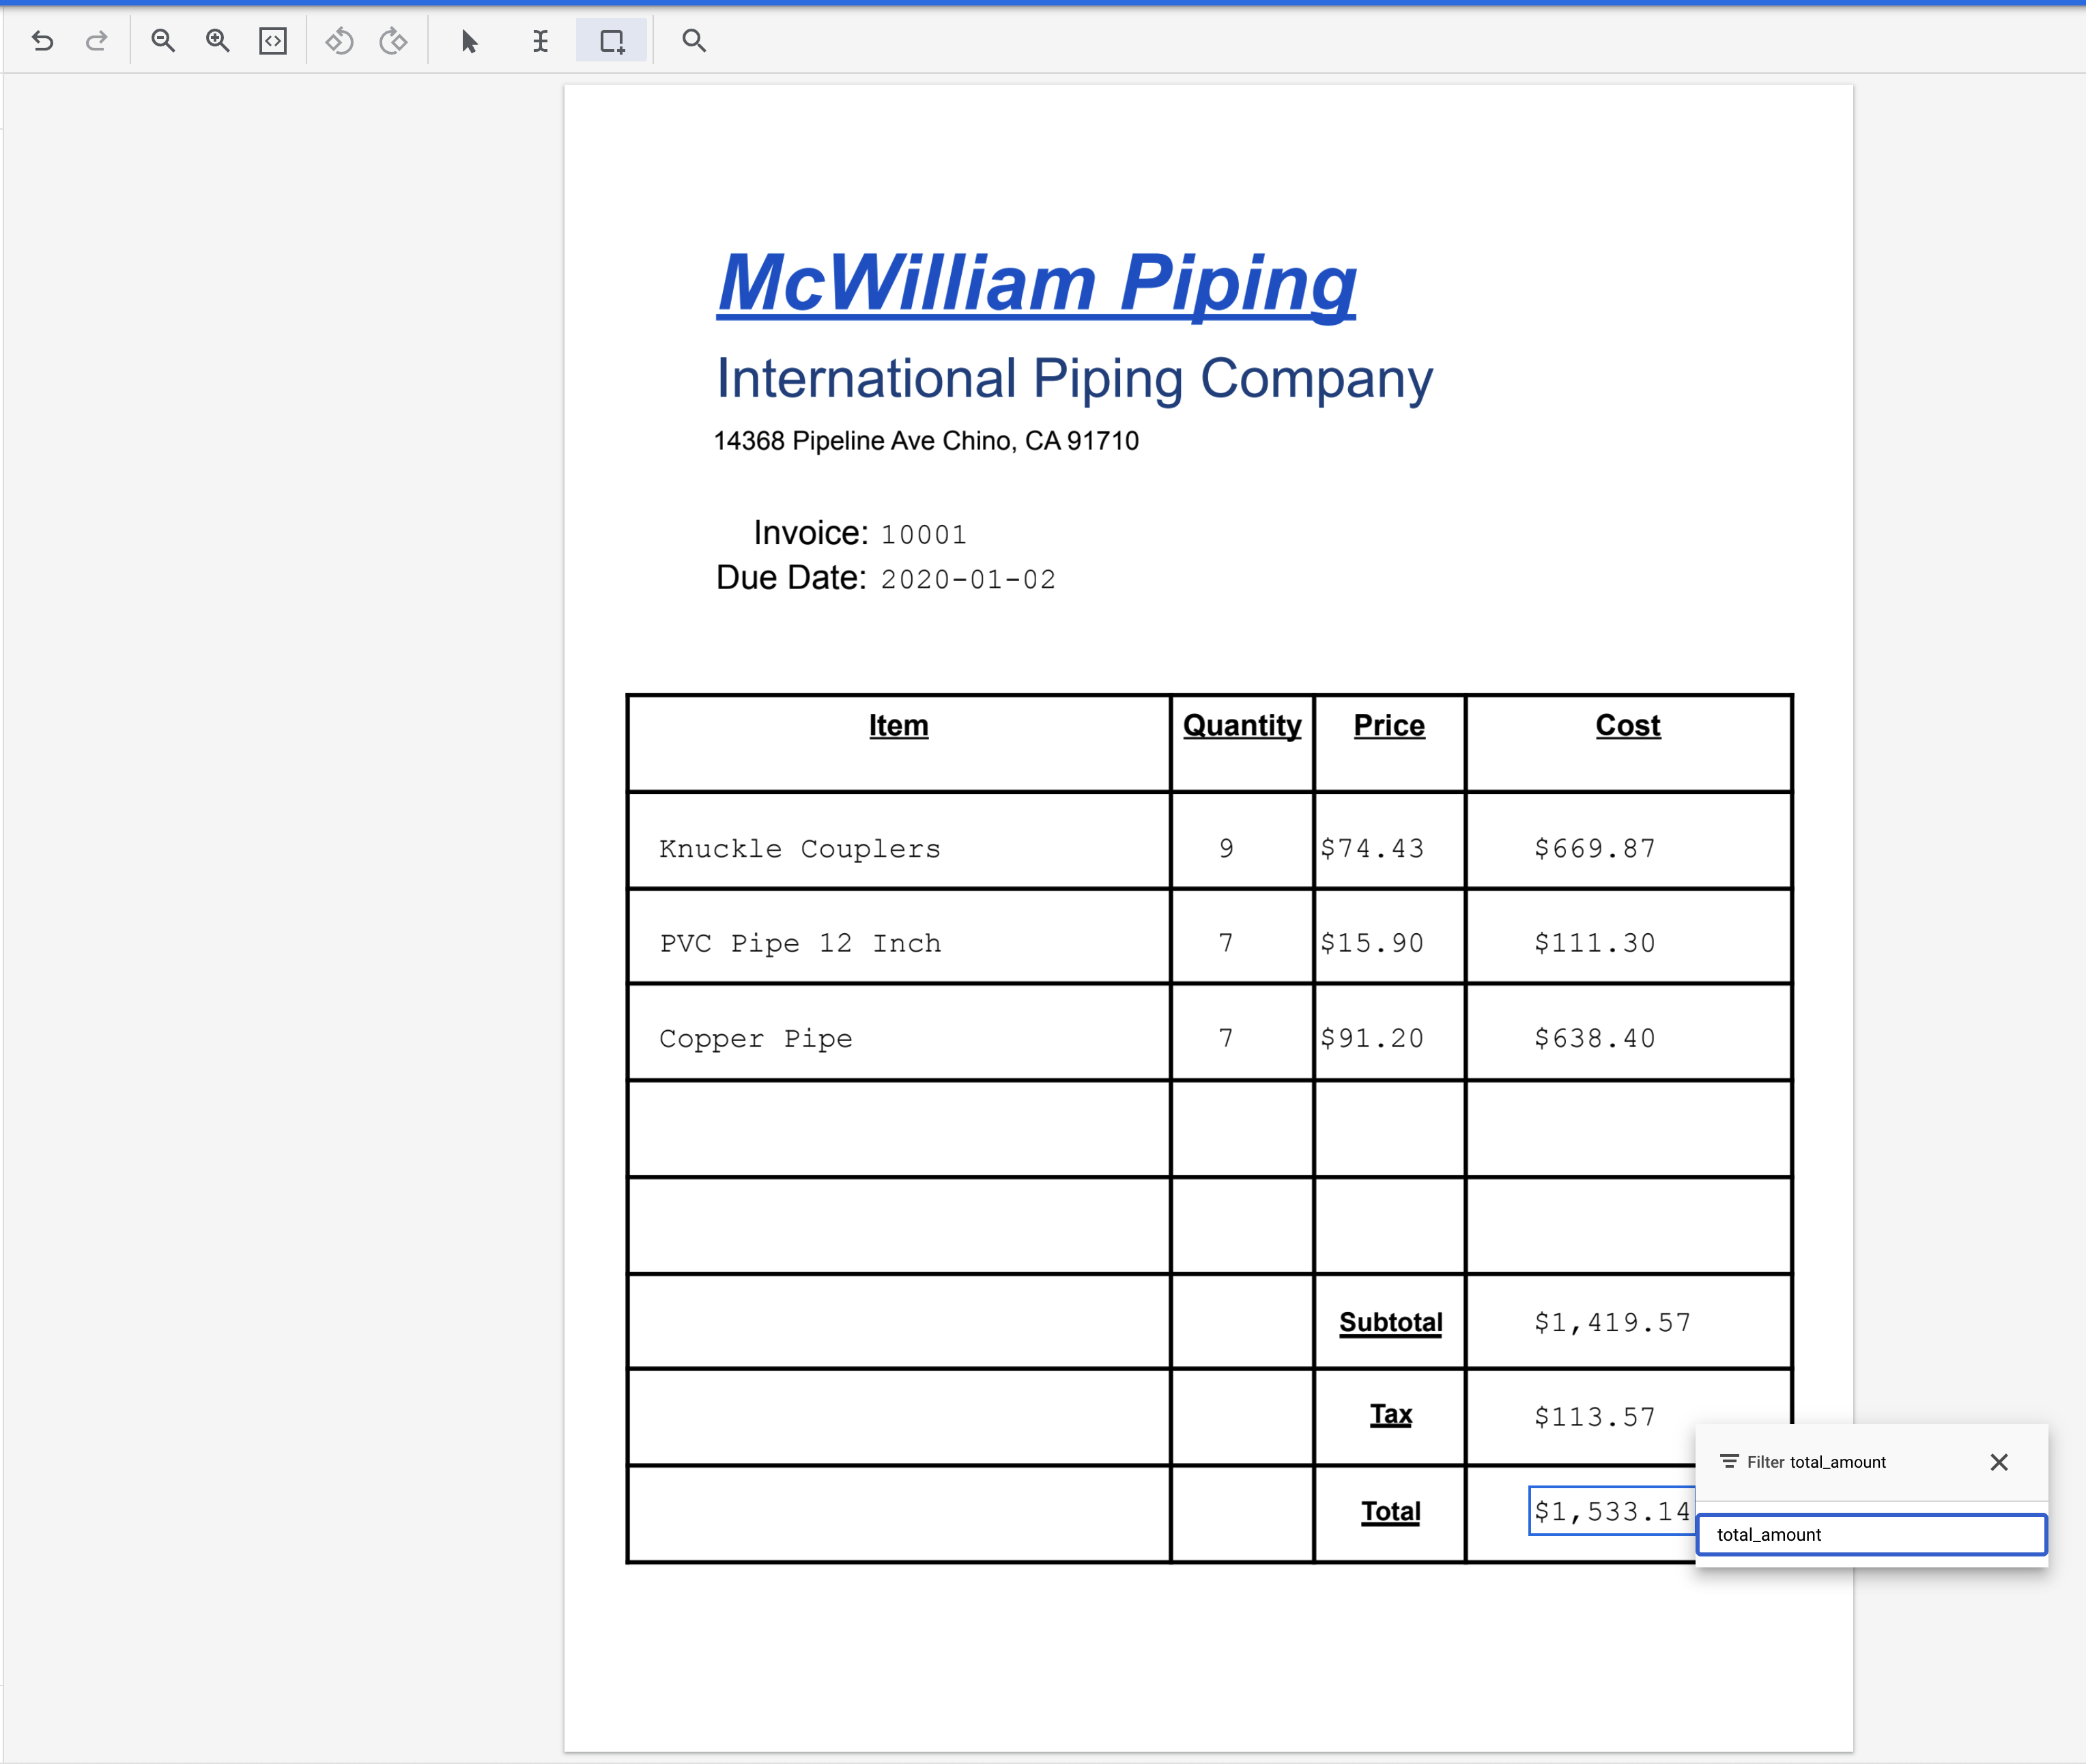
- Highlight the text "1,533.14" (next to Total) and assign the label
total_amount.
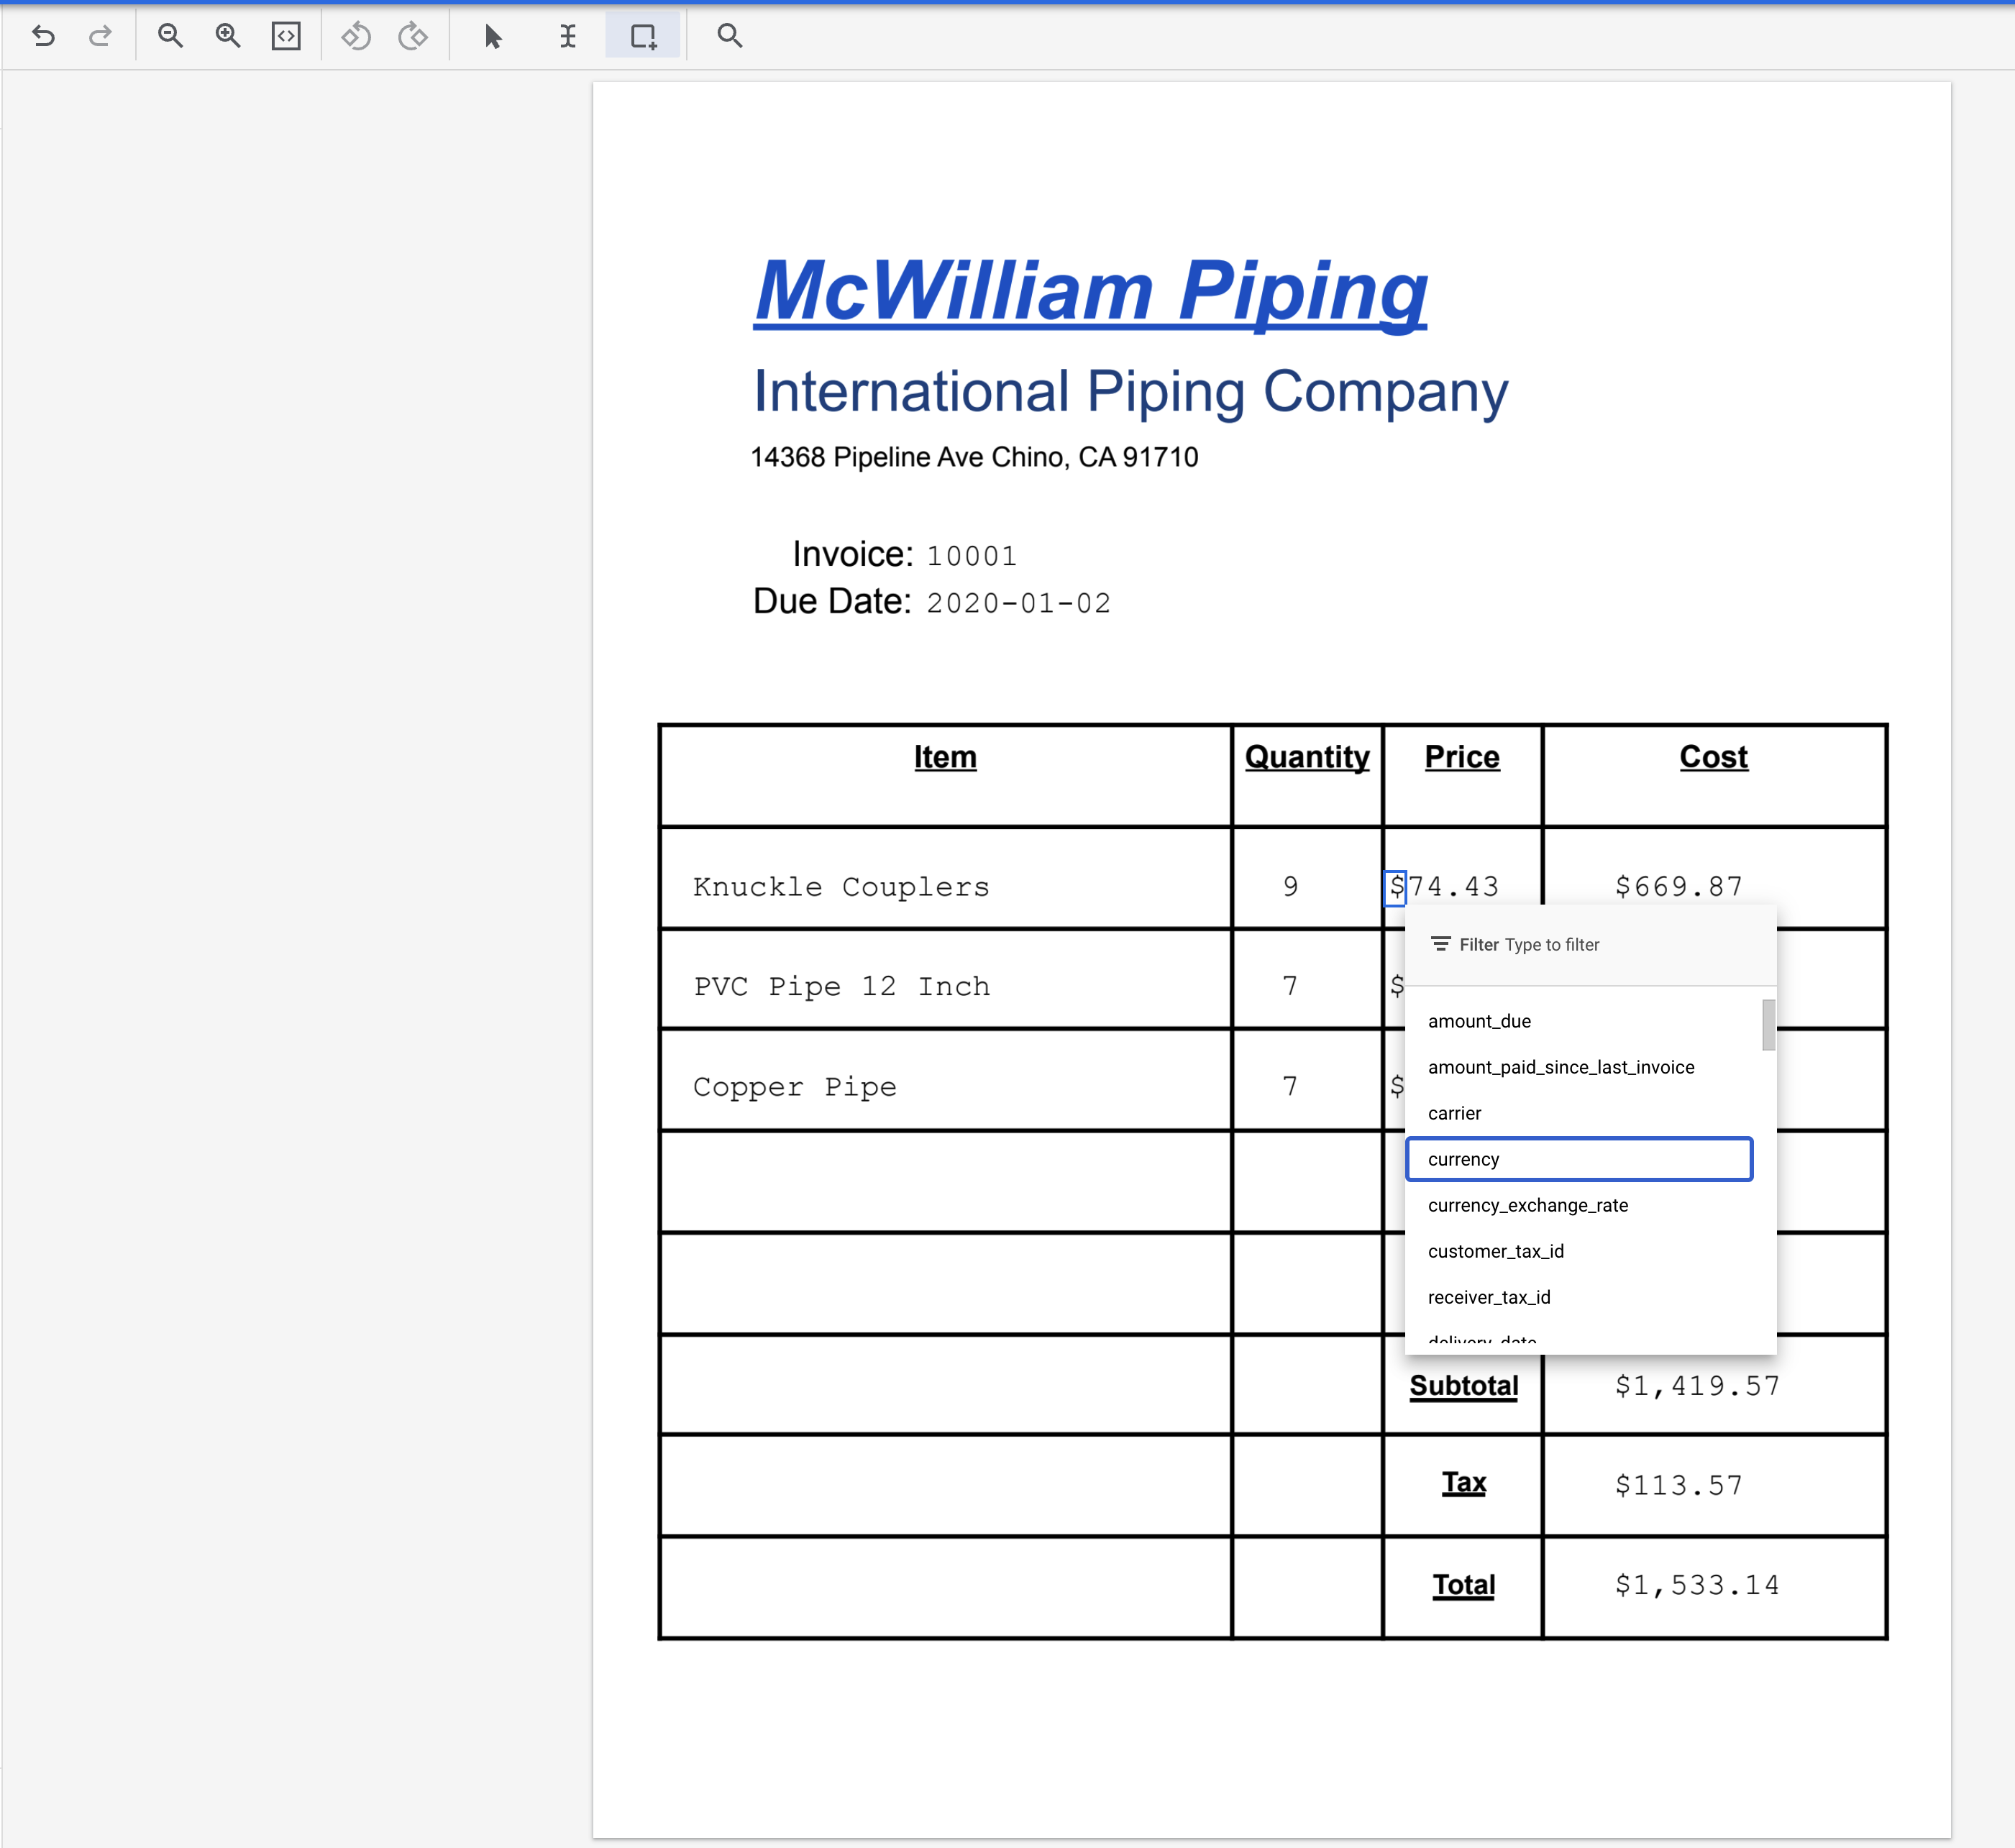
- Highlight one of the "$" characters and assign the label
currency.
- The labeled document should look like this when complete. Note, you can make adjustments to these labels by clicking on the bounding box in the document or the label name/value on the left side menu. Click Save when you are finished labeling.
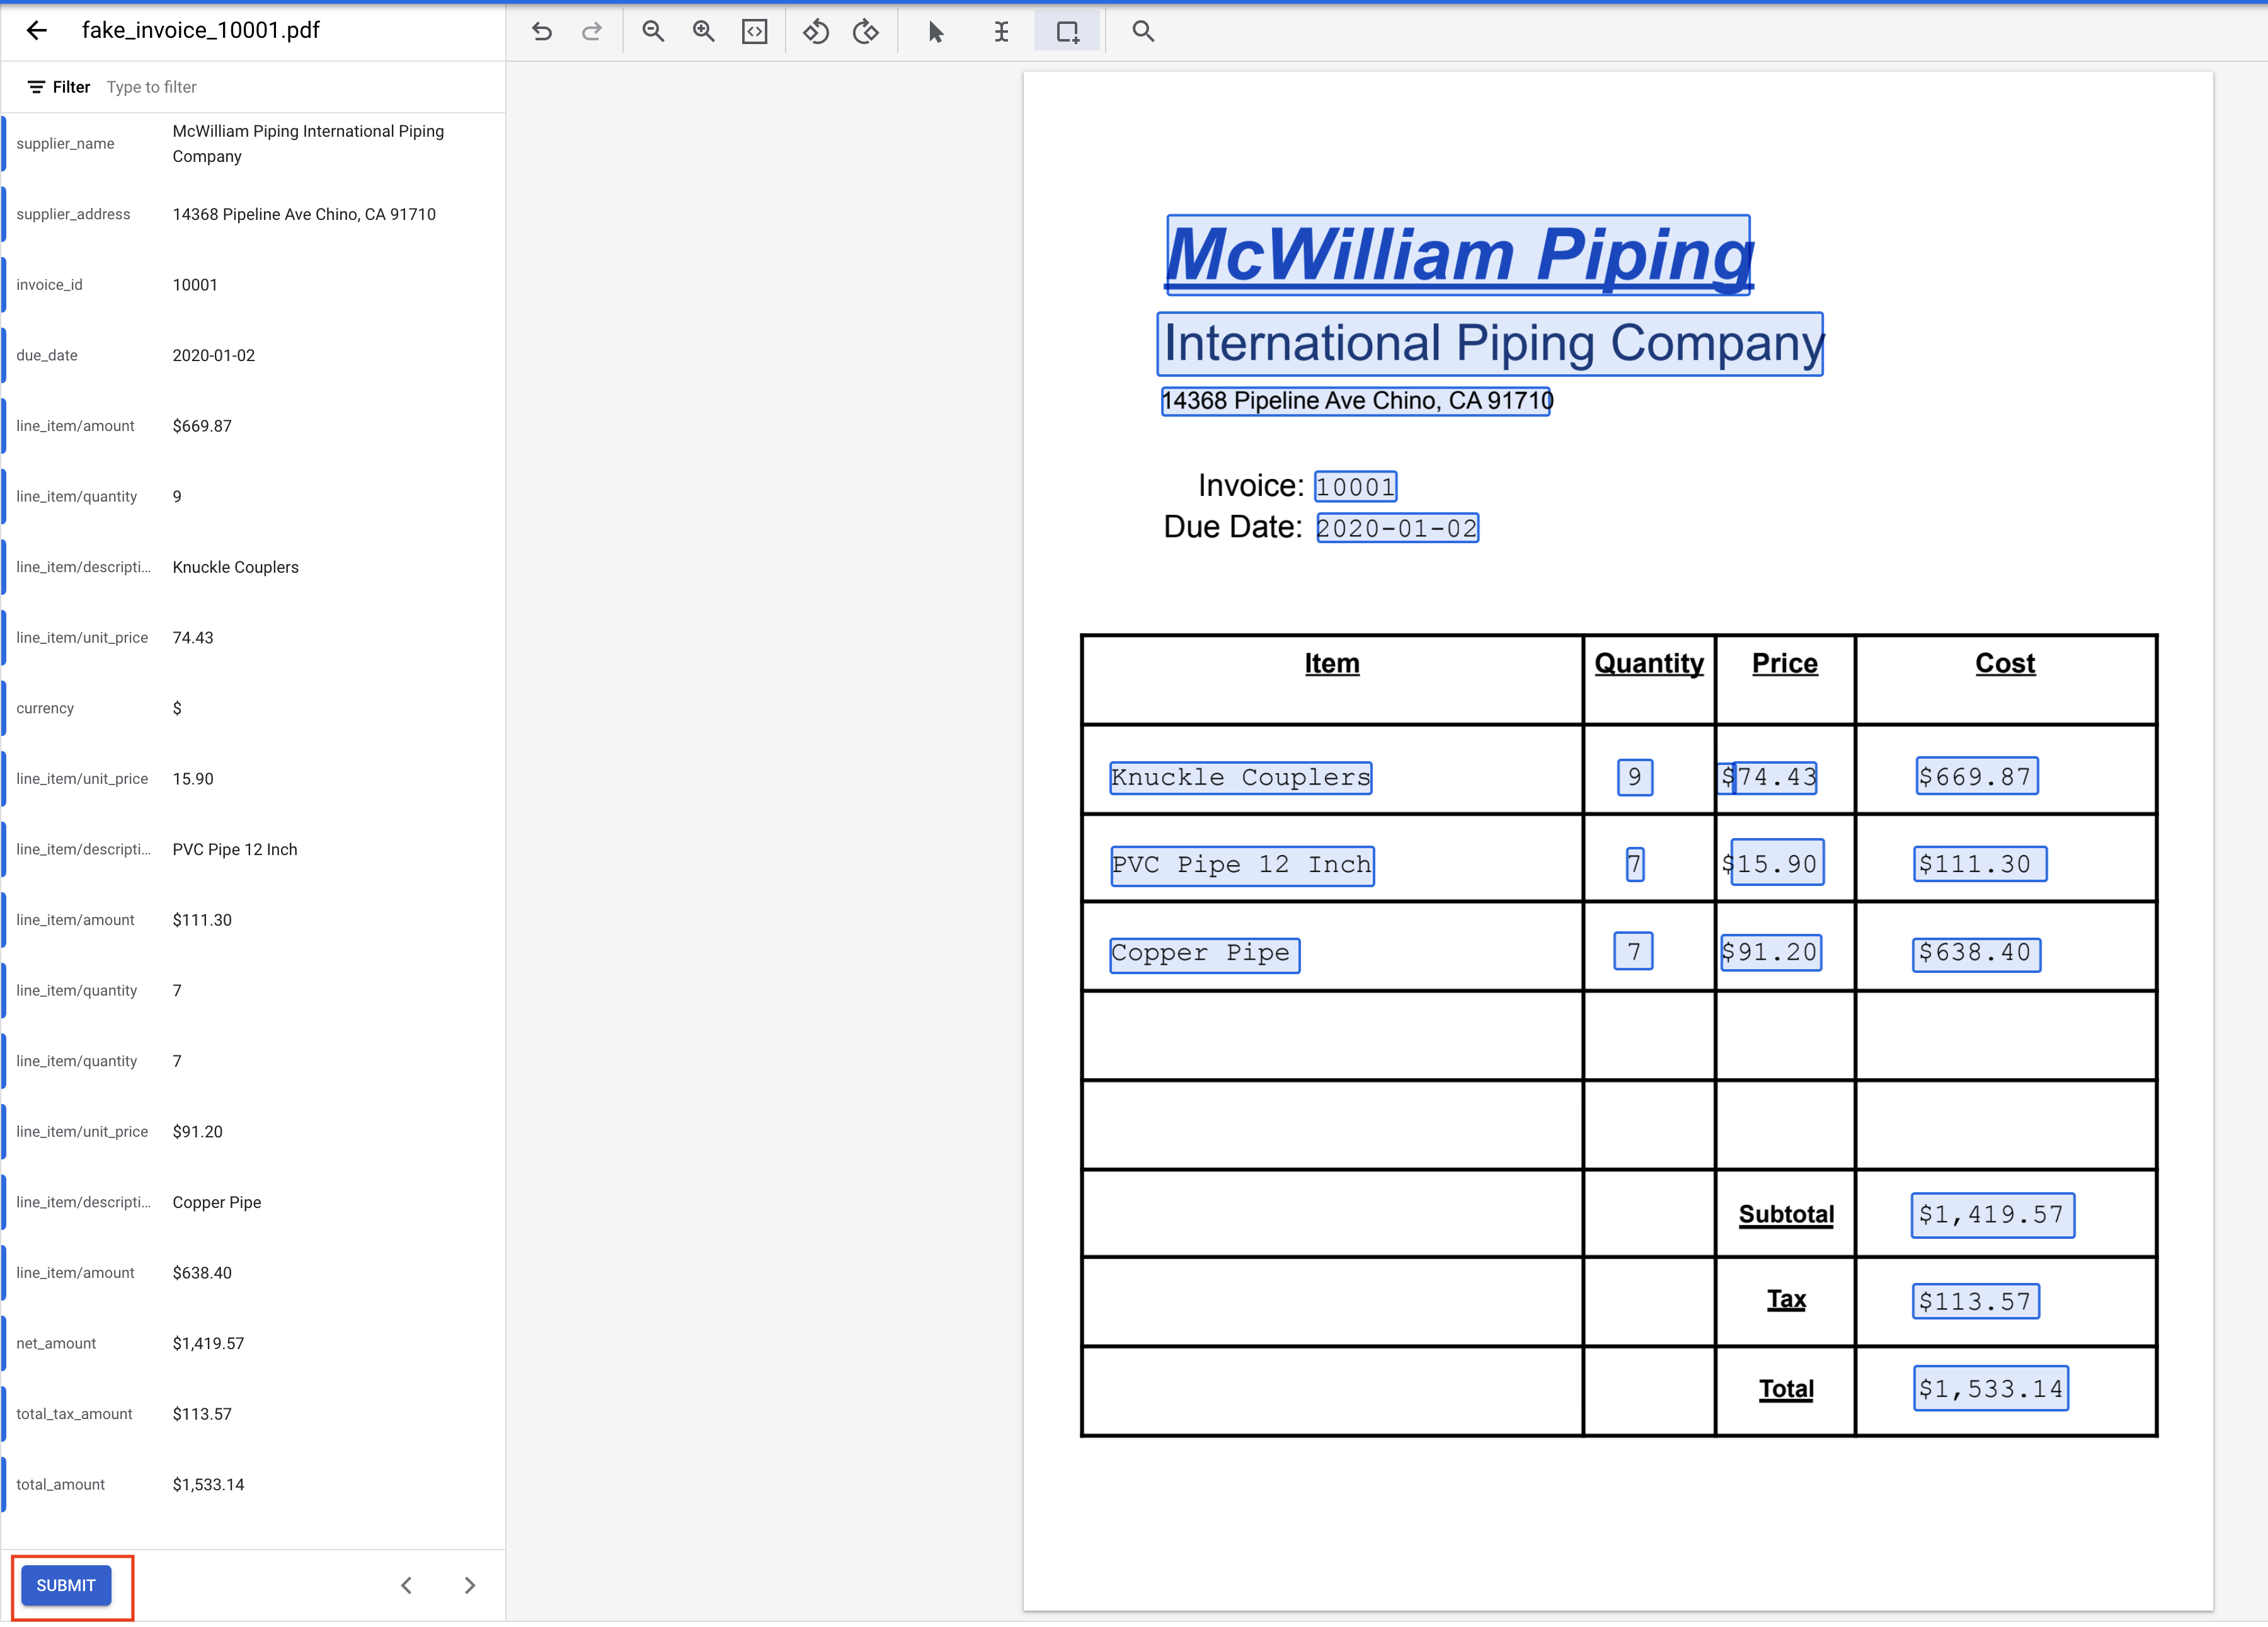
- Here is the full list of labels and values
Label Name | Text |
| McWilliam Piping International Piping Company |
| 14368 Pipeline Ave Chino, CA 91710 |
| 10001 |
| 2020-01-02 |
| Knuckle Couplers |
| 9 |
| 74.43 |
| 669.87 |
| PVC Pipe 12 Inch |
| 7 |
| 15.90 |
| 111.30 |
| Copper Pipe |
| 7 |
| 91.20 |
| 638.40 |
| 1,419.57 |
| 113.57 |
| 1,533.14 |
| $ |
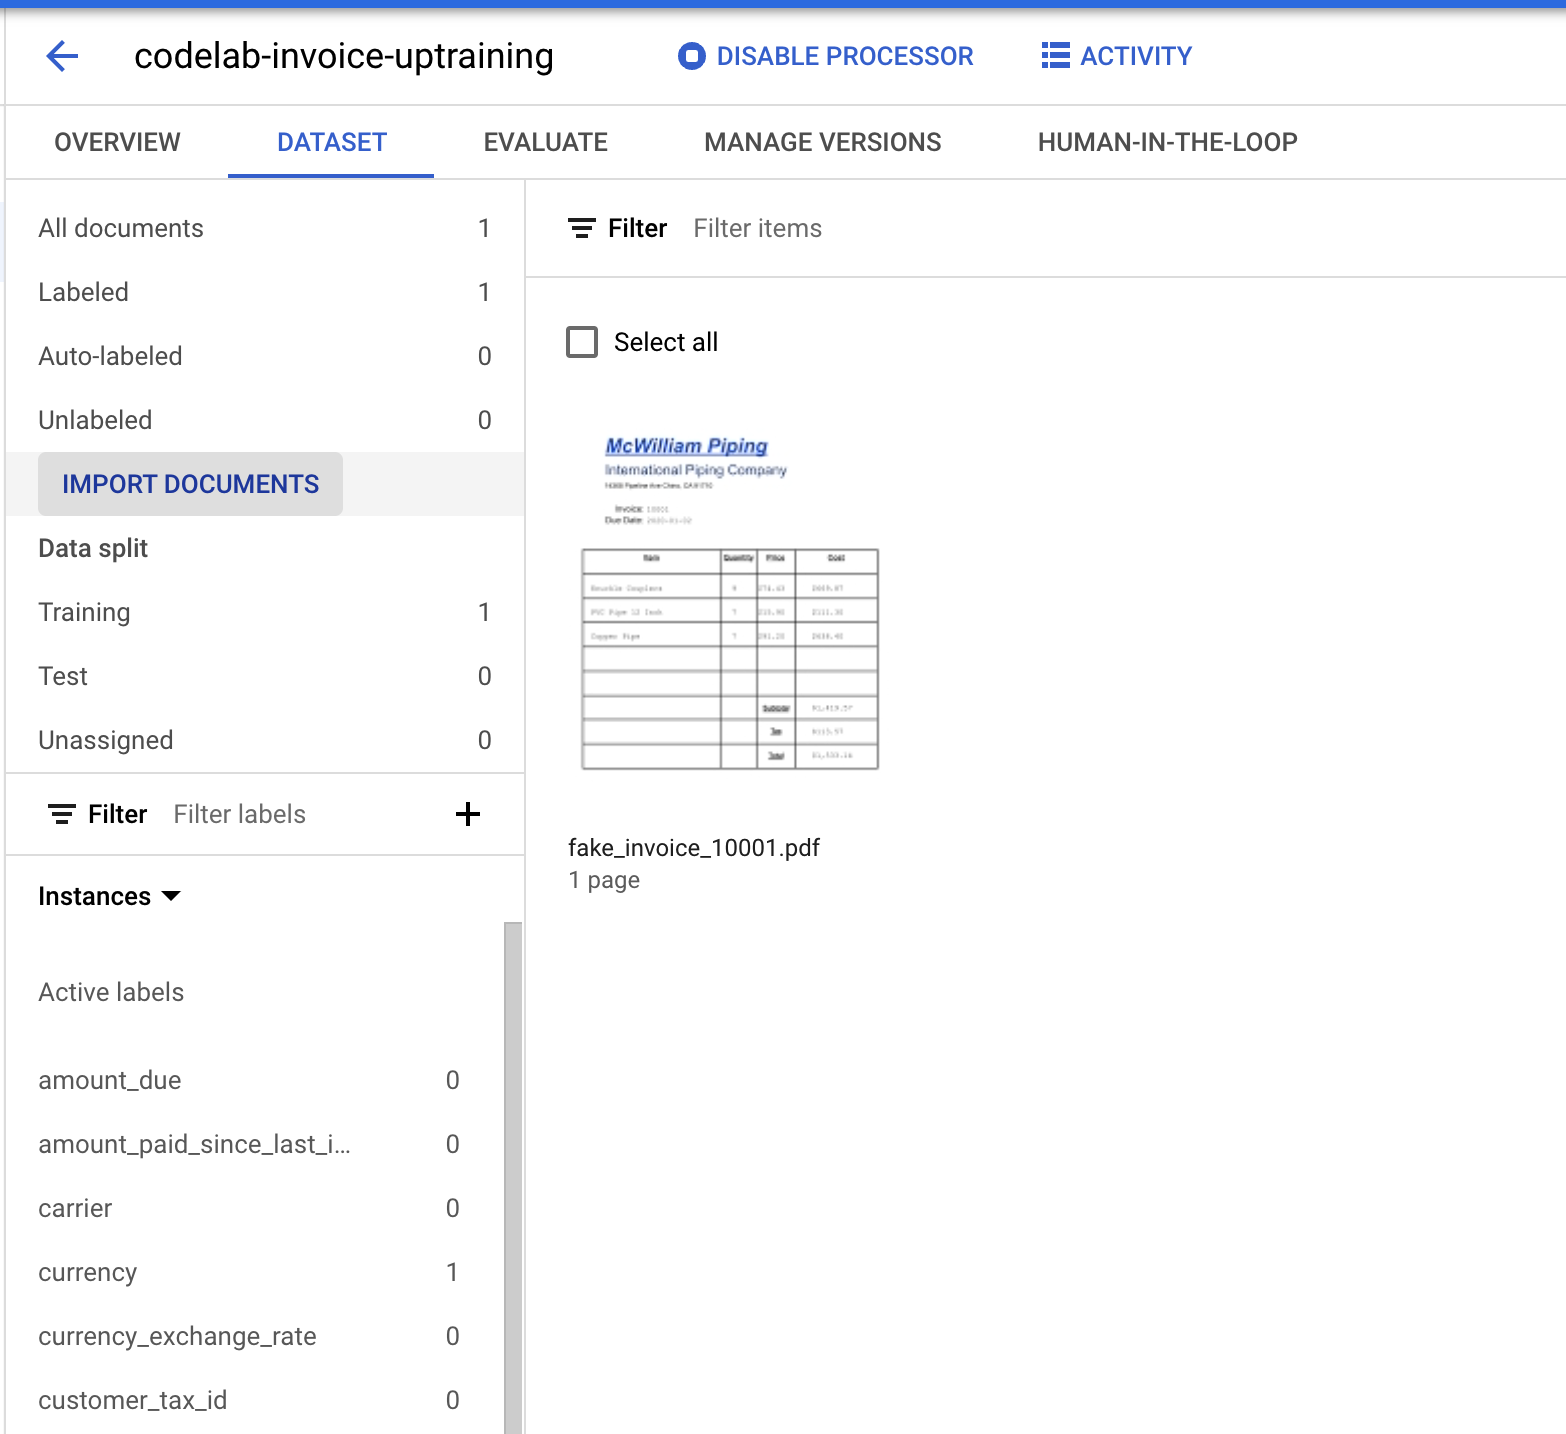
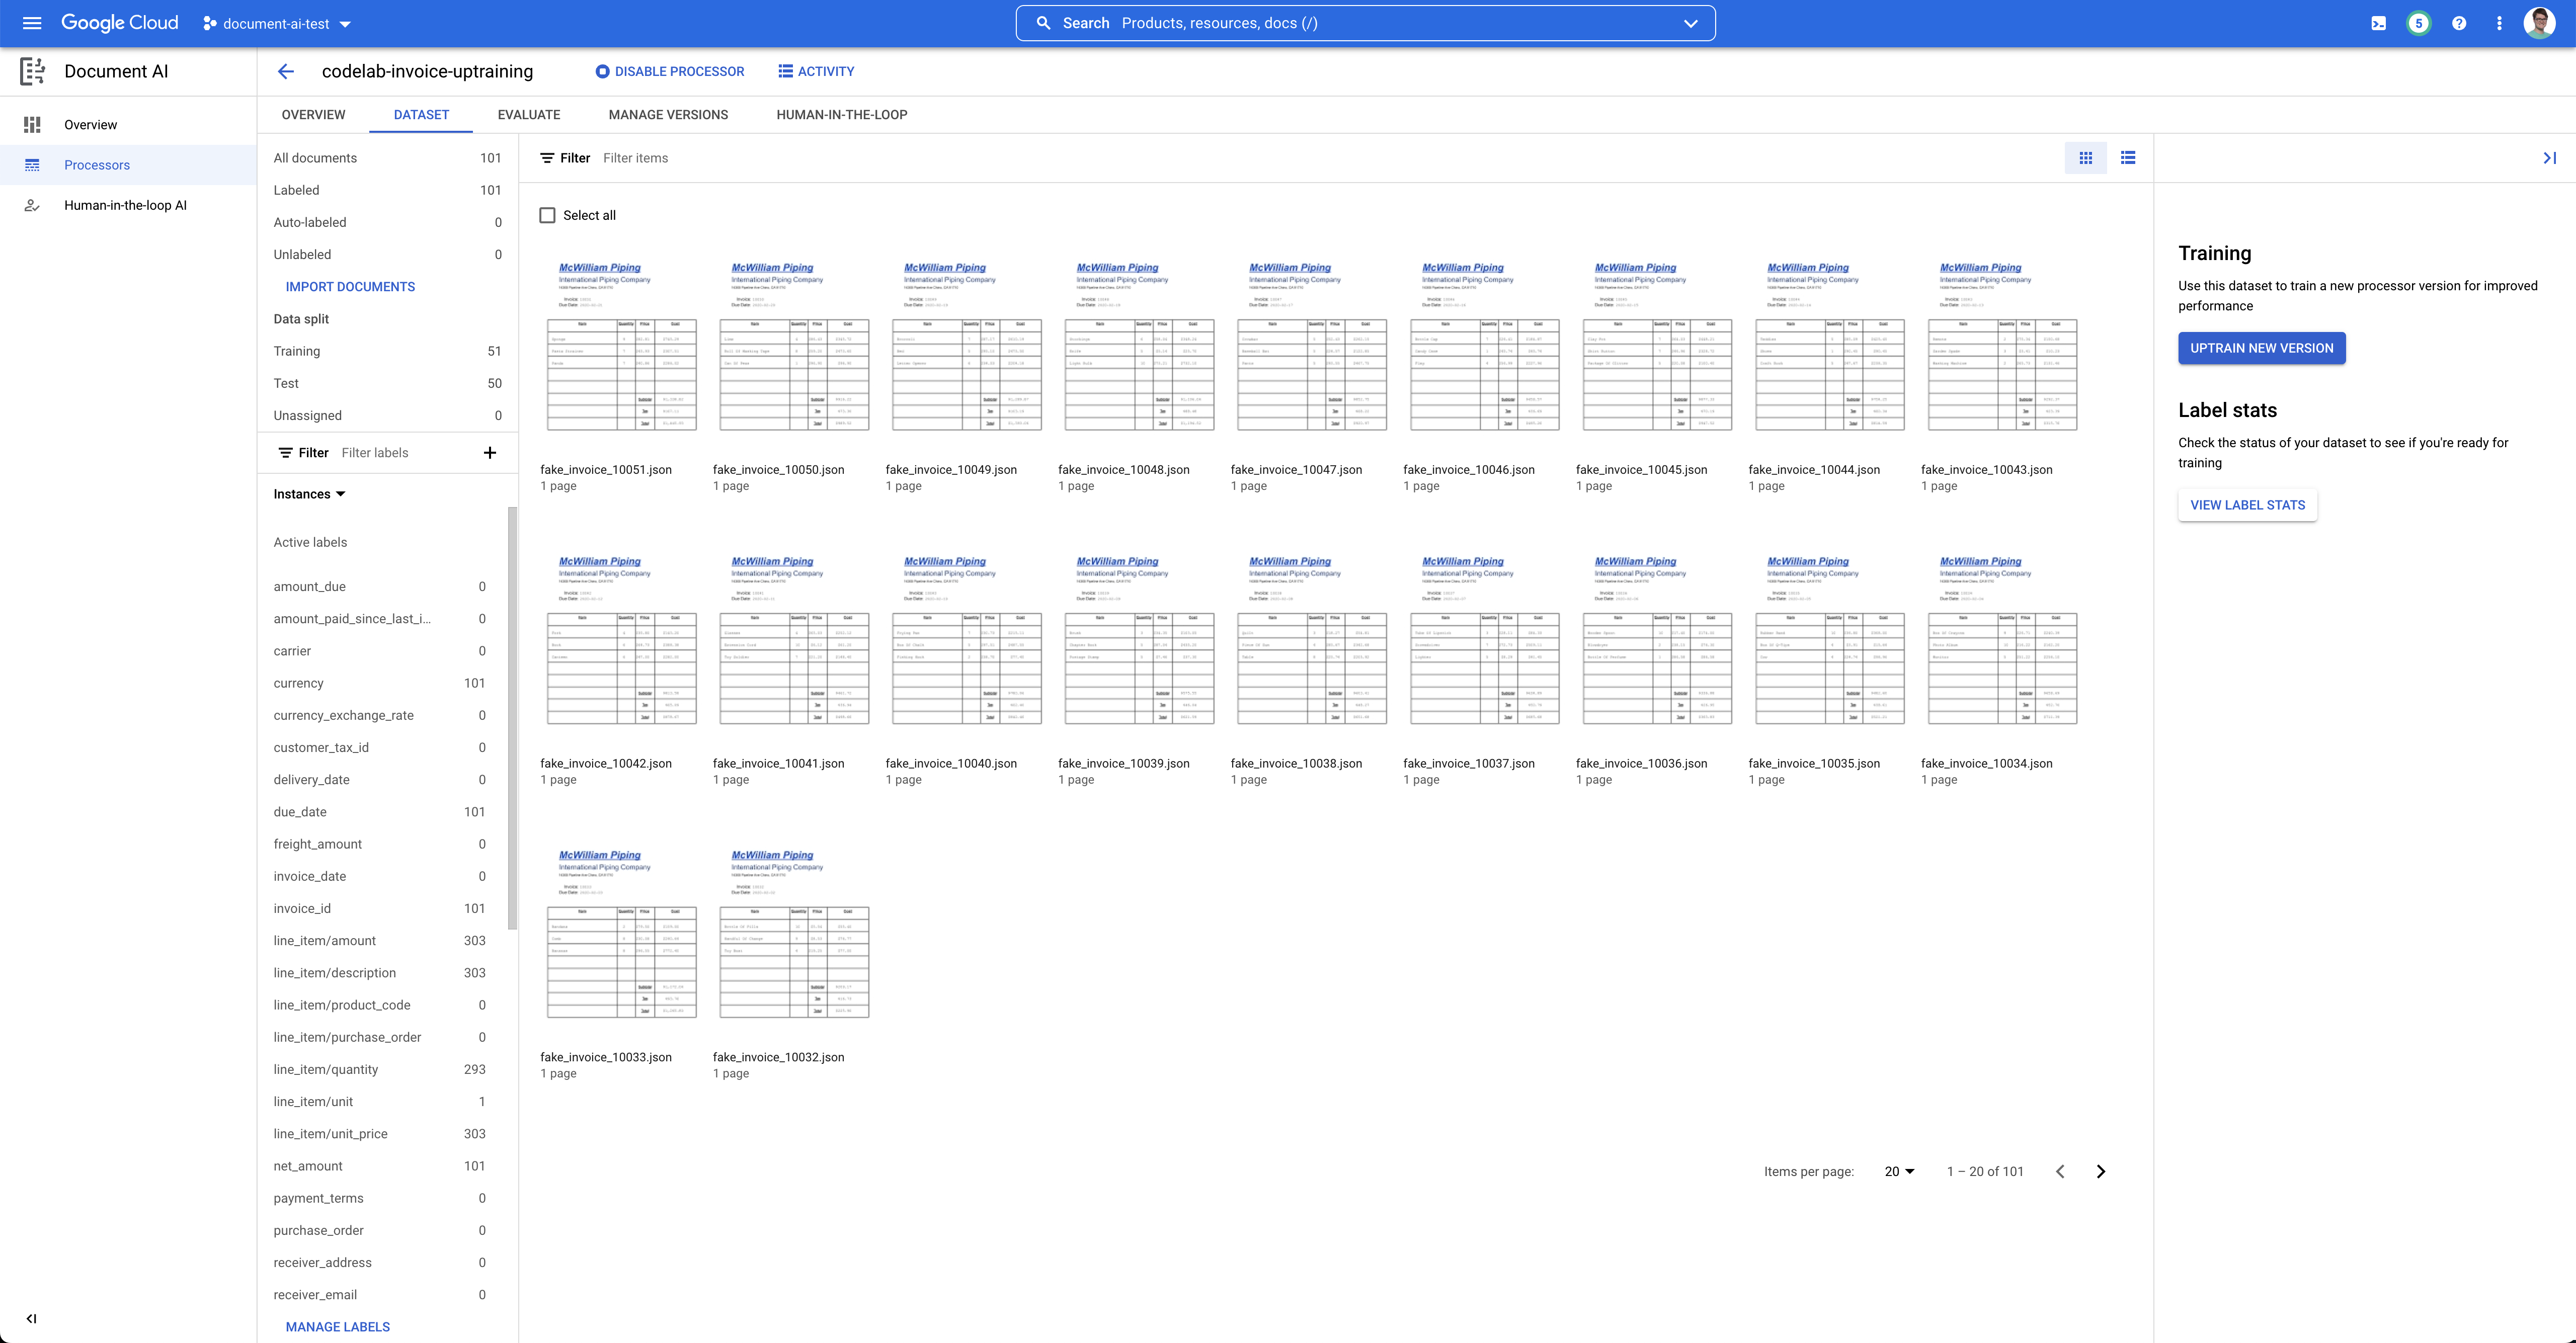
7. Assign Document to Training Set
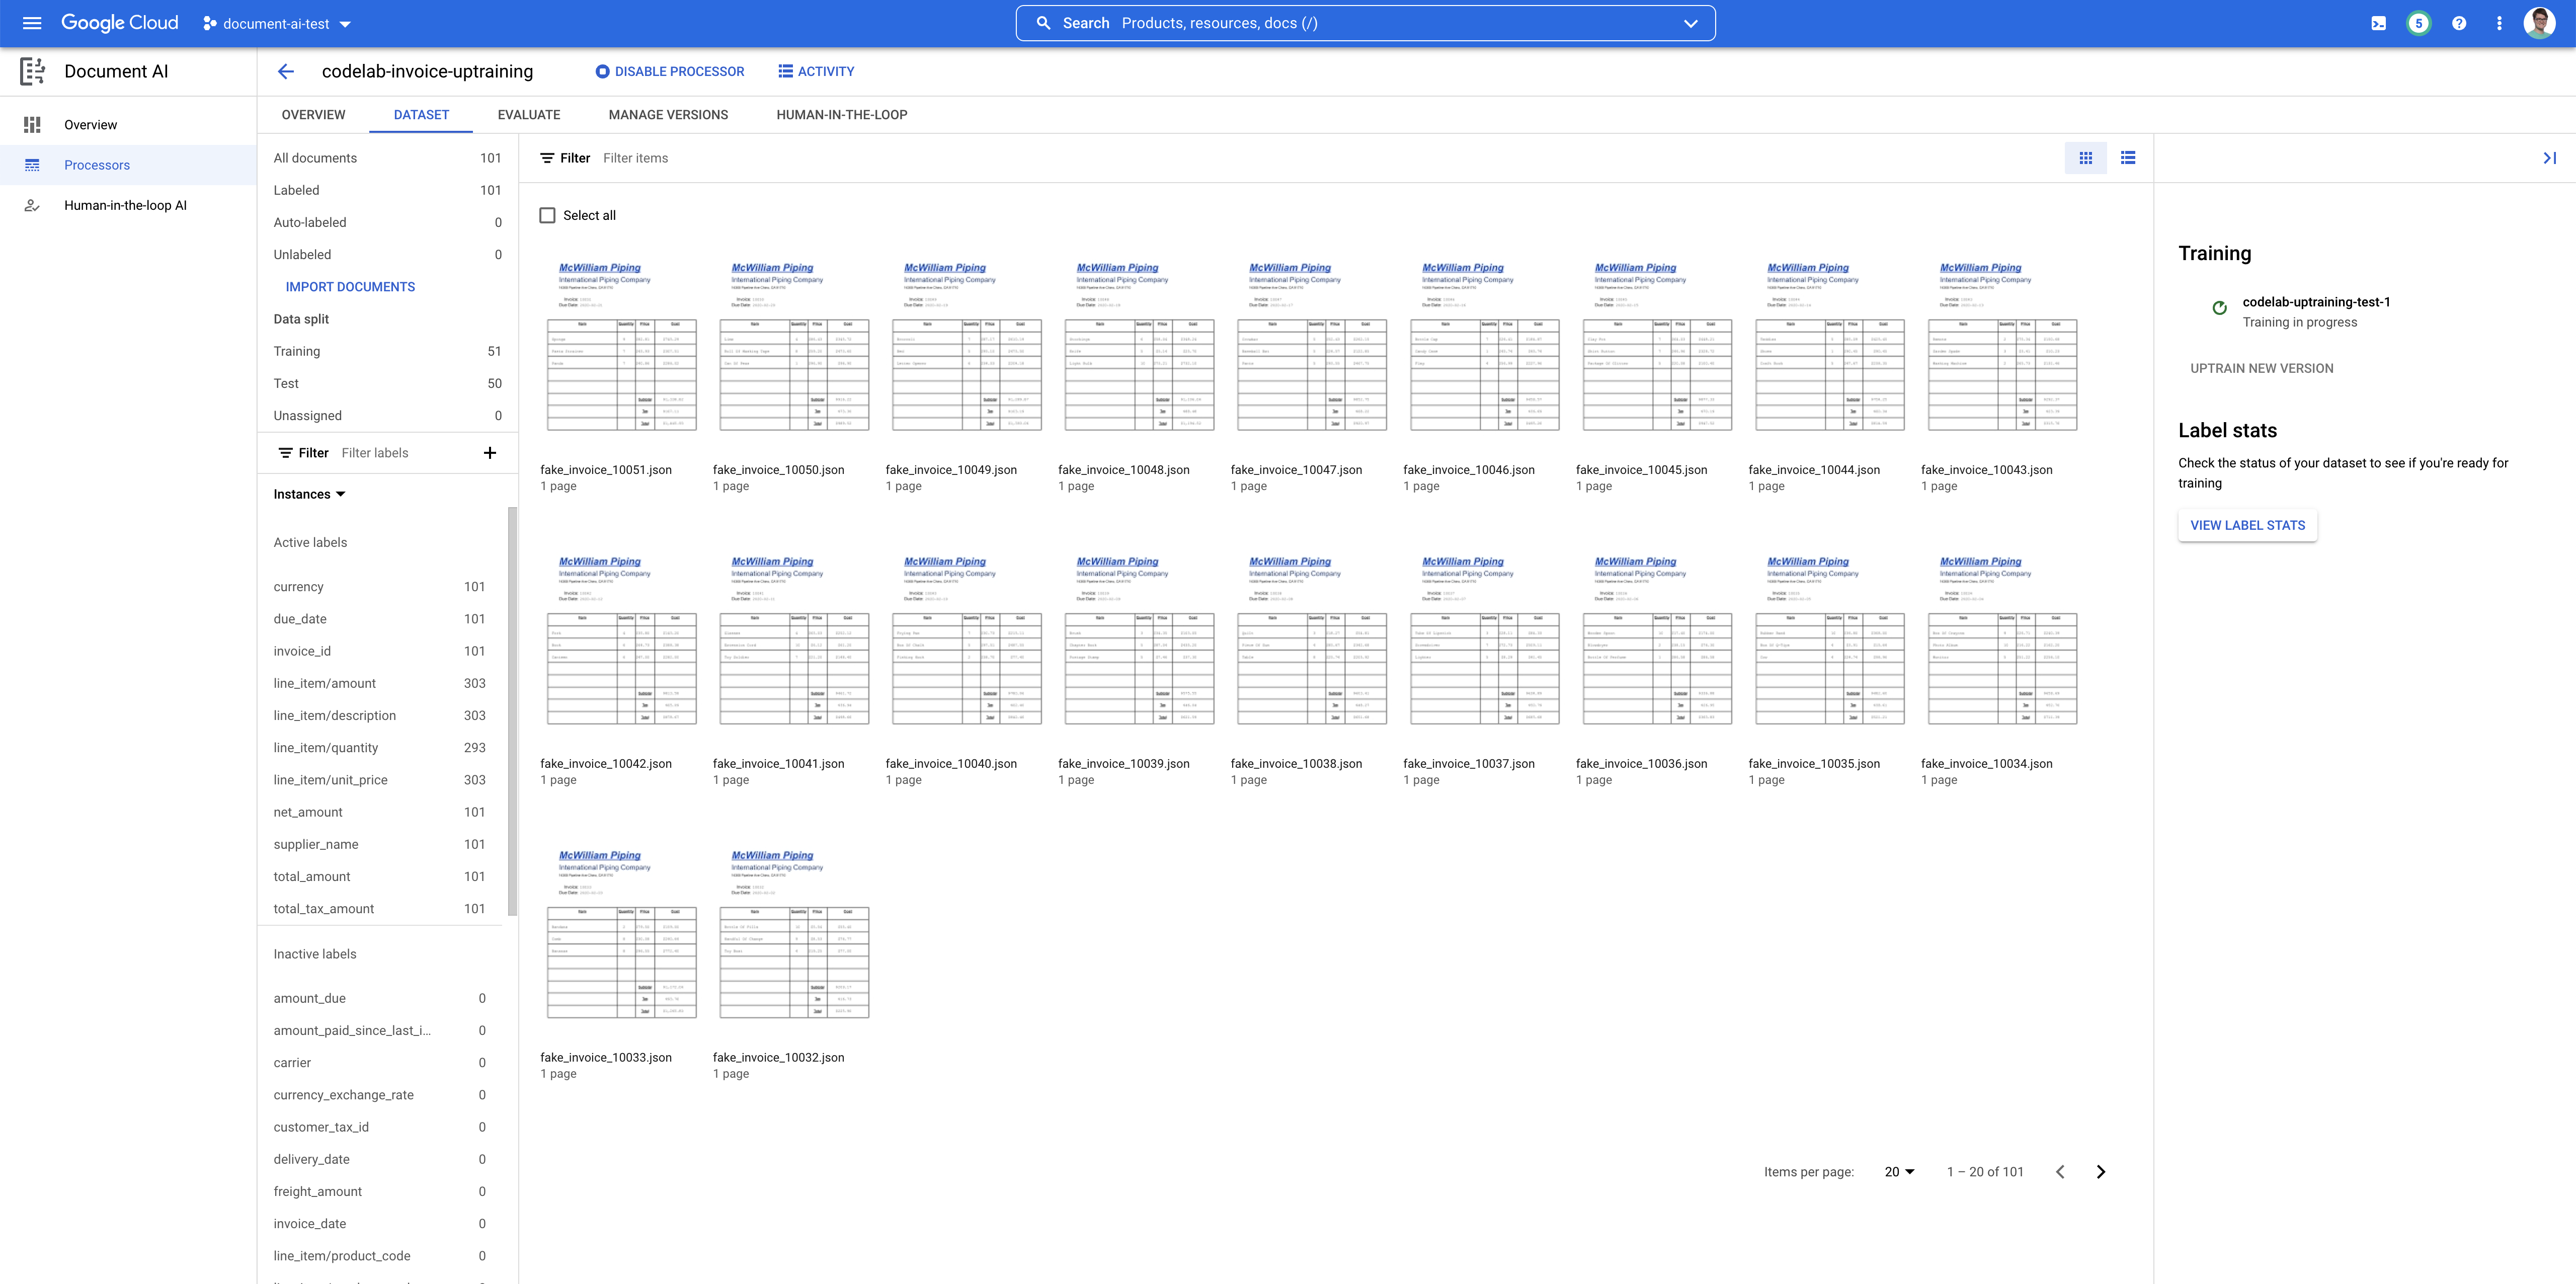
You should now be back at the Dataset management console. Notice that the number of Labeled and Unlabeled documents have changed as well as the numbers of active labels.
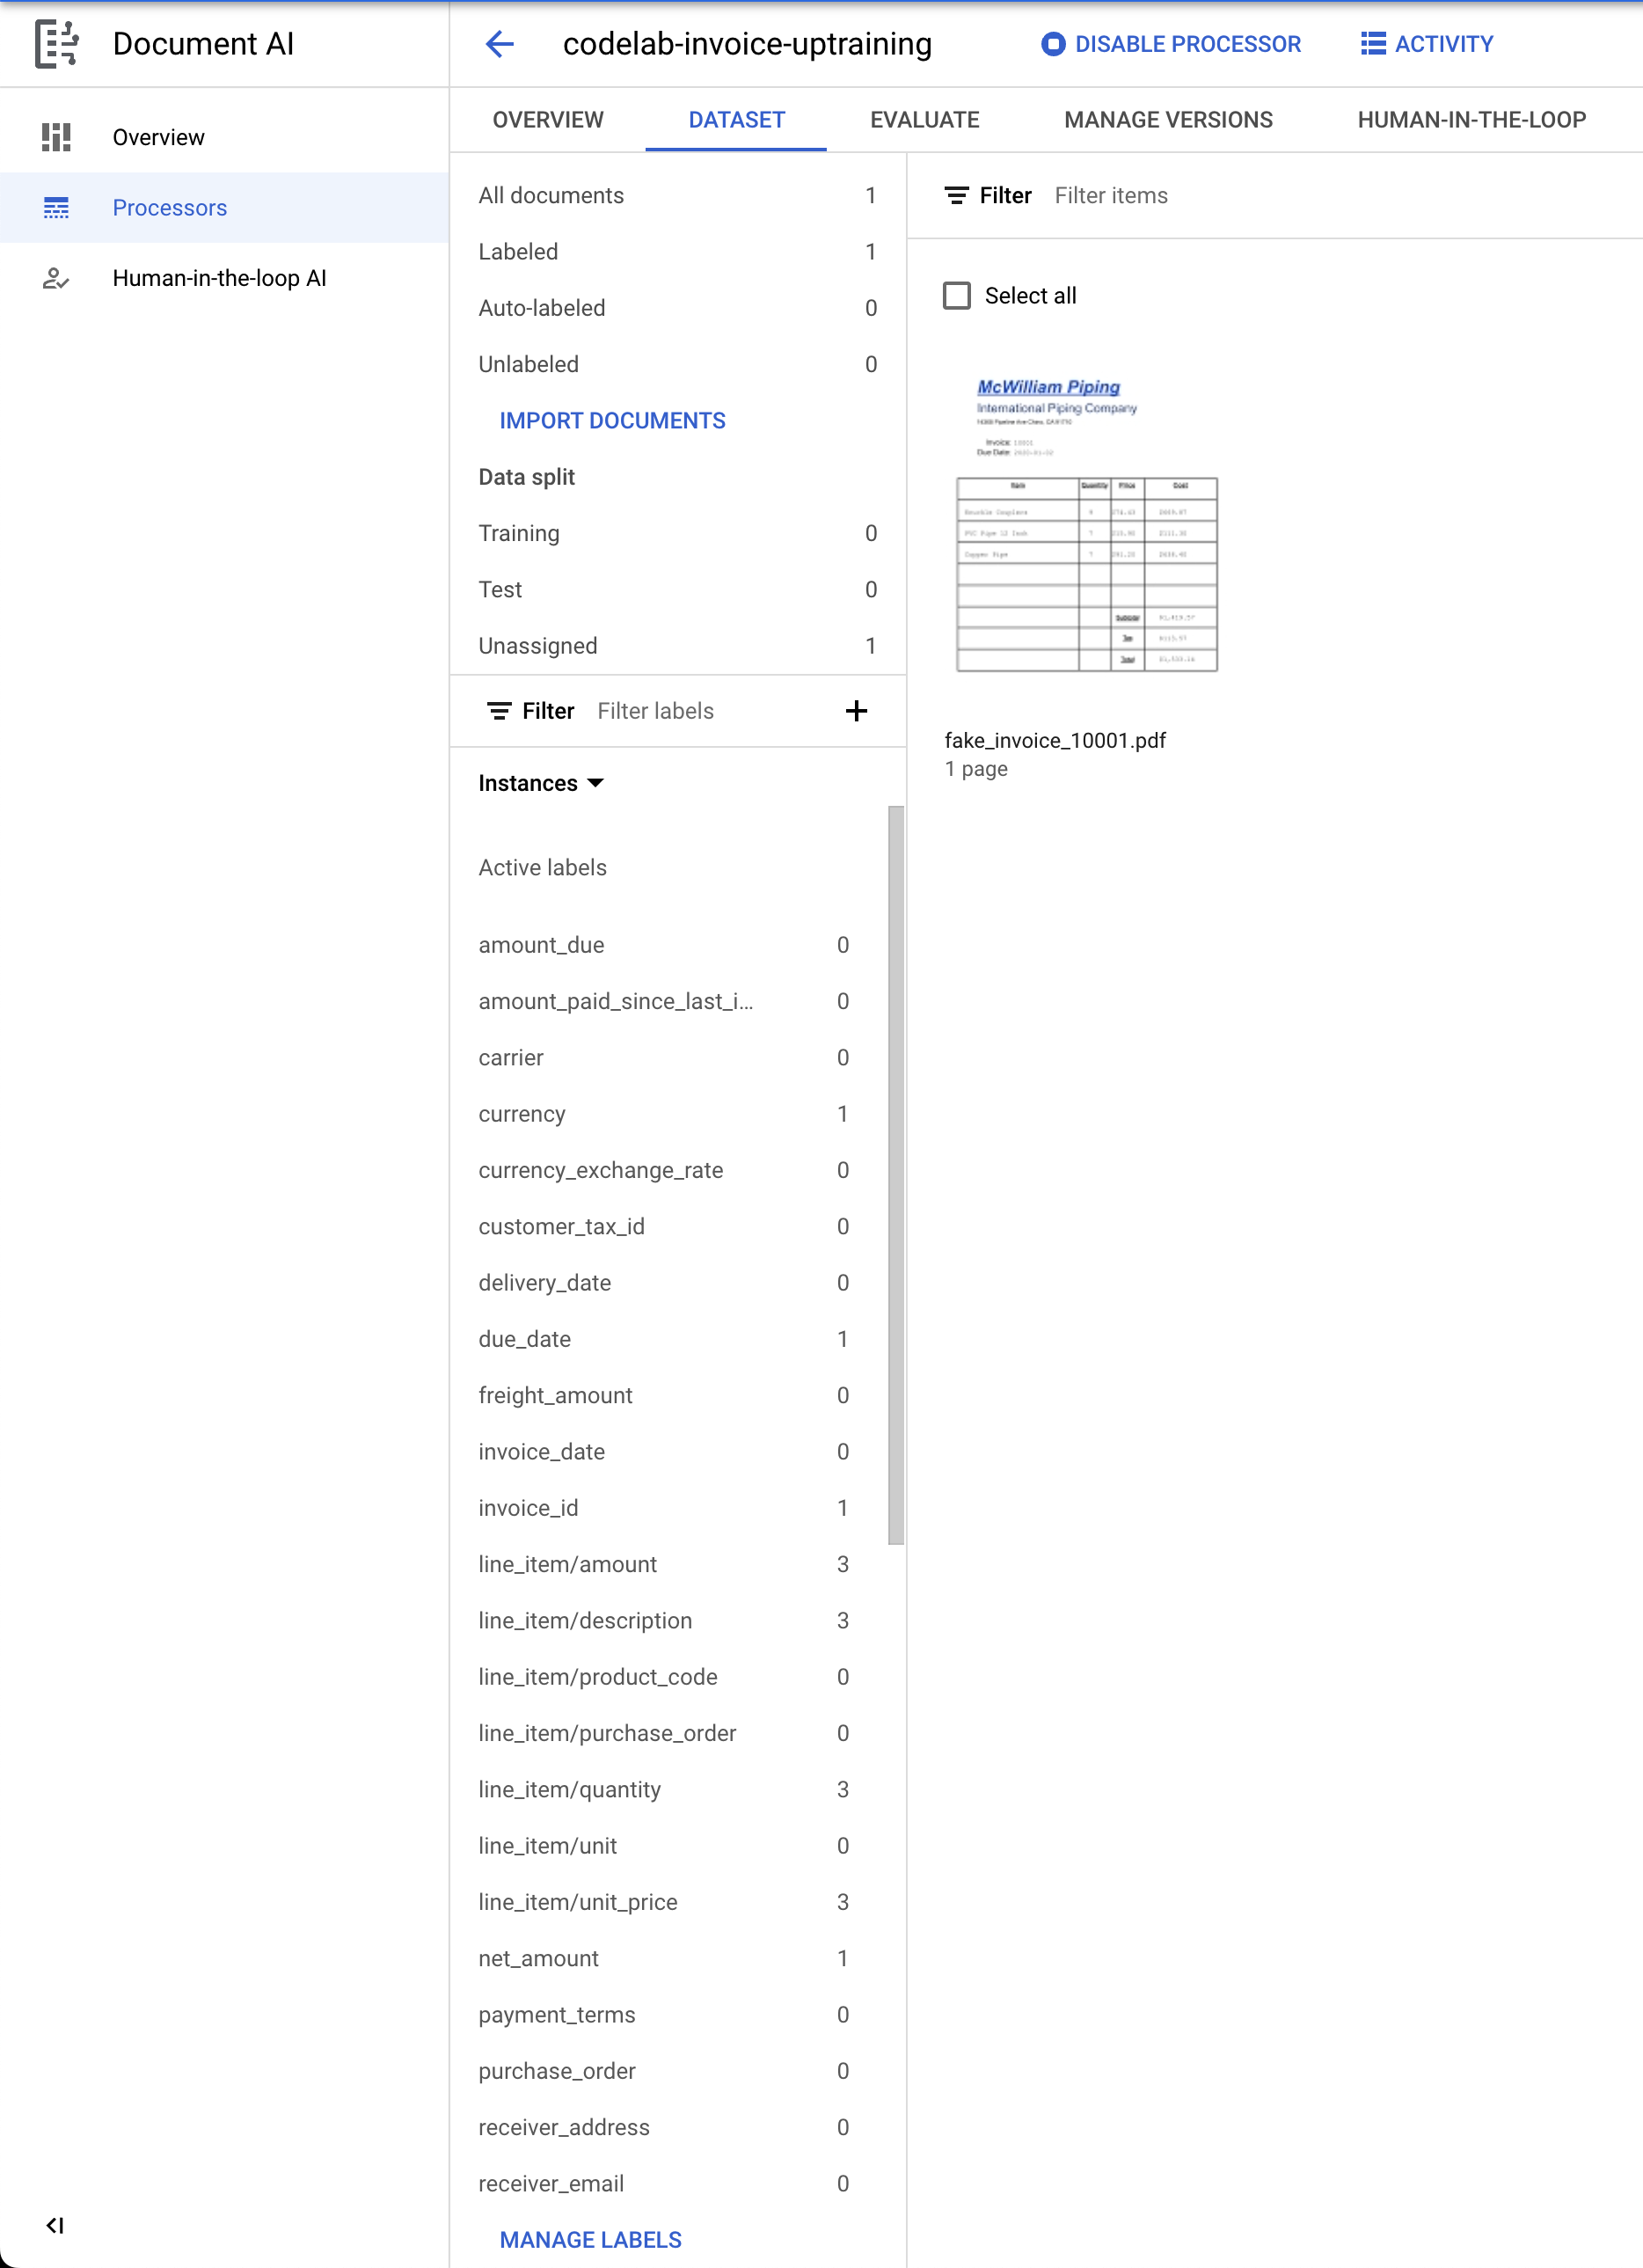
- We need to assign this document to either the "Training" or "Test" set. Click on the Document.
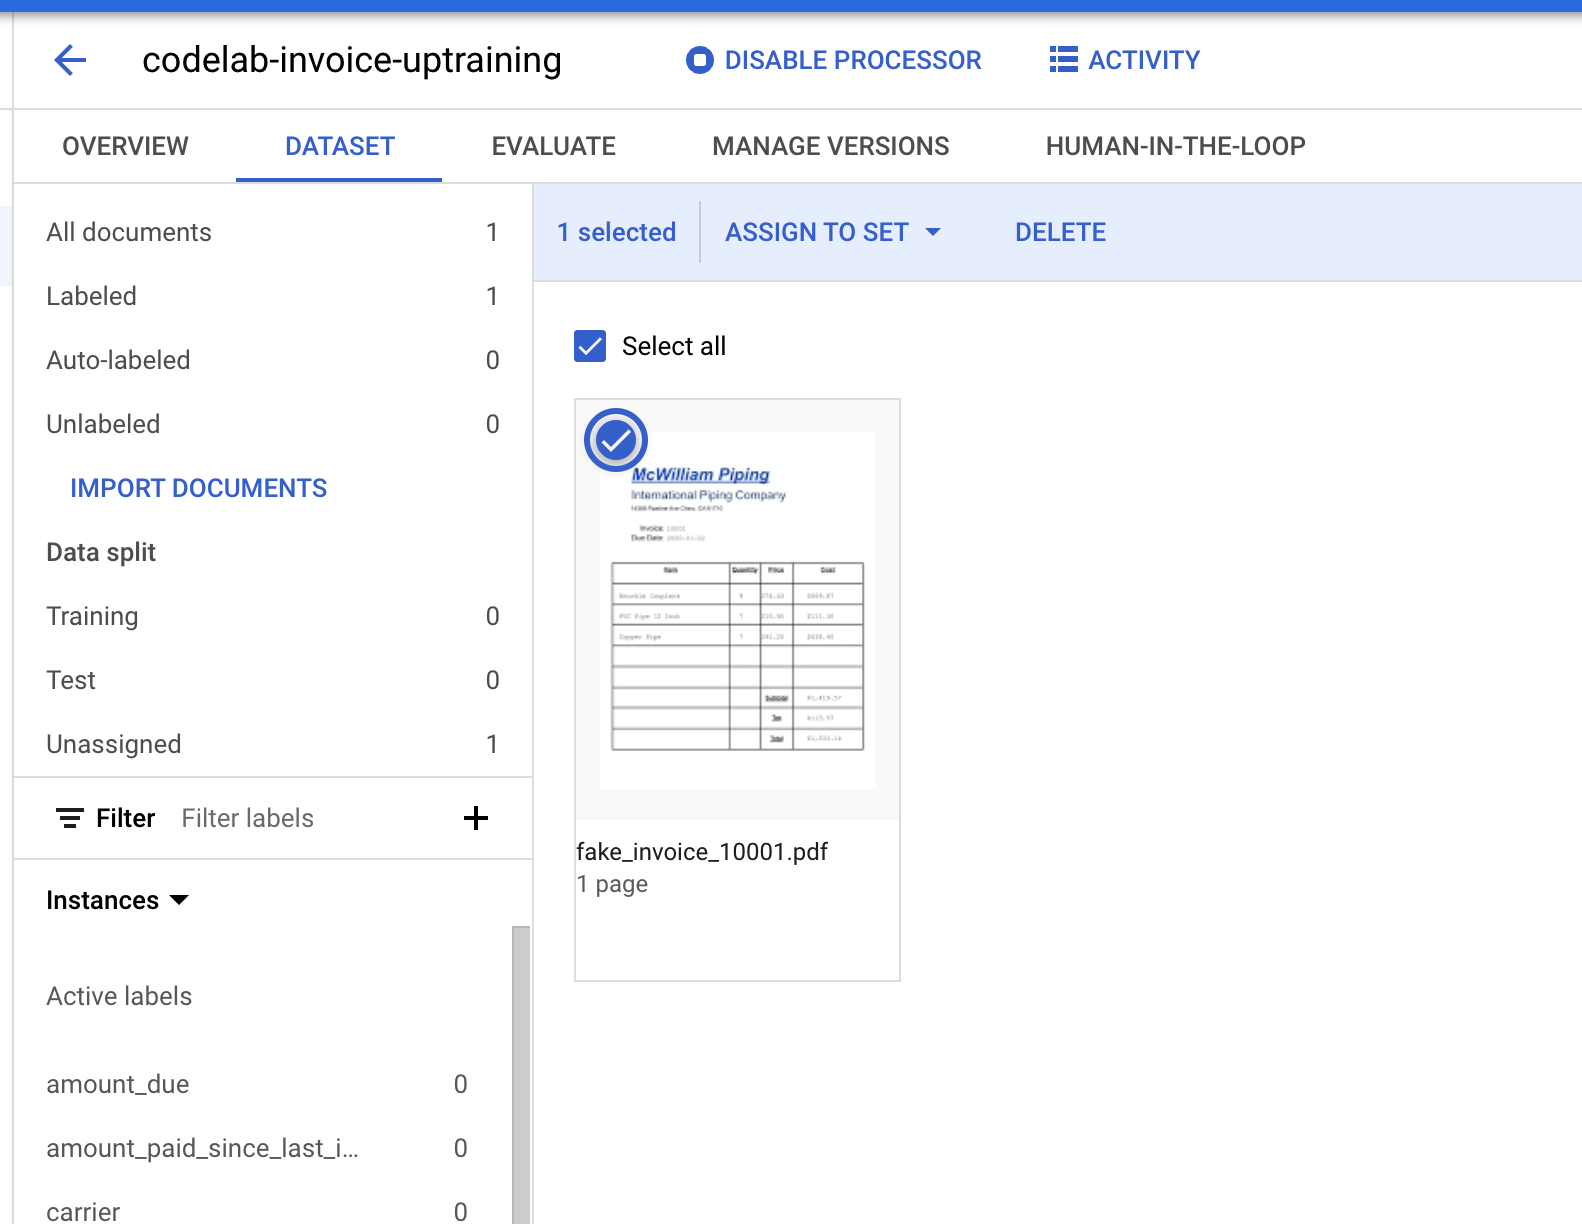
- Click Assign to Set, then click on Training.
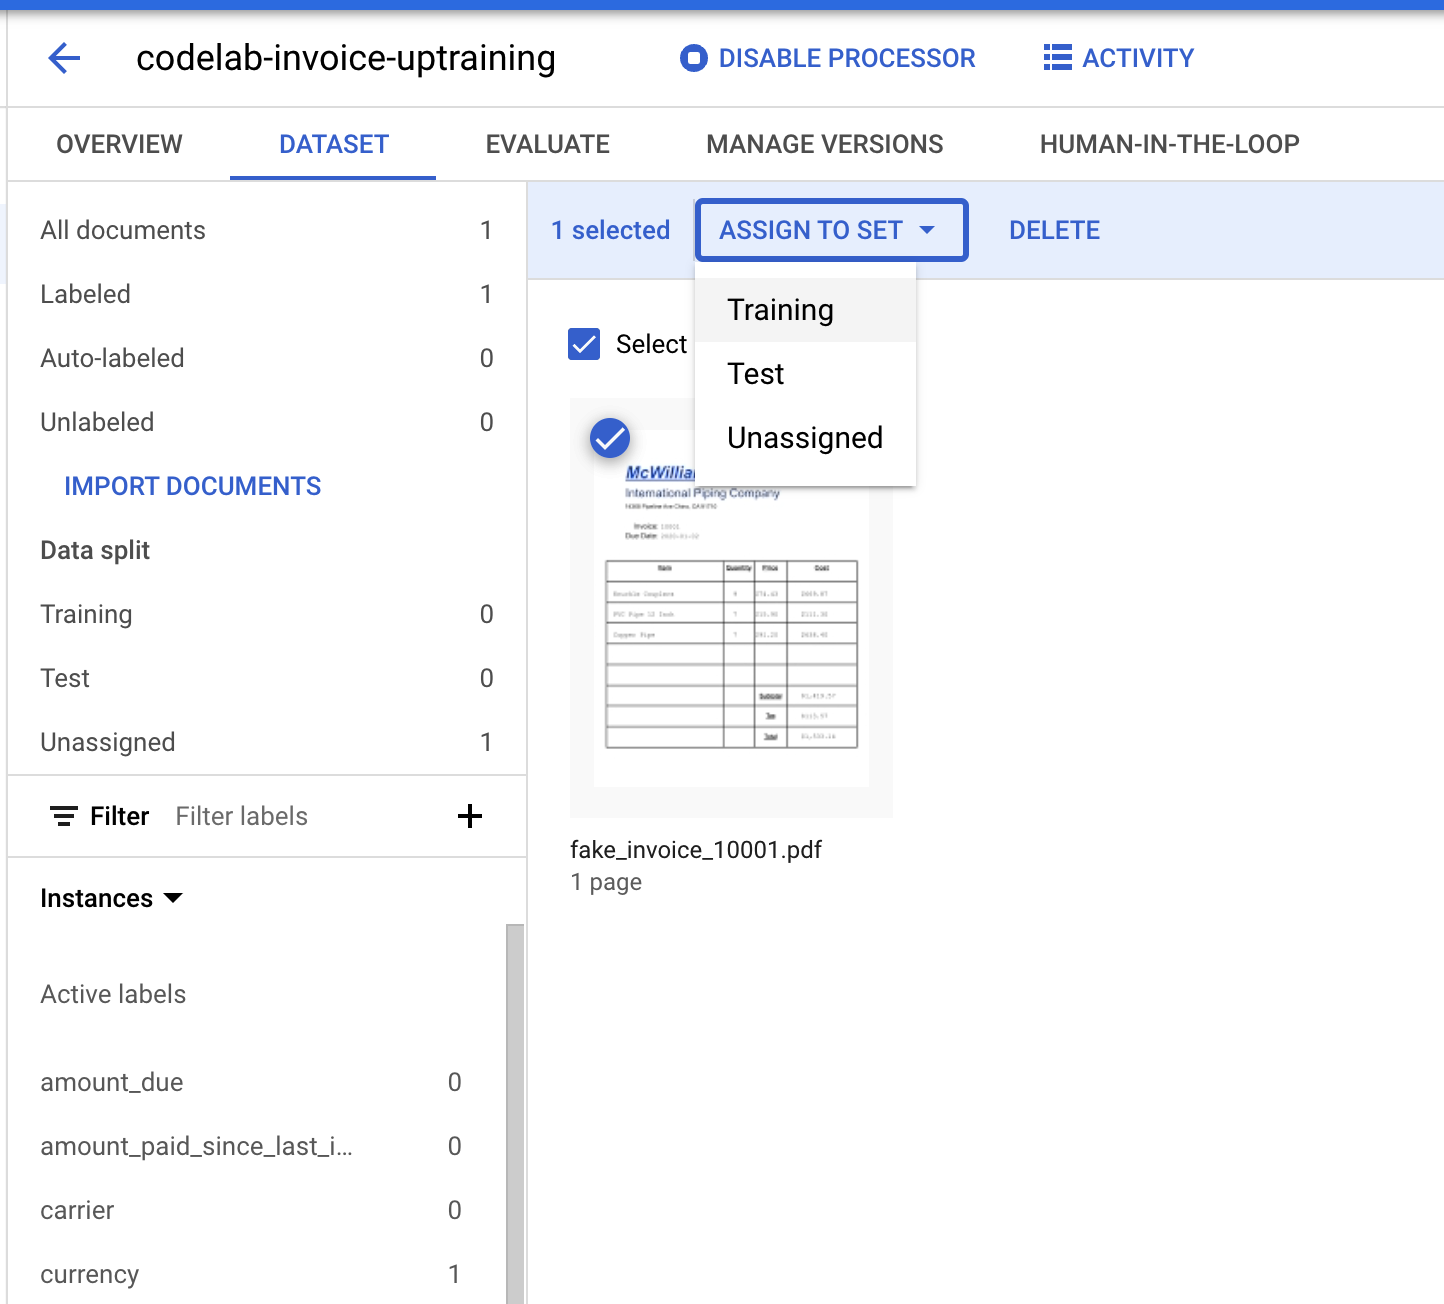
- Notice the Data Split numbers have changed.
8. Import Pre-Labeled Data
Document AI Uptraining requires a minimum of 10 documents in both the training and test sets, along with 10 instances of each label in each set.
It's recommended to have at least 50 documents in each set with 50 instances of each label for best performance. More training data generally equates to higher accuracy.
It will take a long time to manually label 100 documents, so we have some pre-labeled documents that you can import for this lab.
You can import pre-labeled document files in the Document.json format. These can be results from calling a processor and verifying the accuracy using Human in the Loop (HITL).
- Click on Import Documents.
- Copy/Paste the following Cloud Storage path and assign it to the Training set.
cloud-samples-data/documentai/codelabs/uptraining/training
- Click on Add Another Bucket. Then Copy/Paste the following Cloud Storage path and assign it to the Test set.
cloud-samples-data/documentai/codelabs/uptraining/test
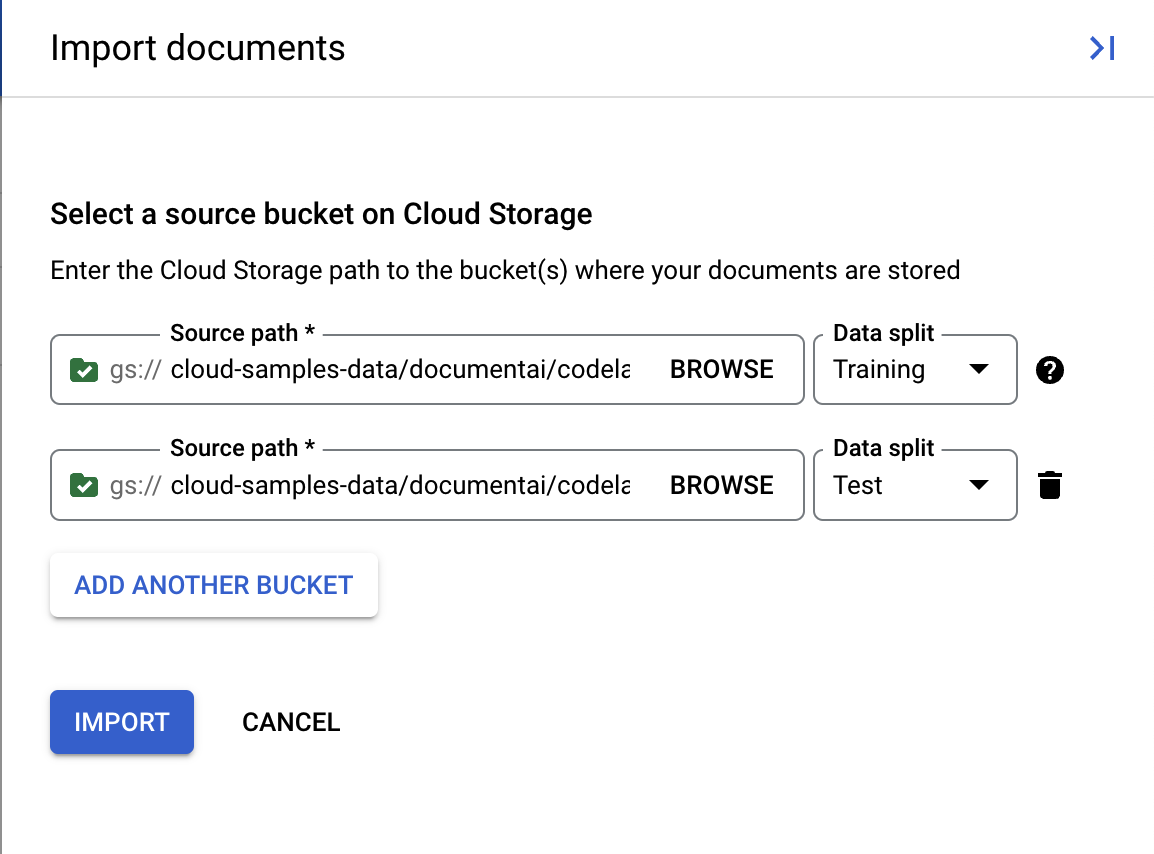
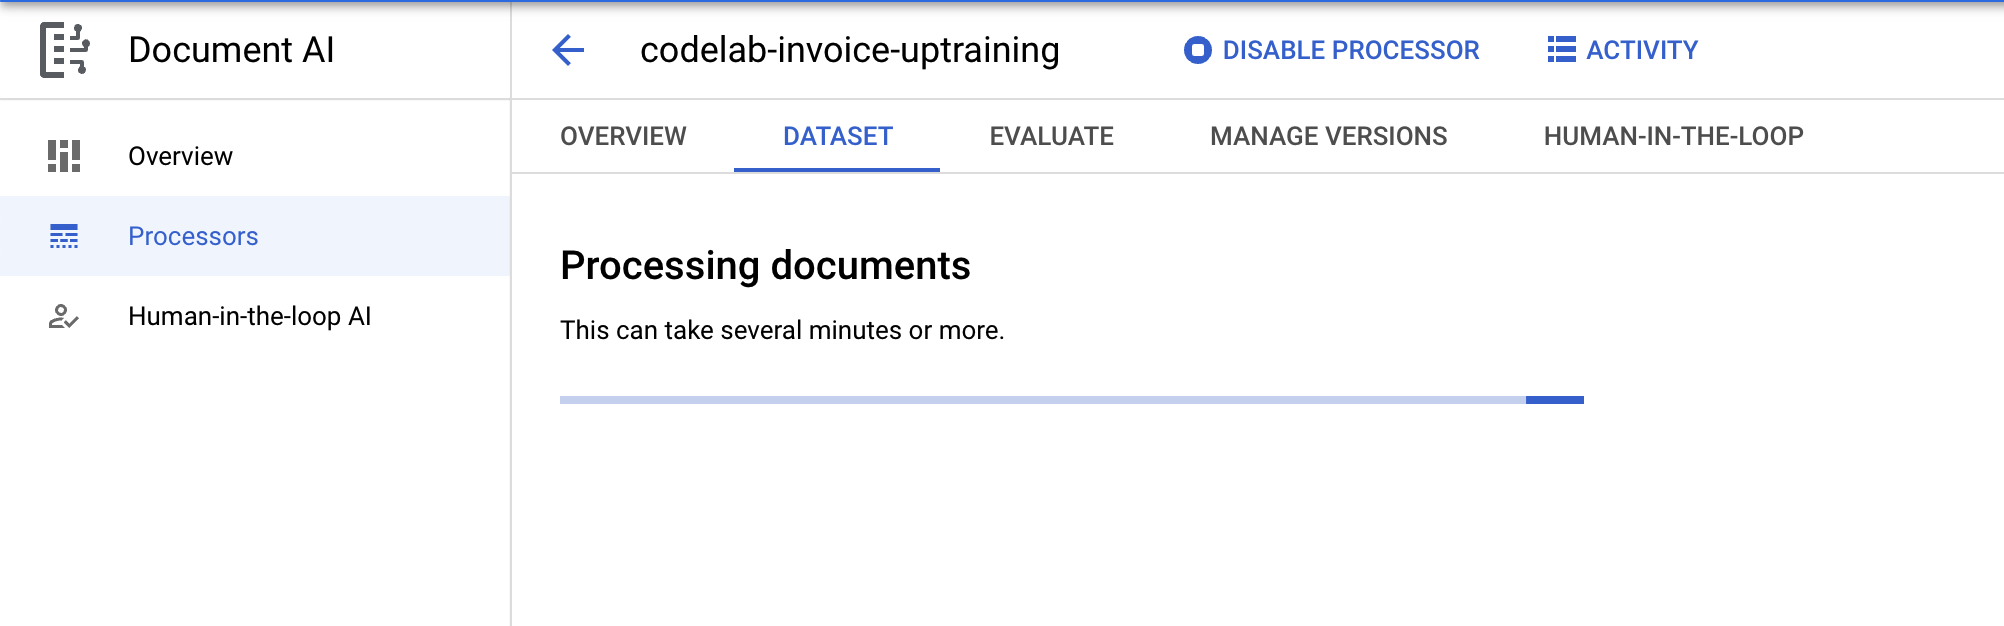
- Click Import and wait for the documents to import. This will take longer than last time because there are more documents to process. In my tests, this took about 6 minutes. You can leave this page and return later.
- Once complete, you should see the documents in the Dataset management page.
9. Edit Labels
The sample documents we are using for this example do not contain every label supported by the Invoice Parser. We will need to mark the labels we are not using as inactive before training. You can also follow similar steps to add a custom label before Uptraining.
- Click on Manage Labels in the bottom-left corner.
- You should now be in the Label Management console.
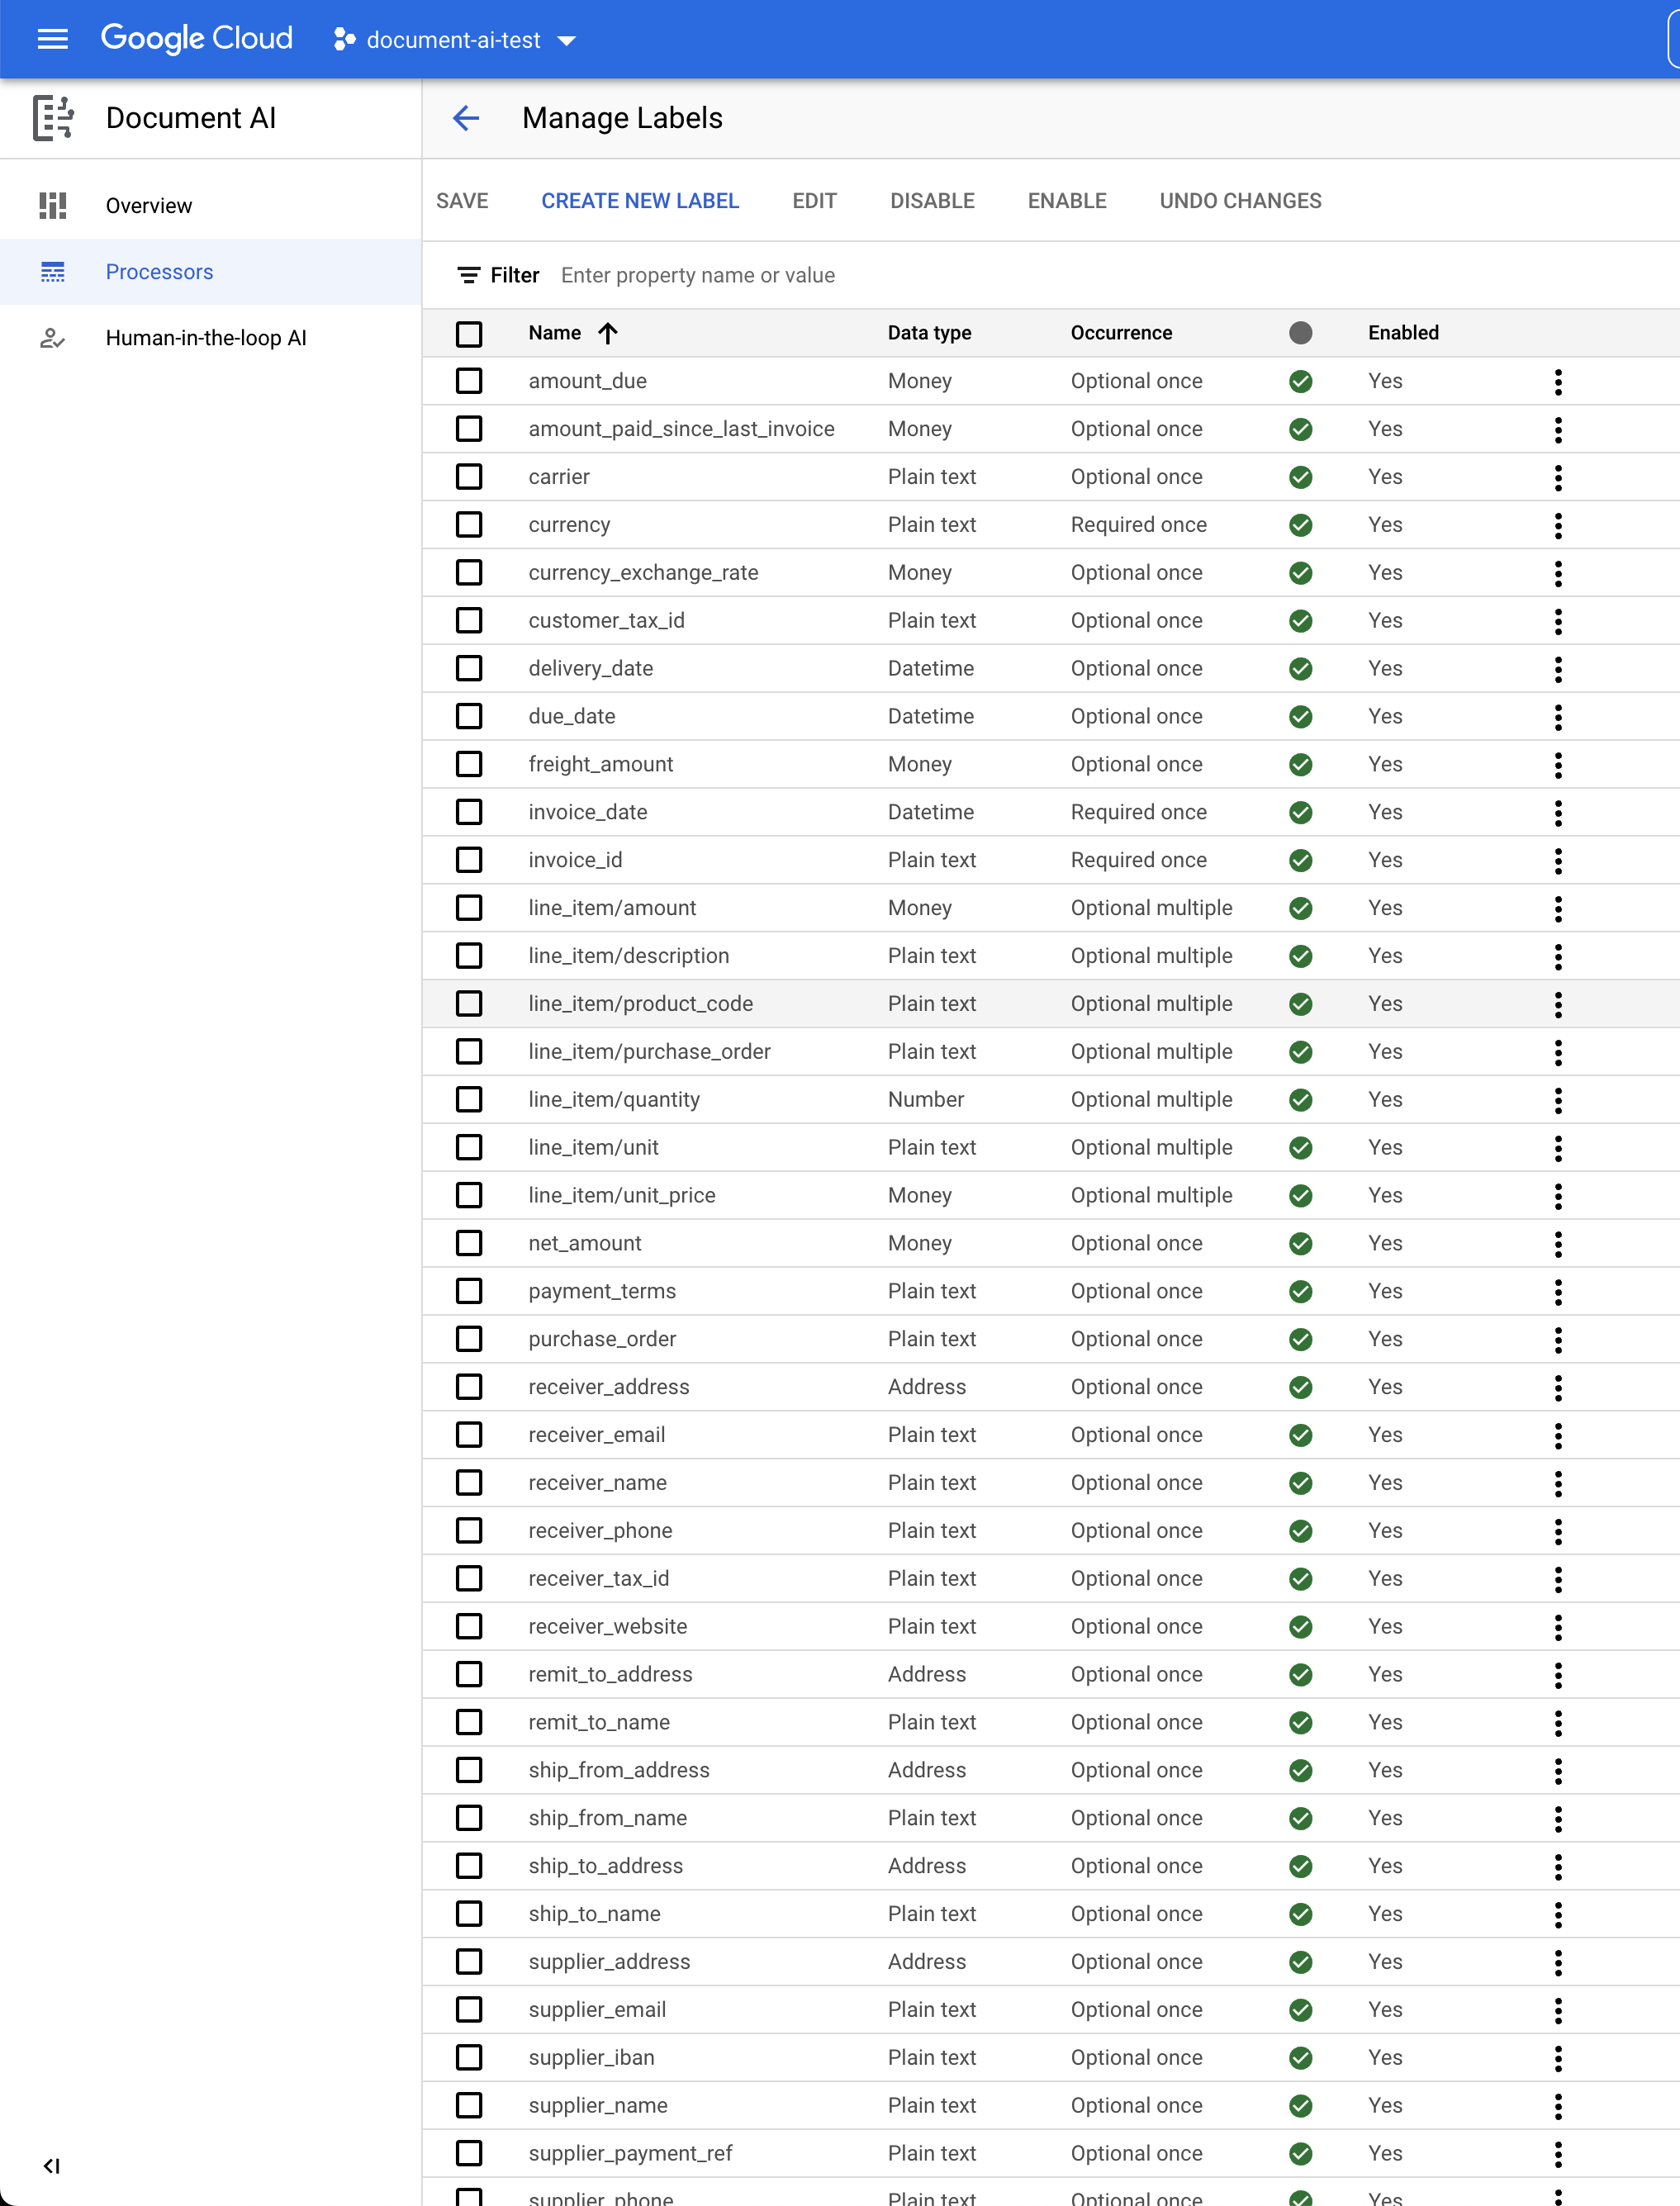
- Use the Checkboxes and the Disable/Enable buttons to mark ONLY the following labels as Enabled.
currencydue_dateinvoice_idline_item/amountline_item/descriptionline_item/quantityline_item/unit_pricenet_amountsupplier_addresssupplier_nametotal_amounttotal_tax_amount
- The Console should look like this when complete. Click Save when finished.
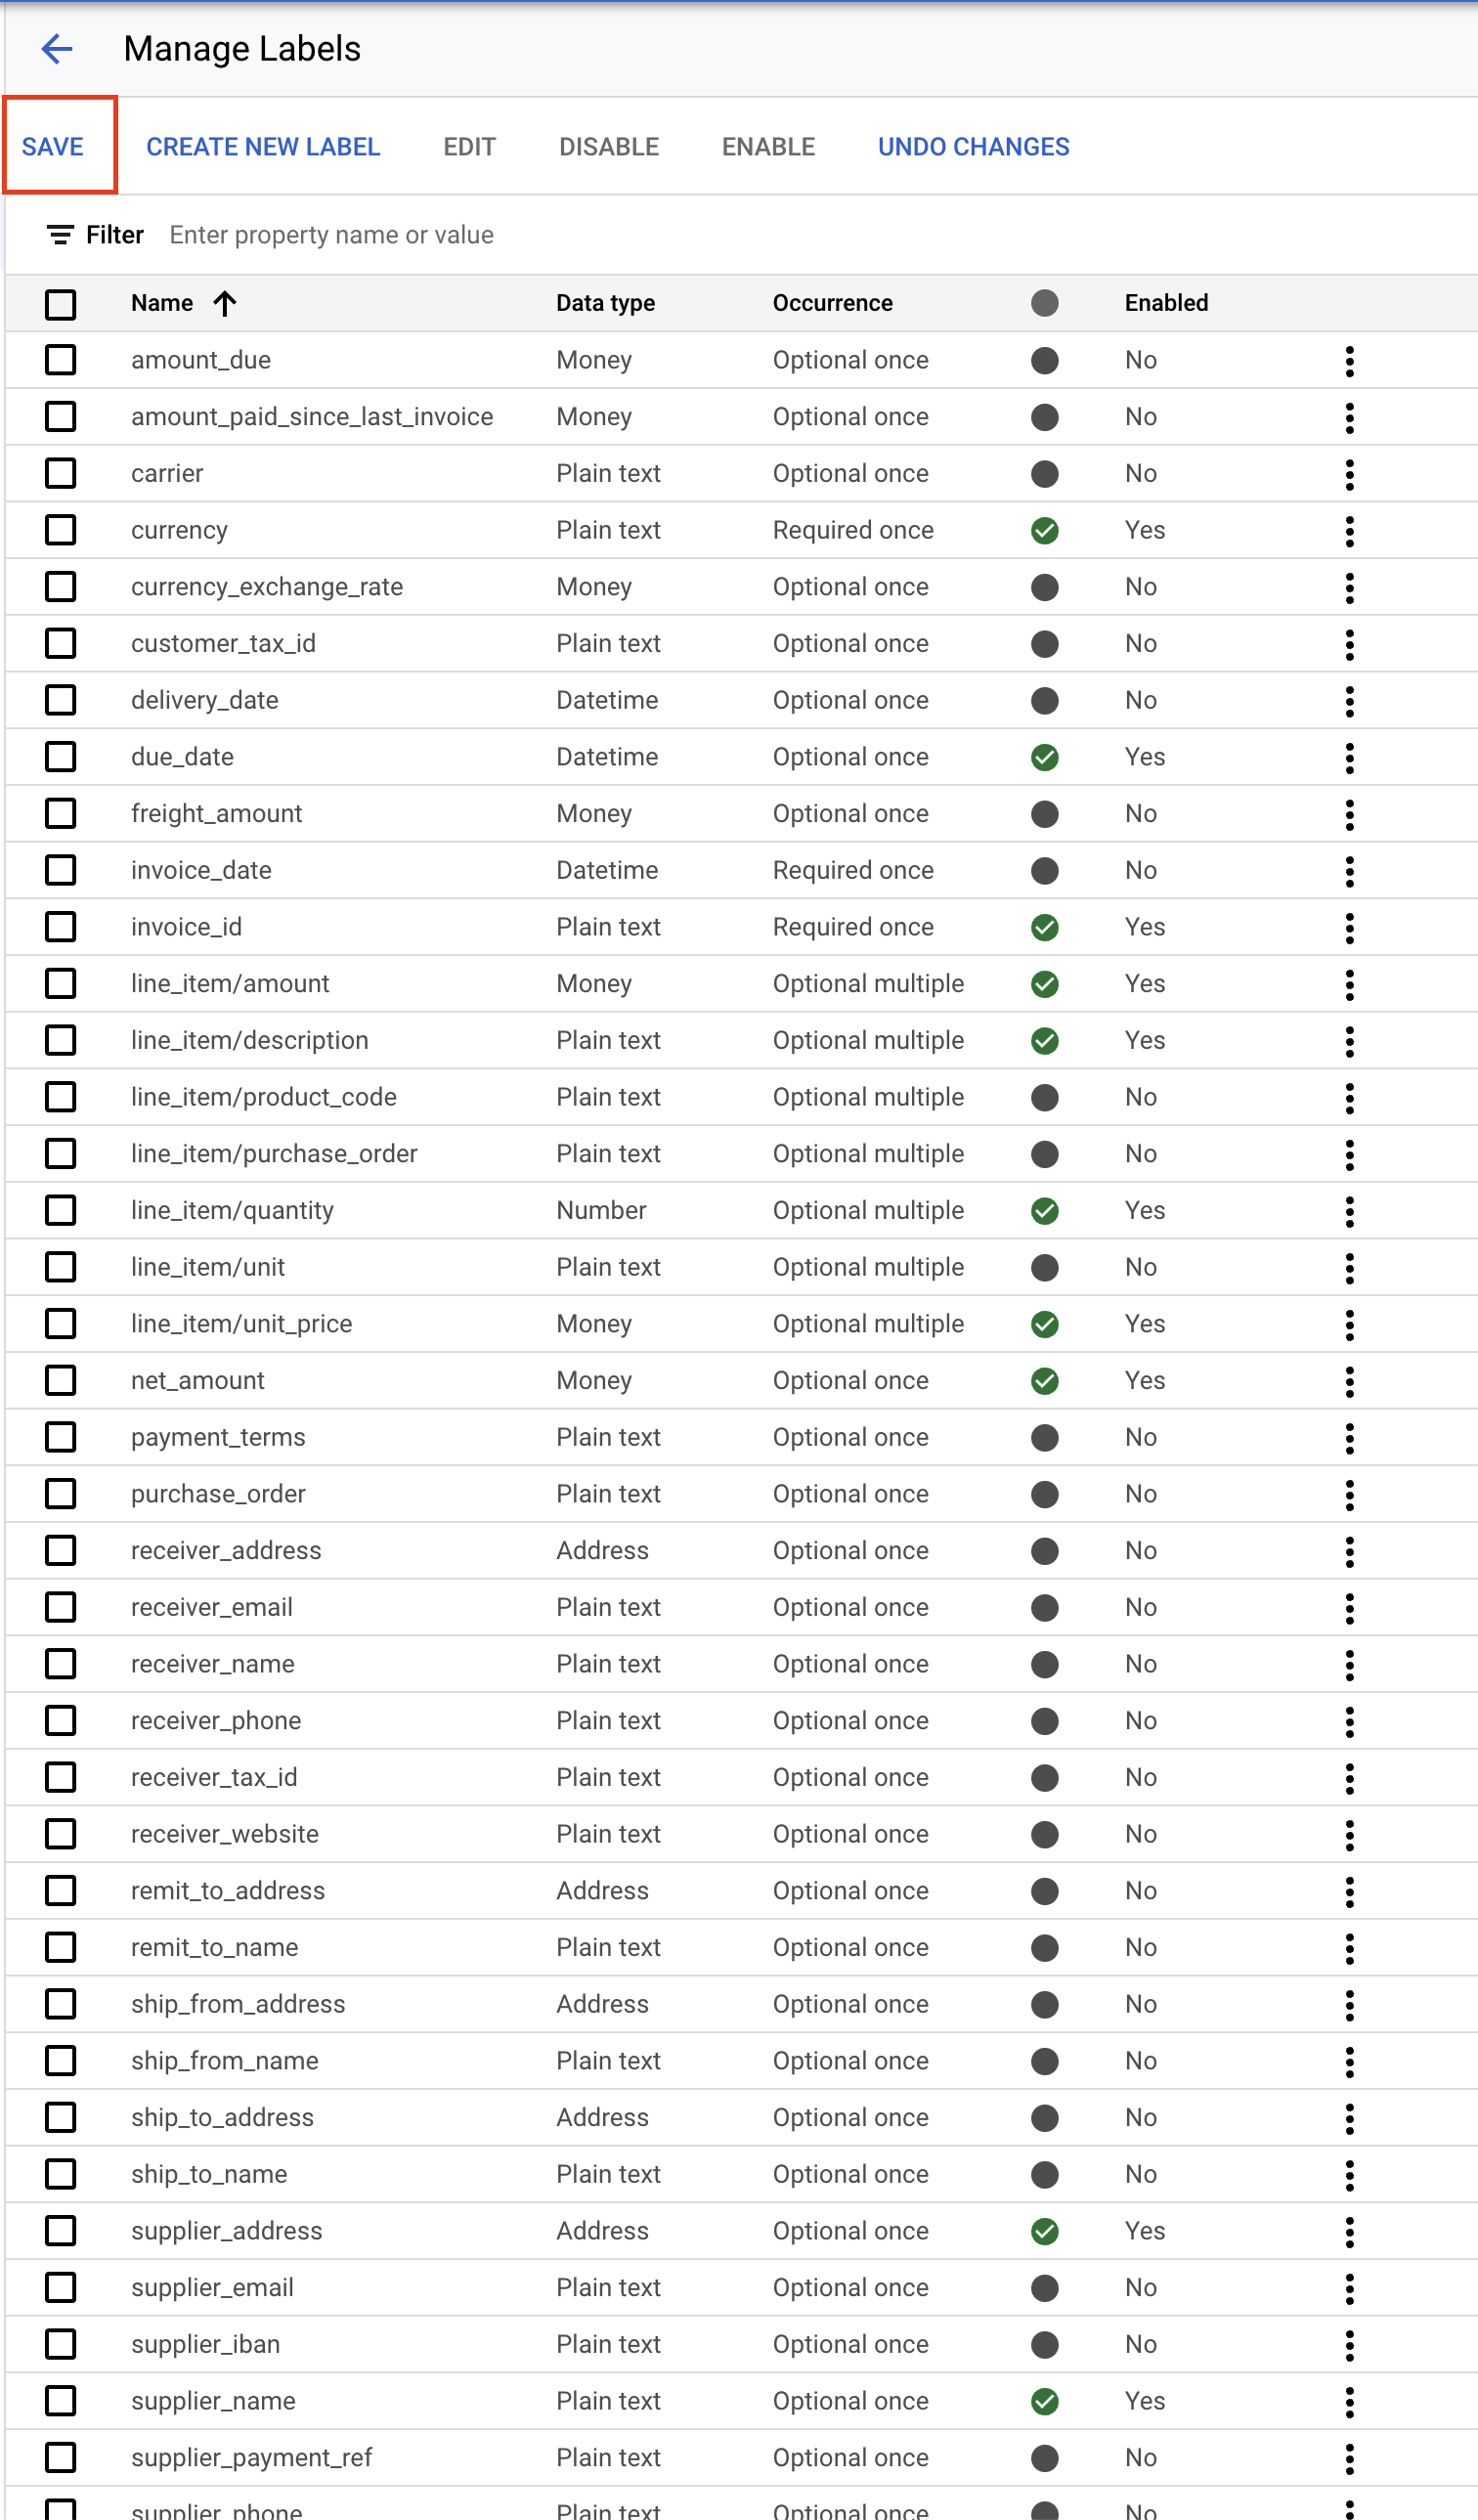
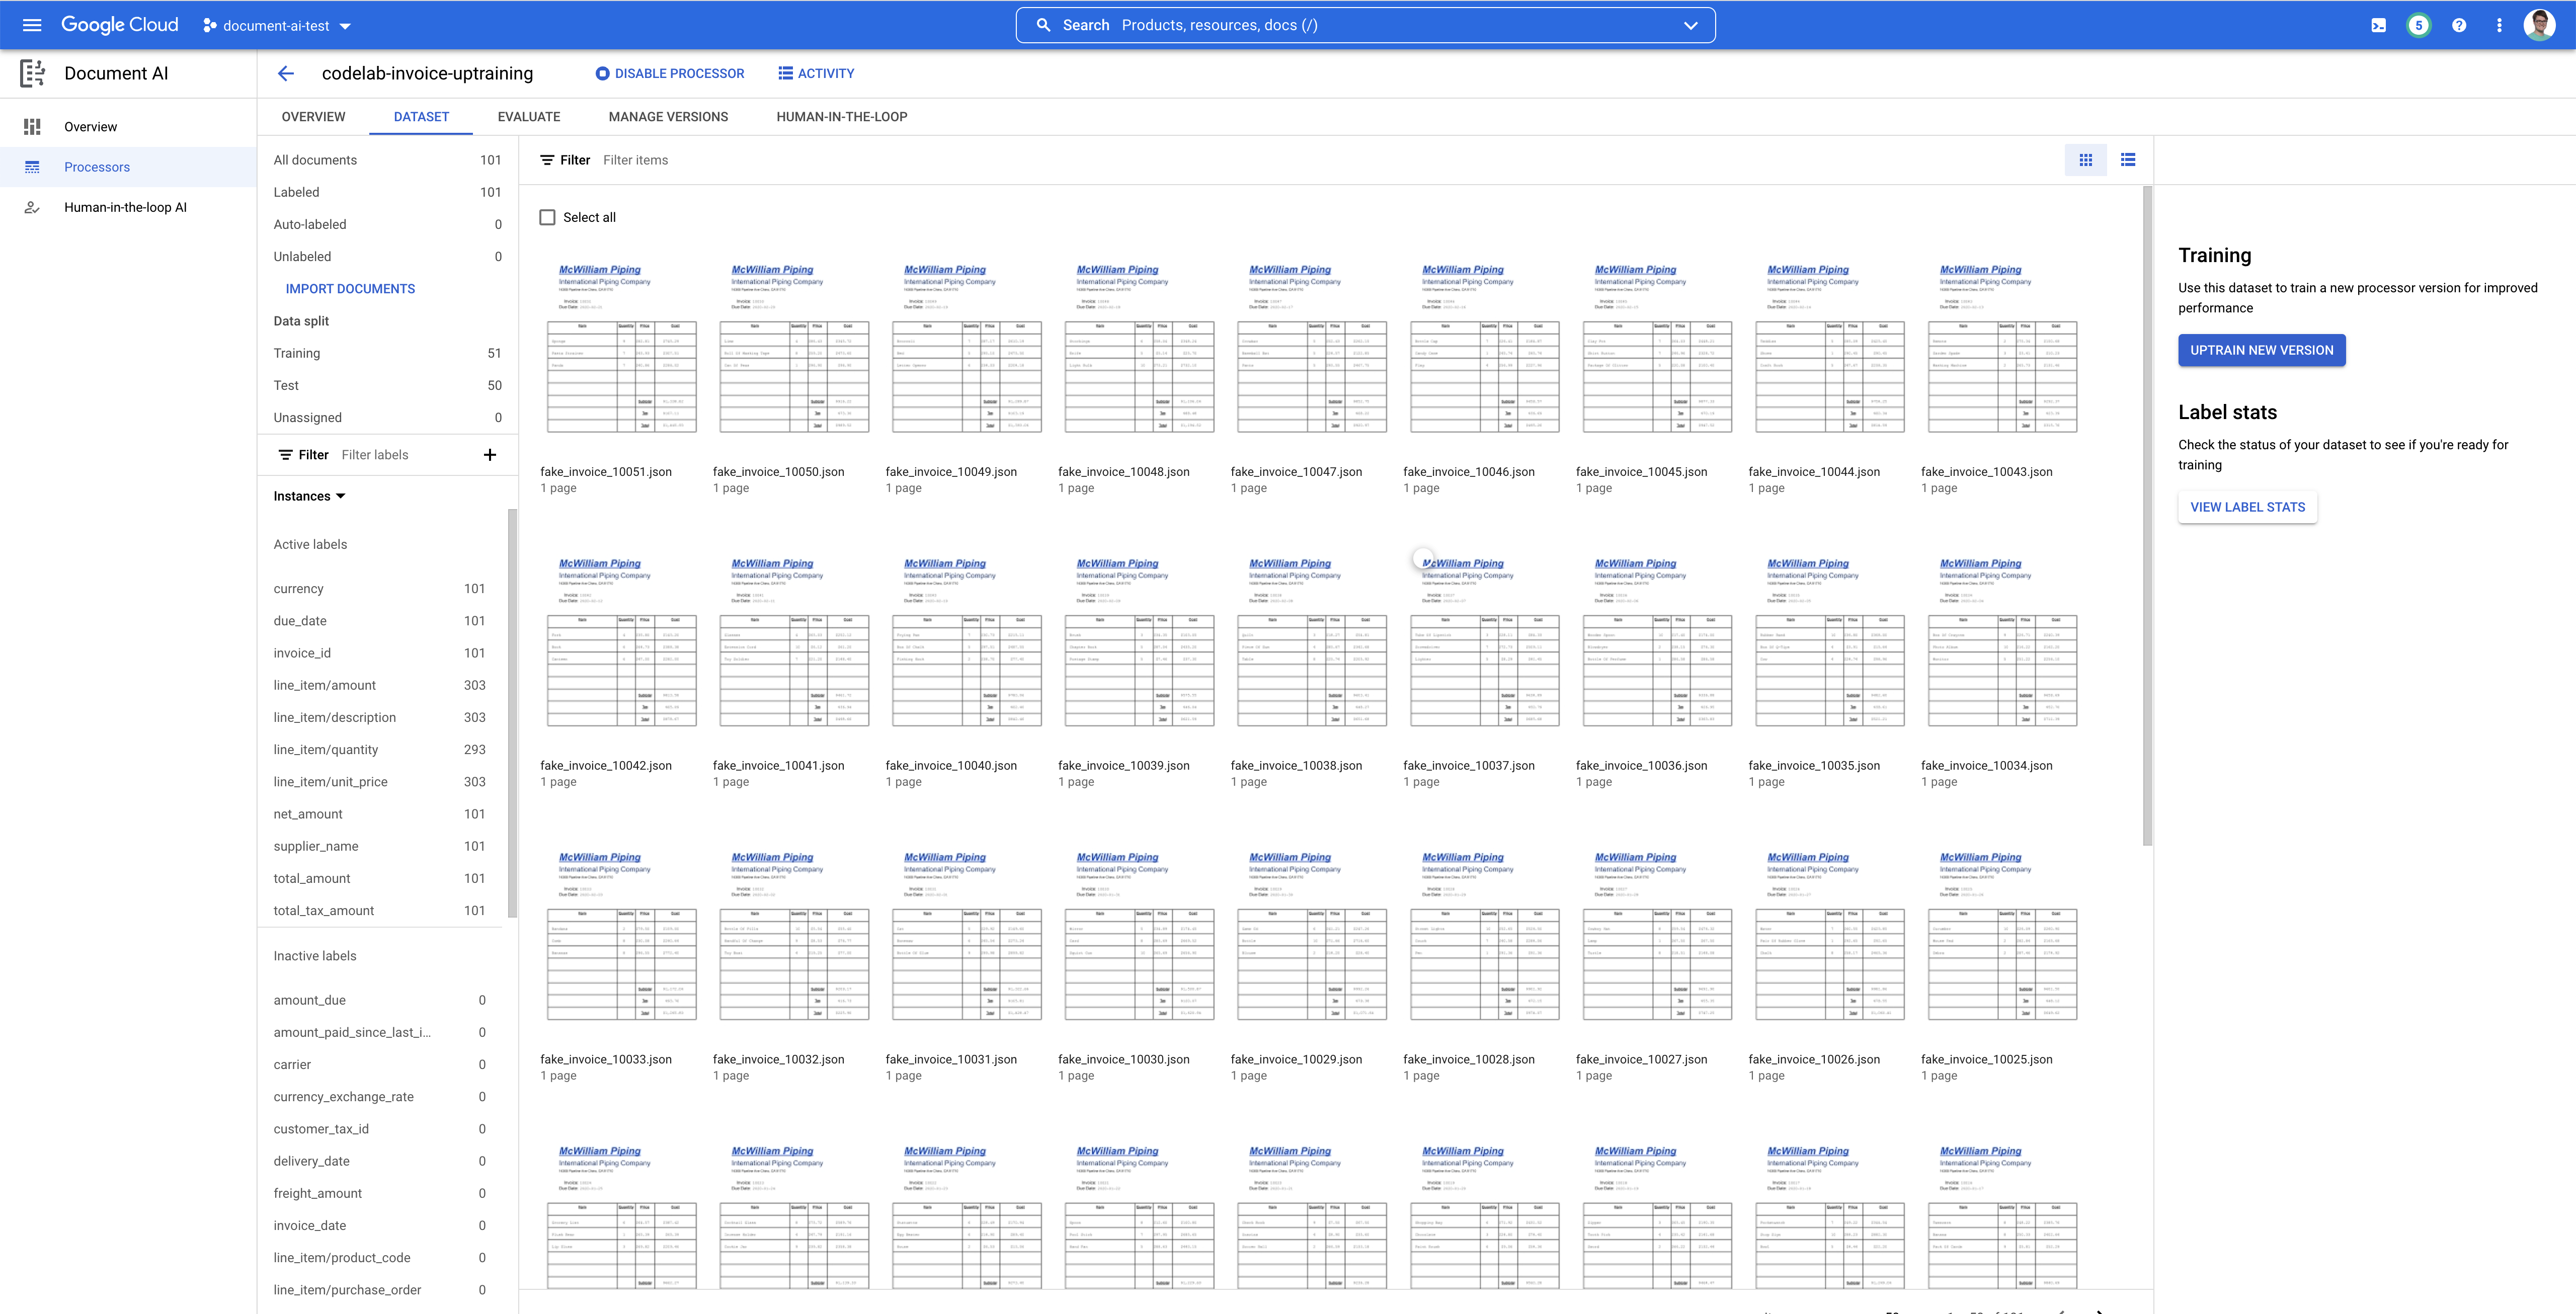
- Click on the Back arrow to return to the Dataset management console. Notice that the labels with 0 instances have been marked as Inactive.
10. Optional: Auto-label newly imported documents
When importing unlabeled documents for a processor with an existing deployed processor version, you can use Auto-labeling to save time on labeling.
- On the Train page, Click Import Documents.
- Copy and paste the following {{storage_name}} path. This directory contains 5 unlabeled invoice PDFs. From the Data split dropdown list, select Training.
cloud-samples-data/documentai/Custom/Invoices/PDF_Unlabeled - In the Auto-labeling section, select the Import with auto-labeling checkbox.
- Select an existing processor version to label the documents.
- For example:
pretrained-invoice-v1.3-2022-07-15
- Click Import and wait for the documents to import. You can leave this page and return later.
- When complete, the documents appear in the Train page in the Auto-labeled section.
- You cannot use auto-labeled documents for training or testing without marking them as labeled. Go to the Auto-labeled section to view the auto-labeled documents.
- Select the first document to enter the labeling console.
- Verify the labels, bounding boxes, and values to ensure they are correct. Label any values that were omitted.
- Select Mark as labeled when finished.
- Repeat the label verification for each auto-labeled document, then return to the Train page to use the data for training.
11. Uptrain the Model
Now, we are ready to begin training our Invoice Parser.
- Click Train New Version
- Give your version a name that you'll remember, such as
codelab-uptraining-test-1. The Base version is the model version this new version will be built from. If you're using a new processor, the only option should be Google Pretrained Next with Uptraining
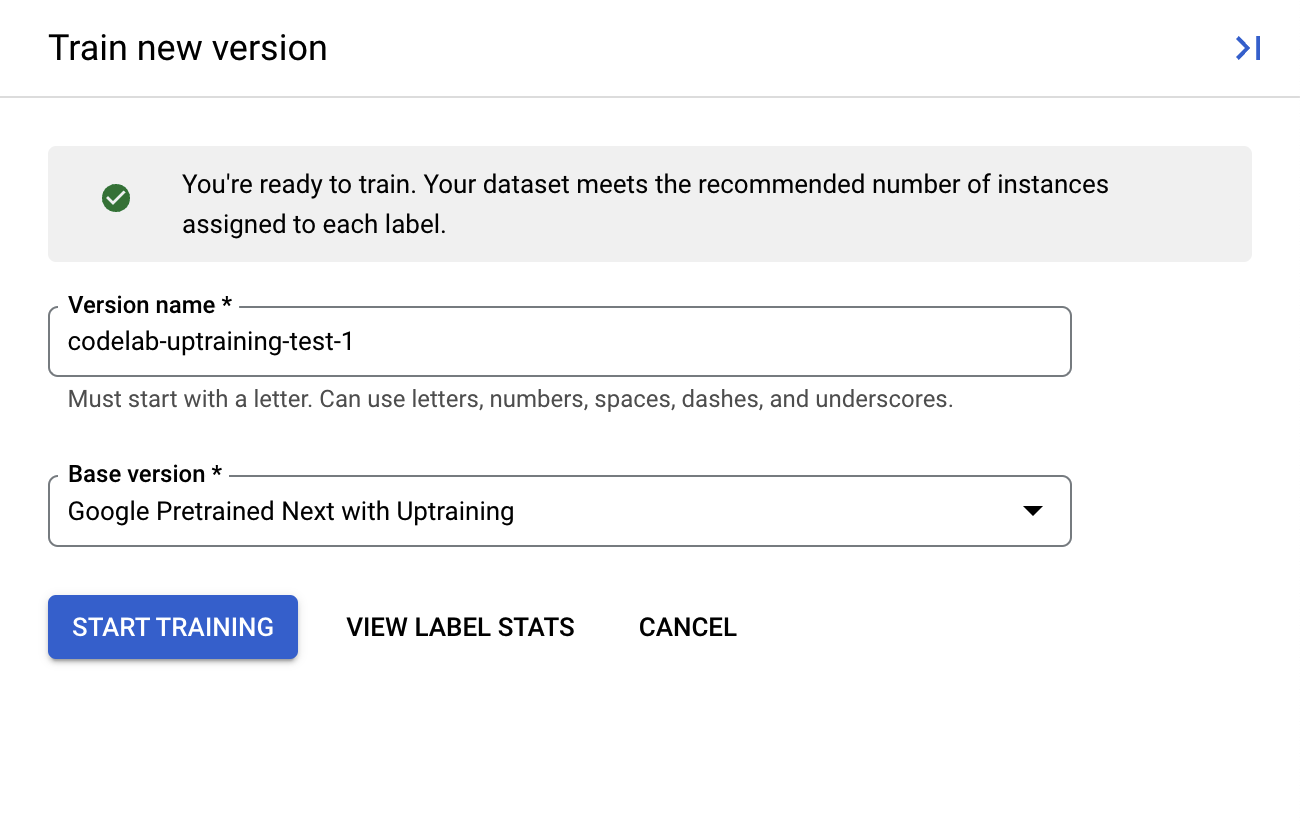
- (Optional) You can also select View Label Stats to see metrics about the labels in your dataset.
- Click on Start Training to begin the Uptraining process. You should be redirected to the Dataset management page. You can view the training status on the right side. Training will take a few hours to complete. You can leave this page and return later.
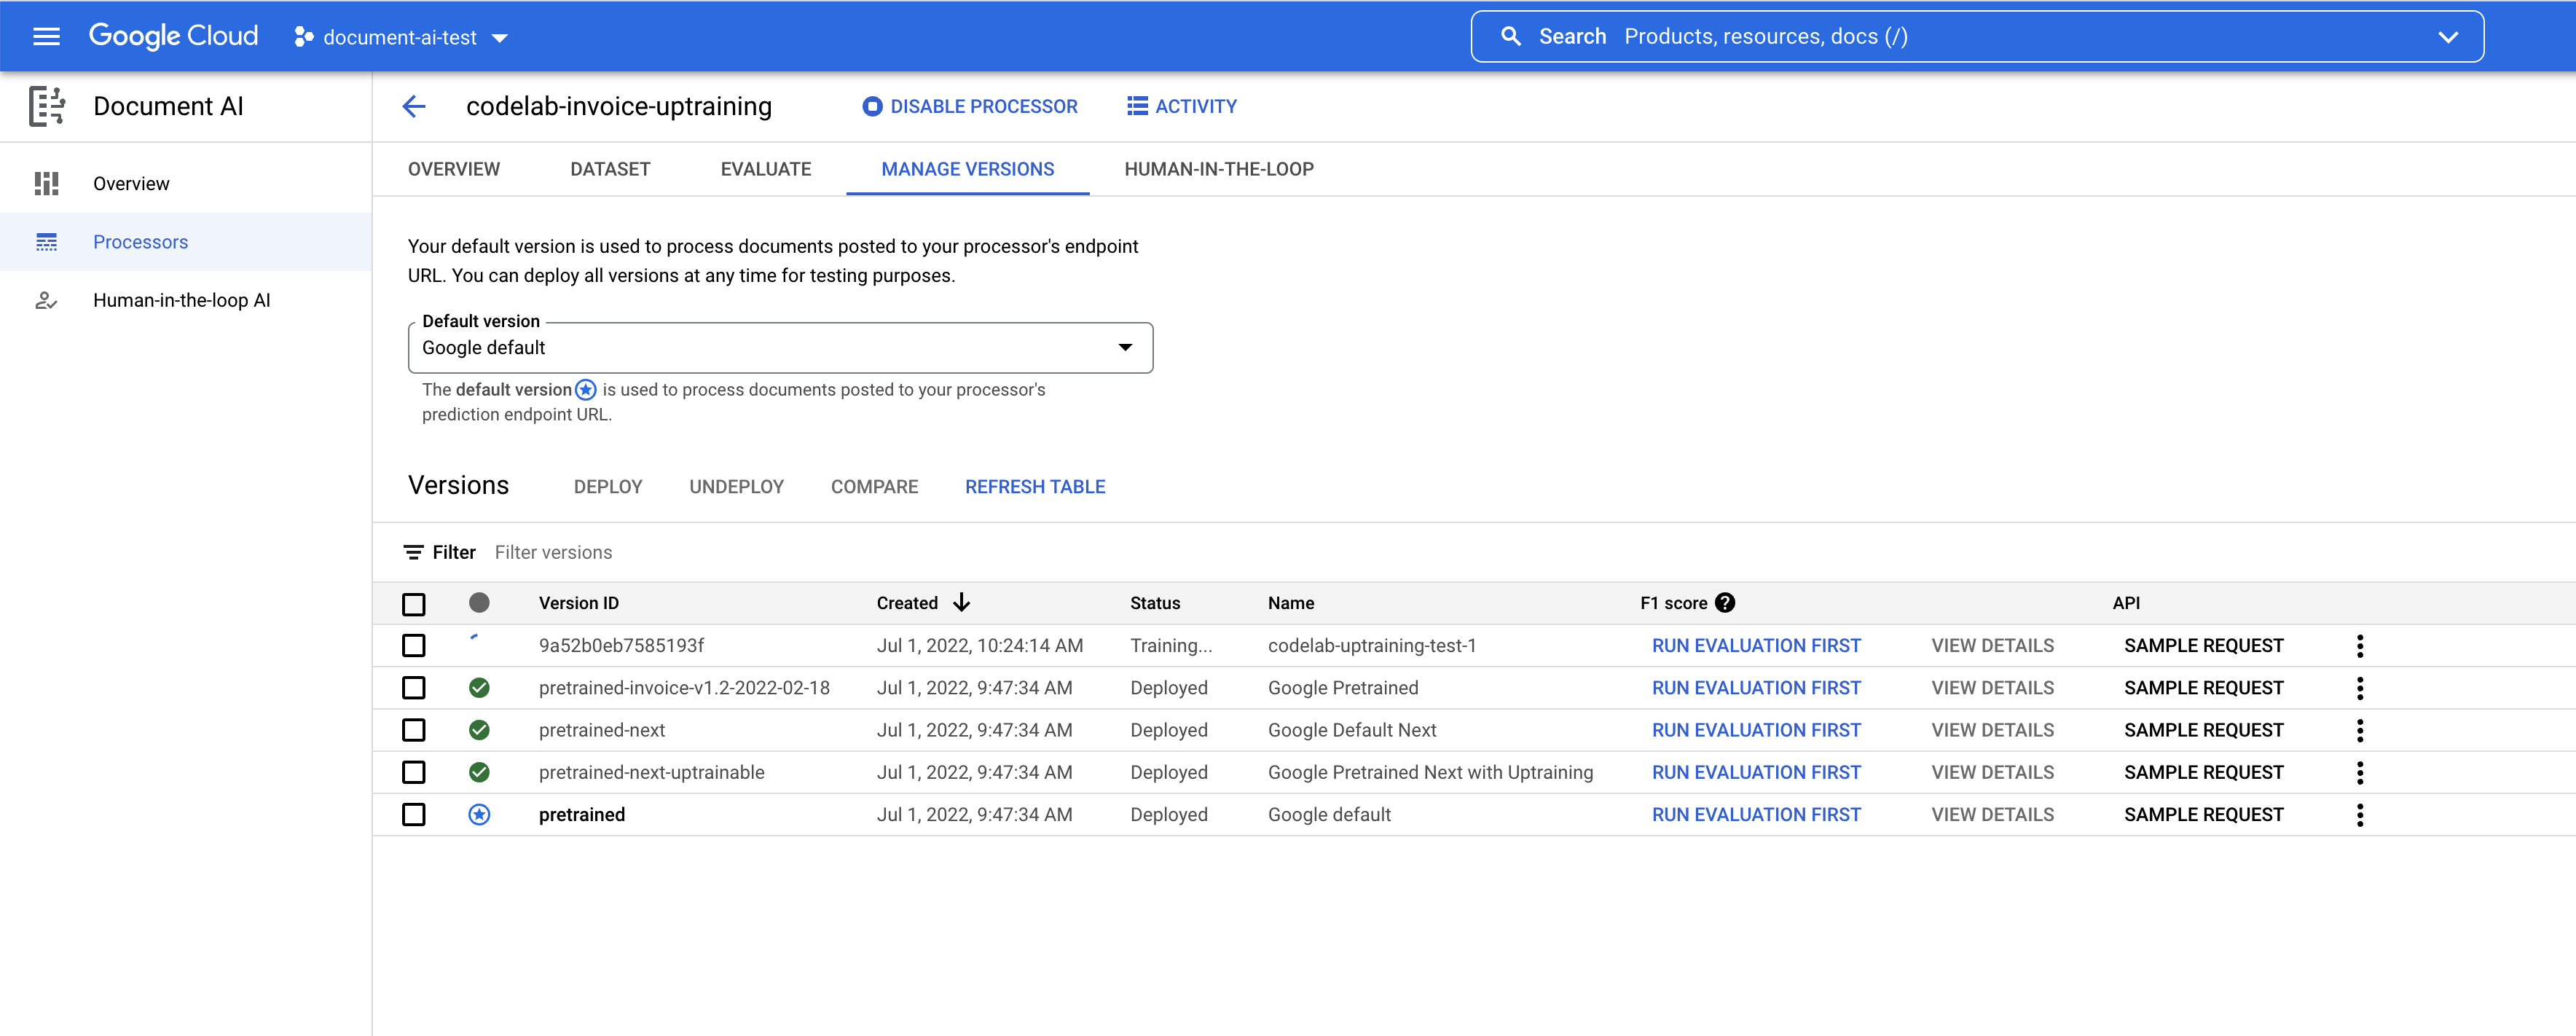
- If you click on the version name, you will be directed to the Manage Versions page, which shows the Version ID and the current status of the Training Job.
12. Test the New Model Version
Once the Training Job is complete (it took about 1 hour in my tests), you can now test out the new model version and start using it for predictions.
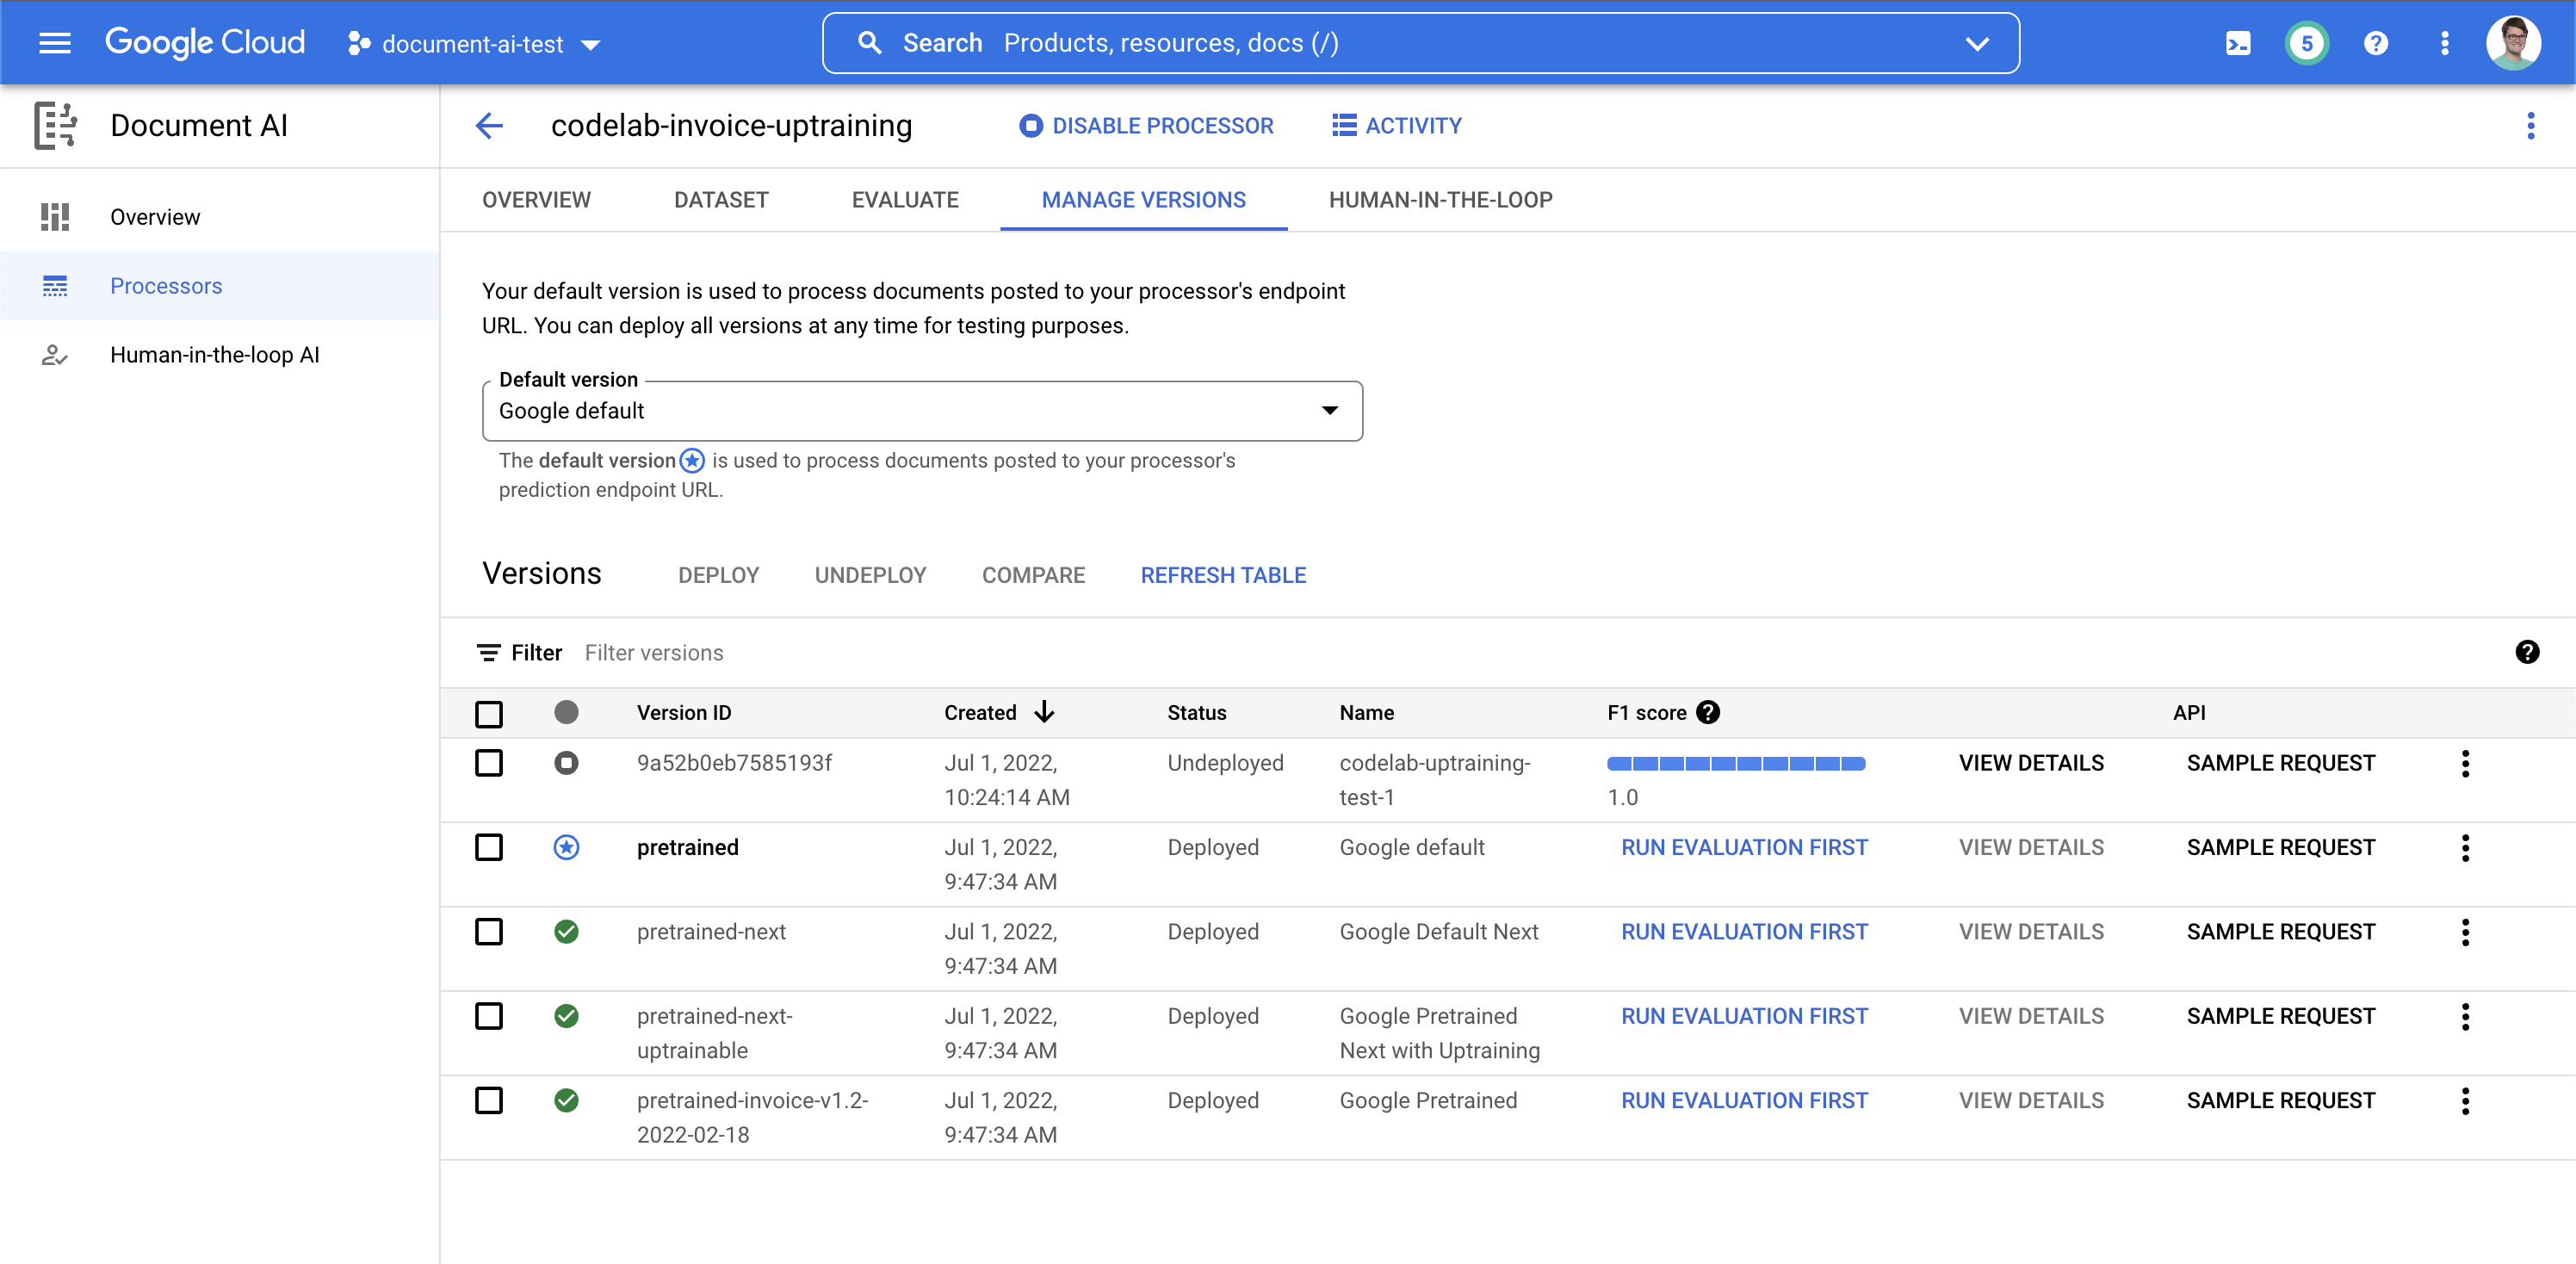
- Go to the Manage Versions page. Here you can see the current status and F1 Score.
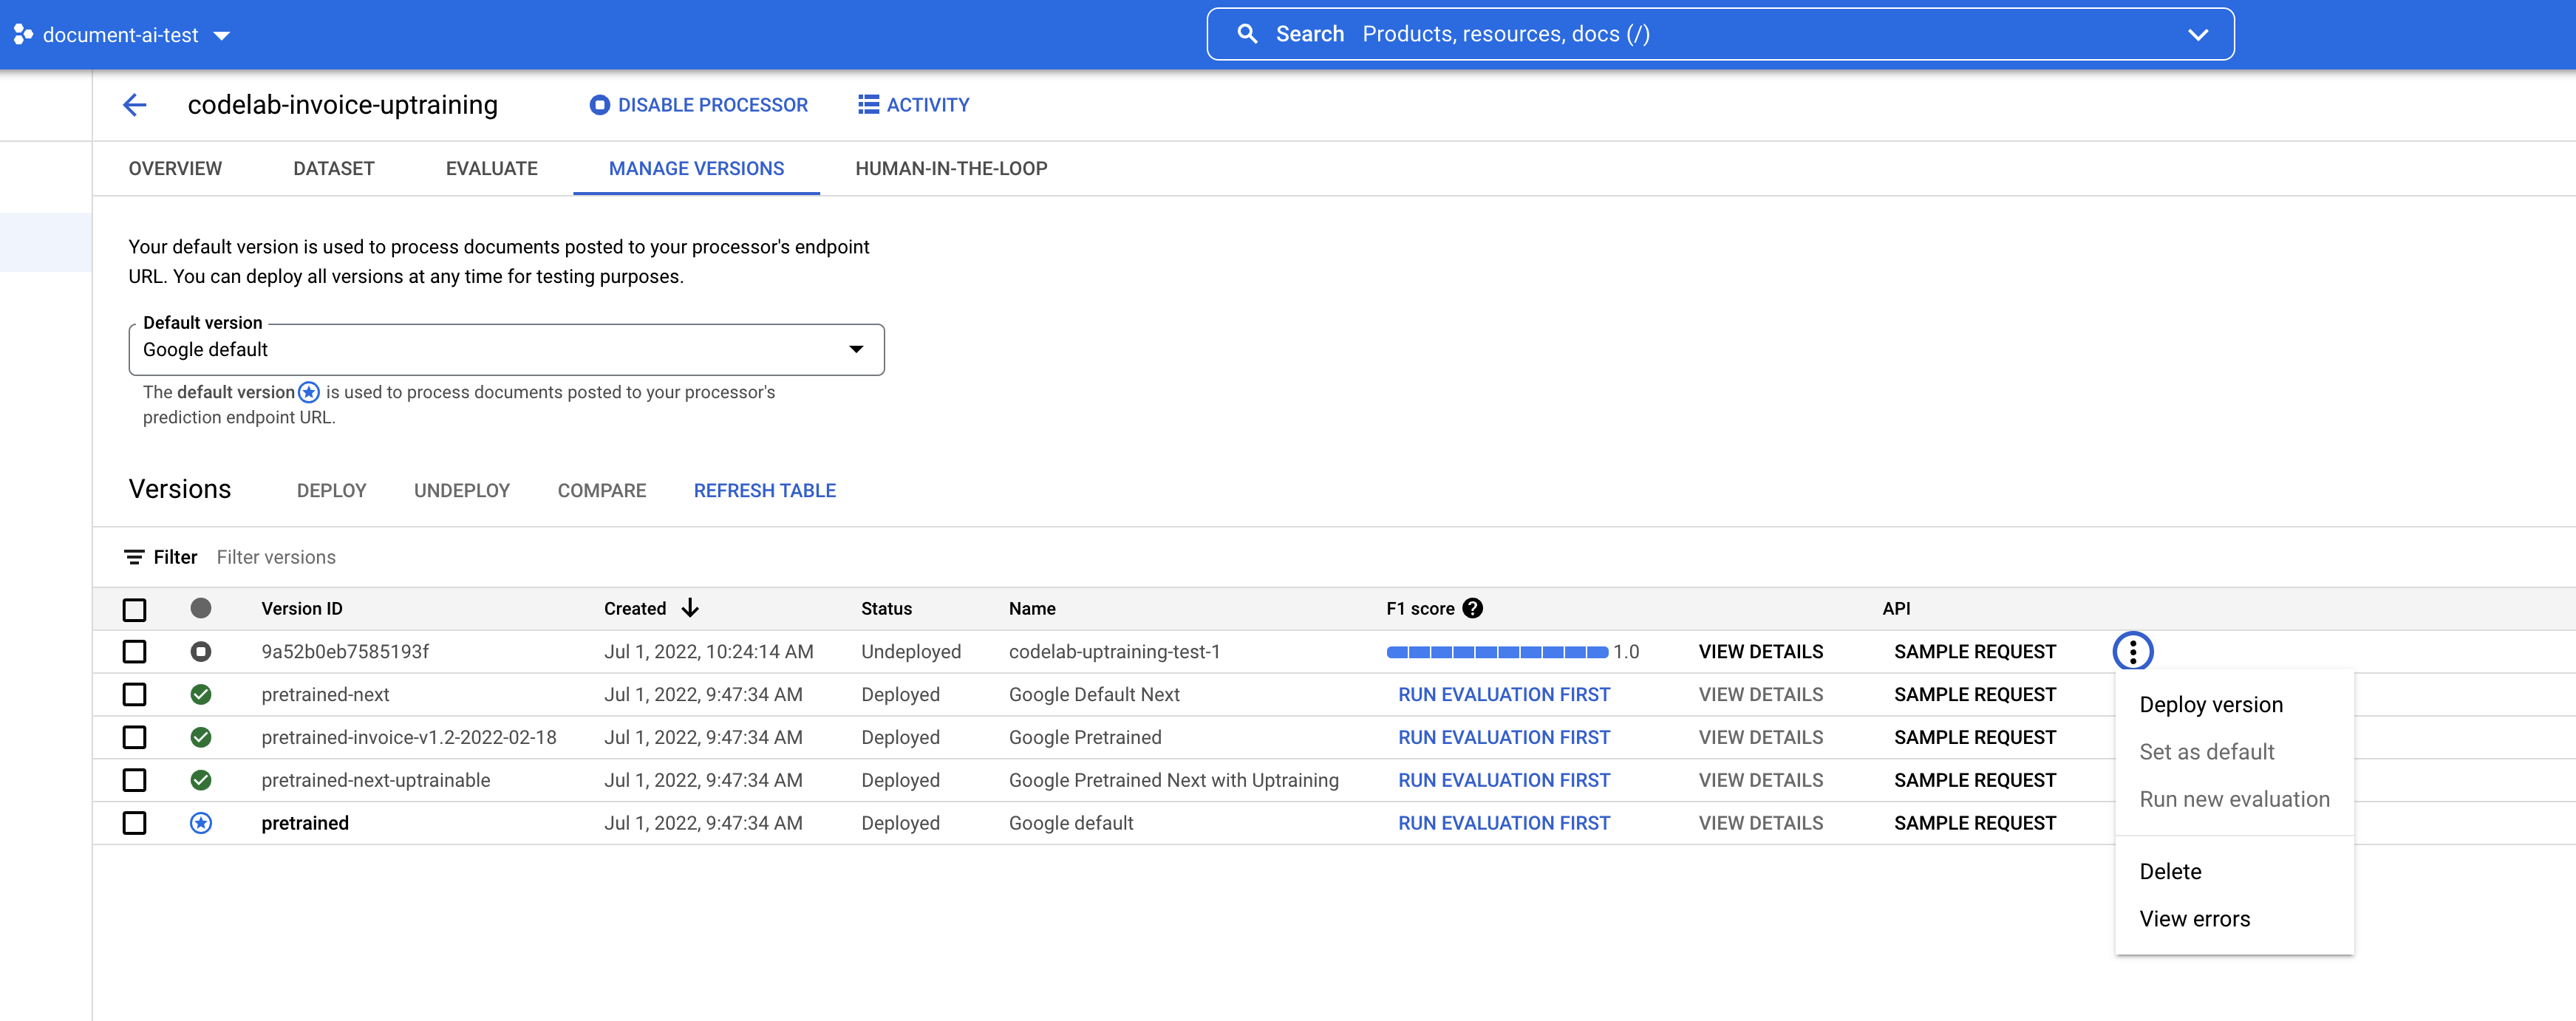
- We will need to deploy this model version before it can be used. Click on the vertical dots on the right side and select Deploy Version.
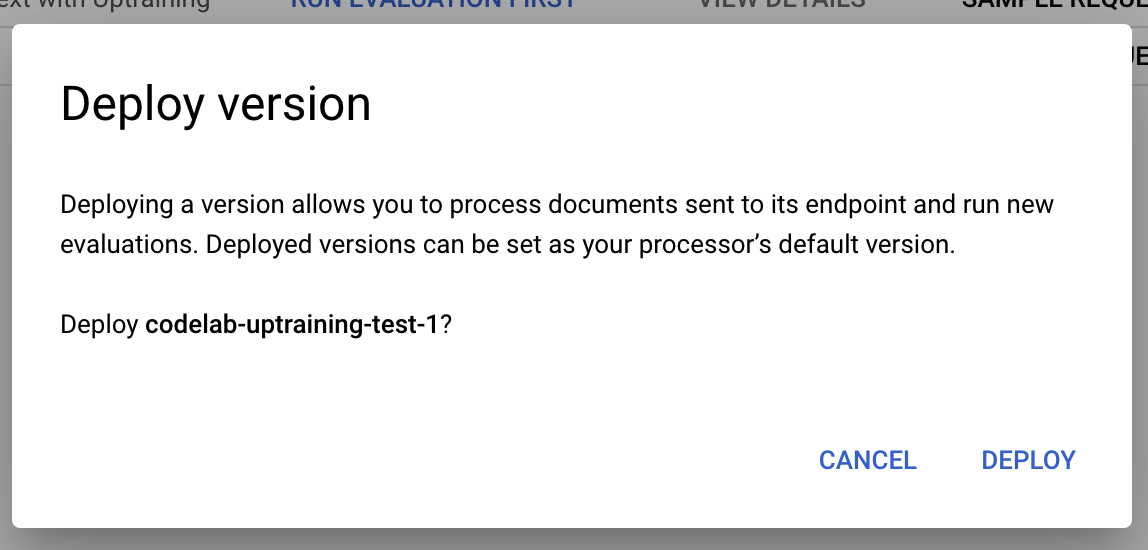
- Select Deploy from the pop-up window, when wait for the version to deploy. This will take a few minutes to complete. After it's deployed, you can also set this version as the Default Version.
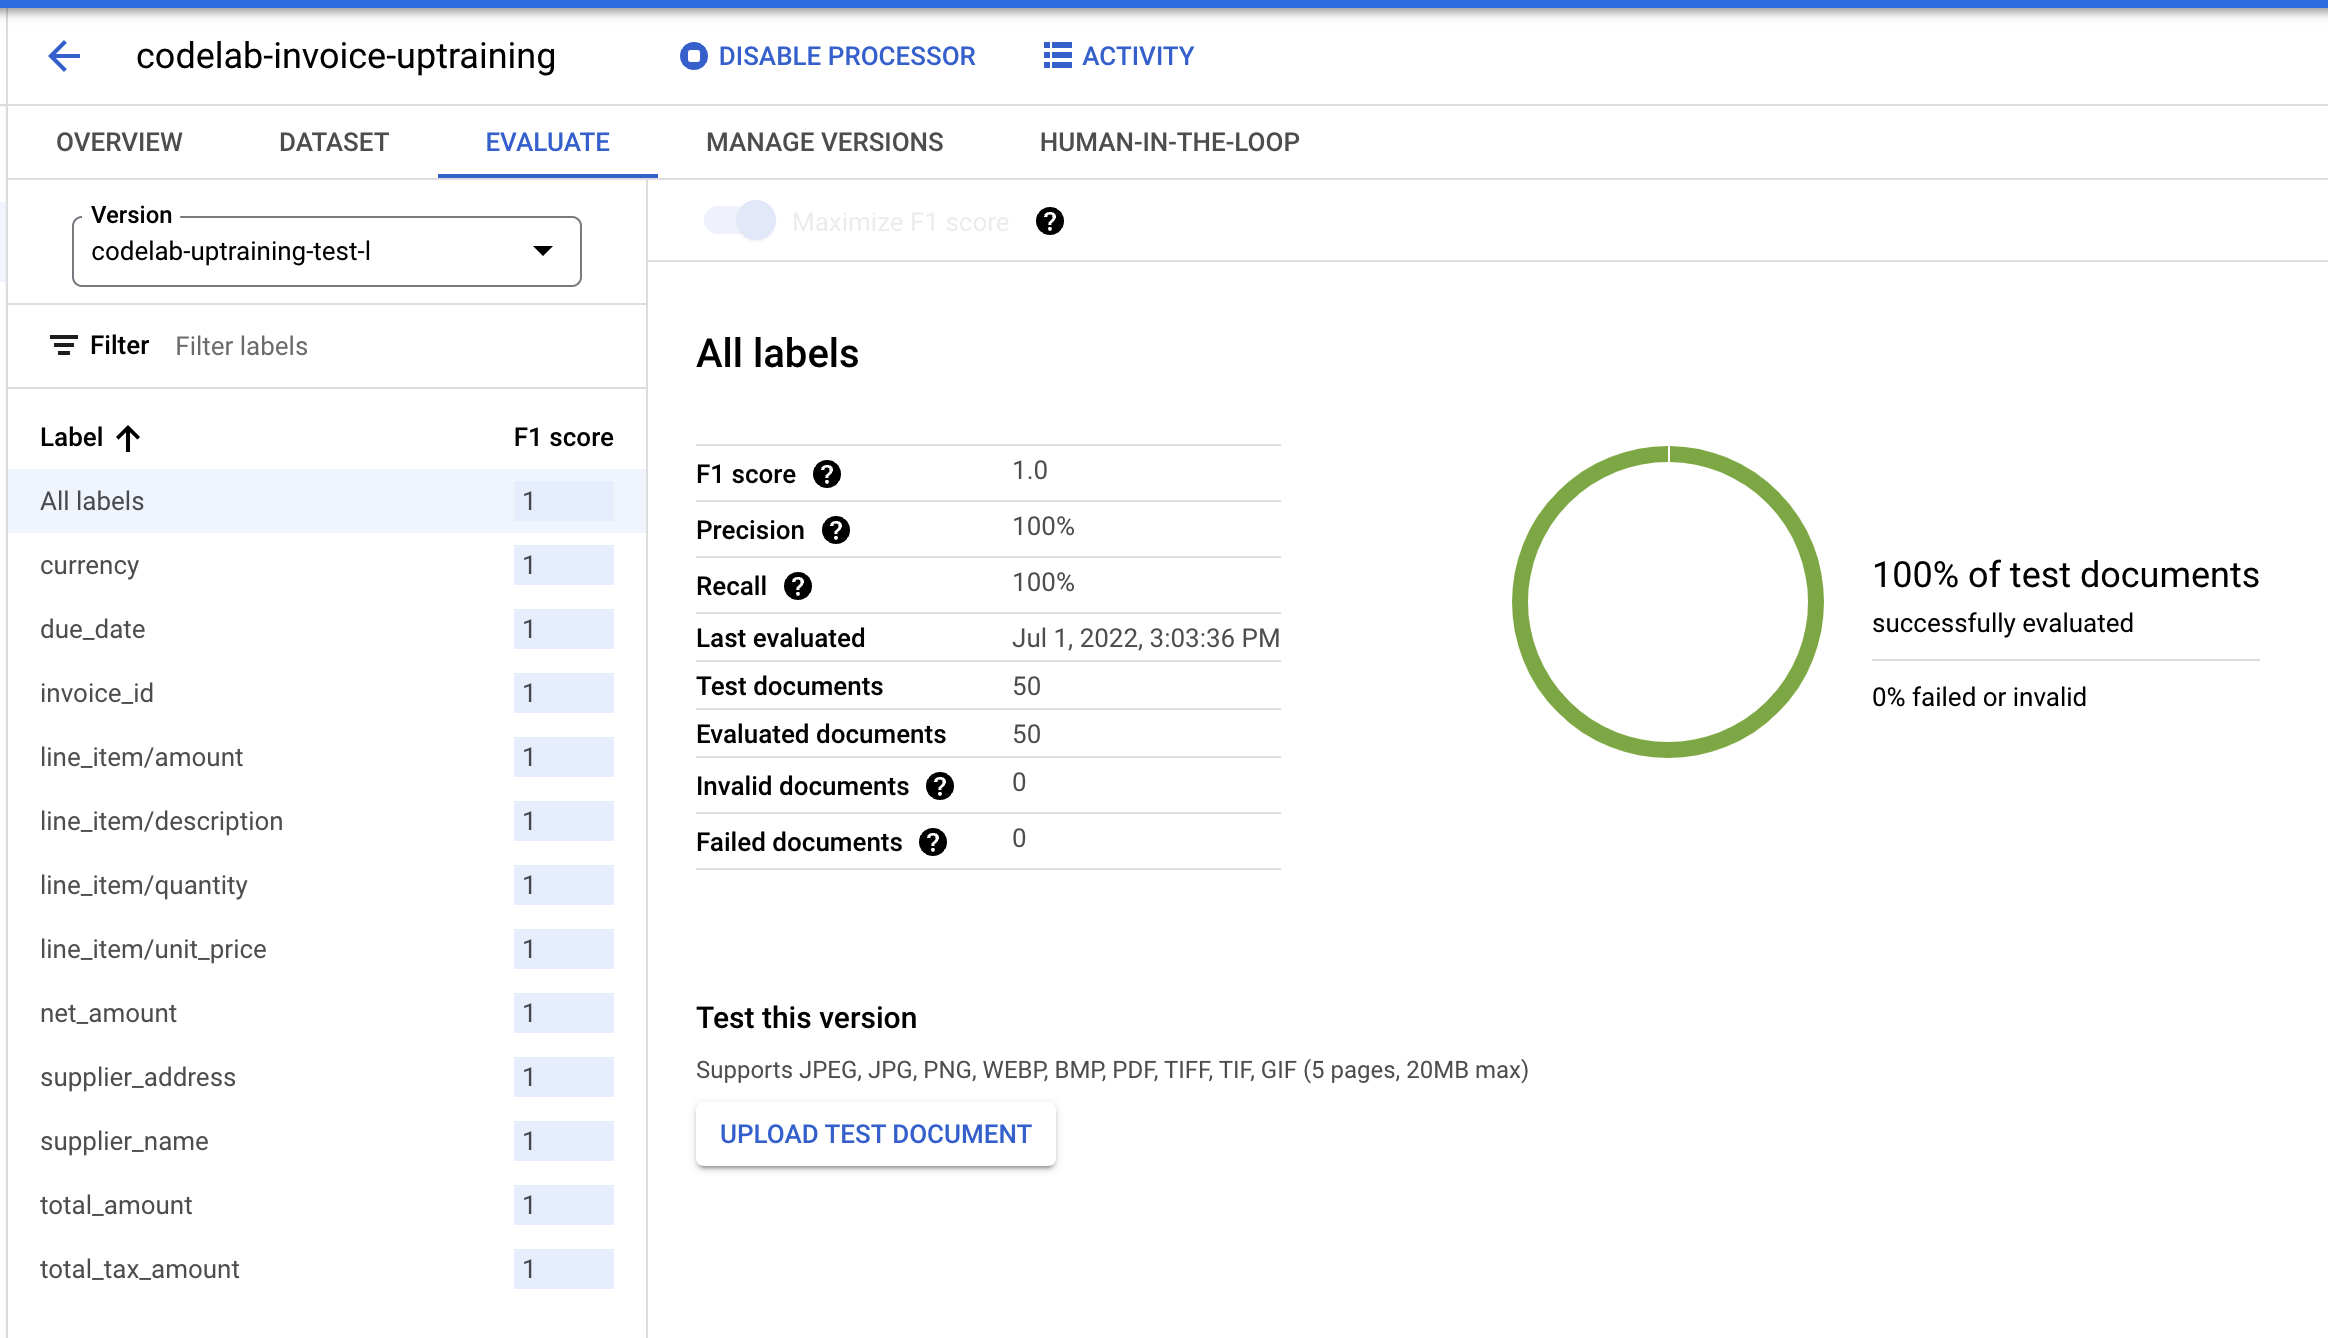
- Once it's finished deploying, go to the Evaluate Tab. Then click on the Version dropdown and select our newly-created version.
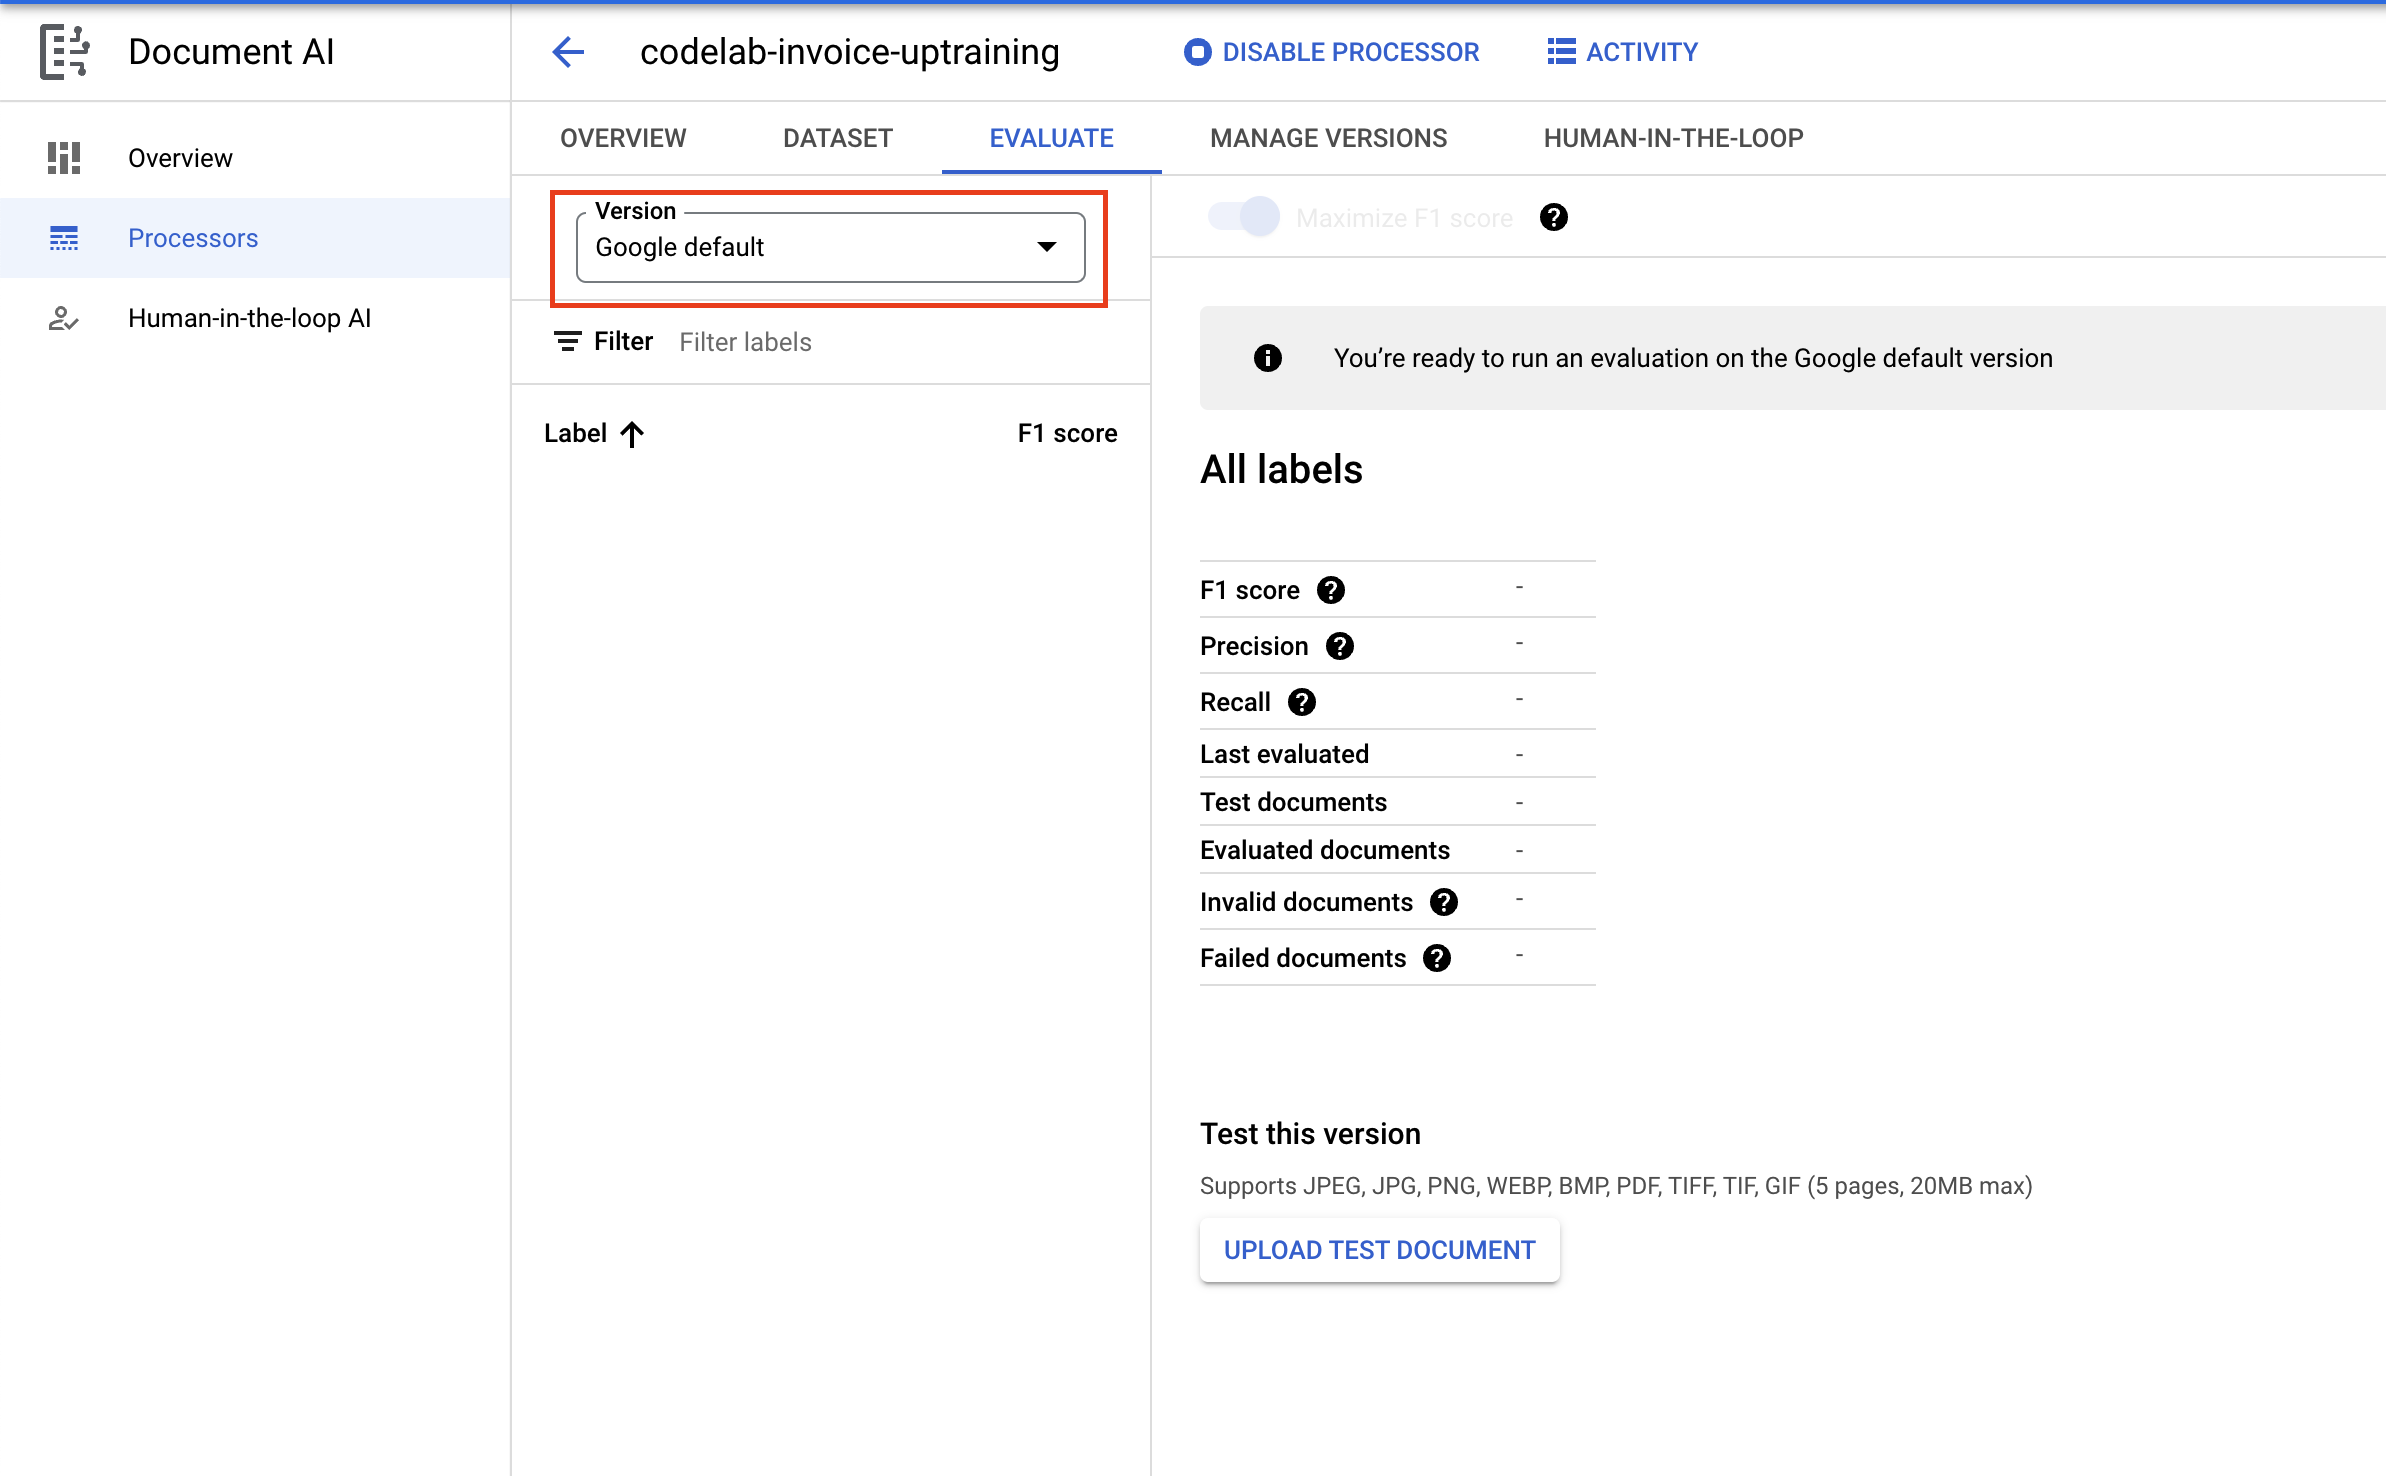
- On this page, you can view evaluation metrics including the F1 score, Precision and Recall for the full document as well as individual labels. You can read more about these metrics in the AutoML Documentation.
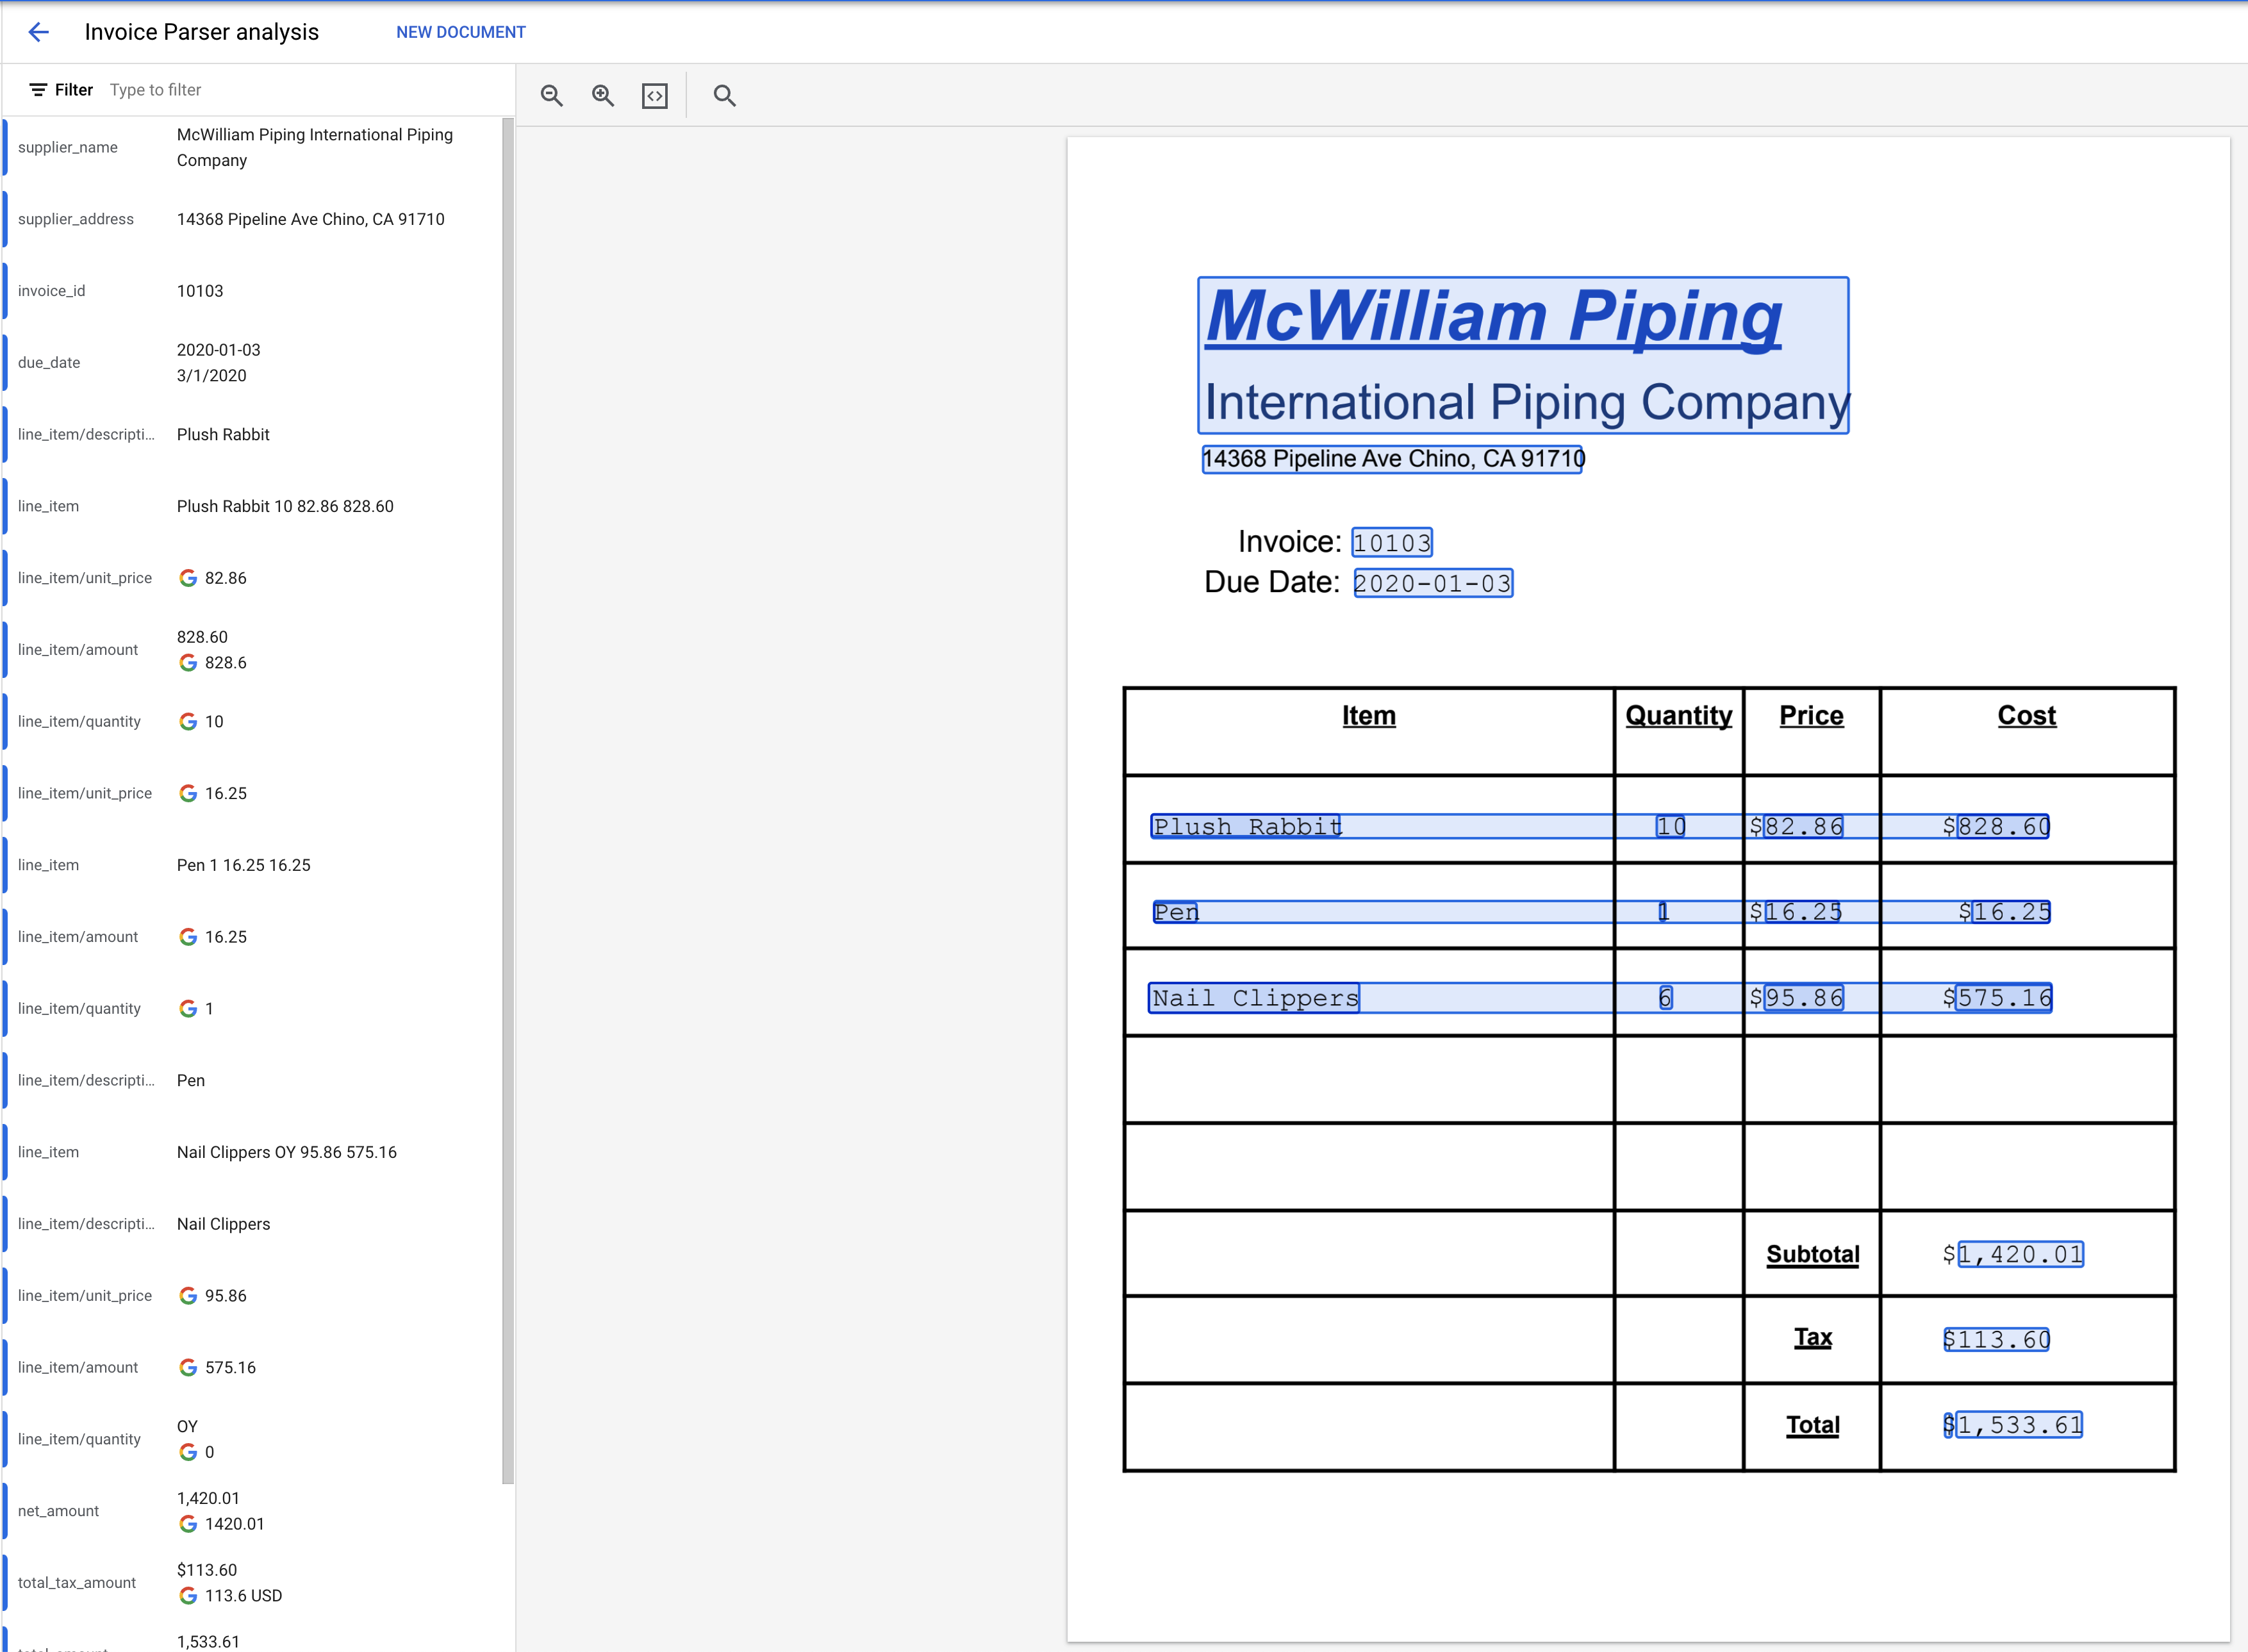
- Download the PDF File linked below. This is a sample document that was not included in the Training or Test set.
- Click on Upload Test Document and select the PDF file.
- The extracted entities should look something like this.
13. Conclusion
Congratulations, you've successfully used Document AI to uptrain an Invoice Parser. You can now use this processor to parse invoices just as you would for any Specialized Processor.
You can refer to the Specialized Processors Codelab to review how to handle the processing response.
Cleanup
To avoid incurring charges to your Google Cloud account for the resources used in this tutorial:
- In the Cloud Console, go to the Manage resources page.
- In the project list, select your project then click Delete.
- In the dialog, type the project ID and then click Shut down to delete the project.
Resources
- Document AI Workbench Documentation
- The Future of Documents - YouTube Playlist
- Document AI Documentation
- Document AI Python Client Library
- Document AI Samples
License
This work is licensed under a Creative Commons Attribution 2.0 Generic License.