1. परिचय
Dart के एफ़एफ़आई (फ़ॉरेन फ़ंक्शन इंटरफ़ेस) की मदद से, Flutter ऐप्लिकेशन ऐसी मौजूदा नेटिव लाइब्रेरी का इस्तेमाल कर सकते हैं जो C API को एक्सपोज़ करती हैं. Dart, Android, iOS, Windows, macOS, और Linux पर एफ़एफ़आई के साथ काम करता है. वेब के लिए, Dart, JavaScript इंटरऑपरेबिलिटी के साथ काम करता है. हालांकि, इस कोडलैब में इस विषय को शामिल नहीं किया गया है.
आपको क्या बनाना है
इस कोडलैब में, C लाइब्रेरी का इस्तेमाल करने वाला मोबाइल और डेस्कटॉप प्लग इन बनाया जाता है. इस एपीआई की मदद से, आपको एक ऐसा ऐप्लिकेशन लिखना होगा जो प्लग इन का इस्तेमाल करता हो. आपका प्लग इन और ऐप्लिकेशन:
- C लाइब्रेरी के सोर्स कोड को अपने नए Flutter प्लगिन में इंपोर्ट करना
- प्लग इन को पसंद के मुताबिक बनाएं, ताकि उसे Windows, macOS, Linux, Android, और iOS पर बनाया जा सके
- ऐसा ऐप्लिकेशन बनाएं जो JavaScript REPL (रीड-एवल्यूएट-प्रिंट-लूप) के लिए प्लग इन का इस्तेमाल करता हो
आपको क्या सीखने को मिलेगा
इस कोडलैब में, आपको डेस्कटॉप और मोबाइल, दोनों प्लैटफ़ॉर्म पर एफ़एफ़आई (फ़ॉरेन फ़ंक्शन इंटरफ़ेस) पर आधारित Flutter प्लग इन बनाने के लिए, ज़रूरी जानकारी मिलेगी. इसमें ये चीज़ें शामिल हैं:
- Dart FFI पर आधारित Flutter प्लगिन टेंप्लेट जनरेट करना
- C लाइब्रेरी के लिए बाइंडिंग कोड जनरेट करने के लिए,
ffigenपैकेज का इस्तेमाल करना - CMake का इस्तेमाल करके, Android, Windows, और Linux के लिए Flutter FFI प्लग इन बनाना
- iOS और macOS के लिए Flutter FFI प्लग इन बनाने के लिए, CocoaPods का इस्तेमाल करना
आपको किन चीज़ों की ज़रूरत होगी
- Android डेवलपमेंट के लिए, Android Studio 4.1 या इसके बाद का वर्शन
- iOS और macOS ऐप्लिकेशन डेवलप करने के लिए, Xcode 13 या इसके बाद का वर्शन
- Windows डेस्कटॉप डेवलपमेंट के लिए, "C++ के साथ डेस्कटॉप डेवलपमेंट" वर्कलोड वाला Visual Studio 2022 या Visual Studio Build Tools 2022
- Flutter SDK टूल
- उन प्लैटफ़ॉर्म के लिए ज़रूरी बिल्ड टूल जिन पर आपको ऐप्लिकेशन डेवलप करना है. उदाहरण के लिए, CMake, CocoaPods वगैरह.
- उन प्लैटफ़ॉर्म के लिए LLVM जिन पर आपको ऐप्लिकेशन डेवलप करना है.
ffigen, LLVM कंपाइलर टूल सुइट का इस्तेमाल करके C हेडर फ़ाइल को पार्स करता है, ताकि Dart में एक्सपोज़ की गई एफ़एफ़आई बाइंडिंग बनाई जा सके. - कोड एडिटर, जैसे कि Visual Studio Code.
2. शुरू करना
ffigen टूल, Flutter में हाल ही में जोड़ा गया है. यह पुष्टि करने के लिए कि आपके Flutter इंस्टॉलेशन में, फ़िलहाल इस्तेमाल किया जा सकने वाला वर्शन चल रहा है, यह निर्देश चलाएं.
$ flutter doctor
Doctor summary (to see all details, run flutter doctor -v):
[✓] Flutter (Channel stable, 3.32.4, on macOS 15.5 24F74 darwin-arm64, locale en-AU)
[✓] Android toolchain - develop for Android devices (Android SDK version 36.0.0)
[✓] Xcode - develop for iOS and macOS (Xcode 16.4)
[✓] Chrome - develop for the web
[✓] Android Studio (version 2024.2)
[✓] IntelliJ IDEA Community Edition (version 2024.3.1.1)
[✓] VS Code (version 1.101.0)
[✓] Connected device (3 available)
[✓] Network resources

• No issues found!
पुष्टि करें कि flutter doctor आउटपुट से पता चलता हो कि आपका डिवाइस, स्टेबल चैनल पर काम कर रहा है और Flutter के नए स्टेबल वर्शन उपलब्ध नहीं हैं. अगर आपने Flutter के स्टैबल वर्शन का इस्तेमाल नहीं किया है या इसके नए वर्शन उपलब्ध हैं, तो Flutter टूल को अप-टू-डेट करने के लिए, नीचे दिए गए दो निर्देश चलाएं.
flutter channel stable
flutter upgrade
इस कोडलैब में कोड चलाने के लिए, इनमें से किसी भी डिवाइस का इस्तेमाल किया जा सकता है:
- डेवलपमेंट के लिए इस्तेमाल किया जाने वाला कंप्यूटर (आपके प्लग इन और उदाहरण के तौर पर दिए गए ऐप्लिकेशन के डेस्कटॉप बिल्ड के लिए)
- आपके कंप्यूटर से कनेक्ट किया गया कोई Android या iOS डिवाइस, जो डेवलपर मोड पर सेट हो
- iOS सिम्युलेटर (इसके लिए, Xcode टूल इंस्टॉल करने की ज़रूरत है)
- Android एमुलेटर (Android Studio में सेटअप करना ज़रूरी है)
3. प्लग इन टेंप्लेट जनरेट करना
Flutter प्लग इन डेवलपमेंट शुरू करना
Flutter में प्लग इन के लिए टेंप्लेट मौजूद होते हैं. इनकी मदद से, Flutter का इस्तेमाल करना आसान हो जाता है. प्लग इन टेंप्लेट जनरेट करते समय, यह तय किया जा सकता है कि आपको किस भाषा का इस्तेमाल करना है.
प्लग इन टेंप्लेट का इस्तेमाल करके प्रोजेक्ट बनाने के लिए, अपनी वर्किंग डायरेक्ट्री में यह कमांड चलाएं:
flutter create --template=plugin_ffi --platforms=android,ios,linux,macos,windows ffigen_app
--platforms पैरामीटर से यह पता चलता है कि आपका प्लग इन किन प्लैटफ़ॉर्म पर काम करेगा.
tree कमांड या अपने ऑपरेटिंग सिस्टम के फ़ाइल एक्सप्लोरर का इस्तेमाल करके, जनरेट किए गए प्रोजेक्ट के लेआउट की जांच की जा सकती है.
$ tree -L 2 ffigen_app
ffigen_app
├── CHANGELOG.md
├── LICENSE
├── README.md
├── analysis_options.yaml
├── android
│   ├── build.gradle
│   ├── ffigen_app_android.iml
│   ├── local.properties
│   ├── settings.gradle
│   └── src
├── example
│   ├── README.md
│   ├── analysis_options.yaml
│   ├── android
│   ├── ffigen_app_example.iml
│   ├── ios
│   ├── lib
│   ├── linux
│   ├── macos
│   ├── pubspec.lock
│   ├── pubspec.yaml
│   └── windows
├── ffigen.yaml
├── ffigen_app.iml
├── ios
│   ├── Classes
│   └── ffigen_app.podspec
├── lib
│   ├── ffigen_app.dart
│   └── ffigen_app_bindings_generated.dart
├── linux
│   └── CMakeLists.txt
├── macos
│   ├── Classes
│   └── ffigen_app.podspec
├── pubspec.lock
├── pubspec.yaml
├── src
│   ├── CMakeLists.txt
│   ├── ffigen_app.c
│   └── ffigen_app.h
└── windows
    └── CMakeLists.txt

17 directories, 26 files
डायरेक्ट्री स्ट्रक्चर को देखने में थोड़ा समय बिताएं, ताकि आपको यह पता चल सके कि क्या बनाया गया है और वह कहां मौजूद है. plugin_ffi टेंप्लेट, प्लग इन के लिए Dart कोड को lib, android, ios, linux, macos, और windows नाम की प्लैटफ़ॉर्म-स्पेसिफ़िक डायरेक्ट्री में डालता है. सबसे अहम बात यह है कि यह कोड example डायरेक्ट्री में भी डाला जाता है.
Flutter में सामान्य तौर पर डेवलपमेंट करने वाले डेवलपर को यह स्ट्रक्चर अजीब लग सकता है. इसकी वजह यह है कि टॉप लेवल पर कोई एक्सीक्यूटेबल नहीं है. प्लग इन को अन्य Flutter प्रोजेक्ट में शामिल किया जाता है. हालांकि, आपको example डायरेक्ट्री में कोड को बेहतर बनाना होगा, ताकि यह पुष्टि की जा सके कि आपका प्लग इन कोड काम करता है.
अब शुरू करने का समय आ गया है!
4. उदाहरण को बिल्ड और चलाना
यह पक्का करने के लिए कि बिल्ड सिस्टम और ज़रूरी शर्तें सही तरीके से इंस्टॉल की गई हैं और वे काम करने वाले हर प्लैटफ़ॉर्म के लिए काम करती हैं, हर टारगेट के लिए जनरेट किया गया उदाहरण ऐप्लिकेशन बनाएं और चलाएं.
Windows
पुष्टि करें कि आपने Windows के उस वर्शन का इस्तेमाल किया हो जिस पर यह सुविधा काम करती है. यह कोडलैब, Windows 10 और Windows 11 पर काम करता है.
ऐप्लिकेशन को कोड एडिटर में या कमांड-लाइन से बनाया जा सकता है.
PS C:\Users\brett\Documents> cd .\ffigen_app\example\
PS C:\Users\brett\Documents\ffigen_app\example> flutter run -d windows
Launching lib\main.dart on Windows in debug mode...Building Windows application...
Syncing files to device Windows...                                 160ms

Flutter run key commands.
r Hot reload.
R Hot restart.
h List all available interactive commands.
d Detach (terminate "flutter run" but leave application running).
c Clear the screen
q Quit (terminate the application on the device).

 Running with sound null safety

An Observatory debugger and profiler on Windows is available at: http://127.0.0.1:53317/OiKWpyHXxHI=/
The Flutter DevTools debugger and profiler on Windows is available at:
http://127.0.0.1:9100?uri=http://127.0.0.1:53317/OiKWpyHXxHI=/
आपको चल रहे ऐप्लिकेशन की विंडो इस तरह दिखेगी:

Linux
पुष्टि करें कि आपने Linux के उस वर्शन का इस्तेमाल किया हो जिस पर यह सुविधा काम करती है. यह कोडलैब Ubuntu 22.04.1 का इस्तेमाल करता है.
दूसरे चरण में बताई गई सभी ज़रूरी शर्तें इंस्टॉल करने के बाद, टर्मिनल में ये निर्देश चलाएं:
$ cd ffigen_app/example
$ flutter run -d linux
Launching lib/main.dart on Linux in debug mode...
Building Linux application...
Syncing files to device Linux...                                   504ms

Flutter run key commands.
r Hot reload. 🔥🔥🔥
R Hot restart.
h List all available interactive commands.
d Detach (terminate "flutter run" but leave application running).
c Clear the screen
q Quit (terminate the application on the device).

💪 Running with sound null safety 💪

An Observatory debugger and profiler on Linux is available at: http://127.0.0.1:36653/Wgek1JGag48=/
The Flutter DevTools debugger and profiler on Linux is available at:
http://127.0.0.1:9103?uri=http://127.0.0.1:36653/Wgek1JGag48=/
आपको चल रहे ऐप्लिकेशन की विंडो इस तरह दिखेगी:

Android
Android के लिए, कंपाइल करने के लिए Windows, macOS या Linux का इस्तेमाल किया जा सकता है.
सही NDK वर्शन का इस्तेमाल करने के लिए, आपको example/android/app/build.gradle.kts में बदलाव करना होगा.
example/android/app/build.gradle.kts)
android {
    // Modify the next line from `flutter.ndkVersion` to the following:
    ndkVersion = "27.0.12077973"
    // ...
}
पक्का करें कि आपके डेवलपमेंट कंप्यूटर से कोई Android डिवाइस कनेक्ट हो या आपने Android एमुलेटर (AVD) इंस्टेंस चलाया हो. यह पुष्टि करें कि Flutter, Android डिवाइस या एमुलेटर में से किसी एक से कनेक्ट हो सकता है. इसके लिए, यह तरीका अपनाएं:
$ flutter devices
3 connected devices:

sdk gphone64 arm64 (mobile) • emulator-5554 • android-arm64  • Android 12 (API 32) (emulator)
macOS (desktop)             • macos         • darwin-arm64   • macOS 13.1 22C65 darwin-arm
Chrome (web)                • chrome        • web-javascript • Google Chrome 108.0.5359.98
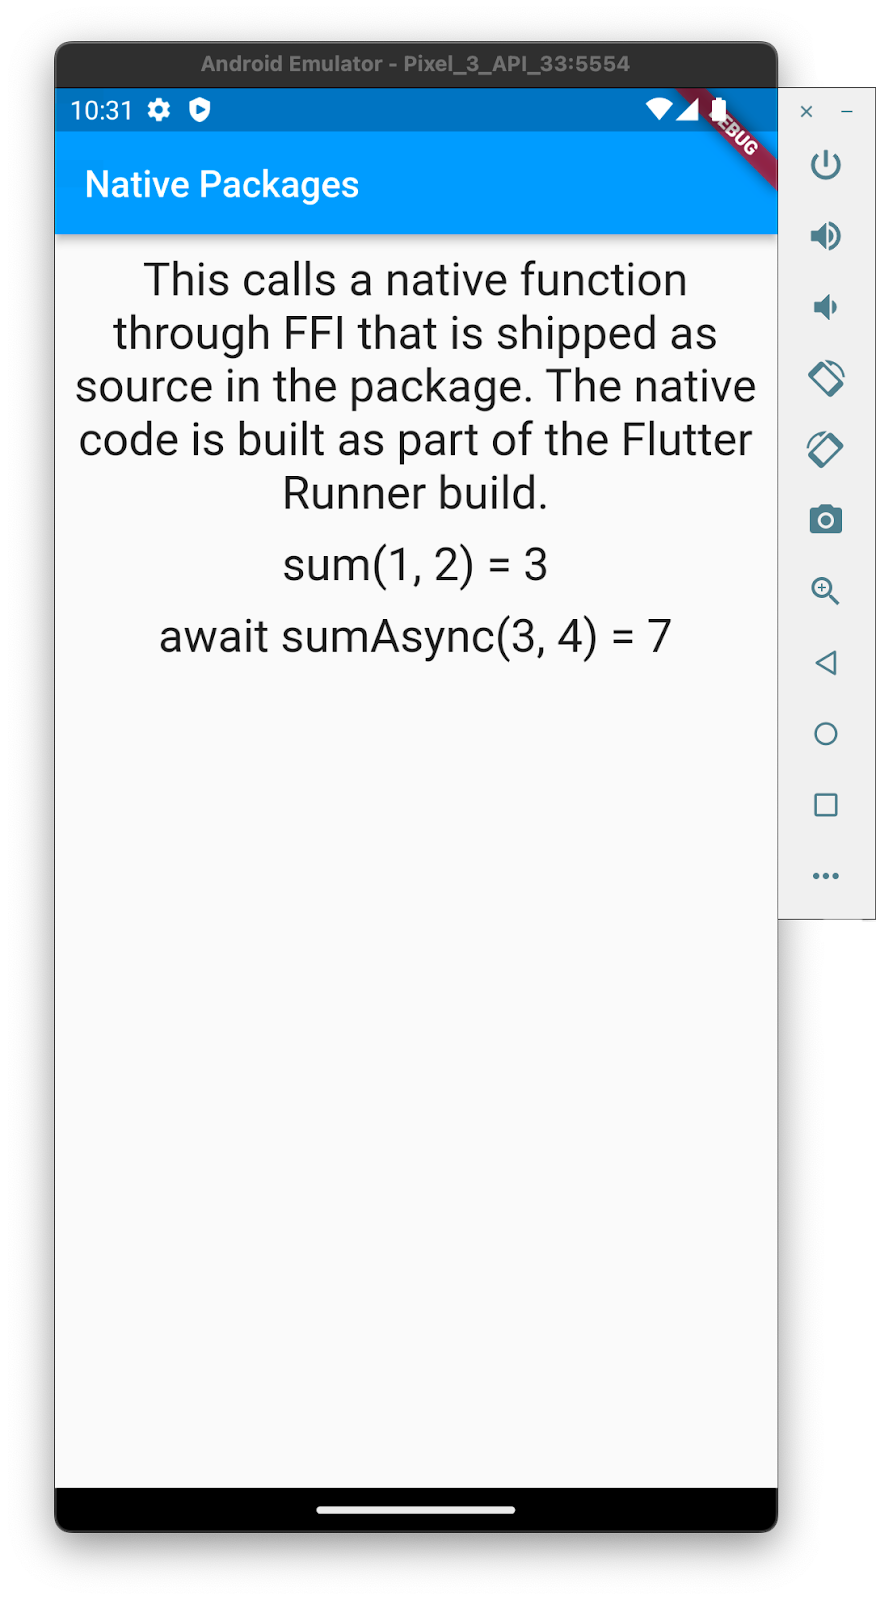
Android डिवाइस (असल डिवाइस या एम्युलेटर) चालू होने के बाद, यह कमांड चलाएं:
cd ffigen_app/example
flutter run
Flutter आपसे पूछेगा कि आपको इसे किस डिवाइस पर चलाना है. सूची में से वह डिवाइस चुनें जिसे आपको अनलिंक करना है.
macOS और iOS
macOS और iOS के लिए Flutter डेवलपमेंट करने के लिए, आपको macOS कंप्यूटर का इस्तेमाल करना होगा.
macOS पर उदाहरण के तौर पर दिया गया ऐप्लिकेशन चलाकर शुरुआत करें. फिर से पुष्टि करें कि Flutter को कौनसे डिवाइस दिख रहे हैं:
$ flutter devices
2 connected devices:

macOS (desktop) • macos  • darwin-arm64   • macOS 13.1 22C65 darwin-arm
Chrome (web)    • chrome • web-javascript • Google Chrome 108.0.5359.98
जनरेट किए गए प्लग इन प्रोजेक्ट का इस्तेमाल करके, उदाहरण के तौर पर दिया गया ऐप्लिकेशन चलाएं:
cd ffigen_app/example
flutter run -d macos
आपको चल रहे ऐप्लिकेशन की विंडो इस तरह दिखेगी:

iOS के लिए, सिम्युलेटर या असली हार्डवेयर डिवाइस का इस्तेमाल किया जा सकता है. अगर सिम्युलेटर का इस्तेमाल किया जा रहा है, तो पहले सिम्युलेटर लॉन्च करें. flutter devices कमांड अब सिम्युलेटर को उपलब्ध डिवाइसों में से एक के तौर पर दिखाता है.
$ flutter devices
3 connected devices:

iPhone SE (3rd generation) (mobile) • 1BCBE334-7EC4-433A-90FD-1BC14F3BA41F • ios            • com.apple.CoreSimulator.SimRuntime.iOS-16-1 (simulator)
macOS (desktop)                     • macos                                • darwin-arm64   • macOS 13.1 22C65 darwin-arm
Chrome (web)                        • chrome                               • web-javascript • Google Chrome 108.0.5359.98
iOS डिवाइस (असल डिवाइस या सिम्युलेटर) चालू होने के बाद, यह कमांड चलाएं:
cd ffigen_app/example
flutter run
Flutter आपसे पूछेगा कि आपको इसे किस डिवाइस पर चलाना है. सूची में से वह डिवाइस चुनें जिसे आपको अनलिंक करना है.
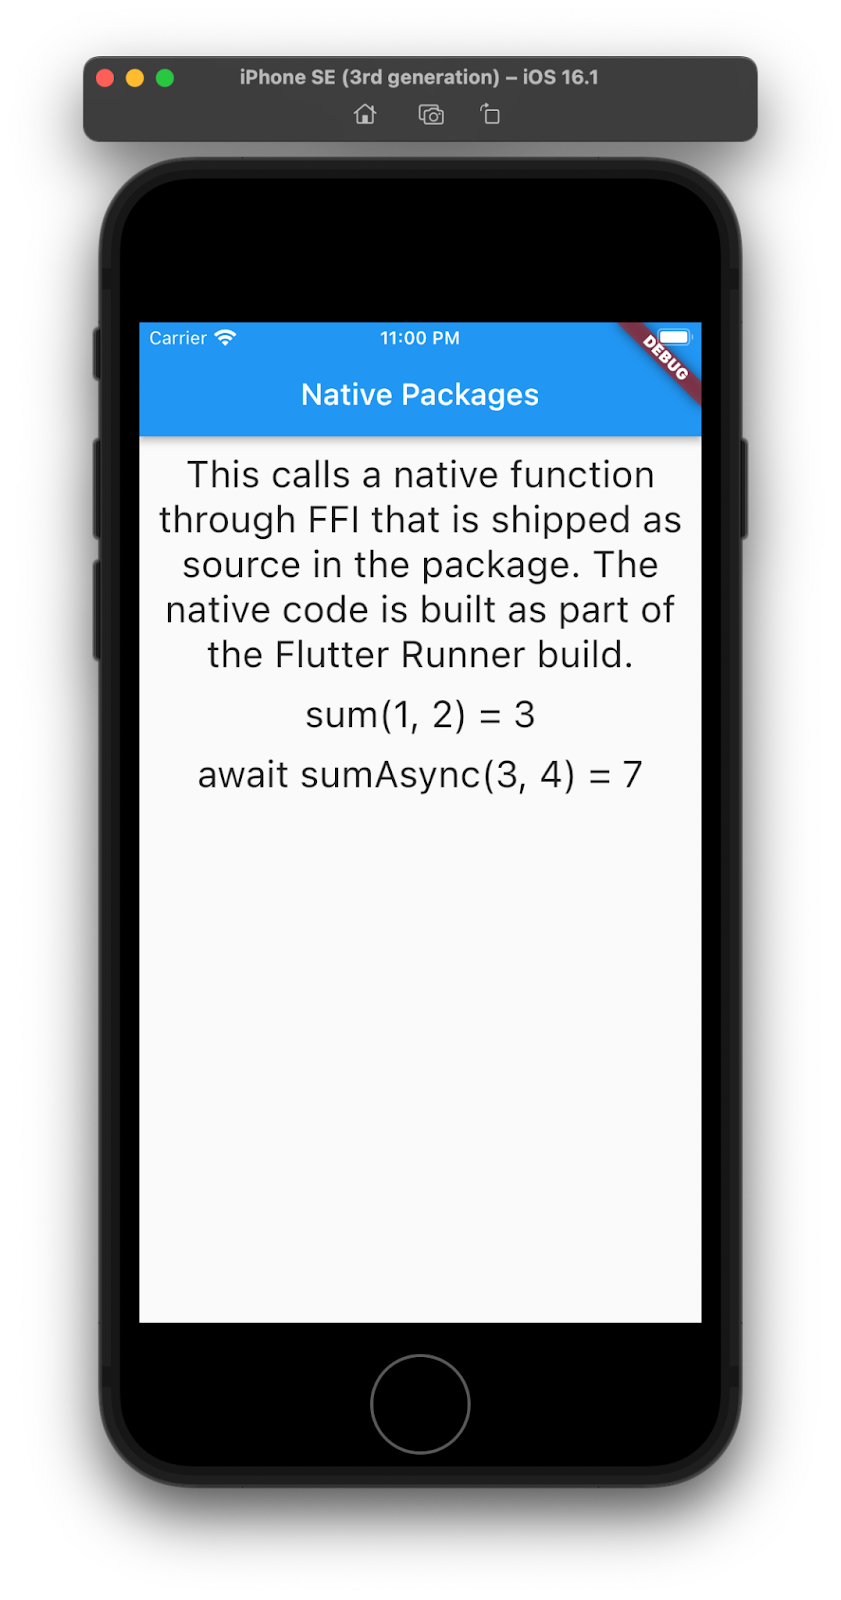
iOS सिम्युलेटर, macOS टारगेट से ज़्यादा प्राथमिकता पाता है. इसलिए, -d पैरामीटर की मदद से किसी डिवाइस की जानकारी देने से बचा जा सकता है.
बधाई हो, आपने पांच अलग-अलग ऑपरेटिंग सिस्टम पर ऐप्लिकेशन बनाकर उसे चला लिया है. इसके बाद, नेटिव प्लगिन बनाना और एफ़एफ़आई का इस्तेमाल करके, Dart से उससे इंटरफ़ेस करना.
5. Windows, Linux, और Android पर Duktape का इस्तेमाल करना
इस कोडलैब में, Duktape C लाइब्रेरी का इस्तेमाल किया जाएगा. Duktape एक ऐसा JavaScript इंजन है जिसे एम्बेड किया जा सकता है. इसे पोर्टेबल और कम जगह लेने वाले इंजन के तौर पर बनाया गया है. इस चरण में, आपको Duktape लाइब्रेरी को कॉम्पाइल करने के लिए प्लग इन को कॉन्फ़िगर करना होगा. इसके बाद, उसे अपने प्लग इन से लिंक करना होगा और फिर Dart के एफ़एफ़आई का इस्तेमाल करके उसे ऐक्सेस करना होगा.
इस चरण में, इंटिग्रेशन को Windows, Linux, और Android पर काम करने के लिए कॉन्फ़िगर किया जाता है. iOS और macOS इंटिग्रेशन के लिए, फ़ाइनल Flutter एक्सीक्यूटेबल में कंपाइल की गई लाइब्रेरी को शामिल करने के लिए, इस चरण में बताए गए कॉन्फ़िगरेशन के अलावा, कुछ और कॉन्फ़िगरेशन की ज़रूरत होती है. ज़रूरी अन्य कॉन्फ़िगरेशन के बारे में अगले चरण में बताया गया है.
Duktape वापस पाना
सबसे पहले, duktape के सोर्स कोड की कॉपी पाने के लिए, duktape.org वेबसाइट से उसे डाउनलोड करें.
Windows के लिए, Invoke-WebRequest के साथ PowerShell का इस्तेमाल किया जा सकता है:
PS> Invoke-WebRequest -Uri https://duktape.org/duktape-2.7.0.tar.xz -OutFile duktape-2.7.0.tar.xz
Linux के लिए, wget एक अच्छा विकल्प है.
$ wget https://duktape.org/duktape-2.7.0.tar.xz
--2022-12-22 16:21:39--  https://duktape.org/duktape-2.7.0.tar.xz
Resolving duktape.org (duktape.org)... 104.198.14.52
Connecting to duktape.org (duktape.org)|104.198.14.52|:443... connected.
HTTP request sent, awaiting response... 200 OK
Length: 1026524 (1002K) [application/x-xz]
Saving to: 'duktape-2.7.0.tar.xz'

duktape-2.7.0.tar.x 100%[===================>]   1002K  1.01MB/s    in 1.0s

2022-12-22 16:21:41 (1.01 MB/s) - 'duktape-2.7.0.tar.xz' saved [1026524/1026524]
फ़ाइल, tar.xz संग्रह है. Windows पर, 7Zip टूल डाउनलोड करें और इसका इस्तेमाल इस तरह करें.
PS> 7z x .\duktape-2.7.0.tar.xz

7-Zip 22.01 (x64) : Copyright (c) 1999-2022 Igor Pavlov : 2022-07-15

Scanning the drive for archives:
1 file, 1026524 bytes (1003 KiB)

Extracting archive: .\duktape-2.7.0.tar.xz
--
Path = .\duktape-2.7.0.tar.xz
Type = xz
Physical Size = 1026524
Method = LZMA2:26 CRC64
Streams = 1
Blocks = 1

Everything is Ok

Size:       19087360
Compressed: 1026524
आपको 7z को दो बार चलाना होगा. पहली बार, xz कंप्रेसन को निकालने के लिए और दूसरी बार, tar संग्रह को बड़ा करने के लिए.
PS> 7z x .\duktape-2.7.0.tar

7-Zip 22.01 (x64) : Copyright (c) 1999-2022 Igor Pavlov : 2022-07-15

Scanning the drive for archives:
1 file, 19087360 bytes (19 MiB)

Extracting archive: .\duktape-2.7.0.tar
--
Path = .\duktape-2.7.0.tar
Type = tar
Physical Size = 19087360
Headers Size = 543232
Code Page = UTF-8
Characteristics = GNU ASCII

Everything is Ok

Folders: 46
Files: 1004
Size:       18281564
Compressed: 19087360
आधुनिक लिनक्स एनवायरमेंट में, tar एक चरण में कॉन्टेंट को इस तरह से निकालता है.
$ tar xvf duktape-2.7.0.tar.xz
x duktape-2.7.0/
x duktape-2.7.0/README.rst
x duktape-2.7.0/Makefile.sharedlibrary
x duktape-2.7.0/Makefile.coffee
x duktape-2.7.0/extras/
x duktape-2.7.0/extras/README.rst
x duktape-2.7.0/extras/module-node/
x duktape-2.7.0/extras/module-node/README.rst
x duktape-2.7.0/extras/module-node/duk_module_node.h
x duktape-2.7.0/extras/module-node/Makefile
[... and many more files]
LLVM इंस्टॉल करना
ffigen का इस्तेमाल करने के लिए, आपको LLVM इंस्टॉल करना होगा. ffigen इसका इस्तेमाल C हेडर को पार्स करने के लिए करता है. Windows पर, यह कमांड चलाएं.
PS> winget install -e --id LLVM.LLVM
Found LLVM [LLVM.LLVM] Version 15.0.5
This application is licensed to you by its owner.
Microsoft is not responsible for, nor does it grant any licenses to, third-party packages.
Downloading https://github.com/llvm/llvm-project/releases/download/llvmorg-15.0.5/LLVM-15.0.5-win64.exe
  ██████████████████████████████   277 MB /  277 MB
Successfully verified installer hash
Starting package install...
Successfully installed
अपने सिस्टम पाथ को कॉन्फ़िगर करें, ताकि अपने Windows मशीन पर LLVM इंस्टॉल करने के लिए, बाइनरी सर्च पाथ में C:\Program Files\LLVM\bin जोड़ा जा सके. यह जांचने के लिए कि टैग सही तरीके से इंस्टॉल हुआ है या नहीं, यह तरीका अपनाएं.
PS> clang --version
clang version 15.0.5
Target: x86_64-pc-windows-msvc
Thread model: posix
InstalledDir: C:\Program Files\LLVM\bin
Ubuntu के लिए, LLVM डिपेंडेंसी को इस तरह इंस्टॉल किया जा सकता है. अन्य Linux डिस्ट्रिब्यूशन में, LLVM और Clang के लिए मिलती-जुलती डिपेंडेंसी होती हैं.
$ sudo apt install libclang-dev
[sudo] password for brett:
Reading package lists... Done
Building dependency tree... Done
Reading state information... Done
The following additional packages will be installed:
  libclang-15-dev
The following NEW packages will be installed:
  libclang-15-dev libclang-dev
0 upgraded, 2 newly installed, 0 to remove and 0 not upgraded.
Need to get 26.1 MB of archives.
After this operation, 260 MB of additional disk space will be used.
Do you want to continue? [Y/n] y
Get:1 http://archive.ubuntu.com/ubuntu kinetic/universe amd64 libclang-15-dev amd64 1:15.0.2-1 [26.1 MB]
Get:2 http://archive.ubuntu.com/ubuntu kinetic/universe amd64 libclang-dev amd64 1:15.0-55.1ubuntu1 [2962 B]
Fetched 26.1 MB in 7s (3748 kB/s)
Selecting previously unselected package libclang-15-dev.
(Reading database ... 85898 files and directories currently installed.)
Preparing to unpack .../libclang-15-dev_1%3a15.0.2-1_amd64.deb ...
Unpacking libclang-15-dev (1:15.0.2-1) ...
Selecting previously unselected package libclang-dev.
Preparing to unpack .../libclang-dev_1%3a15.0-55.1ubuntu1_amd64.deb ...
Unpacking libclang-dev (1:15.0-55.1ubuntu1) ...
Setting up libclang-15-dev (1:15.0.2-1) ...
Setting up libclang-dev (1:15.0-55.1ubuntu1) ...
ऊपर बताए गए तरीके की तरह, Linux पर LLVM इंस्टॉलेशन की जांच करने के लिए, यह तरीका अपनाएं.
$ clang --version
Ubuntu clang version 15.0.2-1
Target: x86_64-pc-linux-gnu
Thread model: posix
InstalledDir: /usr/bin
ffigen को कॉन्फ़िगर करें
टेंप्लेट से जनरेट किए गए टॉप-लेवल pubpsec.yaml में, ffigen पैकेज के पुराने वर्शन हो सकते हैं. प्लग इन प्रोजेक्ट में Dart की डिपेंडेंसी अपडेट करने के लिए, यह कमांड चलाएं:
flutter pub upgrade --major-versions
अब ffigen पैकेज अप-टू-डेट है. इसके बाद, कॉन्फ़िगर करें कि बाइंडिंग फ़ाइलें जनरेट करने के लिए, ffigen किन फ़ाइलों का इस्तेमाल करेगा. अपने प्रोजेक्ट की ffigen.yaml फ़ाइल के कॉन्टेंट में बदलाव करके, उसे यहां दी गई जानकारी से मैच करें.
ffigen.yaml
# Run with `dart run ffigen --config ffigen.yaml`.
name: DuktapeBindings
description: |
  Bindings for `src/duktape.h`.

  Regenerate bindings with `dart run ffigen --config ffigen.yaml`.
output: 'lib/duktape_bindings_generated.dart'
headers:
  entry-points:
    - 'src/duktape.h'
  include-directives:
    - 'src/duktape.h'
preamble: |
  // ignore_for_file: always_specify_types
  // ignore_for_file: camel_case_types
  // ignore_for_file: non_constant_identifier_names
comments:
  style: any
  length: full
ignore-source-errors: true
इस कॉन्फ़िगरेशन में, LLVM को पास करने के लिए C हेडर फ़ाइल, जनरेट करने के लिए आउटपुट फ़ाइल, फ़ाइल में सबसे ऊपर डालने के लिए ब्यौरा, और लिंट चेतावनी जोड़ने के लिए इस्तेमाल किया जाने वाला प्रीऐबल सेक्शन शामिल है.
फ़ाइल के आखिर में एक कॉन्फ़िगरेशन आइटम है, जिसके बारे में ज़्यादा जानकारी दी जानी चाहिए. ffigen के 11.0.0 वर्शन के बाद, हेडर फ़ाइलों को पार्स करते समय clang से चेतावनियां या गड़बड़ियां जनरेट होने पर, बाइंडिंग जनरेटर डिफ़ॉल्ट रूप से बाइंडिंग जनरेट नहीं करेगा.
Duktape की हेडर फ़ाइलें, macOS पर चेतावनियां जनरेट करने के लिए clang को ट्रिगर करती हैं. ऐसा इसलिए होता है, क्योंकि Duktape के पॉइंटर पर, वैल्यू न होने की स्थिति के बारे में बताने वाले टेंप्लेट मौजूद नहीं होते. macOS और iOS पर पूरी तरह से काम करने के लिए, Duktape को Duktape कोडबेस में टाइप के इन स्पेसिफ़ायर जोड़ने की ज़रूरत है. इस बीच, हम ignore-source-errors फ़्लैग को true पर सेट करके, इन चेतावनियों को अनदेखा करने का फ़ैसला ले रहे हैं.
प्रोडक्शन ऐप्लिकेशन में, अपने ऐप्लिकेशन को शिप करने से पहले, आपको कंपाइलर की सभी चेतावनियां हटा देनी चाहिए. हालांकि, Duktape के लिए ऐसा करना, इस कोडलैब के दायरे से बाहर है.
अन्य कुंजियों और वैल्यू के बारे में ज़्यादा जानकारी के लिए, ffigen दस्तावेज़ देखें.
आपको Duktape डिस्ट्रिब्यूशन से, Duktape की कुछ फ़ाइलों को उस जगह पर कॉपी करना होगा जहां ffigen को उन्हें ढूंढने के लिए कॉन्फ़िगर किया गया है.
cp duktape-2.7.0/src/duktape.c src/
cp duktape-2.7.0/src/duktape.h src/
cp duktape-2.7.0/src/duk_config.h src/
तकनीकी तौर पर, आपको ffigen के लिए सिर्फ़ duktape.h को कॉपी करना होगा. हालांकि, आपको CMake को कॉन्फ़िगर करना है, ताकि वह लाइब्रेरी बना सके जिसके लिए तीनों की ज़रूरत है. नई बाइंडिंग जनरेट करने के लिए, ffigen चलाएं:
$ dart run ffigen --config ffigen.yaml
Building package executable... (1.5s)
Built ffigen:ffigen.
[INFO]   : Running in Directory: '/Users/brett/Documents/GitHub/codelabs/ffigen_codelab/step_05'
[INFO]   : Input Headers: [file:///Users/brett/Documents/GitHub/codelabs/ffigen_codelab/step_05/src/duktape.h]
[WARNING]: No definition found for declaration -(Cursor) spelling: duk_hthread, kind: 2, kindSpelling: StructDecl, type: 105, typeSpelling: struct duk_hthread, usr: c:@S@duk_hthread
[WARNING]: No definition found for declaration -(Cursor) spelling: duk_hthread, kind: 2, kindSpelling: StructDecl, type: 105, typeSpelling: struct duk_hthread, usr: c:@S@duk_hthread
[WARNING]: Generated declaration '__builtin_va_list' starts with '_' and therefore will be private.
[INFO]   : Finished, Bindings generated in /Users/brett/Documents/GitHub/codelabs/ffigen_codelab/step_05/lib/duktape_bindings_generated.dart
आपको हर ऑपरेटिंग सिस्टम पर अलग-अलग चेतावनियां दिखेंगी. फ़िलहाल, इन गड़बड़ियों को अनदेखा किया जा सकता है. ऐसा इसलिए, क्योंकि Duktape 2.7.0, Windows, Linux, और macOS पर clang के साथ काम करता है.
CMake कॉन्फ़िगर करना
CMake, बिल्ड सिस्टम जनरेशन सिस्टम है. यह प्लग इन, Android, Windows, और Linux के लिए बिल्ड सिस्टम जनरेट करने के लिए CMake का इस्तेमाल करता है, ताकि जनरेट किए गए Flutter बाइनरी में Duktape शामिल किया जा सके. टेंप्लेट से जनरेट की गई CMake कॉन्फ़िगरेशन फ़ाइल में, आपको इस तरह बदलाव करना होगा.
src/CMakeLists.txt
cmake_minimum_required(VERSION 3.10)

project(ffigen_app_library VERSION 0.0.1 LANGUAGES C)

add_library(ffigen_app SHARED
  duktape.c                     # Modify
)

set_target_properties(ffigen_app PROPERTIES
  PUBLIC_HEADER duktape.h       # Modify
  PRIVATE_HEADER duk_config.h   # Add
  OUTPUT_NAME "ffigen_app"      # Add
)

# Add from here...
if (WIN32)
set_target_properties(ffigen_app PROPERTIES
  WINDOWS_EXPORT_ALL_SYMBOLS ON
)
endif (WIN32)
# ... to here.

target_compile_definitions(ffigen_app PUBLIC DART_SHARED_LIB)

if (ANDROID)
  # Support Android 15 16k page size
  target_link_options(ffigen_app PRIVATE "-Wl,-z,max-page-size=16384")
endif()
CMake कॉन्फ़िगरेशन, सोर्स फ़ाइलें जोड़ता है. सबसे अहम बात यह है कि यह Windows पर जनरेट की गई लाइब्रेरी फ़ाइल के डिफ़ॉल्ट व्यवहार में बदलाव करता है, ताकि सभी C सिंबल डिफ़ॉल्ट रूप से एक्सपोर्ट हो सकें. यह CMake का एक तरीका है, जिससे Unix-स्टाइल लाइब्रेरी को Windows पर पोर्ट करने में मदद मिलती है. Duktape भी एक Unix-स्टाइल लाइब्रेरी है.
lib/ffigen_app.dart के कॉन्टेंट की जगह, यहां दिया गया कॉन्टेंट डालें.
lib/ffigen_app.dart
import 'dart:ffi';
import 'dart:io' show Platform;
import 'package:ffi/ffi.dart' as ffi;

import 'duktape_bindings_generated.dart';

const String _libName = 'ffigen_app';

final DynamicLibrary _dylib = () {
  if (Platform.isMacOS || Platform.isIOS) {
    return DynamicLibrary.open('$_libName.framework/$_libName');
  }
  if (Platform.isAndroid || Platform.isLinux) {
    return DynamicLibrary.open('lib$_libName.so');
  }
  if (Platform.isWindows) {
    return DynamicLibrary.open('$_libName.dll');
  }
  throw UnsupportedError('Unknown platform: ${Platform.operatingSystem}');
}();

final DuktapeBindings _bindings = DuktapeBindings(_dylib);

class Duktape {
  Duktape() {
    ctx = _bindings.duk_create_heap(
      nullptr,
      nullptr,
      nullptr,
      nullptr,
      nullptr,
    );
  }

  void evalString(String jsCode) {
    var nativeUtf8 = jsCode.toNativeUtf8();
    _bindings.duk_eval_raw(
      ctx,
      nativeUtf8.cast<Char>(),
      0,
      0 |
          DUK_COMPILE_EVAL |
          DUK_COMPILE_SAFE |
          DUK_COMPILE_NOSOURCE |
          DUK_COMPILE_STRLEN |
          DUK_COMPILE_NOFILENAME,
    );
    ffi.malloc.free(nativeUtf8);
  }

  int getInt(int index) {
    return _bindings.duk_get_int(ctx, index);
  }

  void dispose() {
    _bindings.duk_destroy_heap(ctx);
    ctx = nullptr;
  }

  late Pointer<duk_hthread> ctx;
}
यह फ़ाइल, डाइनैमिक लिंक लाइब्रेरी फ़ाइल (Linux और Android के लिए .so, Windows के लिए .dll) को लोड करने और एक रैपर उपलब्ध कराने के लिए ज़िम्मेदार है. यह रैपर, C कोड के लिए Dart के हिसाब से इंटरफ़ेस उपलब्ध कराता है.
यह फ़ाइल सीधे ffi पैकेज को इंपोर्ट करती है. इसलिए, आपको पैकेज को dev_dependencies से dependencies पर ले जाना होगा. ऐसा करने का सबसे आसान तरीका यह है कि आप यह कमांड चलाएं:
dart pub add ffi
उदाहरण के main.dart के कॉन्टेंट को इनके साथ बदलें.
example/lib/main.dart
import 'package:ffigen_app/ffigen_app.dart';
import 'package:flutter/material.dart';

const String jsCode = '1+2';

void main() {
  runApp(const MyApp());
}

class MyApp extends StatefulWidget {
  const MyApp({super.key});

  @override
  State<MyApp> createState() => _MyAppState();
}

class _MyAppState extends State<MyApp> {
  late Duktape duktape;
  String output = '';

  @override
  void initState() {
    super.initState();
    duktape = Duktape();
    setState(() {
      output = 'Initialized Duktape';
    });
  }

  @override
  void dispose() {
    duktape.dispose();
    super.dispose();
  }

  @override
  Widget build(BuildContext context) {
    const textStyle = TextStyle(fontSize: 25);
    const spacerSmall = SizedBox(height: 10);
    return MaterialApp(
      home: Scaffold(
        appBar: AppBar(title: const Text('Duktape Test')),
        body: Center(
          child: Container(
            padding: const EdgeInsets.all(10),
            child: Column(
              mainAxisSize: MainAxisSize.min,
              children: [
                Text(output, style: textStyle, textAlign: TextAlign.center),
                spacerSmall,
                ElevatedButton(
                  child: const Text('Run JavaScript'),
                  onPressed: () {
                    duktape.evalString(jsCode);
                    setState(() {
                      output = '$jsCode => ${duktape.getInt(-1)}';
                    });
                  },
                ),
              ],
            ),
          ),
        ),
      ),
    );
  }
}
अब उदाहरण के तौर पर दिए गए ऐप्लिकेशन को फिर से चलाने के लिए, इनका इस्तेमाल करें:
cd example
flutter run
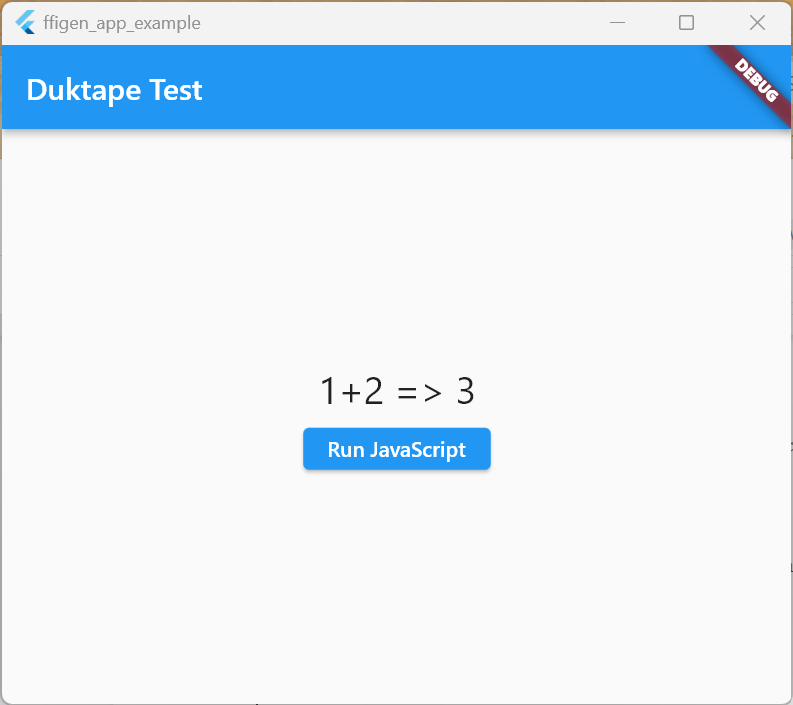
आपको ऐप्लिकेशन इस तरह चलता हुआ दिखेगा:
|
|
इन दो स्क्रीनशॉट में, JavaScript चलाएं बटन को दबाने से पहले और बाद की स्थिति दिखाई गई है. इस इमेज में, Dart से JavaScript कोड को चलाने और स्क्रीन पर नतीजा दिखाने का तरीका बताया गया है.
Android
Android, Linux कर्नेल पर आधारित एक ऑपरेटिंग सिस्टम है. यह कुछ हद तक डेस्कटॉप के लिए उपलब्ध Linux डिस्ट्रिब्यूशन से मिलता-जुलता है. CMake बिल्ड सिस्टम, दोनों प्लैटफ़ॉर्म के बीच के ज़्यादातर अंतर को छिपा सकता है. Android पर ऐप्लिकेशन बनाने और उसे चलाने के लिए, पक्का करें कि Android एम्युलेटर चालू हो या Android डिवाइस कनेक्ट हो. ऐप्लिकेशन चलाएं. उदाहरण के लिए:
cd example
flutter run -d emulator-5554
अब आपको Android पर उदाहरण के तौर पर दिया गया ऐप्लिकेशन दिखेगा:
|
|
6. macOS और iOS पर Duktape का इस्तेमाल करना
अब समय आ गया है कि आप अपने प्लग इन को macOS और iOS, दोनों ऑपरेटिंग सिस्टम पर काम कराने के लिए तैयार करें. ये दोनों ऑपरेटिंग सिस्टम एक-दूसरे से काफ़ी मिलते-जुलते हैं. macOS से शुरू करें. CMake, macOS और iOS पर काम करता है. हालांकि, Linux और Android के लिए किए गए काम का फिर से इस्तेमाल नहीं किया जा सकता. इसकी वजह यह है कि macOS और iOS पर Flutter, लाइब्रेरी इंपोर्ट करने के लिए CocoaPods का इस्तेमाल करता है.
क्लीन अप
पिछले चरण में, आपने Android, Windows, और Linux के लिए काम करने वाला ऐप्लिकेशन बनाया था. हालांकि, ओरिजनल टेंप्लेट से कुछ फ़ाइलें बची हैं. आपको उन्हें हटाना होगा. उन्हें यहां बताए गए तरीके से हटाएं.
rm src/ffigen_app.c
rm src/ffigen_app.h
rm ios/Classes/ffigen_app.c
rm macos/Classes/ffigen_app.c
macOS
macOS प्लैटफ़ॉर्म पर Flutter, C और C++ कोड इंपोर्ट करने के लिए CocoaPods का इस्तेमाल करता है. इसका मतलब है कि इस पैकेज को CocoaPods के बिल्ड इन्फ़्रास्ट्रक्चर में इंटिग्रेट करना होगा. पिछले चरण में, CMake के साथ बिल्ड करने के लिए पहले से कॉन्फ़िगर किए गए C कोड का फिर से इस्तेमाल करने की सुविधा चालू करने के लिए, आपको macOS प्लैटफ़ॉर्म रनर में एक फ़ॉरवर्डिंग फ़ाइल जोड़नी होगी.
macos/Classes/duktape.c
#include "../../src/duktape.c"
यह फ़ाइल, C प्रीप्रोसेसर की सुविधा का इस्तेमाल करके, पिछले चरण में सेट अप किए गए नेटिव सोर्स कोड से सोर्स कोड को शामिल करती है. इस सुविधा के काम करने के तरीके के बारे में ज़्यादा जानने के लिए, macos/ffigen_app.podspec देखें.
इस ऐप्लिकेशन को चलाने का तरीका अब वही है जो आपको Windows और Linux पर दिखता है.
cd example
flutter run -d macos
|
|
iOS
macOS सेटअप की तरह ही, iOS के लिए भी एक फ़ॉरवर्डिंग C फ़ाइल जोड़ना ज़रूरी है.
ios/Classes/duktape.c
#include "../../src/duktape.c"
इस एक फ़ाइल की मदद से, आपका प्लगिन अब iOS पर भी चलने के लिए कॉन्फ़िगर हो गया है. इसे हमेशा की तरह चलाएं.
flutter run -d iPhone
|
|
बधाई हो! आपने पांच प्लैटफ़ॉर्म पर नेटिव कोड इंटिग्रेट कर लिया है. बधाई हो! शायद ज़्यादा फ़ंक्शन वाला यूज़र इंटरफ़ेस भी बनाया जा सकता है. इसे अगले चरण में बनाया जाएगा.
7. Read Eval Print Loop लागू करना
इंटरैक्टिव प्लैटफ़ॉर्म पर प्रोग्रामिंग लैंग्वेज के साथ इंटरैक्ट करना ज़्यादा मज़ेदार होता है. इस तरह के एनवायरमेंट को पहली बार LISP के Read Eval Print Loop (REPL) में लागू किया गया था. इस चरण में, आपको Duktape के साथ कुछ ऐसा ही लागू करना है.
प्रोडक्शन के लिए तैयार करना
Duktape C लाइब्रेरी के साथ इंटरैक्ट करने वाला मौजूदा कोड, यह मानता है कि कोई गड़बड़ी नहीं हो सकती. यह भी ध्यान रखें कि टेस्ट के दौरान, Duktape डाइनैमिक लिंक लाइब्रेरी लोड नहीं होती हैं. इस इंटिग्रेशन को प्रोडक्शन के लिए तैयार करने के लिए, आपको lib/ffigen_app.dart में कुछ बदलाव करने होंगे.
lib/ffigen_app.dart
import 'dart:ffi';
import 'dart:io' show Platform;
import 'package:ffi/ffi.dart' as ffi;
import 'package:path/path.dart' as p;                               // Add this import

import 'duktape_bindings_generated.dart';

const String _libName = 'ffigen_app';

final DynamicLibrary _dylib = () {
  if (Platform.isMacOS || Platform.isIOS) {
    // Add from here...
    if (Platform.environment.containsKey('FLUTTER_TEST')) {
      return DynamicLibrary.open(
        'build/macos/Build/Products/Debug/$_libName/$_libName.framework/$_libName',
      );
    }
    // To here.
    return DynamicLibrary.open('$_libName.framework/$_libName');
  }
  if (Platform.isAndroid || Platform.isLinux) {
    // Add from here...
    if (Platform.environment.containsKey('FLUTTER_TEST')) {
      return DynamicLibrary.open(
        'build/linux/x64/debug/bundle/lib/lib$_libName.so',
      );
    }
    // To here.
    return DynamicLibrary.open('lib$_libName.so');
  }
  if (Platform.isWindows) {
    // Add from here...
    if (Platform.environment.containsKey('FLUTTER_TEST')) {
      return switch (Abi.current()) {
        Abi.windowsArm64 => DynamicLibrary.open(
          p.canonicalize(
            p.join(r'build\windows\arm64\runner\Debug', '$_libName.dll'),
          ),
        ),
        Abi.windowsX64 => DynamicLibrary.open(
          p.canonicalize(
            p.join(r'build\windows\x64\runner\Debug', '$_libName.dll'),
          ),
        ),
        _ => throw 'Unsupported platform',
      };
    }
    // To here.
    return DynamicLibrary.open('$_libName.dll');
  }
  throw UnsupportedError('Unknown platform: ${Platform.operatingSystem}');
}();

final DuktapeBindings _bindings = DuktapeBindings(_dylib);

class Duktape {
  Duktape() {
    ctx = _bindings.duk_create_heap(
      nullptr,
      nullptr,
      nullptr,
      nullptr,
      nullptr,
    );
  }

  // Modify this function
  String evalString(String jsCode) {
    var nativeUtf8 = jsCode.toNativeUtf8();
    final evalResult = _bindings.duk_eval_raw(
      ctx,
      nativeUtf8.cast<Char>(),
      0,
      0 |
          DUK_COMPILE_EVAL |
          DUK_COMPILE_SAFE |
          DUK_COMPILE_NOSOURCE |
          DUK_COMPILE_STRLEN |
          DUK_COMPILE_NOFILENAME,
    );
    ffi.malloc.free(nativeUtf8);

    if (evalResult != 0) {
      throw _retrieveTopOfStackAsString();
    }

    return _retrieveTopOfStackAsString();
  }

  // Add this function
  String _retrieveTopOfStackAsString() {
    Pointer<Size> outLengthPtr = ffi.calloc<Size>();
    final errorStrPtr = _bindings.duk_safe_to_lstring(ctx, -1, outLengthPtr);
    final returnVal = errorStrPtr.cast<ffi.Utf8>().toDartString(
      length: outLengthPtr.value,
    );
    ffi.calloc.free(outLengthPtr);
    return returnVal;
  }

  void dispose() {
    _bindings.duk_destroy_heap(ctx);
    ctx = nullptr;
  }

  late Pointer<duk_hthread> ctx;
}
इसके लिए, path पैकेज जोड़ना ज़रूरी है.
flutter pub add path
डाइनैमिक लिंक लाइब्रेरी को लोड करने के लिए कोड को बड़ा किया गया है, ताकि उस स्थिति को हैंडल किया जा सके जहां प्लग इन का इस्तेमाल टेस्ट रनर में किया जा रहा है. इससे, इंटिग्रेशन टेस्ट लिखा जा सकता है, जो Flutter टेस्ट के तौर पर इस एपीआई का इस्तेमाल करता है. JavaScript कोड की स्ट्रिंग का आकलन करने वाले कोड को, गड़बड़ी की स्थितियों को सही तरीके से मैनेज करने के लिए बढ़ाया गया है. जैसे, अधूरा या गलत कोड. इस अतिरिक्त कोड में, उन स्थितियों को मैनेज करने का तरीका बताया गया है जहां स्ट्रिंग को बाइट ऐरे के तौर पर दिखाया जाता है और उन्हें Dart स्ट्रिंग में बदलना होता है.
पैकेज जोड़ना
आरईपीएल बनाते समय, आपको उपयोगकर्ता और Duktape JavaScript इंजन के बीच इंटरैक्शन दिखेगा. उपयोगकर्ता कोड की लाइनें डालता है और Duktape, कैलकुलेशन का नतीजा या कोई अपवाद दिखाता है. आपको जितने बोइलरप्लेट कोड लिखने हैं उनकी संख्या कम करने के लिए, freezed का इस्तेमाल किया जाएगा. google_fonts का इस्तेमाल करके, दिखाए जाने वाले कॉन्टेंट को थोड़ा और थीम के हिसाब से बनाया जा सकता है. साथ ही, स्टेटस मैनेज करने के लिए flutter_riverpod का इस्तेमाल किया जा सकता है.
उदाहरण के तौर पर दिए गए ऐप्लिकेशन में ज़रूरी डिपेंडेंसी जोड़ें:
cd example
flutter pub add flutter_riverpod freezed_annotation google_fonts
flutter pub add -d build_runner freezed
इसके बाद, आरईपीएल इंटरैक्शन को रिकॉर्ड करने के लिए एक फ़ाइल बनाएं:
example/lib/duktape_message.dart
import 'package:freezed_annotation/freezed_annotation.dart';

part 'duktape_message.freezed.dart';

@freezed
class DuktapeMessage with _$DuktapeMessage {
  factory DuktapeMessage.evaluate(String code) = DuktapeMessageCode;
  factory DuktapeMessage.response(String result) = DuktapeMessageResponse;
  factory DuktapeMessage.error(String log) = DuktapeMessageError;
}
यह क्लास, freezed के यूनियन टाइप की सुविधा का इस्तेमाल करती है. इससे, REPL में दिखाई गई हर लाइन के आकार को तीन में से किसी एक टाइप के तौर पर, टाइप-सेफ़ एक्सप्रेशन के तौर पर दिखाया जा सकता है. इस समय, हो सकता है कि आपका कोड इस कोड पर किसी तरह की गड़बड़ी दिखा रहा हो. ऐसा इसलिए, क्योंकि एक और कोड जनरेट करना ज़रूरी है. इसके लिए, यह तरीका अपनाएं.
flutter pub run build_runner build
इससे example/lib/duktape_message.freezed.dart फ़ाइल जनरेट होती है, जिस पर आपने अभी जो कोड टाइप किया है वह निर्भर करती है.
इसके बाद, आपको macOS कॉन्फ़िगरेशन फ़ाइलों में कुछ बदलाव करने होंगे, ताकि google_fonts फ़ॉन्ट डेटा के लिए नेटवर्क अनुरोध कर सके.
example/macos/Runner/DebugProfile.entitlements
<?xml version="1.0" encoding="UTF-8"?>
<!DOCTYPE plist PUBLIC "-//Apple//DTD PLIST 1.0//EN" "http://www.apple.com/DTDs/PropertyList-1.0.dtd">
<plist version="1.0">
<dict>
        <key>com.apple.security.app-sandbox</key>
        <true/>
        <key>com.apple.security.cs.allow-jit</key>
        <true/>
        <key>com.apple.security.network.server</key>
        <true/>
        <!-- Add from here... -->
        <key>com.apple.security.network.client</key>
        <true/>
        <!-- ...to here -->
</dict>
</plist>
example/macos/Runner/Release.entitlements
<?xml version="1.0" encoding="UTF-8"?>
<!DOCTYPE plist PUBLIC "-//Apple//DTD PLIST 1.0//EN" "http://www.apple.com/DTDs/PropertyList-1.0.dtd">
<plist version="1.0">
<dict>
        <key>com.apple.security.app-sandbox</key>
        <true/>
        <!-- Add from here... -->
        <key>com.apple.security.network.client</key>
        <true/>
        <!-- ...to here -->
</dict>
</plist>
आरईपीएल बनाना
अब आपने गड़बड़ियों को मैनेज करने के लिए इंटिग्रेशन लेयर को अपडेट कर लिया है और इंटरैक्शन के लिए डेटा का प्रतिनिधित्व भी बना लिया है. अब उदाहरण के तौर पर दिए गए ऐप्लिकेशन का यूज़र इंटरफ़ेस बनाने का समय आ गया है.
example/lib/main.dart
import 'package:ffigen_app/ffigen_app.dart';
import 'package:flutter/material.dart';
import 'package:flutter_riverpod/flutter_riverpod.dart';
import 'package:google_fonts/google_fonts.dart';

import 'duktape_message.dart';

void main() {
  runApp(const ProviderScope(child: DuktapeApp()));
}

final duktapeMessagesProvider =
    StateNotifierProvider<DuktapeMessageNotifier, List<DuktapeMessage>>((ref) {
      return DuktapeMessageNotifier(messages: <DuktapeMessage>[]);
    });

class DuktapeMessageNotifier extends StateNotifier<List<DuktapeMessage>> {
  DuktapeMessageNotifier({required List<DuktapeMessage> messages})
    : duktape = Duktape(),
      super(messages);
  final Duktape duktape;

  void eval(String code) {
    state = [DuktapeMessage.evaluate(code), ...state];
    try {
      final response = duktape.evalString(code);
      state = [DuktapeMessage.response(response), ...state];
    } catch (e) {
      state = [DuktapeMessage.error('$e'), ...state];
    }
  }
}

class DuktapeApp extends StatelessWidget {
  const DuktapeApp({super.key});

  @override
  Widget build(BuildContext context) {
    return const MaterialApp(title: 'Duktape App', home: DuktapeRepl());
  }
}

class DuktapeRepl extends ConsumerStatefulWidget {
  const DuktapeRepl({super.key});

  @override
  ConsumerState<DuktapeRepl> createState() => _DuktapeReplState();
}

class _DuktapeReplState extends ConsumerState<DuktapeRepl> {
  final _controller = TextEditingController();
  final _focusNode = FocusNode();
  var _isComposing = false;

  void _handleSubmitted(String text) {
    _controller.clear();
    setState(() {
      _isComposing = false;
    });
    setState(() {
      ref.read(duktapeMessagesProvider.notifier).eval(text);
    });
    _focusNode.requestFocus();
  }

  @override
  Widget build(BuildContext context) {
    final messages = ref.watch(duktapeMessagesProvider);
    return Scaffold(
      backgroundColor: Colors.white,
      appBar: AppBar(
        title: const Text('Duktape REPL'),
        elevation: Theme.of(context).platform == TargetPlatform.iOS ? 0.0 : 4.0,
      ),
      body: Column(
        children: [
          Flexible(
            child: Ink(
              color: Theme.of(context).scaffoldBackgroundColor,
              child: SafeArea(
                bottom: false,
                child: ListView.builder(
                  padding: const EdgeInsets.all(8.0),
                  reverse: true,
                  itemBuilder: (context, idx) {
                    return switch (messages[idx]) {
                      DuktapeMessageCode code => Padding(
                        padding: const EdgeInsets.symmetric(vertical: 2),
                        child: Text(
                          '> ${code.code}',
                          style: GoogleFonts.firaCode(
                            textStyle: Theme.of(context).textTheme.titleMedium,
                          ),
                        ),
                      ),
                      DuktapeMessageResponse response => Padding(
                        padding: const EdgeInsets.symmetric(vertical: 2),
                        child: Text(
                          '= ${response.result}',
                          style: GoogleFonts.firaCode(
                            textStyle: Theme.of(context).textTheme.titleMedium,
                            color: Colors.blue[800],
                          ),
                        ),
                      ),
                      DuktapeMessageError error => Padding(
                        padding: const EdgeInsets.symmetric(vertical: 2),
                        child: Text(
                          error.log,
                          style: GoogleFonts.firaCode(
                            textStyle: Theme.of(context).textTheme.titleSmall,
                            color: Colors.red[800],
                            fontWeight: FontWeight.bold,
                          ),
                        ),
                      ),
                      DuktapeMessage message => Padding(
                        padding: const EdgeInsets.symmetric(vertical: 2),
                        child: Text(
                          'Unhandled message $message',
                          style: GoogleFonts.firaCode(
                            textStyle: Theme.of(context).textTheme.titleSmall,
                            color: Colors.red[800],
                            fontWeight: FontWeight.bold,
                          ),
                        ),
                      ),
                    };
                  },
                  itemCount: messages.length,
                ),
              ),
            ),
          ),
          const Divider(height: 1.0),
          SafeArea(
            top: false,
            child: Container(
              decoration: BoxDecoration(color: Theme.of(context).cardColor),
              child: _buildTextComposer(),
            ),
          ),
        ],
      ),
    );
  }

  Widget _buildTextComposer() {
    return IconTheme(
      data: IconThemeData(color: Theme.of(context).colorScheme.secondary),
      child: Container(
        margin: const EdgeInsets.symmetric(horizontal: 8.0),
        child: Row(
          children: [
            Text('>', style: Theme.of(context).textTheme.titleMedium),
            const SizedBox(width: 4),
            Flexible(
              child: TextField(
                controller: _controller,
                decoration: const InputDecoration(border: InputBorder.none),
                onChanged: (text) {
                  setState(() {
                    _isComposing = text.isNotEmpty;
                  });
                },
                onSubmitted: _isComposing ? _handleSubmitted : null,
                focusNode: _focusNode,
              ),
            ),
            Container(
              margin: const EdgeInsets.symmetric(horizontal: 4.0),
              child: IconButton(
                icon: const Icon(Icons.send),
                onPressed: _isComposing
                    ? () => _handleSubmitted(_controller.text)
                    : null,
              ),
            ),
          ],
        ),
      ),
    );
  }
}
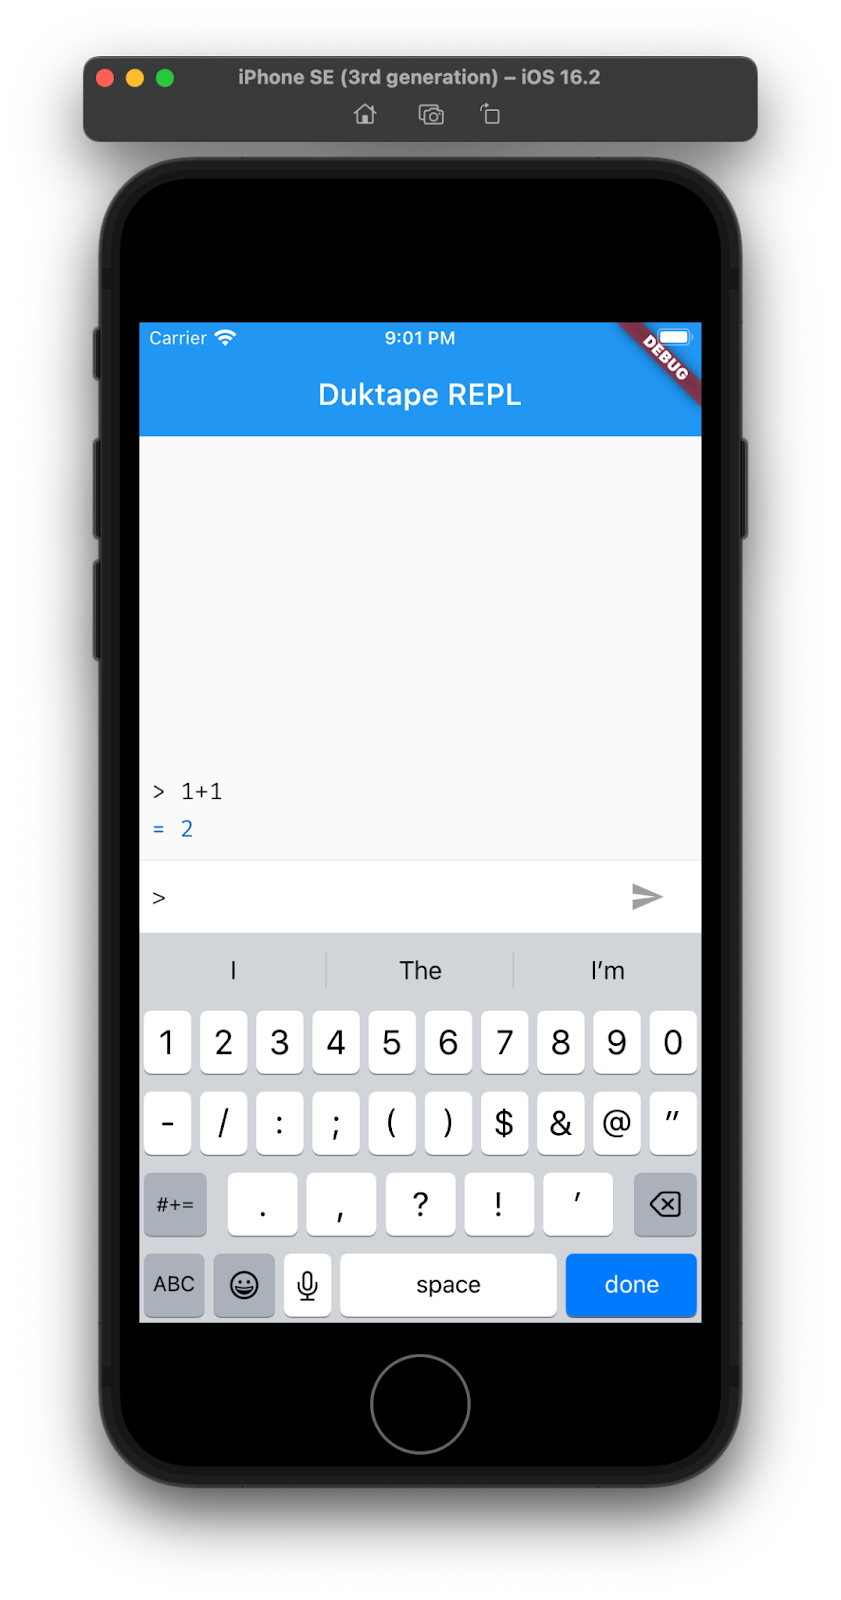
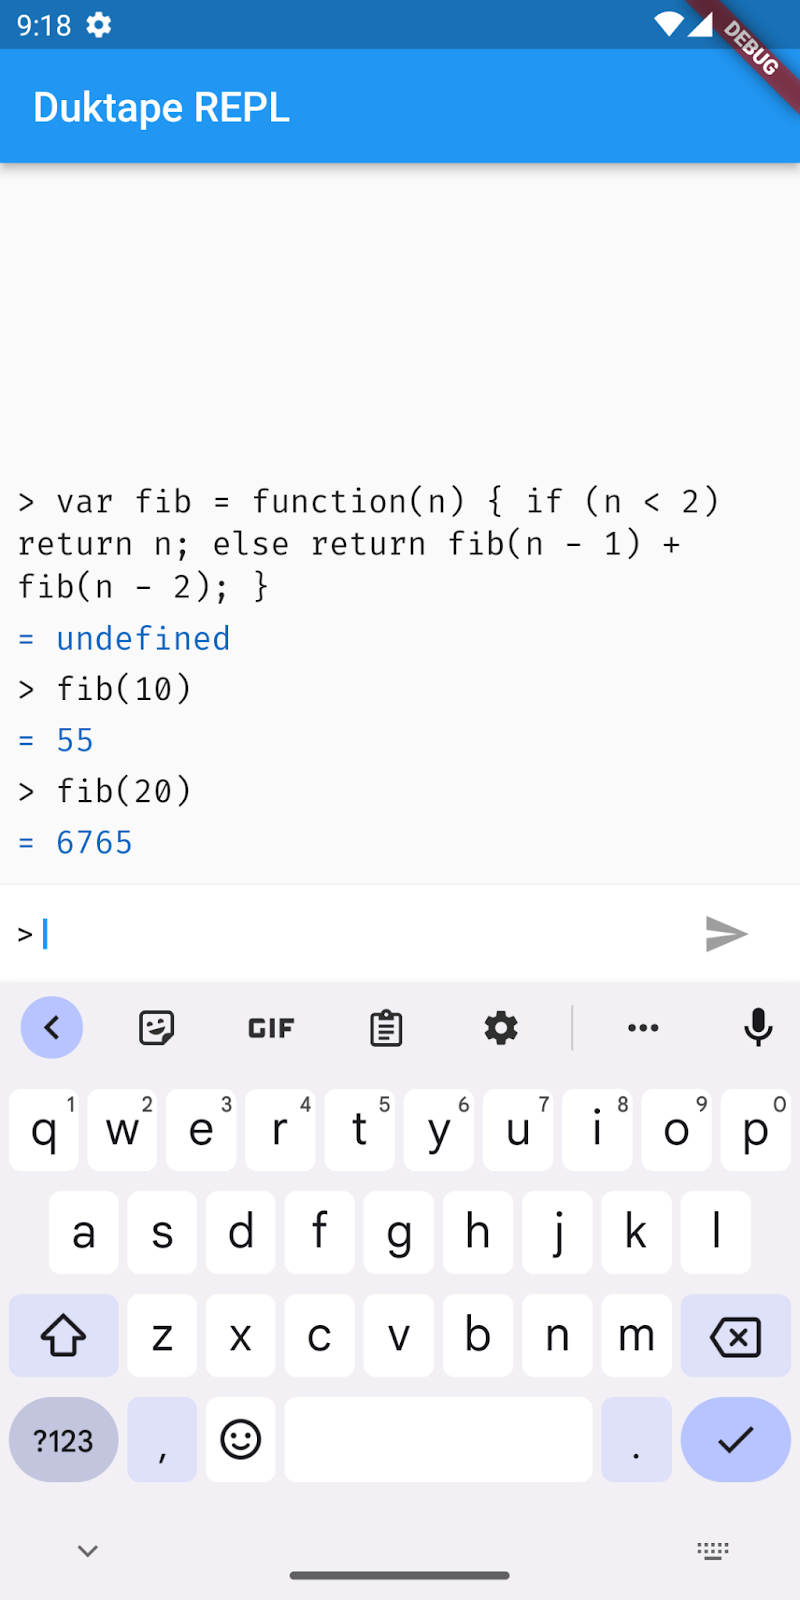
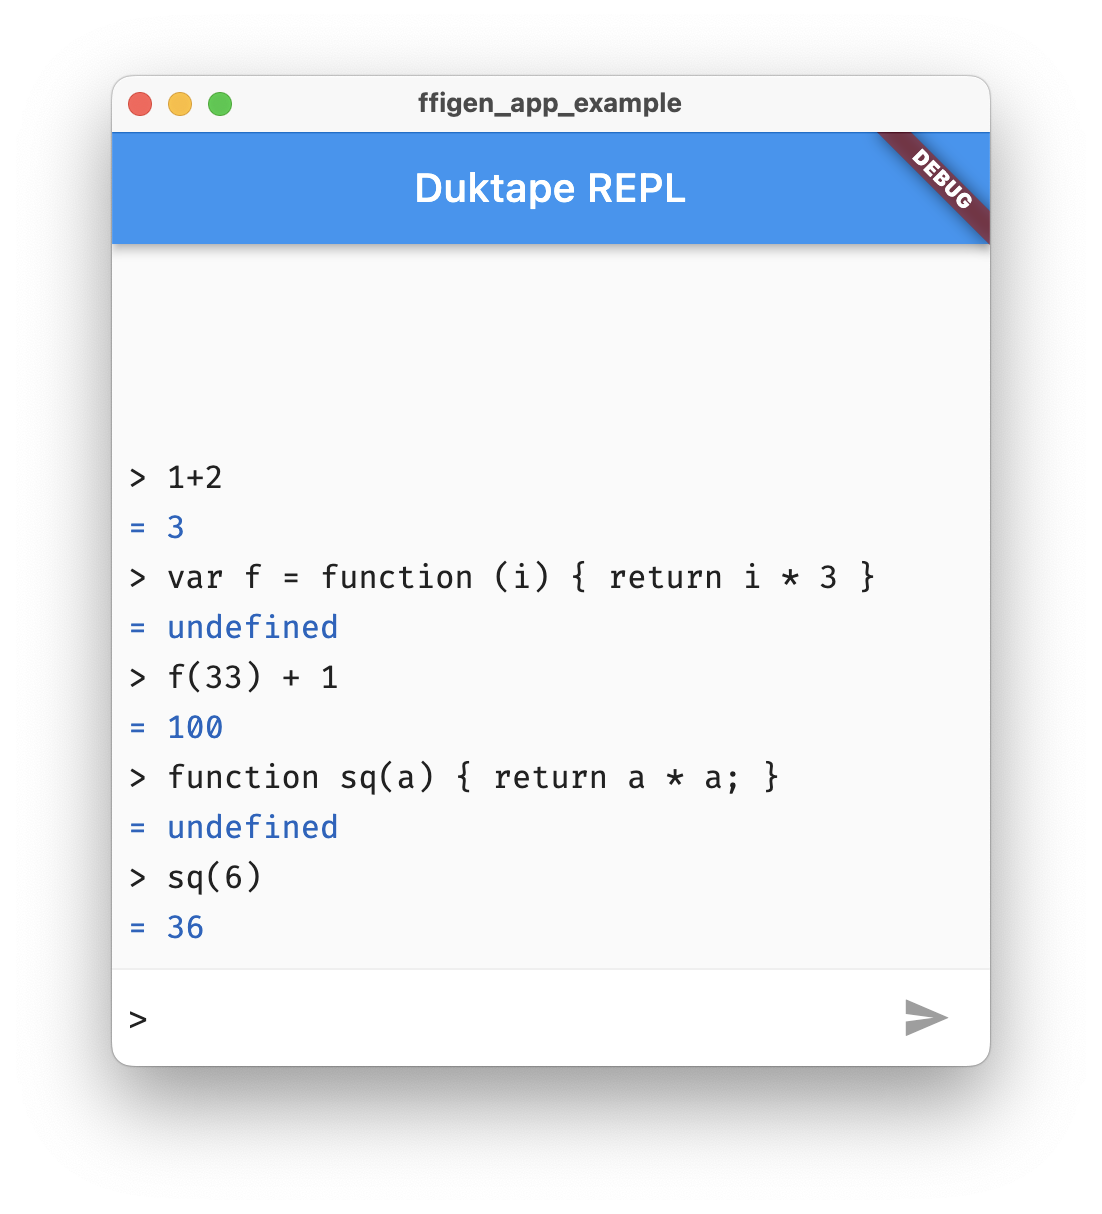
इस कोड में बहुत कुछ हो रहा है, लेकिन इस बारे में पूरी जानकारी देना इस कोडलैब के दायरे से बाहर है. हमारा सुझाव है कि आप कोड को चलाएं और फिर ज़रूरी दस्तावेज़ों की समीक्षा करने के बाद, कोड में बदलाव करें.
cd example
flutter run
|
|
|
|
8. बधाई हो
बधाई हो! आपने Windows, macOS, Linux, Android, और iOS के लिए, Flutter FFI पर आधारित प्लगिन बना लिया है!
प्लग इन बनाने के बाद, हो सकता है कि आप उसे ऑनलाइन शेयर करना चाहें, ताकि दूसरे लोग उसका इस्तेमाल कर सकें. प्लग इन पैकेज बनाना में, pub.dev पर अपने प्लग इन को पब्लिश करने के बारे में पूरा दस्तावेज़ मिल सकता है.


