
1. מטרת שיעור ה-Lab
בשיעור ה-Lab המעשי הזה תלמדו איך להתקין את Gemini CLI ולבצע אימות, ותנסו כמה תרחישי שימוש בסיסיים.
מה תלמדו
- הבנה בסיסית של Gemini CLI.
- איך מבצעים משימות בסיסיות באמצעות Gemini CLI
2. לפני שמתחילים
- אם אין לכם עדיין פרויקט שתוכלו להשתמש בו, תצטרכו ליצור פרויקט חדש במסוף GCP.
- בשיעור ה-Lab הזה נשתמש ב-GCP Cloud Shell כדי לבצע את השלבים הבאים. פותחים את Cloud Shell ומגדירים את הפרויקט באמצעות Cloud Shell.
- פותחים את GCP Cloud Shell Editor על ידי לחיצה על הלחצן Cloud Shell Editor או באמצעות הקישור הזה. אם מופיע החלון הקופץ 'Authorize Shell' (מתן הרשאה ל-Shell), לוחצים כדי לתת הרשאה ל-Cloud Shell Editor.
- אפשר לבדוק אם הפרויקט כבר מאומת באמצעות הפקודה הבאה.
gcloud auth list
- מריצים את הפקודה הבאה ב-Cloud Shell כדי לאשר את הפרויקט
gcloud config list project
- אם אתם לא זוכרים את מזהה הפרויקט, אתם יכולים להציג רשימה של כל מזהי הפרויקטים באמצעות הפקודה
gcloud projects list
- אם הפרויקט לא מוגדר, משתמשים בפקודה הבאה כדי להגדיר אותו
gcloud config set project <YOUR_PROJECT_ID>
- כדי להריץ את שיעור ה-Lab הזה, צריך להפעיל כמה שירותים. מריצים את הפקודה הבאה ב-Cloud Shell.
gcloud services enable aiplatform.googleapis.com
gcloud services enable cloudresourcemanager.googleapis.com
3. התקנה ואימות
התקנה
Gemini CLI מותקן מראש ב-GCP Cloud Shell Editor . אם רוצים להשתמש במינוי הזה, אפשר להתחיל מיד.
אפשר גם להתקין את Gemini CLI בסביבה המקומית.
כדי להתקין את Gemini CLI בסביבה המקומית, צריך Nodejs בגרסה 20 ומעלה. אפשר להריץ את הפקודה הבאה כדי להתקין את Gemini CLI.
npm install -g @google/gemini-cli
כדי לשדרג לגרסה האחרונה , משתמשים בפקודה הבאה
npm update -g @google/gemini-cli
מריצים את Gemini על ידי הפעלת הפקודה הבאה במסוף.
gemini
אימות
אם אתם משתמשים ב-GCP Cloud Shell Editor, האימות כבר אמור להתבצע אם אישרתם את האימות של ה-Shell בזמן ההפעלה שלו.
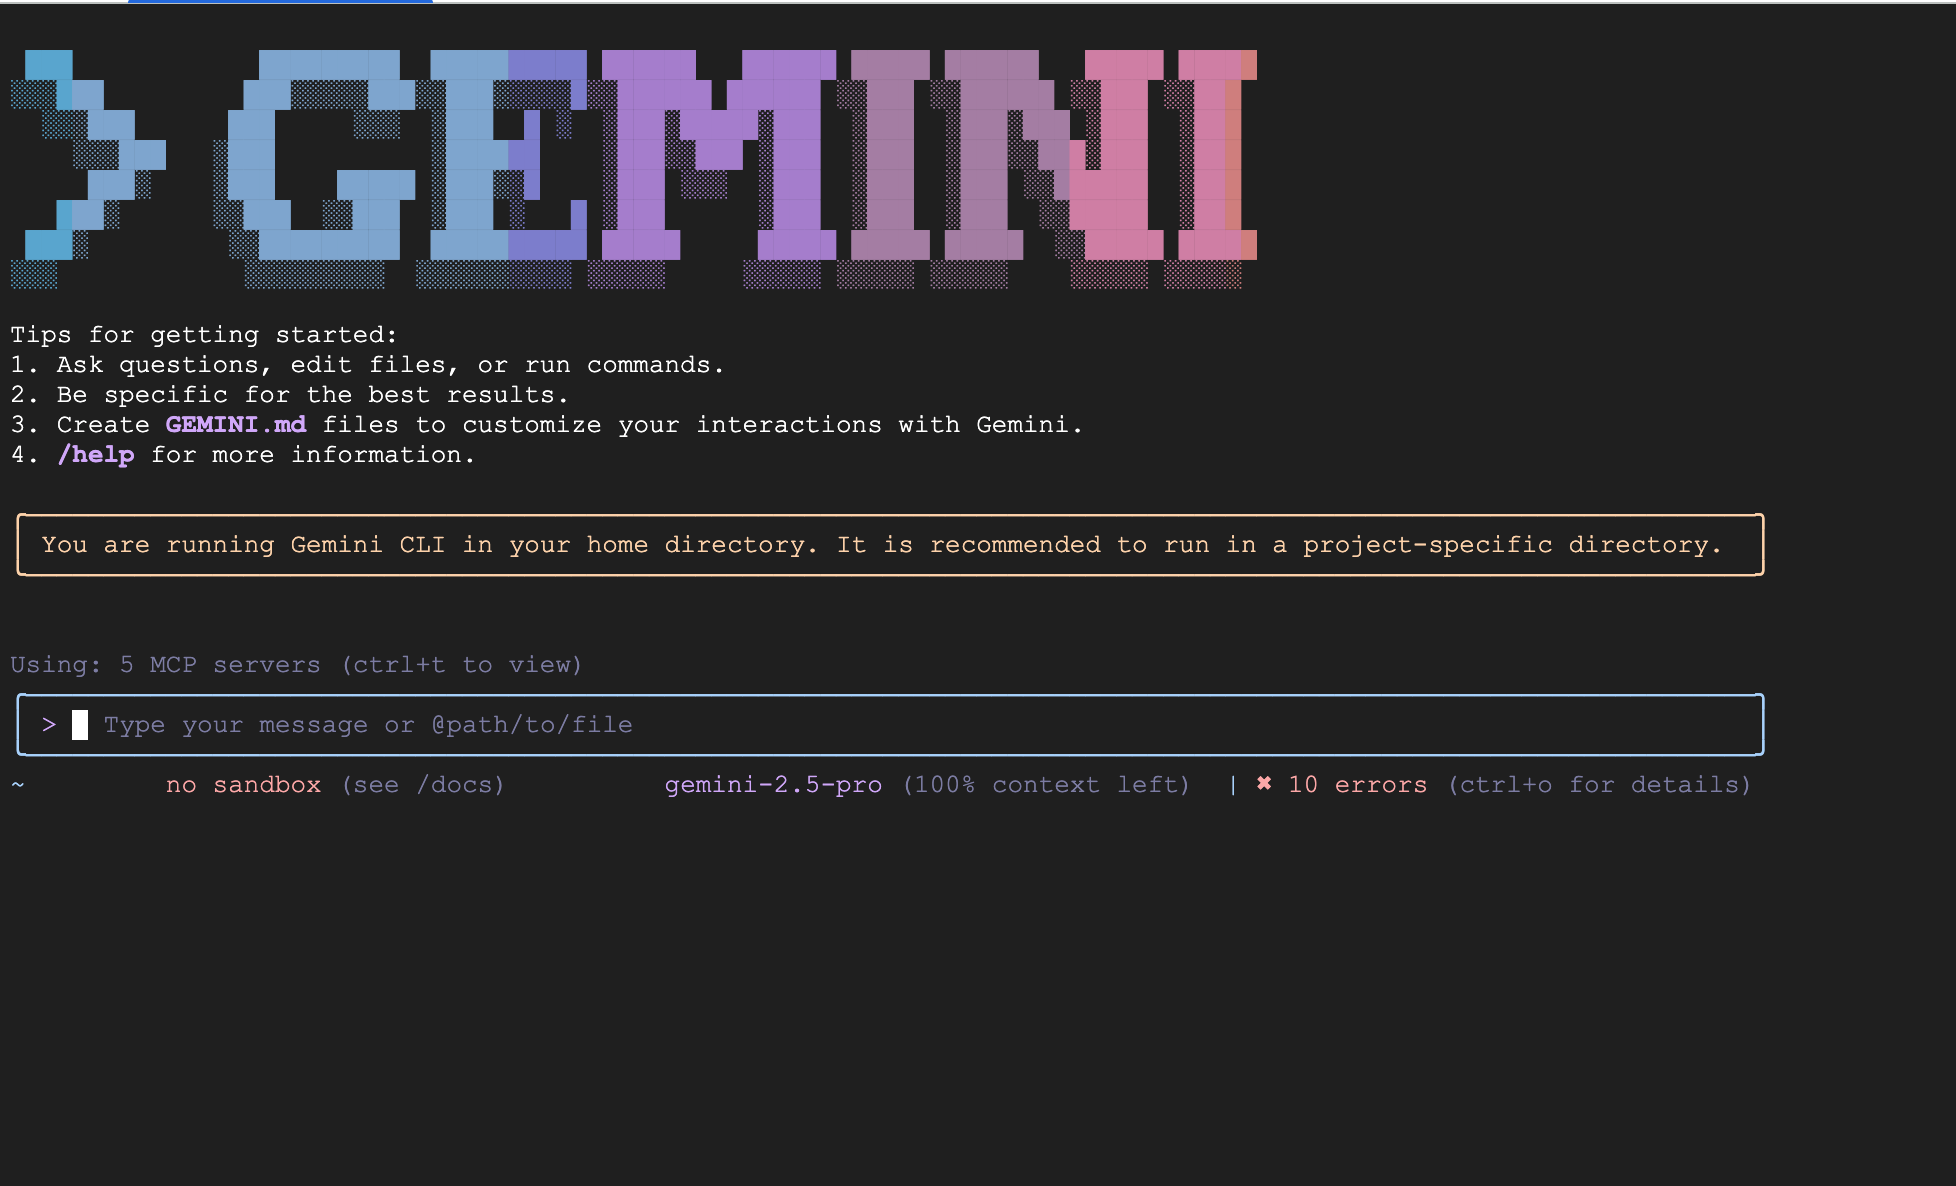
אם אתם מריצים את התהליך באופן מקומי ועדיין לא ביצעתם אימות, יופיע מסך כמו זה שבהמשך.
אפשר גם להקליד /auth כדי להציג את המסך שמופיע בהמשך.

איור 1: Gemini CLI יציע לכם 3 שיטות לאימות.
קודם יוצאים מ-Gemini CLI באמצעות הפקודה /quit.
אימות באמצעות Google: הפעלת הפקודה /auth במסוף תציג אפשרויות אימות. בוחרים באפשרות 'כניסה באמצעות חשבון Google'. אחרי כן, מסך האימות של Google יופיע בדפדפן. אחרי שתתחברו שם, תתבצע גם אימות של המסוף. למרות שהאימות הושלם, כדי להשתמש בפועל ב-Gemini CLI, צריך לציין פרויקט בענן של Google. חוזרים למסך המסוף ומריצים את הפקודה הבאה כדי לציין את הפרויקט (אפשר גם לציין אותו בקובץ .env).
export GOOGLE_CLOUD_PROJECT=xxxxxxxxxxxxxxxxxxxxxxxxxxxxxxxxxxxxxxxxxxx
אימות באמצעות מפתח API: כדי לבצע אימות באמצעות מפתח API, תצטרכו מפתח API. אפשר ליצור מפתח API בכתובת aistudio.google.com . אחרי שמקבלים את מפתח ה-API, מגדירים אותו במסוף באופן הבא:
export GEMINI_API_KEY=xxxxxxxxxxxxxxxxxxxxxxxxxxxxxxxxxxxxxxxxxxxx
אימות באמצעות Vertex AI: כדי להשתמש ב-Gemini API דרך Vertex AI, פועלים לפי השלבים הבאים.
קודם כל, משתמשים בפקודה הבאה כדי לבצע אימות ב-Google Cloud.
gcloud auth application-default login
אחרי זה מריצים את הפקודות הבאות בטרמינל
export GOOGLE_GENAI_USE_VERTEXAI=true
export GOOGLE_CLOUD_PROJECT=Your GCP Project Name
export GOOGLE_CLOUD_LOCATION=us-central1
4. אני רוצה לנסות את Gemini CLI
עכשיו אפשר לנסות את Gemini CLI. אפשר לנסות את התרחישים הבאים.
קודם יוצרים תיקיית פרויקט בשם my_cli_project.
mkdir ~/my_cli_project
cd ~/my_cli_project
הפעלת Gemini מתיקיית פרויקט מאפשרת להפעיל את Gemini CLI בצורה מאובטחת בגבולות התיקייה הזו.
- אם אתם לא נמצאים כבר ב-Gemini CLI, מקלידים את הפקודה הבאה בטרמינל של Cloud Shell כדי להיכנס ל-Gemini CLI
gemini
- מריצים הנחיה פשוטה:
What is the weather today in Tokyo
今日の東京の天気について教えてください
תקבלו את תחזית מזג האוויר בטוקיו. שימו לב שהרצה אוטומטית של הפקודה הזו משתמשת ב-
כלי חיפוש Google!
- מאשרים את כלי ה-CLI שהותקנו: מריצים את הפקודה הבאה ב-Gemini CLI Terminal. אמורה להופיע רשימה של הכלים המותקנים.
/tools
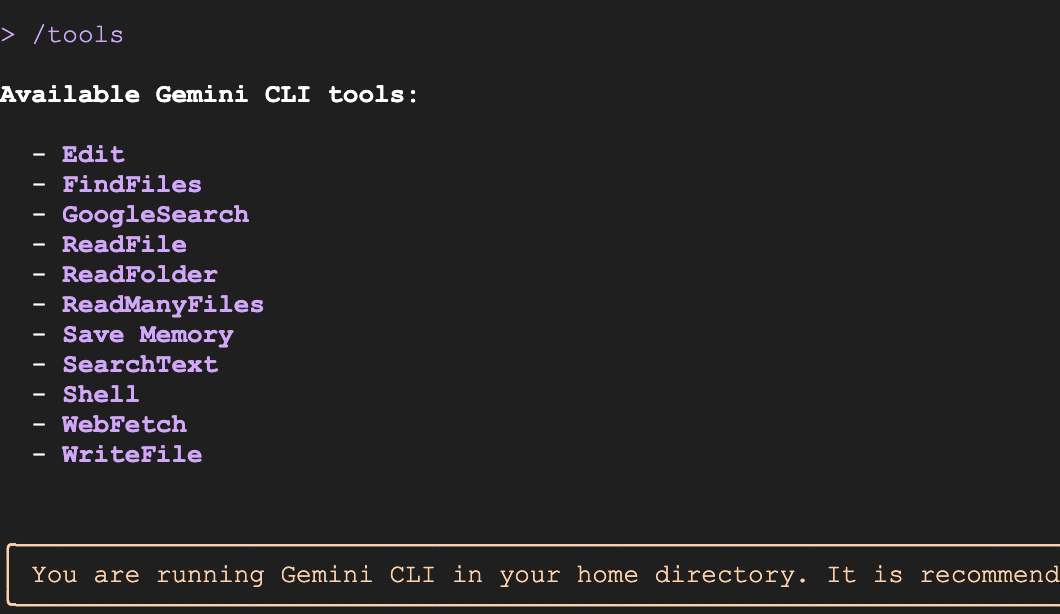
איור 2: רשימה של כלים שמוצגים
- לקבל חדשות מאתר חדשות מקומי: (למשל https://mainichi.jp, מחליפים אותה באתר חדשות מקומי).
Get me the news summary from https://mainichi.jp/
このサイトからニュースのサマリーを教えてください https://mainichi.jp/
אמור להופיע סיכום חדשות מאתר החדשות המקומי. שימו לב שהסוכן משתמש אוטומטית בכלי WebFetch כדי להוריד את התוכן מאתר החדשות וליצור את הסיכום.
- הפעלת משימה מרובת שלבים(צריך לשנות את הכתובת לכתובת של אתר מקומי): תביא לי את החדשות מהאתר https://mainichi.jp/, תסנן רק את חדשות הספורט ותסכם אותן בשבילי.
Get me the news from https://mainichi.jp/ and filter in only the sports news and summarize that for me.
https://mainichi.jp/ からニュースを取得し、スポーツニュースのみを抽出して、その要約を作成してください。
- הפעלת פקודות מערכת : כדי להפעיל פקודות מערכת, לוחצים על ! ומקלידים את הפקודות. כדי לחזור למצב הרגיל, מקלידים ! שוב.
Type ! and Enter key. This starts the command mode.
ls
pwd
Type ! to go back to normal mode.
- יוצרים משחק איקס עיגול. מזינים את ההנחיה הבאה (גרסה בעברית).
Please develop a Tic-Tac-Toe game that meets the following requirements. The solution should be split into separate HTML, CSS, and JavaScript files, with the JavaScript file handling the majority of the game logic independently.
1. General Requirements
The game format should be a match between one human player and one computer player.
When the game ends (a win/loss is determined, or a draw occurs), display "GAME OVER" on the screen along with the winner's name ("X wins!," "O wins!," or "Draw!").
Provide a "Reset" button to start a new game.
2. HTML (index.html)
Create the basic page structure.
The game board should consist of nine squares (cells). Each cell should be clickable and display the player's mark (X or O).
Provide an element to display the game status (e.g., current player's turn, game result).
Place the reset button for starting a new game.
Link the CSS and JavaScript files appropriately.
3. CSS (style.css)
Style the game board and cells so they are visually clear and easy to understand.
Add borders to the cells to indicate they are clickable areas.
Set appropriate font size and color for the X and O marks to ensure good visibility.
Style the game status display and the "GAME OVER" message to make them stand out.
Consider responsive design to ensure appropriate display on various screen sizes.
4. JavaScript (script.js)
It is strongly requested that the JavaScript file handle all the game logic.
4.1. Game State Management
Define an array or object to manage the game board state (e.g., ['', '', '', '', '', '', '', '', '']).
Define a variable to track the current player (X or O). The initial value should be X.
Define a boolean value to track whether the game has ended (win/loss or draw).
4.2. Game Initialization
Create a function to initialize the game board upon page load.
Clear all cells.
Set the current player to X.
Reset the game end flag.
Clear the game result display.
4.3. Player Interaction
Set up event listeners for cell clicks.
Only place the current player's mark and update the board state if the clicked cell is empty.
After placing the mark, execute the following:
Call the win/draw check function.
If a winner is not yet determined, switch the player (X to O, O to X).
4.4. Computer AI Logic
Create a function that is called when it is the computer's (O) turn.
Implement a simple logic where the computer randomly selects an empty cell to place its mark. (While difficulty can be increased in the future, random selection is sufficient initially.)
After the computer places its mark, perform the win/draw check, and if the game is not over, switch the turn back to the human player.
4.5. Win/Draw Determination
Create a function that determines the win/draw status based on the current board state.
Check the following winning conditions:
Three rows
Three columns
Two diagonals
If a player meets a winning condition, declare that player the winner.
If all cells are filled and no player meets a winning condition, declare a draw.
If a win or draw is determined, set the game end flag to true and display the "GAME OVER" message and the result.
4.6. Game End Handling
When the game ends (win/loss or draw), prevent further clicks on the cells.
Display the text "GAME OVER" followed by the message "X wins!," "O wins!," or "Draw!" underneath it.
4.7. Reset Functionality
When the "Reset" button is clicked, call the function to return the game to its initial state.
מזינים את ההנחיה הבאה (גרסה יפנית)
以下の要件を満たす三目並べ(Tic-Tac-Toe)ゲームを開発してください。HTML、CSS、JavaScriptの各ファイルに分割し、JavaScriptはゲームロジックの大部分を単独で処理するようにしてください。
1. 全体要件
プレイヤーは人間1人、コンピューター1人の対戦形式とする。
ゲーム終了時(勝敗が決まった場合、または引き分けの場合)は、画面上に「GAME OVER」と表示し、勝者の名前(「Xの勝利!」「Oの勝利!」または「引き分け!」)も併記すること。
新しいゲームを開始するための「リセット」ボタンを設けること。
2. HTML (index.html)
基本的なページ構造を作成してください。
ゲームボードは、9つのマス目(セル)で構成されるようにしてください。各セルはクリック可能で、プレイヤーのマーク(XまたはO)が表示されるようにします。
ゲームの状態(現在のプレイヤーのターン、ゲーム結果など)を表示する要素を設けてください。
ゲームをリセットするためのボタンを配置してください。
CSSファイルとJavaScriptファイルを適切にリンクしてください。
3. CSS (style.css)
ゲームボードとマス目が視覚的に分かりやすいようにスタイルを設定してください。
マス目には枠線をつけ、クリック可能な領域であることがわかるようにする。
XとOの表示は、見やすいように適切なフォントサイズと色を設定する。
ゲームの状態表示、および「GAME OVER」メッセージが目立つようにスタイルを設定してください。
レスポンシブデザインを考慮し、様々な画面サイズで適切に表示されるようにしてください。
4. JavaScript (script.js)
JavaScriptファイルがゲームロジックの全てを処理することを強く要請します。
4.1. ゲームの状態管理
ゲームボードの状態を管理する配列またはオブジェクト(例: ['', '', '', '', '', '', '', '', ''])を定義してください。
現在のプレイヤー(XまたはO)を追跡する変数を定義してください。初期値はXとする。
ゲームが終了したかどうか(勝敗が決まったか、引き分けか)を追跡するブール値を定義してください。
4.2. ゲームの初期化
ページ読み込み時にゲームボードを初期化する関数を作成してください。
全てのマス目を空にする。
現在のプレイヤーをXに設定する。
ゲーム終了フラグをリセットする。
ゲーム結果表示をクリアする。
4.3. プレイヤーの操作
マス目をクリックした際のイベントリスナーを設定してください。
クリックされたマス目が空の場合のみ、現在のプレイヤーのマークを配置し、ボードの状態を更新する。
マークを配置した後、以下の処理を実行する。
勝敗判定関数を呼び出す。
勝敗が決まっていない場合、プレイヤーを交代する(XからO、OからXへ)。
4.4. コンピューターの思考ロジック
コンピューター(O)が手番の時に呼び出される関数を作成してください。
コンピューターは、空いているマス目の中からランダムに選択してマークを配置するシンプルなロジックを実装してください。(将来的に難易度を上げることも考慮できるが、最初はランダムで十分です)
コンピューターがマークを配置した後、勝敗判定を行い、勝敗が決まっていない場合はプレイヤーを人間に戻す。
4.5. 勝敗判定
現在のボードの状態に基づいて勝敗を判定する関数を作成してください。
以下の勝利条件をチェックする。
3つの行
3つの列
2つの対角線
勝利条件を満たすプレイヤーがいる場合、そのプレイヤーの勝利とする。
全てのマス目が埋まり、かつ勝利条件を満たすプレイヤーがいない場合、引き分けとする。
勝敗または引き分けが決まった場合、ゲーム終了フラグをtrueに設定し、「GAME OVER」メッセージと結果を表示する。
4.6. ゲーム終了時の処理
ゲームが終了した場合(勝敗が決まったか、引き分けか)は、それ以上マス目をクリックできないようにする。
「GAME OVER」というテキストと、その下に「Xの勝利!」「Oの勝利!」または「引き分け!」というメッセージを表示する。
4.7. リセット機能
「リセット」ボタンがクリックされた際に、ゲームを初期状態に戻す関数を呼び出す。
- כדי ליצור טרמינל חדש, לוחצים על Terminal>New בטרמינל של Cloud Shell Editor. אם מזהה הפרויקט עדיין לא מוגדר, מגדירים אותו קודם.
gcloud projects list
gcloud config set project <YOUR_PROJECT_ID>
cd ~/my_cli_project
python3 -m http.server 8080
אמור להתחיל שרת Python. בדפדפן, פותחים (CTRL+click אם אתם ב-Cloud Shell):
http://localhost:8080
אמור להתחיל שרת Python. בדפדפן, פותחים (CTRL+click אם אתם ב-Cloud Shell):
5. הפעלת תוספים ל-Gemini CLI
Gemini CLI כולל כמה תוספים שימושיים מאוד שאפשר להתקין ולהפעיל בקלות. התוספים האלה מאפשרים לכם להתחבר לשירותים שונים ולהשתמש בהם. https://geminicli.com/extensions/ רשימה של תוספים זמינים שמתעדכנת מדי יום. מידע נוסף על תוספים ל-Gemini CLI זמין בדף הזה: https://medium.com/google-cloud/gemini-cli-tutorial-series-part-11-gemini-cli-extensions-69a6f2abb659
בואו נתקין תוסף Gemini Nanobanana ונפעיל אותו.
כדי להתקין את התוסף, מריצים את הפקודה הבאה.
gemini extensions install https://github.com/gemini-cli-extensions/nanobanana
אחרי שמתקינים את התוסף, מפעילים מחדש את Gemini CLI ואפשר להריץ את הפקודות הבאות של nanobanana מ-Gemini CLI.
-
/generate– יצירת תמונה אחת או כמה תמונות עם אפשרויות של סגנון או וריאציה -
/edit– עריכת תמונות /restore– שחזור תמונות-
/icon– יצירת סמלי אפליקציות, סמלי אתרים ורכיבי ממשק משתמש בכמה גדלים -
/pattern– יצירת תבניות ומרקמים חלקים לרקעים /story– יצירת תמונות רציפות שמציגות סטורי ויזואלי או תהליך-
/diagram– יצירת דיאגרמות טכניות, תרשימי זרימה ודגמים של ארכיטקטורה /nanobanana– ממשק בשפה טבעית
נריץ כמה פקודות
לפני שמריצים את Nanobanana, צריך לקבל מפתח Gemini API מכתובת aistudio.google.com ולהגדיר אותו כאן,
export NANOBANANA_GEMINI_API_KEY=YOUR_API_KEY
גרסה באנגלית
# Single image
/generate "a watercolor painting of a fox in a snowy forest"

# Multiple variations with preview
/generate "sunset over mountains" --count=3 --preview

# Style variations
/generate "mountain landscape" --styles="watercolor,oil-painting" --count=4

# Specific variations with auto-preview
/generate "coffee shop interior" --variations="lighting,mood" --preview
Japanese Version
# Single image
/generate "雪の森のキツネの水彩画"

# Multiple variations with preview
/generate "山にかかる夕焼け" --count=3 --preview

# Style variations
/generate "山岳風景" --styles="watercolor,oil-painting" --count=4

# Specific variations with auto-preview
/generate "コーヒーショップのインテリア" --variations="lighting,mood" --preview
עריכת תמונות
משנים את שם הקובץ לשם הקובץ המקומי.
/edit my_photo.png "change the color of fox to blue"
6. אתגר!
תחשוב על הנחיה ליצירת האפליקציות האלה!
-Your favorite game
-A photo gallery application
-A Manga generator App
-お気に入りのゲーム
-フォトギャラリーアプリケーション
-マンガ生成アプリ
7. הושלם
סיימתם! כל הכבוד! למידע נוסף, אפשר לקרוא את המשאבים האלה.