
1. 개요
자연어 처리 (NLP)는 텍스트 데이터에서 통찰력을 도출하고 분석을 수행하는 연구입니다. 인터넷에서 생성되는 글의 양이 계속 증가함에 따라 조직은 그 어느 때보다 텍스트를 활용하여 비즈니스와 관련된 정보를 얻으려고 합니다.
NLP는 언어 번역부터 감정 분석, 처음부터 문장 생성 등 다양한 작업에 사용할 수 있습니다. 텍스트를 사용하는 방식을 혁신하는 활발한 연구 분야입니다.
대규모 텍스트 데이터에 NLP를 대규모로 사용하는 방법을 살펴보겠습니다. 쉽지 않은 일입니다. 다행히 Spark MLlib 및 spark-nlp와 같은 라이브러리를 활용하여 이 작업을 더 쉽게 만들 수 있습니다.
2. 사용 사례
가상의 조직인 'FoodCorp'의 최고 데이터 과학자는 식품 업계의 트렌드에 대해 자세히 알아보고 싶어 합니다. 사람들이 어떤 이야기를 하는지 알아보기 위해 Reddit 하위 게시판 r/food의 게시물 형식으로 텍스트 데이터 코퍼스에 액세스할 수 있습니다.
이를 위한 한 가지 접근방식은 '주제 모델링'이라는 NLP 방법을 사용하는 것입니다. 주제 모델링은 문서 그룹의 시맨틱 의미에서 트렌드를 식별할 수 있는 통계적 방법입니다. 즉, 트렌드를 설명하는 '주제' 또는 단어 그룹 목록을 생성하는 Reddit '게시물' 코퍼스에 주제 모델을 빌드할 수 있습니다.
모델을 빌드하기 위해 텍스트를 클러스터링하는 데 자주 사용되는 Latent Dirichlet Allocation (LDA)이라는 알고리즘을 사용합니다. LDA에 대한 훌륭한 소개는 여기에서 확인할 수 있습니다.
3. 프로젝트 만들기
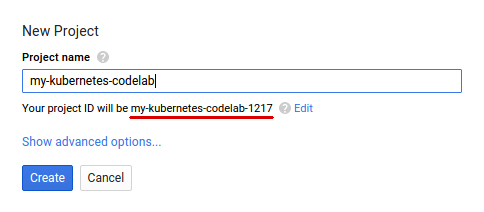
아직 Google 계정 (Gmail 또는 Google Apps)이 없으면 계정을 만들어야 합니다. Google Cloud Platform Console ( console.cloud.google.com)에 로그인하고 새 프로젝트를 만듭니다.


그런 후 Google Cloud 리소스를 사용할 수 있도록 Cloud Console에서 결제를 사용 설정해야 합니다.
이 Codelab을 실행하는 과정에는 많은 비용이 들지 않지만 더 많은 리소스를 사용하려고 하거나 실행 중일 경우 비용이 더 들 수 있습니다. PySpark-BigQuery 및 Spark-NLP Codelab은 각각 끝에 '삭제'를 설명합니다.
Google Cloud Platform 신규 사용자는 $300 상당의 무료 체험판을 사용할 수 있습니다.
4. 환경 설정하기
먼저 Dataproc 및 Compute Engine API를 사용 설정해야 합니다.
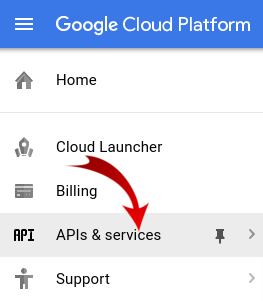
화면 왼쪽 상단의 메뉴 아이콘을 클릭합니다.

드롭다운에서 API 관리자를 선택합니다.
API 및 서비스 사용 설정 을 클릭합니다.

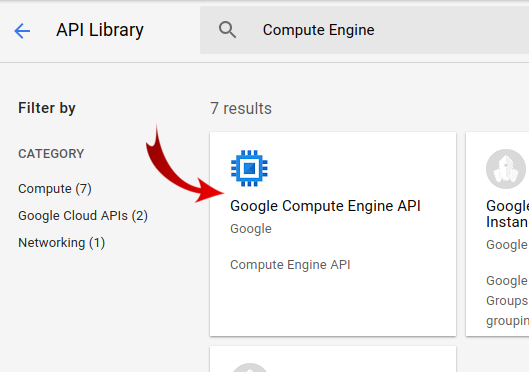
검색창에서 'Compute Engine'을 검색합니다. 표시되는 결과 목록에서 'Google Compute Engine API'를 클릭합니다.
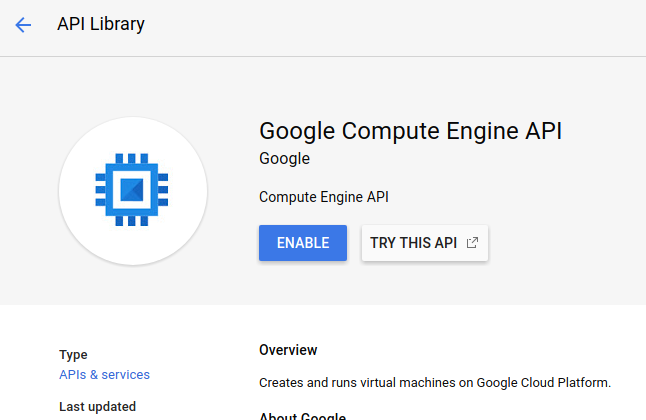
Google Compute Engine 페이지에서 사용 설정 을 클릭합니다.
사용 설정되면 왼쪽을 가리키는 화살표를 클릭하여 돌아갑니다.
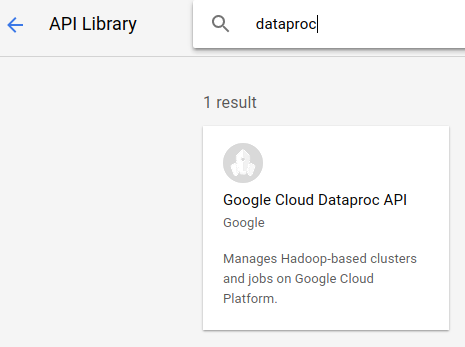
이제 'Google Dataproc API'를 검색하고 사용 설정합니다.
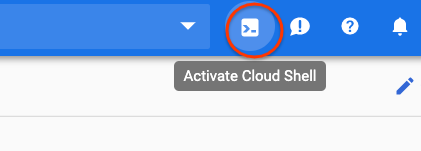
그런 다음 클라우드 콘솔의 오른쪽 상단에 있는 버튼을 클릭하여 Cloud Shell을 엽니다.
Codelab을 진행하면서 참조할 수 있는 일부 환경 변수를 설정합니다. 먼저 'my-cluster'와 같이 만들 Dataproc 클러스터의 이름을 선택하고 환경에서 설정합니다. 원하는 이름을 자유롭게 사용하세요.
CLUSTER_NAME=my-cluster
그런 다음 여기에서 사용 가능한 영역 중 하나를 선택합니다. 예를 들어 us-east1-b.일 수 있습니다.
REGION=us-east1
마지막으로 작업에서 데이터를 읽을 소스 버킷을 설정해야 합니다. bm_reddit 버킷에서 샘플 데이터를 사용할 수 있지만 이전에 PySpark를 사용하여 BigQuery 데이터 전처리를 완료한 경우 생성한 데이터를 자유롭게 사용하세요.
BUCKET_NAME=bm_reddit
환경 변수가 구성되었으므로 다음 명령어를 실행하여 Dataproc 클러스터를 만듭니다.
 gcloud beta dataproc clusters create ${CLUSTER_NAME} \
     --region ${REGION} \
     --metadata 'PIP_PACKAGES=google-cloud-storage spark-nlp==2.7.2' \
     --worker-machine-type n1-standard-8 \
     --num-workers 4 \
     --image-version 1.4-debian10 \
     --initialization-actions gs://dataproc-initialization-actions/python/pip-install.sh \
     --optional-components=JUPYTER,ANACONDA \
     --enable-component-gateway
각 명령어를 단계별로 살펴보겠습니다.
gcloud beta dataproc clusters create ${CLUSTER_NAME}: 이전에 제공한 이름으로 Dataproc 클러스터 생성을 시작합니다. 여기에는 아래에서 설명하는 구성요소 게이트웨이와 같은 Dataproc의 베타 기능을 사용 설정하기 위해 beta가 포함되어 있습니다.
--zone=${ZONE}: 클러스터의 위치를 설정합니다.
--worker-machine-type n1-standard-8: 워커에 사용할 머신 유형입니다.
--num-workers 4: 클러스터에 4명의 워커가 있습니다.
--image-version 1.4-debian9: 사용할 Dataproc의 이미지 버전을 나타냅니다.
--initialization-actions ...: 초기화 작업은 클러스터 및 워커를 만들 때 실행되는 커스텀 스크립트입니다. 사용자가 만들고 GCS 버킷에 저장하거나 공개 버킷 dataproc-initialization-actions에서 참조할 수 있습니다. 여기에 포함된 초기화 작업을 사용하면 --metadata 플래그와 함께 제공되는 Pip를 사용하여 Python 패키지를 설치할 수 있습니다.
--metadata 'PIP_PACKAGES=google-cloud-storage spark-nlp': Dataproc에 설치할 패키지의 공백으로 구분된 목록입니다. 이 경우 google-cloud-storage Python 클라이언트 라이브러리와 spark-nlp를 설치합니다.
--optional-components=ANACONDA: 선택적 구성요소는 생성 중에 Dataproc 클러스터에 자동으로 설치되는 Dataproc에서 사용되는 일반적인 패키지입니다. 초기화 작업보다 선택적 구성요소를 사용하는 이점으로는 빠른 시작 시간과 특정 Dataproc 버전에 대한 테스트가 있습니다. 전반적으로 더 안정적입니다.
--enable-component-gateway: 이 플래그를 사용하면 Dataproc의 구성요소 게이트웨이를 활용하여 Zeppelin, Jupyter 또는 Spark 기록과 같은 일반적인 UI를 볼 수 있습니다. 참고: 이러한 구성요소 중 일부에는 연결된 선택적 구성요소가 필요합니다.
Dataproc에 대한 자세한 소개는 이 Codelab을 참고하세요.
그런 다음 Cloud Shell에서 다음 명령어를 실행하여 샘플 코드가 포함된 저장소를 클론하고 올바른 디렉터리로 cd합니다.
cd
git clone https://github.com/GoogleCloudPlatform/cloud-dataproc
cd cloud-dataproc/codelabs/spark-nlp
5. Spark MLlib
Spark MLlib는 Apache Spark로 작성된 확장 가능한 머신러닝 라이브러리입니다. MLlib는 미세 조정된 머신러닝 알고리즘 모음을 사용하여 Spark의 효율성을 활용하여 대량의 데이터를 분석할 수 있습니다. Java, Scala, Python, R에 API가 있습니다. 이 Codelab에서는 Python에 중점을 둡니다.
MLlib에는 많은 변환기와 추정기가 포함되어 있습니다. 변환기는 일반적으로 transform() 함수를 사용하여 데이터를 변경하거나 수정할 수 있는 도구이고 추정기는 일반적으로 fit() 함수를 사용하여 데이터를 학습할 수 있는 사전 빌드된 알고리즘입니다.
변환기의 예는 다음과 같습니다.
- 토큰화 (단어 문자열에서 숫자 벡터 만들기)
- 원-핫 인코딩 (문자열에 있는 단어를 나타내는 숫자 희소 벡터 만들기)
- 검색 제외 단어 삭제 도구 (문자열에 시맨틱 값을 추가하지 않는 단어 삭제)
추정기의 예는 다음과 같습니다.
- 분류 (사과인가요, 오렌지인가요?)
- 회귀 (이 사과는 얼마에 판매해야 하나요?)
- 클러스터링 (모든 사과가 서로 얼마나 비슷한가요?)
- 의사결정 트리 (색상이 오렌지색이면 오렌지입니다. 그렇지 않으면 사과입니다.)
- 차원 축소 (데이터 세트에서 특성을 삭제하고 사과와 오렌지를 계속 구분할 수 있나요?)
MLlib에는 초매개변수 조정 및 선택, 교차 검증과 같은 머신러닝의 다른 일반적인 방법을 위한 도구도 포함되어 있습니다.
또한 MLlib에는 다시 실행할 수 있는 다양한 변환기를 사용하여 데이터 변환 파이프라인을 빌드할 수 있는 파이프라인 API가 포함되어 있습니다.
6. Spark-NLP
Spark-nlp는 John Snow Labs에서 Spark를 사용하여 효율적인 자연어 처리 작업을 수행하기 위해 만든 라이브러리입니다. 다음과 같은 일반적인 작업을 위한 주석자라는 기본 제공 도구가 포함되어 있습니다.
- 토큰화 (단어 문자열에서 숫자 벡터 만들기)
- 단어 임베딩 만들기 (벡터를 통해 단어 간의 관계 정의)
- 품사 태그 (어떤 단어가 명사인가요? 어떤 단어가 동사인가요?)
이 Codelab의 범위를 벗어나지만 spark-nlp는 TensorFlow와도 잘 통합됩니다.
가장 중요한 점은 Spark-NLP가 MLlib 파이프라인에 쉽게 삽입할 수 있는 구성요소를 제공하여 Spark MLlib의 기능을 확장한다는 것입니다.
7. 자연어 처리 권장사항
데이터에서 유용한 정보를 추출하려면 몇 가지 정리 작업을 해야 합니다. 수행할 전처리 단계는 다음과 같습니다.
토큰화
일반적으로 가장 먼저 할 일은 데이터를 '토큰화'하는 것입니다. 여기에는 데이터를 가져와서 '토큰' 또는 단어를 기준으로 분할하는 작업이 포함됩니다. 일반적으로 이 단계에서는 문장 부호를 삭제하고 모든 단어를 소문자로 설정합니다. 예를 들어 다음과 같은 문자열이 있다고 가정해 보겠습니다. What time is it? 토큰화 후 이 문장은 네 개의 토큰으로 구성됩니다. "what" , "time", "is", "it". 모델에서 what이라는 단어를 대문자가 다른 두 개의 다른 단어로 처리하지 않도록 하려고 합니다. 또한 문장 부호는 일반적으로 단어에서 추론을 더 잘 학습하는 데 도움이 되지 않으므로 문장 부호도 삭제합니다.
정규화
데이터를 '정규화'하는 것이 좋습니다. 이렇게 하면 의미가 비슷한 단어가 동일한 단어로 대체됩니다. 예를 들어 텍스트에서 'fought', 'battled', 'dueled'라는 단어가 식별되면 정규화는 'battled'와 'dueled'를 'fought'라는 단어로 대체할 수 있습니다.
어간 추출
어간 추출은 단어를 어근 의미로 대체합니다. 예를 들어 'car', 'cars'', 'car's'라는 단어는 모두 'car'라는 단어로 대체됩니다. 이러한 단어는 모두 어근에서 동일한 의미를 내포하기 때문입니다.
검색 제외 단어 삭제
검색 제외 단어는 일반적으로 문장의 시맨틱 의미에 값을 추가하지 않는 'and' 및 'the'와 같은 단어입니다. 일반적으로 텍스트 데이터 세트의 노이즈를 줄이기 위해 이러한 단어를 삭제하는 것이 좋습니다.
8. 작업 실행
실행할 작업을 살펴보겠습니다. 코드는 cloud-dataproc/codelabs/spark-nlp/topic_model.py에서 확인할 수 있습니다. 발생하는 상황을 이해하려면 연결된 주석과 함께 코드를 읽는 데 몇 분 이상을 할애하세요. 아래에서 일부 섹션도 강조 표시합니다.
# Python imports
import sys

# spark-nlp components. Each one is incorporated into our pipeline.
from sparknlp.annotator import Lemmatizer, Stemmer, Tokenizer, Normalizer
from sparknlp.base import DocumentAssembler, Finisher

# A Spark Session is how we interact with Spark SQL to create Dataframes
from pyspark.sql import SparkSession

# These allow us to create a schema for our data
from pyspark.sql.types import StructField, StructType, StringType, LongType

# Spark Pipelines allow us to sequentially add components such as transformers
from pyspark.ml import Pipeline

# These are components we will incorporate into our pipeline.
from pyspark.ml.feature import StopWordsRemover, CountVectorizer, IDF

# LDA is our model of choice for topic modeling
from pyspark.ml.clustering import LDA

# Some transformers require the usage of other Spark ML functions. We import them here
from pyspark.sql.functions import col, lit, concat

# This will help catch some PySpark errors
from pyspark.sql.utils import AnalysisException

# Assign bucket where the data lives
try:
    bucket = sys.argv[1]
except IndexError:
    print("Please provide a bucket name")
    sys.exit(1)

# Create a SparkSession under the name "reddit". Viewable via the Spark UI
spark = SparkSession.builder.appName("reddit topic model").getOrCreate()

# Create a three column schema consisting of two strings and a long integer
fields = [StructField("title", StringType(), True),
          StructField("body", StringType(), True),
          StructField("created_at", LongType(), True)]
schema = StructType(fields)

# We'll attempt to process every year / month combination below.
years = ['2016', '2017', '2018', '2019']
months = ['01', '02', '03', '04', '05', '06',
          '07', '08', '09', '10', '11', '12']

# This is the subreddit we're working with.
subreddit = "food"

# Create a base dataframe.
reddit_data = spark.createDataFrame([], schema)

# Keep a running list of all files that will be processed
files_read = []

for year in years:
    for month in months:

        # In the form of <project-id>.<dataset>.<table>
        gs_uri = f"gs://{bucket}/reddit_posts/{year}/{month}/{subreddit}.csv.gz"

        # If the table doesn't exist we will simply continue and not
        # log it into our "tables_read" list
        try:
            reddit_data = (
                spark.read.format('csv')
                .options(codec="org.apache.hadoop.io.compress.GzipCodec")
                .load(gs_uri, schema=schema)
                .union(reddit_data)
            )

            files_read.append(gs_uri)

        except AnalysisException:
            continue

if len(files_read) == 0:
    print('No files read')
    sys.exit(1)

# Replacing null values with their respective typed-equivalent is usually
# easier to work with. In this case, we'll replace nulls with empty strings.
# Since some of our data doesn't have a body, we can combine all of the text
# for the titles and bodies so that every row has useful data.

df_train = (
    reddit_data
    # Replace null values with an empty string
    .fillna("")
    .select(
         # Combine columns
        concat(
            # First column to concatenate. col() is used to specify that we're referencing a column
            col("title"),
            # Literal character that will be between the concatenated columns.
            lit(" "),
            # Second column to concatenate.
            col("body")
        # Change the name of the new column
        ).alias("text")
    )
)

# Now, we begin assembling our pipeline. Each component here is used to some transformation to the data.
# The Document Assembler takes the raw text data and convert it into a format that can
# be tokenized. It becomes one of spark-nlp native object types, the "Document".
document_assembler = DocumentAssembler().setInputCol("text").setOutputCol("document")

# The Tokenizer takes data that is of the "Document" type and tokenizes it.
# While slightly more involved than this, this is effectively taking a string and splitting
# it along ths spaces, so each word is its own string. The data then becomes the
# spark-nlp native type "Token".
tokenizer = Tokenizer().setInputCols(["document"]).setOutputCol("token")

# The Normalizer will group words together based on similar semantic meaning.
normalizer = Normalizer().setInputCols(["token"]).setOutputCol("normalizer")

# The Stemmer takes objects of class "Token" and converts the words into their
# root meaning. For instance, the words "cars", "cars'" and "car's" would all be replaced
# with the word "car".
stemmer = Stemmer().setInputCols(["normalizer"]).setOutputCol("stem")

# The Finisher signals to spark-nlp allows us to access the data outside of spark-nlp
# components. For instance, we can now feed the data into components from Spark MLlib.
finisher = Finisher().setInputCols(["stem"]).setOutputCols(["to_spark"]).setValueSplitSymbol(" ")

# Stopwords are common words that generally don't add much detail to the meaning
# of a body of text. In English, these are mostly "articles" such as the words "the"
# and "of".
stopword_remover = StopWordsRemover(inputCol="to_spark", outputCol="filtered")

# Here we implement TF-IDF as an input to our LDA model. CountVectorizer (TF) keeps track
# of the vocabulary that's being created so we can map our topics back to their
# corresponding words.
# TF (term frequency) creates a matrix that counts how many times each word in the
# vocabulary appears in each body of text. This then gives each word a weight based
# on its frequency.
tf = CountVectorizer(inputCol="filtered", outputCol="raw_features")

# Here we implement the IDF portion. IDF (Inverse document frequency) reduces
# the weights of commonly-appearing words.
idf = IDF(inputCol="raw_features", outputCol="features")

# LDA creates a statistical representation of how frequently words appear
# together in order to create "topics" or groups of commonly appearing words.
lda = LDA(k=10, maxIter=10)

# We add all of the transformers into a Pipeline object. Each transformer
# will execute in the ordered provided to the "stages" parameter
pipeline = Pipeline(
    stages = [
        document_assembler,
        tokenizer,
        normalizer,
        stemmer,
        finisher,
        stopword_remover,
        tf,
        idf,
        lda
    ]
)

# We fit the data to the model.
model = pipeline.fit(df_train)

# Now that we have completed a pipeline, we want to output the topics as human-readable.
# To do this, we need to grab the vocabulary generated from our pipeline, grab the topic
# model and do the appropriate mapping.  The output from each individual component lives
# in the model object. We can access them by referring to them by their position in
# the pipeline via model.stages[<ind>]

# Let's create a reference our vocabulary.
vocab = model.stages[-3].vocabulary

# Next, let's grab the topics generated by our LDA model via describeTopics(). Using collect(),
# we load the output into a Python array.
raw_topics = model.stages[-1].describeTopics().collect()

# Lastly, let's get the indices of the vocabulary terms from our topics
topic_inds = [ind.termIndices for ind in raw_topics]

# The indices we just grab directly map to the term at position <ind> from our vocabulary.
# Using the below code, we can generate the mappings from our topic indices to our vocabulary.
topics = []
for topic in topic_inds:
    _topic = []
    for ind in topic:
        _topic.append(vocab[ind])
    topics.append(_topic)

# Let's see our topics!
for i, topic in enumerate(topics, start=1):
    print(f"topic {i}: {topic}")
작업 실행
이제 작업을 실행해 보겠습니다. 다음 명령어를 실행합니다.
gcloud dataproc jobs submit pyspark --cluster ${CLUSTER_NAME}\
    --region ${REGION}\
    --properties=spark.jars.packages=com.johnsnowlabs.nlp:spark-nlp_2.11:2.7.2\
    --driver-log-levels root=FATAL \
    topic_model.py \
    -- ${BUCKET_NAME}
이 명령어를 사용하면 Dataproc Jobs API를 활용할 수 있습니다. pyspark 명령어를 포함하면 클러스터에 PySpark 작업임을 나타냅니다. 클러스터 이름, 여기에서 사용 가능한 선택적 매개변수 here, 작업이 포함된 파일 이름을 제공합니다. 이 경우 Spark, Yarn 또는 Dataproc의 다양한 속성을 변경할 수 있는 --properties 매개변수를 제공합니다. 작업과 함께 패키지로 제공되는 spark-nlp를 포함하려는 Spark에 알릴 수 있는 Spark 속성 packages를 변경합니다. 또한 오류를 제외한 PySpark의 대부분의 로그 출력을 표시하지 않는 --driver-log-levels root=FATAL 매개변수도 제공합니다. 일반적으로 Spark 로그는 노이즈가 많은 경향이 있습니다.
마지막으로 -- ${BUCKET}은 버킷 이름을 제공하는 Python 스크립트 자체의 명령줄 인수입니다. --와 ${BUCKET} 사이에 공백이 있습니다.
작업을 몇 분 동안 실행한 후 모델이 포함된 출력이 표시됩니다.
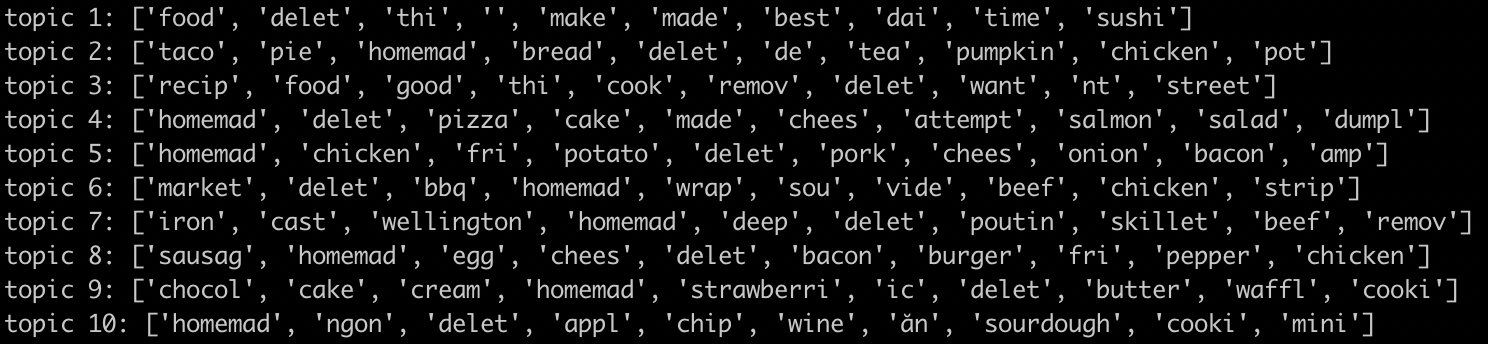
대단해!! 모델의 출력을 보고 트렌드를 추론할 수 있나요? Google의 모델은 어떤가요?
위의 출력에서 아침 식사 음식과 관련된 주제 8과 주제 9의 디저트에서 트렌드를 추론할 수 있습니다.
9. 삭제
이 빠른 시작 가이드를 완료한 후 GCP 계정에 불필요한 요금이 청구되지 않도록 하려면 다음 단계를 따르세요.
이 Codelab만을 위한 프로젝트를 생성한 경우 프로젝트를 삭제할 수도 있습니다.
- GCP 콘솔에서 프로젝트 페이지로 이동합니다.
- 프로젝트 목록에서 삭제할 프로젝트를 선택하고 삭제 를 클릭합니다.
- 상자에 프로젝트 ID를 입력하고 종료 를 클릭하여 프로젝트를 삭제합니다.
라이선스
이 작업물은 크리에이티브 커먼즈 저작자표시 3.0 일반 라이선스 및 Apache 2.0 라이선스에 따라 사용이 허가되었습니다.