
1. Overview
Fulfilling a multi-constraint travel request (such as designing a full-day Kyoto itinerary under $100 focused on historic temples and local cuisine with zero modern art galleries) requires extracting constraints, researching attractions and dining concurrently, assembling an itemized schedule, and auditing the final plan. Relying on a single monolithic agent with many tools can skip verification steps or violate exclusions, so orchestration coordinates specialized sub-agents through deterministic workflow controllers.
In this third part of the Building AI Agents with ADK series, you build a self-contained multi-agent travel planner on Agent Platform using Agent Development Kit (ADK) 2 workflow controllers (SequentialAgent, ParallelAgent, and LoopAgent). Across three progressive stages (with no Part 1 or Part 2 workspace setup required), you coordinate six specialist agents powered by gemini-3.8-flash with shared session state (output_key), concurrent google_search execution, and an iterative maker-checker refinement loop.
Prerequisites
- An understanding of Generative AI concepts
- Basic proficiency in Python programming
- Familiarity with AI agent fundamentals and Google ADK
What you learn
- How to scaffold a multi-agent ADK 2 project from scratch
- How to design a team of specialized agents that share session state using
output_key - How to use
SequentialAgentto execute sub-agents in a deterministic, step-by-step pipeline - How to use
ParallelAgentto run independent research agents concurrently for lower latency - How to use
LoopAgentandToolContextescalation to implement an iterative maker-checker refinement loop - How to combine sequential, parallel, and loop patterns into a hierarchical multi-agent workflow
What you need
- A Google account (use a personal
@gmail.comaccount if claiming workshop credits) - A workshop credit link from your instructor (plus a phone camera to scan the QR code) or an active Cloud Billing account
- Google Chrome (an Incognito window is recommended to avoid mixing personal and work accounts)
2. Claim Google Cloud credits (Optional)
If you are attending a workshop with an event credit link, claim your Google Developer Program credit to provision a billing account without a credit card.
Claim your event credit
- Open the workshop credit link in an Incognito window and sign in with your
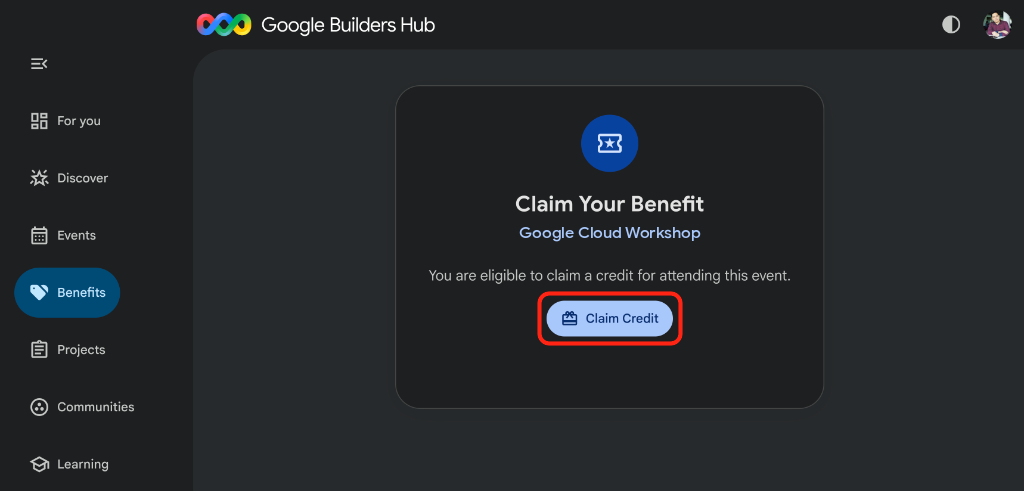
@gmail.comaccount. - On Claim Your Benefit, click Claim Credit:
- If prompted to create a Google Developer Program profile, complete the form.
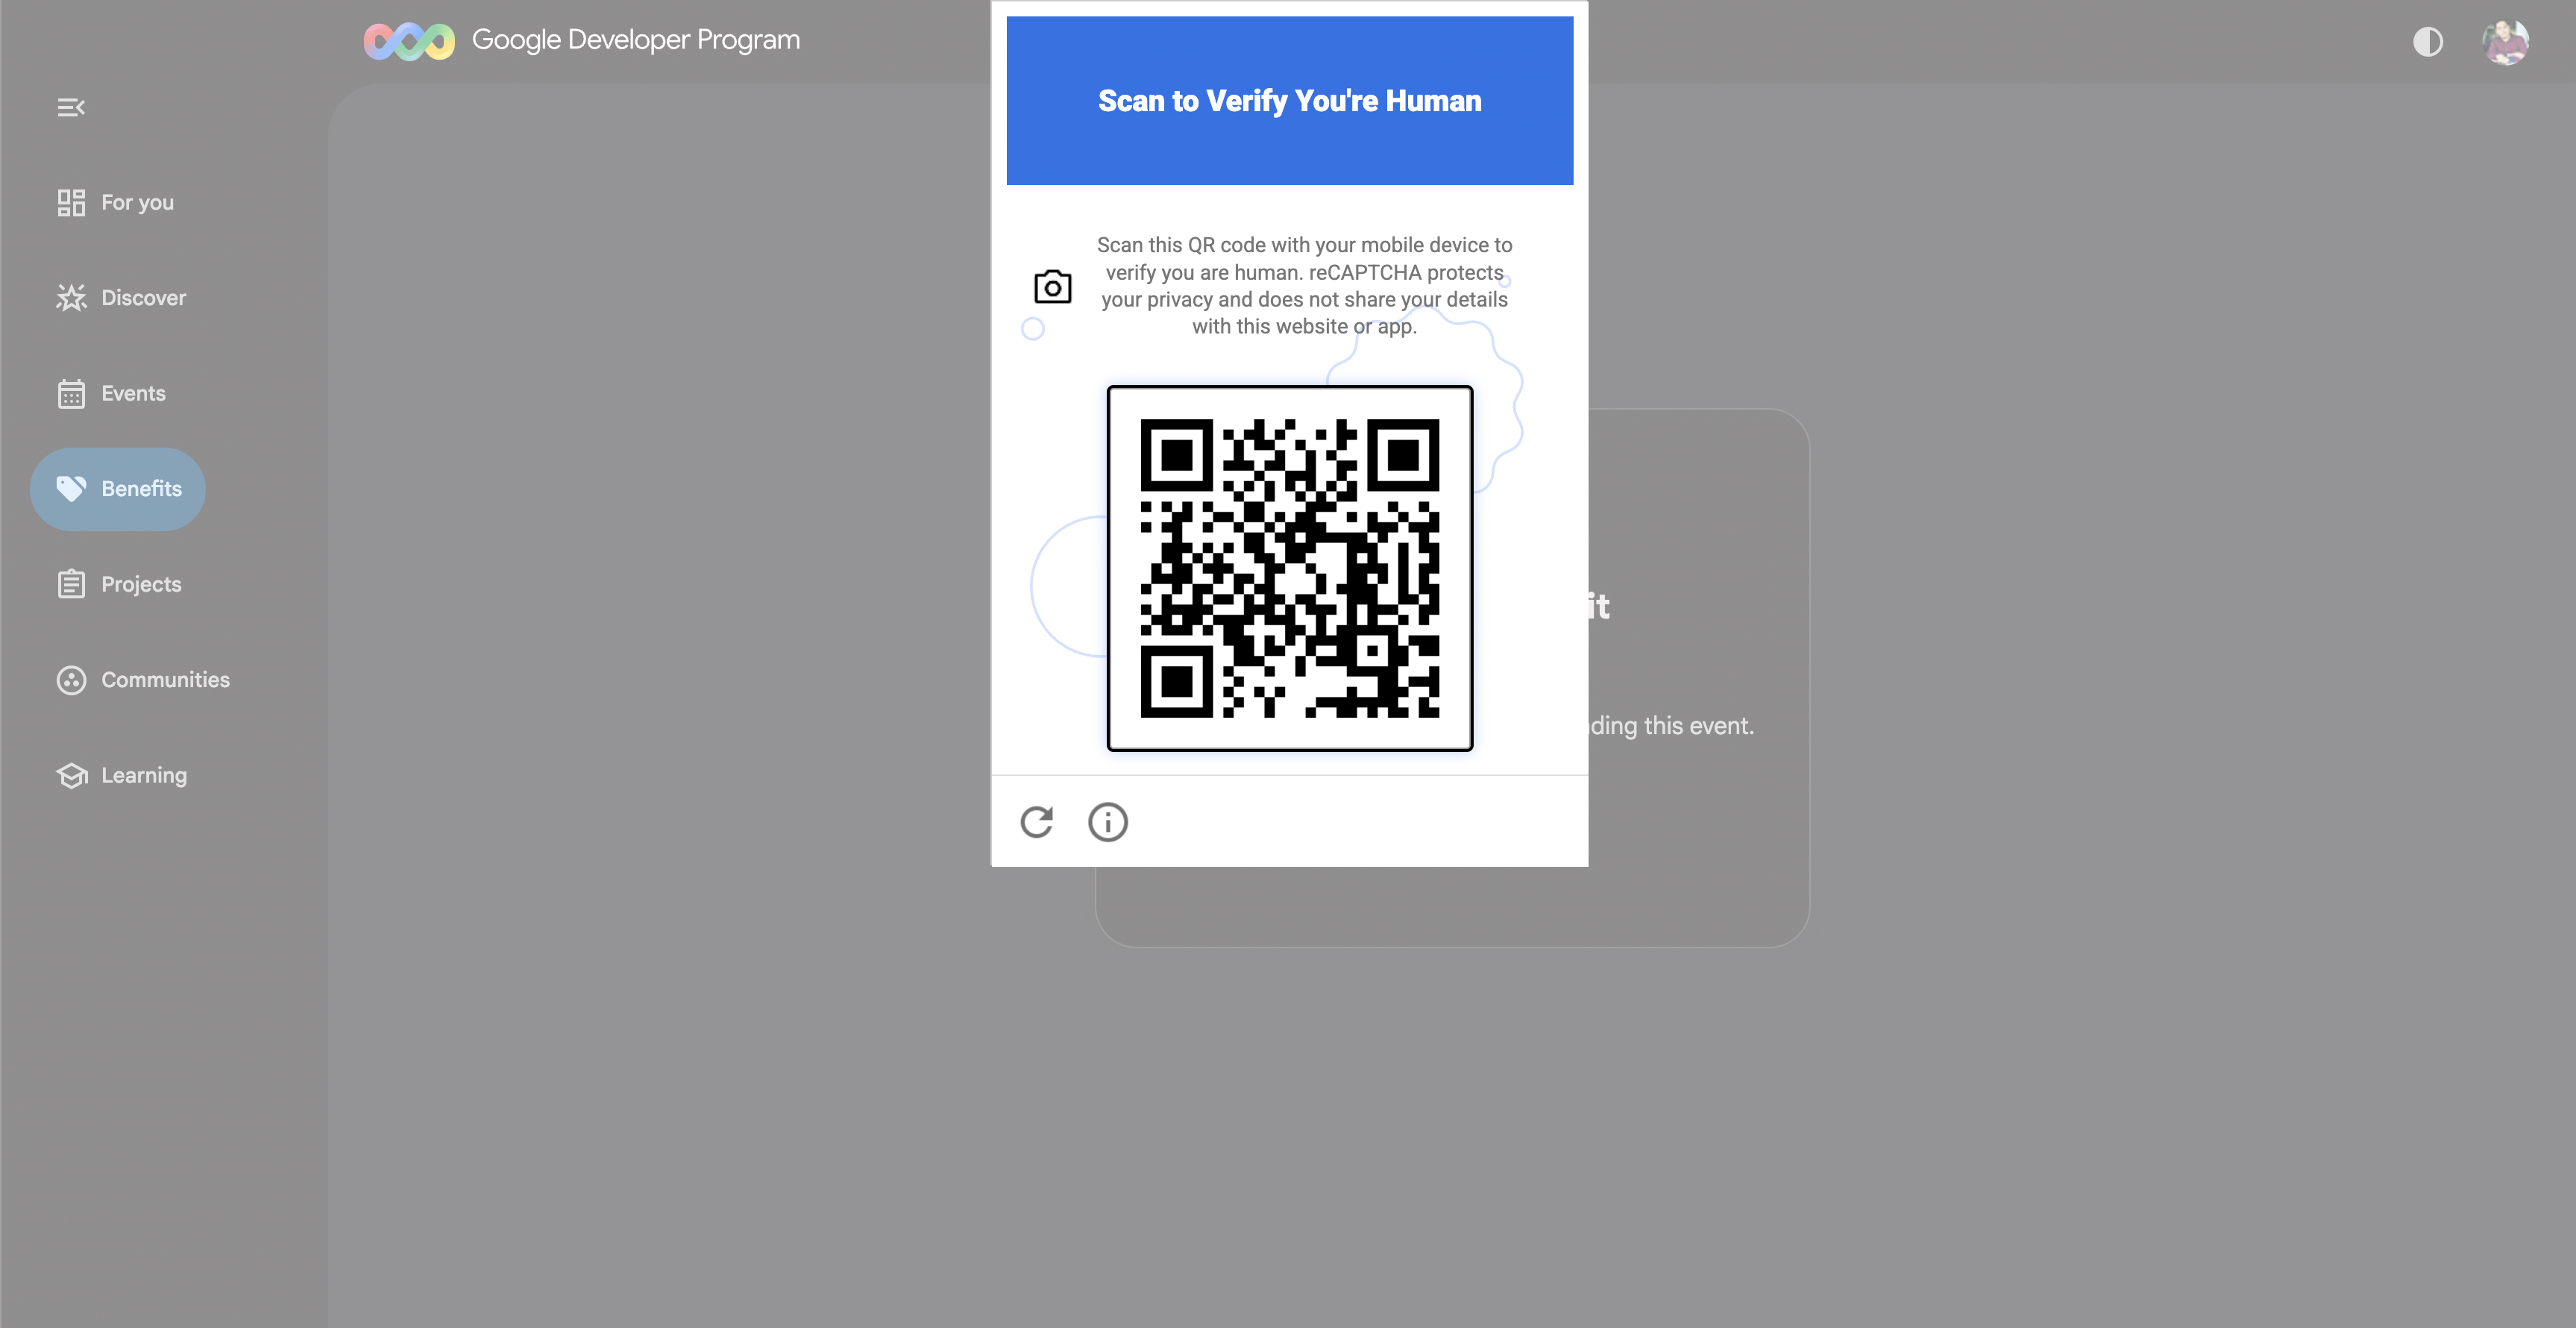
- When Scan to Verify You're Human appears, scan the QR code with your phone and complete verification (refresh and click Claim Credit again if the QR code does not appear):
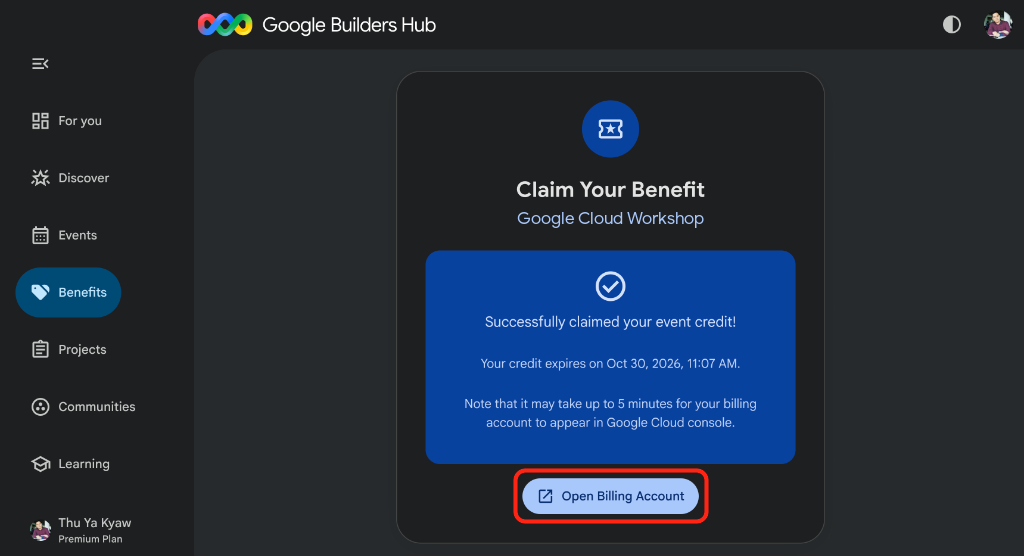
- Confirm Successfully claimed your event credit! appears, then click Open Billing Account:
🔍 Check your work
Billing account setup takes up to 3 minutes:
- Open Google Cloud Billing (or copy the URL into your Incognito window) and select Your billing accounts:
https://console.cloud.google.com/billing
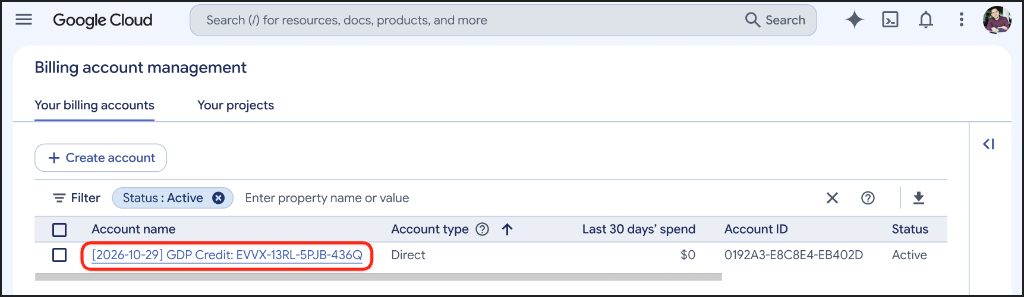
- Refresh until your
GDP Creditaccount shows status Active:
3. Create a Google Cloud project (Optional)
Create a dedicated Google Cloud project so all resources from this codelab stay isolated and easy to clean up.
- Open Create a Project (or copy the URL into your Incognito window):
https://console.cloud.google.com/projectcreate
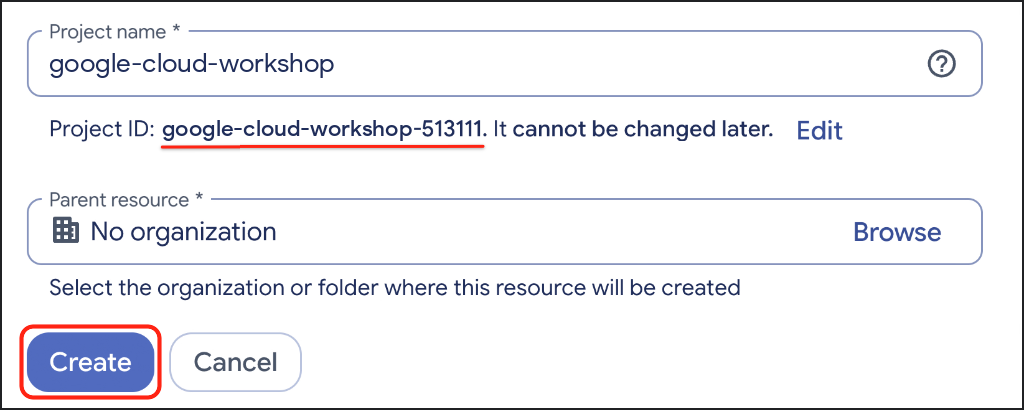
- Enter your project details:
- Project name: For example,
google-cloud-workshop - Billing account (if shown): Select
GDP Credit(or your active billing account) - Parent resource: No organization (or your organization if required)
- Project name: For example,
- Note the generated Project ID below the project name, then click Create:
🔍 Check your work
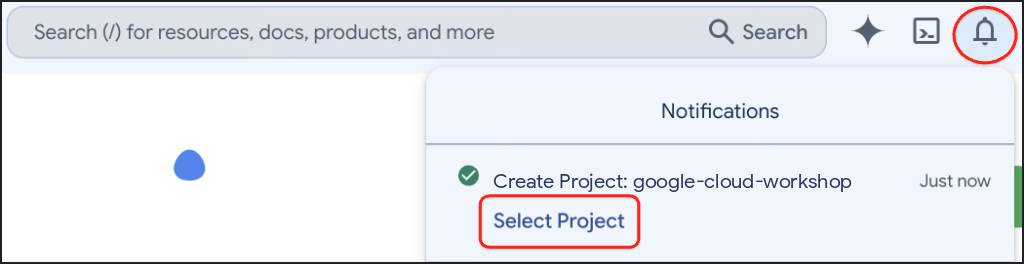
Click Notifications in the top-right toolbar and click Select Project once project creation finishes:
4. Set up your environment
Configure Google Cloud Shell, enable the Agent Platform API, and create an isolated Python 3.12 virtual environment with uv.
Configure Cloud Shell
- Click Activate Cloud Shell (
>_) in the Google Cloud console toolbar, or open Google Cloud Shell directly (or copy the URL into your Incognito window):
https://shell.cloud.google.com/?show=ide,terminal

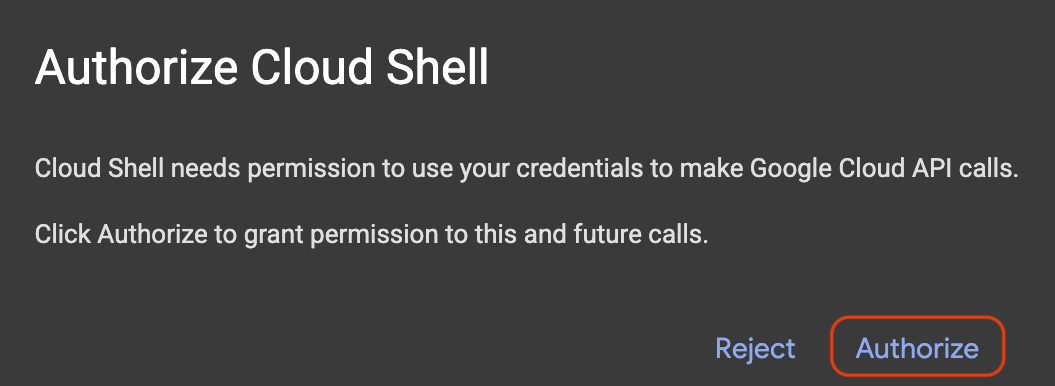
- Click Authorize if prompted:
- Select your active Google Cloud Project ID from the numbered menu in your terminal:
unset CLOUDSDK_CORE_PROJECT
PS3="Select your project (e.g. 1): "
select PROJECT_ID in $(gcloud projects list --format="value(projectId)"); do
  [ -n "$PROJECT_ID" ] && gcloud config set project "$PROJECT_ID" && break
done
You should see output similar to (untagged projects also print an informational [environment: untagged] line):
1) google-cloud-workshop-4210
2) my-cloud-project-8812
Select your project (e.g. 1): 1
Updated property [core/project].
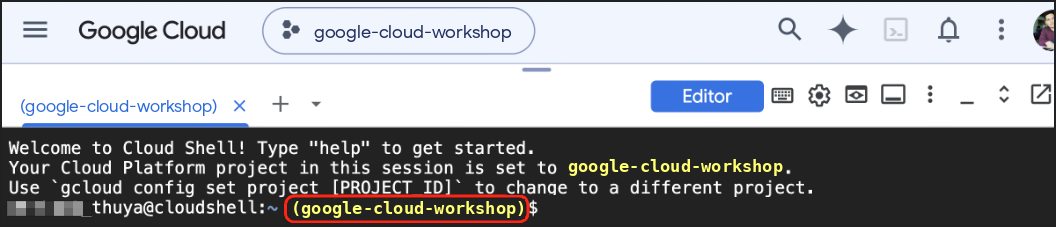
Verify your selected Project ID appears highlighted in yellow in the Cloud Shell prompt:
Enable required APIs
Enable the Agent Platform API so your ADK agents can invoke Gemini models:
gcloud services enable aiplatform.googleapis.com
You should see output similar to:
Operation "operations/acat.p2-..." finished successfully.
Create a Python virtual environment and install ADK
Create the ~/adk-agents workspace and activate a Python 3.12 virtual environment:
cd ~
mkdir -p adk-agents && cd ~/adk-agents

which uv >/dev/null 2>&1 || curl -LsSf https://astral.sh/uv/install.sh | sh
export PATH="$HOME/.local/bin:$PATH"

uv venv .venv --python 3.12
source .venv/bin/activate
Confirm the (.venv) prefix appears at the start of your terminal prompt:

Install ADK 2 inside the active virtual environment:
uv pip install --no-cache "google-adk==2.14.0"
🔍 Check your work
Verify the installed adk CLI version:
adk --version
You should see output similar to:
adk, version 2.14.0
5. Scaffold the travel planner agent
With your environment ready, use ADK's built-in adk create command to generate the starter files for your travel_planner agent package.
Generate the starter package
Run adk create from your ~/adk-agents directory:
cd ~/adk-agents
adk create travel_planner
When prompted in the terminal, select the following configuration options (if prompted with Enable telemetry? [Y/n]: on first run, press Enter or type n and press Enter):
- Choose a model for the root agent: Type
2to selectgemini-3.8-flash(option1selectsgemini-3.5-flash) and press Enter. - Choose a backend: Type
2to select the Google Cloud Agent Platform backend (option2in the CLI menu below) and press Enter. - Enter Google Cloud project ID: Confirm your Project ID shown in brackets by pressing Enter.
- Enter Google Cloud region: Type
globaland press Enter.
adk create writes GOOGLE_GENAI_USE_ENTERPRISE=1, your project ID, and GOOGLE_CLOUD_LOCATION=global into travel_planner/.env, so your credentials remain configured when you update agent.py later.
🔍 Check your work
You should see output similar to:
Choose a model for the root agent:
1. gemini-3.5-flash
2. gemini-3.8-flash
3. Other models (fill later)
Choose model (1, 2, 3): 2
1. Google AI
2. Vertex AI
3. Login with Google
Choose a backend (1, 2, 3): 2

You need an existing Google Cloud account and project, check out this link for details:
https://google.github.io/adk-docs/get-started/quickstart/#gemini---google-cloud-vertex-ai

Enter Google Cloud project ID [google-cloud-workshop-4210]:
Enter Google Cloud region [us-central1]: global

Agent created in /home/your_username/adk-agents/travel_planner:
- .env
- .gitignore
- __init__.py
- agent.py

⚠️  WARNING: Secrets (like GOOGLE_API_KEY) are stored in .env.

Next steps:
- Chat with your agent in the terminal: adk run travel_planner
- Or in the browser: adk web .
- Have your coding agent evaluate and deploy it: uvx google-agents-cli setup
  (other install options: https://adk.dev/get-started/agents-cli/)
Open the current folder in the Cloud Shell code editor so you can inspect and edit files side by side with your terminal:
which cloudshell >/dev/null 2>&1 && cloudshell workspace ~/adk-agents || true
cd ~/adk-agents
source .venv/bin/activate
Test the default single agent
Before building multi-agent workflows, launch the ADK Development UI to observe how the default single agent responds to a broad travel planning query:
cd ~/adk-agents
adk web --allow_origins "*"
Open the Development UI in your browser using Cloud Shell Web Preview:
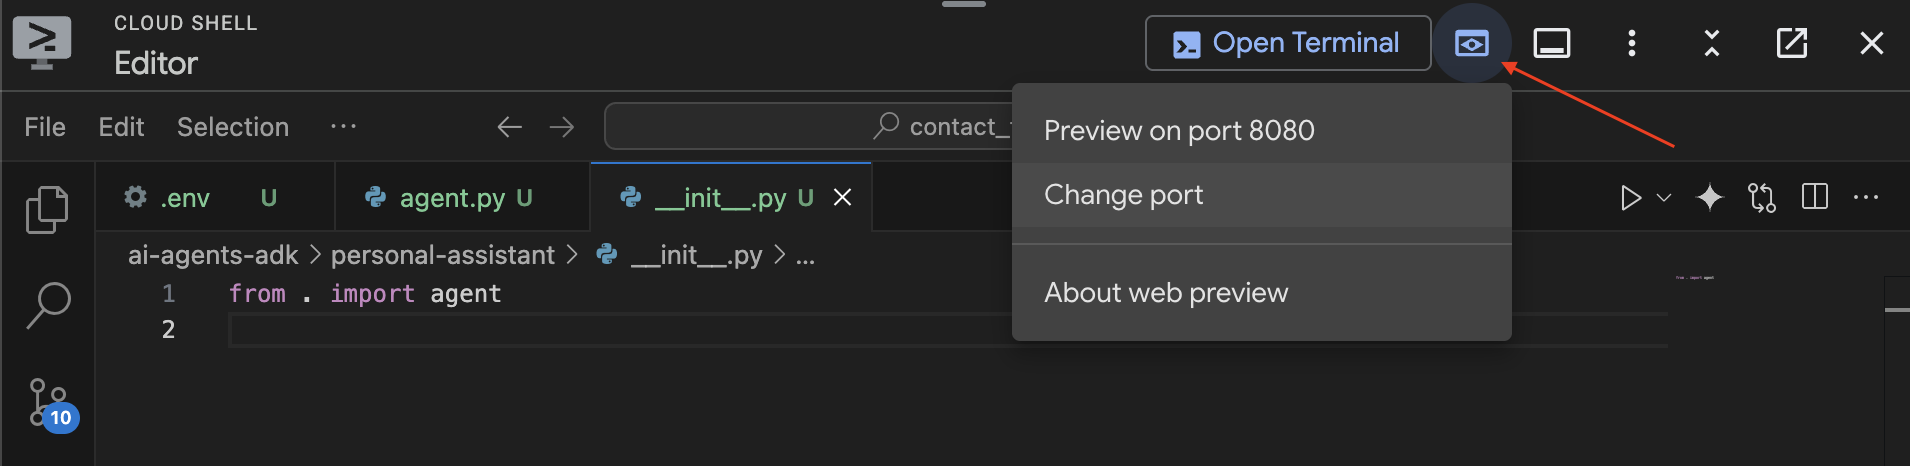
- Click the Web Preview icon in the top-right toolbar of Cloud Shell.
- Select Change Port, enter
8000, and click Change and Preview.
Once the ADK Web UI loads, send a greeting such as "hello, what can you do?" or "Help me plan a trip to Japan":
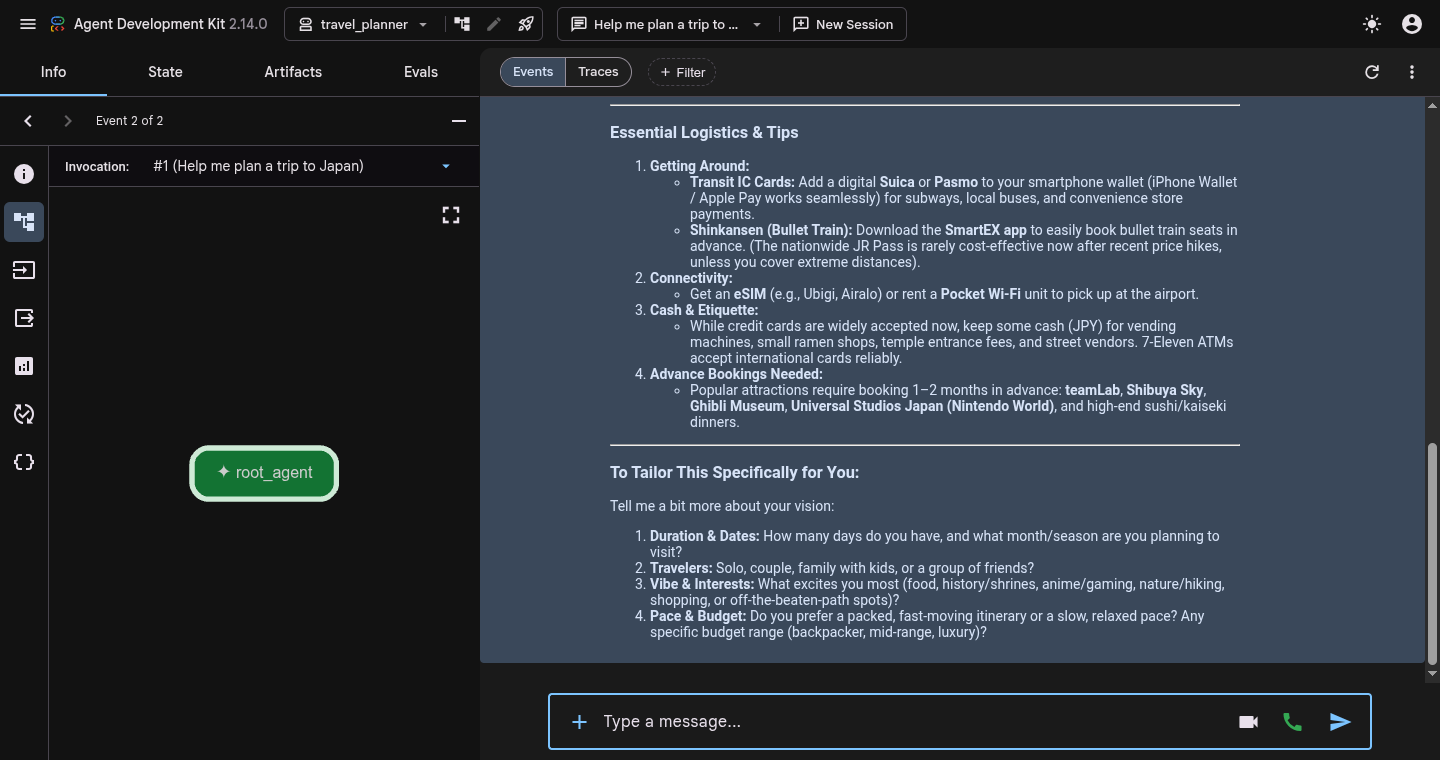
Notice that the single root_agent answers directly in one pass without structured preference extraction, live web research, or budget verification.
When you are finished testing, press Ctrl + C in your Cloud Shell terminal to stop the adk web server and return to the command prompt.
6. Build a SequentialAgent workflow
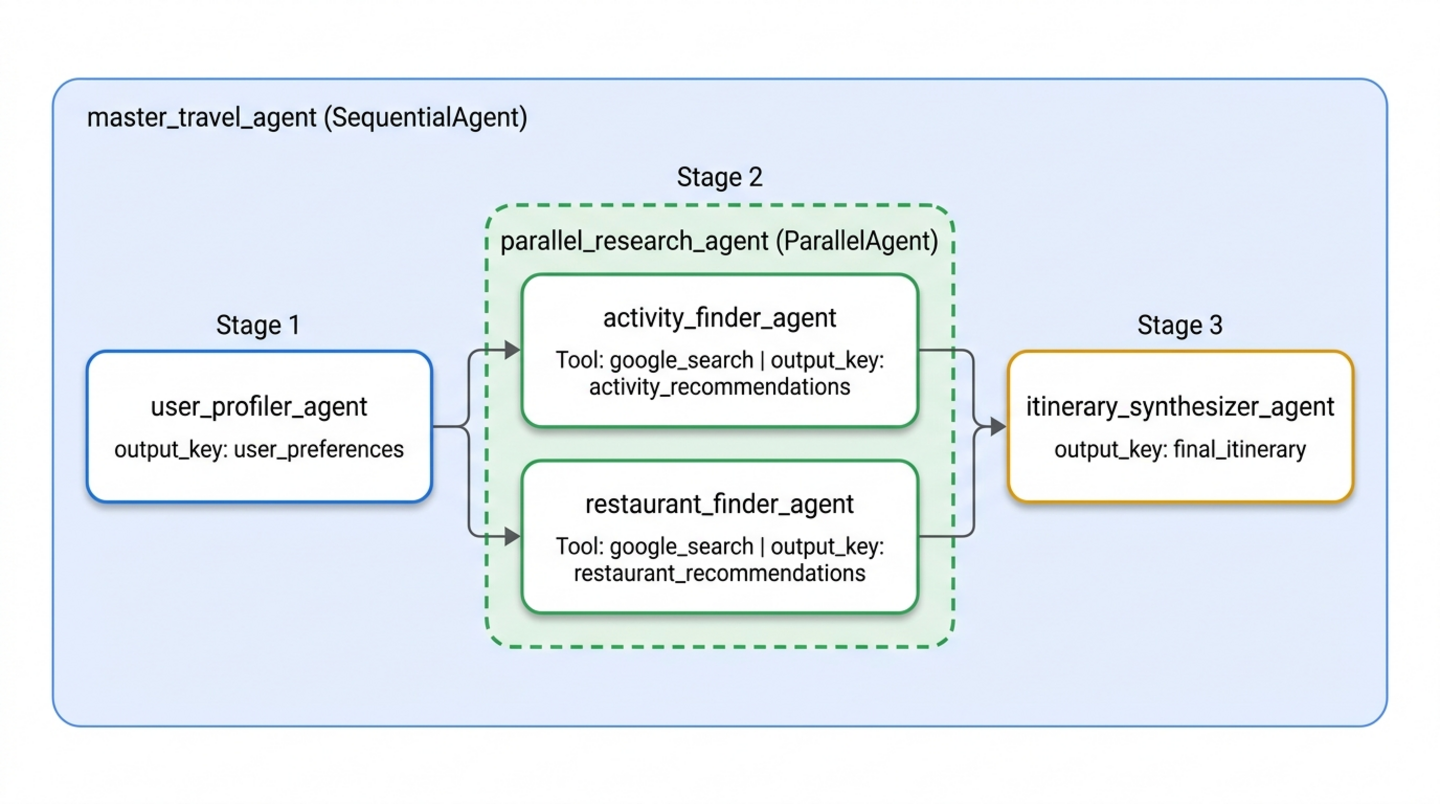
Now you will build your first orchestration pattern: a linear workflow powered by SequentialAgent. In a sequential pipeline, sub-agents execute in a strict order. The first specialist extracts structured parameters and saves them to the shared session state using output_key="user_preferences", and the second specialist reads {user_preferences} from the shared state to draft the itinerary.
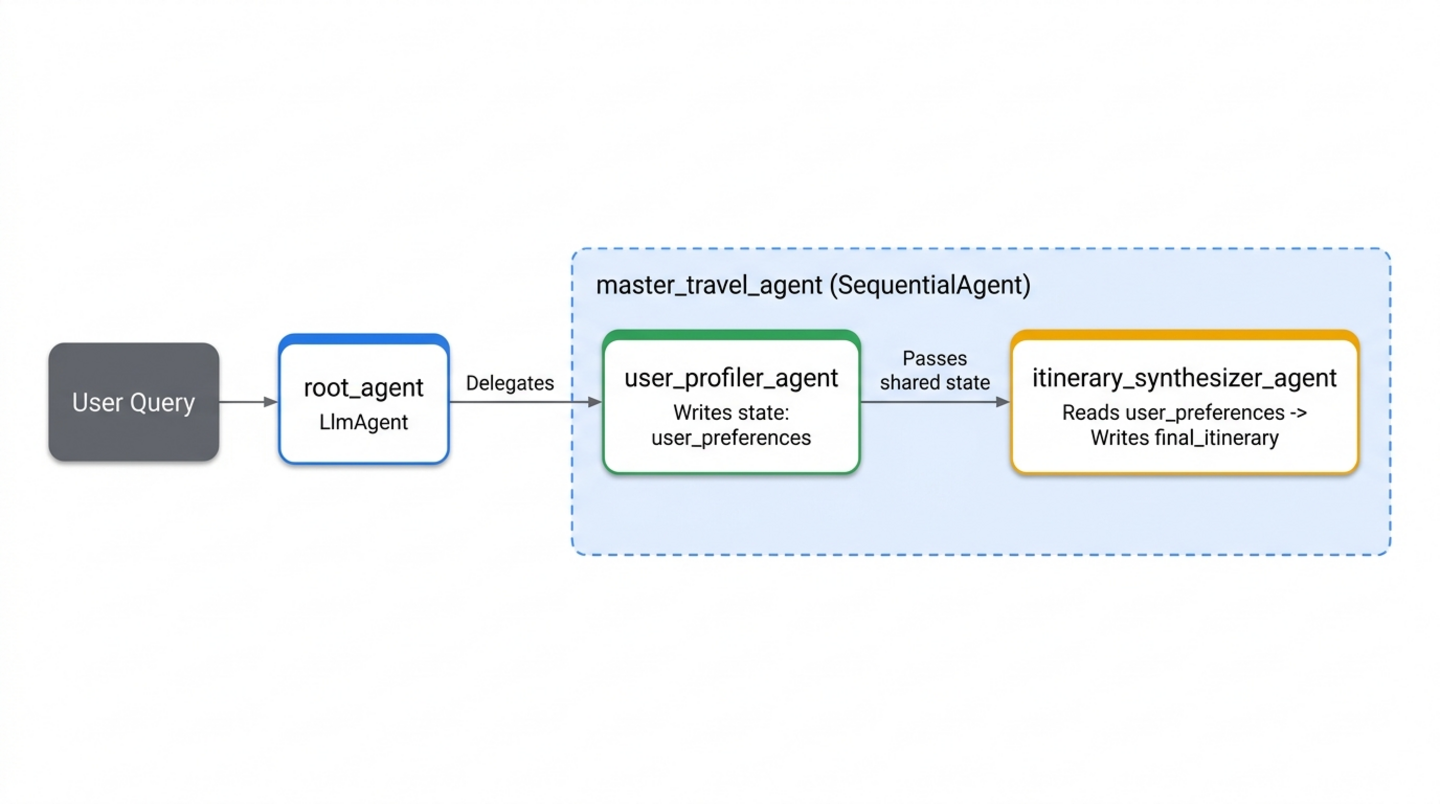
Create the initial specialists (specialists.py)
Open a new file named specialists.py inside travel_planner/:
cloudshell edit ~/adk-agents/travel_planner/specialists.py
Paste the following code into travel_planner/specialists.py to define user_profiler_agent and itinerary_synthesizer_agent (importing ToolContext and google_search upfront for the next steps):
from google.adk import Agent
from google.adk.tools import ToolContext, google_search

# --- Specialist 1: The User Profiler ---
user_profiler_agent = Agent(
    name="user_profiler_agent",
    description="Extracts travel preferences and constraints from user input.",
    instruction="""
        Extract destination, duration (default 1 day), budget, interests, and exclusions.
        Return a single JSON object with keys: "destination", "duration", "budget", "interests", "exclusions".
    """,
    output_key="user_preferences",  # Saves output to state['user_preferences']
)

# --- Specialist 2: The Synthesizer ---
itinerary_synthesizer_agent = Agent(
    name="itinerary_synthesizer_agent",
    description="Compiles preferences and research into a final Markdown itinerary.",
    instruction="""
        You are an elite Travel Concierge. Write a Markdown itinerary with an itemized USD and local currency cost breakdown using:
        - User Preferences: {user_preferences}
        - Activities (if available): {activity_recommendations?}
        - Restaurants (if available): {restaurant_recommendations?}
    """,
    output_key="final_itinerary",
)
Wire the sequential pipeline (workflows.py)
Create a new file named workflows.py inside travel_planner/ to orchestrate the specialists:
cloudshell edit ~/adk-agents/travel_planner/workflows.py
Add the following SequentialAgent definition to travel_planner/workflows.py:
from google.adk.agents import SequentialAgent
from .specialists import (
    user_profiler_agent,
    itinerary_synthesizer_agent,
)

# 1. SEQUENTIAL PHASE: A linear two-step workflow
master_travel_agent = SequentialAgent(
    name="master_travel_agent",
    description="Orchestrates the end-to-end travel planning process for trip and itinerary requests.",
    sub_agents=[
        user_profiler_agent,         # Step 1: Extract constraints into user_preferences
        itinerary_synthesizer_agent,  # Step 2: Draft itinerary from user_preferences
    ],
)
Connect the workflow to root_agent (agent.py)
Now register master_travel_agent as a sub-agent of root_agent. Open travel_planner/agent.py:
cloudshell edit ~/adk-agents/travel_planner/agent.py
Replace the contents of travel_planner/agent.py with the following code:
from google.adk import Agent
from .workflows import master_travel_agent

MODEL = "gemini-3.8-flash"

root_agent = Agent(
    model=MODEL,
    name="root_agent",
    description="A helpful assistant for user questions.",
    instruction=(
        "Greet the user and delegate any travel or trip planning requests "
        "to master_travel_agent."
    ),
    sub_agents=[master_travel_agent],
)
🔍 Check your work
Start the ADK Web UI from your terminal:
cd ~/adk-agents
adk web --allow_origins "*"
Open the Web Preview on port 8000 and enter the prompt:
Help me plan a trip to Kyoto
You should see output similar to the following execution flow in the Events view:
1. root_agent -> calls transfer_to_agent(agent_name="master_travel_agent")
2. user_profiler_agent -> outputs JSON {"destination": "Kyoto", "duration": "1 day", ...} to state['user_preferences']
3. itinerary_synthesizer_agent -> reads {user_preferences} and outputs the formatted Markdown itinerary
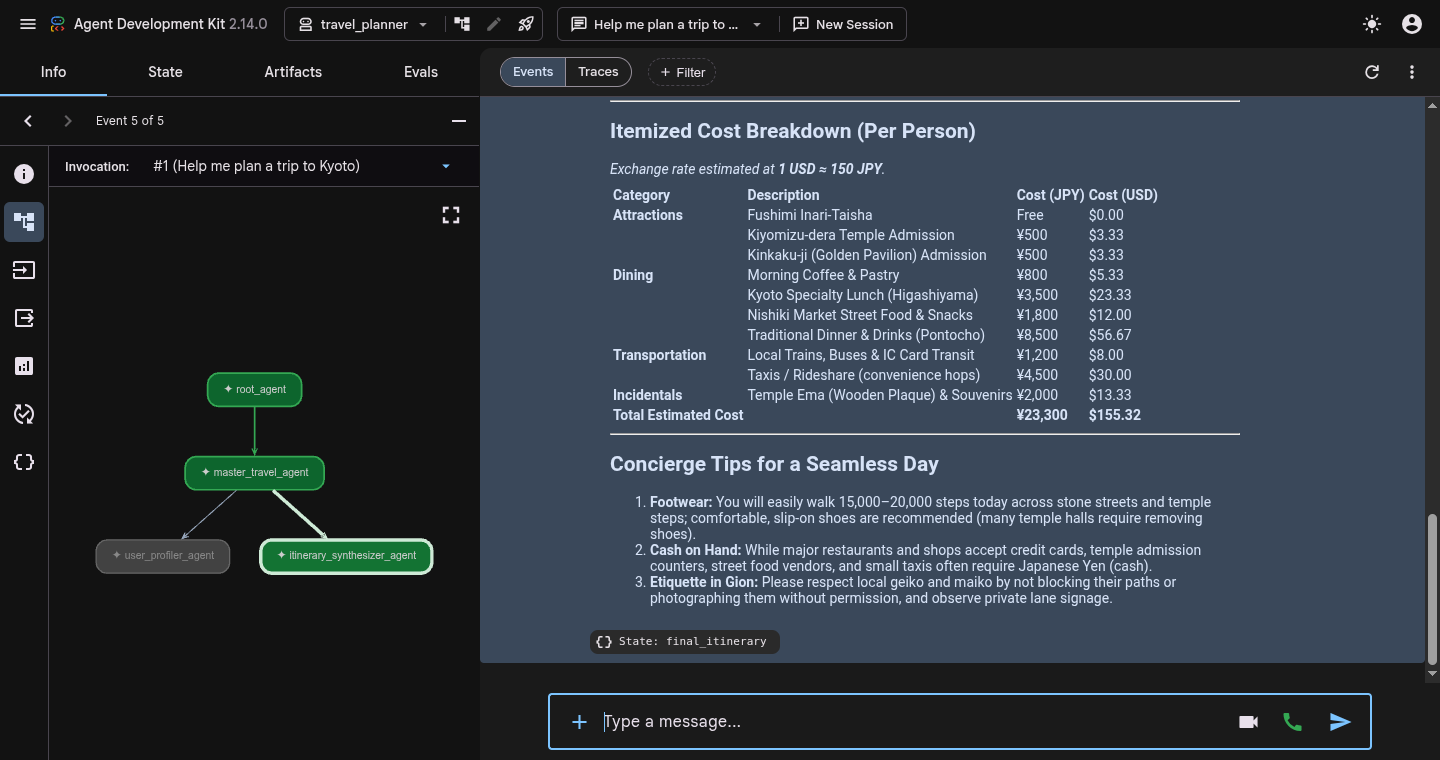
Click any event badge (or the State: final_itinerary chip) and switch to the State tab in the left inspector panel to confirm that user_preferences and final_itinerary are both populated in the session state.
When you are finished inspecting the trace, press Ctrl + C in your terminal to stop adk web.
7. Run research with ParallelAgent
While the sequential workflow cleanly separates preference extraction from itinerary drafting, its recommendations still rely purely on the model's static training knowledge. You can ground the itinerary in live web data by adding two dedicated researchers powered by the built-in google_search tool:
activity_finder_agent: Finds 3 specific attractions matching the user's destination and interests, along with estimated ticket prices.restaurant_finder_agent: Finds 3 highly rated local restaurants and their estimated cost per person.
Because researching attractions and researching restaurants do not depend on each other, running them one after another wastes time. Instead, you will wrap both researchers inside a ParallelAgent (parallel_research_agent) so ADK executes both Google Search workflows concurrently and populates {activity_recommendations?} and {restaurant_recommendations?} before handing off to itinerary_synthesizer_agent.
Append the parallel research specialists to specialists.py
Open travel_planner/specialists.py:
cloudshell edit ~/adk-agents/travel_planner/specialists.py
Append the following two Google Search specialists to the bottom of travel_planner/specialists.py (right below itinerary_synthesizer_agent):
# --- Specialist 3: The Activity Finder ---
activity_finder_agent = Agent(
    name="activity_finder_agent",
    description="Finds 3 attractions matching the user's destination and interests.",
    instruction="""
        Based on {user_preferences}, use google_search to find 3 specific attractions (including budget-friendly options).
        Return a JSON list with keys: "attraction_name", "estimated_cost_local", "estimated_cost_usd", "notes".
    """,
    tools=[google_search],
    output_key="activity_recommendations",
)

# --- Specialist 4: The Restaurant Finder ---
restaurant_finder_agent = Agent(
    name="restaurant_finder_agent",
    description="Finds 3 restaurants matching the destination and budget.",
    instruction="""
        Based on {user_preferences}, use google_search to find 3 highly-rated restaurants across price points.
        Return a JSON list with keys: "restaurant_name", "cuisine", "estimated_cost_local", "estimated_cost_usd".
    """,
    tools=[google_search],
    output_key="restaurant_recommendations",
)
Insert ParallelAgent into workflows.py
Open travel_planner/workflows.py:
cloudshell edit ~/adk-agents/travel_planner/workflows.py
Update travel_planner/workflows.py to define parallel_research_agent using ParallelAgent and place it between user_profiler_agent and itinerary_synthesizer_agent:
from google.adk.agents import ParallelAgent, SequentialAgent
from .specialists import (
    activity_finder_agent,
    itinerary_synthesizer_agent,
    restaurant_finder_agent,
    user_profiler_agent,
)

# Parallel branch: Run activity and restaurant research simultaneously
parallel_research_agent = ParallelAgent(
    name="parallel_research_agent",
    description="Runs activity and restaurant research concurrently.",
    sub_agents=[
        activity_finder_agent,
        restaurant_finder_agent,
    ],
)

# Master pipeline: Profile -> Parallel Research -> Synthesize
master_travel_agent = SequentialAgent(
    name="master_travel_agent",
    description="Orchestrates the end-to-end travel planning process for trip and itinerary requests.",
    sub_agents=[
        user_profiler_agent,          # Step 1: Extract constraints
        parallel_research_agent,      # Step 2: Research activities & restaurants in parallel
        itinerary_synthesizer_agent,  # Step 3: Synthesize into an itinerary
    ],
)
🔍 Check your work
Launch adk web again to test the parallel research pipeline:
cd ~/adk-agents
adk web --allow_origins "*"
In the Web Preview UI, send the prompt:
Help me plan a trip to Kyoto focused on historic temples and ramen
You should see output similar to the following sequence in the Events view:
1. user_profiler_agent -> writes state['user_preferences']
2. parallel_research_agent -> fans out concurrently:
   - activity_finder_agent invokes google_search -> writes state['activity_recommendations']
   - restaurant_finder_agent invokes google_search -> writes state['restaurant_recommendations']
3. itinerary_synthesizer_agent -> merges all three state keys into state['final_itinerary']
- Traces view: Click Traces at the top of the conversation pane (next to Events) and inspect your turn. You will see overlapping timeline spans for
activity_finder_agentandrestaurant_finder_agentunderparallel_research_agent, cutting total web-research latency nearly in half compared to running them sequentially. - State tab: Click the State tab in the left inspector panel to inspect the live session dictionary (
user_preferences,activity_recommendations,restaurant_recommendations, andfinal_itinerary).
When you are finished testing, press Ctrl + C in your terminal to stop adk web.
8. Refine drafts with LoopAgent
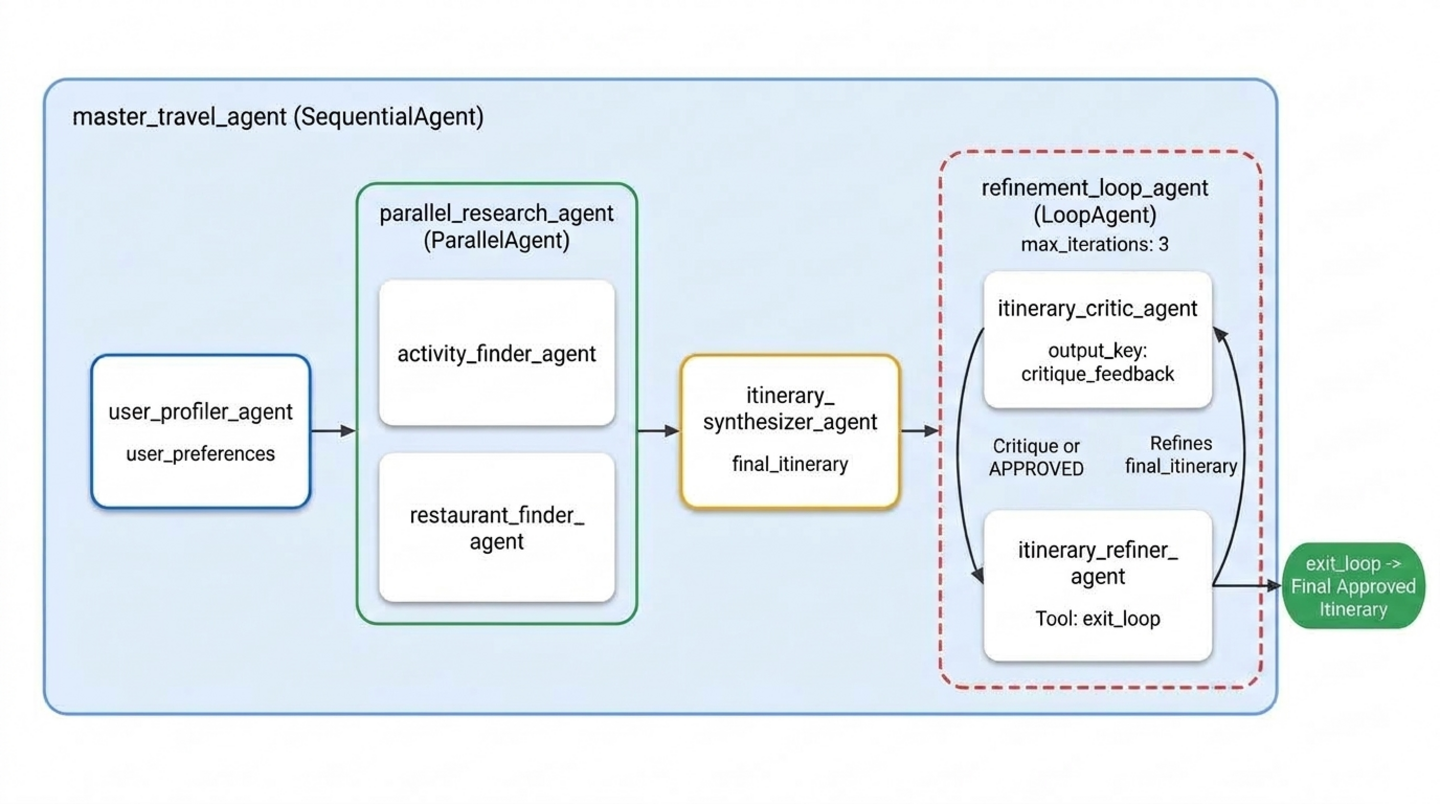
Even with live search results, the initial draft produced by itinerary_synthesizer_agent might exceed the user's total budget or accidentally include an excluded category (such as a modern art gallery when the user asked for none).
To guarantee constraint compliance, you will add a maker-checker refinement loop at the end of the pipeline using LoopAgent:
itinerary_critic_agent(The Checker): Audits{final_itinerary}against{user_preferences}. It sums the estimated costs, checks every negative constraint, and either writes specific revision instructions tocritique_feedbackor responds with the exact phrase"APPROVED".itinerary_refiner_agent(The Maker / Exiter): Reads{critique_feedback}. If the critique equals"APPROVED", it invokes theexit_looptool (tool_context.actions.escalate = True) to break out of theLoopAgentimmediately. Otherwise, it revises{final_itinerary}to fix the flagged issues and overwritesfinal_itineraryfor the next pass.
Append exit_loop, Critic, and Refiner to specialists.py
Open travel_planner/specialists.py:
cloudshell edit ~/adk-agents/travel_planner/specialists.py
Append the exit_loop tool (ToolContext), itinerary_critic_agent, and itinerary_refiner_agent to the bottom of travel_planner/specialists.py:
def exit_loop(tool_context: ToolContext) -> dict:
    """Call ONLY when the critique is APPROVED to exit the refinement loop."""
    print(f"[Tool Call] exit_loop triggered by {tool_context.agent_name}")
    tool_context.actions.escalate = True
    return {"status": "approved", "message": "Itinerary approved. Exiting refinement loop."}


# --- Specialist 5: The Budget & Constraint Critic (Inside LoopAgent) ---
itinerary_critic_agent = Agent(
    name="itinerary_critic_agent",
    include_contents="none",
    description="Audits the itinerary draft against budget and negative constraints.",
    instruction="""
        Audit Current Itinerary ({final_itinerary}) against User Preferences ({user_preferences}).
        Verify that the USD total stays within the user's budget and no excluded venue types appear.
        If all checks pass, respond EXACTLY with the single word "APPROVED".
        Otherwise, output 1-2 concise revision instructions explaining what to swap or adjust.
    """,
    output_key="critique_feedback",
)

# --- Specialist 6: The Itinerary Refiner / Exiter (Inside LoopAgent) ---
itinerary_refiner_agent = Agent(
    name="itinerary_refiner_agent",
    include_contents="none",
    description="Refines the itinerary from critique feedback, or calls exit_loop when APPROVED.",
    instruction="""
        Review Auditor Critique ({critique_feedback}) for Current Itinerary ({final_itinerary}).
        If the critique is EXACTLY "APPROVED", call `exit_loop` immediately and return the itinerary unchanged.
        Otherwise, revise the draft using {activity_recommendations} and {restaurant_recommendations}
        so all USD budget and exclusion rules pass, and output ONLY the updated Markdown itinerary.
    """,
    tools=[exit_loop],
    output_key="final_itinerary",
)
Add LoopAgent to workflows.py
Open travel_planner/workflows.py:
cloudshell edit ~/adk-agents/travel_planner/workflows.py
Update travel_planner/workflows.py to wrap itinerary_critic_agent and itinerary_refiner_agent in a LoopAgent (max_iterations=3) and append it as the fourth stage of master_travel_agent:
from google.adk.agents import LoopAgent, ParallelAgent, SequentialAgent
from .specialists import (
    activity_finder_agent,
    itinerary_critic_agent,
    itinerary_refiner_agent,
    itinerary_synthesizer_agent,
    restaurant_finder_agent,
    user_profiler_agent,
)

# Stage 2: Parallel research branch
parallel_research_agent = ParallelAgent(
    name="parallel_research_agent",
    description="Runs activity and restaurant research concurrently.",
    sub_agents=[
        activity_finder_agent,
        restaurant_finder_agent,
    ],
)

# Stage 4: Iterative Maker-Checker refinement loop
refinement_loop_agent = LoopAgent(
    name="refinement_loop_agent",
    description="Iteratively audits and refines the itinerary until constraints and budget are approved.",
    sub_agents=[
        itinerary_critic_agent,
        itinerary_refiner_agent,
    ],
    max_iterations=3,
)

# Master pipeline: Profile -> Parallel Research -> Synthesize -> Refinement Loop
master_travel_agent = SequentialAgent(
    name="master_travel_agent",
    description="Orchestrates the end-to-end travel planning process for trip and itinerary requests.",
    sub_agents=[
        user_profiler_agent,          # Stage 1: Extract constraints
        parallel_research_agent,      # Stage 2: Research activities & restaurants in parallel
        itinerary_synthesizer_agent,  # Stage 3: Draft initial itinerary
        refinement_loop_agent,        # Stage 4: Audit and refine until approved
    ],
)
🔍 Check your work
Start adk web to test the complete multi-agent workflow:
cd ~/adk-agents
adk web --allow_origins "*"
Open the Web Preview UI on port 8000, start a New Session, and test the full system with this Kyoto multi-constraint prompt:
Design a full-day itinerary for Kyoto with a total budget of $100. My main interests are historical landmarks, temples, and authentic local cuisine. Please do not include any modern art museums or galleries.
You should see output similar to the following execution sequence in the Events view and terminal logs:
1. user_profiler_agent -> writes JSON with destination="Kyoto", budget="$100", exclusions=["modern art museums", "galleries"]
2. parallel_research_agent -> runs activity_finder_agent and restaurant_finder_agent in parallel
3. itinerary_synthesizer_agent -> produces initial draft in state['final_itinerary']
4. refinement_loop_agent:
   - itinerary_critic_agent -> audits USD budget and exclusions -> outputs "APPROVED" (or revision notes)
   - itinerary_refiner_agent -> triggers [Tool Call] exit_loop triggered by itinerary_refiner_agent and outputs the approved itinerary
- Events view: Click any event chip from
itinerary_critic_agentoritinerary_refiner_agentto inspect its payload in the left Info tab. Whenitinerary_refiner_agentinvokesexit_loop, inspect the event to seeactions.escalate: true- the signal that tellsLoopAgentto stop iterating before reachingmax_iterations=3. - State tab: Click the State tab to watch
state['critique_feedback']andstate['final_itinerary']update across passes. If the initial draft exceeded$100 USD,critique_feedbackholds the auditor's revision instructions on pass 1 beforefinal_itineraryupdates with lower-cost alternatives andcritique_feedbackchanges to"APPROVED"on pass 2.
When you are finished testing, press Ctrl + C in your terminal to stop adk web.
9. Clean up
Delete the local project files
To remove the adk-agents project directory and virtual environment from your Cloud Shell home folder, run:
cd ~
rm -rf ~/adk-agents
Disable the Agent Platform API
If you no longer need the Agent Platform API enabled in your project, disable it with gcloud:
gcloud services disable aiplatform.googleapis.com --quiet
Delete the entire Google Cloud project (Optional)
PROJECT_ID=$(gcloud config get-value project)
gcloud projects delete "$PROJECT_ID" --quiet
🔍 Check your work
Confirm that ~/adk-agents has been removed:
test ! -d ~/adk-agents && echo "Workspace ~/adk-agents removed"
You should see output similar to:
Workspace ~/adk-agents removed
10. Congratulations
Congratulations! You have built a hierarchical multi-agent system with Google Agent Development Kit (ADK) that coordinates a team of six specialized agents across sequential, parallel, and iterative loop workflows.
What you accomplished
- Structured inter-agent communication through shared session state (
output_keyand{state_variable}template injection) - Built a deterministic step-by-step pipeline using
SequentialAgent - Executed independent Google Search research agents concurrently using
ParallelAgent - Implemented an automated maker-checker verification loop using
LoopAgentandtool_context.actions.escalate = True
Next steps
- Continue to Part 4 of the series, Building AI Agents with ADK: Orchestrating Graph Workflows, to rebuild this travel planner with ADK 2's unified
Workflow,JoinNode, and deterministicEvent(route=...)cycles - Read the official ADK Workflow Agents documentation
- Explore Multi-Agent Systems in ADK
- Join the GEAR (Gemini Enterprise Agent Ready) program and Get Certified program for hands-on workshops and learning pathways