
1. Overview
In Part 1, we successfully transformed chaotic, unstructured PDFs into clean, intelligent and structured tables in BigQuery using Knowledge Catalog and DataScan. Now, we have a robust data warehouse.
If you need a quick recall, in part 1 lab, we took the use case of a fictional Frozen Yogurt franchise and converted 400 of its unstructured PDF files — spanning text, tables, and images — into cleanly structured BigQuery tables with relationships automatically inferred between them using BigQuery Knowledge Catalog and Dataplex.
What you'll build
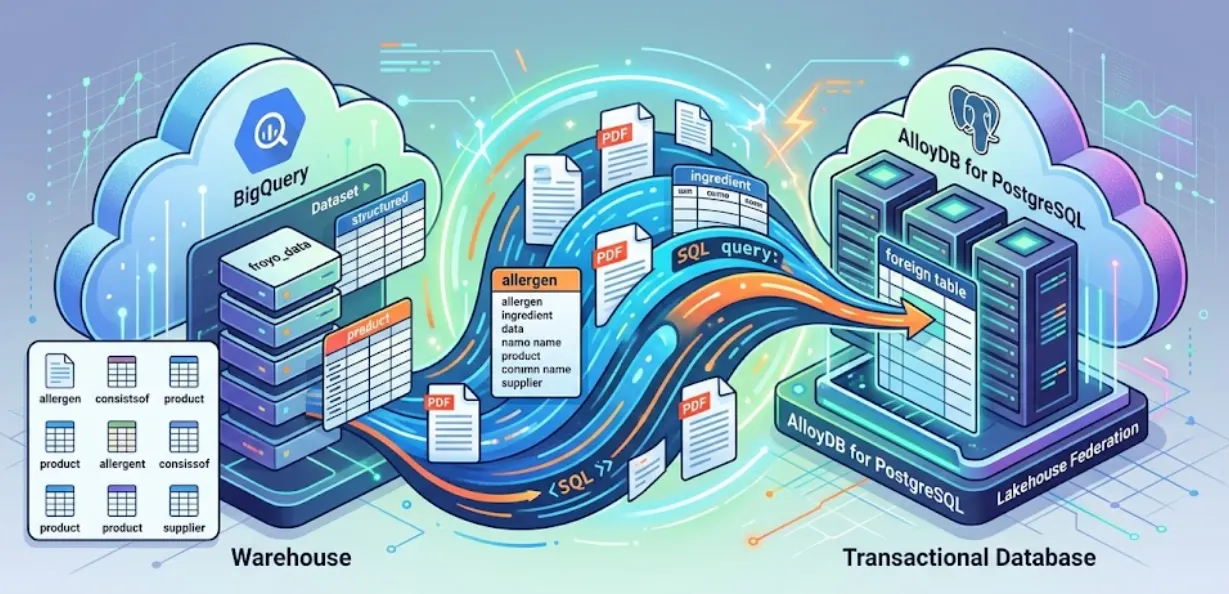
In this session, we are setting up AlloyDB for PostgreSQL and doing something magical: federating our BigQuery data directly into AlloyDB. This means our transactional app can query our warehouse data in real-time, without copying or duplicating any of it.
You as a developer must ask this question at this stage:
"If the data is already in BigQuery, why bring AlloyDB into the mix? Why doesn't the application just run a SELECT statement directly against BigQuery?"
Here's why:
With Lakehouse Federation, you can use AlloyDB's query engine to power your application's transactional and analytical workloads from within the same interface. You can also materialize or import this data on AlloyDB for faster access for use in your applications, which lets you use AlloyDB AI and the columnar engine.
You can use AlloyDB as a transactional database and also have large amounts of data residing in BigQuery or BigLake. Your applications usually integrate independently with both of these systems to access data across these different Google Cloud services. Lakehouse Federation for AlloyDB lets you use AlloyDB's federated query support implemented as a foreign data wrapper to access BigQuery and AlloyDB data using a SQL interface in AlloyDB.
Instead of building a brittle ETL pipeline to query the BigQuery data from AlloyDB, we will use federated queries. AlloyDB will act as a unified endpoint, seamlessly reaching into BigQuery when needed.
Let's start building!
What you'll learn
- How to set up AlloyDB Cluster, Instance and Networking at the click of a button
- How to set up extension to prepare for the federation
- How to set up federation from BigQuery to AlloyDB
- Test it out
Requirements
2. Before you begin
Create a project
- In the Google Cloud Console, on the project selector page, select or create a Google Cloud project.
- Make sure that billing is enabled for your Cloud project. Learn how to check if billing is enabled on a project.
- You'll use Cloud Shell, a command-line environment running in Google Cloud. Click Activate Cloud Shell at the top of the Google Cloud console.
- Once connected to Cloud Shell, you check that you're already authenticated and that the project is set to your project ID using the following command:
gcloud auth list
- Run the following command in Cloud Shell to confirm that the gcloud command knows about your project.
gcloud config list project
- If you want to authenticate
gcloud auth login
- If your project is not set, use the following command to set it:
export PROJECT_ID=<YOUR_PROJECT_ID>
gcloud config set project <YOUR_PROJECT_ID>
- Enable the required APIs: Run this command to enable all the required APIs:
gcloud services enable alloydb.googleapis.com
Gotchas & Troubleshooting
The "Ghost Project" Syndrome | You ran |
The Billing Barricade | You enabled the project, but forgot the billing account. AlloyDB is a high-performance engine; it won't start if the "gas tank" (billing) is empty. |
API Propagation Lag | You clicked "Enable APIs," but the command line still says |
Quota Quags | If you're using a brand-new trial account, you might hit a regional quota for AlloyDB instances. If |
3. Quick Recap of the data from Part 1
In this section, you need to ensure that the structured data that we extracted from unstructured PDFs are available in BigQuery. Now if you missed part 1 or if you don't have a Billing Account, it is ok, you can complete the following steps and get going:
Go to Google Cloud Console from your personal gmail account and click the Activate Cloud Shell Button on top right corner of the console:
Then follow the steps in the no-billing-account section below:
Steps to continue to experience the data without the billing account:
- You can get the data csv files (BigQuery Data) from the github repo link above.
- First, create the BigQuery Dataset by running the below command from Cloud Shell Terminal:
bq mk --location us-central1 --dataset froyo_data
- Next, download the 8 data files (csv files) from the github repo into your working directory by running the following commands one by one:
wget https://raw.githubusercontent.com/AbiramiSukumaran/raw-data-to-gold/refs/heads/main/data/froyo_data.allergen.csv
wget https://raw.githubusercontent.com/AbiramiSukumaran/raw-data-to-gold/refs/heads/main/data/froyo_data.consistsof.csv
wget https://raw.githubusercontent.com/AbiramiSukumaran/raw-data-to-gold/refs/heads/main/data/froyo_data.containsallergen.csv
wget https://raw.githubusercontent.com/AbiramiSukumaran/raw-data-to-gold/refs/heads/main/data/froyo_data.froyo_data_materialized.csv
wget https://raw.githubusercontent.com/AbiramiSukumaran/raw-data-to-gold/refs/heads/main/data/froyo_data.ingredient.csv
wget https://raw.githubusercontent.com/AbiramiSukumaran/raw-data-to-gold/refs/heads/main/data/froyo_data.product.csv
wget https://raw.githubusercontent.com/AbiramiSukumaran/raw-data-to-gold/refs/heads/main/data/froyo_data.suppliedby.csv
wget https://raw.githubusercontent.com/AbiramiSukumaran/raw-data-to-gold/refs/heads/main/data/froyo_data.supplier.csv
- Run the following commands one by one to create these tables with the data in your newly created dataset
bq load --autodetect --source_format=CSV --skip_leading_rows=1 --allow_quoted_newlines --quote="" froyo_data.allergen ./froyo_data.allergen.csv allergen_name:STRING
bq load --autodetect --source_format=CSV --skip_leading_rows=1 --allow_quoted_newlines --quote="" froyo_data.consistsof ./froyo_data.consistsof.csv product_id:STRING,ingredient_id:STRING
bq load --autodetect --source_format=CSV --skip_leading_rows=1 --allow_quoted_newlines --quote="" froyo_data.containsallergen ./froyo_data.containsallergen.csv ingredient_id:STRING,allergen_name:STRING
bq load --autodetect --source_format=CSV --skip_leading_rows=1 --allow_quoted_newlines --quote="" froyo_data.froyo_data_materialized ./froyo_data.froyo_data_materialized.csv allergen:STRING,containsallergen:STRING,ingredient:STRING,product:STRING,suppliedby:STRING,supplier:STRING,ref:STRING,md5_hash:STRING
bq load --autodetect --source_format=CSV --skip_leading_rows=1 --allow_quoted_newlines --quote="" froyo_data.ingredient ./froyo_data.ingredient.csv ingredient_id:STRING,ingredient_name:STRING,purity:STRING,moisture_content:STRING,ph_range:STRING,specific_gravity_range:STRING
bq load --autodetect --source_format=CSV --skip_leading_rows=1 --allow_quoted_newlines --quote="" froyo_data.product ./froyo_data.product.csv product_id:STRING,product_name:STRING,category:STRING,stability:STRING
bq load --autodetect --source_format=CSV --skip_leading_rows=1 --allow_quoted_newlines --quote="" froyo_data.suppliedby ./froyo_data.suppliedby.csv ingredient_id:STRING,supplier_id:STRING
bq load --autodetect --source_format=CSV --skip_leading_rows=1 --allow_quoted_newlines --quote="" froyo_data.supplier ./froyo_data.supplier.csv supplier_id:STRING,supplier_name:STRING,production_site_id:STRING,facility_grade:STRING
Now that we have the data in BigQuery, let's move on to next steps.
4. Setup AlloyDB Cluster, Instance and Network
There is a web-based quick start application that would help you set up AlloyDB Cluster, Instance and other dependencies. You can follow steps 2–4 in this lab to set it up at the click of a button:
https://codelabs.developers.google.com/quick-alloydb-setup
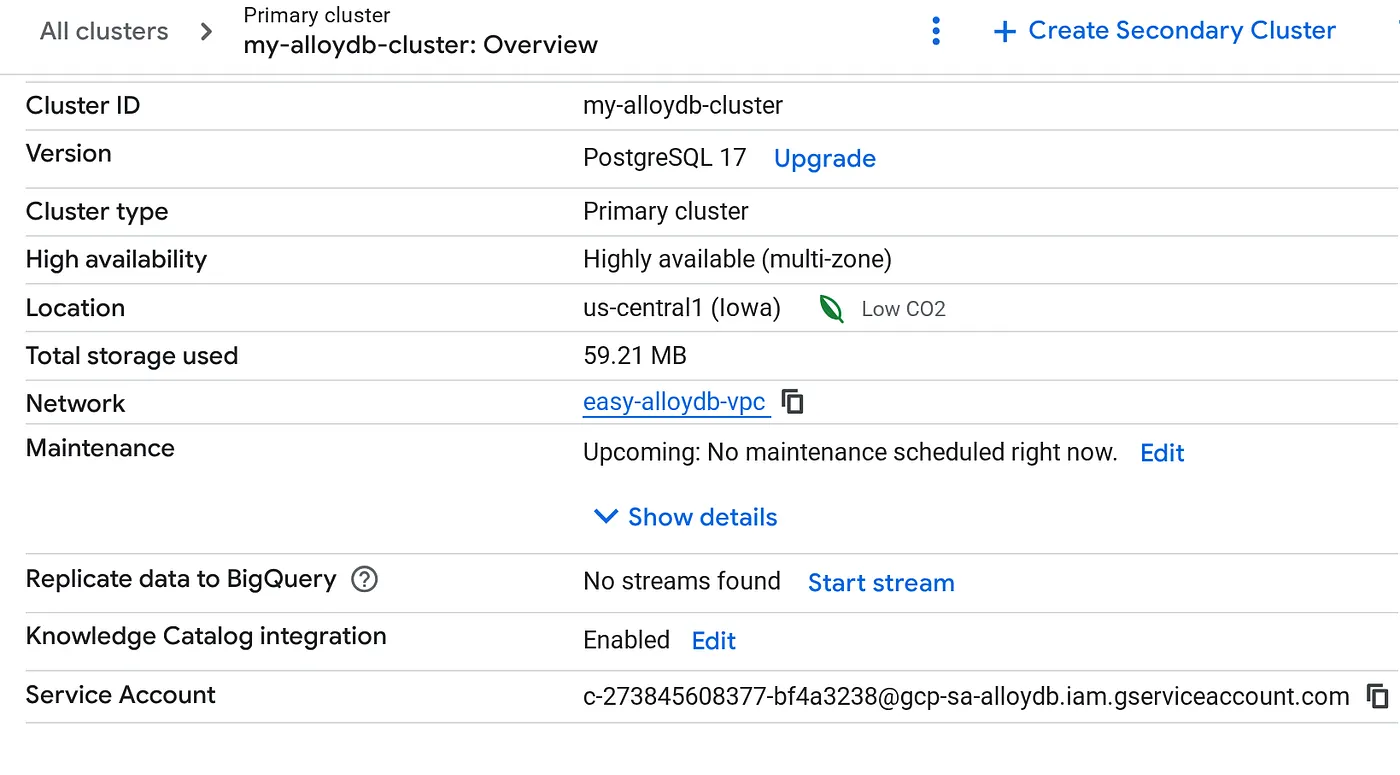
Once your cluster is created go to the Cluster Overview page and copy the service account detail from there.
5. Permissions Setup
Grant BigQuery Permissions to this Service Account
- Navigate to IAM & Admin > IAM.
- Click Grant Access.
- Paste the AlloyDB Service Account address into the New principals field.
- Assign the following roles:
- BigQuery Data Viewer (roles/bigquery.dataViewer): Allows reading the data.
- BigQuery User (roles/bigquery.user): Allows running the queries.
- (Optional but recommended) BigQuery Read Session User (roles/bigquery.readSessionUser): Optimizes reading large datasets via the Storage Read API.
6. Connect to AlloyDB and Enable the BigQuery Extension
Now we connect to our fresh AlloyDB instance to configure the federation extension. We'll use AlloyDB Studio for this.
- From your Cluster Overview page (AlloyDB console), click "Edit Primary" on your primary instance and scroll down to the bottom to "Advanced Configuration Options".
- Go to the "Flags" section, and enable the 2 flags to "On" as shown below:
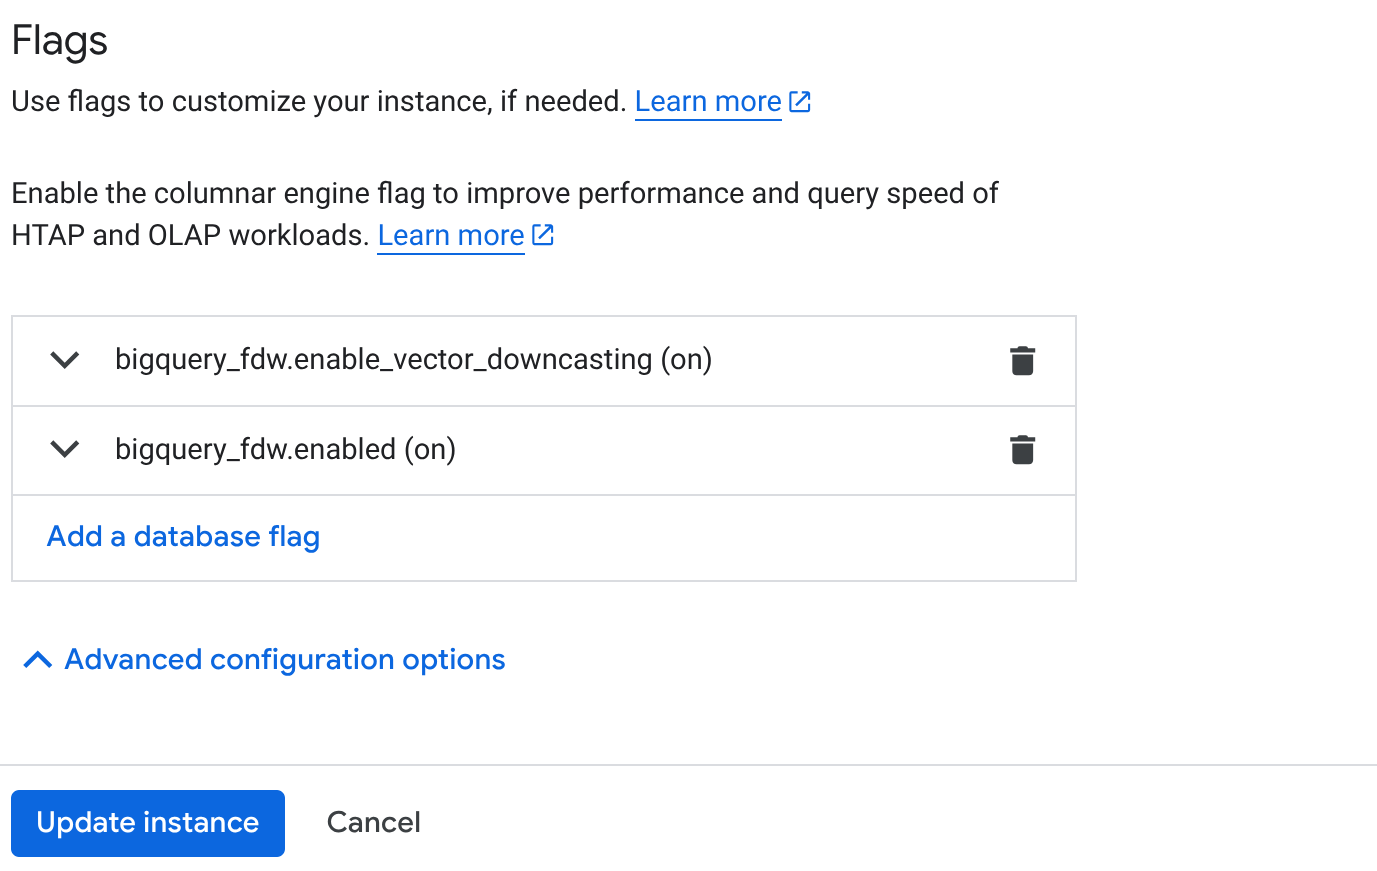 3. Click the **Update instance** button and it would take a few minutes to complete the update. 4. From your Cluster Overview page (AlloyDB console), click AlloyDB Studio.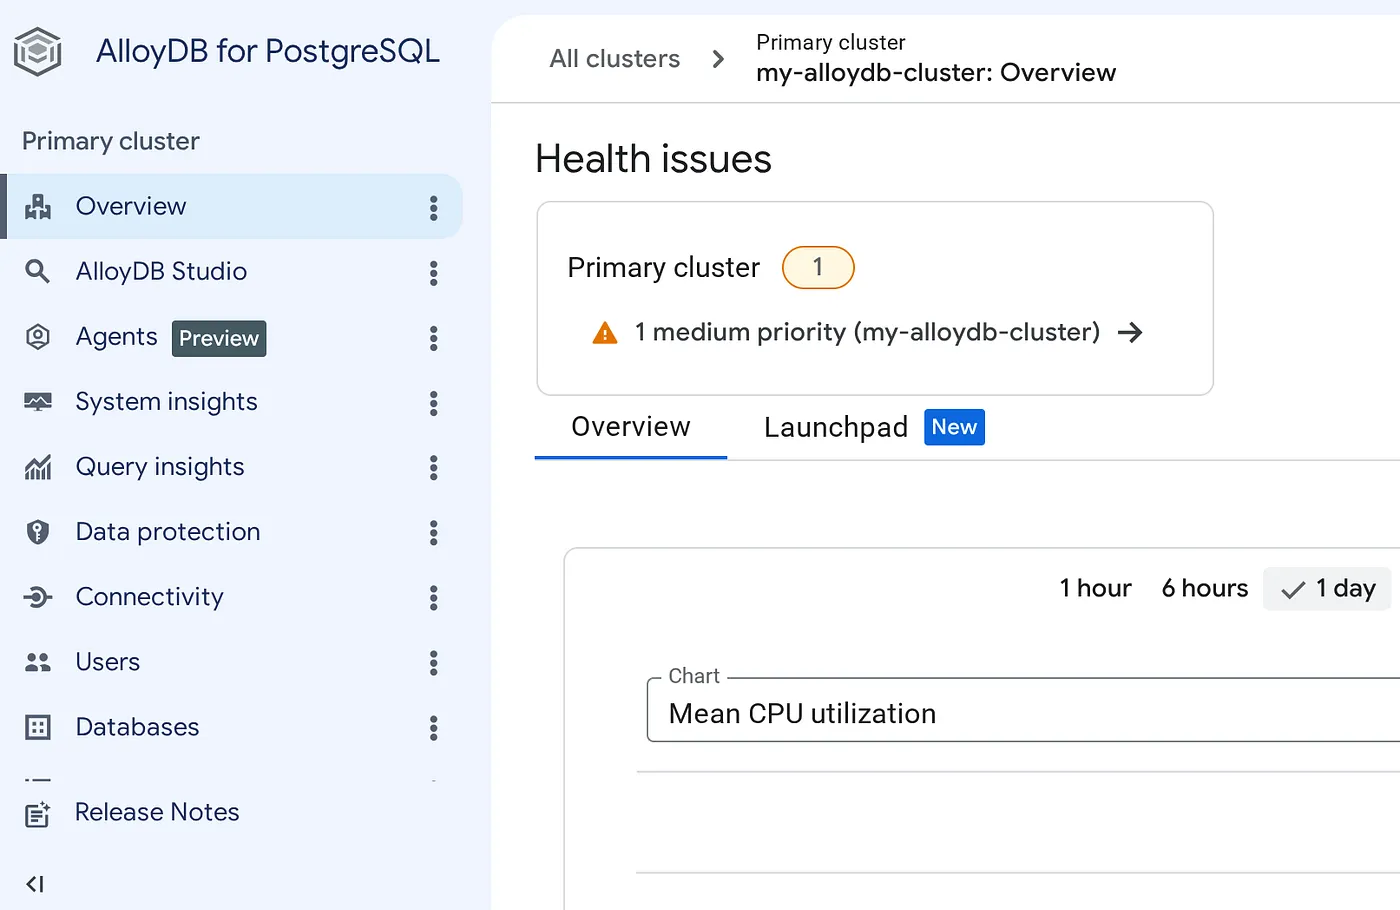
- Connect with your database, username and password that you configured at the time of AlloyDB Quick Setup step.
- Once connected, on the Query Editor tab on the right side, enter the following statements and RUN one by one:
CREATE EXTENSION IF NOT EXISTS  bigquery_fdw;

CREATE SERVER bigquery_server FOREIGN DATA WRAPPER bigquery_fdw;

CREATE USER MAPPING FOR postgres SERVER bigquery_server;
- Once successfully done, navigate to the explorer pane on the left and scroll down to BigQuery tables:
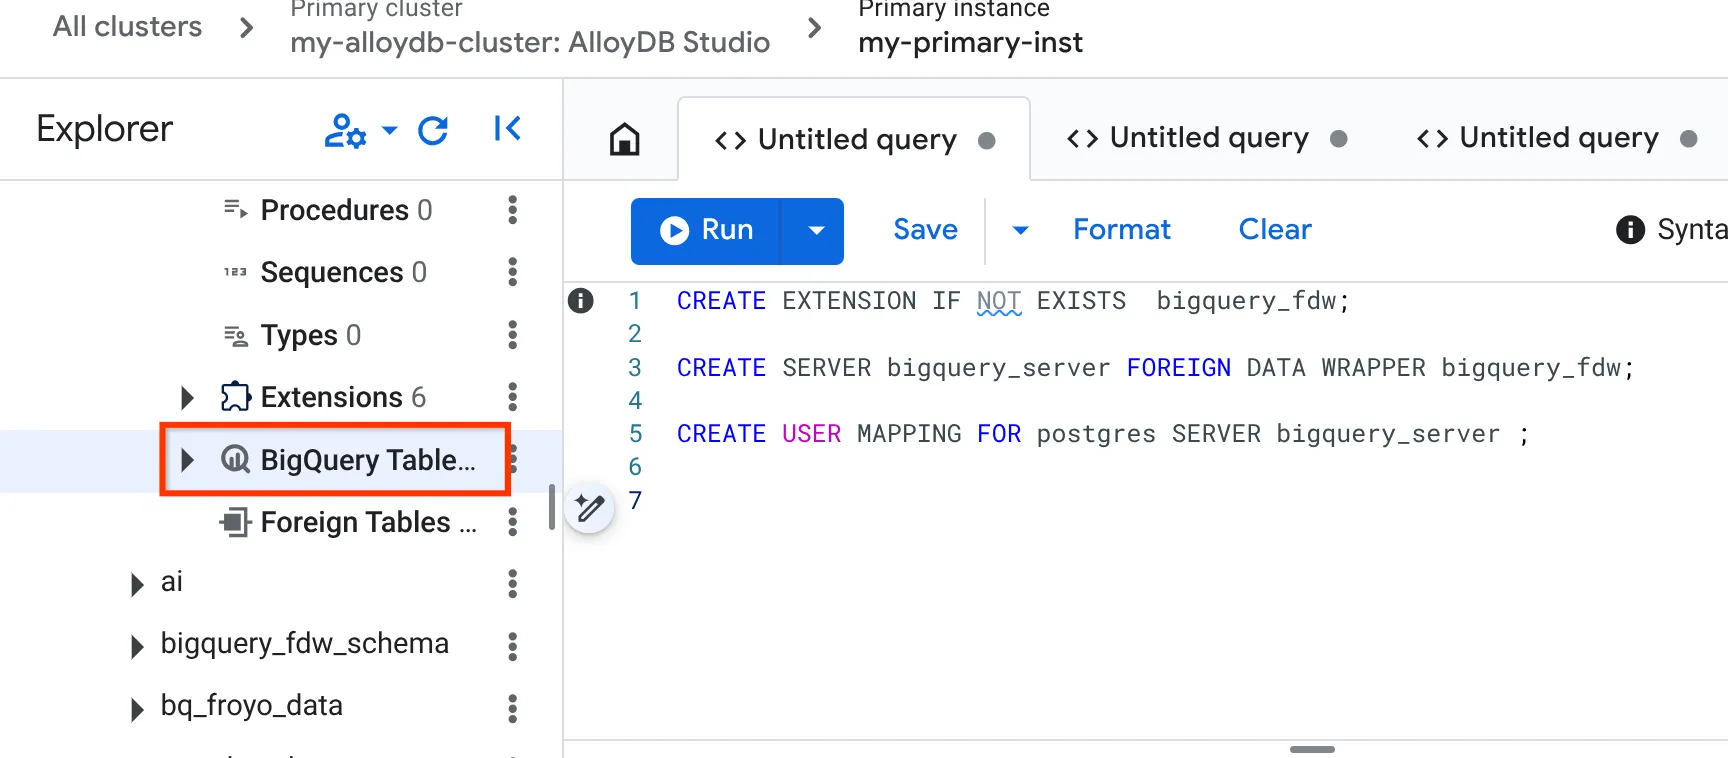
- Click the 3 dots and click "Connect BigQuery Table".
- In the Connect BigQuery Table popup that opens, select your project_id and the BigQuery dataset name (created in part 1) from which you want to query the data in your AlloyDB database.
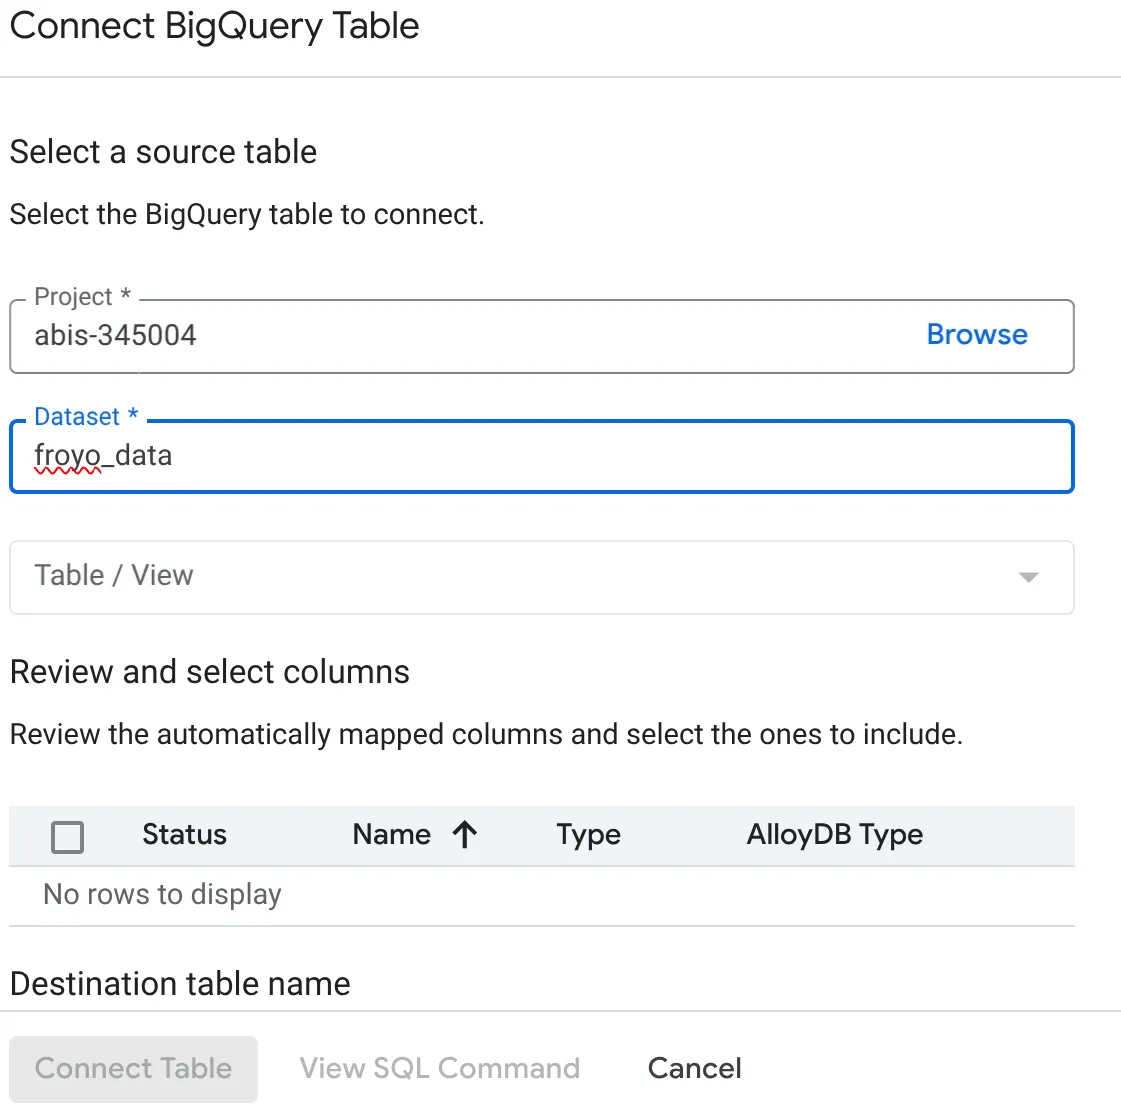
- Select each table one by one to get all your data connected to AlloyDB. This is so we validate the column types to ensure they are supported in AlloyDB.
If you want to do the same with a SQL instead of through the point-and-click approach:
CREATE FOREIGN TABLE <<TABLE_NAME>> (
      "cas_number" VARCHAR, "ingredient_name" VARCHAR, "max_moisture_percentage" DOUBLE PRECISION, "ph_range" VARCHAR, "purity_percentage" DOUBLE PRECISION, "shelf_life_months" BIGINT, "specific_gravity_range" VARCHAR
    ) SERVER "bigquery_server" OPTIONS (
      project '<<PROJECT_ID>>',
      dataset 'froyo_data',
      table '<<BQ_TABLE_NAME>>'
    );
The magic!!!
We just created "Foreign Tables" in AlloyDB. These look and act like normal PostgreSQL tables, but they don't store any data. When you query them, AlloyDB instantly passes the query to BigQuery, fetches the results, and returns them to you.
7. Test the federation in AlloyDB
Let's verify that we can query our massive, analytical BigQuery dataset directly from our transactional PostgreSQL database.
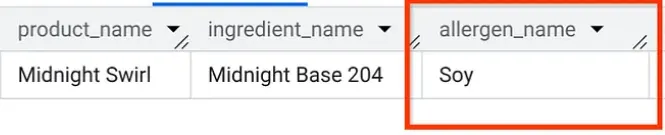
Still in your AlloyDB Studio, let's run a query to find out what allergens are in the "Midnight Swirl" (the same question we asked in Part 1, but this time asked from AlloyDB!):
SELECT
    p.product_name,
    i.ingredient_name,
    a.allergen_name
FROM
    consistsof c
INNER JOIN product p
    ON c.product_id = p.product_id
INNER JOIN ingredient i
    ON c.ingredient_id = i.ingredient_name
LEFT OUTER JOIN containsallergen a
    ON i.ingredient_id = a.ingredient_id
WHERE
    UPPER(p.product_name) LIKE '%MIDNIGHT%SWIRL%'
    AND a.allergen_name IS NOT NULL;
Boom. You should see the exact same results as you did in BigQuery.
8. Clean up
Once this lab is done, do not forget to delete the AlloyDB cluster and instance.
It should clean up the cluster along with its instance(s).
9. Congratulations on your Unified Data Layer
Think about what we just accomplished:
- Our transactional app (running on AlloyDB) can handle rapid, concurrent user sessions.
- When it needs heavy analytical data or historical context (like supplier details or complex ingredient mappings), it queries the BigQuery froyo_dataschema.
- Zero ETL. No data pipelines breaking. No out-of-sync databases. We store once (in BQ) and compute where we need it.
Now that our data foundation — both analytical and transactional — is rock solid and interconnected, we are ready for the fun part.
In Part 3, we will build the Multi-Agent Application that sits on top of this architecture to run the Froyo business operations!