
1. Overview
In this lab, you will set up the GitHub actions workflow and integrate it with Gemini to automate code review steps.
What you will learn
In this lab, you will learn how to do the following:
- How to add GenAI code review automation steps in GitHub
- How to run devai cli locally to automate code reviews
Prerequisites
- This lab assumes familiarity with the Cloud Console and Cloud Shell environments.
2. Setup and Requirements
Cloud Project setup
- Sign-in to the Google Cloud Console and create a new project or reuse an existing one. If you don't already have a Gmail or Google Workspace account, you must create one.


- The Project name is the display name for this project's participants. It is a character string not used by Google APIs. You can always update it.
- The Project ID is unique across all Google Cloud projects and is immutable (cannot be changed after it has been set). The Cloud Console auto-generates a unique string; usually you don't care what it is. In most codelabs, you'll need to reference your Project ID (typically identified as
PROJECT_ID). If you don't like the generated ID, you might generate another random one. Alternatively, you can try your own, and see if it's available. It can't be changed after this step and remains for the duration of the project. - For your information, there is a third value, a Project Number, which some APIs use. Learn more about all three of these values in the documentation.
- Next, you'll need to enable billing in the Cloud Console to use Cloud resources/APIs. Running through this codelab won't cost much, if anything at all. To shut down resources to avoid incurring billing beyond this tutorial, you can delete the resources you created or delete the project. New Google Cloud users are eligible for the $300 USD Free Trial program.
Environment Setup
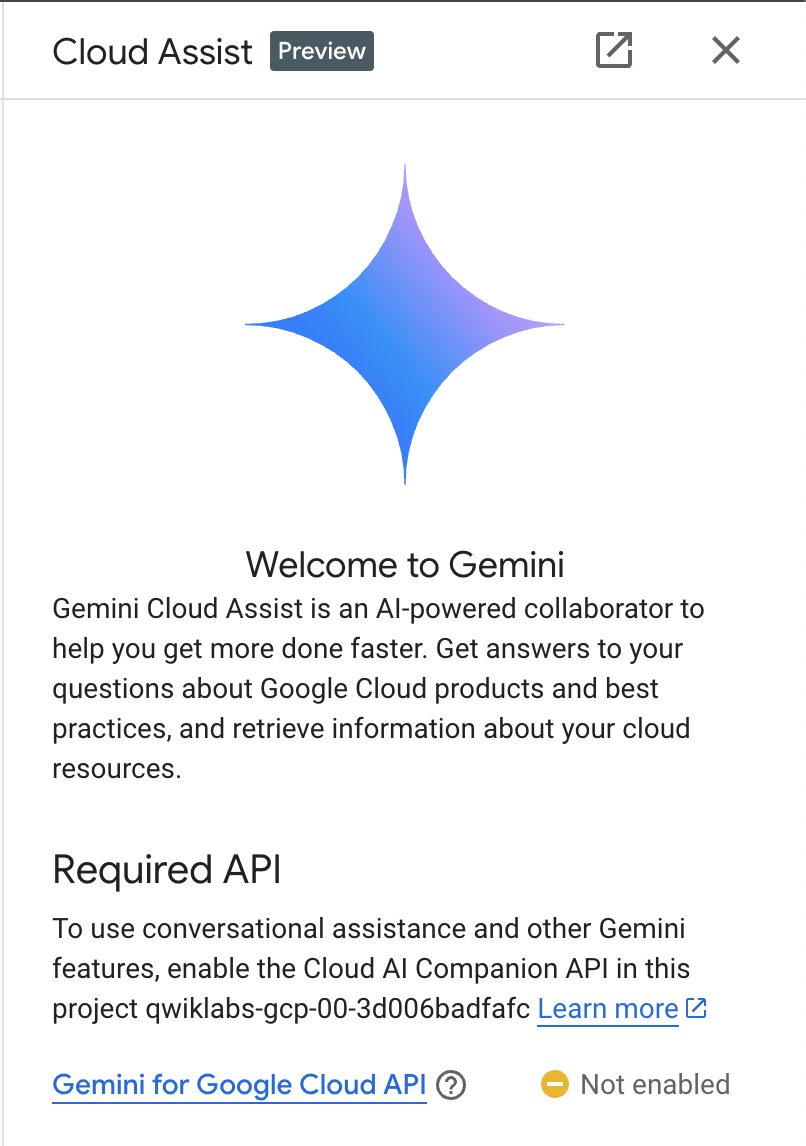
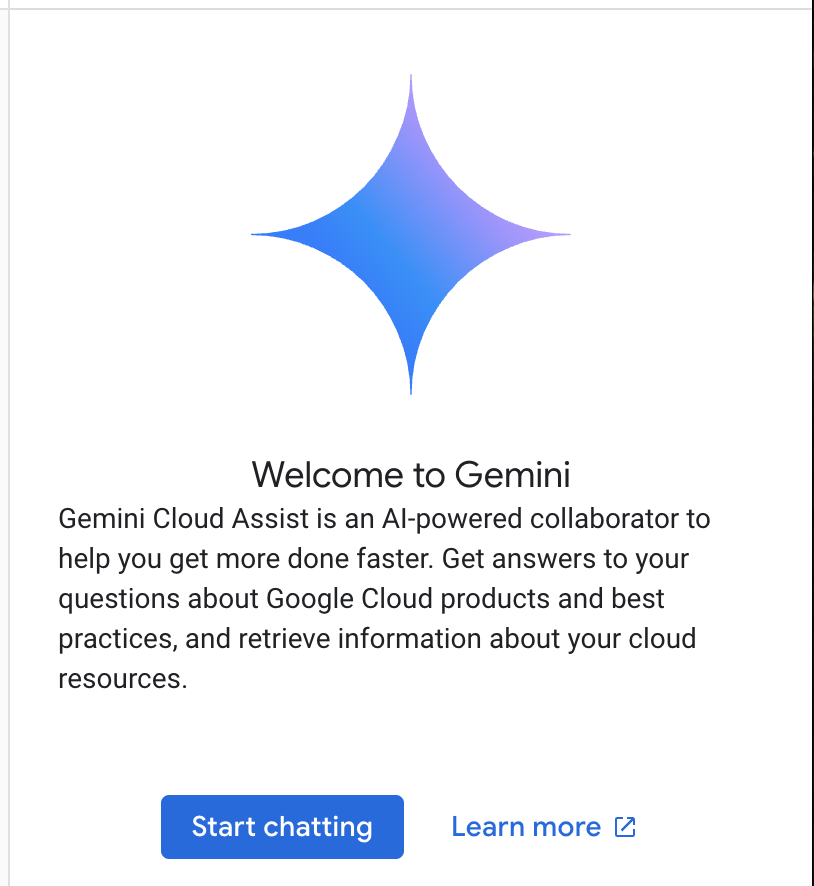
Open Gemini chat.

Or type "Ask Gemini" in the search bar.

Enable Gemini for Google Cloud API:
Click "Start chatting" and follow one of the sample questions or type your own prompt to try it out.
Prompts to try:
- Explain Cloud Run in 5 key points.
- You are Google Cloud Run Product Manager, explain Cloud Run to a student in 5 short key points.
- You are Google Cloud Run Product Manager, explain Cloud Run to a Certified Kubernetes Developer in 5 short key points.
- You are Google Cloud Run Product Manager, explain when you would use Cloud Run versus GKE to a Senior Developer in 5 short key points.
Check out Prompt Guide to learn more about writing better prompts.
How Gemini for Google Cloud uses your data
Google's privacy commitment
Google was one of the first in the industry to publish an AI/ML privacy commitment, which outlines our belief that customers should have the highest level of security and control over their data that's stored in the cloud.
Data you submit and receive
The questions that you ask Gemini, including any input information or code that you submit to Gemini to analyze or complete, are called prompts. The answers or code completions that you receive from Gemini are called responses. Gemini doesn't use your prompts or its responses as data to train its models.
Encryption of prompts
When you submit prompts to Gemini, your data is encrypted in-transit as input to the underlying model in Gemini.
Program data generated from Gemini
Gemini is trained on first-party Google Cloud code as well as selected third-party code. You're responsible for the security, testing, and effectiveness of your code, including any code completion, generation, or analysis that Gemini offers you.
Learn more how Google handles your prompts.
3. Options to test prompts
If you would like to change/extend existing devai cli prompts, you have several options for that.
Vertex AI Studio is a part of Google Cloud's Vertex AI platform, specifically designed to simplify and accelerate the development and use of generative AI models.
Google AI Studio is a web-based tool for prototyping and experimenting with prompt engineering and the Gemini API.
- Gemini Web App (gemini.google.com)
The Google Gemini web app (gemini.google.com) is a web-based tool designed to help you explore and utilize the power of Google's Gemini AI models.
- Google Gemini mobile app for Android and Google app on iOS
4. Create Service Account
Activate Cloud Shell by clicking on the icon to the right of the search bar.

In the opened terminal, enable required services to use Vertex AI APIs and Gemini chat.
gcloud services enable \
    aiplatform.googleapis.com \
    cloudaicompanion.googleapis.com \
    cloudresourcemanager.googleapis.com \
    secretmanager.googleapis.com
If prompted to authorize, click "Authorize" to continue.

Run following commands to create a new service account and keys.
You will use this service account to make API calls to Vertex AI Gemini API from CICD pipelines.
PROJECT_ID=$(gcloud config get-value project)
SERVICE_ACCOUNT_NAME='vertex-client'
DISPLAY_NAME='Vertex Client'
KEY_FILE_NAME='vertex-client-key'

gcloud iam service-accounts create $SERVICE_ACCOUNT_NAME --display-name "$DISPLAY_NAME"
Grant roles.
gcloud projects add-iam-policy-binding $PROJECT_ID --member="serviceAccount:$SERVICE_ACCOUNT_NAME@$PROJECT_ID.iam.gserviceaccount.com" --role="roles/aiplatform.admin" --condition None

gcloud projects add-iam-policy-binding $PROJECT_ID --member="serviceAccount:$SERVICE_ACCOUNT_NAME@$PROJECT_ID.iam.gserviceaccount.com" --role="roles/secretmanager.secretAccessor" --condition None

gcloud iam service-accounts keys create $KEY_FILE_NAME.json --iam-account=$SERVICE_ACCOUNT_NAME@$PROJECT_ID.iam.gserviceaccount.com
5. Fork GitHub repo to your personal GitHub repo
Go to https://github.com/GoogleCloudPlatform/genai-for-developers/fork and select your GitHub userid as an owner.
Click "Create fork".
6. Enable GitHub Actions Workflow
Open the forked GitHub repo in the browser and switch to the "Actions" tab to enable workflows.

7. Add Repository Secrets
Create a repository secret under "Settings / Secrets and variables / Actions" in the forked GitHub repository.
Add Repository secret with name "GOOGLE_API_CREDENTIALS".

Switch to Google Cloud Shell window/tab and run the command below in the Cloud Shell terminal.
cat ~/vertex-client-key.json
Copy the file content and paste it as a value for the secret.

Add PROJECT_ID secret with your Qwiklabs project id as a value:

8. Run GitHub Actions Workflow
Navigate to your GitHub repository in the browser and run the workflow.
The workflow is configured to run on on-demand.

9. Review workflow output

Pipeline commands overview
GitHub actions workflow configuration: devai-review.yml
Test coverage command's results:
devai review testcoverage -c ${{ github.workspace }}/sample-app/src/main/java/anthos/samples/bankofanthos/balancereader
This devai review testcoverage command analyzes code and its associated test suite, if available, using a generative AI model, Gemini. It assesses the test coverage of the provided code, identifying files and methods with and without unit tests. The command then leverages the model to provide a summary of the coverage, including metrics like lines and branches/conditions covered. Based on its analysis, it makes recommendations for improving test coverage, suggesting specific tests to add and offering general advice on testing best practices. Finally, it outputs the Gemini model's response which includes details such as files lacking coverage, and suggestions for improving existing tests to the user via command line.

Code review command's results:
devai review code -c ${{ github.workspace }}/sample-app/src/main/java/anthos/samples/bankofanthos/balancereader
The devai review code command conducts a comprehensive code review of a provided code snippet using a Generative AI model. It takes the code to be reviewed as input (context) and an output format preference (output). It leverages a large language model to analyze the code for correctness, efficiency, maintainability, security, and adherence to best practices. The command constructs a detailed prompt instructing the Gemini on how to conduct the review and then sends it to the model to evaluate provided code. Finally, it processes the Gemini's response, formatting it in markdown, JSON, or a table according to the user's preference, and outputs the review results.

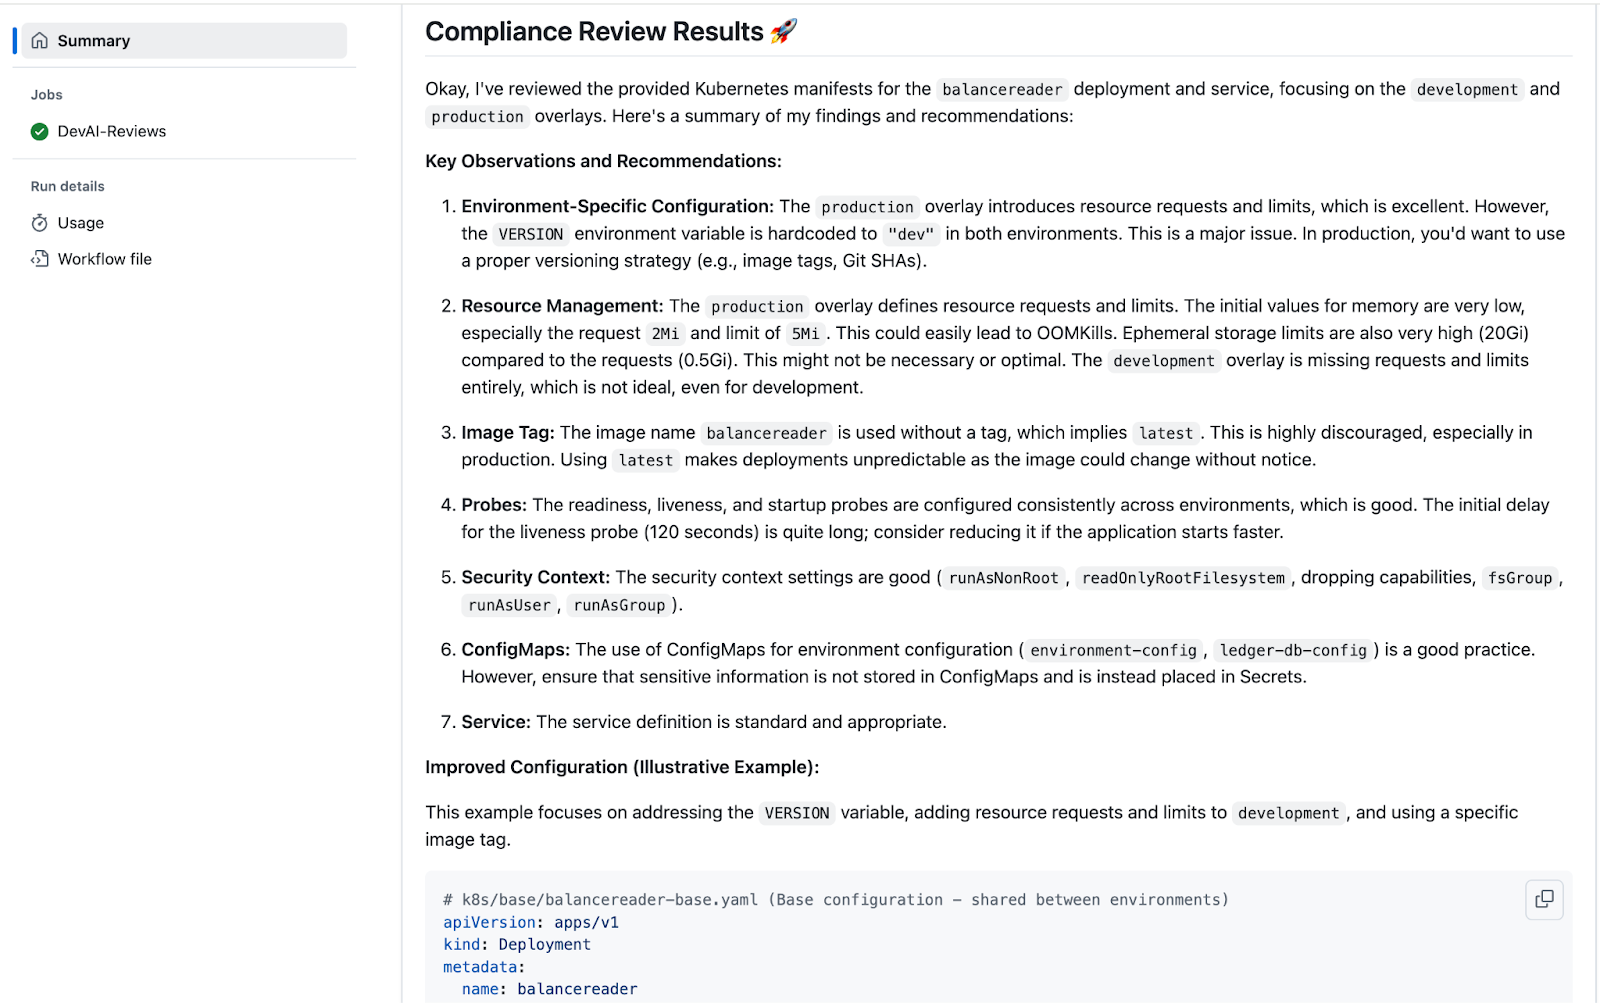
Compliance review command's results:
devai review compliance -c ${{ github.workspace }}/sample-app/k8s --config ${{ github.workspace }}/devai-cli/gemini/styleguide.md
The devai review compliance command analyzes code against a set of best practices, typically for Kubernetes configurations. It utilizes a Gemini model to review the provided code (context) and compare it against specified standards defined in a separate configuration file (config). The command leverages a prompt to instruct the Gemini model to act as an expert Kubernetes engineer and provide a compliance report. It then formats the findings as a brief explanation, focusing on code samples that demonstrate how to address any identified issues. Finally, the command prints the Gemini's compliance review output to the console. This allows a user to easily audit their code for compliance.
10. Clone the repository
Return to the Cloud Shell terminal and clone the repository.
Change YOUR-GITHUB-USERID to your GitHub userid before running the commands.
git clone https://github.com/YOUR-GITHUB-USERID/genai-for-developers.git
Change folder and open workflow file in the Cloud Shell Editor.
cd genai-for-developers

cloudshell edit .github/workflows/devai-review.yml
Wait until the config file is displayed in the IDE.
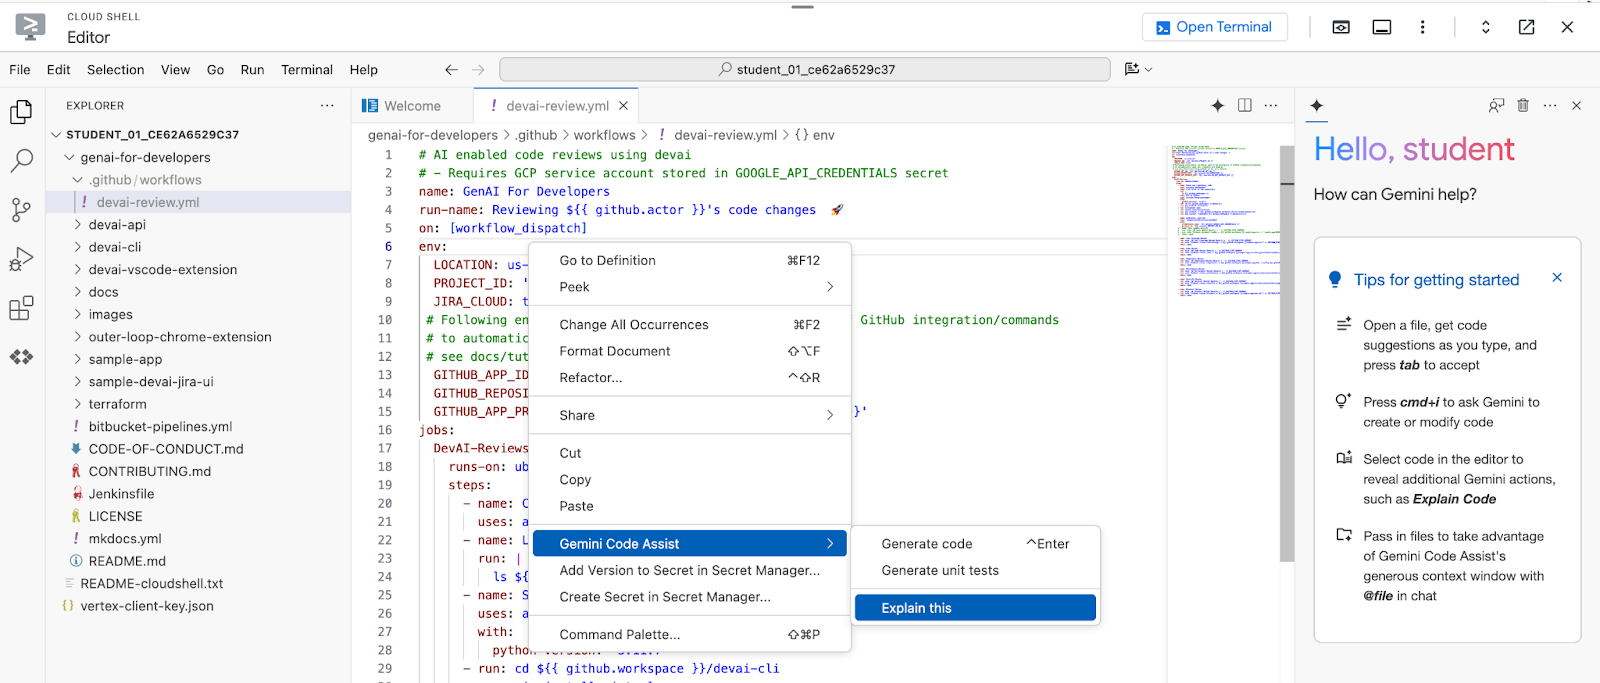
11. Explain code with Gemini Code Assist
Right click anywhere in the devai-review.yml file and select Gemini Code Assist > Explain this.
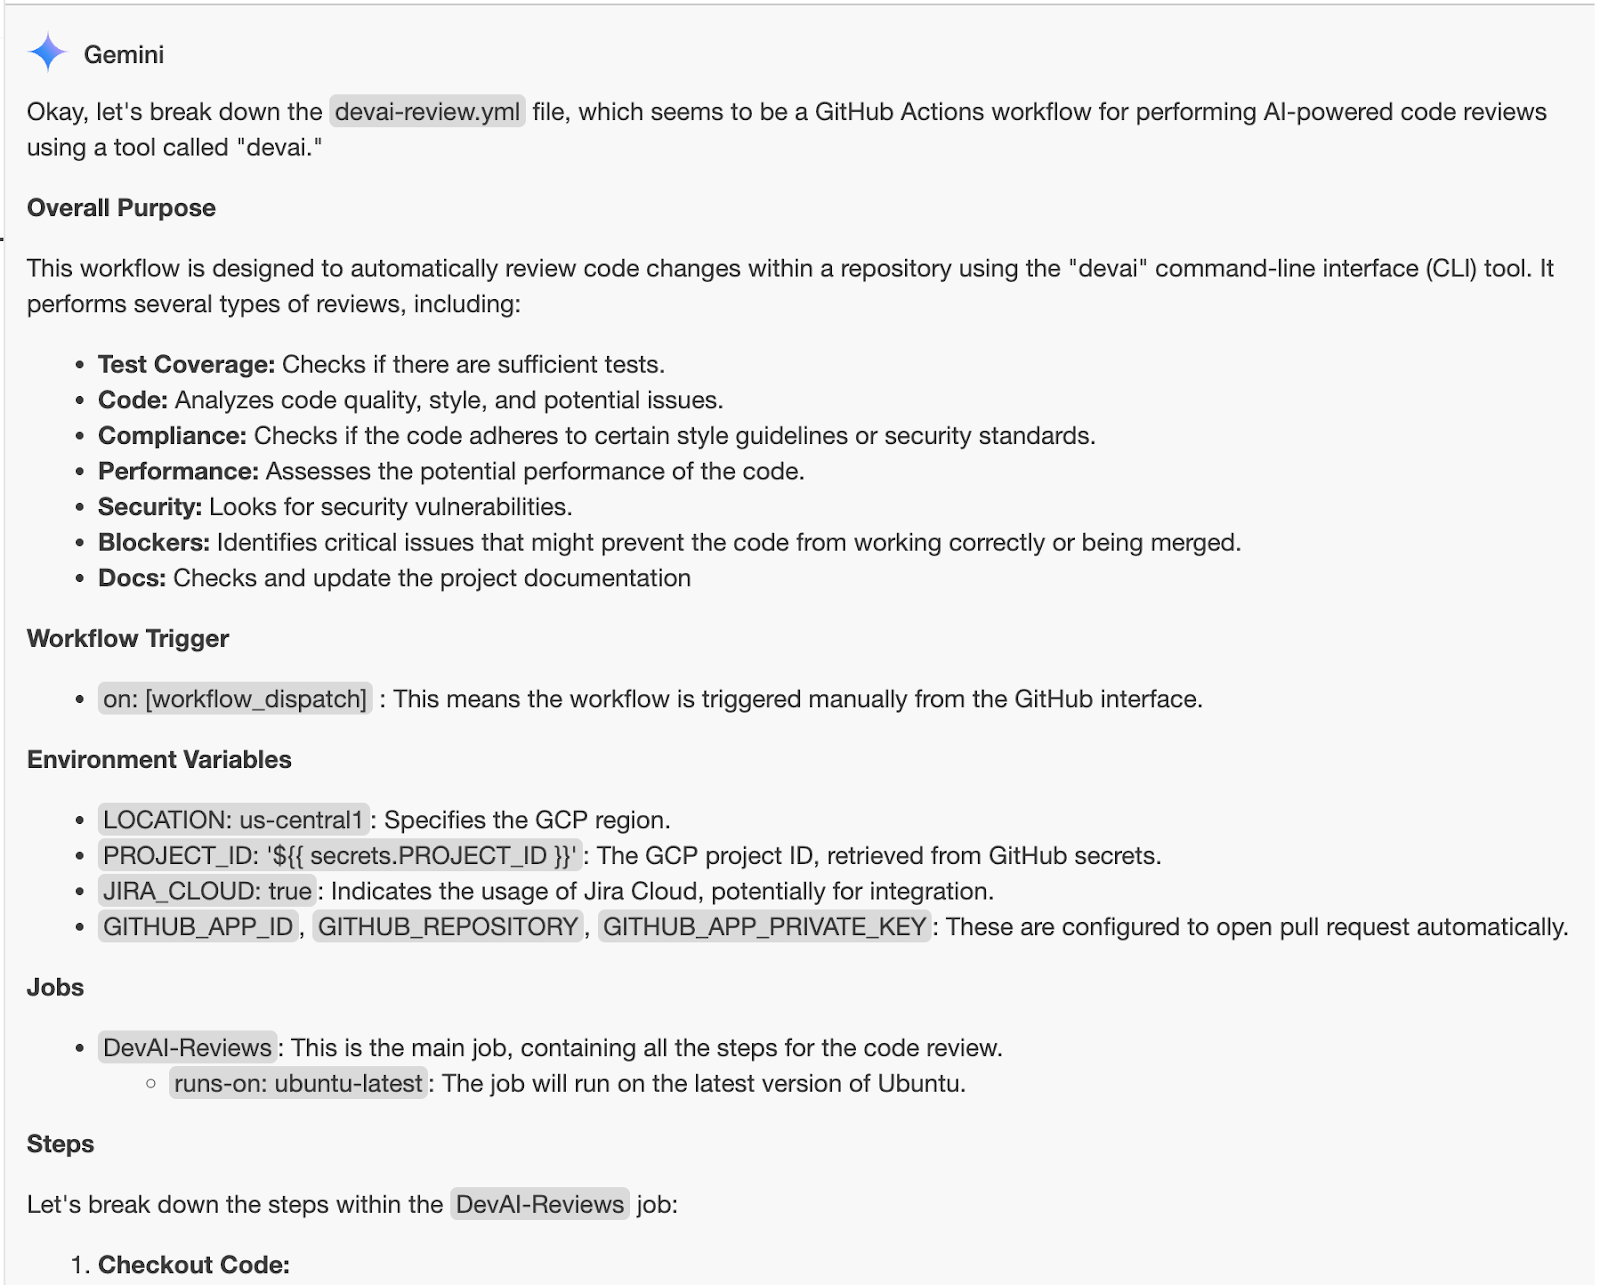
Review explanation:
12. DevAI CLI Development
In this section you will be making changes to devai cli.
To start, set up python virtualenv, install requirements and run the sample command.
cd ~/genai-for-developers/devai-cli
python3 -m venv venv
. venv/bin/activate
pip3 install -r src/requirements.txt
pip3 install --editable ./src
devai echo
Set required environment variables.
export PROJECT_ID=$(gcloud config get-value project)
export LOCATION=us-central1
Run code review command to check that everything is working fine:
devai review code -c ~/genai-for-developers/sample-app/src/main/java/anthos/samples/bankofanthos/balancereader > code-review.md

cloudshell edit code-review.md
Review results using Markdown preview in Cloud Shell Editor.
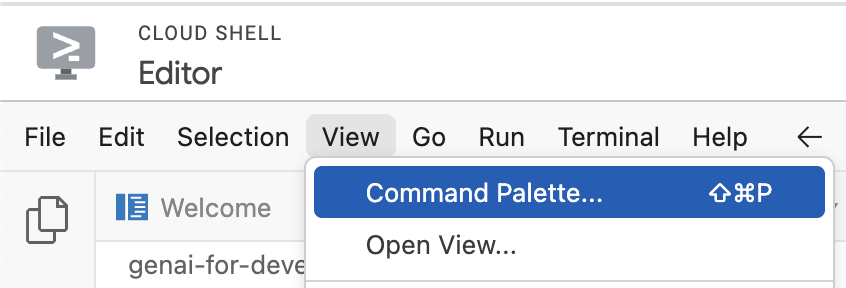
Use Command Palette and select "Markdown: Open Preview".


13. Explore devai cli commands
Test coverage review command
devai review testcoverage -c ~/genai-for-developers/sample-app/src > testcoverage.md

cloudshell edit testcoverage.md
Compliance review command
devai review compliance --context ~/genai-for-developers/sample-app/k8s --config ~/genai-for-developers/devai-cli/.gemini/styleguide.md > k8s-review.md

cloudshell edit k8s-review.md
Performance review command
devai review performance -c ~/genai-for-developers/sample-app/src/main/java > performance-review.md

cloudshell edit performance-review.md
Security review command
devai review security -c ~/genai-for-developers/sample-app/src/main/java > security-review.md

cloudshell edit security-review.md
Blockers review commands
devai review blockers -c ~/genai-for-developers/sample-app/pom.xml
devai review blockers -c ~/genai-for-developers/sample-app/setup.md
Image/Diagram review and summarization
Input diagram[~/genai-for-developers/images/extension-diagram.png]:

Review command:
devai review image \
  -f ~/genai-for-developers/images/extension-diagram.png \
  -p "Review and summarize this diagram" > image-review.md

cloudshell edit image-review.md
Output:
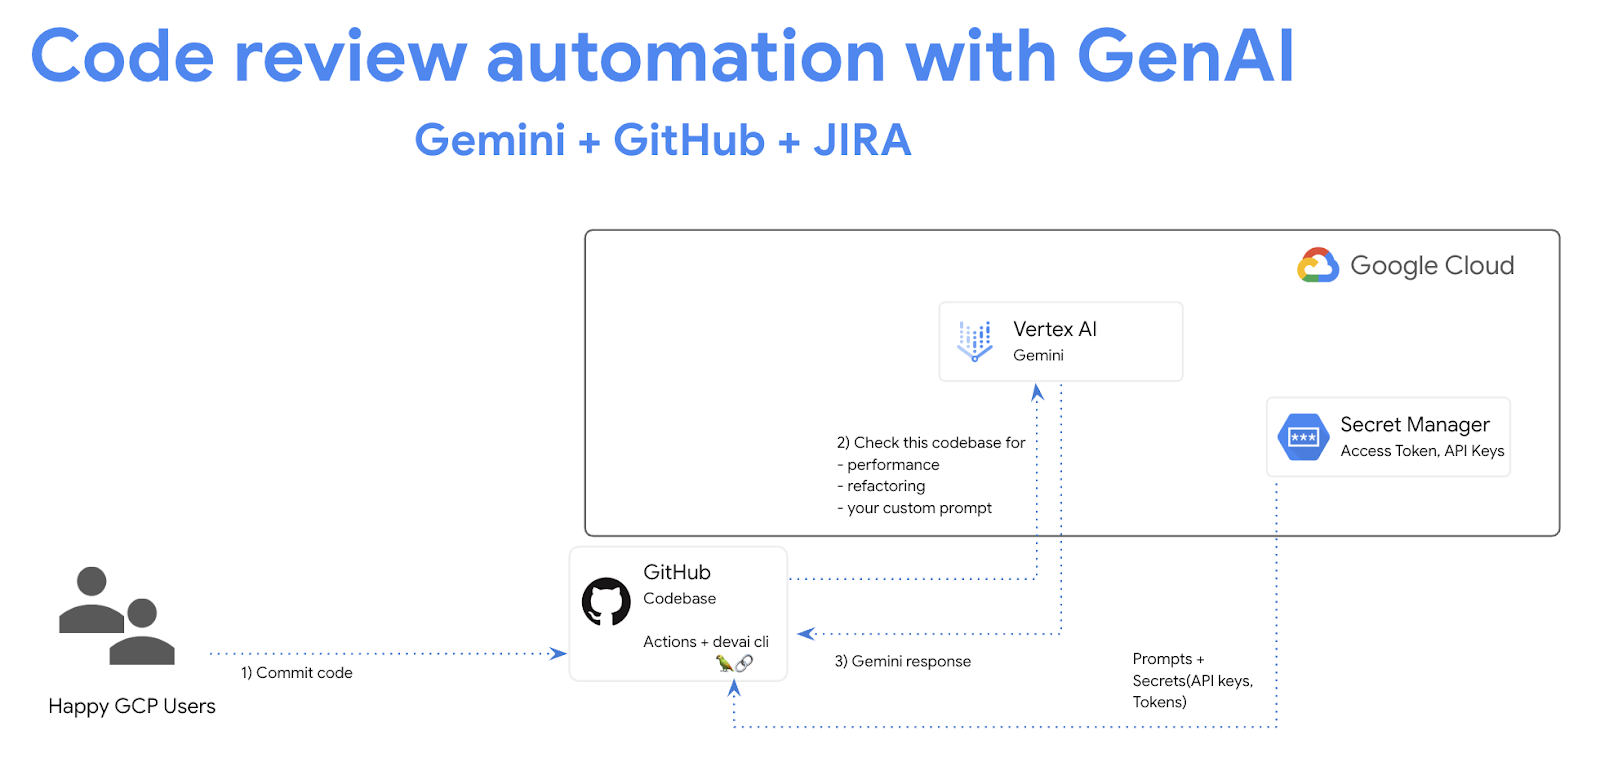
The diagram outlines a process for conducting local code reviews using a VS Code extension or CLI, leveraging Google Cloud's Vertex AI (Gemini Pro) for generating review prompts.

**Process Flow:**

1. **Code Style Check:** Developers initiate the process by checking their code for adherence to pre-defined style guidelines.
2. **Prompt Generation:** The VS Code extension/CLI sends the code to Vertex AI (Gemini Pro) on Google Cloud.
3. **Vertex AI Review:**  Vertex AI analyzes the code and generates relevant review prompts.
4. **Local Review:** The prompts are sent back to the developer's IDE for their consideration.
5. **Optional Actions:** Developers can optionally:
    - Create new JIRA issues directly from the IDE based on the review prompts.
    - Generate new issues in a GitLab repository.

**Key Components:**

* **VS Code Extension/CLI:** Tools facilitating the interaction with Vertex AI and potential integrations with JIRA and GitLab.
* **Vertex AI (Gemini Pro):**  Google Cloud's generative AI service responsible for understanding the code and generating meaningful review prompts.
* **Google Cloud Secret Manager:** Securely stores API keys and access tokens required to authenticate and interact with Google Cloud services.
* **JIRA/GitLab (Optional):** Issue tracking and project management tools that can be integrated for a streamlined workflow.

**Benefits:**

* **Automated Review Assistance:**  Leveraging AI to generate review prompts saves time and improves the consistency and quality of code reviews.
* **Local Development:** The process empowers developers to conduct reviews locally within their familiar IDE.
* **Integration Options:** The flexibility to integrate with project management tools like JIRA and GitLab streamlines workflow and issue tracking.
Image diff analysis
devai review imgdiff \
  -c ~/genai-for-developers/images/devai-api.png \
  -t ~/genai-for-developers/images/devai-api-slack.png > image-diff-review.md

cloudshell edit image-diff-review.md
Output:
The following UI elements are missing in the "AFTER UPGRADE STATE" image compared to the "BEFORE UPGRADE STATE" image:

1. **Slack:** The entire Slack element, including the icon, "Team channel" label, and the arrow indicating interaction, is absent in the AFTER UPGRADE image.
2. **Storage Bucket:**  The "Storage Bucket" element with its icon and "PDFs" label is missing in the AFTER UPGRADE image.
3. **"GenAI Agents" label in Vertex AI block:** The BEFORE UPGRADE image has "Vertex AI Agents" and "GenAI Agent" labels within the Vertex AI block, while the AFTER UPGRADE image only has "Vertex AI."
4. **"Open JIRA Issue" and "Team Project" labels:** In the BEFORE UPGRADE image, these labels are connected to the JIRA block with an arrow. These are missing in the AFTER UPGRADE image.

**Decision Explanation:**

The analysis is based on a direct visual comparison of the two provided images, noting the presence and absence of specific UI elements and their associated labels. The elements listed above are present in the BEFORE UPGRADE image but absent in the AFTER UPGRADE image.
Video file analysis:
devai review video \
  -f "/tmp/video.mp4" \
  -p "Review user journey video and create unit tests using jest framework"
Documentation generation command
devai document readme -c ~/genai-for-developers/sample-app/src/main/
Output:
# Bank of Anthos - Balance Reader Service

## Description

The Balance Reader service is a component of the Bank of Anthos sample application. It provides a REST endpoint for retrieving the current balance of a user account. This service demonstrates key concepts for building microservices with Spring Boot and deploying them to a Kubernetes cluster.

## Features
...
Review available devai cli commands in the Cloud Shell Editor:
cloudshell edit ~/genai-for-developers/devai-cli/README.md
Or review README.md in the GitHub repository.
14. Congratulations!
Congratulations, you finished the codelab!
What we've covered:
- Adding GenAI code review automation steps in GitHub
- Running devai cli locally
What's next:
- More hands-on sessions are coming!
Clean up
To avoid incurring charges to your Google Cloud account for the resources used in this tutorial, either delete the project that contains the resources, or keep the project and delete the individual resources.
Deleting the project
The easiest way to eliminate billing is to delete the project that you created for the tutorial.
©2024 Google LLC All rights reserved. Google and the Google logo are trademarks of Google LLC. All other company and product names may be trademarks of the respective companies with which they are associated.