
1. Прежде чем начать
Данная практическая работа разработана на основе результатов предыдущей практической работы из этой серии, посвященной обнаружению спама в комментариях с использованием TensorFlow.js.
В последнем практическом занятии вы создали полностью функционирующую веб-страницу для вымышленного видеоблога. Вы смогли фильтровать комментарии на предмет спама до того, как они отправлялись на сервер для хранения или другим подключенным клиентам, используя предварительно обученную модель обнаружения спама в комментариях, работающую на основе TensorFlow.js в браузере.
Результат выполнения этого практического задания представлен ниже:

Хотя это работало очень хорошо, существуют граничные случаи, которые модель не смогла обнаружить. Можно переобучить модель, чтобы учесть ситуации, с которыми она не справилась.
Этот практический курс посвящен использованию обработки естественного языка (искусства понимания человеческого языка с помощью компьютера) и показывает, как модифицировать существующее веб-приложение, которое вы создали (настоятельно рекомендуется проходить практические курсы по порядку ), чтобы решить очень реальную проблему спама в комментариях, с которой наверняка столкнутся многие веб-разработчики, работая над постоянно растущим числом популярных веб-приложений, существующих сегодня.
В этом практическом занятии вы сделаете еще один шаг вперед, переобучив свою модель машинного обучения, чтобы она учитывала изменения в содержании спам-сообщений, которые могут меняться со временем в зависимости от текущих тенденций или популярных тем обсуждения, что позволит вам поддерживать модель в актуальном состоянии и учитывать такие изменения.
Предварительные требования
- Завершил первую практическую работу из этой серии.
- Базовые знания веб-технологий, включая HTML, CSS и JavaScript.
Что вы построите
Вы будете использовать ранее созданный веб-сайт для вымышленного видеоблога с разделом комментариев в реальном времени и обновите его, загрузив специально обученную версию модели обнаружения спама с помощью TensorFlow.js, чтобы она лучше работала в крайних случаях, когда раньше не справлялась с этой задачей. Конечно, как веб-разработчики и инженеры, вы можете изменить этот гипотетический UX для повторного использования на любом веб-сайте, над которым вы работаете в повседневной работе, и адаптировать решение под любой сценарий использования клиента — возможно, это блог, форум или какая-либо CMS, например, Drupal.
Давайте начнём взламывать...
Что вы узнаете
Вы будете:
- Выявите граничные случаи, в которых предварительно обученная модель давала сбой.
- Переобучите модель классификации спама, созданную с помощью Model Maker.
- Экспортируйте эту модель, созданную на основе Python, в формат TensorFlow.js для использования в браузерах.
- Обновите размещенную модель и ее словарь, используя недавно обученную модель, и проверьте результаты.
Для выполнения этой лабораторной работы предполагается знакомство с HTML5, CSS и JavaScript. Вы также запустите некоторый код на Python через блокнот "co lab" для переобучения модели, созданной с помощью Model Maker, но знание Python для этого не требуется.
2. Настройте свой компьютер для работы с программированием.
В очередной раз вы будете использовать Glitch.com для размещения и модификации веб-приложения. Если вы еще не выполнили предварительный практический урок , вы можете клонировать конечный результат сюда в качестве отправной точки. Если у вас возникнут вопросы о работе кода, настоятельно рекомендуется пройти предыдущий практический урок, в котором подробно описано, как создать это работающее веб-приложение, прежде чем продолжить.
На Glitch просто нажмите кнопку «Remix this» , чтобы создать форк и новый набор файлов для редактирования.
3. Выявите граничные случаи в предыдущем решении.
Если вы откроете только что клонированный веб-сайт и попробуете оставить комментарии, то заметите, что в большинстве случаев всё работает как надо: комментарии, похожие на спам, блокируются, как и ожидалось, а на них оставляются легитимные ответы.
Однако, если проявить изобретательность и попытаться сформулировать фразы таким образом, чтобы обмануть модель, вы, вероятно, в какой-то момент добьетесь успеха. Методом проб и ошибок вы можете вручную создать примеры, подобные показанным ниже. Попробуйте вставить их в существующее веб-приложение, проверьте консоль и посмотрите, какие вероятности появятся, если комментарий является спамом:
Законные комментарии, размещенные без проблем (истинные негативы):
- «Вау, мне очень понравилось это видео, потрясающая работа». Вероятность спама: 47,91854%.
- "Мне очень понравились эти демоверсии! Есть ещё какие-нибудь подробности?" Вероятность спама: 47,15898%
- «На каком сайте я могу узнать больше?» Вероятность спама: 15,32495%
Это замечательно, вероятность всего вышеперечисленного довольно низкая, и все успешно преодолевает SPAM_THRESHOLD по умолчанию, составляющий минимум 75% до принятия мер (определенный в коде script.js из предыдущего практического задания).
А теперь давайте попробуем написать ещё несколько провокационных комментариев, которые будут помечены как спам, хотя на самом деле таковыми не являются...
Законные комментарии, помеченные как спам (ложные срабатывания):
- «Кто-нибудь может дать ссылку на сайт, где продается маска, которую он носит?» Вероятность спама: 98,46466%
- "Можно ли купить эту песню на Spotify? Пожалуйста, сообщите мне!" Вероятность спама: 94,40953%
- "Кто-нибудь может связаться со мной и предоставить подробную информацию о том, как скачать TensorFlow.js?" Вероятность спама: 83,20084%
О нет! Похоже, эти вполне законные комментарии помечаются как спам, хотя их следует разрешать. Как это исправить?
Один из простых вариантов — повысить пороговое значение SPAM_THRESHOLD до уровня уверенности более 98,5%. В этом случае неправильно классифицированные комментарии будут опубликованы. Учитывая это, давайте рассмотрим другие возможные варианты развития событий ниже...
Спам-комментарии, помеченные как спам (истинные срабатывания):
- «Это круто, но посмотрите ссылки для скачивания на моём сайте, они лучше!» Вероятность спама: 99,77873%
- «Я знаю людей, которые могут достать вам лекарства, подробности смотрите в моём профиле». Вероятность спама: 98,46955%.
- «Посмотрите мой профиль, чтобы скачать еще больше потрясающих видео, которые еще лучше! http://example.com» Вероятность спама: 96,26383%
Хорошо, всё работает как ожидалось с нашим первоначальным порогом в 75%, но учитывая, что на предыдущем шаге вы изменили SPAM_THRESHOLD на значение выше 98,5% уверенности, это означало бы, что два примера здесь будут пропущены, поэтому, возможно, порог слишком высок. Может быть, 96% лучше? Но если вы это сделаете, то один из комментариев в предыдущем разделе (ложные срабатывания) будет помечен как спам, хотя он был легитимным, поскольку его оценка составила 98,46466%.
В этом случае, вероятно, лучше всего зафиксировать все эти реальные спам-комментарии и просто переобучить систему с учетом вышеуказанных ошибок. Установив пороговое значение на 96%, вы по-прежнему будете фиксировать все истинно положительные результаты и исключите 2 ложноположительных результата. Неплохо для изменения всего лишь одного числа.
Продолжим...
Разрешено публиковать спам-комментарии (ложные отрицательные результаты):
- «Посмотрите мой профиль, чтобы скачать еще больше потрясающих видео, которые еще лучше!» Вероятность спама: 7,54926%
- « Получите скидку на наши тренировки в спортзале, смотрите pr0file! » Вероятность спама: 17,49849%
- "О боже, акции GOOG взлетели! Берите, пока не поздно!" Вероятность спама: 20,42894%
Для таких комментариев простое изменение значения SPAM_THRESHOLD ничего не изменит. Снижение порога спама с 96% до ~9% приведет к тому, что подлинные комментарии будут помечены как спам — один из них имеет рейтинг 58%, хотя он является легитимным. Единственный способ справиться с такими комментариями — переобучить модель, включив подобные крайние случаи в обучающие данные, чтобы она научилась корректировать свое восприятие мира, определяя, что является спамом, а что нет.
Хотя сейчас остается только переобучить модель, вы также увидели, как можно уточнить пороговое значение, при котором модель определяет что-либо как спам, чтобы улучшить производительность. Для человека 75% кажется достаточно уверенным, но для этой модели нужно было увеличить этот показатель до 81,5%, чтобы она была более эффективна при работе с примерами входных данных.
Не существует единого универсального значения, которое хорошо работало бы во всех моделях, и этот пороговый уровень необходимо устанавливать для каждой модели отдельно, после экспериментов с реальными данными, чтобы определить, что работает лучше всего.
В некоторых ситуациях ложноположительный (или ложноотрицательный) результат может иметь серьезные последствия (например, в медицинской отрасли), поэтому вы можете установить очень высокий пороговый уровень и запросить дополнительную ручную проверку для тех результатов, которые не соответствуют этому порогу. Это ваш выбор как разработчика, и он требует некоторого экспериментирования.
4. Переобучить модель обнаружения спама в комментариях.
В предыдущем разделе вы выявили ряд крайних случаев, когда модель давала сбой, и единственным вариантом было переобучение модели с учетом этих ситуаций. В производственной системе такие случаи могут возникать со временем, когда пользователи вручную помечают комментарии как спам, но они проходят проверку, или когда модераторы, просматривающие помеченные комментарии, понимают, что некоторые из них на самом деле не являются спамом, и могут пометить такие комментарии для переобучения. Предполагая, что вы собрали множество новых данных для этих крайних случаев (для достижения наилучших результатов, по возможности, следует иметь несколько вариантов этих новых предложений), мы теперь перейдем к тому, как переобучить модель с учетом этих крайних случаев.
Краткий обзор готовой модели
Использованная вами готовая модель была создана сторонним разработчиком с помощью Model Maker и использует модель "среднего векторного представления слов".
Поскольку модель была создана с помощью Model Maker, вам потребуется ненадолго переключиться на Python для переобучения модели, а затем экспортировать созданную модель в формат TensorFlow.js, чтобы вы могли использовать её в браузере. К счастью, Model Maker значительно упрощает использование своих моделей, поэтому следовать инструкциям будет довольно легко, и мы проведём вас через весь процесс, так что не беспокойтесь, если вы никогда раньше не использовали Python!
Коллаборации
Поскольку в этом практическом занятии вас не особо интересует настройка Linux-сервера со всеми необходимыми утилитами Python, вы можете просто выполнять код через веб-браузер, используя «блокнот Colab». Эти блокноты могут подключаться к «бэкенду» — просто серверу с предустановленным программным обеспечением, с которого вы можете выполнять произвольный код в веб-браузере и видеть результаты. Это очень полезно для быстрого прототипирования или для использования в подобных учебных пособиях.
Просто перейдите по адресу colab.research.google.com , и вы увидите приветственный экран, как показано на рисунке:

Теперь нажмите кнопку «Новый блокнот» в правом нижнем углу всплывающего окна, и вы увидите пустой интерфейс Colab, примерно такой:

Отлично! Следующий шаг — подключить фронтенд-версию Colab к бэкенд-серверу, чтобы вы могли выполнить написанный вами код на Python. Для этого нажмите «Подключить» в правом верхнем углу и выберите «Подключиться к размещенной среде выполнения».

После подключения на их месте должны появиться значки оперативной памяти и диска, примерно такие:

Отличная работа! Теперь вы можете начать программировать на Python для переобучения модели Model Maker. Просто следуйте приведенным ниже шагам.
Шаг 1
В первой пустой ячейке скопируйте приведенный ниже код. Он установит для вас TensorFlow Lite Model Maker с помощью менеджера пакетов Python под названием "pip" (он похож на npm, с которым большинство читателей этого практического занятия, вероятно, знакомы по экосистеме JavaScript):
!apt-get install libasound-dev portaudio19-dev libportaudio2 libportaudiocpp0
!pip install -q tflite-model-maker
Однако вставка кода в ячейку не приведет к его выполнению. Далее, наведите курсор мыши на серую ячейку, в которую вы вставили приведенный выше код, и слева от ячейки появится небольшой значок «воспроизведение», как показано ниже:
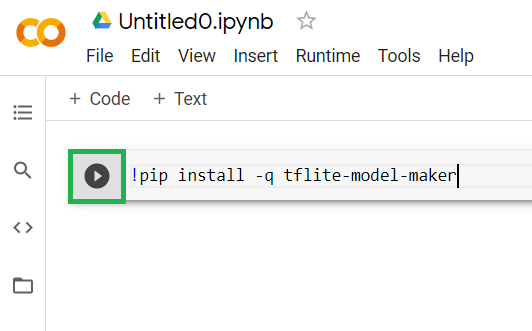 Нажмите кнопку воспроизведения, чтобы выполнить код, только что введенный в ячейку.
Теперь вы увидите, как устанавливается программа для создания моделей:

После завершения выполнения этой ячейки, как показано на рисунке, перейдите к следующему шагу ниже.
Шаг 2
Далее добавьте новую ячейку с кодом, как показано на рисунке, чтобы вы могли вставить еще немного кода после первой ячейки и выполнить его отдельно:

В следующей ячейке будет указано несколько импортов, которые потребуется использовать коду в остальной части блокнота. Скопируйте и вставьте приведенный ниже код в созданную новую ячейку:
import numpy as np
import os

from tflite_model_maker import configs
from tflite_model_maker import ExportFormat
from tflite_model_maker import model_spec
from tflite_model_maker import text_classifier
from tflite_model_maker.text_classifier import DataLoader

import tensorflow as tf
assert tf.__version__.startswith('2')
tf.get_logger().setLevel('ERROR')
Всё довольно стандартно, даже если вы не знакомы с Python. Вам просто нужно импортировать некоторые утилиты и функции Model Maker, необходимые для классификатора спама. Также будет проверено, используете ли вы TensorFlow 2.x, что является обязательным условием для работы с Model Maker.
Наконец, как и прежде, выполните команду в ячейке, наведя на нее курсор мыши на значок «воспроизведение» , а затем добавьте новую ячейку с кодом для следующего шага.
Шаг 3
Далее вам нужно будет загрузить данные с удалённого сервера на ваше устройство и установить переменную training_data в качестве пути к полученному локальному файлу:
data_file = tf.keras.utils.get_file(fname='comment-spam-extras.csv', origin='https://storage.googleapis.com/jmstore/TensorFlowJS/EdX/code/6.5/jm_blog_comments_extras.csv', extract=False)
Model Maker может обучать модели на основе простых CSV-файлов, подобных тому, что вы скачали. Вам нужно лишь указать, в каких столбцах будет текст, а в каких — метки. Как это сделать, вы узнаете на шаге 5. При желании вы можете самостоятельно скачать CSV-файл, чтобы посмотреть, что он содержит.
Внимательные из вас заметят, что название этого файла — jm_blog_comments .csv Этот файл содержит исходные обучающие данные _extras которые мы использовали для создания первой модели распознавания спама в комментариях, в сочетании с новыми данными о граничных случаях, которые вы обнаружили, так что всё находится в одном файле. Вам также понадобятся исходные обучающие данные, использованные для обучения модели, в дополнение к новым предложениям, на основе которых вы хотите обучаться.
Дополнительно: Если вы скачаете этот CSV-файл и проверите последние несколько строк, вы увидите примеры граничных случаев, которые ранее работали некорректно. Они были просто добавлены в конец существующих обучающих данных, которые использовала готовая модель для своего обучения.
Выполните эту ячейку, затем, после завершения выполнения, добавьте новую ячейку и перейдите к шагу 4.
Шаг 4
При использовании Model Maker вам не нужно создавать модели с нуля. Как правило, вы используете уже существующие модели, которые затем настраиваете под свои нужды.
Model Maker предоставляет несколько предварительно обученных моделей, которые вы можете использовать, но самый простой и быстрый вариант для начала — average_word_vec , который вы использовали в предыдущем практическом занятии для создания своего веб-сайта. Вот код:
spec = model_spec.get('average_word_vec')
spec.num_words = 2000
spec.seq_len = 20
spec.wordvec_dim = 7
После того, как вы вставите текст в новую ячейку, запустите этот скрипт.
Понимание
num_words
параметр
Это количество слов, которое вы хотите, чтобы модель использовала. Можно подумать, что чем больше, тем лучше, но обычно существует оптимальное значение, основанное на частоте использования каждого слова. Если вы используете каждое слово из всего корпуса, модель может начать учиться и балансировать веса слов, которые используются только один раз — это не очень полезно. В любом текстовом корпусе вы обнаружите, что многие слова используются всего один или два раза, и обычно нет смысла включать их в модель, поскольку они оказывают незначительное влияние на общую тональность. Поэтому вы можете настроить модель на нужное количество слов, используя параметр num_words . Меньшее значение здесь приведет к меньшей и более быстрой модели, но она может быть менее точной, поскольку распознает меньше слов. Большее значение здесь приведет к большей и потенциально более медленной модели. Найти оптимальное значение — ключевой момент, и задача инженера по машинному обучению — определить, что лучше всего подходит для вашего случая.
Понимание
wordvec_dim
параметр
Параметр wordvec_dim определяет количество измерений, которые вы хотите использовать для вектора каждого слова. Эти измерения, по сути, представляют собой различные характеристики (созданные алгоритмом машинного обучения во время обучения), по которым можно измерить любое данное слово, и которые программа будет использовать для того, чтобы попытаться наилучшим образом связать слова, похожие друг на друга каким-либо значимым образом.
Например, если бы существовал параметр, определяющий «медицинскую» направленность слова, слово «таблетки» могло бы получить высокий балл по этому параметру и ассоциироваться с другими словами с высокими баллами, такими как «рентген», но слово «кот» получило бы низкий балл по этому параметру. Вполне возможно, что «медицинский параметр» окажется полезным для определения спама в сочетании с другими потенциальными значимыми параметрами, которые могут быть использованы.
В случае слов, имеющих высокие баллы в «медицинском измерении», может оказаться полезным второе измерение, связывающее слова с человеческим телом. Такие слова, как «нога», «рука», «шея», могут иметь высокие баллы в этом измерении, а также довольно высокие баллы в медицинском измерении.
Модель может использовать эти параметры для обнаружения слов, которые с большей вероятностью связаны со спамом. Например, в спам-письмах чаще встречаются слова, относящиеся одновременно к медицинской тематике и названиям частей человеческого тела.
На основе проведенных исследований установлено эмпирическое правило: корень четвертой степени из количества слов хорошо подходит для этого параметра. Таким образом, если я использую 2000 слов, хорошей отправной точкой будет 7 измерений. Изменение количества используемых слов также может повлиять на этот параметр.
Понимание
seq_len
параметр
Как правило, модели очень строги в отношении входных значений. Для языковой модели это означает, что она может классифицировать предложения определенной, статической длины. Это определяется параметром seq_len , где seq_len означает «длина последовательности». Когда слова преобразуются в числа (или токены), предложение становится последовательностью этих токенов. Таким образом, ваша модель будет обучена (в данном случае) классифицировать и распознавать предложения, содержащие 20 токенов. Если предложение длиннее этого, оно будет усечено. Если оно короче, оно будет дополнено — как в первом практическом задании этой серии.
Шаг 5 — загрузка обучающих данных
Ранее вы скачали CSV-файл. Теперь пришло время использовать загрузчик данных, чтобы преобразовать его в обучающие данные, которые модель сможет распознать.
data = DataLoader.from_csv(
      filename=data_file,
      text_column='commenttext',
      label_column='spam',
      model_spec=spec,
      delimiter=',',
      shuffle=True,
      is_training=True)

train_data, test_data = data.split(0.9)
Если открыть CSV-файл в текстовом редакторе, вы увидите, что каждая строка содержит всего два значения, которые описываются текстом в первой строке файла. Как правило, каждая запись рассматривается как «столбец». Вы увидите, что дескриптор для первого столбца — commenttext , а первая запись в каждой строке — это текст комментария.
Аналогично, дескриптор для второго столбца — spam , и вы увидите, что вторая запись в каждой строке — TRUE или FALSE , указывающая, считается ли этот текст спамом в комментариях или нет. Остальные свойства задают спецификацию модели, которую вы создали на шаге 4, а также символ-разделитель, которым в данном случае является запятая, поскольку файл разделен запятыми. Вы также задаете параметр перемешивания для случайного перераспределения обучающих данных, чтобы элементы, которые могли быть похожими или собранными вместе, были случайным образом распределены по всему набору данных.
Затем вы используете data.split() для разделения данных на обучающую и тестовую выборки. Значение 0,9 означает, что 90% набора данных будет использоваться для обучения, а остальная часть — для тестирования.
Шаг 6 — Построение модели
Добавьте еще одну ячейку, куда мы добавим код для построения модели:
model = text_classifier.create(train_data, model_spec=spec, epochs=50)
Это позволяет создать модель классификатора текста с помощью Model Maker, указав необходимые обучающие данные (определенные на шаге 4), спецификацию модели (также заданную на шаге 4) и количество эпох, в данном случае 50.
Основной принцип машинного обучения заключается в том, что это разновидность сопоставления образов. Первоначально модель загружает предварительно обученные веса для слов и пытается сгруппировать их вместе, «предсказывая», какие из них, будучи сгруппированными вместе, указывают на спам, а какие нет. В первый раз результат, вероятно, будет близок к 50:50, поскольку модель только начинает работу, как показано ниже:

Затем программа измерит результаты, изменит веса модели, чтобы скорректировать её предсказание, и попробует снова. Это эпоха. Таким образом, указав epochs=50, она пройдёт этот «цикл» 50 раз, как показано ниже:

Таким образом, к 50-й эпохе модель покажет гораздо более высокий уровень точности. В данном случае — 99,1%!
Шаг 7 — Экспорт модели
После завершения обучения вы можете экспортировать модель. TensorFlow обучает модель в собственном формате, и её необходимо преобразовать в формат TensorFlow.js для использования на веб-странице. Просто вставьте следующий код в новую ячейку и выполните его:
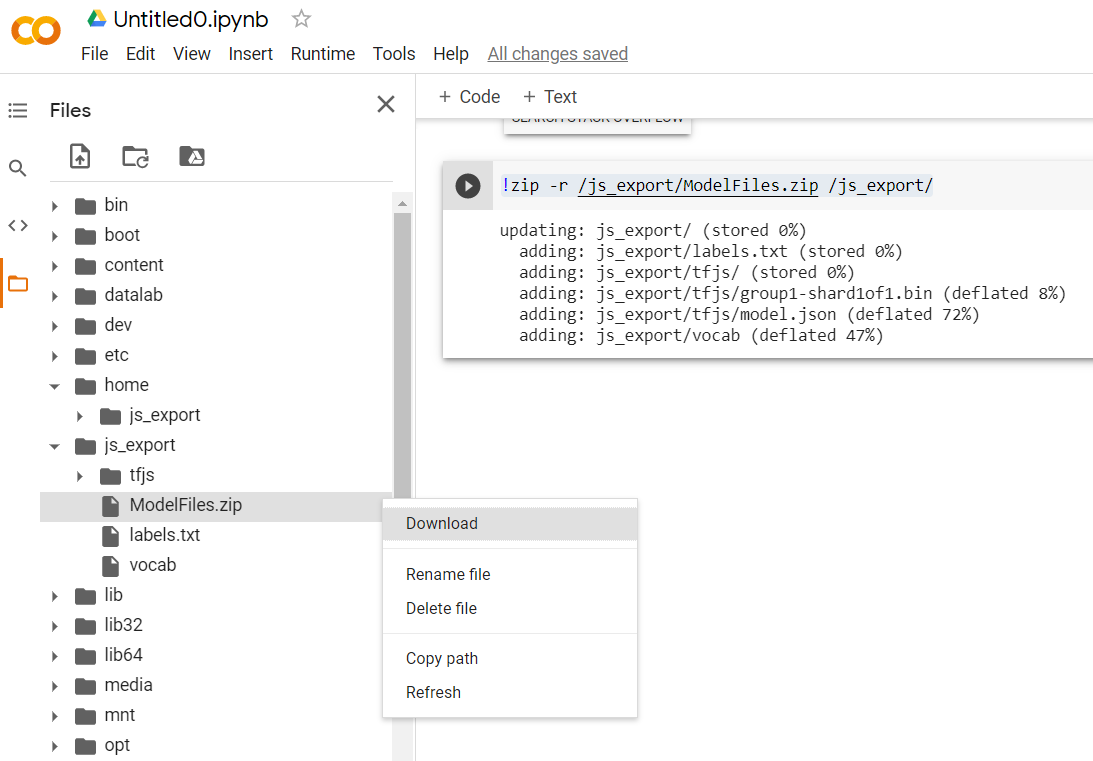
model.export(export_dir="/js_export/", export_format=[ExportFormat.TFJS, ExportFormat.LABEL, ExportFormat.VOCAB])
!zip -r /js_export/ModelFiles.zip /js_export/
После выполнения этого кода, если вы щелкнете по маленькой иконке папки слева в Colab, вы сможете перейти в папку, в которую вы экспортировали файлы (в корневом каталоге — возможно, вам потребуется подняться на один уровень выше), и найти архив с экспортированными файлами, содержащийся в ModelFiles.zip .
Загрузите этот zip-файл на свой компьютер прямо сейчас, так как вы будете использовать эти файлы точно так же, как и в первом практическом задании:
Отлично! С Python покончено, теперь вы можете вернуться в мир JavaScript, который вы знаете и любите. Фух!
5. Внедрение новой модели машинного обучения.
Теперь вы почти готовы загрузить модель. Однако, прежде чем это сделать, необходимо загрузить новые файлы модели, скачанные ранее в рамках практического занятия, чтобы она была размещена и доступна для использования в вашем коде.
Во-первых, если вы еще этого не сделали, распакуйте файлы модели, только что загруженные из блокнота Model Maker Colab, который вы только что запустили. В папках вы должны увидеть следующие файлы:

Что у вас здесь?
-
model.json— это один из файлов, составляющих обученную модель TensorFlow.js. Вы будете ссылаться на этот конкретный файл в коде JavaScript. -
group1-shard1of1.bin— это бинарный файл, содержащий большую часть сохраненных данных для экспортированной модели TensorFlow.js. Его необходимо разместить где-нибудь на вашем сервере для загрузки в той же директории, что иmodel.jsonуказанный выше. -
vocab— Этот странный файл без расширения — это фрагмент кода из Model Maker, демонстрирующий, как кодировать слова в предложениях, чтобы модель понимала, как их использовать. Подробнее об этом вы узнаете в следующем разделе. -
labels.txt— Этот файл просто содержит имена классов, которые будет предсказывать модель. Для этой модели, если вы откроете этот файл в текстовом редакторе, вы увидите только значения «false» и «true», указывающие на то, что результатом предсказания будет «не спам» или «спам».
Разместите файлы модели TensorFlow.js
Сначала разместите сгенерированные файлы model.json и *.bin на веб-сервере, чтобы вы могли получить к ним доступ через свою веб-страницу.
Удалите существующие файлы моделей.
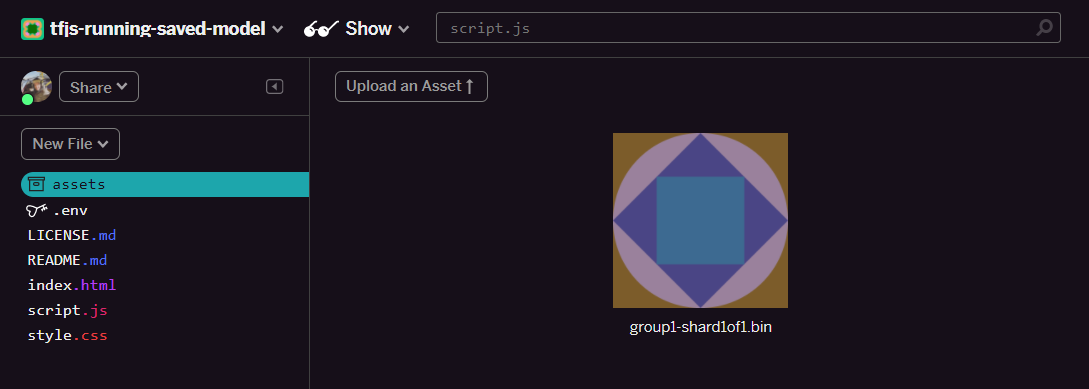
Поскольку вы продолжаете работу над результатом первого практического занятия из этой серии, вам необходимо сначала удалить существующие загруженные файлы моделей. Если вы используете Glitch.com, просто найдите в панели файлов слева файлы model.json и group1-shard1of1.bin , щелкните раскрывающееся меню с тремя точками для каждого файла и выберите «Удалить», как показано на рисунке:

Загрузка новых файлов в Glitch
Отлично! Теперь загрузите новые:
- Откройте папку assets на левой панели вашего проекта Glitch и удалите все старые загруженные ресурсы, если у них одинаковые имена.
- Нажмите «Загрузить ресурс» и выберите файл
group1-shard1of1.binдля загрузки в эту папку. После загрузки файл должен выглядеть примерно так:
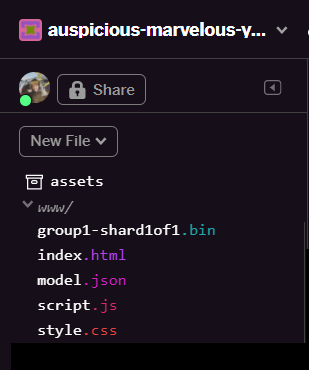
- Отлично! Теперь сделайте то же самое для файла model.json, чтобы в папке assets оказалось два файла, примерно такие:

- Если вы щёлкнете по только что загруженному файлу
group1-shard1of1.binвы сможете скопировать URL-адрес этого файла. Скопируйте этот путь, как показано ниже:

- Теперь в левом нижнем углу экрана нажмите «Инструменты» > «Терминал» . Дождитесь загрузки окна терминала.
- После загрузки введите следующее и нажмите Enter, чтобы перейти в папку
www:
Терминал:
cd www
- Далее, используйте
wgetдля загрузки двух только что загруженных файлов, заменив указанные ниже URL-адреса на URL-адреса, которые вы сгенерировали для файлов в папке assets на Glitch (проверьте папку assets, чтобы узнать пользовательский URL-адрес каждого файла).
Обратите внимание на пробел между двумя URL-адресами, а также на то, что URL-адреса, которые вам понадобятся, будут отличаться от показанных, но будут выглядеть похоже:
Терминал
wget https://cdn.glitch.com/1cb82939-a5dd-42a2-9db9-0c42cab7e407%2Fmodel.json?v=1616111344958 https://cdn.glitch.com/1cb82939-a5dd-42a2-9db9-0c42cab7e407%2Fgroup1-shard1of1.bin?v=1616017964562
Отлично! Теперь вы создали копию файлов, загруженных в папку www .
Однако сейчас они будут загружаться со странными именами. Если вы введете команду ls в терминале и нажмете Enter, вы увидите что-то подобное:

- Переименуйте файлы с помощью команды
mv. Введите в консоль следующее и нажимайте Enter после каждой строки:
Терминал:
mv *group1-shard1of1.bin* group1-shard1of1.bin
mv *model.json* model.json
- Наконец, обновите проект Glitch, набрав в терминале
refreshи нажав Enter:
Терминал:
refresh
После обновления страницы вы должны увидеть файлы model.json и group1-shard1of1.bin в папке www пользовательского интерфейса:
Отлично! Последний шаг — обновить файл dictionary.js .
- Преобразуйте загруженный файл со словарем в нужный формат JavaScript вручную с помощью текстового редактора или с помощью этого инструмента и сохраните полученный результат как
dictionary.jsв папкеwww. Если у вас уже есть файлdictionary.jsвы можете просто скопировать и вставить в него новое содержимое и сохранить файл.
Ура! Вы успешно обновили все измененные файлы, и если вы теперь попробуете использовать веб-сайт, вы заметите, что переобученная модель должна уметь учитывать обнаруженные и изученные граничные случаи, как показано на рисунке:

Как видите, первые 6 писем теперь правильно классифицированы как не спам, а вторая группа из 6 писем также определена как спам. Отлично!
Давайте попробуем несколько вариантов, чтобы посмотреть, насколько хорошо это работает в целом. Изначально было неудачное предложение, например:
« О боже, акции GOOG взлетели до небес! Покупайте, пока не поздно! »
Теперь это правильно классифицируется как спам, но что произойдет, если изменить это на:
« Итак, акции XYZ только что подорожали! Покупайте, пока не поздно! »
Здесь вы получаете прогноз с вероятностью 98%, что это спам, и это верно, даже несмотря на то, что вы немного изменили биржевой символ и формулировку.
Конечно, если вы действительно попытаетесь взломать эту новую модель, у вас это получится, и всё сведётся к сбору ещё большего количества обучающих данных, чтобы иметь наилучшие шансы выявить больше уникальных вариаций для распространённых ситуаций, с которыми вы, вероятно, столкнётесь в интернете. В одном из будущих практических занятий мы покажем вам, как постоянно улучшать вашу модель с помощью данных в реальном времени по мере их поступления.
6. Поздравляем!
Поздравляем, вам удалось переобучить существующую модель машинного обучения, чтобы она адаптировалась к обнаруженным вами граничным случаям, и развернуть эти изменения в браузере с помощью TensorFlow.js для реального приложения.
Краткий обзор
В этом практическом занятии вы:
- Обнаружены граничные случаи, когда не работала готовая модель защиты от спама в комментариях.
- Модель Model Maker была переобучена с учетом обнаруженных вами граничных случаев.
- Новая обученная модель экспортирована в формат TensorFlow.js.
- Обновили ваше веб-приложение, чтобы использовать новые файлы.
Что дальше?
Это обновление работает отлично, но, как и в любом веб-приложении, изменения неизбежны со временем. Было бы гораздо лучше, если бы приложение постоянно совершенствовалось, вместо того чтобы нам приходилось делать это вручную каждый раз. Можете ли вы представить, как можно автоматизировать эти шаги для автоматического переобучения модели после, например, 100 новых комментариев, помеченных как неправильно классифицированные? Наденьте свою обычную шляпу веб-разработчика, и вы, вероятно, сможете придумать, как создать конвейер для автоматического выполнения этой задачи. Если нет, не волнуйтесь, следите за следующим практическим занятием из этой серии, где мы покажем вам, как это сделать.
Поделитесь с нами своими творениями!
Вы легко можете расширить возможности созданного сегодня решения и для других творческих задач, и мы призываем вас мыслить нестандартно и продолжать экспериментировать.
Не забудьте отметить нас в социальных сетях, используя хэштег #MadeWithTFJS , чтобы получить шанс на публикацию вашего проекта в блоге TensorFlow или даже на будущих мероприятиях . Нам очень интересно посмотреть на ваши работы.
Больше практических заданий по TensorFlow.js для более глубокого изучения темы.
- Используйте Firebase Hosting для развертывания и размещения модели TensorFlow.js в масштабе предприятия.
- Создайте умную веб-камеру, используя готовую модель обнаружения объектов с помощью TensorFlow.js.
Сайты, которые стоит посмотреть
- Официальный сайт TensorFlow.js
- готовые модели TensorFlow.js
- API TensorFlow.js
- TensorFlow.js: демонстрация и рассказ – вдохновитесь и посмотрите, что создали другие.