
1. 任务

您已向紧急情况 AI 表明了自己的身份,信标现在正在行星地图上闪烁,但几乎看不到,淹没在静电中。从轨道上扫描的救援队可以在您的坐标处看到某些东西,但无法锁定。信号太弱。
如需将信标增强到最大强度,您需要确认自己的确切位置。太空舱的导航系统已损坏,但坠毁散落的残骸中仍有可供收集的证据。土壤样本。奇异的植物。清晰的异星夜空。
如果您能分析这些证据并确定自己所处的地球区域,AI 就能通过三角定位法确定您的位置,并放大信标信号。然后,或许会有人找到您。
是时候将这些碎片拼凑起来了。
前提条件
⚠️ 此级别需要先完成 0 级。
开始之前,请确认您已具备以下条件:
- [ ] 将项目根目录中的
config.json替换为参与者 ID 和坐标 - [ ] 您的头像显示在世界地图上
- [ ] 信标在您的坐标处显示为(暗色)
如果您尚未完成 0 级,请先从 0 级开始。
构建内容
在此级别中,您将构建一个使用并行处理来分析坠机现场证据的多代理 AI 系统:


学习目标
概念 | 学习内容 |
多智能体系统 | 构建具有单一职责的专业智能体 |
ParallelAgent | 组合独立代理以并发运行 |
before_agent_callback | 在代理运行之前提取配置并设置状态 |
ToolContext | 在工具函数中访问状态值 |
自定义 MCP 服务器 | 使用命令式模式构建工具(Cloud Run 上的 Python 代码) |
OneMCP BigQuery | 连接到 Google 的托管 MCP 以访问 BigQuery |
多模态 AI | 使用 Gemini 分析图片和视频+音频 |
智能体编排 | 使用根编排器协调多个代理 |
云部署 | 将 MCP 服务器和代理部署到 Cloud Run |
A2A 准备工作 | 构建智能体,以便日后实现智能体间通信 |
地球的生物群系
星球表面分为四种不同的生物群落,每种生物群落都有独特的特征:

您的坐标决定了您坠毁的生物群系。坠机现场的证据反映了相应生物群落的特征:
生物群系 | 象限 | 地质证据 | 植物学证据 | 天文证据 |
🧊 CRYO | 西北 (x<50, y≥50) | 冻结的甲烷、冰晶 | 霜花、低温植物 | 蓝巨星 |
🌋 VOLCANIC | NE(x≥50,y≥50) | 黑曜石、ite 矿藏 | 火花、耐热植物群 | 红矮星双星 |
💜 BIOLUMINESCENT | 西南 (x<50, y<50) | 磷光土壤 | 发光真菌、发光植物 | 绿色脉冲星 |
🦴 FOSSILIZED | 东南 (x≥50,y<50) | 琥珀矿床,ite 矿物 | 石化树、古代植物群 | 黄太阳 |
您的任务:构建能够分析证据并推断您所处生物群系的 AI 智能体。
2. 设置环境
运行环境设置脚本
在生成证据之前,您需要启用所需的 Google Cloud API,包括为 BigQuery 提供受管理 MCP 访问权限的 OneMCP for BigQuery。
👉💻 运行环境设置脚本:
cd $HOME/way-back-home/level_1
chmod +x setup/setup_env.sh
./setup/setup_env.sh
您应该会看到类似如下所示的输出:
================================================================
Level 1: Environment Setup
================================================================
Project: your-project-id

[1/6] Enabling core Google Cloud APIs...
      ✓ Vertex AI API enabled
      ✓ Cloud Run API enabled
      ✓ Cloud Build API enabled
      ✓ BigQuery API enabled
      ✓ Artifact Registry API enabled
      ✓ IAM API enabled

[2/6] Enabling OneMCP BigQuery (Managed MCP)...
      ✓ OneMCP BigQuery enabled

[3/6] Setting up service account and IAM permissions...
      ✓ Service account 'way-back-home-sa' created
      ✓ Vertex AI User role granted
      ✓ Cloud Run Invoker role granted
      ✓ BigQuery User role granted
      ✓ BigQuery Data Viewer role granted
      ✓ Storage Object Viewer role granted

[4/6] Configuring Cloud Build IAM for deployments...
      ✓ Cloud Build can now deploy services as way-back-home-sa
      ✓ Cloud Run Admin role granted to Compute SA

[5/6] Creating Artifact Registry repository...
      ✓ Repository 'way-back-home' created

[6/6] Creating environment variables file...
      Found PARTICIPANT_ID in config.json: abc123...
      ✓ Created ../set_env.sh

================================================================
✅ Environment Setup Complete!
================================================================
来源环境变量
👉💻 提取环境变量:
source $HOME/way-back-home/set_env.sh
安装依赖项
👉💻 安装 1 级 Python 依赖项:
cd $HOME/way-back-home/level_1
uv sync
设置星表
👉💻 在 BigQuery 中设置星级目录:
uv run python setup/setup_star_catalog.py
您应该会看到:
Setting up star catalog in project: your-project-id
==================================================
✓ Dataset way_back_home already exists
✓ Created table star_catalog
✓ Inserted 12 rows into star_catalog

📊 Star Catalog Summary:
----------------------------------------
  NE (VOLCANIC): 3 stellar patterns
  NW (CRYO): 3 stellar patterns
  SE (FOSSILIZED): 3 stellar patterns
  SW (BIOLUMINESCENT): 3 stellar patterns
----------------------------------------
✓ Star catalog is ready for triangulation queries

==================================================
✅ Star catalog setup complete!
3. 生成崩溃现场证据
现在,根据您的坐标生成个性化的坠机地点证据。
运行证据生成器
👉💻 从 level_1 目录运行以下命令:
cd $HOME/way-back-home/level_1
uv run python generate_evidence.py
您应该会看到类似如下所示的输出:
✓ Welcome back, Explorer_Aria!
  Coordinates: (23, 67)
  Ready to analyze your crash site.

📍 Crash site analysis initiated...
   Generating evidence for your location...

🔬 Generating soil sample...
✓ Soil sample captured: outputs/soil_sample.png
✨ Capturing star field...
✓ Star field captured: outputs/star_field.png
🌿 Recording flora activity...
   (This may take 1-2 minutes for video generation)
   Generating video...
   Generating video...
   Generating video...
✓ Flora recorded: outputs/flora_recording.mp4

📤 Uploading evidence to Mission Control...
✓ Config updated with evidence URLs

==================================================
✅ Evidence generation complete!
==================================================
查看您的证据
👉 花点时间查看 outputs/ 文件夹中生成的证据文件。每张照片都反映了碰撞地点的生物群落特征,不过在 AI 代理分析这些照片之前,您不会知道是哪个生物群落!
根据您所在的位置,生成的证据可能如下所示:


4. 构建自定义 MCP 服务器
逃生舱的机载分析系统已损坏,但原始传感器数据在坠毁中幸存下来。您将使用 FastMCP 构建一个 MCP 服务器,该服务器提供地质和植物学分析工具。
创建地质分析工具
此工具可分析土壤样本图片,以确定矿物成分。
👉✏️ 打开 $HOME/way-back-home/level_1/mcp-server/main.py 并找到 #REPLACE-GEOLOGICAL-TOOL。将其替换为:
GEOLOGICAL_PROMPT = """Analyze this alien soil sample image.

Classify the PRIMARY characteristic (choose exactly one):

1. CRYO - Frozen/icy minerals, crystalline structures, frost patterns,
   blue-white coloration, permafrost indicators

2. VOLCANIC - Volcanic rock, basalt, obsidian, sulfur deposits,
   red-orange minerals, heat-formed crystite structures

3. BIOLUMINESCENT - Glowing particles, phosphorescent minerals,
   organic-mineral hybrids, purple-green luminescence

4. FOSSILIZED - Ancient compressed minerals, amber deposits,
   petrified organic matter, golden-brown stratification

Respond ONLY with valid JSON (no markdown, no explanation):
{
    "biome": "CRYO|VOLCANIC|BIOLUMINESCENT|FOSSILIZED",
    "confidence": 0.0-1.0,
    "minerals_detected": ["mineral1", "mineral2"],
    "description": "Brief description of what you observe"
}
"""


@mcp.tool()
def analyze_geological(
    image_url: Annotated[
        str,
        Field(description="Cloud Storage URL (gs://...) of the soil sample image")
    ]
) -> dict:
    """
    Analyzes a soil sample image to identify mineral composition and classify the planetary biome.

    Args:
        image_url: Cloud Storage URL of the soil sample image (gs://bucket/path/image.png)

    Returns:
        dict with biome, confidence, minerals_detected, and description
    """
    logger.info(f">>> 🔬 Tool: 'analyze_geological' called for '{image_url}'")

    try:
        response = client.models.generate_content(
            model="gemini-2.5-flash",
            contents=[
                GEOLOGICAL_PROMPT,
                genai_types.Part.from_uri(file_uri=image_url, mime_type="image/png")
            ]
        )

        result = parse_json_response(response.text)
        logger.info(f"    ✓ Geological analysis complete: {result.get('biome', 'UNKNOWN')}")
        return result

    except Exception as e:
        logger.error(f"    ✗ Geological analysis failed: {str(e)}")
        return {"error": str(e), "biome": "UNKNOWN", "confidence": 0.0}
创建植物分析工具
此工具可分析植物视频录制内容(包括音轨)。
👉✏️ 在同一文件 ($HOME/way-back-home/level_1/mcp-server/main.py) 中,找到 #REPLACE-BOTANICAL-TOOL 并将其替换为:
BOTANICAL_PROMPT = """Analyze this alien flora video recording.

Pay attention to BOTH:
1. VISUAL elements: Plant appearance, movement patterns, colors, bioluminescence
2. AUDIO elements: Ambient sounds, rustling, organic noises, frequencies

Classify the PRIMARY biome (choose exactly one):

1. CRYO - Crystalline ice-plants, frost-covered vegetation,
   crackling/tinkling sounds, slow brittle movements, blue-white flora

2. VOLCANIC - Heat-resistant plants, sulfur-adapted species,
   hissing/bubbling sounds, smoke-filtering vegetation, red-orange flora

3. BIOLUMINESCENT - Glowing plants, pulsing light patterns,
   humming/resonating sounds, reactive to stimuli, purple-green flora

4. FOSSILIZED - Ancient petrified plants, amber-preserved specimens,
   deep resonant sounds, minimal movement, golden-brown flora

Respond ONLY with valid JSON (no markdown, no explanation):
{
    "biome": "CRYO|VOLCANIC|BIOLUMINESCENT|FOSSILIZED",
    "confidence": 0.0-1.0,
    "species_detected": ["species1", "species2"],
    "audio_signatures": ["sound1", "sound2"],
    "description": "Brief description of visual and audio observations"
}
"""


@mcp.tool()
def analyze_botanical(
    video_url: Annotated[
        str,
        Field(description="Cloud Storage URL (gs://...) of the flora video recording")
    ]
) -> dict:
    """
    Analyzes a flora video recording (visual + audio) to identify plant species and classify the biome.

    Args:
        video_url: Cloud Storage URL of the flora video (gs://bucket/path/video.mp4)

    Returns:
        dict with biome, confidence, species_detected, audio_signatures, and description
    """
    logger.info(f">>> 🌿 Tool: 'analyze_botanical' called for '{video_url}'")

    try:
        response = client.models.generate_content(
            model="gemini-2.5-flash",
            contents=[
                BOTANICAL_PROMPT,
                genai_types.Part.from_uri(file_uri=video_url, mime_type="video/mp4")
            ]
        )

        result = parse_json_response(response.text)
        logger.info(f"    ✓ Botanical analysis complete: {result.get('biome', 'UNKNOWN')}")
        return result

    except Exception as e:
        logger.error(f"    ✗ Botanical analysis failed: {str(e)}")
        return {"error": str(e), "biome": "UNKNOWN", "confidence": 0.0}
在本地测试 MCP 服务器
👉💻 测试 MCP 服务器:
cd $HOME/way-back-home/level_1/mcp-server
pip install -r requirements.txt
python main.py
您应该会看到:
[INFO] Initialized Gemini client for project: your-project-id
[INFO] 🚀 Location Analyzer MCP Server starting on port 8080
[INFO] 📍 MCP endpoint: http://0.0.0.0:8080/mcp
[INFO] 🔧 Tools: analyze_geological, analyze_botanical
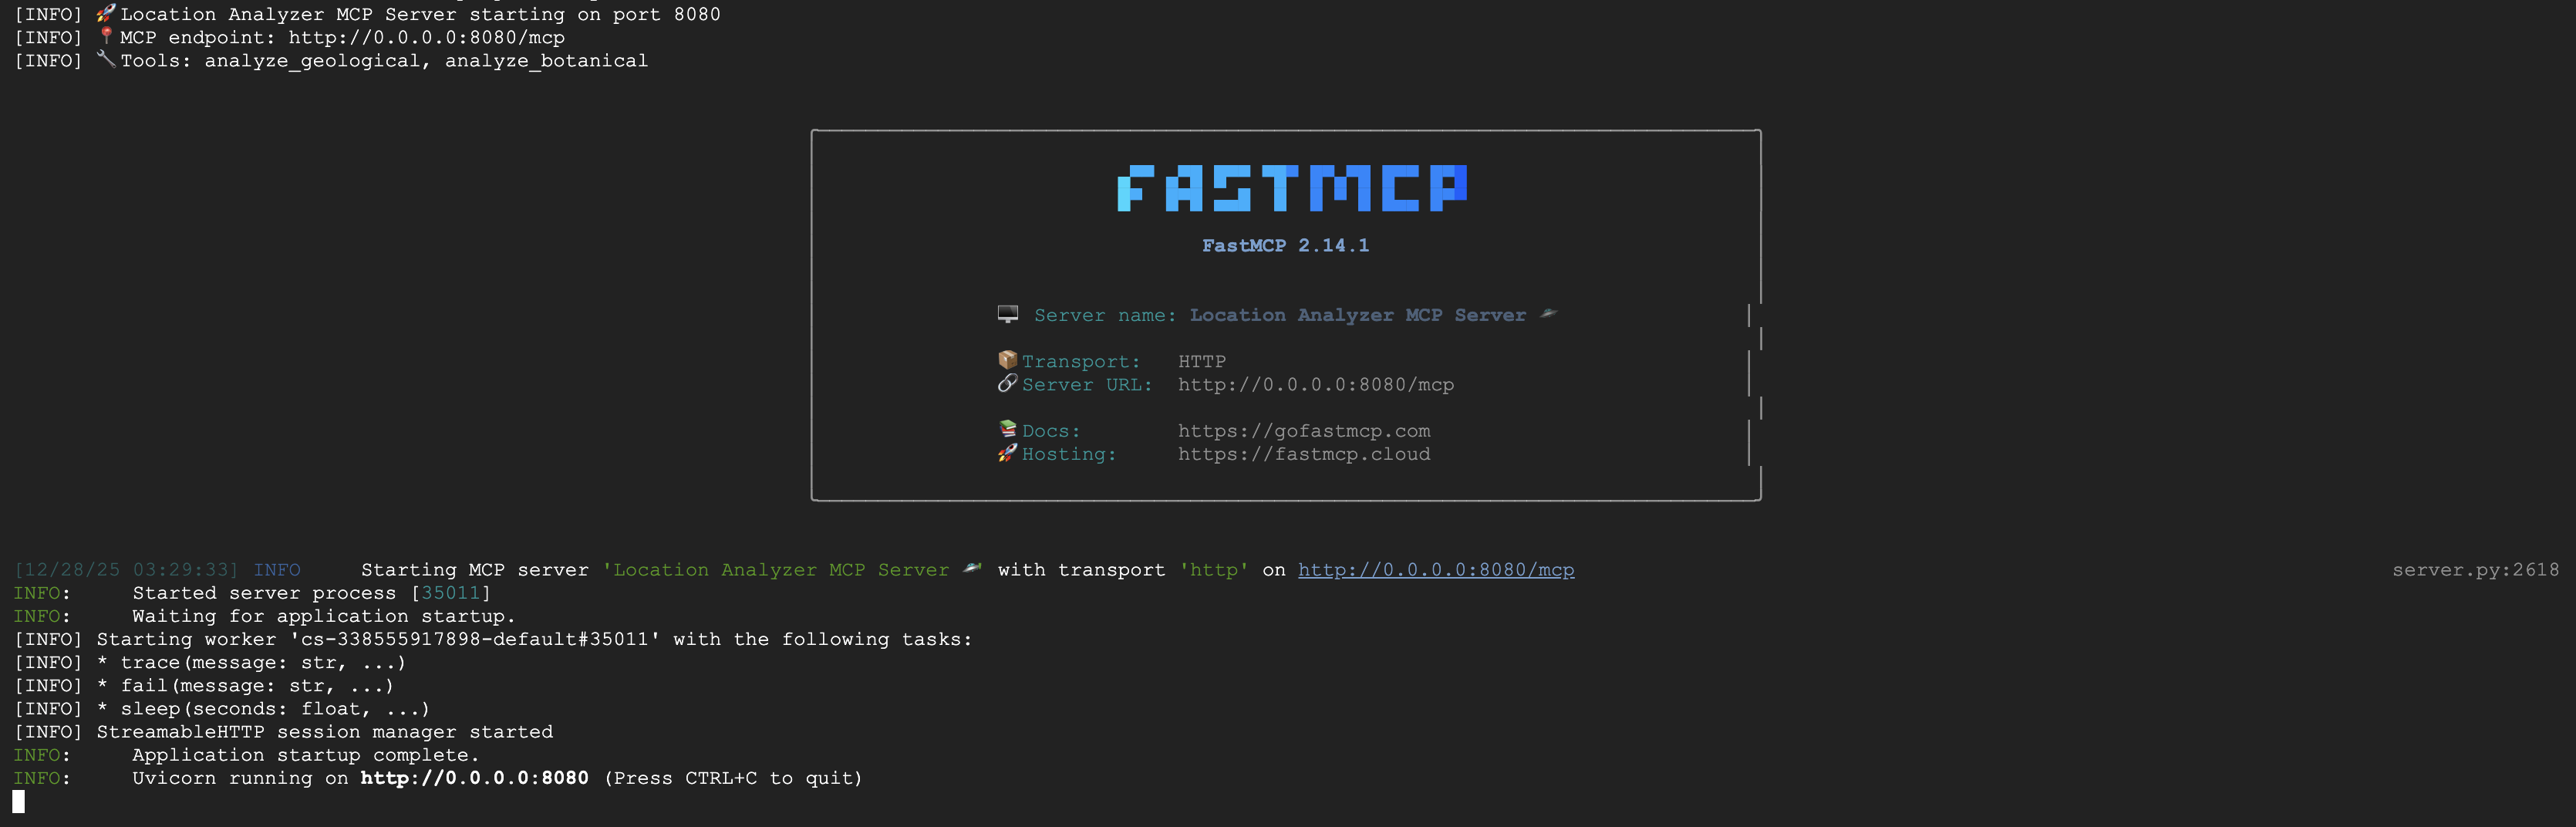
FastMCP 服务器现已通过 HTTP 传输运行。按 Ctrl+C 即可停止。
将 MCP 服务器部署到 Cloud Run
👉💻 部署:
cd $HOME/way-back-home/level_1/mcp-server
source $HOME/way-back-home/set_env.sh

gcloud builds submit . \
  --config=cloudbuild.yaml \
  --substitutions=_REGION="$REGION",_REPO_NAME="$REPO_NAME",_SERVICE_ACCOUNT="$SERVICE_ACCOUNT"
保存服务网址
👉💻 保存服务网址:
export MCP_SERVER_URL=$(gcloud run services describe location-analyzer \
  --region=$REGION --format='value(status.url)')
echo "MCP Server URL: $MCP_SERVER_URL"

# Add to set_env.sh for later use
echo "export MCP_SERVER_URL=\"$MCP_SERVER_URL\"" >> $HOME/way-back-home/set_env.sh
5. 构建专家代理
现在,您将创建三个专家代理,每个代理都只负责一项任务。
创建地质分析师智能体
👉✏️ 打开 agent/agents/geological_analyst.py 并找到 #REPLACE-GEOLOGICAL-AGENT。将其替换为:
from google.adk.agents import Agent
from agent.tools.mcp_tools import get_geological_tool

geological_analyst = Agent(
    name="GeologicalAnalyst",
    model="gemini-2.5-flash",
    description="Analyzes soil samples to classify planetary biome based on mineral composition.",
    instruction="""You are a geological specialist analyzing alien soil samples.

## YOUR EVIDENCE TO ANALYZE
Soil sample URL: {soil_url}

## YOUR TASK
1. Call the analyze_geological tool with the soil sample URL above
2. Examine the results for mineral composition and biome indicators
3. Report your findings clearly

The four possible biomes are:
- CRYO: Frozen, icy minerals, blue/white coloring
- VOLCANIC: Magma, obsidian, volcanic rock, red/orange coloring
- BIOLUMINESCENT: Glowing, phosphorescent minerals, purple/green
- FOSSILIZED: Amber, ancient preserved matter, golden/brown

## REPORTING FORMAT
Always report your classification clearly:
"GEOLOGICAL ANALYSIS: [BIOME] (confidence: X%)"

Include a brief description of what you observed in the sample.

## IMPORTANT
- You do NOT synthesize with other evidence
- You do NOT confirm locations
- Just analyze the soil sample and report what you find
- Call the tool immediately with the URL provided above""",
    tools=[get_geological_tool()]
)
创建植物分析师智能体
👉✏️ 打开 agent/agents/botanical_analyst.py 并找到 #REPLACE-BOTANICAL-AGENT。将其替换为:
from google.adk.agents import Agent
from agent.tools.mcp_tools import get_botanical_tool

botanical_analyst = Agent(
    name="BotanicalAnalyst",
    model="gemini-2.5-flash",
    description="Analyzes flora recordings to classify planetary biome based on plant life and ambient sounds.",
    instruction="""You are a botanical specialist analyzing alien flora recordings.

## YOUR EVIDENCE TO ANALYZE
Flora recording URL: {flora_url}

## YOUR TASK
1. Call the analyze_botanical tool with the flora recording URL above
2. Pay attention to BOTH visual AND audio elements in the recording
3. Report your findings clearly

The four possible biomes are:
- CRYO: Frost ferns, crystalline plants, cold wind sounds, crackling ice
- VOLCANIC: Fire blooms, heat-resistant flora, crackling/hissing sounds
- BIOLUMINESCENT: Glowing fungi, luminescent plants, ethereal hum, chiming
- FOSSILIZED: Petrified trees, ancient formations, deep resonant sounds

## REPORTING FORMAT
Always report your classification clearly:
"BOTANICAL ANALYSIS: [BIOME] (confidence: X%)"

Include descriptions of what you SAW and what you HEARD.

## IMPORTANT
- You do NOT synthesize with other evidence
- You do NOT confirm locations
- Just analyze the flora recording and report what you find
- Call the tool immediately with the URL provided above""",
    tools=[get_botanical_tool()]
)
创建天文分析师智能体
此代理使用一种不同的方法,即两种工具模式:
- 本地 FunctionTool:Gemini Vision 提取星级功能
- OneMCP BigQuery:通过 Google 的受管 MCP 查询星表
👉✏️ 打开 agent/agents/astronomical_analyst.py 并找到 #REPLACE-ASTRONOMICAL-AGENT。将其替换为:
from google.adk.agents import Agent
from agent.tools.star_tools import (
    extract_star_features_tool,
    get_bigquery_mcp_toolset,
)

# Get the BigQuery MCP toolset
bigquery_toolset = get_bigquery_mcp_toolset()

astronomical_analyst = Agent(
    name="AstronomicalAnalyst",
    model="gemini-2.5-flash",
    description="Analyzes star field images and queries the star catalog via OneMCP BigQuery.",
    instruction="""You are an astronomical specialist analyzing alien night skies.

## YOUR EVIDENCE TO ANALYZE
Star field URL: {stars_url}

## YOUR TWO TOOLS

### TOOL 1: extract_star_features (Local Gemini Vision)
Call this FIRST with the star field URL above.
Returns: "primary_star": "...", "nebula_type": "...", "stellar_color": "..."

### TOOL 2: BigQuery MCP (execute_query)
Call this SECOND with the results from Tool 1.
Use this exact SQL query (replace the placeholders with values from Step 1):

SELECT quadrant, biome, primary_star, nebula_type
FROM `{project_id}.way_back_home.star_catalog`
WHERE LOWER(primary_star) = LOWER('PRIMARY_STAR_FROM_STEP_1')
  AND LOWER(nebula_type) = LOWER('NEBULA_TYPE_FROM_STEP_1')
LIMIT 1

## YOUR WORKFLOW
1. Call extract_star_features with: {stars_url}
2. Get the primary_star and nebula_type from the result
3. Call execute_query with the SQL above (replacing placeholders)
4. Report the biome and quadrant from the query result

## BIOME REFERENCE
| Biome | Quadrant | Primary Star | Nebula Type |
|-------|----------|--------------|-------------|
| CRYO | NW | blue_giant | ice_blue |
| VOLCANIC | NE | red_dwarf_binary | fire |
| BIOLUMINESCENT | SW | green_pulsar | purple_magenta |
| FOSSILIZED | SE | yellow_sun | golden |

## REPORTING FORMAT
"ASTRONOMICAL ANALYSIS: [BIOME] in [QUADRANT] quadrant (confidence: X%)"

Include a description of the stellar features you observed.

## IMPORTANT
- You do NOT synthesize with other evidence
- You do NOT confirm locations
- Just analyze the stars and report what you find
- Start by calling extract_star_features with the URL above""",
    tools=[extract_star_features_tool, bigquery_toolset]
)
6. 构建 MCP 工具连接
现在,您将创建 Python 封装容器,以便 ADK 智能体与 MCP 服务器通信。这些封装容器负责处理连接生命周期,包括建立会话、调用工具和解析响应。
创建 MCP 工具连接(自定义 MCP)
这会连接到部署在 Cloud Run 上的自定义 FastMCP 服务器。
👉✏️ 打开 agent/tools/mcp_tools.py 并找到 #REPLACE-MCP-TOOL-CONNECTION。将其替换为:
import os
import logging

from google.adk.tools.mcp_tool.mcp_toolset import MCPToolset
from google.adk.tools.mcp_tool.mcp_session_manager import StreamableHTTPConnectionParams

logger = logging.getLogger(__name__)

MCP_SERVER_URL = os.environ.get("MCP_SERVER_URL")

_mcp_toolset = None

def get_mcp_toolset():
    """Get the MCPToolset connected to the location-analyzer server."""
    global _mcp_toolset

    if _mcp_toolset is not None:
        return _mcp_toolset

    if not MCP_SERVER_URL:
        raise ValueError(
            "MCP_SERVER_URL not set. Please run:\n"
            "  export MCP_SERVER_URL='https://location-analyzer-xxx.a.run.app'"
        )

    # FastMCP exposes MCP protocol at /mcp endpoint
    mcp_endpoint = f"{MCP_SERVER_URL}/mcp"
    logger.info(f"[MCP Tools] Connecting to: {mcp_endpoint}")

    _mcp_toolset = MCPToolset(
        connection_params=StreamableHTTPConnectionParams(
            url=mcp_endpoint,
            timeout=120,  # 2 minutes for Gemini analysis
        )
    )

    return _mcp_toolset

def get_geological_tool():
    """Get the geological analysis tool from the MCP server."""
    return get_mcp_toolset()

def get_botanical_tool():
    """Get the botanical analysis tool from the MCP server."""
    return get_mcp_toolset()
创建 Star 分析工具 (OneMCP BigQuery)
您之前加载到 BigQuery 中的星表包含每个生物群系的恒星模式。我们不编写 BigQuery 客户端代码来查询 OneMCP,而是连接到 Google 的 OneMCP BigQuery 服务器,该服务器将 BigQuery 的 execute_query 功能作为 MCP 工具公开,任何 ADK 代理都可以直接使用该工具。
👉✏️ 打开 agent/tools/star_tools.py 并找到 #REPLACE-STAR-TOOLS。将其替换为:
import os
import json
import logging

from google import genai
from google.genai import types as genai_types
from google.adk.tools import FunctionTool
from google.adk.tools.mcp_tool.mcp_toolset import MCPToolset
from google.adk.tools.mcp_tool.mcp_session_manager import StreamableHTTPConnectionParams
import google.auth
import google.auth.transport.requests

logger = logging.getLogger(__name__)

# =============================================================================
# CONFIGURATION - Environment variables only
# =============================================================================

PROJECT_ID = os.environ.get("GOOGLE_CLOUD_PROJECT", "")

if not PROJECT_ID:
    logger.warning("[Star Tools] GOOGLE_CLOUD_PROJECT not set")

# Initialize Gemini client for star feature extraction
genai_client = genai.Client(
    vertexai=True,
    project=PROJECT_ID or "placeholder",
    location=os.environ.get("GOOGLE_CLOUD_LOCATION", "us-central1")
)

logger.info(f"[Star Tools] Initialized for project: {PROJECT_ID}")

# =============================================================================
# OneMCP BigQuery Connection
# =============================================================================

BIGQUERY_MCP_URL = "https://bigquery.googleapis.com/mcp"

_bigquery_toolset = None

def get_bigquery_mcp_toolset():
    """
    Get the MCPToolset connected to Google's BigQuery MCP server.

    This uses OAuth 2.0 authentication with Application Default Credentials.
    The toolset provides access to BigQuery's pre-built MCP tools like:
    - execute_query: Run SQL queries
    - list_datasets: List available datasets
    - get_table_schema: Get table structure
   """
    global _bigquery_toolset

    if _bigquery_toolset is not None:
        return _bigquery_toolset

    logger.info("[Star Tools] Connecting to OneMCP BigQuery...")

    # Get OAuth credentials
    credentials, project_id = google.auth.default(
        scopes=["https://www.googleapis.com/auth/bigquery"]
    )

    # Refresh to get a valid token
    credentials.refresh(google.auth.transport.requests.Request())
    oauth_token = credentials.token

    # Configure headers for BigQuery MCP
    headers = {
        "Authorization": f"Bearer {oauth_token}",
        "x-goog-user-project": project_id or PROJECT_ID
    }

    # Create MCPToolset with StreamableHTTP connection
    _bigquery_toolset = MCPToolset(
        connection_params=StreamableHTTPConnectionParams(
            url=BIGQUERY_MCP_URL,
            headers=headers
        )
    )

    logger.info("[Star Tools] Connected to BigQuery MCP")
    return _bigquery_toolset


# =============================================================================
# Local FunctionTool: Star Feature Extraction
# =============================================================================
# This is a LOCAL tool that calls Gemini directly - demonstrating that
# you can mix local FunctionTools with MCP tools in the same agent.

STAR_EXTRACTION_PROMPT = """Analyze this alien night sky image and extract stellar features.

Identify:
1. PRIMARY STAR TYPE: blue_giant, red_dwarf, red_dwarf_binary, green_pulsar, yellow_sun, etc.
2. NEBULA TYPE: ice_blue, fire, purple_magenta, golden, etc.
3. STELLAR COLOR: blue_white, red_orange, green_purple, yellow_gold, etc.

Respond ONLY with valid JSON:
{"primary_star": "...", "nebula_type": "...", "stellar_color": "...", "description": "..."}
"""


def _parse_json_response(text: str) -> dict:
    """Parse JSON from Gemini response, handling markdown formatting."""
    cleaned = text.strip()
    if cleaned.startswith("```json"):
        cleaned = cleaned[7:]
    elif cleaned.startswith("```"):
        cleaned = cleaned[3:]
    if cleaned.endswith("```"):
        cleaned = cleaned[:-3]
    cleaned = cleaned.strip()

    try:
        return json.loads(cleaned)
    except json.JSONDecodeError as e:
        logger.error(f"Failed to parse JSON: {e}")
        return {"error": f"Failed to parse response: {str(e)}"}


def extract_star_features(image_url: str) -> dict:
    """
    Extract stellar features from a star field image using Gemini Vision.

    This is a LOCAL FunctionTool - we call Gemini directly, not through MCP.
    The agent will use this alongside the BigQuery MCP tools.
    """
    logger.info(f"[Stars] Extracting features from: {image_url}")

    response = genai_client.models.generate_content(
        model="gemini-2.5-flash",
        contents=[
            STAR_EXTRACTION_PROMPT,
            genai_types.Part.from_uri(file_uri=image_url, mime_type="image/png")
        ]
    )

    result = _parse_json_response(response.text)
    logger.info(f"[Stars] Extracted: primary_star={result.get('primary_star')}")
    return result


# Create the local FunctionTool
extract_star_features_tool = FunctionTool(extract_star_features)
7. 构建 Orchestrator
现在,创建并行工作人员和协调所有事宜的根编排器。
创建 Parallel Analysis Crew
为何要并行运行这三位专家?因为它们是完全独立的,地质分析师无需等待植物学分析师的结果,反之亦然。每位专家都会使用不同的工具分析不同的证据。ParallelAgent 会同时运行这三个任务,从而将总分析时间从大约 30 秒(依序)缩短到大约 10 秒(并行)。
👉✏️ 打开 agent/agent.py 并找到 #REPLACE-PARALLEL-CREW。将其替换为:
import os
import logging
import httpx

from google.adk.agents import Agent, ParallelAgent
from google.adk.agents.callback_context import CallbackContext

# Import specialist agents
from agent.agents.geological_analyst import geological_analyst
from agent.agents.botanical_analyst import botanical_analyst
from agent.agents.astronomical_analyst import astronomical_analyst

# Import confirmation tool
from agent.tools.confirm_tools import confirm_location_tool

logger = logging.getLogger(__name__)


# =============================================================================
# BEFORE AGENT CALLBACK - Fetches config and sets state
# =============================================================================

async def setup_participant_context(callback_context: CallbackContext) -> None:
    """
    Fetch participant configuration and populate state for all agents.

    This callback:
    1. Reads PARTICIPANT_ID and BACKEND_URL from environment
    2. Fetches participant data from the backend API
    3. Sets state values: soil_url, flora_url, stars_url, username, x, y, etc.
    4. Returns None to continue normal agent execution
    """
    participant_id = os.environ.get("PARTICIPANT_ID", "")
    backend_url = os.environ.get("BACKEND_URL", "https://api.waybackhome.dev")
    project_id = os.environ.get("GOOGLE_CLOUD_PROJECT", "")

    logger.info(f"[Callback] Setting up context for participant: {participant_id}")

    # Set project_id and backend_url in state immediately
    callback_context.state["project_id"] = project_id
    callback_context.state["backend_url"] = backend_url
    callback_context.state["participant_id"] = participant_id

    if not participant_id:
        logger.warning("[Callback] No PARTICIPANT_ID set - using placeholder values")
        callback_context.state["username"] = "Explorer"
        callback_context.state["x"] = 0
        callback_context.state["y"] = 0
        callback_context.state["soil_url"] = "Not available - set PARTICIPANT_ID"
        callback_context.state["flora_url"] = "Not available - set PARTICIPANT_ID"
        callback_context.state["stars_url"] = "Not available - set PARTICIPANT_ID"
        return None

    # Fetch participant data from backend API
    try:
        url = f"{backend_url}/participants/{participant_id}"
        logger.info(f"[Callback] Fetching from: {url}")

        async with httpx.AsyncClient(timeout=30.0) as client:
            response = await client.get(url)
            response.raise_for_status()
            data = response.json()

        # Extract evidence URLs
        evidence_urls = data.get("evidence_urls", {})

        # Set all state values for sub-agents to access
        callback_context.state["username"] = data.get("username", "Explorer")
        callback_context.state["x"] = data.get("x", 0)
        callback_context.state["y"] = data.get("y", 0)
        callback_context.state["soil_url"] = evidence_urls.get("soil", "Not available")
        callback_context.state["flora_url"] = evidence_urls.get("flora", "Not available")
        callback_context.state["stars_url"] = evidence_urls.get("stars", "Not available")

        logger.info(f"[Callback] State populated for {data.get('username')}")

    except Exception as e:
        logger.error(f"[Callback] Error fetching participant config: {e}")
        callback_context.state["username"] = "Explorer"
        callback_context.state["x"] = 0
        callback_context.state["y"] = 0
        callback_context.state["soil_url"] = f"Error: {e}"
        callback_context.state["flora_url"] = f"Error: {e}"
        callback_context.state["stars_url"] = f"Error: {e}"

    return None


# =============================================================================
# PARALLEL ANALYSIS CREW
# =============================================================================

evidence_analysis_crew = ParallelAgent(
    name="EvidenceAnalysisCrew",
    description="Runs geological, botanical, and astronomical analysis in parallel.",
    sub_agents=[geological_analyst, botanical_analyst, astronomical_analyst]
)
创建根编排器
现在,创建协调所有事务并使用回调的根代理。
👉✏️ 在同一文件 (agent/agent.py) 中,找到 #REPLACE-ROOT-ORCHESTRATOR。将其替换为:
root_agent = Agent(
    name="MissionAnalysisAI",
    model="gemini-2.5-flash",
    description="Coordinates crash site analysis to confirm explorer location.",
    instruction="""You are the Mission Analysis AI coordinating a rescue operation.

## Explorer Information
- Name: {username}
- Coordinates: ({x}, {y})

## Evidence URLs (automatically provided to specialists via state)
- Soil sample: {soil_url}
- Flora recording: {flora_url}
- Star field: {stars_url}

## Your Workflow

### STEP 1: DELEGATE TO ANALYSIS CREW
Tell the EvidenceAnalysisCrew to analyze all the evidence.
The evidence URLs are already available to the specialists.

### STEP 2: COLLECT RESULTS
Each specialist will report:
- "GEOLOGICAL ANALYSIS: [BIOME] (confidence: X%)"
- "BOTANICAL ANALYSIS: [BIOME] (confidence: X%)"
- "ASTRONOMICAL ANALYSIS: [BIOME] in [QUADRANT] quadrant (confidence: X%)"

### STEP 3: APPLY 2-OF-3 AGREEMENT RULE
- If 2 or 3 specialists agree → that's the answer
- If all 3 disagree → use judgment based on confidence

### STEP 4: CONFIRM LOCATION
Call confirm_location with the determined biome.

## Biome Reference
| Biome | Quadrant | Key Characteristics |
|-------|----------|---------------------|
| CRYO | NW | Frozen, blue, ice crystals |
| VOLCANIC | NE | Magma, red/orange, obsidian |
| BIOLUMINESCENT | SW | Glowing, purple/green |
| FOSSILIZED | SE | Amber, golden, ancient |

## Response Style
Be encouraging and narrative! Celebrate when the beacon activates!
""",
    sub_agents=[evidence_analysis_crew],
    tools=[confirm_location_tool],
    before_agent_callback=setup_participant_context
)
创建营业地点确认工具
这是最后一步,即使用该工具向 Mission Control 确认您的位置并激活信标。当根编排器确定您所在的生物群系(使用 2/3 协议规则)时,它会调用此工具将结果发送到后端 API。
此工具使用 ToolContext,这使其能够访问 before_agent_callback 之前设置的状态值(例如 participant_id 和 backend_url)。
👉✏️ 在 agent/tools/confirm_tools.py 中,找到 #REPLACE-CONFIRM-TOOL。将其替换为:
import os
import logging
import requests

from google.adk.tools import FunctionTool
from google.adk.tools.tool_context import ToolContext

logger = logging.getLogger(__name__)

BIOME_TO_QUADRANT = {
    "CRYO": "NW",
    "VOLCANIC": "NE",
    "BIOLUMINESCENT": "SW",
    "FOSSILIZED": "SE"
}


def _get_actual_biome(x: int, y: int) -> tuple[str, str]:
    """Determine actual biome and quadrant from coordinates."""
    if x < 50 and y >= 50:
        return "NW", "CRYO"
    elif x >= 50 and y >= 50:
        return "NE", "VOLCANIC"
    elif x < 50 and y < 50:
        return "SW", "BIOLUMINESCENT"
    else:
        return "SE", "FOSSILIZED"


def confirm_location(biome: str, tool_context: ToolContext) -> dict:
    """
    Confirm the explorer's location and activate the rescue beacon.

    Uses ToolContext to read state values set by before_agent_callback.
    """
    # Read from state (set by before_agent_callback)
    participant_id = tool_context.state.get("participant_id", "")
    x = tool_context.state.get("x", 0)
    y = tool_context.state.get("y", 0)
    backend_url = tool_context.state.get("backend_url", "https://api.waybackhome.dev")

    # Fallback to environment variables
    if not participant_id:
        participant_id = os.environ.get("PARTICIPANT_ID", "")
    if not backend_url:
        backend_url = os.environ.get("BACKEND_URL", "https://api.waybackhome.dev")

    if not participant_id:
        return {"success": False, "message": "❌ No participant ID available."}

    biome_upper = biome.upper().strip()

    if biome_upper not in BIOME_TO_QUADRANT:
        return {"success": False, "message": f"❌ Unknown biome: {biome}"}

    # Get actual biome from coordinates
    actual_quadrant, actual_biome = _get_actual_biome(x, y)

    if biome_upper != actual_biome:
        return {
            "success": False,
            "message": f"❌ Mismatch! Analysis: {biome_upper}, Actual: {actual_biome}"
        }

    quadrant = BIOME_TO_QUADRANT[biome_upper]

    try:
        response = requests.patch(
            f"{backend_url}/participants/{participant_id}/location",
            params={"x": x, "y": y},
            timeout=10
        )
        response.raise_for_status()

        return {
            "success": True,
            "message": f"🔦 BEACON ACTIVATED!\n\nLocation: {biome_upper} in {quadrant}\nCoordinates: ({x}, {y})"
        }

    except requests.exceptions.ConnectionError:
        return {
            "success": True,
            "message": f"🔦 BEACON ACTIVATED! (Local)\n\nLocation: {biome_upper} in {quadrant}",
            "simulated": True
        }

    except Exception as e:
        return {"success": False, "message": f"❌ Failed: {str(e)}"}


confirm_location_tool = FunctionTool(confirm_location)
8. 使用 ADK 网页界面进行测试
现在,我们来在本地测试完整的多智能体系统。
启动 ADK Web 服务器
👉💻 设置环境变量并启动 ADK Web 服务器:
cd $HOME/way-back-home/level_1
source $HOME/way-back-home/set_env.sh

# Verify environment is set
echo "PARTICIPANT_ID: $PARTICIPANT_ID"
echo "MCP Server: $MCP_SERVER_URL"

# Start ADK web server
uv run adk web
您应该会看到:
+-----------------------------------------------------------------------------+
| ADK Web Server started                                                      |
|                                                                             |
| For local testing, access at http://localhost:8000.                         |
+-----------------------------------------------------------------------------+

INFO:     Application startup complete.
INFO:     Uvicorn running on http://0.0.0.0:8000 (Press CTRL+C to quit)
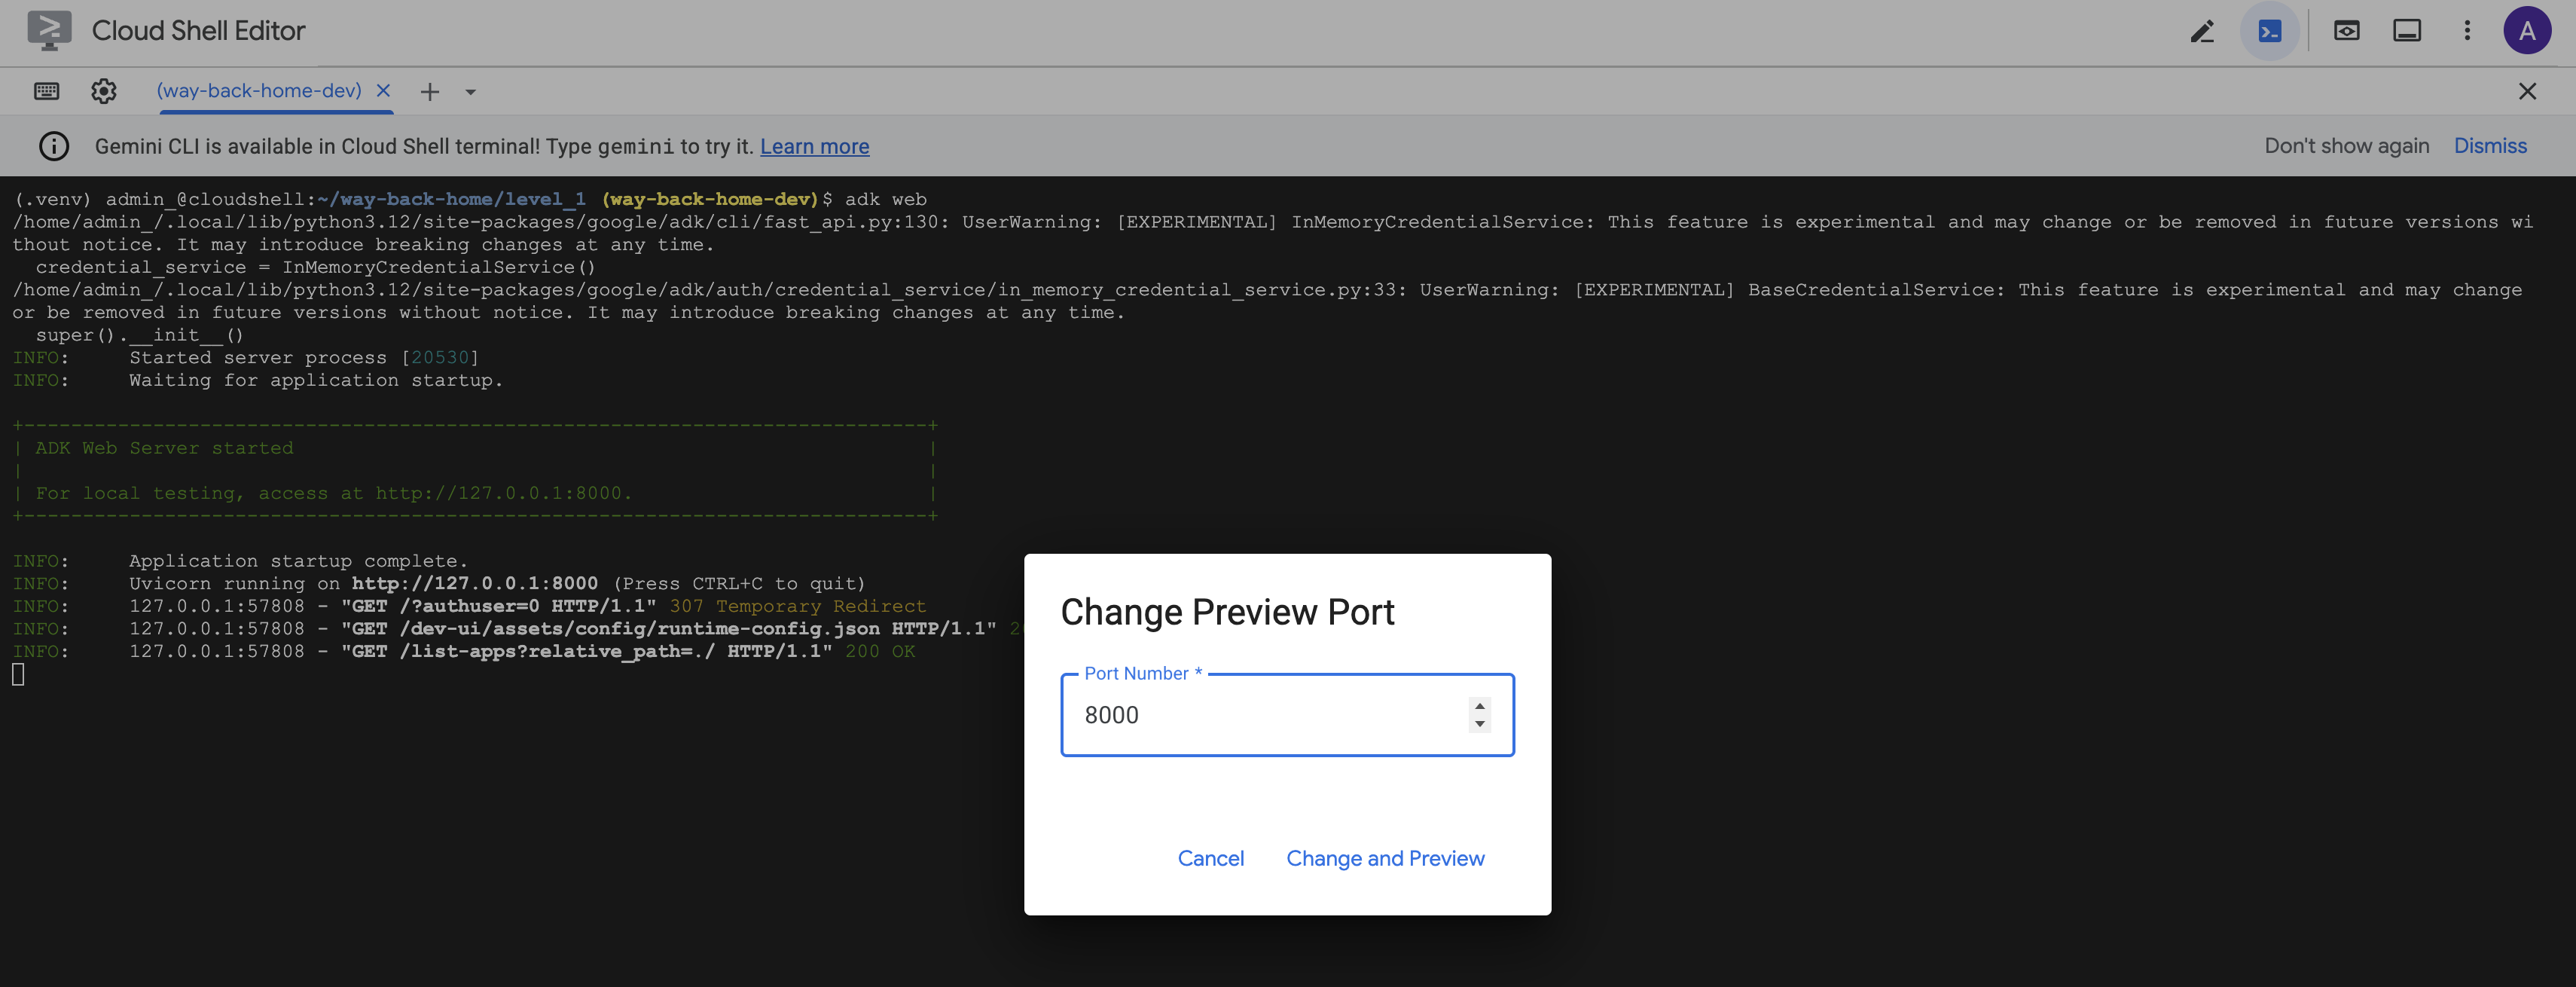
访问网页界面
👉 在 Cloud Shell 工具栏(右上角)中,点击网页预览图标,然后选择更改端口。
![]()
👉 将端口设置为 8000,然后点击“更改并预览”。
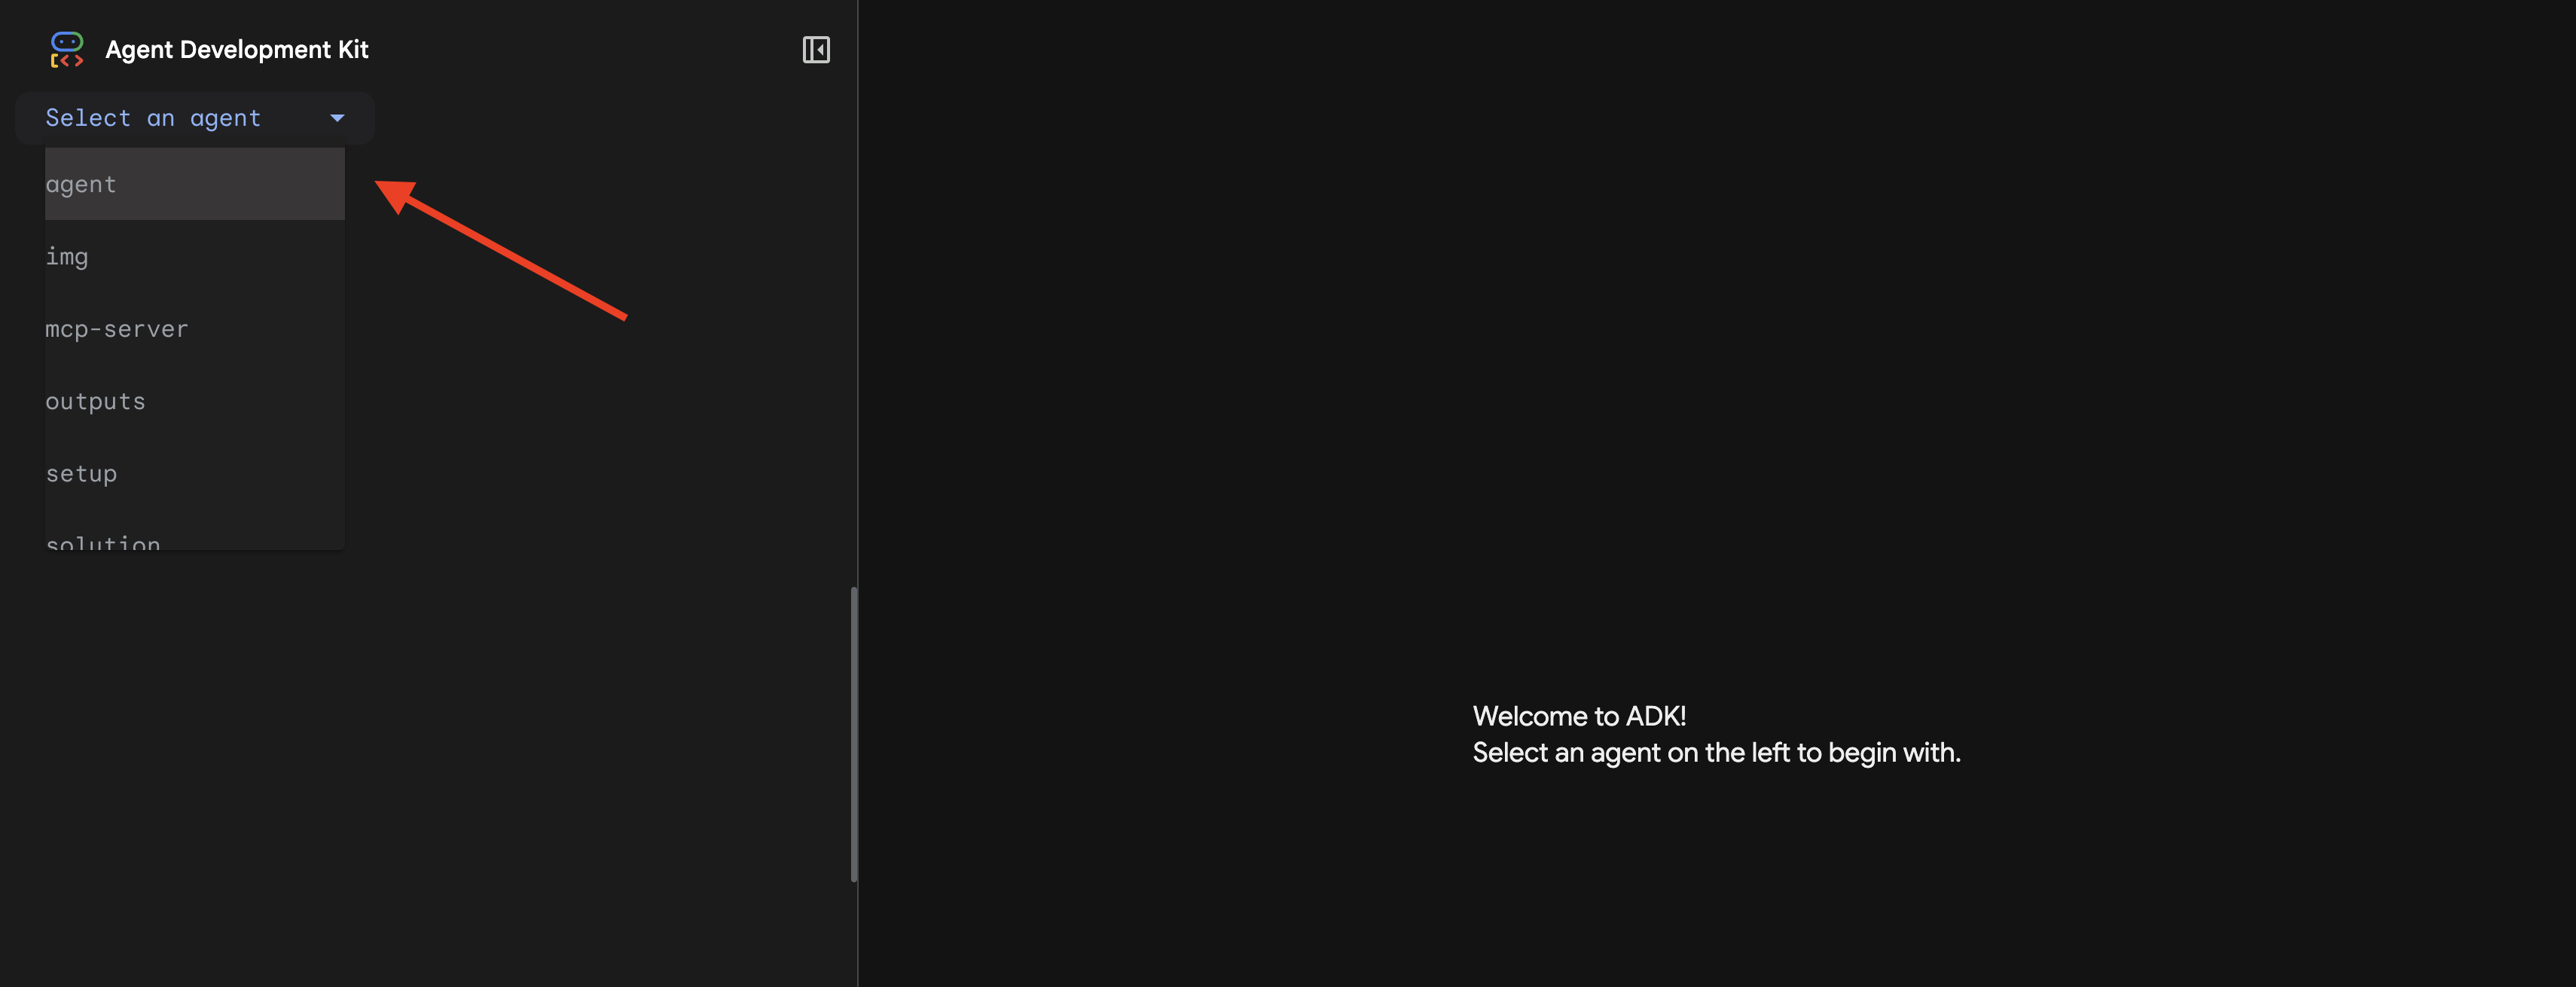
👉 系统会打开 ADK 网页界面。从下拉菜单中选择 agent。
运行分析
👉 在聊天界面中,输入:
Analyze the evidence from my crash site and confirm my location to activate the beacon.
观看多智能体系统的实际应用:
👉 当这三个代理完成分析后,输入:
Where am I?
系统如何处理您的请求:

右侧的轨迹面板会显示所有代理互动和工具调用。
👉 测试完成后,在终端中按 Ctrl+C 停止服务器。
9. 部署到 Cloud Run
现在,将多智能体系统部署到 Cloud Run,以实现 A2A 就绪状态。
部署代理
👉💻 使用 ADK CLI 部署到 Cloud Run:
cd $HOME/way-back-home/level_1
source $HOME/way-back-home/set_env.sh

uv run adk deploy cloud_run \
  --project=$GOOGLE_CLOUD_PROJECT \
  --region=$REGION \
  --service_name=mission-analysis-ai \
  --with_ui \
  --a2a \
  ./agent
当系统提示 Do you want to continue (Y/n) 和 Allow unauthenticated invocations to [mission-analysis-ai] (Y/n)? 时,请为两者都输入 Y,以部署您的 A2A 代理并允许公开访问。
您应该会看到类似如下所示的输出:
Building and deploying agent to Cloud Run...
✓ Container built successfully
✓ Deploying to Cloud Run...
✓ Service deployed: https://mission-analysis-ai-abc123-uc.a.run.app
在 Cloud Run 上设置环境变量
已部署的代理需要访问环境变量。更新服务:
👉💻 设置所需的环境变量:
gcloud run services update mission-analysis-ai \
  --region=$REGION \
  --labels=dev-tutorial=multi-modal \
  --set-env-vars="GOOGLE_CLOUD_PROJECT=$GOOGLE_CLOUD_PROJECT,GOOGLE_CLOUD_LOCATION=$REGION,MCP_SERVER_URL=$MCP_SERVER_URL,BACKEND_URL=$BACKEND_URL,PARTICIPANT_ID=$PARTICIPANT_ID,GOOGLE_GENAI_USE_VERTEXAI=True"
保存代理网址
👉💻 获取已部署的网址:
export AGENT_URL=$(gcloud run services describe mission-analysis-ai \
  --region=$REGION --format='value(status.url)')
echo "Agent URL: $AGENT_URL"

# Add to set_env.sh
echo "export LEVEL1_AGENT_URL=\"$AGENT_URL\"" >> $HOME/way-back-home/set_env.sh
验证部署
👉💻 通过在浏览器中打开网址(--with_ui 标志部署了 ADK 网页界面)来测试已部署的代理,或通过 curl 进行测试:
curl -X GET "$AGENT_URL/list-apps"
您应该会看到列出代理的响应。
10. 总结
🎉 第 1 级已完成!
您的救援信标现在正以最大强度广播。经过三角定位的信号穿透大气干扰,发出稳定的脉冲,仿佛在说:“我在这里。我活了下来。快来找我吧。”
但您并不是这个星球上的唯一居民。随着信标启动,您注意到地平线上其他灯光闪烁着亮起——其他幸存者、其他坠机地点、其他成功逃脱的探险者。
![]()
在第 2 级中,您将学习如何处理传入的 SOS 信号并与其他幸存者协调行动。救援不仅仅是被发现,更是找到彼此。
问题排查
“未设置 MCP_SERVER_网址”
export MCP_SERVER_URL=$(gcloud run services describe location-analyzer \
  --region=$REGION --format='value(status.url)')
“未设置 PARTICIPANT_ID”
source $HOME/way-back-home/set_env.sh
echo $PARTICIPANT_ID
“未找到 BigQuery 表”
uv run python setup/setup_star_catalog.py
“专家要求提供网址”:这意味着 {key} 模板无法正常运行。查找位置:
- 根代理上是否设置了
before_agent_callback? - 回调是否正确设置了状态值?
- 子代理是否使用
{soil_url}(而非 f 字符串)?
“三种分析结果均不一致”重新生成证据:uv run python generate_evidence.py
“代理在 adk web 中不响应”
- 检查端口 8000 是否正确
- 验证 MCP_SERVER_网址 和 PARTICIPANT_ID 是否已设置
- 检查终端中的错误消息
架构摘要
组件 | 类型 | 模式 | 用途 |
setup_participant_context | 回拨电话 | before_agent_callback | 提取配置,设置状态 |
GeologicalAnalyst | 代理 | {soil_url} 模板 | 土壤分类 |
BotanicalAnalyst | 代理 | {flora_url} 模板 | 植物群分类 |
AstronomicalAnalyst | 代理 | {stars_url}, {project_id} | 星形三角定位 |
confirm_location | 工具 | ToolContext 状态访问 | 激活信标 |
EvidenceAnalysisCrew | 并行智能体 | 分代理组成 | 同时运行多个专家 |
MissionAnalysisAI | 代理(根) | 编排器 + 回调 | 协调 + 综合 |
位置分析器 | FastMCP 服务器 | 自定义 MCP | 地质分析 + 植物学分析 |
bigquery.googleapis.com/mcp | OneMCP | 受管 MCP | BigQuery 访问权限 |
掌握的关键概念
✓ before_agent_callback:在代理运行之前提取配置
✓ {key} 状态模板:在代理指令中访问状态值
✓ ToolContext:在工具函数中访问状态值
✓ 状态共享:父状态通过 InvocationContext 自动提供给子代理
✓ 多代理架构:具有单一职责的专用代理
✓ ParallelAgent:并发执行独立任务
✓ 自定义 MCP 服务器:在 Cloud Run 上运行您自己的 MCP 服务器
✓ OneMCP BigQuery:用于数据库访问的受管理 MCP 模式
✓ 云部署:使用环境变量进行无状态部署
✓ A2A 准备:代理已准备好进行代理间通信
对于非游戏玩家:实际应用
“精确定位您的位置”表示并行专家分析与共识,即同时运行多个专业 AI 分析并汇总结果。
企业应用
使用场景 | 并行专家 | 合成规则 |
医疗诊断 | 图片分析师、症状分析师、实验室分析师 | 2/3 置信度阈值 |
欺诈检测 | 交易分析师、行为分析师、网络分析师 | 任何 1 个标志 = 评价 |
文档处理 | OCR 代理、分类代理、提取代理 | 所有审批人都必须同意 |
质量控制 | 视觉检查员、传感器分析师、规范检查员 | 2 天通行证(共 3 天) |
关键架构分析
- 配置的 before_agent_callback:在开始时提取一次配置,为所有子代理填充状态。子代理中没有配置文件读取。
- {key} 状态模板:声明式、简洁、惯用。没有 f 字符串、没有导入、没有 sys.path 操作。
- 共识机制:2/3 协议可稳健地处理模糊情况,而无需达成一致意见。
- 针对独立任务的 ParallelAgent:如果分析彼此不依赖,则并发运行它们以提高速度。
- 两种 MCP 模式:自定义(自行构建)与 OneMCP(Google 托管)。两者都使用 StreamableHTTP。
- 无状态部署:相同的代码可在本地和部署后运行。环境变量 + 后端 API = 容器中没有配置文件。
后续步骤
学习如何使用事件驱动型模式和更高级的代理协调来处理其他幸存者发出的遇险信号。