

1. Introduzione
Crea esperienze di AI agentica interattive e senza interruzioni con cui i tuoi clienti possono interagire direttamente dall'applicazione di messaggistica che hanno già utilizzato. Scopri come sviluppare ed eseguire il deployment di applicazioni intelligenti che funzionano senza problemi su interfacce web e canali di messaggistica moderni.
Cosa creerai
Integrazione tra un'applicazione completa di "Concierge del ristorante" basata su ADK e alimentata da Gemini che aiuta i clienti a sfogliare il menu di un ristorante e a prenotare, e l'app di chat Telegram. Puoi interagire con il bot Telegram e chiedere descrizioni in linguaggio naturale come "Voglio qualcosa di piccante e vegetariano". Il bot si connetterà quindi all'agente ADK che legge e scrive in un database Cloud SQL PostgreSQL interamente tramite MCP Toolbox for Databases, che gestisce tutto l'accesso al database, inclusa la generazione automatica di incorporamenti per la ricerca vettoriale. Nel frattempo, l'utente potrà vedere che il bot sta riconoscendo il messaggio e digitando ... typing per la risposta mentre attende la risposta dell'agente ADK.
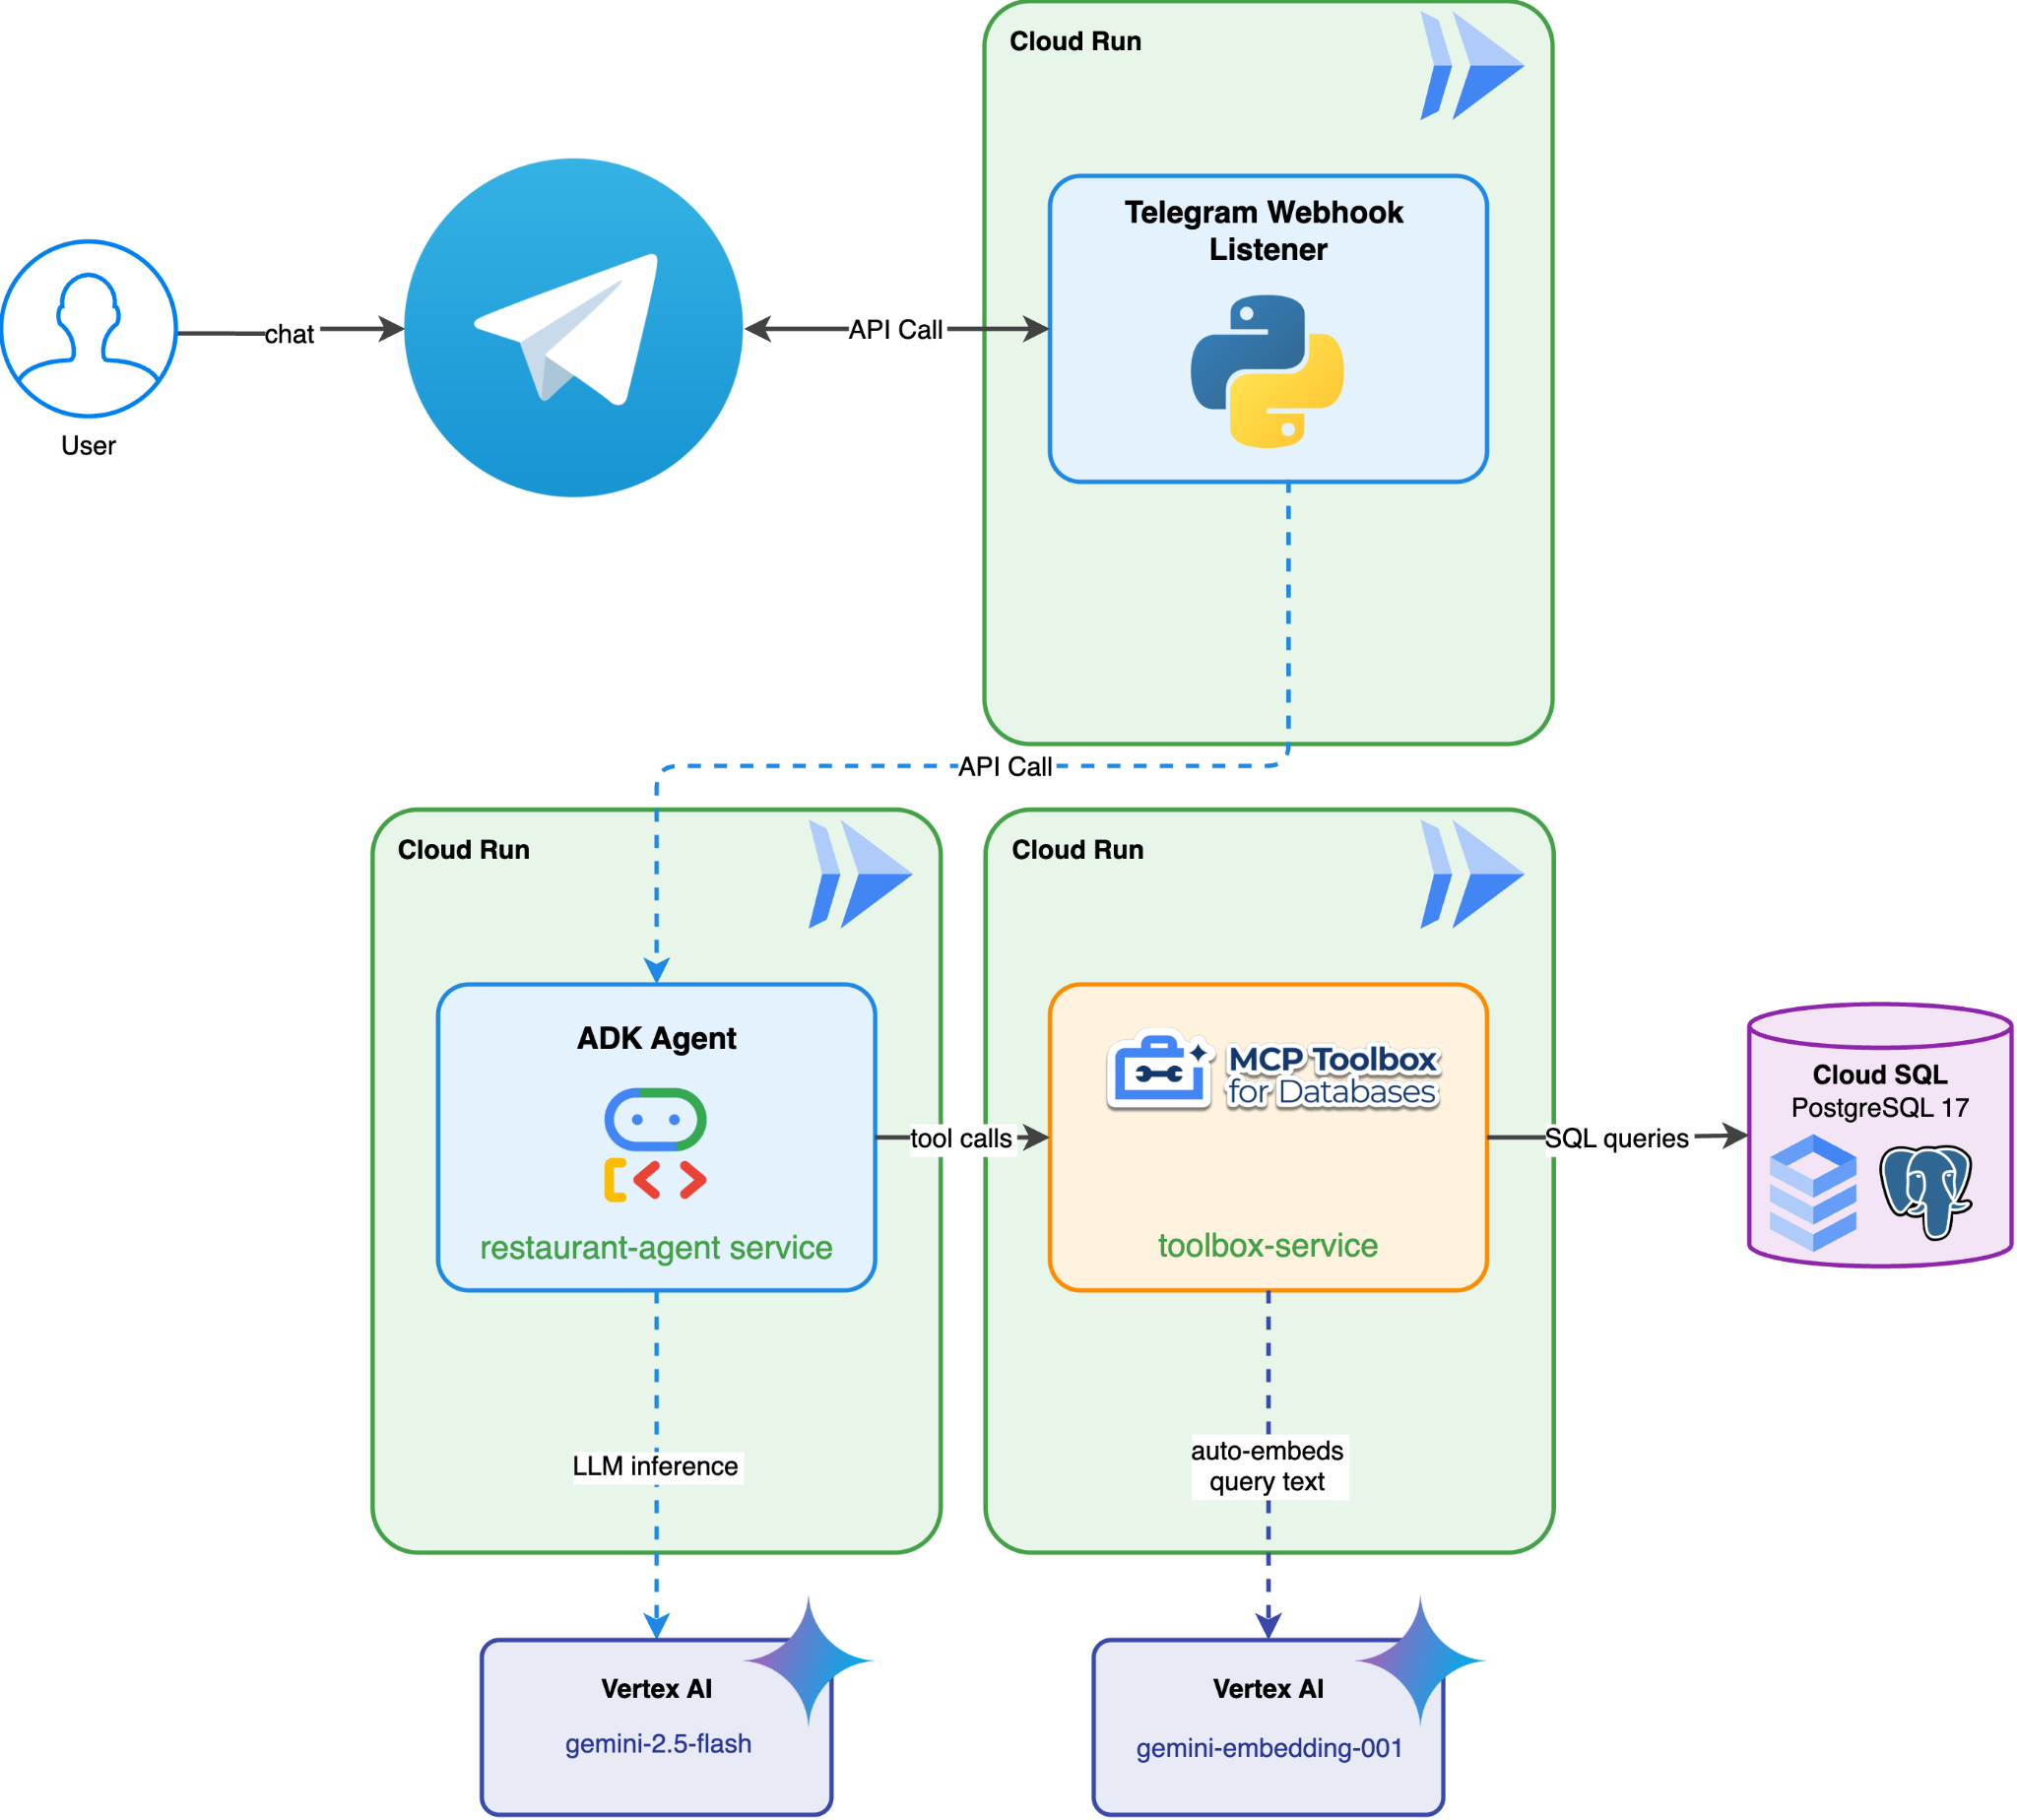
Cosa imparerai a fare
- Esegui il deployment di un'applicazione "Restaurant Concierge" basata su ADK e Gemini
- Configurare il bot di chat Telegram utilizzando BotFather
- Scrivere applicazioni Python per ascoltare il webhook del bot
- Invia l'azione di chat per fornire la notifica
... typingin Telegram sul messaggio dell'utente ed esegui il polling per inviare... typingperiodicamente durante l'attesa della risposta effettiva - Chiama l'endpoint Cloud Run
Restaurant Conciergeper elaborare la richiesta dell'utente - Gestisci il ritorno dall'agente ADK, invia il messaggio a Telegram e chiudi il buffer
- Esegui il deployment dell'applicazione Python in Cloud Run
- Interagire con il bot Telegram
Prerequisiti
- Un account Google Cloud con un account di fatturazione di prova
- Conoscenza di base di Python
- L'esperienza pregressa con il deployment di ADK e Cloud Run sarà utile
- Account Telegram
- (Consigliato) Completa i seguenti codelab :
- RAG agentica con ADK, MCP Toolbox e Cloud SQL: puoi continuare a creare il tuo agente da questo codelab. Il codice di avvio fornito è identico.
- (OPPURE) Agenti su larga scala: architettura multi-agente con protocollo A2A su runtime dell'agente e integrazione ADK: se vuoi arricchire ulteriormente l'agente utilizzando l'architettura multi-agente
2. Configurazione dell'ambiente - Proseguimento del codelab precedente
Le narrazioni che forniamo in questo codelab sono in realtà la continuazione di questo codelab prerequisito: RAG agentica con ADK, MCP Toolbox e Cloud SQL o Agenti su larga scala: architettura multi-agente con protocollo A2A su runtime dell'agente e integrazione ADK. Puoi continuare il lavoro del codelab precedente
Possiamo iniziare a creare nella directory di lavoro del codelab precedente ( la directory di lavoro deve essere build-agent-adk-toolbox-cloudsql o adk-a2a-agent-runtime-starter). Per evitare confusione, rinominiamo la directory con lo stesso nome che utilizziamo quando iniziamo da zero.
Se continui dal lab RAG agentica con ADK, MCP Toolbox e Cloud SQL :
mv ~/build-agent-adk-toolbox-cloudsql ~/build-agent-adk-telegram
Altrimenti, se continui dal lab Agenti su larga scala: architettura multi-agente con protocollo A2A su Agent Runtime e integrazione ADK
mv ~/adk-a2a-agent-runtime-starter ~/build-agent-adk-telegram
Quindi, cambia la directory di lavoro impostandola su questa directory.
cloudshell workspace ~/build-agent-adk-telegram && cd ~/build-agent-adk-telegram
source .env
Dopodiché, verifica che il tuo restaurant-agent sia già stato implementato e abbia un URL pubblico a cui accedere.
AGENT_URL=$(gcloud run services describe restaurant-agent \
    --region="$REGION" \
    --format='value(status.url)')

echo "      ✓ Agent service deployed"
echo "      Agent URL: $AGENT_URL"
echo ""
Se riesci ad accedere all'URL, puoi passare alla sezione successiva: Create Telegram Bot
3. Configurazione dell'ambiente: un nuovo inizio con il repository iniziale
Questo passaggio prepara l'ambiente Cloud Shell, configura il progetto Google Cloud e clona il repository iniziale.
Apri Cloud Shell
Apri Cloud Shell nel browser. Cloud Shell fornisce un ambiente preconfigurato con tutti gli strumenti necessari per questo codelab. Quando richiesto, fai clic su Autorizza.
Poi fai clic su "Visualizza" -> "Terminale" per aprire il terminale.L'interfaccia dovrebbe avere un aspetto simile a questo
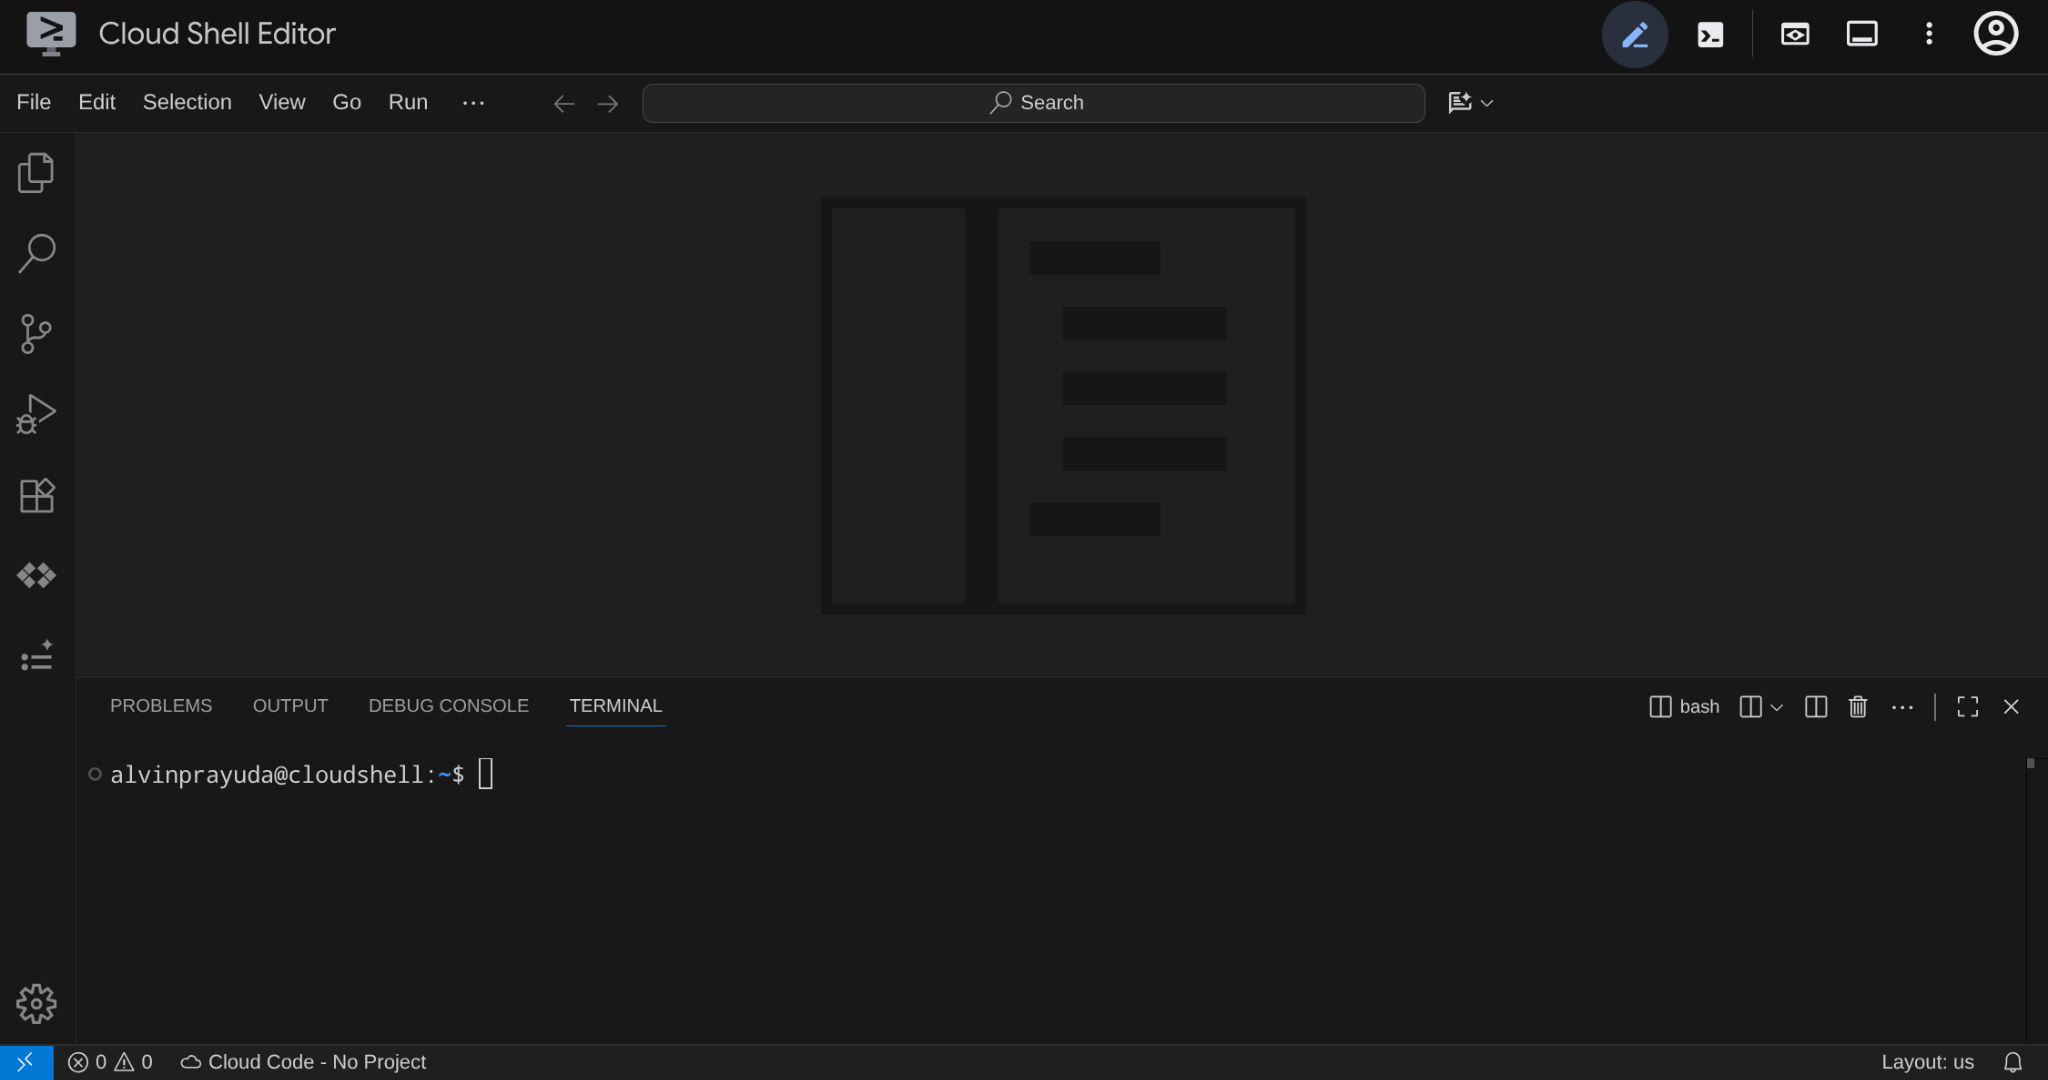
Questa sarà la nostra interfaccia principale, con l'IDE in alto e il terminale in basso.
Configurare la directory di lavoro
Clona il repository iniziale. Tutto il codice che scrivi in questo codelab si trova qui:
rm -rf ~/build-agent-adk-telegram
git clone https://github.com/alphinside/adk-a2a-agent-runtime-starter.git build-agent-adk-telegram
cloudshell workspace ~/build-agent-adk-telegram && cd ~/build-agent-adk-telegram
Crea il file .env dal modello fornito:
cp .env.example .env
Per semplificare la configurazione del progetto nel terminale, scarica questo script di configurazione del progetto nella tua directory di lavoro:
curl -sL https://raw.githubusercontent.com/alphinside/cloud-trial-project-setup/main/setup_verify_trial_project.sh -o setup_verify_trial_project.sh
Esegui lo script. Verifica il tuo account di fatturazione di prova, crea un nuovo progetto (o ne convalida uno esistente), salva l'ID progetto in un file .env nella directory corrente e imposta il progetto attivo in gcloud.
bash setup_verify_trial_project.sh && source .env
Lo script:
- Verificare di avere un account di fatturazione di prova attivo
- Controlla se esiste un progetto in
.env(se presente) - Crea un nuovo progetto o riutilizza quello esistente
- Collega l'account di fatturazione di prova al tuo progetto
- Salva l'ID progetto in
.env - Imposta il progetto come progetto
gcloudattivo
Verifica che il progetto sia impostato correttamente controllando il testo giallo accanto alla directory di lavoro nel prompt del terminale Cloud Shell. Dovrebbe essere visualizzato l'ID progetto.

Starter Infrastructure Setup
Innanzitutto, dovremo installare le dipendenze Python utilizzando uv, un gestore di pacchetti e progetti Python veloce scritto in Rust ( documentazione di uv). Questo codelab lo utilizza per la velocità e la semplicità di manutenzione del progetto Python
uv sync
Poi esegui lo script di configurazione completo, che crea l'istanza Cloud SQL, inserisce i dati e implementa il servizio Toolbox che fungerà da stato iniziale del nostro agente ristorante
bash scripts/full_setup.sh > logs/full_setup.log 2>&1 &
Questo ti permetterà di:
- Crea un'istanza Cloud SQL e inizializza il database (fase 1)
- Genera la configurazione dell'ambiente dell'agente e avvia il servizio Toolbox locale (fase 2)
- Esegui il deployment dei servizi Toolbox e Agent su Cloud Run (fase 3)
Al termine del deployment, puoi accedere all'interfaccia utente per sviluppatori dell'ADK nell'URL di Cloud Run
source .env
AGENT_URL=$(gcloud run services describe restaurant-agent \
    --region="$REGION" \
    --format='value(status.url)')

echo "      ✓ Agent service deployed"
echo "      Agent URL: $AGENT_URL"
echo ""
Apri l'interfaccia utente per sviluppatori dell'ADK, seleziona restaurant_agent e testa con query come l'esempio seguente:
What Italian dishes do you have?
Oppure,
I want something spicy and creamy
Ora, la prossima azione è come possiamo passare dall'interfaccia di sviluppo web al canale di messaggistica Telegram
4. Crea bot Telegram
Telegram è una piattaforma di messaggistica senza costi molto nota che viene ampiamente utilizzata per il coinvolgimento basato sulla community. Uno dei motivi è che offre molti modi per integrarsi facilmente, quindi le persone possono creare facilmente il proprio bot con una grande varietà di funzioni.
Nel nostro caso, utilizzeremo BotFather per creare il nostro bot per la prima volta. Tieni presente che, sebbene in questa sessione utilizzeremo Telegram, lo stesso metodo può essere utilizzato per WhatsApp o altre piattaforme di messaggistica a tua scelta.
Utilizzare BotFather per creare il tuo bot
Apri il browser web e visita https://telegram.me/BotFather per iniziare a creare il tuo bot Telegram.
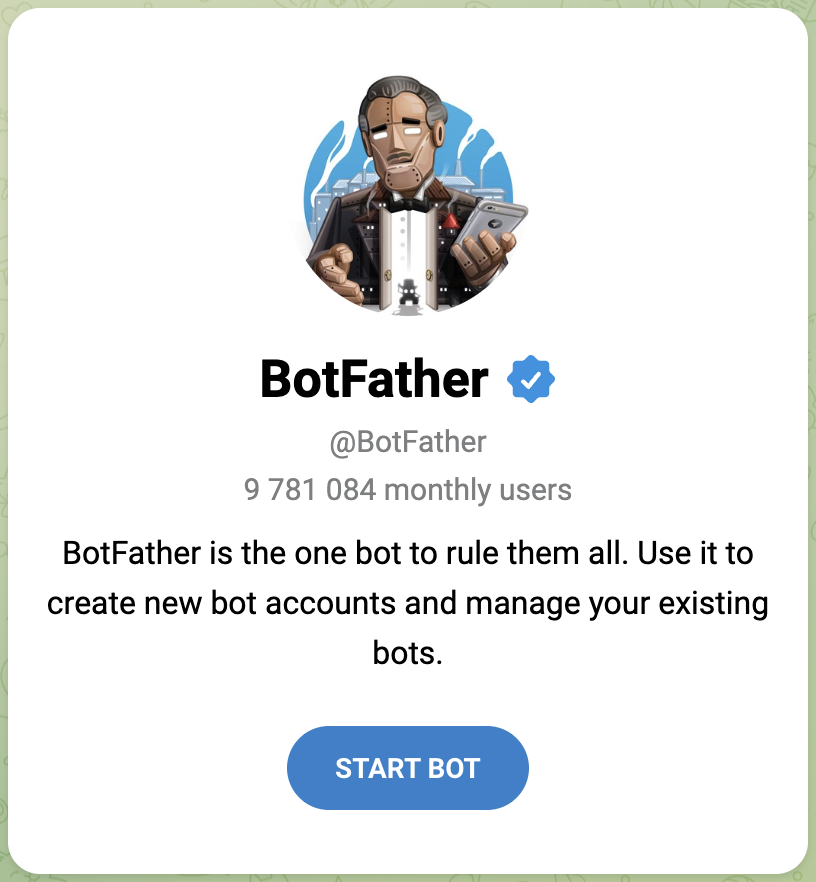
Iniziare a interagire con BotFather
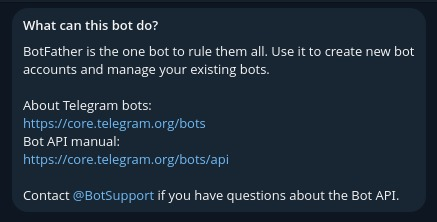
Inviare il comando /start
Per iniziare a utilizzare BotFather e creare il tuo primo bot, devi richiamare il messaggio /start per BotFather, che condividerà tutti i comandi che ha a disposizione per interagire ulteriormente.
/start
Avviare la creazione di bot con il comando /newbot
Creiamo il nostro nuovo bot inviando il comando /newbot a BotFather. Ti verrà chiesto di dare un nome al bot e poi di assegnargli username, che deve sempre terminare con bot . Ad esempio, TetrisBot o tetris_bot. Deve essere univoco.
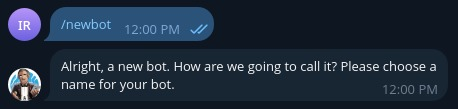
Una volta creato correttamente il bot, riceverai il seguente messaggio da BotFather
Done! Congratulations on your new bot. You will find it at t.me/AdkTelegramTest_bot. You can now add a description, about section and profile picture for your bot, see /help for a list of commands. By the way, when you've finished creating your cool bot, ping our Bot Support if you want a better username for it. Just make sure the bot is fully operational before you do this.

Use this token to access the HTTP API:
<YOUR_TELEGRAM_API_KEY>
Keep your token secure and store it safely, it can be used by anyone to control your bot.

For a description of the Bot API, see this page: https://core.telegram.org/bots/api
Prendi nota di YOUR_TELEGRAM_API_KEY, lo utilizzeremo nella sezione successiva.
5. Sviluppare l'applicazione webhook di Telegram
Prepariamo la directory di lavoro per iniziare a sviluppare l'applicazione webhook di Telegram
mkdir ~/build-agent-adk-telegram/telegram-integration
cd ~/build-agent-adk-telegram
Aggiungere le dipendenze richieste
Crea lo script requirements.txt con i seguenti contenuti per fornire le dipendenze adeguate per lo script del listener webhook di Telegram.
cloudshell edit ./telegram-integration/requirements.txt
Quindi aggiungi le seguenti dipendenze
python-telegram-bot[webhooks]
httpx
Crea lo script per il listener webhook di Telegram
Una volta installata la dipendenza. Ora possiamo creare uno script Python main.py per l'applicazione di integrazione
cloudshell edit ~/build-agent-adk-telegram/telegram-integration/main.py
Quindi, copia il seguente codice
# ./telegram-integration/main.py

import asyncio
import os
import sys
from telegram import Update
from telegram.ext import Application, CommandHandler, MessageHandler, filters, CallbackContext
from telegram.constants import ChatAction
import httpx

# Read token from environment variable
TOKEN = os.environ.get("TELEGRAM_BOT_TOKEN")
ADK_SERVER_URL = os.environ.get("ADK_SERVER_URL", "http://localhost:8000")
ADK_APP_NAME = os.environ.get("ADK_APP_NAME", "restaurant_agent")

# Parse base URL out of ADK_SERVER_URL
BASE_URL = ADK_SERVER_URL.rstrip('/')
if BASE_URL.endswith('/run'):
    BASE_URL = BASE_URL[:-4]
elif BASE_URL.endswith('/query'):
    BASE_URL = BASE_URL[:-6]

if not TOKEN:
    print("Error: TELEGRAM_BOT_TOKEN environment variable not set.")
    print("Please set it before running the application.")
    sys.exit(1)

async def start(update: Update, context: CallbackContext) -> None:
    """Send a message when the command /start is issued."""
    await update.message.reply_text('Hi! I am your ADK Integration Bot. Send me a message and I will forward it to the ADK server.')

async def send_typing_loop(chat_id: int, bot, stop_event: asyncio.Event):
    """Send typing action periodically until the stop event is set."""
    while not stop_event.is_set():
        try:
            await bot.send_chat_action(chat_id=chat_id, action=ChatAction.TYPING)
            # The research suggested repeating every 4 seconds
            await asyncio.sleep(4)
        except Exception as e:
            print(f"Error sending chat action: {e}")
            await asyncio.sleep(1) # Wait a bit before retrying if error

async def handle_message(update: Update, context: CallbackContext) -> None:
    """Handle incoming user messages."""
    user_message = update.message.text
    chat_id = update.message.chat_id
    raw_user_id = str(update.message.from_user.id)

    # Derive unique user_id and session_id for this user
    user_id = f"tg_{raw_user_id}"
    session_id = f"tg_sess_{raw_user_id}"

    print(f"Received message from {user_id}: {user_message}")

    # Create a stop event for the typing loop
    stop_event = asyncio.Event()

    # Start the typing loop as a background task
    typing_task = asyncio.create_task(send_typing_loop(chat_id, context.bot, stop_event))

    try:
        async with httpx.AsyncClient() as client:
            # 1. Check if the session exists
            session_url = f"{BASE_URL}/apps/{ADK_APP_NAME}/users/{user_id}/sessions/{session_id}"
            session_check = await client.get(session_url, timeout=10.0)

            if session_check.status_code == 404:
                # 2. If session doesn't exist, create it
                print(f"Session {session_id} not found. Creating session...")
                session_create = await client.post(session_url, json={}, timeout=10.0)
                if session_create.status_code != 200:
                    raise Exception(f"Failed to create session: {session_create.status_code} {session_create.text}")
            elif session_check.status_code != 200:
                raise Exception(f"Error checking session: {session_check.status_code} {session_check.text}")

            # 3. Run the ADK agent
            run_url = f"{BASE_URL}/run"
            payload = {
                "appName": ADK_APP_NAME,
                "userId": user_id,
                "sessionId": session_id,
                "newMessage": {
                    "role": "user",
                    "parts": [{"text": user_message}]
                }
            }
            response = await client.post(run_url, json=payload, timeout=60.0)

        if response.status_code == 200:
            events = response.json()
            if isinstance(events, list) and len(events) > 0:
                # The last event contains the final text response
                last_event = events[-1]
                content = last_event.get("content", {})
                parts = content.get("parts", [])
                if parts and "text" in parts[0]:
                    reply_text = parts[0]["text"]
                else:
                    reply_text = "ADK agent returned an empty or non-text response."
            else:
                reply_text = "No events returned from ADK agent."
        else:
            reply_text = f"Error communicating with ADK server (Status: {response.status_code})."

    except Exception as e:
        reply_text = f"Failed to connect to ADK server: {e}"
    finally:
        # Stop the typing loop
        stop_event.set()
        await typing_task

    # Send the final response back to the user
    await update.message.reply_text(reply_text)

def main() -> None:
    """Start the bot."""
    # Create the Application and pass it your bot's token.
    application = Application.builder().token(TOKEN).build()

    # on different commands - answer in Telegram
    application.add_handler(CommandHandler("start", start))

    # on non command i.e message - echo the message on Telegram
    application.add_handler(MessageHandler(filters.TEXT & ~filters.COMMAND, handle_message))

    # Check if running in webhook mode (e.g., on Cloud Run)
    port = os.environ.get("PORT")
    service_url = os.environ.get("SERVICE_URL")

    if port and service_url:
        if not service_url.startswith("http"):
            service_url = f"https://{service_url}"

        print(f"Starting bot in WEBHOOK mode on port {port} with url {service_url}")

        application.run_webhook(
            listen="0.0.0.0",
            port=int(port),
            url_path=TOKEN,
            webhook_url=f"{service_url}/{TOKEN}",
            allowed_updates=Update.ALL_TYPES
        )
    else:
        print("Starting bot in POLLING mode")
        # Run the bot until the user presses Ctrl-C
        application.run_polling(allowed_updates=Update.ALL_TYPES)


if __name__ == "__main__":
    main()
Informazioni sul codice di integrazione del bot Telegram
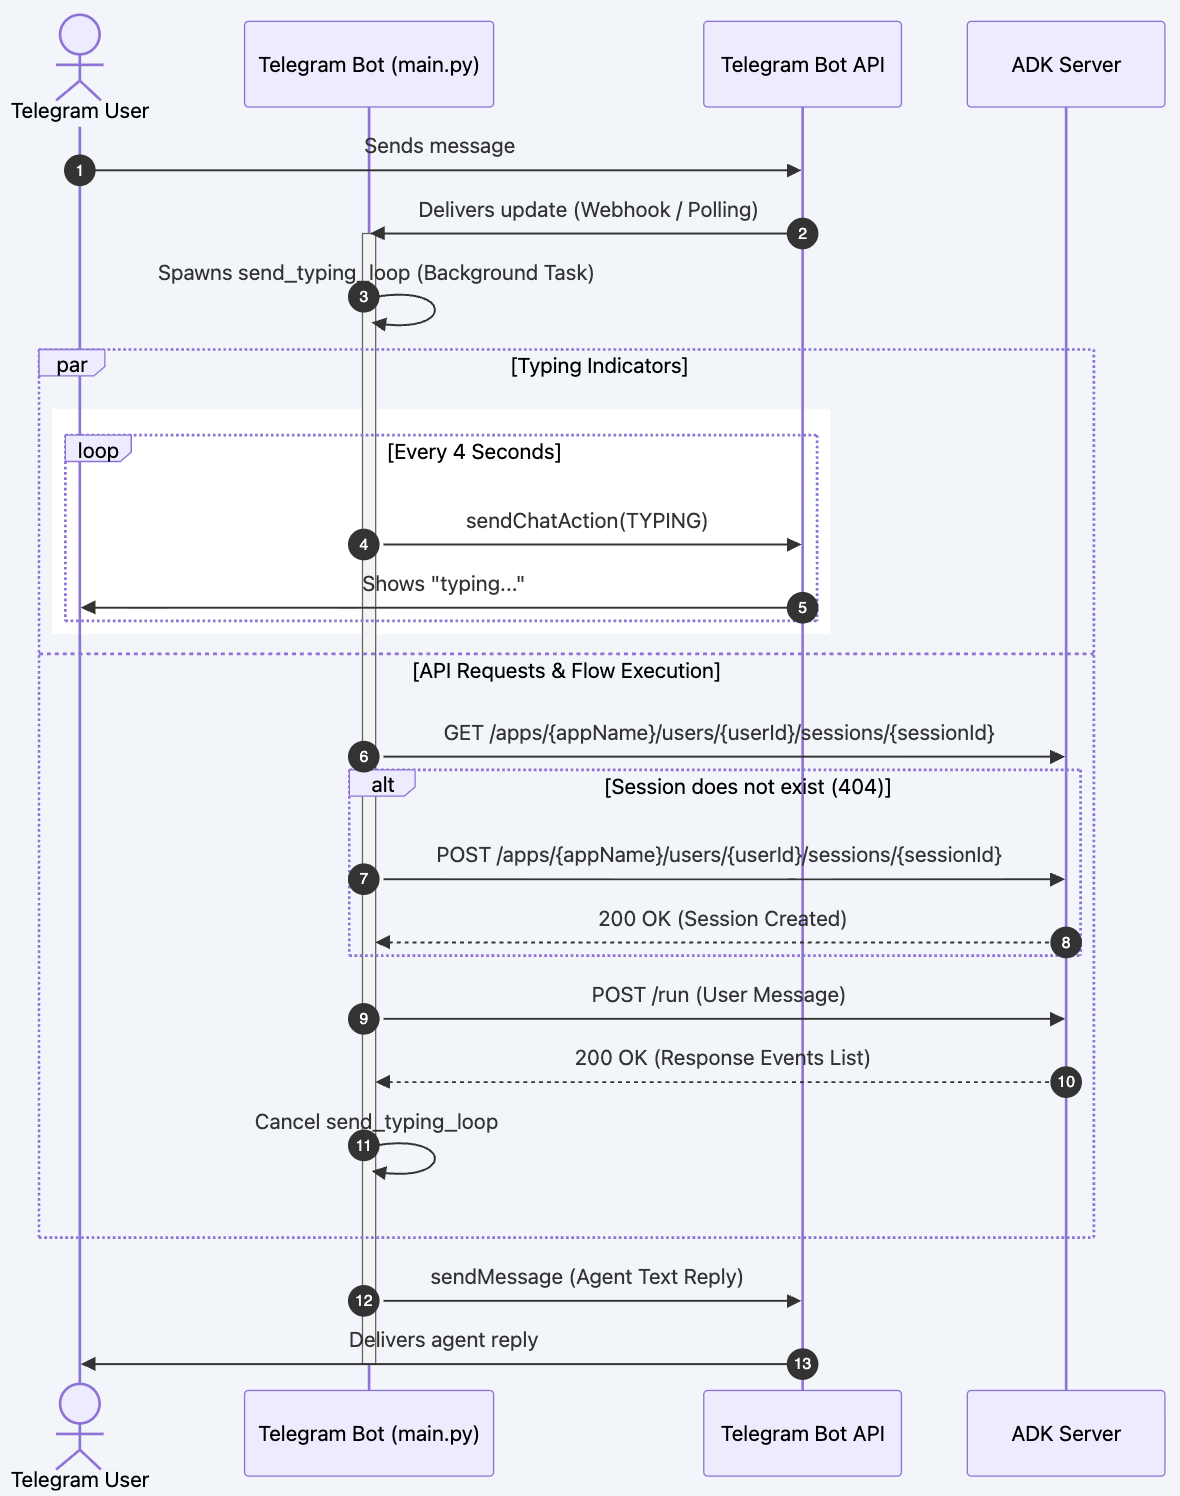
Quando un utente invia un messaggio, la seguente pipeline viene eseguita in handle_message()
Passaggio 1: derivazione di identità e sessione
Il bot mappa l'ID utente Telegram a identificatori ADK unici per mantenere distinte le sessioni utente:
user_id = f"tg_{raw_user_id}"
session_id = f"tg_sess_{raw_user_id}"
Passaggio 2: stato "Digitazione" asincrono (righe 53-58)
Per garantire un'esperienza utente altamente reattiva mentre l'agente ADK elabora il prompt (operazione che può richiedere diversi secondi), il bot avvia un ciclo asincrono in background:
asyncio.Eventviene istanziato comestop_event.asyncio.create_taskgenerasend_typing_loop(...)in background.- Il ciclo invia un'azione
ChatAction.TYPINGa Telegram ogni 4 secondi finché non viene impostatostop_event.
Passaggio 3: verifica e creazione della sessione ADK (righe 61-72)
Prima di eseguire l'agente, il bot controlla se esiste già una sessione:
- Invia una richiesta
GETa/apps/{appName}/users/{userId}/sessions/{sessionId}. - Se la risposta è
404 Not Found, la sessione viene creata tramite una richiestaPOSTallo stesso URL con un corpo JSON vuoto. - Se viene restituito uno stato diverso da
200o404, viene generata un'eccezione.
Passaggio 4: invio della richiesta all'agente (righe 74-85)
Il payload del messaggio viene inoltrato all'endpoint /run dell'ADK:
- Endpoint:
POST /run - Il timeout della richiesta è impostato su
60.0secondi per consentire ragionamenti complessi o latenza upstream. - Struttura del payload:
{
  "appName": "restaurant_agent",
  "userId": "tg_<user_id>",
  "sessionId": "tg_sess_<user_id>",
  "newMessage": {
    "role": "user",
    "parts": [{"text": "<user_message>"}]
  }
}
Passaggio 5: analisi della risposta (righe 87-101)
Il server ADK restituisce un elenco di eventi di messaggi. Il bot esamina l'array restituito:
- Recupera l'ultimo evento nell'elenco (
events[-1]). - Va ai contenuti di testo tramite
event["content"]["parts"][0]["text"]. - Se non vengono restituiti eventi o se manca la struttura del testo, viene impostato un testo segnaposto descrittivo.
Passaggio 6: smontaggio e invio della risposta (righe 103-111)
- Nel blocco
finally,stop_eventè impostato, interrompendo il ciclo dell'azione di digitazione. - Il bot attende il completamento di
typing_taskper garantire risorse pulite. - Infine, il bot risponde alla chat di Telegram con il testo della risposta analizzata.
6. Esegui il deployment dell'applicazione webhook di Telegram in Cloud Run
Successivamente, eseguiremo il deployment del listener webhook di Telegram in Cloud Run, in modo che il nostro bot possa comunicare con esso
Crea il Dockerfile
Innanzitutto, dobbiamo creare il Dockerfile.
cloudshell edit ~/build-agent-adk-telegram/telegram-integration/Dockerfile
Quindi, copia il seguente codice
# Use an official Python runtime as a parent image
FROM python:3.11-slim

# Prevent Python from writing pyc files to disc and buffering stdout/stderr
ENV PYTHONDONTWRITEBYTECODE=1
ENV PYTHONUNBUFFERED=1

# Set the working directory in the container
WORKDIR /app

# Install system dependencies if needed
RUN apt-get update && apt-get install -y --no-install-recommends \
    build-essential \
    && rm -rf /var/lib/apt/lists/*

# Copy the dependencies file to the working directory
COPY requirements.txt .

# Install any needed packages specified in requirements.txt
RUN pip install --no-cache-dir -r requirements.txt

# Copy the rest of the application code
COPY main.py .

# Expose the port that Cloud Run will provide via environment variable
EXPOSE 8080

# Run main.py when the container launches
CMD ["python", "main.py"]
Il servizio è containerizzato utilizzando python:3.11-slim per mantenere ridotto l'ingombro dell'immagine:
- Installa le dipendenze da
requirements.txt(python-telegram-bot[webhooks]ehttpx). - Espone la porta standard
8080. - Lanciato il giorno
python main.py.
Prepara le variabili di ambiente
Dopodiché, controlliamo di nuovo se l'agente è stato implementato correttamente.
AGENT_URL=$(gcloud run services describe restaurant-agent \
    --region="$REGION" \
    --format='value(status.url)')

echo "      ✓ Agent service deployed"
echo "      Agent URL: $AGENT_URL"
echo ""
Successivamente, inseriamo il TELEGRAM_BOT_TOKEN che abbiamo ottenuto in precedenza in .env
echo "TELEGRAM_BOT_TOKEN=YOUR_TELEGRAM_API_KEY" >> .env
Poi, compiliamo i dati .env con altri valori di cui abbiamo bisogno.
echo "ADK_SERVER_URL=$AGENT_URL" >> .env
echo "ADK_APP_NAME=restaurant_agent" >> .env
echo "SERVICE_NAME=telegram-integration" >> .env
source .env
Crea script di deployment
Creiamo uno script di deployment che fornisca controlli completi ed esegui il deployment dell'app su Cloud Run
cloudshell edit ~/build-agent-adk-telegram/telegram-integration/deploy.sh
e copia il seguente codice nel file.
#!/usr/bin/env bash
# ./telegram-integration/deploy.sh

# Exit immediately if a command exits with a non-zero status
set -euo pipefail

# Color codes for neat terminal output
RED='\033[0;31m'
GREEN='\033[0;32m'
YELLOW='\033[1;33m'
BLUE='\033[0;34m'
NC='\033[0;37m' # No Color
# Load environment variables from .env if it exists
if [ -f .env ]; then
    echo -e "${GREEN}✔ Loading environment variables from .env...${NC}"
    export $(grep -v '^#' .env | xargs)
fi

echo -e "${BLUE}====================================================${NC}"
echo -e "${BLUE}   Google Cloud Run Deployment: Telegram Bot        ${NC}"
echo -e "${BLUE}====================================================${NC}"

# 1. Check for gcloud CLI
if ! command -v gcloud &> /dev/null; then
    echo -e "${RED}Error: 'gcloud' CLI is not installed.${NC}"
    echo "Please install the Google Cloud SDK and try again."
    echo "See: https://cloud.google.com/sdk/docs/install"
    exit 1
fi

# 2. Check active gcloud account/auth
ACTIVE_ACCOUNT=$(gcloud auth list --filter=status:ACTIVE --format="value(account)" 2>/dev/null || true)
if [ -z "$ACTIVE_ACCOUNT" ]; then
    echo -e "${RED}Error: No active Google Cloud account found.${NC}"
    echo "Please run: gcloud auth login"
    exit 1
fi

# 3. Detect / Prompt for GCP Project
DEFAULT_PROJECT=${GCP_PROJECT_ID:-$(gcloud config get-value project 2>/dev/null || true)}
if [ -n "${DEFAULT_PROJECT}" ]; then
    echo -e "${GREEN}✔ Using GCP Project: $DEFAULT_PROJECT${NC}"
    GCP_PROJECT="$DEFAULT_PROJECT"
else
    echo -n "Enter GCP Project ID: "
    read -r GCP_PROJECT
fi

if [ -z "$GCP_PROJECT" ]; then
    echo -e "${RED}Error: GCP Project ID is required.${NC}"
    exit 1
fi

# Set active project
gcloud config set project "$GCP_PROJECT" &> /dev/null

# 4. Configure Service Parameters
DEFAULT_SERVICE=${SERVICE_NAME:-"telegram-integration"}
if [ -n "${SERVICE_NAME:-}" ]; then
    echo -e "${GREEN}✔ Using Cloud Run Service Name: $SERVICE_NAME${NC}"
else
    echo -n "Enter Cloud Run Service Name [Default: $DEFAULT_SERVICE]: "
    read -r SERVICE_NAME
    SERVICE_NAME=${SERVICE_NAME:-$DEFAULT_SERVICE}
fi

DEFAULT_REGION=${REGION:-"us-central1"}
if [ -n "${REGION:-}" ]; then
    echo -e "${GREEN}✔ Using Cloud Run Region: $REGION${NC}"
else
    echo -n "Enter Cloud Run Region [Default: $DEFAULT_REGION]: "
    read -r REGION
    REGION=${REGION:-$DEFAULT_REGION}
fi

DEFAULT_ADK_APP=${ADK_APP_NAME:-"restaurant_agent"}
if [ -n "${ADK_APP_NAME:-}" ]; then
    echo -e "${GREEN}✔ Using ADK App Name: $ADK_APP_NAME${NC}"
    ADK_APP="$ADK_APP_NAME"
else
    echo -n "Enter ADK App Name [Default: $DEFAULT_ADK_APP]: "
    read -r ADK_APP
    ADK_APP=${ADK_APP:-$DEFAULT_ADK_APP}
fi

# 5. Retrieve/Prompt for Telegram Bot Token
if [ -n "${TELEGRAM_BOT_TOKEN:-}" ]; then
    echo -e "${GREEN}✔ Found TELEGRAM_BOT_TOKEN in environment.${NC}"
    BOT_TOKEN="$TELEGRAM_BOT_TOKEN"
else
    echo -e "${YELLOW}TELEGRAM_BOT_TOKEN is not set in your environment.${NC}"
    echo -n "Enter your Telegram Bot Token (input will be hidden): "
    read -s -r BOT_TOKEN
    echo ""
fi

if [ -z "$BOT_TOKEN" ]; then
    echo -e "${RED}Error: Telegram Bot Token is required.${NC}"
    exit 1
fi

# 6. Retrieve/Prompt for ADK Server URL
DEFAULT_ADK_URL="http://localhost:8000"
if [ -n "${ADK_SERVER_URL:-}" ]; then
    echo -e "${GREEN}✔ Found ADK_SERVER_URL in environment: $ADK_SERVER_URL${NC}"
    ADK_URL="$ADK_SERVER_URL"
else
    echo -n "Enter your ADK Server URL [Default: $DEFAULT_ADK_URL]: "
    read -r ADK_URL
    ADK_URL=${ADK_URL:-$DEFAULT_ADK_URL}
fi

# Enable required GCP services
echo -e "\n${YELLOW}Checking and enabling required GCP services...${NC}"
gcloud services enable run.googleapis.com cloudbuild.googleapis.com artifactregistry.googleapis.com --project "$GCP_PROJECT"

# Determine source directory dynamically
SOURCE_DIR="."
if [ -d "telegram-integration" ]; then
    SOURCE_DIR="telegram-integration"
    echo -e "${GREEN}✔ Found source directory: telegram-integration${NC}"
elif [ -f "Dockerfile" ]; then
    SOURCE_DIR="."
    echo -e "${GREEN}✔ Dockerfile found in current directory. Using current directory as source.${NC}"
else
    echo -e "${RED}Error: Could not find source directory 'telegram-integration' or Dockerfile in current directory.${NC}"
    exit 1
fi

# 7. First-pass Deployment with placeholder SERVICE_URL
# This boots the container in Webhook mode (so health check binds to port)
# but uses a high-reliability placeholder URL (google.com) to pass DNS verification checks.
echo -e "\n${YELLOW}Deploying to Cloud Run (Step 1/2: Initial Deploy)...${NC}"
gcloud run deploy "$SERVICE_NAME" \
  --source "$SOURCE_DIR" \
  --region "$REGION" \
  --allow-unauthenticated \
  --set-env-vars "TELEGRAM_BOT_TOKEN=$BOT_TOKEN,ADK_SERVER_URL=$ADK_URL,ADK_APP_NAME=$ADK_APP,SERVICE_URL=https://google.com" \
  --project "$GCP_PROJECT"

# 8. Retrieve the actual service URL
echo -e "\n${YELLOW}Retrieving service URL...${NC}"
SERVICE_URL=$(gcloud run services describe "$SERVICE_NAME" --region "$REGION" --project "$GCP_PROJECT" --format 'value(status.url)')
echo -e "${GREEN}✔ Service URL is: $SERVICE_URL${NC}"

# 9. Update service environment variables with the real SERVICE_URL
# This triggers a rolling update and registers the correct webhook with Telegram automatically!
echo -e "\n${YELLOW}Updating configuration with final Webhook URL (Step 2/2)...${NC}"
gcloud run services update "$SERVICE_NAME" \
  --region "$REGION" \
  --set-env-vars "TELEGRAM_BOT_TOKEN=$BOT_TOKEN,ADK_SERVER_URL=$ADK_URL,ADK_APP_NAME=$ADK_APP,SERVICE_URL=$SERVICE_URL" \
  --project "$GCP_PROJECT"

echo -e "\n${GREEN}====================================================${NC}"
echo -e "${GREEN}   Deployment Completed Successfully! 🎉            ${NC}"
echo -e "${GREEN}====================================================${NC}"
echo -e "Service Name:   ${BLUE}$SERVICE_NAME${NC}"
echo -e "Region:         ${BLUE}$REGION${NC}"
echo -e "Active URL:     ${BLUE}$SERVICE_URL${NC}"
echo -e "Webhook Path:   ${BLUE}$SERVICE_URL/<bot-token>${NC}"
echo -e "ADK Backend:    ${BLUE}$ADK_URL${NC}"
echo -e "ADK App Name:   ${BLUE}$ADK_APP${NC}"
echo -e "${GREEN}====================================================${NC}"
echo "Your Telegram Bot has been configured to use webhooks."
echo "Any message sent to your bot will now trigger this Cloud Run instance."
Script di doppio deployment (deploy.sh)
Quando esegue il deployment su Google Cloud Run, il bot deve specificare il proprio URL (SERVICE_URL) nel suo ambiente in modo da poterlo registrare come target webhook con Telegram. Per risolvere questa dipendenza ciclica (l'URL è sconosciuto fino al deployment, ma il servizio richiede l'URL per l'avvio senza errori di controllo di integrità), deploy.sh esegue un deployment in due fasi:
- Passaggio 1: deployment iniziale: avvia il container con un DNS segnaposto (
https://google.com) in modo che il servizio si avvii correttamente, si associ alla porta locale e superi i controlli di integrità iniziali di Cloud Run. - Passaggio 2: recupera l'URL: estrae a livello di programmazione l'endpoint Cloud Run appena creato utilizzando
gcloud run services describe. - Passaggio 3: aggiorna la configurazione: aggiorna le variabili di ambiente con l'URL del servizio live effettivo. In questo modo viene attivato un aggiornamento in sequenza pulito in Cloud Run e viene registrato in modo sicuro il target webhook corretto con l'API Telegram.
Esegui il deployment in Cloud Run
Lo script di deployment stampa l'URL dell'agente. Apri il link nel browser per accedere alla stessa UI di sviluppo dell'ADK in esecuzione su Cloud Run.
cd ~/build-agent-adk-telegram
bash ./telegram-integration/deploy.sh
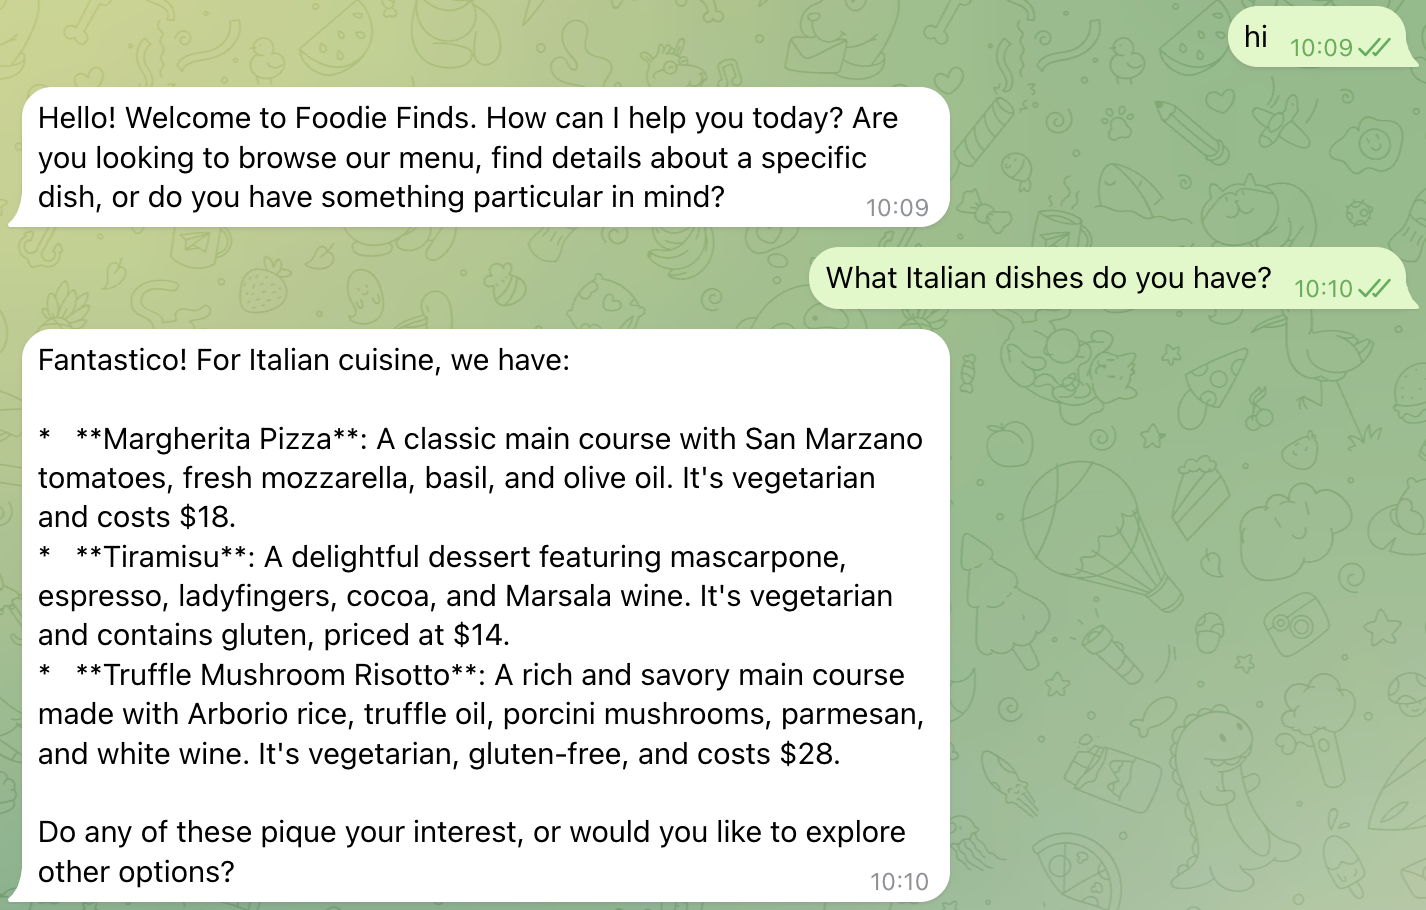
Se tutto va bene, puoi iniziare a chattare con il bot direttamente dall'applicazione di chat Telegram. Trova il bot che hai appena creato e inizia a interagire con lui:
What Italian dishes do you have?
Oppure,
I want something spicy and creamy
Guarda lo stato di invio del bot "...sta scrivendo" e poi, a breve, restituirà il messaggio dell'ADK che hai creato in precedenza.
7. Complimenti!
Hai creato, fatto il deployment e integrato completamente il nostro agente AI ADK dell'assistente per il menu del ristorante intelligente con Telegram, tramite la comunicazione client-server HTTP, e consenti alle persone di fare query sul loro menu preferito e prenotare il ristorante.
Che cosa hai imparato
- Esegui il deployment e configura Restaurant Concierge, l'agente basato su ADK e MCP Toolbox su Cloud Run
- Come configurare il bot Telegram utilizzando BotFather
- Come scrivere script Python per ascoltare il webhook di Telegram e interagire con l'agente ADK per trasmettere la query e la risposta degli utenti di conseguenza
- Come implementare
"... typing"in Telegram per segnalare che i messaggi vengono elaborati come feedback in tempo reale agli utenti in attesa della risposta dell'agente ADK. - Come eseguire il deployment dello script Python in Cloud Run e poter interagire con esso
Pulizia
Per evitare che al tuo account Google Cloud vengano addebitati costi, elimina le risorse create in questo codelab.
Opzione 1: elimina il progetto (consigliata)
gcloud projects delete $GOOGLE_CLOUD_PROJECT
Opzione 2: elimina singole risorse
# If you follow from previous A2A Agent Runtime codelab
# Delete the Agent Runtime deployment (skip if not found)
uv run python -c "
import vertexai
from google.genai import types
vertexai.init(project='$GOOGLE_CLOUD_PROJECT', location='$REGION')
client = vertexai.Client(
    project='$GOOGLE_CLOUD_PROJECT', location='$REGION',
    http_options=types.HttpOptions(api_version='v1beta1'),
)
try:
    agent = client.agent_engines.get(name='$RESERVATION_AGENT_RESOURCE_NAME')
    agent.delete(force=True)
    print('Agent Runtime deployment deleted.')
except Exception as e:
    print(f'No agent deployment found or already deleted, skipping. ({e})')
"

# Delete GCS staging bucket (skip if STAGING_BUCKET is not set)
if [ -n "$STAGING_BUCKET" ]; then
  gsutil rm -r gs://$STAGING_BUCKET
else
  echo "STAGING_BUCKET not set, skipping bucket deletion."
fi

# Delete Cloud Run services
gcloud run services delete restaurant-agent --region=$REGION --quiet
gcloud run services delete toolbox-service --region=$REGION --quiet
gcloud run services delete telegram-integration --region=$REGION --quiet

# Delete Cloud SQL instance
gcloud sql instances delete $DB_INSTANCE --quiet