

1. 简介
打造顺畅的互动式智能体 AI 体验,让客户可以直接通过他们已使用的消息应用进行互动。了解如何开发和部署可在 Web 界面和现代消息传递渠道中顺畅运行的智能应用。
构建内容
一个功能齐全的“餐厅礼宾”应用(基于 ADK,由 Gemini 提供支持)与 Telegram 聊天应用之间的集成。该应用可帮助用餐者浏览餐厅的菜单和预订座位。您可以与 Telegram 机器人互动,并使用自然语言描述提出要求,例如“我想吃辣的素食”。然后,该机器人将连接到 ADK 智能体,该智能体完全通过 MCP Toolbox for Databases 从 Cloud SQL PostgreSQL 数据库读取数据和向其中写入数据,从而处理所有数据库访问操作(包括自动生成用于向量搜索的嵌入)。与此同时,用户将能够看到该机器人正在确认消息并输入 ... typing 以生成回答,同时等待 ADK 智能体返回结果。
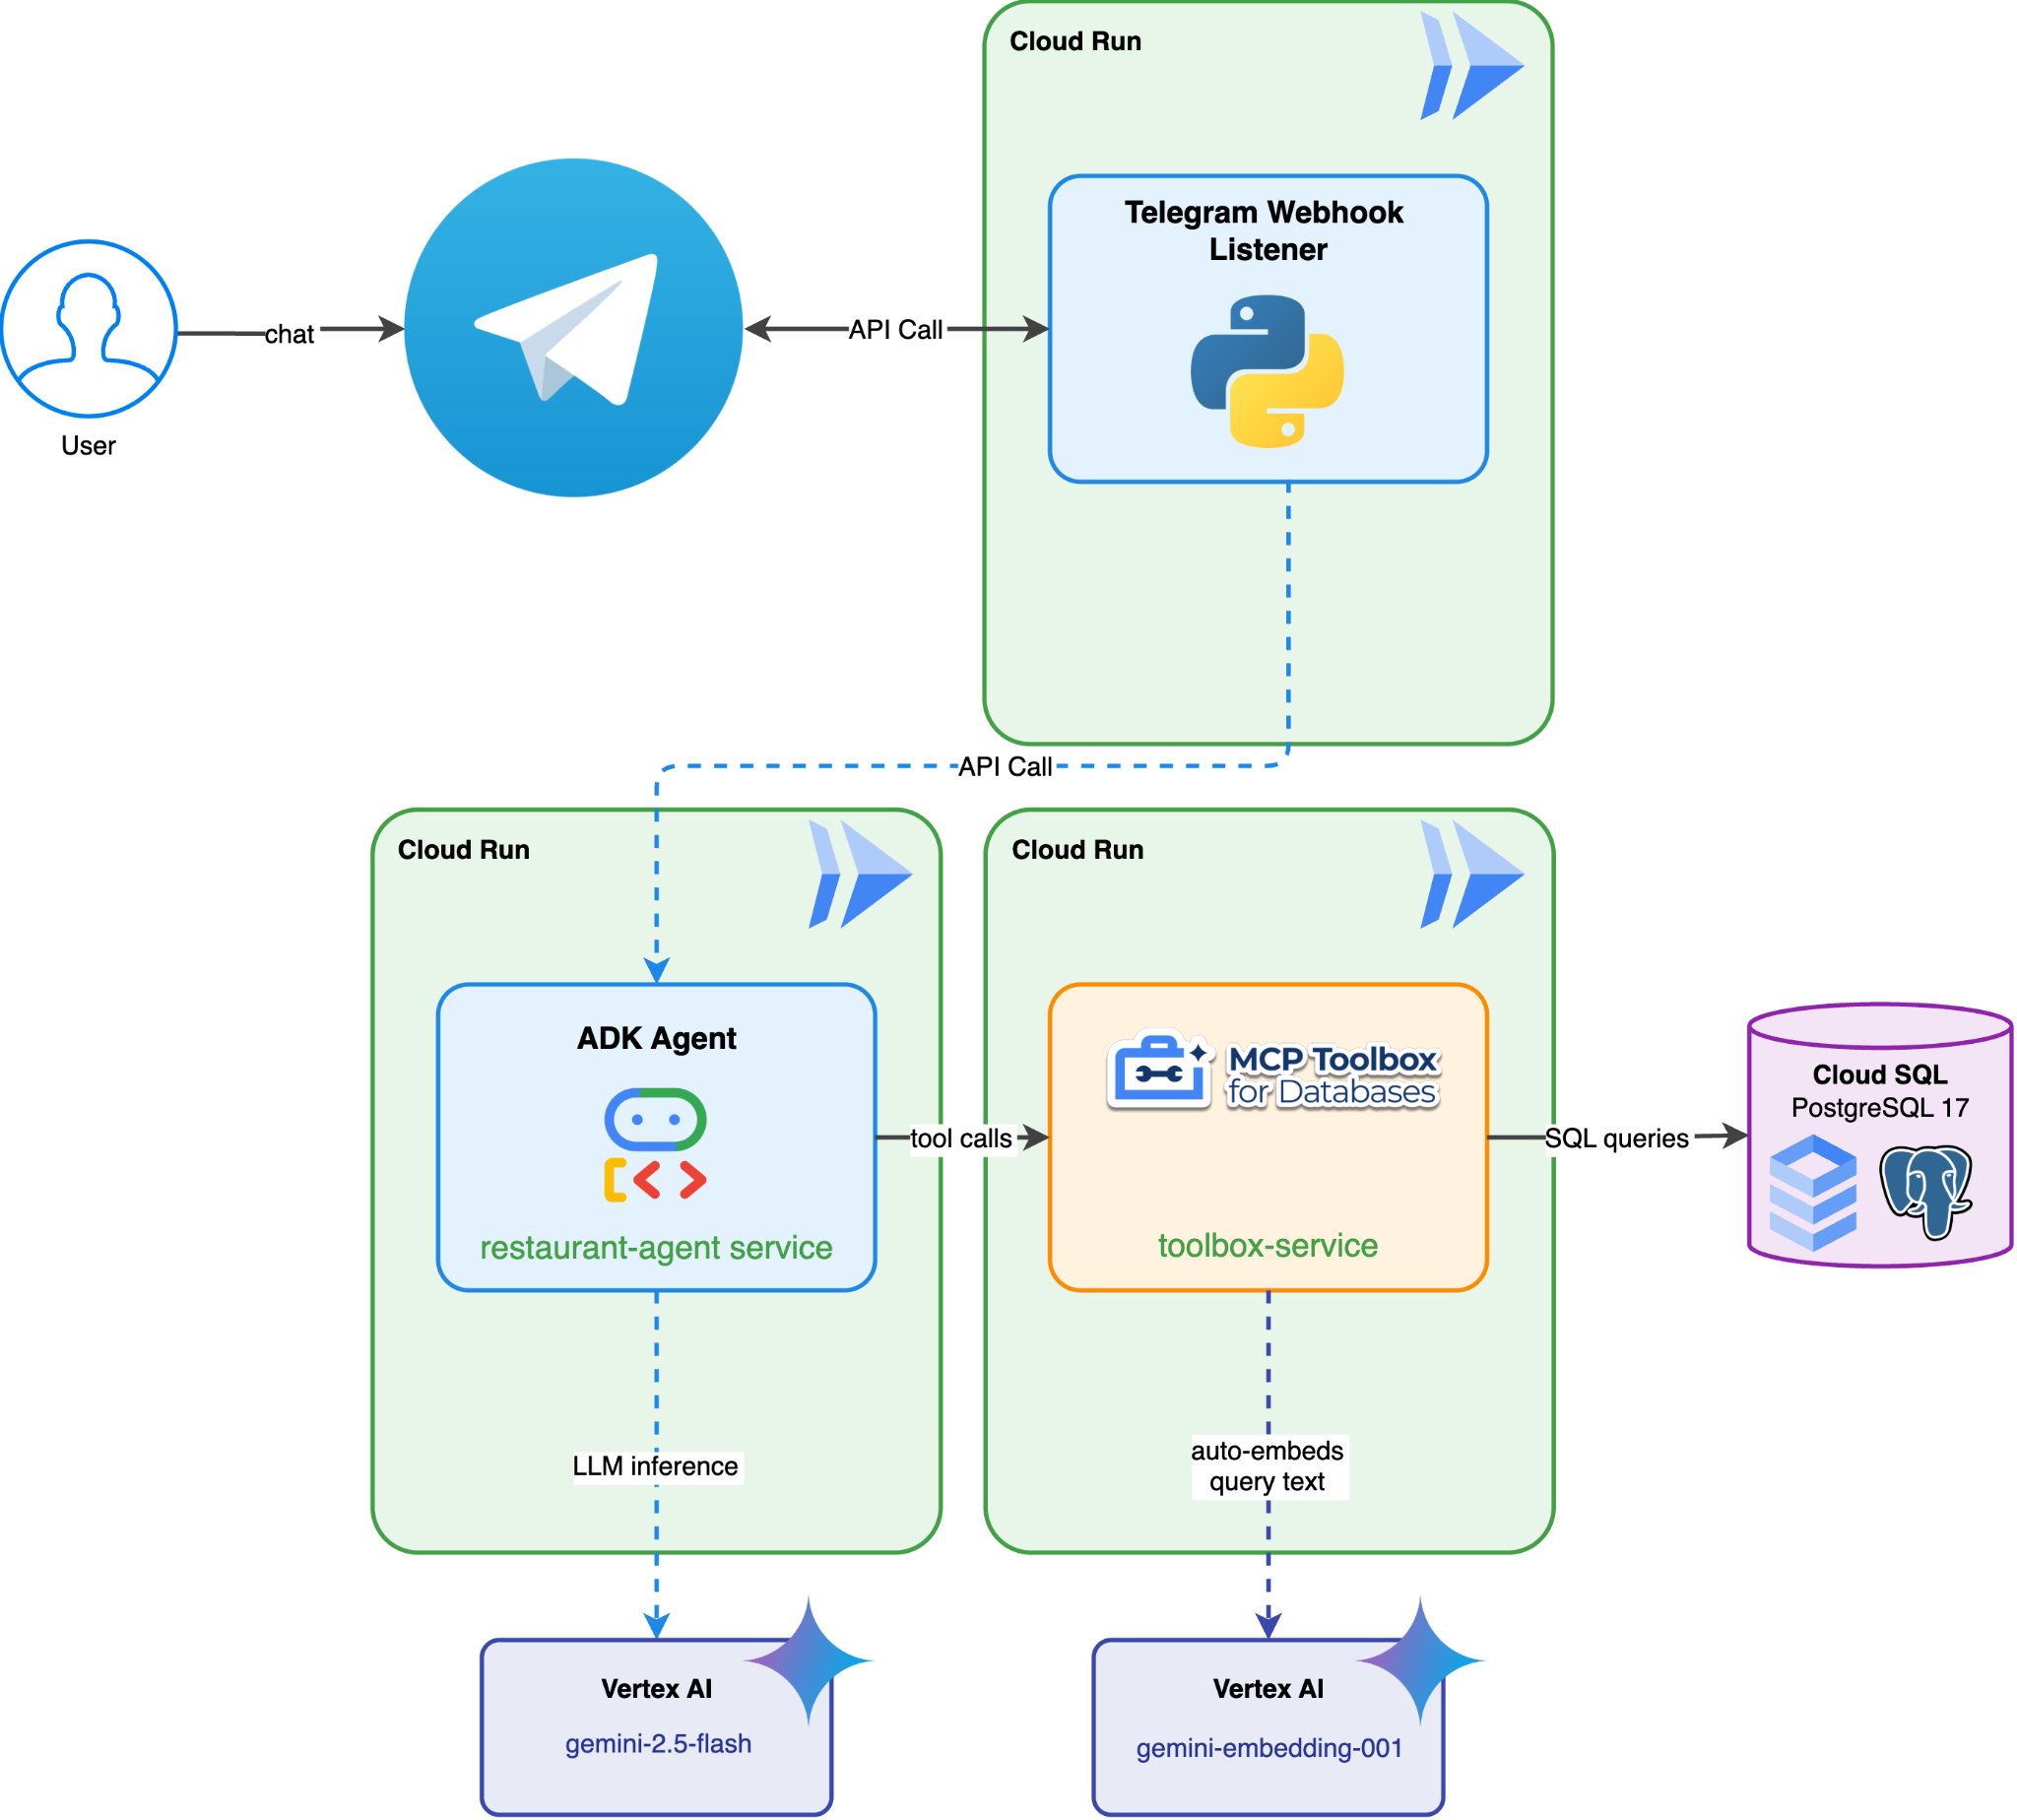
学习内容
- 部署一个可正常运行的“餐厅礼宾”应用,该应用基于 ADK,由 Gemini 提供支持
- 使用 BotFather 设置 Telegram 聊天机器人
- 编写 Python 应用以监听聊天机器人 Web 钩子
- 发送聊天操作,以便在 Telegram 中针对用户消息提供
... typing通知,并在等待实际响应时定期进行轮询以发送... typing - 调用
Restaurant ConciergeCloud Run 端点来处理用户咨询 - 处理来自 ADK 代理的返回,并向 Telegram 发送消息并关闭缓冲区
- 将 Python 应用部署到 Cloud Run
- 与 Telegram 聊天机器人互动
前提条件
- 具有试用结算账号的 Google Cloud 账号
- 基本熟悉 Python
- 拥有 ADK 和 Cloud Run 部署方面的经验会很有帮助
- Telegram 账号
- (推荐)已完成以下 Codelab:
- 使用 ADK、MCP Toolbox 和 Cloud SQL 的智能体 RAG - 您可以继续使用此 Codelab 中的起始代码构建智能体,提供的起始代码是相同的
- (或)大规模智能体:在智能体运行时和 ADK 集成中使用 A2A 协议的多智能体架构 - 如果您想使用多智能体架构进一步丰富智能体
2. 环境设置 - 接续上一个 Codelab
此 Codelab 中提供的叙述实际上是前提 Codelab:使用 ADK、MCP Toolbox 和 Cloud SQL 的智能体 RAG 或大规模智能体:在智能体运行时和 ADK 集成上使用 A2A 协议的多智能体架构的延续。您可以继续上一个 Codelab 中的工作
我们可以从上一个 Codelab 的工作目录(工作目录应为 build-agent-adk-toolbox-cloudsql 或 adk-a2a-agent-runtime-starter)开始构建。为避免混淆,我们使用从头开始时所用的相同目录名称重命名该目录
如果您是从实验 使用 ADK、MCP Toolbox 和 Cloud SQL 的智能体 RAG 继续操作的,请执行以下步骤:
mv ~/build-agent-adk-toolbox-cloudsql ~/build-agent-adk-telegram
否则,如果您要继续完成实验大规模智能体:在 Agent Runtime 上使用 A2A 协议的多智能体架构和 ADK 集成
mv ~/adk-a2a-agent-runtime-starter ~/build-agent-adk-telegram
然后,将工作目录更改为该目录
cloudshell workspace ~/build-agent-adk-telegram && cd ~/build-agent-adk-telegram
source .env
之后,验证您的 restaurant-agent 是否已部署并具有可供访问的公开网址
AGENT_URL=$(gcloud run services describe restaurant-agent \
    --region="$REGION" \
    --format='value(status.url)')

echo "      ✓ Agent service deployed"
echo "      Agent URL: $AGENT_URL"
echo ""
如果您可以访问该网址,则可以前往下一部分:Create Telegram Bot
3. 环境设置 - 从初始代码库开始
此步骤将准备 Cloud Shell 环境、配置 Google Cloud 项目并克隆起始代码库。
打开 Cloud Shell
在浏览器中打开 Cloud Shell。Cloud Shell 提供了一个预配置的环境,其中包含本 Codelab 所需的所有工具。在系统提示时点击授权,以
然后,依次点击“查看” ->“终端”,打开终端。您的界面应与此类似
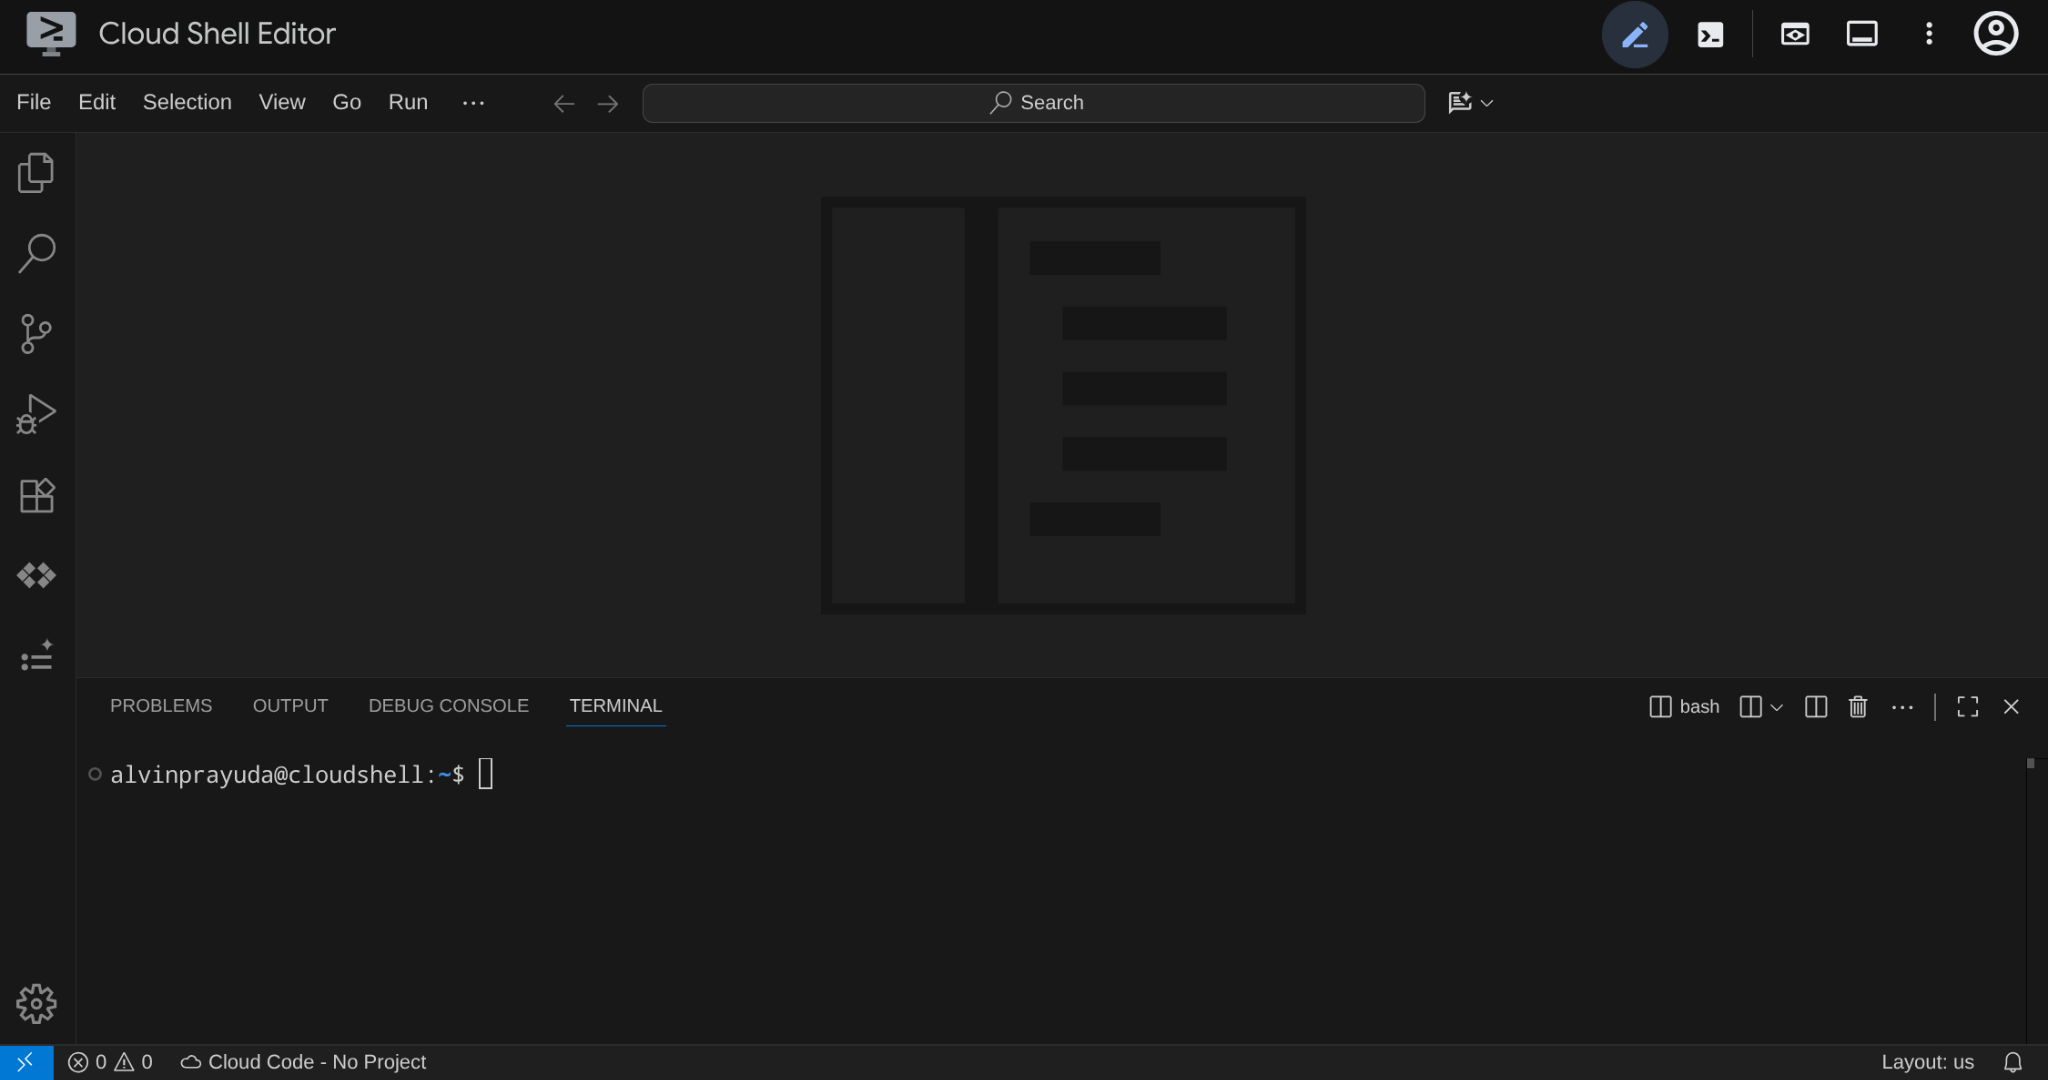
这将是我们的主要界面,顶部是 IDE,底部是终端
设置工作目录
克隆起始代码库,您在此 Codelab 中编写的所有代码都将位于此处:
rm -rf ~/build-agent-adk-telegram
git clone https://github.com/alphinside/adk-a2a-agent-runtime-starter.git build-agent-adk-telegram
cloudshell workspace ~/build-agent-adk-telegram && cd ~/build-agent-adk-telegram
使用提供的模板创建 .env 文件:
cp .env.example .env
为简化终端中的项目设置,请将此项目设置脚本下载到您的工作目录中:
curl -sL https://raw.githubusercontent.com/alphinside/cloud-trial-project-setup/main/setup_verify_trial_project.sh -o setup_verify_trial_project.sh
运行脚本。它会验证您的试用结算账号,创建新项目(或验证现有项目),将项目 ID 保存到当前目录中的 .env 文件,并在 gcloud 中设置有效项目。
bash setup_verify_trial_project.sh && source .env
该脚本将:
- 验证您是否拥有有效的试用结算账号
- 检查
.env中是否存在现有项目(如果有) - 创建新项目或重复使用现有项目
- 将试用结算账号与您的项目相关联
- 将项目 ID 保存到
.env - 将项目设置为活跃
gcloud项目
通过检查 Cloud Shell 终端提示中工作目录旁边的黄色文字,验证项目是否已正确设置。其中应显示您的项目 ID。

入门级基础架构设置
首先,我们需要使用 uv 安装 Python 依赖项。uv 是一个用 Rust 编写的快速 Python 软件包和项目管理器(uv 文档)。本 Codelab 使用它来提高 Python 项目的维护速度并简化维护工作
uv sync
然后,运行完整设置脚本,该脚本会创建 Cloud SQL 实例、植入数据并部署 Toolbox 服务,该服务将充当餐厅代理的初始状态
bash scripts/full_setup.sh > logs/full_setup.log 2>&1 &
这样会:
- 创建 Cloud SQL 实例并为数据库植入初始数据(第 1 阶段)
- 生成代理环境配置并启动本地 Toolbox 服务(阶段 2)
- 将 Toolbox 和代理服务部署到 Cloud Run(第 3 阶段)
此部署完成后,您可以通过 Cloud Run 网址访问 ADK 开发者界面
source .env
AGENT_URL=$(gcloud run services describe restaurant-agent \
    --region="$REGION" \
    --format='value(status.url)')

echo "      ✓ Agent service deployed"
echo "      Agent URL: $AGENT_URL"
echo ""
打开 ADK 开发者界面,选择 restaurant_agent,然后使用如下示例中的查询进行测试:
What Italian dishes do you have?
或者,
I want something spicy and creamy
现在,下一个行动是,如何从仅限 Web 开发的界面转移到 Telegram 消息传递渠道
4. 创建 Telegram 机器人
Telegram 是一款广为人知的免费即时通讯平台,广泛用于基于社区的互动。原因之一是,它提供了许多易于集成的功能,因此人们可以轻松创建具有各种不同功能的自定义机器人。
在本例中,我们将使用 BotFather 首次创建自己的机器人。请注意,虽然我们在此会话中使用的是 Telegram,但同样的方法也可用于 WhatsApp 或其他即时通讯平台。
使用 BotFather 创建自己的机器人
在网络浏览器中前往 https://telegram.me/BotFather,开始创建自己的 Telegram 机器人。
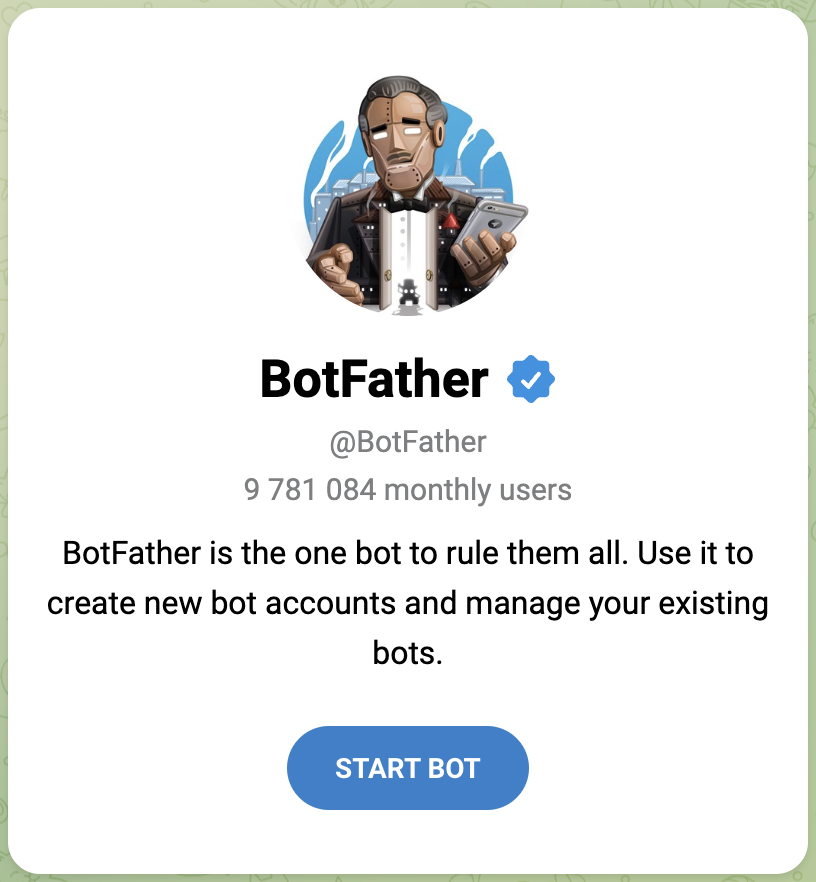
开始与 BotFather 互动
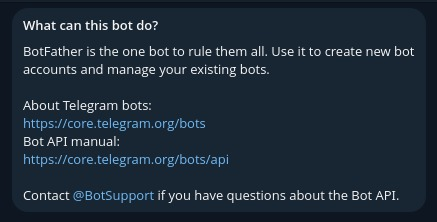
发送 /start 命令
如需开始使用 BotFather 并创建您的第一个机器人,您需要向 BotFather 调用 /start 消息,然后它会分享所有可用于进一步互动的命令。
/start
使用 /newbot 命令启动聊天机器人创建流程
让我们向 BotFather 发送 /newbot 命令来创建新机器人。系统会要求您为聊天机器人命名,然后要求您为聊天机器人提供 username,该名称必须以 bot 结尾。例如 TetrisBot 或 tetris_bot。此值必须是唯一的。
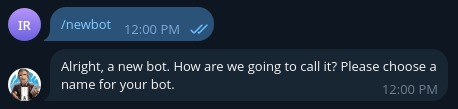
成功创建机器人后,您将收到来自 BotFather 的以下消息
Done! Congratulations on your new bot. You will find it at t.me/AdkTelegramTest_bot. You can now add a description, about section and profile picture for your bot, see /help for a list of commands. By the way, when you've finished creating your cool bot, ping our Bot Support if you want a better username for it. Just make sure the bot is fully operational before you do this.

Use this token to access the HTTP API:
<YOUR_TELEGRAM_API_KEY>
Keep your token secure and store it safely, it can be used by anyone to control your bot.

For a description of the Bot API, see this page: https://core.telegram.org/bots/api
请记下 YOUR_TELEGRAM_API_KEY,我们将在后续部分中使用它。
5. 开发 Telegram Webhook 应用
让我们准备好工作目录,以便开始开发 Telegram webhook 应用
mkdir ~/build-agent-adk-telegram/telegram-integration
cd ~/build-agent-adk-telegram
添加所需的依赖项
创建一个包含以下内容的 requirements.txt 脚本,以便为 Telegram Webhook 监听器脚本提供足够的依赖项。
cloudshell edit ./telegram-integration/requirements.txt
然后添加以下依赖项
python-telegram-bot[webhooks]
httpx
为 Telegram Webhook 监听器创建脚本
安装依赖项后。现在,我们可以为集成应用创建 Python 脚本 main.py 脚本
cloudshell edit ~/build-agent-adk-telegram/telegram-integration/main.py
然后,将以下代码复制到该文件中
# ./telegram-integration/main.py

import asyncio
import os
import sys
from telegram import Update
from telegram.ext import Application, CommandHandler, MessageHandler, filters, CallbackContext
from telegram.constants import ChatAction
import httpx

# Read token from environment variable
TOKEN = os.environ.get("TELEGRAM_BOT_TOKEN")
ADK_SERVER_URL = os.environ.get("ADK_SERVER_URL", "http://localhost:8000")
ADK_APP_NAME = os.environ.get("ADK_APP_NAME", "restaurant_agent")

# Parse base URL out of ADK_SERVER_URL
BASE_URL = ADK_SERVER_URL.rstrip('/')
if BASE_URL.endswith('/run'):
    BASE_URL = BASE_URL[:-4]
elif BASE_URL.endswith('/query'):
    BASE_URL = BASE_URL[:-6]

if not TOKEN:
    print("Error: TELEGRAM_BOT_TOKEN environment variable not set.")
    print("Please set it before running the application.")
    sys.exit(1)

async def start(update: Update, context: CallbackContext) -> None:
    """Send a message when the command /start is issued."""
    await update.message.reply_text('Hi! I am your ADK Integration Bot. Send me a message and I will forward it to the ADK server.')

async def send_typing_loop(chat_id: int, bot, stop_event: asyncio.Event):
    """Send typing action periodically until the stop event is set."""
    while not stop_event.is_set():
        try:
            await bot.send_chat_action(chat_id=chat_id, action=ChatAction.TYPING)
            # The research suggested repeating every 4 seconds
            await asyncio.sleep(4)
        except Exception as e:
            print(f"Error sending chat action: {e}")
            await asyncio.sleep(1) # Wait a bit before retrying if error

async def handle_message(update: Update, context: CallbackContext) -> None:
    """Handle incoming user messages."""
    user_message = update.message.text
    chat_id = update.message.chat_id
    raw_user_id = str(update.message.from_user.id)

    # Derive unique user_id and session_id for this user
    user_id = f"tg_{raw_user_id}"
    session_id = f"tg_sess_{raw_user_id}"

    print(f"Received message from {user_id}: {user_message}")

    # Create a stop event for the typing loop
    stop_event = asyncio.Event()

    # Start the typing loop as a background task
    typing_task = asyncio.create_task(send_typing_loop(chat_id, context.bot, stop_event))

    try:
        async with httpx.AsyncClient() as client:
            # 1. Check if the session exists
            session_url = f"{BASE_URL}/apps/{ADK_APP_NAME}/users/{user_id}/sessions/{session_id}"
            session_check = await client.get(session_url, timeout=10.0)

            if session_check.status_code == 404:
                # 2. If session doesn't exist, create it
                print(f"Session {session_id} not found. Creating session...")
                session_create = await client.post(session_url, json={}, timeout=10.0)
                if session_create.status_code != 200:
                    raise Exception(f"Failed to create session: {session_create.status_code} {session_create.text}")
            elif session_check.status_code != 200:
                raise Exception(f"Error checking session: {session_check.status_code} {session_check.text}")

            # 3. Run the ADK agent
            run_url = f"{BASE_URL}/run"
            payload = {
                "appName": ADK_APP_NAME,
                "userId": user_id,
                "sessionId": session_id,
                "newMessage": {
                    "role": "user",
                    "parts": [{"text": user_message}]
                }
            }
            response = await client.post(run_url, json=payload, timeout=60.0)

        if response.status_code == 200:
            events = response.json()
            if isinstance(events, list) and len(events) > 0:
                # The last event contains the final text response
                last_event = events[-1]
                content = last_event.get("content", {})
                parts = content.get("parts", [])
                if parts and "text" in parts[0]:
                    reply_text = parts[0]["text"]
                else:
                    reply_text = "ADK agent returned an empty or non-text response."
            else:
                reply_text = "No events returned from ADK agent."
        else:
            reply_text = f"Error communicating with ADK server (Status: {response.status_code})."

    except Exception as e:
        reply_text = f"Failed to connect to ADK server: {e}"
    finally:
        # Stop the typing loop
        stop_event.set()
        await typing_task

    # Send the final response back to the user
    await update.message.reply_text(reply_text)

def main() -> None:
    """Start the bot."""
    # Create the Application and pass it your bot's token.
    application = Application.builder().token(TOKEN).build()

    # on different commands - answer in Telegram
    application.add_handler(CommandHandler("start", start))

    # on non command i.e message - echo the message on Telegram
    application.add_handler(MessageHandler(filters.TEXT & ~filters.COMMAND, handle_message))

    # Check if running in webhook mode (e.g., on Cloud Run)
    port = os.environ.get("PORT")
    service_url = os.environ.get("SERVICE_URL")

    if port and service_url:
        if not service_url.startswith("http"):
            service_url = f"https://{service_url}"

        print(f"Starting bot in WEBHOOK mode on port {port} with url {service_url}")

        application.run_webhook(
            listen="0.0.0.0",
            port=int(port),
            url_path=TOKEN,
            webhook_url=f"{service_url}/{TOKEN}",
            allowed_updates=Update.ALL_TYPES
        )
    else:
        print("Starting bot in POLLING mode")
        # Run the bot until the user presses Ctrl-C
        application.run_polling(allowed_updates=Update.ALL_TYPES)


if __name__ == "__main__":
    main()
了解 Telegram 聊天机器人集成代码
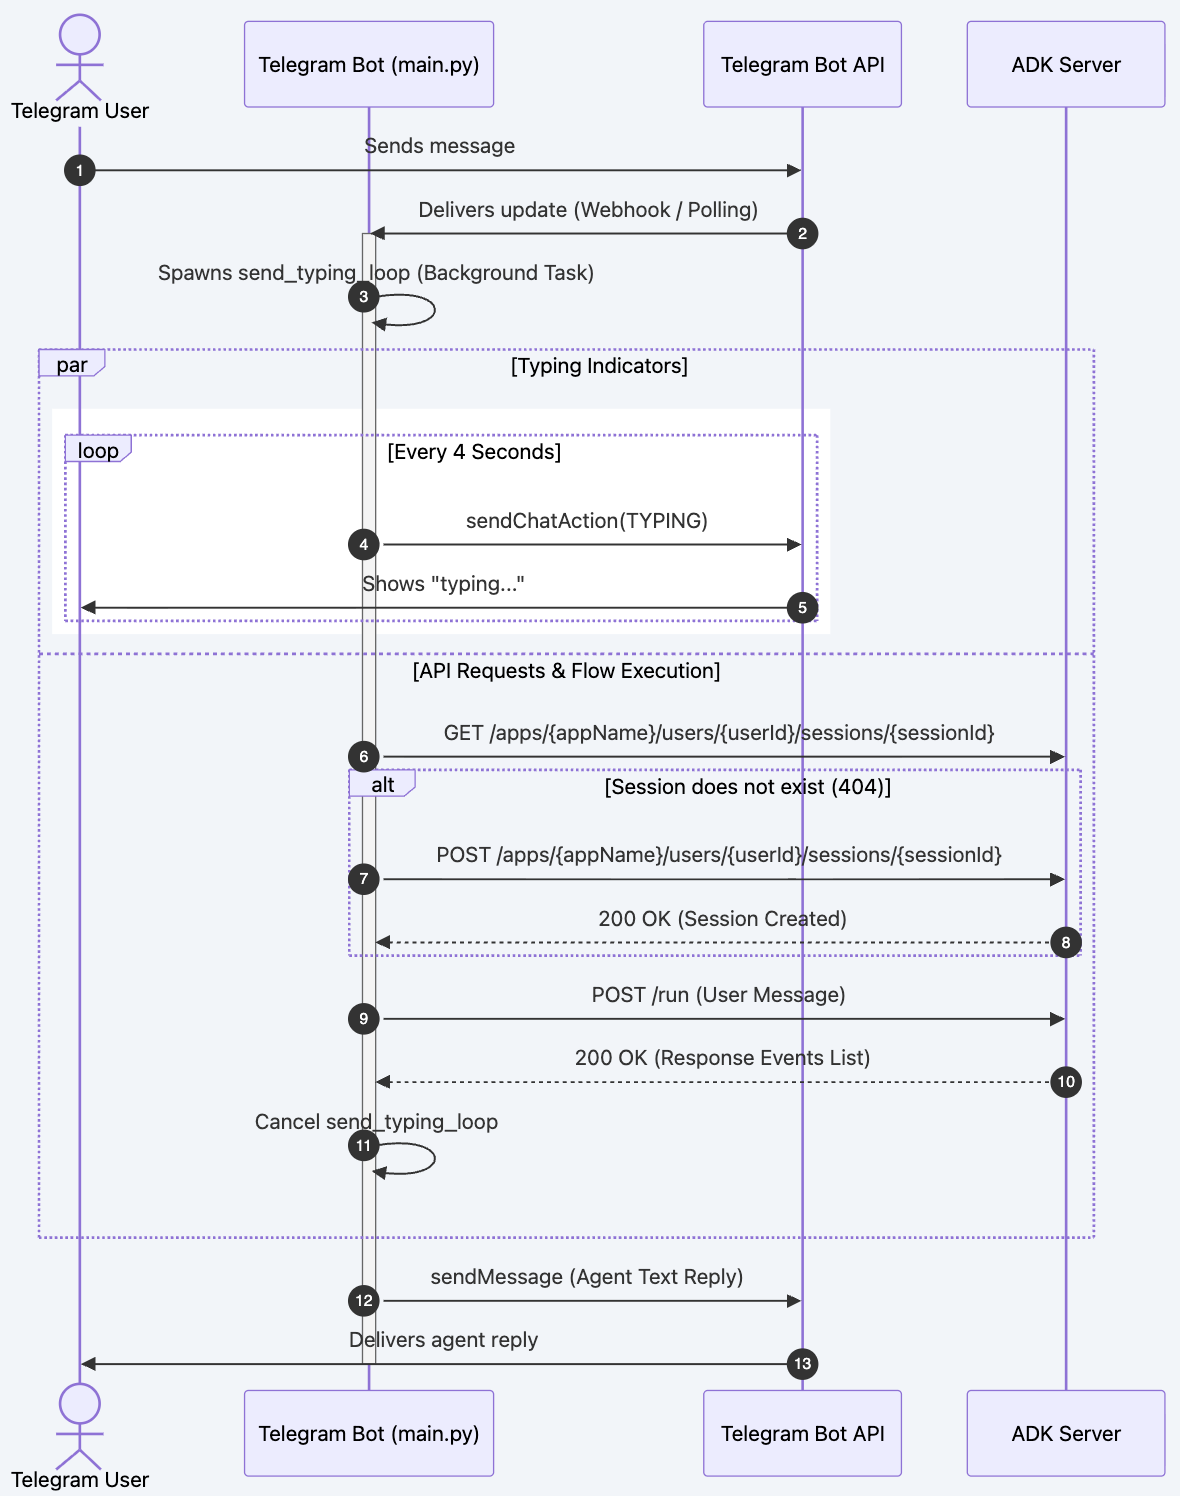
当用户发送消息时,以下流水线会在 handle_message() 下运行
第 1 步:身份和会话推导
该机器人会将 Telegram 用户 ID 映射到唯一的 ADK 标识符,以保持用户会话的区分度:
user_id = f"tg_{raw_user_id}"
session_id = f"tg_sess_{raw_user_id}"
第 2 步:异步“正在输入”状态(第 53-58 行)
为了确保在 ADK 代理处理提示(可能需要几秒钟)时提供高度响应的用户体验,机器人会启动异步后台循环:
asyncio.Event被实例化为stop_event。asyncio.create_task在后台生成send_typing_loop(...)。- 该循环每 4 秒向 Telegram 发送一次
ChatAction.TYPING操作,直到设置stop_event。
第 3 步:ADK 会话验证和创建(第 61-72 行)
在执行代理之前,机器人会检查会话是否已存在:
- 向
/apps/{appName}/users/{userId}/sessions/{sessionId}发送GET请求。 - 如果响应为
404 Not Found,则通过向同一网址发送POST请求(带有空的 JSON 正文)来创建会话。 - 如果返回的状态不是
200或404,则会引发异常。
第 4 步:向代理发送请求(第 74-85 行)
消息载荷会转发到 ADK /run 端点:
- 端点:
POST /run - 请求超时时间设置为
60.0秒,以应对复杂的推理或上游延迟。 - 载荷结构:
{
  "appName": "restaurant_agent",
  "userId": "tg_<user_id>",
  "sessionId": "tg_sess_<user_id>",
  "newMessage": {
    "role": "user",
    "parts": [{"text": "<user_message>"}]
  }
}
第 5 步:解析响应(第 87-101 行)
ADK 服务器会返回消息事件列表。机器人会检查返回的数组:
- 它会检索列表中的最终事件 (
events[-1])。 - 它通过
event["content"]["parts"][0]["text"]导航到文本内容。 - 如果未返回任何活动或缺少文本结构,则会设置描述性占位文本。
第 6 步:拆解和响应调度(第 103-111 行)
- 在
finally块中,设置了stop_event,从而停止了输入操作循环。 - 机器人会等待
typing_task完成,以确保资源干净。 - 最后,机器人会通过解析后的回答文本回复 Telegram 对话。
6. 将 Telegram Webhook 应用部署到 Cloud Run
接下来,我们将 Telegram Webhook Listener 部署到 Cloud Run,以便我们的机器人可以与其通信
创建 Dockerfile
首先,我们需要创建 Dockerfile。
cloudshell edit ~/build-agent-adk-telegram/telegram-integration/Dockerfile
然后,将以下代码复制到该文件中
# Use an official Python runtime as a parent image
FROM python:3.11-slim

# Prevent Python from writing pyc files to disc and buffering stdout/stderr
ENV PYTHONDONTWRITEBYTECODE=1
ENV PYTHONUNBUFFERED=1

# Set the working directory in the container
WORKDIR /app

# Install system dependencies if needed
RUN apt-get update && apt-get install -y --no-install-recommends \
    build-essential \
    && rm -rf /var/lib/apt/lists/*

# Copy the dependencies file to the working directory
COPY requirements.txt .

# Install any needed packages specified in requirements.txt
RUN pip install --no-cache-dir -r requirements.txt

# Copy the rest of the application code
COPY main.py .

# Expose the port that Cloud Run will provide via environment variable
EXPOSE 8080

# Run main.py when the container launches
CMD ["python", "main.py"]
该服务使用 python:3.11-slim 进行容器化,以保持较小的映像占用空间:
- 从
requirements.txt(python-telegram-bot[webhooks]和httpx)安装依赖项。 - 公开标准端口
8080。 - 启动
python main.py。
准备环境变量
之后,我们再检查一下代理是否已成功部署
AGENT_URL=$(gcloud run services describe restaurant-agent \
    --region="$REGION" \
    --format='value(status.url)')

echo "      ✓ Agent service deployed"
echo "      Agent URL: $AGENT_URL"
echo ""
接下来,将之前获取的 TELEGRAM_BOT_TOKEN 放入 .env 中
echo "TELEGRAM_BOT_TOKEN=YOUR_TELEGRAM_API_KEY" >> .env
然后,我们用所需的值填充 .env 数据。
echo "ADK_SERVER_URL=$AGENT_URL" >> .env
echo "ADK_APP_NAME=restaurant_agent" >> .env
echo "SERVICE_NAME=telegram-integration" >> .env
source .env
创建部署脚本
接下来,我们来创建部署脚本,该脚本将提供完整的检查并将应用部署到 Cloud Run
cloudshell edit ~/build-agent-adk-telegram/telegram-integration/deploy.sh
并将以下代码复制到该文件中
#!/usr/bin/env bash
# ./telegram-integration/deploy.sh

# Exit immediately if a command exits with a non-zero status
set -euo pipefail

# Color codes for neat terminal output
RED='\033[0;31m'
GREEN='\033[0;32m'
YELLOW='\033[1;33m'
BLUE='\033[0;34m'
NC='\033[0;37m' # No Color
# Load environment variables from .env if it exists
if [ -f .env ]; then
    echo -e "${GREEN}✔ Loading environment variables from .env...${NC}"
    export $(grep -v '^#' .env | xargs)
fi

echo -e "${BLUE}====================================================${NC}"
echo -e "${BLUE}   Google Cloud Run Deployment: Telegram Bot        ${NC}"
echo -e "${BLUE}====================================================${NC}"

# 1. Check for gcloud CLI
if ! command -v gcloud &> /dev/null; then
    echo -e "${RED}Error: 'gcloud' CLI is not installed.${NC}"
    echo "Please install the Google Cloud SDK and try again."
    echo "See: https://cloud.google.com/sdk/docs/install"
    exit 1
fi

# 2. Check active gcloud account/auth
ACTIVE_ACCOUNT=$(gcloud auth list --filter=status:ACTIVE --format="value(account)" 2>/dev/null || true)
if [ -z "$ACTIVE_ACCOUNT" ]; then
    echo -e "${RED}Error: No active Google Cloud account found.${NC}"
    echo "Please run: gcloud auth login"
    exit 1
fi

# 3. Detect / Prompt for GCP Project
DEFAULT_PROJECT=${GCP_PROJECT_ID:-$(gcloud config get-value project 2>/dev/null || true)}
if [ -n "${DEFAULT_PROJECT}" ]; then
    echo -e "${GREEN}✔ Using GCP Project: $DEFAULT_PROJECT${NC}"
    GCP_PROJECT="$DEFAULT_PROJECT"
else
    echo -n "Enter GCP Project ID: "
    read -r GCP_PROJECT
fi

if [ -z "$GCP_PROJECT" ]; then
    echo -e "${RED}Error: GCP Project ID is required.${NC}"
    exit 1
fi

# Set active project
gcloud config set project "$GCP_PROJECT" &> /dev/null

# 4. Configure Service Parameters
DEFAULT_SERVICE=${SERVICE_NAME:-"telegram-integration"}
if [ -n "${SERVICE_NAME:-}" ]; then
    echo -e "${GREEN}✔ Using Cloud Run Service Name: $SERVICE_NAME${NC}"
else
    echo -n "Enter Cloud Run Service Name [Default: $DEFAULT_SERVICE]: "
    read -r SERVICE_NAME
    SERVICE_NAME=${SERVICE_NAME:-$DEFAULT_SERVICE}
fi

DEFAULT_REGION=${REGION:-"us-central1"}
if [ -n "${REGION:-}" ]; then
    echo -e "${GREEN}✔ Using Cloud Run Region: $REGION${NC}"
else
    echo -n "Enter Cloud Run Region [Default: $DEFAULT_REGION]: "
    read -r REGION
    REGION=${REGION:-$DEFAULT_REGION}
fi

DEFAULT_ADK_APP=${ADK_APP_NAME:-"restaurant_agent"}
if [ -n "${ADK_APP_NAME:-}" ]; then
    echo -e "${GREEN}✔ Using ADK App Name: $ADK_APP_NAME${NC}"
    ADK_APP="$ADK_APP_NAME"
else
    echo -n "Enter ADK App Name [Default: $DEFAULT_ADK_APP]: "
    read -r ADK_APP
    ADK_APP=${ADK_APP:-$DEFAULT_ADK_APP}
fi

# 5. Retrieve/Prompt for Telegram Bot Token
if [ -n "${TELEGRAM_BOT_TOKEN:-}" ]; then
    echo -e "${GREEN}✔ Found TELEGRAM_BOT_TOKEN in environment.${NC}"
    BOT_TOKEN="$TELEGRAM_BOT_TOKEN"
else
    echo -e "${YELLOW}TELEGRAM_BOT_TOKEN is not set in your environment.${NC}"
    echo -n "Enter your Telegram Bot Token (input will be hidden): "
    read -s -r BOT_TOKEN
    echo ""
fi

if [ -z "$BOT_TOKEN" ]; then
    echo -e "${RED}Error: Telegram Bot Token is required.${NC}"
    exit 1
fi

# 6. Retrieve/Prompt for ADK Server URL
DEFAULT_ADK_URL="http://localhost:8000"
if [ -n "${ADK_SERVER_URL:-}" ]; then
    echo -e "${GREEN}✔ Found ADK_SERVER_URL in environment: $ADK_SERVER_URL${NC}"
    ADK_URL="$ADK_SERVER_URL"
else
    echo -n "Enter your ADK Server URL [Default: $DEFAULT_ADK_URL]: "
    read -r ADK_URL
    ADK_URL=${ADK_URL:-$DEFAULT_ADK_URL}
fi

# Enable required GCP services
echo -e "\n${YELLOW}Checking and enabling required GCP services...${NC}"
gcloud services enable run.googleapis.com cloudbuild.googleapis.com artifactregistry.googleapis.com --project "$GCP_PROJECT"

# Determine source directory dynamically
SOURCE_DIR="."
if [ -d "telegram-integration" ]; then
    SOURCE_DIR="telegram-integration"
    echo -e "${GREEN}✔ Found source directory: telegram-integration${NC}"
elif [ -f "Dockerfile" ]; then
    SOURCE_DIR="."
    echo -e "${GREEN}✔ Dockerfile found in current directory. Using current directory as source.${NC}"
else
    echo -e "${RED}Error: Could not find source directory 'telegram-integration' or Dockerfile in current directory.${NC}"
    exit 1
fi

# 7. First-pass Deployment with placeholder SERVICE_URL
# This boots the container in Webhook mode (so health check binds to port)
# but uses a high-reliability placeholder URL (google.com) to pass DNS verification checks.
echo -e "\n${YELLOW}Deploying to Cloud Run (Step 1/2: Initial Deploy)...${NC}"
gcloud run deploy "$SERVICE_NAME" \
  --source "$SOURCE_DIR" \
  --region "$REGION" \
  --allow-unauthenticated \
  --set-env-vars "TELEGRAM_BOT_TOKEN=$BOT_TOKEN,ADK_SERVER_URL=$ADK_URL,ADK_APP_NAME=$ADK_APP,SERVICE_URL=https://google.com" \
  --project "$GCP_PROJECT"

# 8. Retrieve the actual service URL
echo -e "\n${YELLOW}Retrieving service URL...${NC}"
SERVICE_URL=$(gcloud run services describe "$SERVICE_NAME" --region "$REGION" --project "$GCP_PROJECT" --format 'value(status.url)')
echo -e "${GREEN}✔ Service URL is: $SERVICE_URL${NC}"

# 9. Update service environment variables with the real SERVICE_URL
# This triggers a rolling update and registers the correct webhook with Telegram automatically!
echo -e "\n${YELLOW}Updating configuration with final Webhook URL (Step 2/2)...${NC}"
gcloud run services update "$SERVICE_NAME" \
  --region "$REGION" \
  --set-env-vars "TELEGRAM_BOT_TOKEN=$BOT_TOKEN,ADK_SERVER_URL=$ADK_URL,ADK_APP_NAME=$ADK_APP,SERVICE_URL=$SERVICE_URL" \
  --project "$GCP_PROJECT"

echo -e "\n${GREEN}====================================================${NC}"
echo -e "${GREEN}   Deployment Completed Successfully! 🎉            ${NC}"
echo -e "${GREEN}====================================================${NC}"
echo -e "Service Name:   ${BLUE}$SERVICE_NAME${NC}"
echo -e "Region:         ${BLUE}$REGION${NC}"
echo -e "Active URL:     ${BLUE}$SERVICE_URL${NC}"
echo -e "Webhook Path:   ${BLUE}$SERVICE_URL/<bot-token>${NC}"
echo -e "ADK Backend:    ${BLUE}$ADK_URL${NC}"
echo -e "ADK App Name:   ${BLUE}$ADK_APP${NC}"
echo -e "${GREEN}====================================================${NC}"
echo "Your Telegram Bot has been configured to use webhooks."
echo "Any message sent to your bot will now trigger this Cloud Run instance."
双重部署脚本 (deploy.sh)
部署到 Google Cloud Run 时,机器人需要在其环境中指定自己的网址 (SERVICE_网址),以便向 Telegram 注册该网址作为 webhook 目标。为了解决此循环依赖问题(网址在部署之前未知,但服务需要网址才能启动,且不会出现健康检查失败),deploy.sh 执行两阶段部署:
- 第 1 步:初始部署:使用占位 DNS (
https://google.com) 启动容器,以便服务成功启动、绑定到本地端口并顺利通过初始 Cloud Run 健康检查。 - 第 2 步:提取网址:使用
gcloud run services describe以编程方式提取新创建的 Cloud Run 端点。 - 第 3 步:更新配置:使用实际的实时服务网址更新环境变量。这会在 Cloud Run 中触发干净的滚动更新,并安全地向 Telegram API 注册正确的 webhook 目标。
部署到 Cloud Run
部署脚本会输出代理网址。在浏览器中打开该网址,即可访问在 Cloud Run 上运行的同一 ADK 开发界面。
cd ~/build-agent-adk-telegram
bash ./telegram-integration/deploy.sh
如果一切顺利,此时您就可以直接通过 Telegram 聊天应用与机器人聊天了。找到您刚刚创建的机器人,然后开始与其互动:
What Italian dishes do you have?
或者,
I want something spicy and creamy
观看聊天机器人发送状态“正在输入内容”,然后很快,它就会返回您之前创建的 ADK 中的消息!
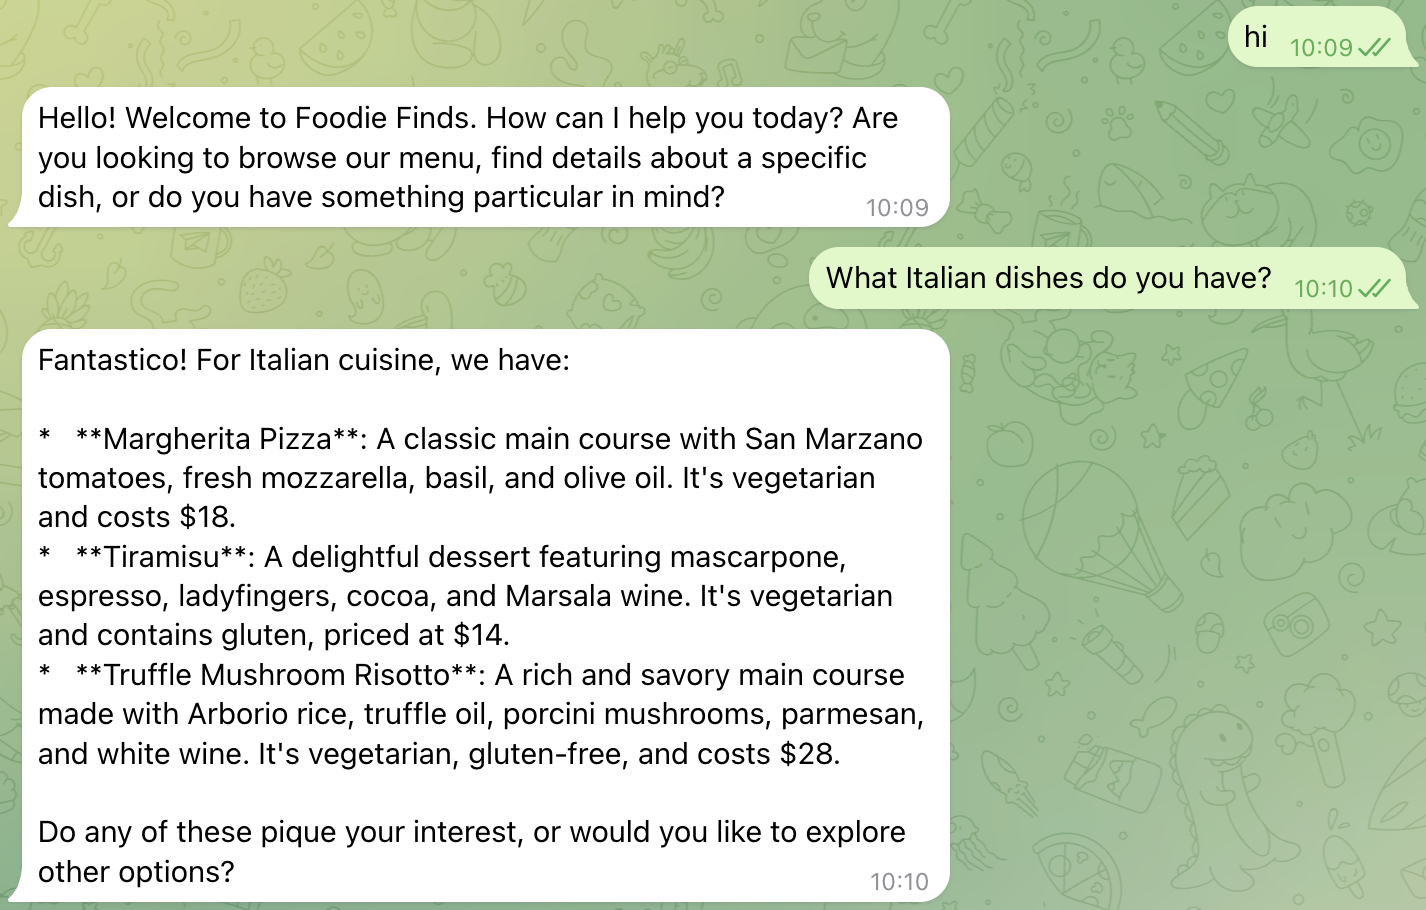
7. 恭喜!
您已通过 HTTP 客户端-服务器通信,在 Telegram 中构建、部署并完全集成我们基于 ADK 的智能餐厅菜单助理 AI 智能体,让人们可以查询自己喜欢的菜单并预订餐厅。
您学到的内容
- 将餐厅礼宾服务、基于 ADK 的智能体和 MCP Toolbox 部署到 Cloud Run 并进行配置
- 如何使用 BotFather 设置 Telegram 聊天机器人
- 如何编写 Python 脚本来监听 Telegram Webhook 并与 ADK 代理互动,以相应地传递用户查询和回答
- 如何在 Telegram 中实现
"... typing",以便在等待 ADK 代理响应时向用户实时反馈消息正在处理中。 - 如何将 Python 脚本部署到 Cloud Run 并与之互动
清理
为避免系统向您的 Google Cloud 账号收取费用,请删除在此 Codelab 中创建的资源。
方法 1:删除项目(推荐)
gcloud projects delete $GOOGLE_CLOUD_PROJECT
方法 2:删除单个资源
# If you follow from previous A2A Agent Runtime codelab
# Delete the Agent Runtime deployment (skip if not found)
uv run python -c "
import vertexai
from google.genai import types
vertexai.init(project='$GOOGLE_CLOUD_PROJECT', location='$REGION')
client = vertexai.Client(
    project='$GOOGLE_CLOUD_PROJECT', location='$REGION',
    http_options=types.HttpOptions(api_version='v1beta1'),
)
try:
    agent = client.agent_engines.get(name='$RESERVATION_AGENT_RESOURCE_NAME')
    agent.delete(force=True)
    print('Agent Runtime deployment deleted.')
except Exception as e:
    print(f'No agent deployment found or already deleted, skipping. ({e})')
"

# Delete GCS staging bucket (skip if STAGING_BUCKET is not set)
if [ -n "$STAGING_BUCKET" ]; then
  gsutil rm -r gs://$STAGING_BUCKET
else
  echo "STAGING_BUCKET not set, skipping bucket deletion."
fi

# Delete Cloud Run services
gcloud run services delete restaurant-agent --region=$REGION --quiet
gcloud run services delete toolbox-service --region=$REGION --quiet
gcloud run services delete telegram-integration --region=$REGION --quiet

# Delete Cloud SQL instance
gcloud sql instances delete $DB_INSTANCE --quiet