
1. Przegląd
ARCore to platforma Google do tworzenia na smartfonach projektów rzeczywistości rozszerzonej. Do tworzenia aplikacji AR na wiele platform możesz używać AR Foundation od Unity.
Co utworzysz
W tym ćwiczeniu utworzysz prostą grę za pomocą AR Foundation. Celem gry jest zbieranie paczek za pomocą samochodu sterowanego za pomocą urządzenia przenośnego.
Nie stanie się to jednak w całkowicie wirtualnym świecie. Połączysz fizyczne atomy i cyfrowe bity, aby stworzyć nowy rodzaj rozgrywki, tworząc grę, która rozumie otoczenie gracza.
Po ukończeniu tego ćwiczenia Twój kod będzie:
- wykrywać prawdziwe samoloty i rysować nad nimi pole gry;
- Rzutuj promienie z widoku kamery i wykrywaj przecięcia z płaszczyznami.
- Reaguj na rzeczywiste warunki oświetleniowe, aby nadać grze dodatkowy realizm.

Czego się nauczysz
- Jak skonfigurować projekt, który korzysta z AR Foundation od Unity.
- Jak używać
ARPlaneManagerdo subskrybowania nowych samolotów. - Jak używać funkcji
Raycastdo znajdowania przecięć z wirtualną geometrią - Jak używać
ARLightEstimationDatado oświetlania sceny.
Czego potrzebujesz
- Obsługiwane urządzenie ARCore połączone z komputerem używanym do programowania za pomocą kabla USB.
- Usługi Google Play dla AR w wersji 1.23 lub nowszej.
- Zainstalowany Unity Hub lub Unity 2020 LTS.
2. Konfigurowanie środowiska programistycznego
W tym kroku przygotujesz środowisko do programowania za pomocą AR Foundation w Unity.
Sprawdź, czy Twoje urządzenie jest zgodne z AR
Funkcje AR na urządzeniach z Androidem są obsługiwane przez ARCore, który jest dostępny na urządzeniach obsługujących ARCore. Sprawdź, czy urządzenie deweloperskie jest zgodne z AR. Możesz też użyć prawidłowo skonfigurowanej instancji Android Emulatora zgodnej z rzeczywistością rozszerzoną.
Konfigurowanie debugowania USB na urządzeniu
Aby uruchamiać aplikacje w trybie debugowania, musisz włączyć na urządzeniu Opcje programisty. Jeśli jeszcze tego nie zrobiono, zapoznaj się z dokumentacją Androida na temat włączania opcji programisty i debugowania USB.
Instalowanie Unity (2020.3 LTS)
Zainstaluj na stacji roboczej Unity 2020 LTS. W tym laboratorium kodów zrzuty ekranu interfejsu Unity pochodzą z wersji 2020.3 (LTS). Inne wersje Unity mogą działać, ale mogą wymagać dodatkowych czynności. Może on wyglądać inaczej niż na zrzutach ekranu.
Utwórz nowy projekt
Utwórz nowy projekt, korzystając z szablonu Universal Render Pipeline. Nadaj mu opisową nazwę i wybierz odpowiednią lokalizację, a następnie kliknij UTWÓRZ.

Zainstaluj wymagane platformy
AR Foundation w Unity znajdziesz w Menedżerze pakietów Unity.
- Otwórz go, klikając Window > Package Manager (Okno > Menedżer pakietów).

- W tym oknie zainstaluj pakiety, których będziesz używać w tym module. Aby wyświetlić najnowsze wersje tych platform, rozwiń odpowiedni wpis, klikając ikonę
►. Zainstaluj najnowsze wersje tych platform:- AR Foundation
- Wtyczka ARCore XR
Gdy skończysz, Menedżer pakietów powinien wyglądać mniej więcej tak:

Instalowanie pakietu startowego
Na potrzeby tego ćwiczenia przygotowaliśmy pakiet startowy zawierający prefabrykaty i skrypty, które przyspieszą niektóre części ćwiczenia, dzięki czemu możesz skupić się na tym, jak korzystać z AR Foundation.
- Zainstaluj pakiet startowy, otwierając Assets > Import Package > Custom Package... (Zasoby > Importuj pakiet > Własny pakiet...) i otwierając
starter-package.unitypackage. - W wyświetlonym oknie upewnij się, że wszystko jest zaznaczone.
- Kliknij Importuj.
Zmiana ustawień kompilacji
Ponieważ aplikacja będzie działać na Androidzie, zmień platformę kompilacji na Androida:
- Otwórz File > Build Settings (Plik > Ustawienia kompilacji).
- W panelu Platforma wybierz Android.
- Opcjonalnie włącz Wersję deweloperską i Debugowanie skryptu, aby zachować informacje na potrzeby debugowania podczas działania aplikacji.
- Kliknij Przełącz platformę.

Zmiana ustawień projektu
AR Foundation musi być skonfigurowany tak, aby inicjować systemy XR podczas uruchamiania.
- Otwórz Edytuj > Ustawienia projektu… i kliknij sekcję Zarządzanie wtyczkami XR.
- Na karcie Android włącz ARCore.

- W panelu po lewej stronie kliknij sekcję Odtwarzacz.
- Na karcie Android w sekcji Inne ustawienia usuń Vulkan z Interfejsów API grafiki.

- Aplikacje wymagające AR korzystające z ARCore wymagają minimalnego poziomu API 24. Przewiń w dół i znajdź Minimalny poziom interfejsu API. Ustaw minimalny poziom API na 24.

Dodawanie wymaganych elementów sceny
Szablon Universal Render Pipeline zawiera kilka obiektów gry, których nie będziesz używać w tym samouczku.
- Usuń wszystkie obiekty gry w
SampleScene.

- Dodaj obiekty AR Foundation. Kliknij prawym przyciskiem myszy panel Hierarchia. Za pomocą tego menu możesz dodać:
- XR > Sesja AR: ten obiekt kontroluje cykl życia funkcji AR.
- XR > AR Session Origin: ten obiekt przekształca współrzędne AR na współrzędne świata Unity.
- Światło > Światło kierunkowe: zapewnia źródło światła do oświetlania obiektów w grze.
Hierarchia powinna wyglądać tak:

- Rozwiń w hierarchii utworzony obiekt AR Session Origin i wybierz obiekt AR Camera. W inspektorze zmień tag na MainCamera.

Konfigurowanie renderowania
Aby potok renderowania uniwersalnego Unity był zgodny z AR Foundation, należy wprowadzić w nim jedną zmianę.
- W panelu Project (Projekt) przejdź do Assets > Settings (Zasoby > Ustawienia), aby znaleźć komponent ForwardRenderer.

- Wybierz ForwardRenderer.
- W panelu Inspektora użyj opcji Add Renderer Feature (Dodaj funkcję renderowania), aby dodać AR Background Renderer Feature (Funkcja renderowania tła AR). Ten komponent będzie renderować przekaz z kamery w scenie.

Sprawdzanie konfiguracji
- Upewnij się, że urządzenie jest podłączone do zasilania i że debugowanie ADB jest włączone.
- Kliknij File > Build And Run... (Plik > Kompiluj i uruchom...). Aplikacja zostanie przesłana na urządzenie i uruchomiona po zainstalowaniu.
- Na ekranie urządzenia powinien być widoczny przekaz z kamery.
W następnym kroku zaczniesz dodawać funkcje do aplikacji.
3. Wykrywanie samolotów w rzeczywistym świecie
Po skonfigurowaniu podstawowej sceny możesz rozpocząć tworzenie gry. W tym kroku wykryjesz płaszczyzny i narysujesz je na scenie.
Dodawanie komponentu ARPlaneManager
ARPlaneManager wykrywa ARPlane i tworzy, aktualizuje oraz usuwa obiekty gry, gdy zmienia się sposób, w jaki urządzenie rozumie otoczenie.
- W okienku Hierarchia utwórz pustą hierarchię
GameObject. - Zmień jego nazwę na
Driving Surface Manager. Ten komponent będzie wyświetlać samoloty, dopóki gracz nie wybierze jednego z nich. - Wybierz nowy obiekt gry. W panelu Inspektora kliknij Add Component (Dodaj komponent), aby dodać AR Plane Manager (Menedżer płaszczyzn AR).

- Skonfiguruj
ARPlaneManager, ustawiając polePlane Prefab:- Kliknij przycisk obok ikony
None, aby otworzyć okno Wybierz obiekt gry. - Wybierz kartę Zasoby i wyszukaj Driving Surface Plane (Płaszczyzna powierzchni jezdnej).
- Kliknij przycisk obok ikony

Ten prefab z pakietu startowego zawiera szorstką teksturę podłogi, która będzie używana jako dekoracja płaszczyzny.
- Zmień
Detection ModenaHorizontal. Ta konfiguracja sprawia, żeARPlaneManagerudostępnia tylko płaszczyzny poziome, które są idealne do jazdy.
Dodawanie komponentu ARRaycastManager
ARRaycastManager udostępnia funkcję raycast. W następnym kroku użyjemy tego obiektu, aby udostępnić użytkownikowi elementy sterujące.
- Sprawdź, czy w panelu Hierarchia jest wybrany obiekt o nazwie
Driving Surface Manager. - W oknie Inspektora kliknij Add Component (Dodaj komponent), aby dodać do obiektu gry komponent
ARRaycastManager.
Ten komponent nie wymaga dalszej konfiguracji.
Dodawanie komponentu DrivingSurfaceManager
DrivingSurfaceManager to skrypt pomocniczy z pakietu startowego, który umożliwia wybranie ARPlane. Po wybraniu ARPlane wszystkie inne płaszczyzny zostaną ukryte, a nowe płaszczyzny zostaną wyłączone.
- Sprawdź, czy w panelu Hierarchia jest wybrany obiekt o nazwie
Driving Surface Manager. - W Inspektorze kliknij Add Component (Dodaj komponent), aby dodać komponent
DrivingSurfaceManagerdo obiektu gry.
Ten komponent nie wymaga dalszej konfiguracji.
Uruchamianie aplikacji
- Aby przetestować zmiany, kliknij Plik > Zbuduj i uruchom....
- Skieruj urządzenie na poziomą powierzchnię w rzeczywistym świecie i poruszaj nim, aby poprawić rozpoznawanie otoczenia przez ARCore.
- Gdy ARCore wykryje płaszczyznę, na powierzchniach w rzeczywistym świecie powinna pojawić się tekstura ziemi.
ARPlaneManagertworzy instancję podanego elementuPlane Prefabdla każdego wykrytego samolotu. PrefabrykatDriving Surface Planema komponentARPlaneMeshVisualizer, który tworzy siatkę dla danego obiektuARPlane.
W kolejnym kroku użyjesz wykrytej płaszczyzny jako pola gry.
4. Przeprowadź test pozycji wskaźnika na wykrytych płaszczyznach
W poprzednim kroku zaprogramowaliśmy aplikację, która potrafi wykrywać samoloty. Te płaszczyzny są odzwierciedlone w scenie gry. Teraz dodasz interaktywność do tych płaszczyzn, tworząc celownik i samochód, który będzie jeździć po wykrytej płaszczyźnie.
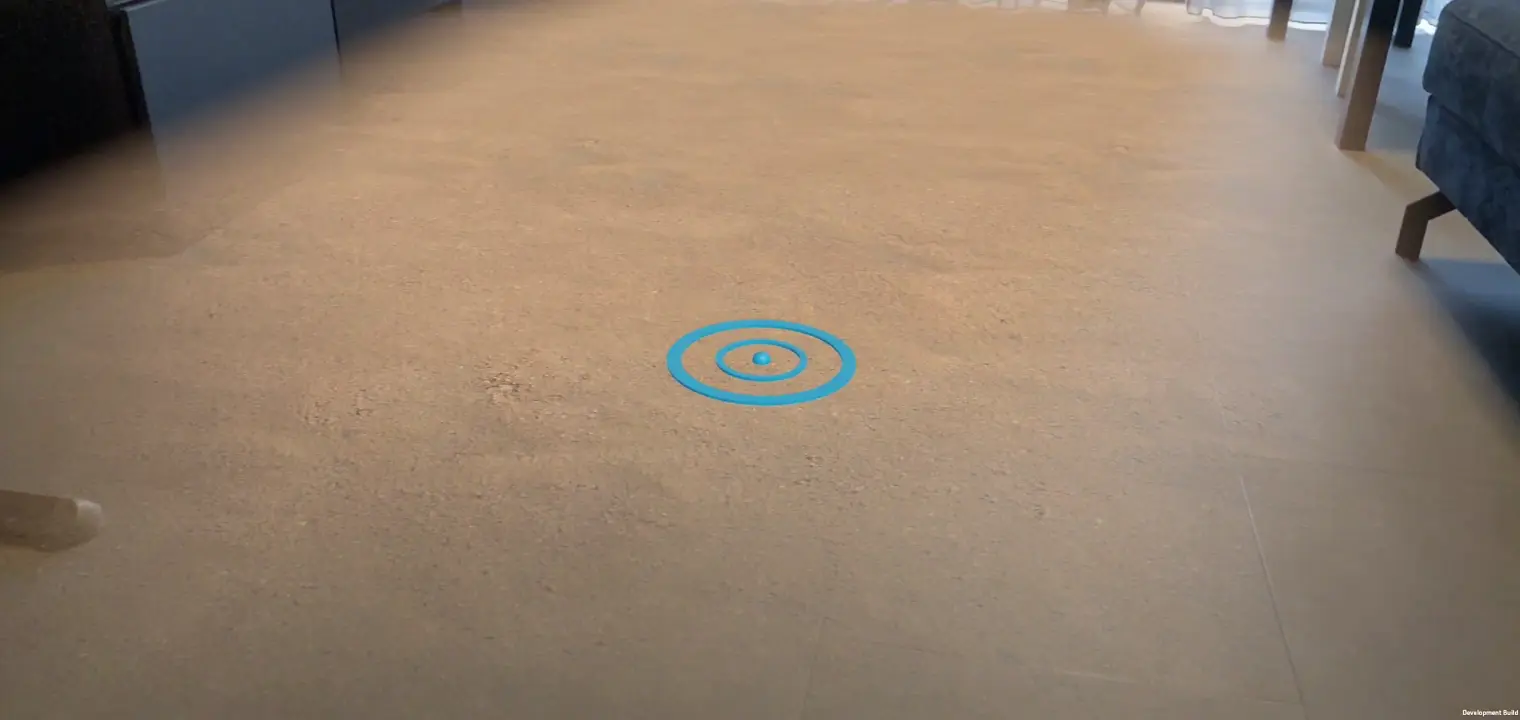
Tworzenie siatki celowniczej
Sterowanie w tej aplikacji polega na kierowaniu telefonu na powierzchnię. Aby zapewnić wyraźną informację wizualną o wyznaczonej lokalizacji, użyj siatki celowniczej.

Aby „przykleić” ten celownik do płaszczyzny AR, użyj testu pozycji wskaźnika. Test pozycji wskaźnika to technika obliczania przecięć podczas rzutowania promienia w danym kierunku. Użyjesz testu pozycji wskaźnika, aby wykryć przecięcie w kierunku widoku kamery.

Dodawanie siatki celowniczej
- W panelu Project (Projekt) u dołu ekranu przejdź do Assets > Starter Package (Zasoby > Pakiet startowy).
- Umieść prefabrykat siatki celowniczej w scenie, przeciągając go do panelu Hierarchia projektu.
- Wybierz siatkę celowniczą w hierarchii.
- W inspektorze kliknij Add Component (Dodaj komponent). Dodaj skrypt
ReticleBehaviourz pakietu startowego. Ten skrypt zawiera kod standardowy do sterowania siatką celowniczą. - Skrypt
ReticleBehaviourjest zależny od utworzonego wcześniej skryptuDriving Surface Manager, więc dodaj zależność, klikając selektorDriving Surface Manager. Wybierz kartę Scena i kliknijDriving Surface Manager.

Edytuj ReticleBehaviour
Skrypt ReticleBehavior umieści celownik na płaszczyźnie znajdującej się na środku obszaru widocznego na urządzeniu.
- Otwórz skrypt
ReticleBehaviour.cs, klikając dwukrotnie poleScript. - Określ środek ekranu za pomocą
ViewToScreenPointkamery. Edytuj metodęUpdate(), aby dodać te elementy:
var screenCenter = Camera.main.ViewportToScreenPoint(new Vector3(0.5f, 0.5f));
- Użyj tego punktu, aby przeprowadzić raycasting. Dodaj te informacje:
var hits = new List<ARRaycastHit>();
DrivingSurfaceManager.RaycastManager.Raycast(screenCenter, hits, TrackableType.PlaneWithinBounds);
Zmienna hits będzie zawierać ARRaycastHit, które opisują punkty na śledzonych obiektach, przez które przechodzi ray.
- Określ punkt przecięcia, który Cię interesuje, wysyłając zapytanie do listy
hits. Priorytetem jest zablokowana płaszczyzna zawarta wDrivingSurfaceManager. Jeśli nie istnieje, użyj pierwszej płaszczyzny, która została trafiona. Na końcu plikuUpdate()dodaj te informacje:
CurrentPlane = null;
ARRaycastHit? hit = null;
if (hits.Length > 0)
{
    // If you don't have a locked plane already...
    var lockedPlane = DrivingSurfaceManager.LockedPlane;
    hit = lockedPlane == null
        // ... use the first hit in `hits`.
        ? hits[0]
        // Otherwise use the locked plane, if it's there.
        : hits.SingleOrDefault(x => x.trackableId == lockedPlane.trackableId);
}
- Jeśli
hitzawiera wynik, przenieś transformację tegoGameObjectna pozycję trafienia.
if (hit.HasValue)
{
    CurrentPlane = DrivingSurfaceManager.PlaneManager.GetPlane(hit.Value.trackableId);
    // Move this reticle to the location of the hit.
    transform.position = hit.Value.pose.position;
}
Child.SetActive(CurrentPlane != null);
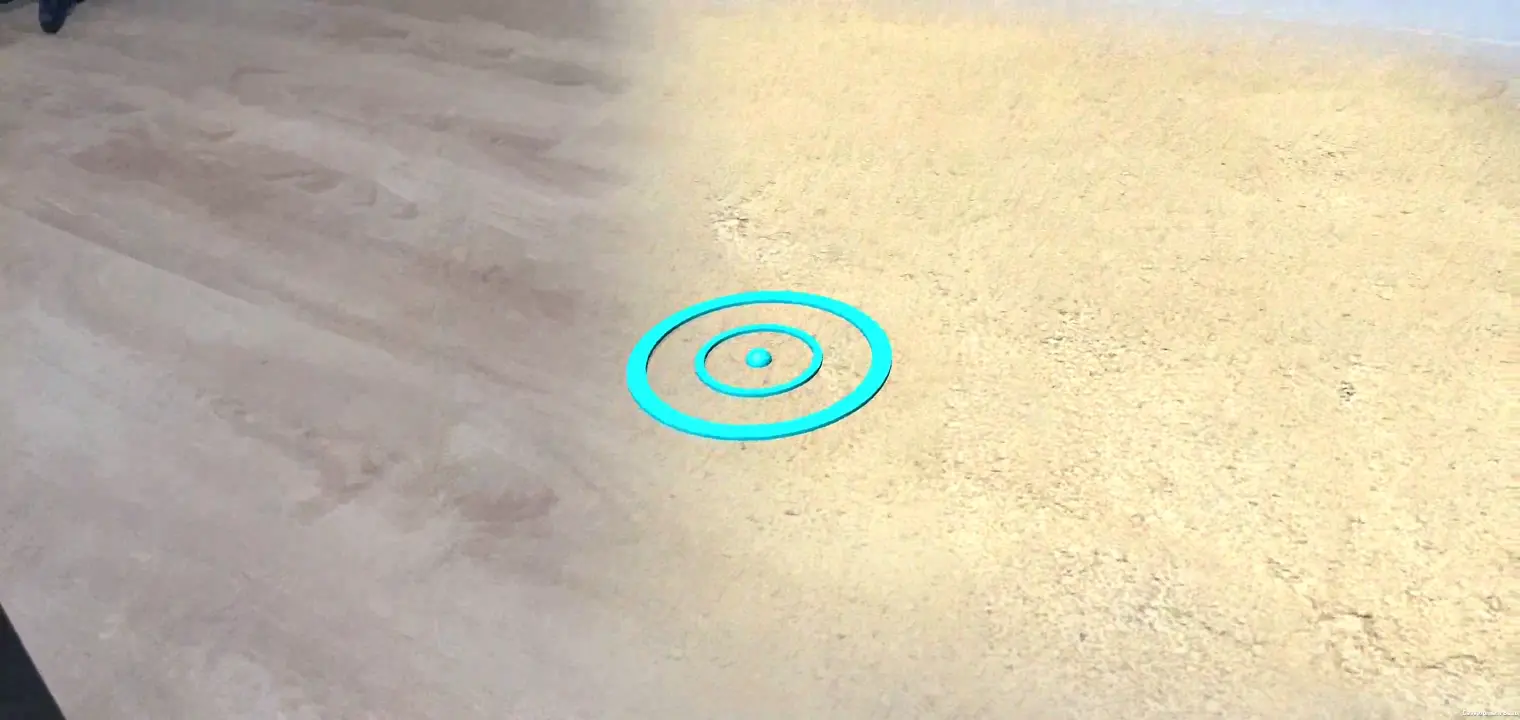
Testowanie siatki celowniczej
- Aby przetestować zmiany, kliknij Plik > Zbuduj i uruchom....
- Gdy skierujesz urządzenie na samolot, celownik powinien podążać za ruchami kamery.
Tworzenie samochodu
Gracz będzie sterować zabawką, która będzie jechać w kierunku celownika. Model i zachowanie tego samochodu są dostępne w pakiecie startowym.
Dodawanie CarManager do sceny
- W hierarchii utwórz nowy pusty obiekt
GameObject. - Zmień jego nazwę na
Car Spawner. - Wybierz utworzony obiekt. W panelu Hierarchia kliknij Dodaj komponent, aby dodać komponent
CarManager. - Skonfiguruj zależności
CarManager, klikając selektor w każdym polu:- Gotowy element samochodu: w sekcji Komponenty wybierz Gotowy element samochodu.
- Celownik: w sekcji Scena wybierz Prefabryk celownika.
- Menedżer powierzchni do jazdy: w sekcji Scena wybierz Menedżer powierzchni do jazdy.
To działanie CarManager powoduje pojawienie się zabawkowego samochodu na płaszczyźnie, na której znajduje się celownik. Jeśli chcesz, możesz sprawdzić CarBehaviourskrypt, aby dowiedzieć się, jak zaprogramowano samochód.
Jazdy próbne
- Aby przetestować zmiany, kliknij Plik > Zbuduj i uruchom.
- Gdy klikniesz samolot, w tym miejscu powinien pojawić się mały samochód. Samochód będzie podążać za siatką celowniczą.
Dodawanie elementu gry
Teraz, gdy gracz może sterować obiektem na scenie, wyznacz mu miejsce docelowe, do którego ma się udać.
- Utwórz nowy pusty obiekt
GameObjectw hierarchii. - Zmień jego nazwę na
Package Spawner. - Wybierz utworzony obiekt. W panelu Hierarchia kliknij Dodaj komponent, aby dodać do niego komponent
PackageSpawner. - Skonfiguruj zależności
PackageSpawner, klikając selektor w każdym polu:- Package Prefab: w sekcji Assets wybierz Package Prefab.
- Menedżer powierzchni jezdnej: w sekcji Scena wybierz Menedżer powierzchni jezdnej.
To działanie PackageSpawner powoduje utworzenie nowego pakietu w losowej lokalizacji na zablokowanym ARPlane, jeśli nie ma jeszcze pakietu.
Testowanie gry
- Aby przetestować zmiany, kliknij Plik > Zbuduj i uruchom. 2. Po utworzeniu samochodu powinien pojawić się pakiet.
- Podjedź samochodem do paczki.
- Nowy pojawi się w losowym miejscu.
5. Konfigurowanie szacowania oświetlenia
Podstawowa gra jest już gotowa. Teraz dodaj do sceny AR odrobinę realizmu. W tym kroku użyjesz interfejsu ARCore Lighting Estimation API, aby wykryć oświetlenie w rzeczywistym świecie na podstawie przychodzących klatek z kamery. Te informacje będą używane do dostosowywania oświetlenia sceny do oświetlenia w świecie rzeczywistym.
Włącz szacowanie oświetlenia
- W sekcji Hierarchia rozwiń Początek sesji AR i wybierz obiekt Kamera AR.
- W Inspektorze rozwiń skrypt AR Camera Manager.
- Zmień pole Szacowanie oświetlenia na Wszystko.

Modyfikowanie światła kierunkowego
- W sekcji Hierarchia wybierz obiekt Światło kierunkowe.
- Dodaj do niego komponent
LightEstimation. Ten komponent z pakietu startowego zawiera kod do subskrybowania zmian oświetlenia. - W funkcji
FrameReceived()dodaj:
ARLightEstimationData lightEstimation = args.lightEstimation;

if (lightEstimation.averageBrightness.HasValue)
    Light.intensity = lightEstimation.averageBrightness.Value;

if (lightEstimation.averageColorTemperature.HasValue)
    Light.colorTemperature = lightEstimation.averageColorTemperature.Value;

if (lightEstimation.colorCorrection.HasValue)
    Light.color = lightEstimation.colorCorrection.Value;

if (lightEstimation.mainLightDirection.HasValue)
    Light.transform.rotation = Quaternion.LookRotation(lightEstimation.mainLightDirection.Value);

if (lightEstimation.mainLightColor.HasValue)
    Light.color = lightEstimation.mainLightColor.Value;

if (lightEstimation.mainLightIntensityLumens.HasValue)
    Light.intensity = lightEstimation.averageMainLightBrightness.Value;

if (lightEstimation.ambientSphericalHarmonics.HasValue)
{
    RenderSettings.ambientMode = AmbientMode.Skybox;
    RenderSettings.ambientProbe = lightEstimation.ambientSphericalHarmonics.Value;
}
Testowanie zmian
- Aby przetestować zmiany, kliknij Plik > Zbuduj i uruchom.
- Obiekty w scenie mogą mieć różne kolory w zależności od oświetlenia otoczenia.
- Jeśli to możliwe, spróbuj zmienić oświetlenie. Spróbuj na przykład wyłączyć światło w pomieszczeniu, w którym się znajdujesz. Oświetlenie obiektów powinno dostosować się do zmiany oświetlenia w rzeczywistości.
6. Podsumowanie
Gratulacje! Udało Ci się dotrzeć do końca tego ćwiczenia z zakresu Unity AR Foundation.
Omówione zagadnienia
- Jak skonfigurować podstawowy projekt za pomocą AR Foundation i Universal Rendering Pipeline w Unity.
- Jak używać
ARPlaneManagerdo subskrybowania nowych samolotów. - Jak używać funkcji
Raycastdo znajdowania przecięć z wirtualną geometrią. - Jak używać
ARLightEstimationDatado oświetlania sceny.
Dalsze kroki
- Zapoznaj się z przykładami AR Foundation od Unity.
- Zapoznaj się z dokumentacją AR Foundation.
- Zapoznaj się z dokumentacją Google dotyczącą rozszerzeń ARCore dla AR Foundation w Unity.
Dodatkowe zadania
Jeśli chcesz rozwinąć utworzoną grę, możesz skorzystać z tych pomysłów:
- Dodaj licznik punktów do gry, modyfikując
TextMeshPro, gdyPackageManagertworzy nowy pakiet. - Gdy gra jest uruchomiona, możesz sprawdzić informacje o wydajności, włączając nakładkę wydajności.
- Użyj opcji Persistent Raycasts, aby najpierw umieścić nowe obiekty w scenie. Gdy w tym obszarze zostanie wykryta płaszczyzna, obiekt zostanie do niej przyciągnięty.