
1. Introduction

Overview
Cloud Run services are a good fit for containers that run indefinitely listening for HTTP requests, whereas Cloud Run jobs are a better fit for containers that run to completion (currently up to 24 hours) and don't serve requests. For example, processing records from a database, processing a list of files from a Cloud Storage bucket, or a long-running operation, such as calculating Pi, would work well if implemented as a Cloud Run job.
Jobs don't have the ability to serve requests or listen on a port. This means that unlike Cloud Run services, jobs should not bundle a web server. Instead, jobs containers should exit when they are done.
In Cloud Run jobs, you can run multiple copies of your container in parallel by specifying a number of tasks. Each task represents one running copy of the container. Using multiple tasks is useful if each task can independently process a subset of your data. For example, processing 10,000 records from Cloud SQL or 10,000 files from Cloud Storage could be done faster with 10 tasks processing 1000 records or files, each in parallel.
Using Cloud Run jobs is a two step process:
- Create a job: This encapsulates all the configuration needed to run the job, such as the container image, region, environment variables.
- Run the job: This creates a new execution of the job. Optionally, set up your job to run on a schedule using Cloud Scheduler.
In this codelab, you first explore a Node.js application to take screenshots of web pages and store them to Cloud Storage. You then build a container image for the application, run it on Cloud Run jobs, update the job to process more web pages, and run the job on a schedule with Cloud Scheduler.
What you'll learn
- How to use an app to take screenshots of web pages.
- How to build a container image for the application.
- How to create a Cloud Run job for the application.
- How to run the application as a Cloud Run job.
- How to update the job.
- How to schedule the job with Cloud Scheduler.
2. Setup and Requirements
Self-paced environment setup
- Sign-in to the Google Cloud Console and create a new project or reuse an existing one. If you don't already have a Gmail or Google Workspace account, you must create one.


- The Project name is the display name for this project's participants. It is a character string not used by Google APIs. You can always update it.
- The Project ID is unique across all Google Cloud projects and is immutable (cannot be changed after it has been set). The Cloud Console auto-generates a unique string; usually you don't care what it is. In most codelabs, you'll need to reference your Project ID (typically identified as
PROJECT_ID). If you don't like the generated ID, you might generate another random one. Alternatively, you can try your own, and see if it's available. It can't be changed after this step and remains for the duration of the project. - For your information, there is a third value, a Project Number, which some APIs use. Learn more about all three of these values in the documentation.
- Next, you'll need to enable billing in the Cloud Console to use Cloud resources/APIs. Running through this codelab won't cost much, if anything at all. To shut down resources to avoid incurring billing beyond this tutorial, you can delete the resources you created or delete the project. New Google Cloud users are eligible for the $300 USD Free Trial program.
Start Cloud Shell
While Google Cloud can be operated remotely from your laptop, in this codelab you will be using Google Cloud Shell, a command line environment running in the Cloud.
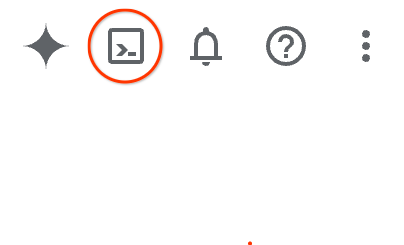
From the Google Cloud Console, click the Cloud Shell icon on the top right toolbar:
It should only take a few moments to provision and connect to the environment. When it is finished, you should see something like this:

This virtual machine is loaded with all the development tools you'll need. It offers a persistent 5GB home directory, and runs on Google Cloud, greatly enhancing network performance and authentication. All of your work in this codelab can be done within a browser. You do not need to install anything.
Set up gcloud
In Cloud Shell, set your project ID and the region you want to deploy the Cloud Run job to. Save them as PROJECT_ID and REGION variables. In the future, you will be able to pick a region from one of the Cloud Run locations.
PROJECT_ID=[YOUR-PROJECT-ID]
REGION=us-central1
gcloud config set core/project $PROJECT_ID
Enable APIs
Enable all necessary services:
gcloud services enable \
  artifactregistry.googleapis.com \
  cloudbuild.googleapis.com \
  run.googleapis.com
3. Get the code
You first explore a Node.js application to take screenshots of web pages and store them to Cloud Storage. Later, you build a container image for the application and run it as a job on Cloud Run.
From the Cloud Shell, run the following command to clone the application code from this repo:
git clone https://github.com/GoogleCloudPlatform/jobs-demos.git
Go to the directory containing the application:
cd jobs-demos/screenshot
You should see this file layout:
screenshot
 |
 ├── Dockerfile
 ├── README.md
 ├── screenshot.js
 ├── package.json
Here's a brief description of each file:
screenshot.jscontains the Node.js code for the application.package.jsondefines the library dependencies.Dockerfiledefines the container image.
4. Explore the code
To explore the code, use the built-in text editor by clicking the Open Editor button at the top of the Cloud Shell window.

Here's a brief explanation of each file.
screenshot.js
screenshot.js first adds Puppeteer and Cloud Storage as dependencies. Puppeteer is a Node.js library you use to take screenshots of web pages:
const puppeteer = require('puppeteer');
const {Storage} = require('@google-cloud/storage');
There is an initBrowser function to initialize Puppeteer and takeScreenshot function to take screenshots of a given URL:
async function initBrowser() {
  console.log('Initializing browser');
  return await puppeteer.launch();
}

async function takeScreenshot(browser, url) {
  const page = await browser.newPage();

  console.log(`Navigating to ${url}`);
  await page.goto(url);

  console.log(`Taking a screenshot of ${url}`);
  return await page.screenshot({
    fullPage: true
  });
}
Next, there is a function to get or create a Cloud Storage bucket and another one to upload the screenshot of a webpage to a bucket:
async function createStorageBucketIfMissing(storage, bucketName) {
  console.log(`Checking for Cloud Storage bucket '${bucketName}' and creating if not found`);
  const bucket = storage.bucket(bucketName);
  const [exists] = await bucket.exists();
  if (exists) {
    // Bucket exists, nothing to do here
    return bucket;
  }

  // Create bucket
  const [createdBucket] = await storage.createBucket(bucketName);
  console.log(`Created Cloud Storage bucket '${createdBucket.name}'`);
  return createdBucket;
}

async function uploadImage(bucket, taskIndex, imageBuffer) {
  // Create filename using the current time and task index
  const date = new Date();
  date.setMinutes(date.getMinutes() - date.getTimezoneOffset());
  const filename = `${date.toISOString()}-task${taskIndex}.png`;

  console.log(`Uploading screenshot as '${filename}'`)
  await bucket.file(filename).save(imageBuffer);
}
Finally, the main function is the entry point:
async function main(urls) {
  console.log(`Passed in urls: ${urls}`);

  const taskIndex = process.env.CLOUD_RUN_TASK_INDEX || 0;
  const url = urls[taskIndex];
  if (!url) {
    throw new Error(`No url found for task ${taskIndex}. Ensure at least ${parseInt(taskIndex, 10) + 1} url(s) have been specified as command args.`);
  }
  const bucketName = process.env.BUCKET_NAME;
  if (!bucketName) {
    throw new Error('No bucket name specified. Set the BUCKET_NAME env var to specify which Cloud Storage bucket the screenshot will be uploaded to.');
  }

  const browser = await initBrowser();
  const imageBuffer = await takeScreenshot(browser, url).catch(async err => {
    // Make sure to close the browser if we hit an error.
    await browser.close();
    throw err;
  });
  await browser.close();

  console.log('Initializing Cloud Storage client')
  const storage = new Storage();
  const bucket = await createStorageBucketIfMissing(storage, bucketName);
  await uploadImage(bucket, taskIndex, imageBuffer);

  console.log('Upload complete!');
}

main(process.argv.slice(2)).catch(err => {
  console.error(JSON.stringify({severity: 'ERROR', message: err.message}));
  process.exit(1);
});
Notice the following about the main method:
- URLs are passed as arguments.
- Bucket name is passed in as the user-defined
BUCKET_NAMEenvironment variable. The bucket name must be globally unique across all Google Cloud. - A
CLOUD_RUN_TASK_INDEXenvironment variable is passed by Cloud Run jobs. Cloud Run jobs can run multiple copies of the application as unique tasks.CLOUD_RUN_TASK_INDEXrepresents the index of the running task. It defaults to zero when the code is run outside of Cloud Run jobs. When the application is run as multiple tasks, each task/container picks up the URL it's responsible for, takes a screenshot, and saves the image to the bucket.
package.json
The package.json file defines the application and specifies the dependencies for Cloud Storage and Puppeteer:
{
  "name": "screenshot",
  "version": "1.0.0",
  "description": "Create a job to capture screenshots",
  "main": "screenshot.js",
  "scripts": {
    "test": "echo \"Error: no test specified\" && exit 1"
  },
  "author": "Google LLC",
  "license": "Apache-2.0",
  "dependencies": {
    "@google-cloud/storage": "^5.18.2",
    "puppeteer": "^13.5.1"
  }
}
Dockerfile
The Dockerfile defines the container image for the application with all the required libraries and dependencies:
FROM ghcr.io/puppeteer/puppeteer:16.1.0
COPY package*.json ./
RUN npm ci --omit=dev
COPY . .
ENTRYPOINT ["node", "screenshot.js"]
5. Deploy a job
Before creating a job, you need to create a service account that you will use to run the job.
gcloud iam service-accounts create screenshot-sa --display-name="Screenshot app service account"
Grant storage.admin role to the service account, so it can be used to create buckets and objects.
gcloud projects add-iam-policy-binding $PROJECT_ID \
  --role roles/storage.admin \
  --member serviceAccount:screenshot-sa@$PROJECT_ID.iam.gserviceaccount.com
You're now ready to deploy a Cloud Run job that includes the configuration needed to run the job.
gcloud beta run jobs deploy screenshot \
  --source=. \
  --args="https://example.com" \
  --args="https://cloud.google.com" \
  --tasks=2 \
  --task-timeout=5m \
  --region=$REGION \
  --set-env-vars=BUCKET_NAME=screenshot-$PROJECT_ID-$RANDOM \
  --service-account=screenshot-sa@$PROJECT_ID.iam.gserviceaccount.com
This uses source based deployment and creates a Cloud Run job without executing it.
Notice how the web pages are passed in as arguments. The bucket name to save the screenshots is passed in as an environment variable.
You can run multiple copies of your container in parallel by specifying a number of tasks to run with --tasks flag. Each task represents one running copy of the container. Using multiple tasks is useful if each task can independently process a subset of your data. To facilitate this, each task is aware of its index, which is stored in the CLOUD_RUN_TASK_INDEX environment variable. Your code is responsible for determining which task handles which subset of the data. Notice --tasks=2 in this sample. This makes sure 2 containers run for the 2 URLs we want to process.
Each task can run for up to 24 hours. You can decrease this timeout using the --task-timeout flag, as we did in this example. All tasks need to succeed in order for the job to successfully complete. By default, failed tasks are not retried. You can configure tasks to be retried when they fail. If any task exceeds its number of retries, the whole job fails.
By default, your job will run with as many tasks in parallel as possible. This will be equal to the number of tasks for your job, up to a maximum of 100. You may wish to set parallelism lower for jobs that access a backend with limited scalability. For example, a database that supports a limited number of active connections. You can lower parallelism with the --parallelism flag.
6. Run a job
Before running the job, list the job to see that it has been created:
gcloud run jobs list

✔
JOB: screenshot
REGION: us-central
LAST RUN AT:
CREATED: 2022-02-22 12:20:50 UTC
Run the job with the following command:
gcloud run jobs execute screenshot --region=$REGION
This executes the job. You can list current and past executions:
gcloud run jobs executions list --job screenshot --region=$REGION

...
JOB: screenshot
EXECUTION: screenshot-znkmm
REGION: $REGION
RUNNING: 1
COMPLETE: 1 / 2
CREATED: 2022-02-22 12:40:42 UTC
Describe the execution. You should see the green checkmark and tasks completed successfully message:
gcloud run jobs executions describe screenshot-znkmm --region=$REGION

✔ Execution screenshot-znkmm in region $REGION
2 tasks completed successfully


Image:           $REGION-docker.pkg.dev/$PROJECT_ID/containers/screenshot at 311b20d9...
Tasks:           2
Args:            https://example.com https://cloud.google.com
Memory:          1Gi
CPU:             1000m
Task Timeout:    3600s
Parallelism:     2
Service account: 11111111-compute@developer.gserviceaccount.com
Env vars:
  BUCKET_NAME    screenshot-$PROJECT_ID-$RANDOM
You can also check Cloud Run jobs page of Cloud Console to see the status:

If you check the Cloud Storage bucket, you should see the two screenshot files created:

Sometimes you may need to stop an execution before it completes - perhaps because you realized you need to run the job with different parameters or there's an error in the code, and you don't want to use unnecessary compute time.
To stop an execution of your job, you need to delete the execution:
gcloud run jobs executions delete screenshot-znkmm --region=$REGION
7. Update a job
New versions of your container don't automatically get picked up by Cloud Run jobs in the next execution. If you change the code for your job, you need to rebuild the container and update your job. Using tagged images will help you to identify which version of the image is currently being used.
Similarly, you also need to update the job if you want to update some of the configuration variables. Subsequent executions of the job will use the new container and configuration settings.
Update the job and change the pages that the app takes screenshots of in the --args flag. Also update the --tasks flag to reflect the number of pages.
gcloud run jobs update screenshot \
  --args="https://www.pinterest.com" \
  --args="https://www.apartmenttherapy.com" \
  --args="https://www.google.com" \
  --region=$REGION \
  --tasks=3
Run the job again. This time pass in the --wait flag to wait for executions to finish:
gcloud run jobs execute screenshot --region=$REGION --wait
After a few seconds, you should see 3 more screenshots added to the bucket:

8. Schedule a job
So far, you're running jobs manually. In a real-world scenario, you probably want to run jobs in response to an event or on a schedule. Let's see how to run the screenshot job on a schedule using Cloud Scheduler.
First, make sure the Cloud Scheduler API is enabled:
gcloud services enable cloudscheduler.googleapis.com
Go to the Cloud Run jobs detail page and click on the Triggers section:

Select the Add Scheduler Trigger button:

A panel opens up on the right. Create a Scheduler job to run every day at 9:00 with this configuration and select Continue:

In the next page, select the default compute service account and select Create:

You should now see a new Cloud Scheduler trigger created:

Click on View Details to go to the Cloud Scheduler page.
You can wait until 9am for scheduler to kick in or you can manually trigger the Cloud Scheduler by selecting Force Run:

After a few seconds, you should see the Cloud Scheduler job executed successfully:

You should also see 3 more screenshots added by the call from Cloud Scheduler:

9. Congratulations
Congratulations, you finished the codelab!
Cleanup (Optional)
To avoid incurring charges, it's a good idea to clean up resources.
If you don't need the project, you can simply delete the project:
gcloud projects delete $PROJECT_ID
If you need the project, you can delete resources individually.
Delete the source code:
rm -rf ~/jobs-demos/
Delete the Artifact Registry repository:
gcloud artifacts repositories delete containers --location=$REGION
Delete the service account:
gcloud iam service-accounts delete screenshot-sa@$PROJECT_ID.iam.gserviceaccount.com
Delete the Cloud Run job:
gcloud run jobs delete screenshot --region=$REGION
Delete the Cloud Scheduler job:
gcloud scheduler jobs delete screenshot-scheduler-trigger --location=$REGION
Delete the Cloud Storage bucket:
gcloud storage rm --recursive gs://screenshot-$PROJECT_ID
What we've covered
- How to use an app to take screenshots of web pages.
- How to build a container image for the application.
- How to create a Cloud Run job for the application.
- How to run the application as a Cloud Run job.
- How to update the job.
- How to schedule the job with Cloud Scheduler.