
1. Overview
There are several options to connect to a private Cloud SQL instance from another project or VPCs. Private Service Connect (PSC) allows service producers the ability to expose their services via service attachments. These service attachments can be used by consumers to create PSC endpoints and/or PSC backends in their environment and connect to these producer services via a specified private IP.
Cloud SQL has the capability to utilize PSC service attachment to allow private connection. In this lab you can configure and test the option.
In this lab, you're going to build a simple architecture that illustrates the use of PSC endpoint access with CloudSQL.
Figure1.
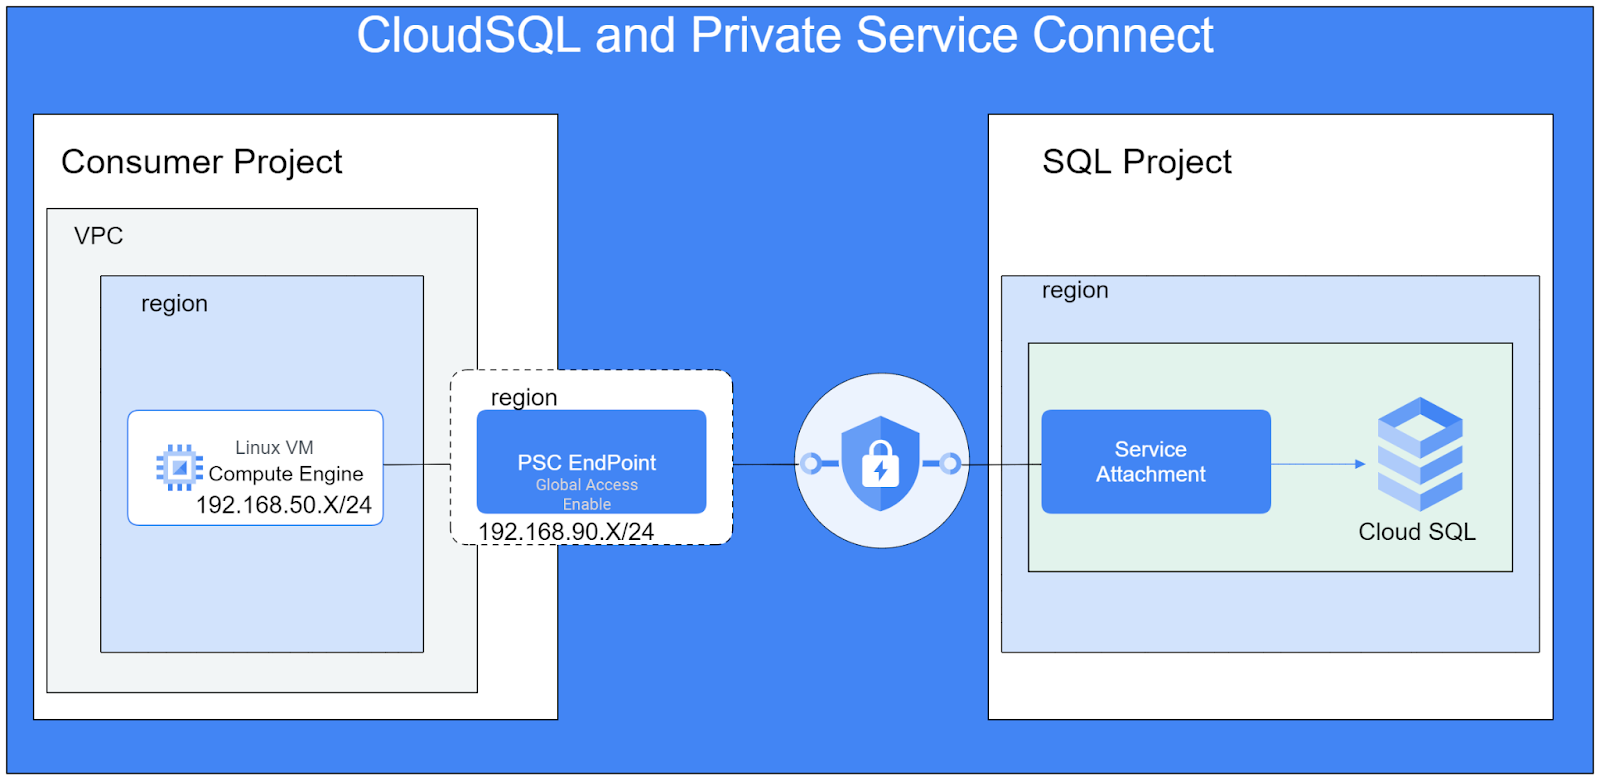
For this lab, you will need two projects or separate VPCs in the same project.
Objectives
In this lab you will learn how to perform the following task:
- Create a CloudSQL instance with PSC service attachment.
- Create a static IP address
- Create a PSC endpoint in the consumer VPC to connect to the CloudSQL database
- Verify access to the SQL database from a test VM in the consumer network via PSC endpoint IP.
2. Setup and Requirements
Self-paced environment setup
- Sign-in to the Google Cloud Console and create a new project or reuse an existing one. If you don't already have a Gmail or Google Workspace account, you must create one.

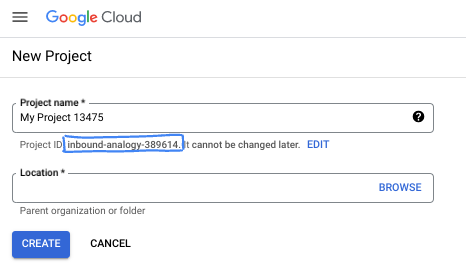
- The Project name is the display name for this project's participants. It is a character string not used by Google APIs. You can always update it.
- The Project ID is unique across all Google Cloud projects and is immutable (cannot be changed after it has been set). The Cloud Console auto-generates a unique string; usually you don't care what it is. In most codelabs, you'll need to reference your Project ID (typically identified as
PROJECT_ID). If you don't like the generated ID, you might generate another random one. Alternatively, you can try your own, and see if it's available. It can't be changed after this step and remains for the duration of the project. - For your information, there is a third value, a Project Number, which some APIs use. Learn more about all three of these values in the documentation.
- Next, you'll need to enable billing in the Cloud Console to use Cloud resources/APIs. Running through this codelab won't cost much, if anything at all. To shut down resources to avoid incurring billing beyond this tutorial, you can delete the resources you created or delete the project. New Google Cloud users are eligible for the $300 USD Free Trial program.
Start Cloud Shell
While Google Cloud can be operated remotely from your laptop, in this codelab you will be using Google Cloud Shell, a command line environment running in the Cloud.
From the Google Cloud Console, click the Cloud Shell icon on the top right toolbar:

It should only take a few moments to provision and connect to the environment. When it is finished, you should see something like this:

This virtual machine is loaded with all the development tools you'll need. It offers a persistent 5GB home directory, and runs on Google Cloud, greatly enhancing network performance and authentication. All of your work in this codelab can be done within a browser. You do not need to install anything.
3. Task 1. Setup Environment for database project with (Terraform)
In the database project, we will create a custom VPC with Firewall rules and subnet. Open the cloud console and select the project you will be using for the database.
- Open Cloud Shell located at the top of your console on the right, ensure you see the database Project ID for the database project in Cloud Shell, confirm any prompts to allow access.

- Create a folder called terraform-db and move to folder
mkdir terraform-db && cd terraform-db
- Create a main.tf, variable.tf and database.tf file.
touch main.tf variable.tf database.tf
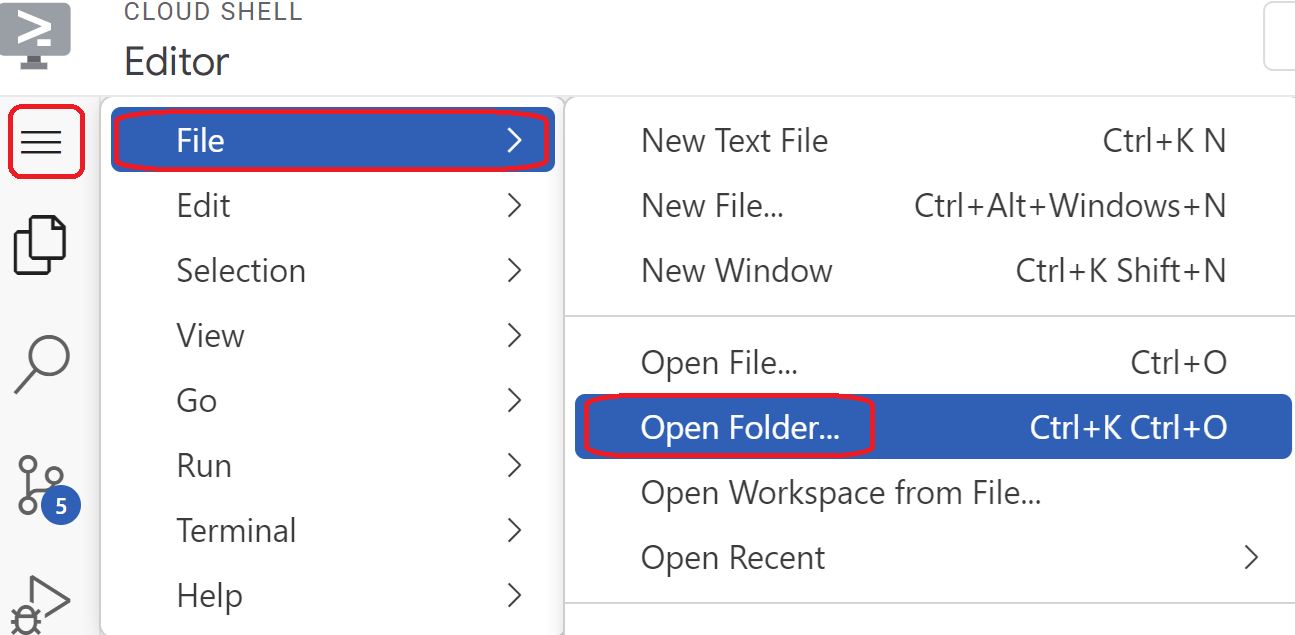
- Switch over to the Cloud Shell editor view. Select editor, ensure you allow any necessary prompts so the interface can load.
- Once loaded navigate to, File > Open Folder and go to the /home/your-user-name/terraform-db and select Ok to open the folder in the editor.
- Select the variable.tf file and add the following. Replace the
your-database-project-id-heretext with your actual database project ID in quotes. Replace theyour-consumer-project-id-heretext with your actual consumer project ID in quotes.
variable "project_id" {
  type = string
  default = "your-database-project-id-here"
}

variable "project_id_consumer" {
  type = set(string)
  default = ["your-consumer-project-id-here"]
}

variable "network_id" {
  type = string
  default = "database-net"
}

variable "region_id" {
  type = string
  default = "us-east1"
}

variable "db_password" {
  type = string
  default = "cloudsql24"
}
- Next open the main.tf file. We are going to add some terraform code to perform various actions as explained below.
Enable API's |
|
Create VPC |
|
Add Firewall rules |
|
- Copy and paste the following into the main .tf file.
resource "google_project_service" "default" {
  for_each = toset([
    "compute.googleapis.com",
    "sqladmin.googleapis.com"
  ])

  service            = each.value
  disable_on_destroy = false
}

resource "google_compute_network" "default" {
  project                 = var.project_id
  name                    = var.network_id
  auto_create_subnetworks = true
  mtu                     = 1460
  routing_mode            = "GLOBAL"
}

resource "google_compute_firewall" "allow_icmp" {
  name    = "allow-icmp-${google_compute_network.default.name}"
  network = google_compute_network.default.id
  project = var.project_id

  allow {
    protocol = "icmp"
  }

  source_ranges = ["0.0.0.0/0"]
  target_tags   = ["allow-icmp"]
}

resource "google_compute_firewall" "allow_ssh" {
  name    = "allow-ssh-${google_compute_network.default.name}"
  network = google_compute_network.default.id
  project = var.project_id

  allow {
    protocol = "tcp"
    ports    = ["22"]
  }

  source_ranges = ["0.0.0.0/0"]
  target_tags   = ["allow-ssh"]
}

resource "google_compute_firewall" "allow_sql" {
  name    = "allow-sql-${google_compute_network.default.name}"
  network = google_compute_network.default.id
  project = var.project_id

  allow {
    protocol = "tcp"
    ports    = ["3306"]
  }

  source_ranges = ["0.0.0.0/0"]
 }

resource "google_compute_firewall" "allow_internal" {
  name    = "allow-internal-${google_compute_network.default.name}"
  network = google_compute_network.default.id
  project = var.project_id

  allow {
    protocol = "icmp"
    }


  allow {
    protocol = "tcp"
    ports    = ["0-65535"]
  }
  allow {
    protocol = "udp"
    ports    = ["0-65535"]
  }

  source_ranges = ["10.128.0.0/9"]
 }
- Switch back to Cloud Shell terminal make sure your are in the terraform-db directory
cd terraform-dband run the following commands
terraform init
Initializes the working directory. This step downloads the providers required for the given configuration.
terraform plan
Generates an execution plan, showing what actions Terraform will take to deploy your infrastructure.
- Now to create the resources run the
terraform applycommand and typeyesto run.
4. Task 2. Create CloudSQL instance with PSC attachment (Terraform)
Let's use Terraform to create a CloudSQL instance, with the PSC option to allow connectivity. Complete this configuration in the database project.
- Switch over to the Cloud Shell editor view. Ensure you are in the
terraform-dbfolder. Select thedatabase.tffile and add the following.
resource "google_sql_database_instance" "default" {
  name             = "psc-sql-db"
  region           = var.region_id
  database_version = "MYSQL_8_0"
  settings {
    tier              = "db-f1-micro"
    availability_type = "REGIONAL"
    backup_configuration {
      enabled            = true
      binary_log_enabled = true
    }
    ip_configuration {
      psc_config {
        psc_enabled               = true
        allowed_consumer_projects = var.project_id_consumer
      }
      ipv4_enabled = false
    }
  }
  deletion_protection = false
}

resource "google_sql_user" "users" {
  name     = "testsql"
  instance = google_sql_database_instance.default.name
  password = var.db_password
}
- Switch back to Cloud Shell terminal, make sure you are in the terraform-db directory. Now to create the resources run the
terraform applycommand and typeyesto run. Creating the CloudSQL instance with PSC attachment may take up to 5+ minutes.
Verify database
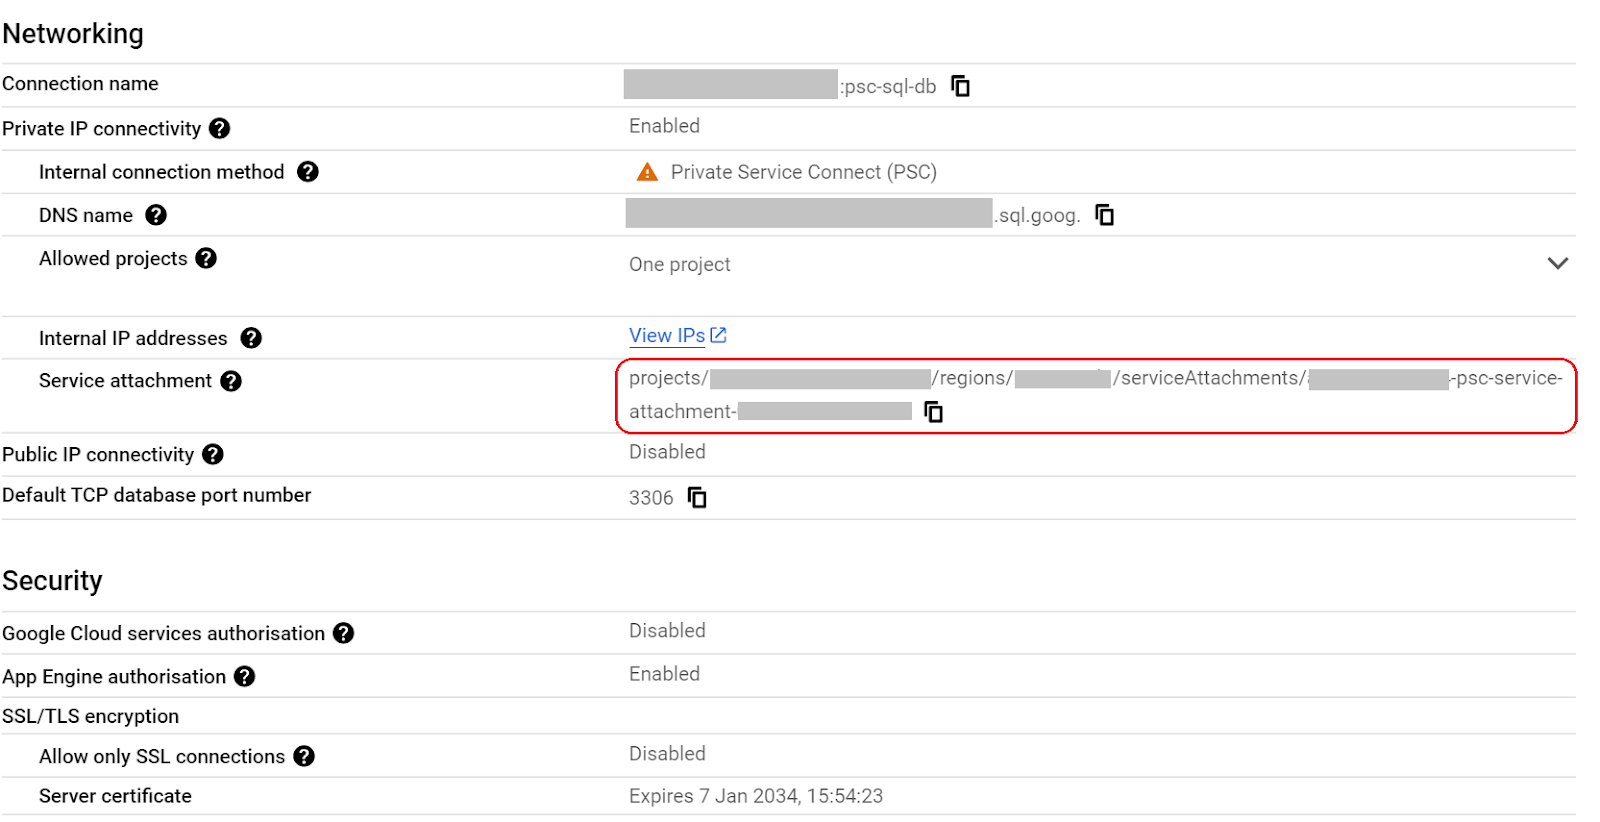
- After completion, Go to SQL in the console, select the newly created psc-sql-db database instance.
- On the left side expand the SQL options slideout and select Connections
- Under the summary tab you can see information about the connection.
- Copy the Service attachment address and save it somewhere on your system.
- You will need this to complete task 3 step 8.
- On the left side expand the SQL options slideout and select Users.
- You should see a user called testsql with password cloudsql24 (This will be used to access db later on)
5. Task 3. Setup Environment for consumer project (Terraform)
In the consumer project, we will create a custom VPC with Firewall rules and subnet. Open the cloud console and select the project you will be using.
- At the top of your console on the right next to Google Cloud icon, click the dropdown and then select the all tab.

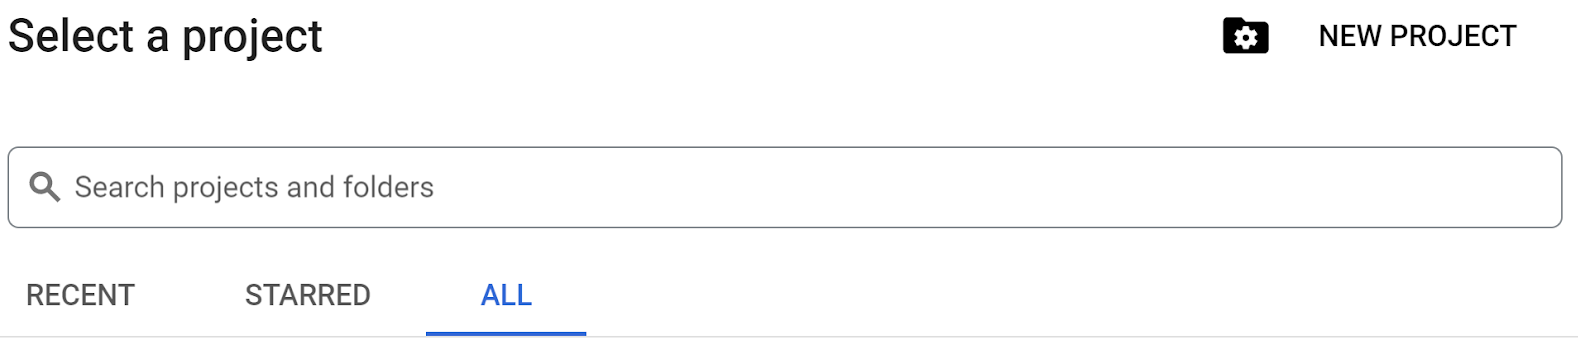
- From the listed projects select your consumer project ID to continue.
- Open Cloud Shell located at the top of your console on the right, ensure you see the consumer project ID in Cloud Shell, confirm any prompts to allow access.
- Create a folder called terraform-consumer and move to folder
mkdir terraform-consumer && cd terraform-consumer
- Create a main.tf, variable.tf and psc.tf file.
touch main.tf variable.tf psc.tf
- Switch over to the Cloud Shell editor view for the consumer project ID. Select editor, ensure you allow any necessary prompts so the interface can load.
- Once loaded navigate to, File > Open Folder and go to the /home/your-user-name/terraform-consumer and select Ok to open the folder in the editor.
- Select the variable.tf file and add the following. Replace the
your-consumer-project-id-heretext with your actual consumer project ID in quotes Replace theyour-psc-attachment-id-heretext with your psc attachment address in quotes. This is the ID you copied in task 2 section 2-5
variable "project_id" {
  type = string
  default = "your-consumer-project-id-here"
}

variable "psc_attachment_id" {
  type = string
  default = "your-psc-attachment-id-here"
}

variable "network_id" {
  type = string
  default = "psc-endpoint-net"
}

variable "region_id" {
  type = string
  default = "us-east1"
}

variable "region_id2" {
  type = string
  default = "us-central1"
}
- Next open the main.tf file. We are going to add some terraform code to perform various actions as explained below.
Enable API's |
|
Create VPC |
|
Create NAT gateway |
|
Add Firewall rules |
|
- Copy and paste the following into the main .tf file.
resource "google_project_service" "default" {
  for_each = toset([
    "compute.googleapis.com",
    "cloudresourcemanager.googleapis.com"
  ])

  service            = each.value
  disable_on_destroy = false
}

resource "google_compute_network" "default" {
  project                 = var.project_id
  name                    = var.network_id
  auto_create_subnetworks = false
  mtu                     = 1460
  routing_mode            = "GLOBAL"
}

resource "google_compute_subnetwork" "vm_subnet" {
  name          = "vm-subnet"
  ip_cidr_range = "192.168.50.0/24"
  region        = var.region_id2
  network       = google_compute_network.default.name
  project       = var.project_id
}

resource "google_compute_subnetwork" "psc_subnet" {
  name          = "psc-subnet"
  ip_cidr_range = "192.168.90.0/24"
  region        = var.region_id
  network       = google_compute_network.default.name
  project       = var.project_id
}

resource "google_compute_router" "default" {
  name    = "outbound-nat"
  region  = var.region_id2
  network = google_compute_network.default.id

 bgp {
  asn = 64514
  }
}

resource "google_compute_router_nat" "default" {
  name = "outbound-nat-gw"
  router = google_compute_router.default.name
  region = google_compute_router.default.region
  nat_ip_allocate_option = "AUTO_ONLY"
  source_subnetwork_ip_ranges_to_nat = "ALL_SUBNETWORKS_ALL_IP_RANGES"

  log_config {
    enable = true
    filter = "ERRORS_ONLY"
  }
}

resource "google_compute_firewall" "allow_icmp" {
  name    = "allow-icmp-${google_compute_network.default.name}"
  network = google_compute_network.default.id
  project = var.project_id

  allow {
    protocol = "icmp"
  }

  source_ranges = ["0.0.0.0/0"]

}

resource "google_compute_firewall" "allow_ssh" {
  name    = "allow-ssh-${google_compute_network.default.name}"
  network = google_compute_network.default.id
  project = var.project_id

  allow {
    protocol = "tcp"
    ports    = ["22"]
  }

  source_ranges = ["0.0.0.0/0"]
  target_tags   = ["allow-ssh"]
}


resource "google_compute_firewall" "allow_internal" {
  name    = "allow-internal-${google_compute_network.default.name}"
  network = google_compute_network.default.id
  project = var.project_id

  allow {
    protocol = "icmp"
    }


  allow {
    protocol = "tcp"
    ports    = ["0-65535"]
  }
  allow {
    protocol = "udp"
    ports    = ["0-65535"]
  }

  source_ranges = ["192.168.0.0/16"]
 }
- Switch back to Cloud Shell terminal make sure your are in the terraform-consumer directory
cd terraform-consumerin the consumer project and run the following commands
terraform init
Initializes the working directory. This step downloads the providers required for the given configuration.
terraform plan
Generates an execution plan, showing what actions Terraform will take to deploy your infrastructure.
- Now to create the resources run the
terraform applycommand and typeyesto run.
6. Task 4. Create the PSC endpoint to SQL DB attachment in consumer project and test VM (Terraform)
Complete this configuration in the consumer project.
- Switch back to Cloud Shell editor, open the terraform-consumer directory and select the
psc.tffile. Add the following Terraform code to the file. This creates a static internal IP, a PSC endpoint and a test VM with Maria DB installed.
resource "google_compute_address" "default" {
  name = "psc-ip"
  region = var.region_id
  address_type = "INTERNAL"
  subnetwork = google_compute_subnetwork.psc_subnet.name
  address = "192.168.90.100"
}

resource "google_compute_forwarding_rule" "default" {
  name = "psc-sql-endpoint"
  region = var.region_id
  network = google_compute_network.default.name
  ip_address = google_compute_address.default.self_link
  load_balancing_scheme = ""
  target = var.psc_attachment_id
}


resource "google_compute_instance" "sql_test_vm" {
  name         = "sql-test-vm"
  machine_type = "e2-medium"
  zone         = "${var.region_id2}-b"
  project      = var.project_id

  boot_disk {
    initialize_params {
      image = "debian-cloud/debian-11"
    }
  }

  network_interface {
    subnetwork = google_compute_subnetwork.vm_subnet.name
  }

  # No external IP address
  network_performance_config {
    total_egress_bandwidth_tier = "DEFAULT"
  }

  tags = ["allow-icmp", "allow-ssh", "allow-internal", "allow-health-check"]

  # Install MariaDB at startup
  metadata_startup_script = <<EOF
#!/bin/bash
apt-get update
apt-get install -y mariadb-server
systemctl enable mariadb
EOF
}
- Switch back to Cloud Shell terminal make sure your are in the terraform-consumer directory
cd terraform-consumerin the consumer project and run the following commands
terraform plan
Generates an execution plan, showing what actions Terraform will take to deploy your infrastructure.
- Now to create the resources run the
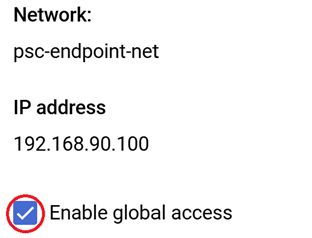
terraform applycommand and typeyesto run - Because our VM and endpoint are in different regions we need to enable Global Access on the PSC endpoint. We do this via the console
- In the consumer project console, go to Private Service Connect. Under the Connected Endpoint tab, look under the Endpoint section and select the psc-sql-endpoint
- Now select EDIT, and then click the checkbox next to Enable global access and Save option.
- Continue to next step to verify connectivity
7. Task 5. Verify endpoint connectivity from VM via PSC IP address
Complete this in the consumer project
- Go to VM Instance. Select sql-test-vm
- Select the SSH option to connect to the VM.
- Connect to DB via endpoint with the following:
mysql --host=192.168.90.100 --user=testsql --password=cloudsql24
- When connection is established let create a database with the following psc-sql-db.
CREATE DATABASE remotesqldb;
- Once complete type exit to exit the connection.
8. Task 6. Verify database entry
Complete this verification in the database project
- At the top of your console on the right next to Google Cloud icon, click the dropdown and then select the all tab.
- From the listed projects select your database project ID to continue.
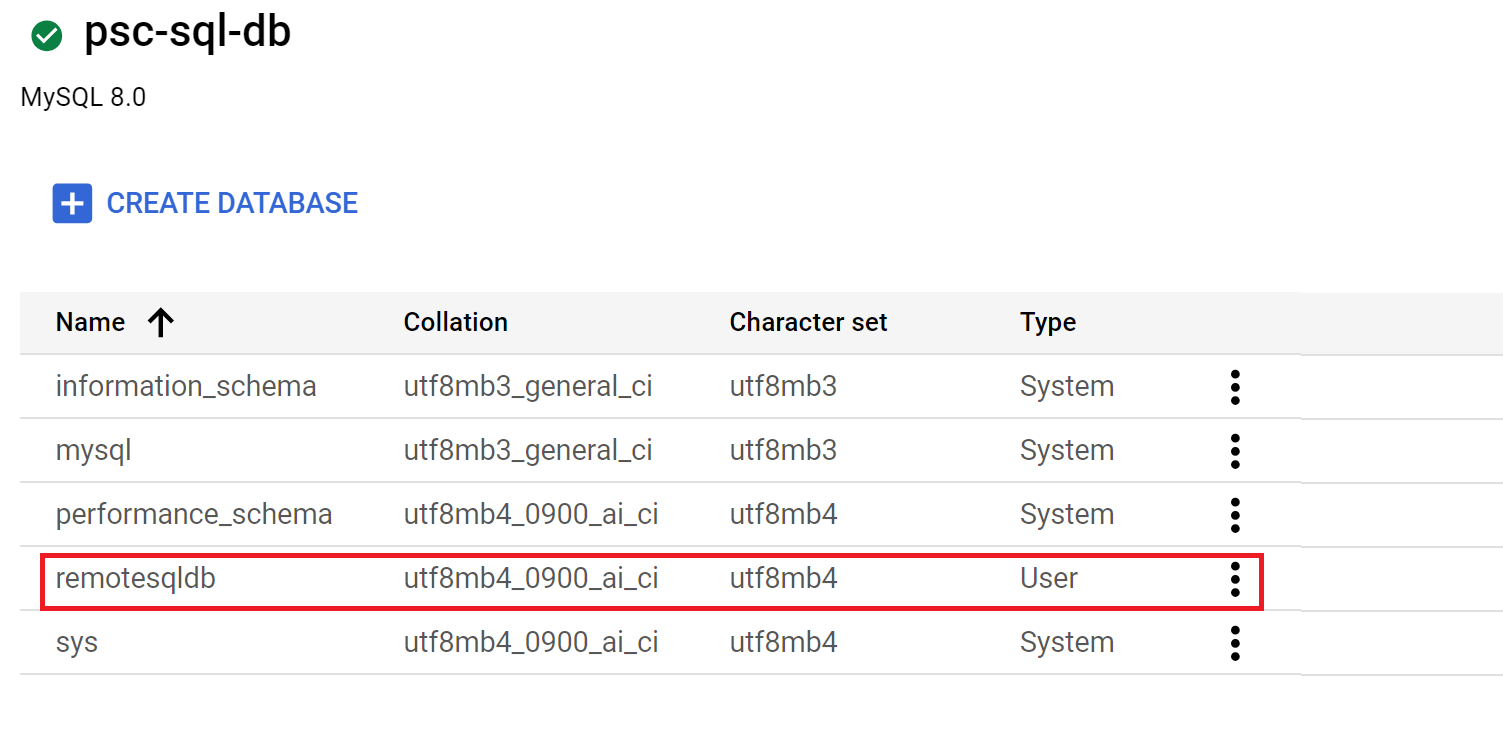
- Navigate to SQL, select the database psc-sql-db, expand the SQL options and select Databases. You should see the database you just created called remotesqldb from the consumer project VM**
.**
9. Clean Up
Complete this in the Database project
- Select the database project ID
- Go to Cloud Shell make sure you see the database project id
- Go to the terraform-db directory
cd terraform-dband run the following commandterraform destroyand typeyesall the resources you created in your db project with Terraform will be removed.
Complete this in the Consumer project
- Select the consumer project ID
- Go to Cloud Shell make sure you see the consumer project id
- Go to the terraform-consumer directory
cd terraform-consumerand run the following commandterraform destroyand typeyesall the resources you created in your db project with Terraform will be removed.
10. Congratulations
Congratulations, you've successfully configured a Cloud SQL instance with PSC attachment and created a Private Service Connect endpoint in another VPC. You have been able to successfully connect from a remote VM via the PSC endpoint into the database.
Learn more
You can read more about Private Service Connect and Cloud SQL